How to redesign a room
How to Design a Room, in 12 Easy Steps
By
Kristin Hohenadel
Kristin Hohenadel
Kristin Hohenadel is an interior design expert who has covered architecture, interiors, and decor trends for publications including the New York Times, Interior Design, Lonny, and the American and international editions of Elle Decor. She resides in Paris, France, and has traveled to over 30 countries, giving her a global perspective on home design.
Learn more about The Spruce's Editorial Process
Published on 09/14/21
Whether you don’t have the budget to hire an interior designer or simply enjoy the idea of doing it yourself, designing a room from scratch can be intimidating for the uninitiated. Keep in mind that interior design is more art than science, and there are no hard and fast rules about how to decorate a room. But if you’re looking for a roadmap, this start-to-finish guide will help you visualize all the steps required to design your space like a pro.
1. Set the Mood
Instead of asking yourself what you want your space to look like, ask yourself how you want it to feel, and let that guide you toward colors, textures, furniture choices, and décor. A light and airy zen oasis might suggest minimal furniture and natural materials. An energizing, casual family space may include bold colors and patterns. Focusing on mood rather than a particular style or trend will help you to create an eclectic space that works for you.
Margaret Austin Photo / Cathie Hong Interiors
2. Get Inspired
Check out your favorite social media channels, interior design magazines, books, and websites for inspiration. Think about the places you like to escape to, and analyze why. If you’re into mood boards, go ahead and make one. If you live alone, this is a chance to get to know yourself a little better. If you live with other people, it's an opportunity to collaborate on a shared space that honors everyone in the home.
3. Get Real
Rather than striving for some aspirational vision of how you think your life should look, design your space for the way that you live now. If you have rambunctious kids or pets, choose upholstery fabrics and surfaces that can take a beating and still look great. If you live alone and rarely entertain, there is no need to hog floor space with a dining table for six. If you work from home, move that makeshift office in the corner of the living room into the spare room that only gets used during the holidays. And before you buy anything, come up with a realistic budget that will help you prioritize spending along the way.
Margaret Austin Photo / Cathie Hong Interiors
4. Declutter
If you’re redecorating, start by eliminating anything you don’t use, need, or adore. If you’re designing an empty room from scratch, think before you bring anything in. There is room in any space for personal items and the things that matter, but successful interior design starts by embracing the essential and building from there.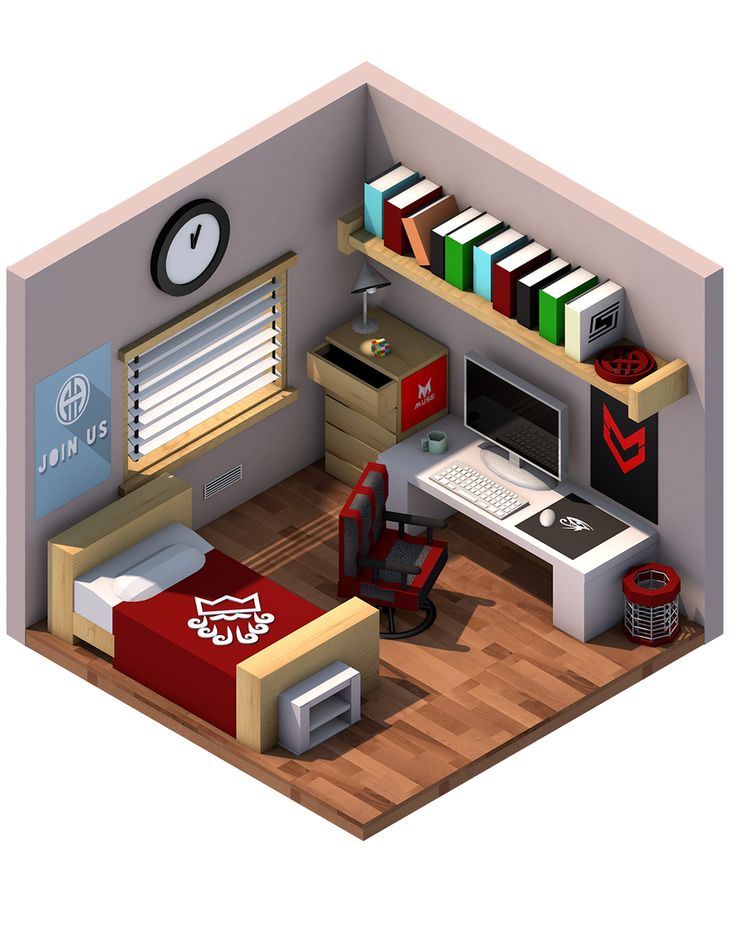
5. Map It Out
There are plenty of free online room design tools and home design software options if you want to create a floorplan, but space planning doesn’t have to be overly technical. Sketch out layout ideas on paper, or mark out furniture placement with painter's tape to get a sense of scale and flow. Before you buy a single piece of furniture, measure your space. Measure twice. Otherwise you might find that the sofa you ordered is too large to make it through your front door, or too small for your living room.
Best Online Interior Design Services of 2022
6. Decide on a Color Palette
Whether you want to keep it neutral or have your mind set on an eye-catching color palette, deciding early on will help you create a cohesive look. Neutral rooms can be brightened with accessories that can be changed out easily. If you’ve decided you want your room to be an ode to green or pink or blue, pick three complementary shades to keep it interesting. If you like the look of an all-white room, sticking to shades of white allows you to mix and match furniture styles and periods with ease.
Christy Q. Photography / Cathie Hong Interiors
7. Start With the Finishes
If you are aiming for a makeover rather than a remodel, think about how you can build on the room's existing flooring, wall color, and fixtures to beautify and personalize the space without renovating. If you’re starting with an empty room, refinish floors, paint walls, add tile, wallpaper, or wall panels, or install cabinetry before you bring in furniture and accessories.
8. Choose Anchor Pieces
When designing a living room, focus on your anchor piece, which is usually a sofa, before fussing over throw pillows. Making your biggest, most expensive purchases first will help ensure that you don’t skimp on quality for high-use items, help you maintain a realistic sense of your budget, as well as visualize how much room you have for additional furniture once the core pieces are installed.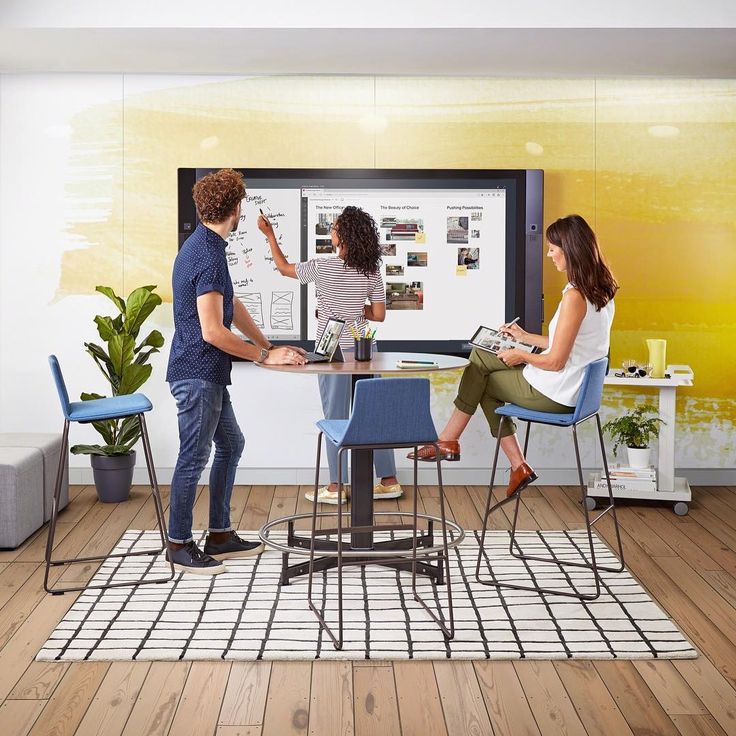
9. Select Secondary Furniture
Once you have picked out the perfect sofa, start looking at coffee tables to determine what sizes and styles are a good fit, or whether an oversized pouf would work better. If you chose a rustic wooden farm table in the dining room, add contrast with contemporary metal chairs. Complement a modern upholstered headboard with vintage lighting or bedside tables.
Christy Q. Photo / Cathie Hong Interiors
10. Choose Rugs, Curtains, and Textiles
Now that you have a sense of how the room flows, you can choose rugs, curtains, and textiles such as bedding, throws and decorative pillows that will complement your anchor pieces and add color, pattern, texture, and interest.
11. Light It Up
One of the keys to a successful room design is paying attention to lighting. Maximize natural light for daytime, and add in plenty of layered options for the evening, from functional task lighting to warm ambient table lamps or sconces, to sculptural pendant lighting that function as décor.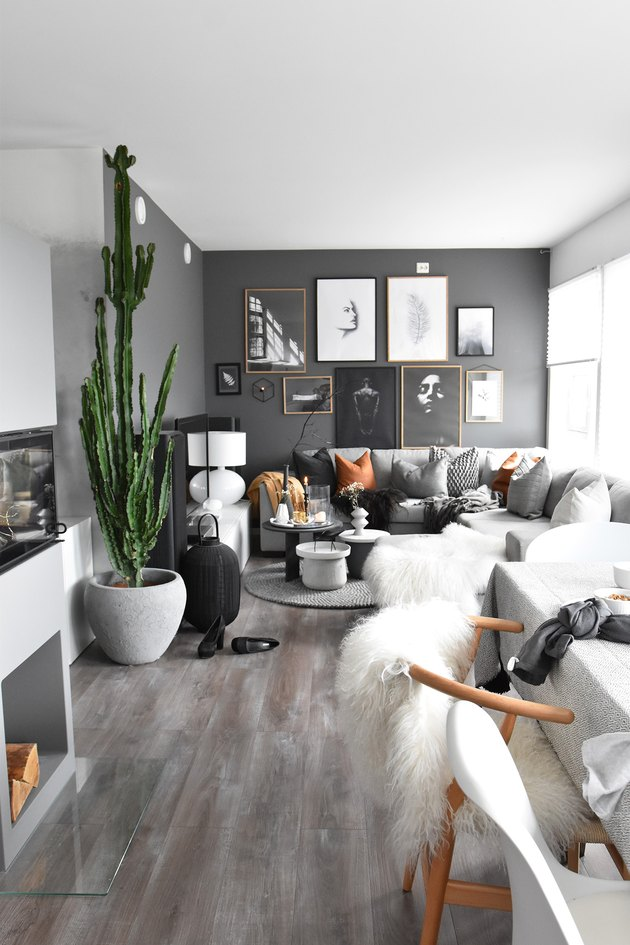 Be sure to light all four corners of the room to avoid creating shadows and promote a sense of well being after dark.
12. Accessorize
Now that you have all the essentials in place, take a step back, and ask yourself what’s missing. Select and hang art, photographs, or decorative mirrors. Layer in additional decorative pillows and throws. Style shelves and tables with design books, candles, decorative objects, plants, or precious souvenirs. This is your chance to add texture through personal touches that will bring the room to life and make it feel like home.
12 Tips for How to Arrange Wall Art
How To Design A Room Like An Interior Designer [Step By Step] — Greenhouse Studio
Does overwhelm and paralysis set in at the thought of how to even start decorating your space? A living room, bedroom, let alone your entire home? It can be (almost) enough to make you dive back under the covers and just say “forget it - I’ll live with it the way it is!”
I feel you and I’m here to help with a methodical, step by step process that will break down how to design your room into doable parts.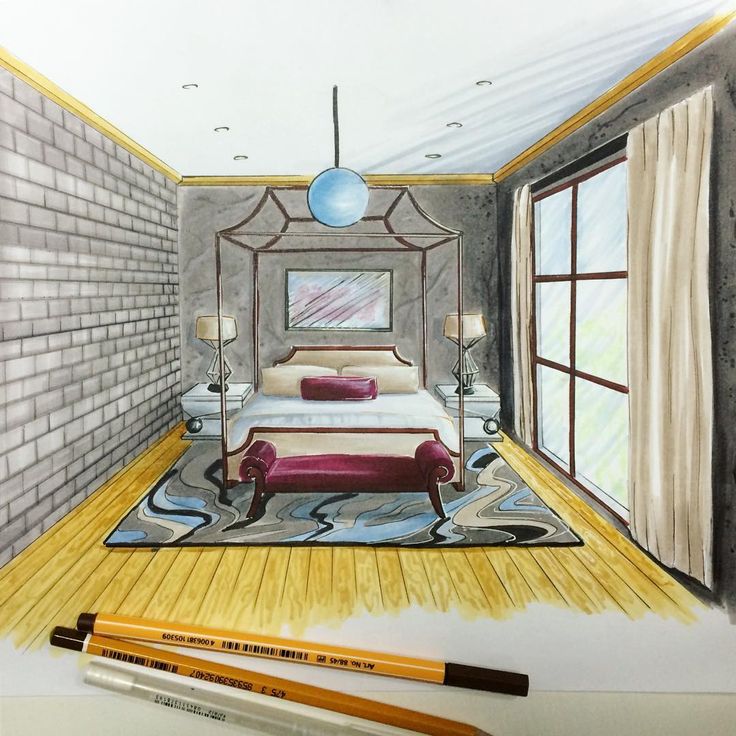
Even though it’s my design process, the whole point is to make it adaptable so it serves YOU, your home, and your loved ones. If you follow these guidelines, you will create a room that is comfortable, cohesive, functional for you and yours, and reflects your own personal style.
It also doesn’t need to cost a fortune. I firmly believe that design constraints, whether budgetary or otherwise, often result in a more interesting project, and not the other way around.
With some clever ingenuity and a little extra legwork, you can save money and your end result will be a richer and more compelling reflection of your personal style. I really do believe this.
Ready? Let’s get to it!
This post contains affiliate links. Click here to read my full disclosure.
Interior design by Fletcher Rhodes, Sonoma CA. Photo: Thomas Kuoh
Ready? Here goes:
1.
 Make A Budget
2. Create A Mood board
3. Choose Your “Springboard" (Inspiration) Object
4. Make A Room Layout Plan
5. Choose Foundation Furniture
6. Pick Paint Colors
7. Scale Up
8. Don’t Over-Source Any Single Source
9. Inject Your Own Style And Individuality
Budget for your design project
A budget is a must if you want to keep your remodel/redesign under control. Decide up front what you can spend on your project. Prioritize your expenditures into “must haves,” “nice to haves,” and “not a priority.” Then pencil out approximately how much those items will cost. (More on this below.)
I start off by creating a spreadsheet where I input line items for each and every element of a project. Any fixed costs go in along with cost estimates that are replaced by hard numbers once I have them.
If you’re planning on sourcing any of the materials yourself, you’ll need to calculate square footages to estimate your materials costs.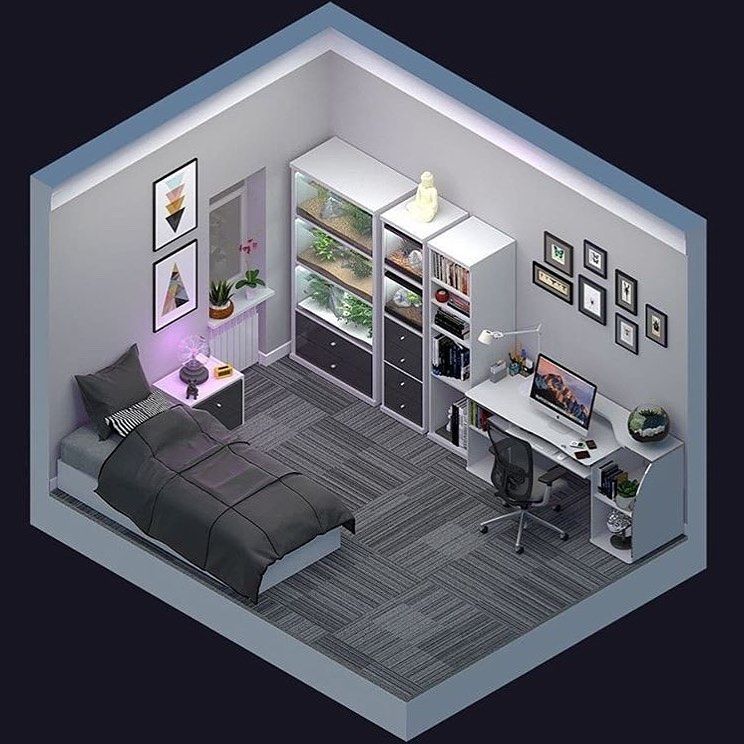
Keep your spreadsheet updated so you know where you are budget and cash-flow wise.
Always add in an additional 10% for cost overruns. Some would say 20% is more appropriate. For a landscape overhaul, 10% should be sufficient. For a gut kitchen remodel in an old house - better to go with 20%.
Once you’ve set your budget, stick to it. Don’t be tempted to deviate from your budget mid-project with “Iit sure would be nice if (insert expensive upgrade). This is how budgets get blown. Unless you can really and truly afford it, don’t do it.
Here’s a full post on funding a home remodel or design project.
Pro Tip: Get 3 bids for any work that needs to be done. You’d be surprised at the variation in cost sometimes, but of course, this also needs to be closely compared to your assessment of the contractor’s quality of the work being done and project management skills.
If your contractor is only going to show up every 3 days or so to work while squeezing you in between other jobs, that’s going to delay your overall project timeline which may have cost or scheduling consequences elsewhere. Be sure to discuss project management expectations up front.
Read the full post on how to budget and fund your design or renovation project.
Kitchen design and source: deVOL Kitchens
Create a mood board
Before you spend any of your hard-earned money, the first step in the design process is to create a mood board, and then take a step back to see what the common threads are.
Having a plan ahead of time before you jump in is always smart. A mood board and subsequent plan of attack can help you avoid ending up with a piecemeal look and making costly mistakes.
Some questions to ponder:
What’s the purpose of the space you’re working on? Does it need to be practical for families and groups or is it more of a private space where you want to relax?
What do you want the overall feel or mood of the room to be about? Come up with a few descriptor words if that helps.
What styles, themes, colors are you drawn to? It’s worth noting that sometimes we think we know what we like, but then we find out otherwise. More on that shortly.
[Want more design inspo and helpful plant tips? Let's hang out on Instagram!]
Mood-project board image by The Home Index, Napa CA.
Mood Board, Round 1 - Pinterest
Click here for a complete post on easy ways to create your own mood board. My favorite quick and dirty way is to make a Pinterest board. Start pinning rooms, color schemes, furniture and accessories that you like.
If you don’t already have a definite style preference or even if you do, try to avoid having preconceived ideas. Just start pinning what appeals to you.
Tip: When pinning furniture, look for the individual shots with only the plain white background so you can see the furniture piece alone in conjunction with your other items without the “visual noise” of a staged room scene.
Once you have about 50 pins, take a step back and look at the board overall.
For example, are you finding you’re consistently drawn to soft, off-white walls or do you crave the vitality of stronger color?
Are your pins fitting what you originally thought you were after? If so, great! If not, don’t be afraid to consider these new ideas that are emerging from your pinning.
Do a gut check! Up above where I asked if you really know your style? At times I’ve discovered that just because I thought I knew what I wanted ahead of time, my pins don’t lie.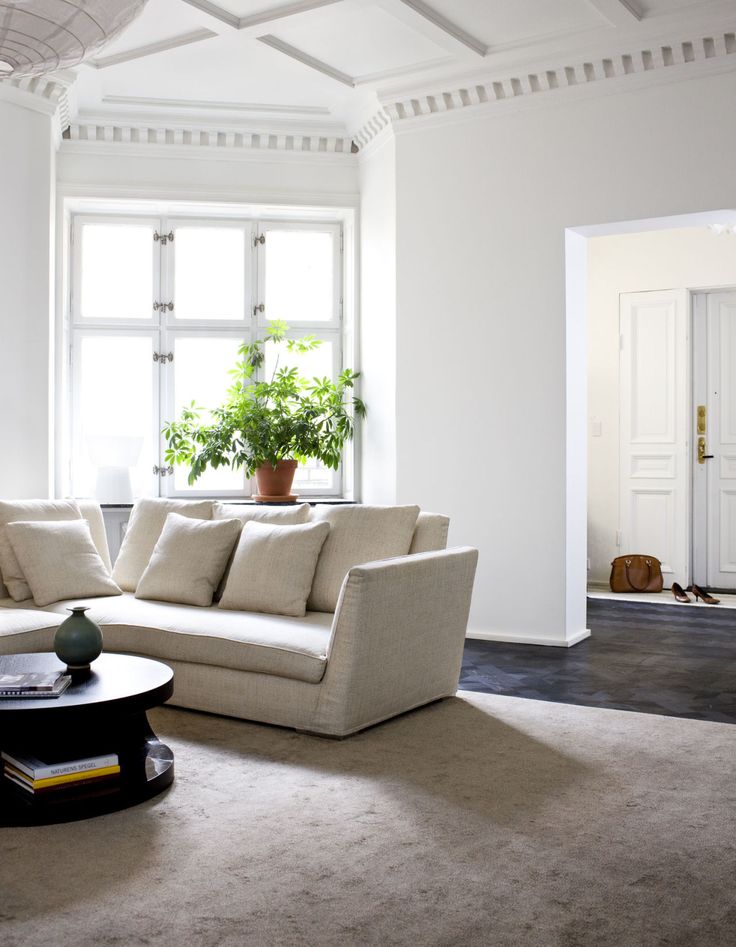 I recently realized that I’m more of a soothing neutrals and contemporary design person than I used to be, and don’t laugh - Pinterest helped me figure this out!
After pinning many rooms that individually resonated with me, I looked back over them all collectively and realized “Hey - I seem to be drawn to a lot of light-neutral walls and clean-lined decor (with black windows) and lots of plants!” OK the plant part wasn’t exactly a shocker, but I had always thought I was more into color than I actually am.
Just as the camera doesn’t lie, neither do your pins when taken in as a whole. It’s possible that Pinterest can facilitate your style gut check for you.
A collection of imagery inspiration as well as specific objects, furniture, and paint for my home office remodel project.
Mood Board, Round 2 - refine your ideas
If you want, after doing a Pinterest mood board, (quick and easy requiring no graphics skills) you can drill down a bit further and create a board like I did below.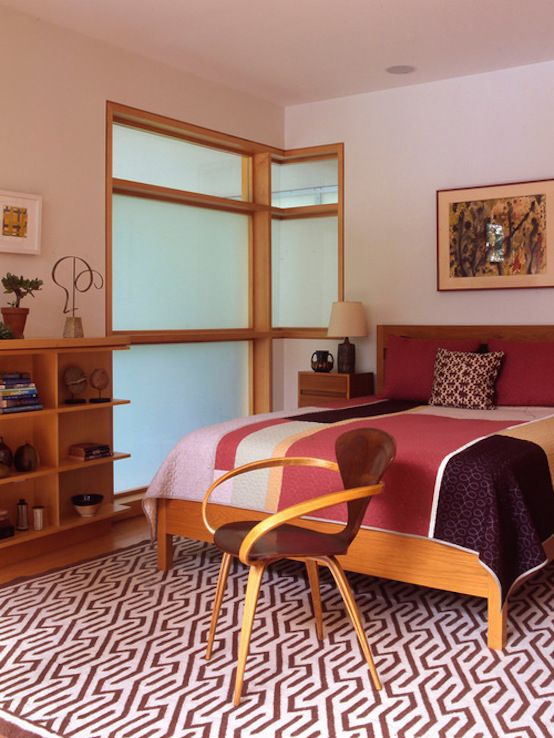 It’s not absolutely necessary but it does provide a clearer picture of what you’re considering.
Again, here’s a link for easy mood board options.
You could also create a second Pinterest Mood Board with your refined ideas. Be sure to keep the first one though where you save all your original ideas and save source information from a pin representing anything screen shot and brought into Pinterest by you.
Be sure to try out different options for each of your pieces - more than one sofa, pillows, rugs, coffee tables, lamps etc. See how they work together comparatively. Too much contrast or too little? Too much pattern? Too much blue? Practical enough to stand up to your family? Take a good hard look and evaluate.
Greenhouse Studio home office mood board. Photo credits - upper left inspirationsdeco.blogspot.com, bottom left, @melissamlo via Instagram, bottom right, Margo Hupert - margohupert. pl.
pl.
Choose a "springboard" (inspiration) object
A “springboard object” is a term I came up with that evolved from my own design process. (I picture the vault springboard from gymnastics days.)
In addition to your unifying elements discussed above, you can select an object, artwork or decor piece that you use to help organize and propel the direction of your design project.
A painting or a rug for example, might inform the color scheme you work with. Or if you fall in love with a quirky thrift store find or antique, it could set the tone, style, or mood for your entire room if you want.
As always though, do a gut check. Just because you have a cool vintage painting with some purple in it doesn’t mean you need to dogmatically take up that color and incorporate it elsewhere if it doesn’t feel good or “right” to you to do so.
It wouldn’t surprise me if the quirky painting were the springboard object in this beautifully moody deVOL Kitchen design.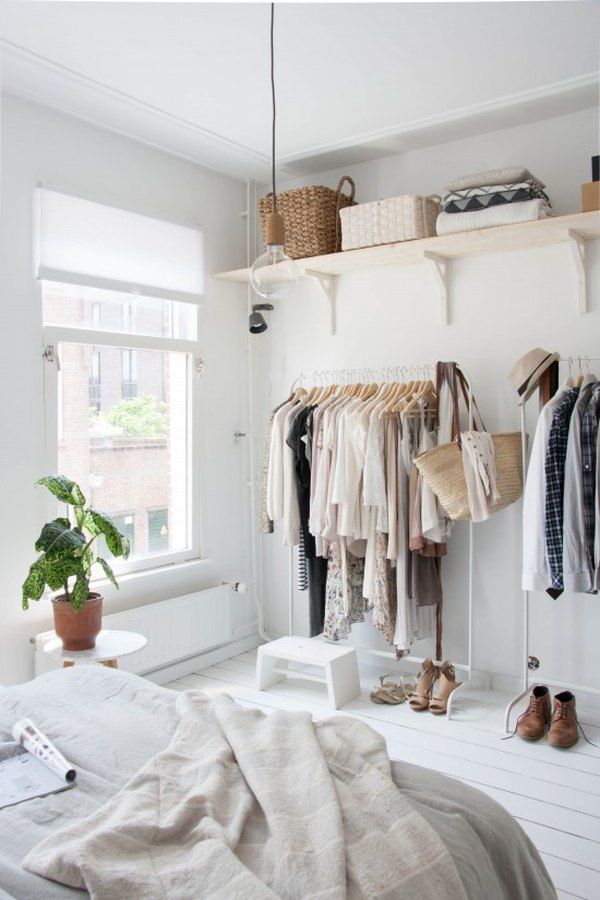
It also doesn’t have to be an object but could instead be a particular image that inspires you. For example, for my home office redesign, my “springboard” was images of the fabulous studio of Polish artist Margo Hupert. The wonderful imagery of her eclectic nature-inspired studio in greens, whites, and gray-browns had me swooning and became my main source of inspiration.
Create a scaled plan (ie - make sure your furniture fits)
This is a bit of a chicken or egg scenario and can be done either before or after the next section on picking foundation furniture. Which ever order, you MUST take measurements and make a simple drawing of your space and layout your proposed furniture and any other room elements before purchasing.
To get to the point where you’re motivated to make a plan, you probably have your eye on a few furniture pieces you’re excited about.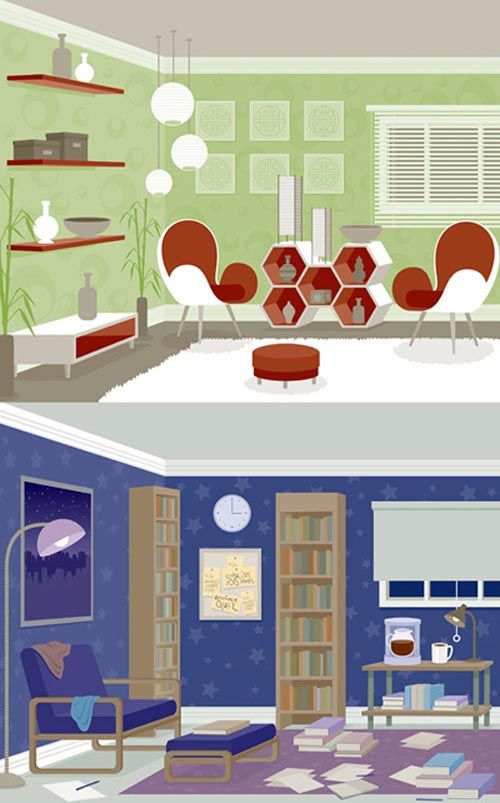 To know if they realistically fit or not, you need to lay them out on paper (virtual or not) and see.
You can get out the graph paper, pencil, and eraser and lay out your scaled plan if you like, using 1 square = 1 foot and interior design furniture placement cut-outs (this can be a lot of fun and works fine - don’t get me wrong!).
Or you can use a free floor planner app to lay out your furniture and see how everything works in your space.
I have a post reviewing free floor planner apps including video demos. AutoCAD and SketchUP are my go-to software for 2D and 3D respectively, but roomstyler.com was the first simple, user-friendly free option I found. To get started:
After making a plan view, another important step is to take some blue painter’s tape (or I lay out a few intersecting tape measures in a pinch) on the floor (or wall) and see how different objects fit irl.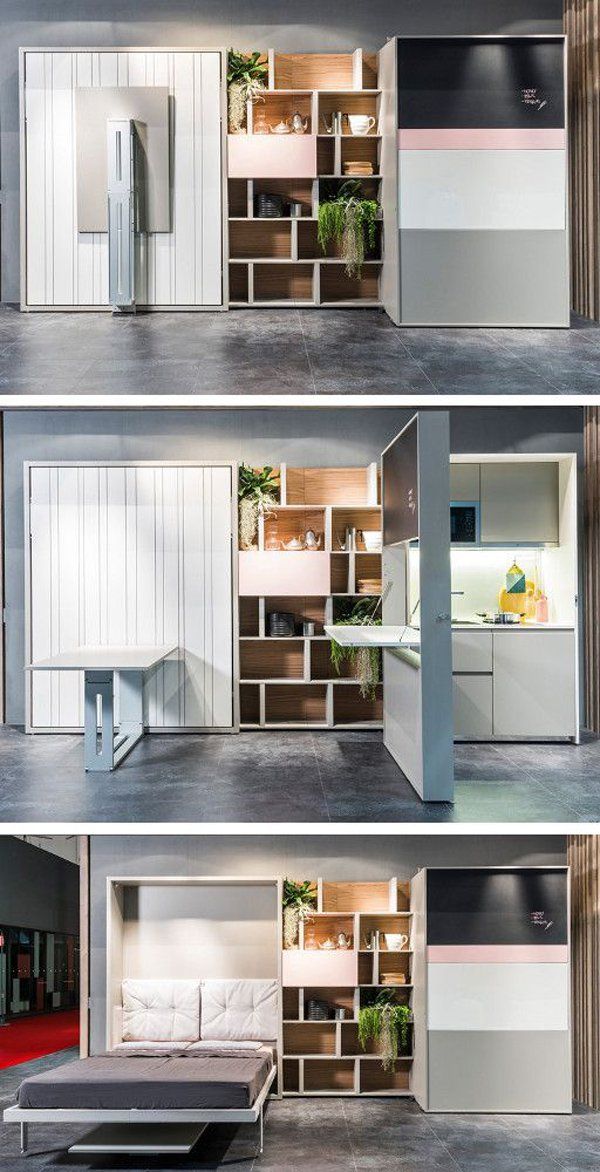 Again, laying it out on paper is important, but so is a second check of how it might feel in your actual space.
Research interior design dimension standards on how much space is needed between dining room chairs and walls for comfortable passage or a sofa and coffee table for example.
After all, laying out your furniture possibilities is important, but if you unknowingly only leave 12” to walk between your virtual sofa and a wall, you’ll find it’s a tight squeeze IRL!
Take this time to consider outlet locations and wall elements like mounting a TV, wall sconces, and ceiling lights with associated wiring needs.
Seeing your ideas laid out to scale provides an important reality check to the ideas and inspiration of the mood board. The last thing you want is spend a lot of money on something that doesn’t fit well in your space, no matter how much you like it.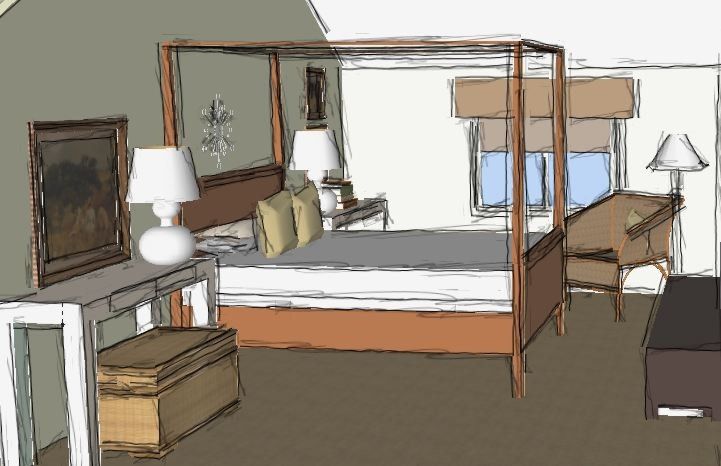
Start with foundation furniture
Again, which comes first, picking some furniture possibilities and measuring them in our space, or measuring our space to determine rough sizes for furniture. Realistically, I know which I would do - I’d find things I love first and then determine if they fit, and if not, find something similar that does.
Either way, we can now move onto the furnishing basics. If we’re talking about a living room, this might be a sofa and coffee table for starters, or a sofa and a couple armchairs.
To get going here, I’d recommend selecting a neutral couch and a simple cocktail table, or the neutral couch and a couple of leather armchairs - whether midcentury, club chairs, or whatever, so long as they’re streamlined and classic overall. The point is to choose foundation pieces that are versatile and can work with a variety of styles, color schemes, and accessories.
7 years from now, you may be over modern farmhouse, or at least over it in the way you love to style it now.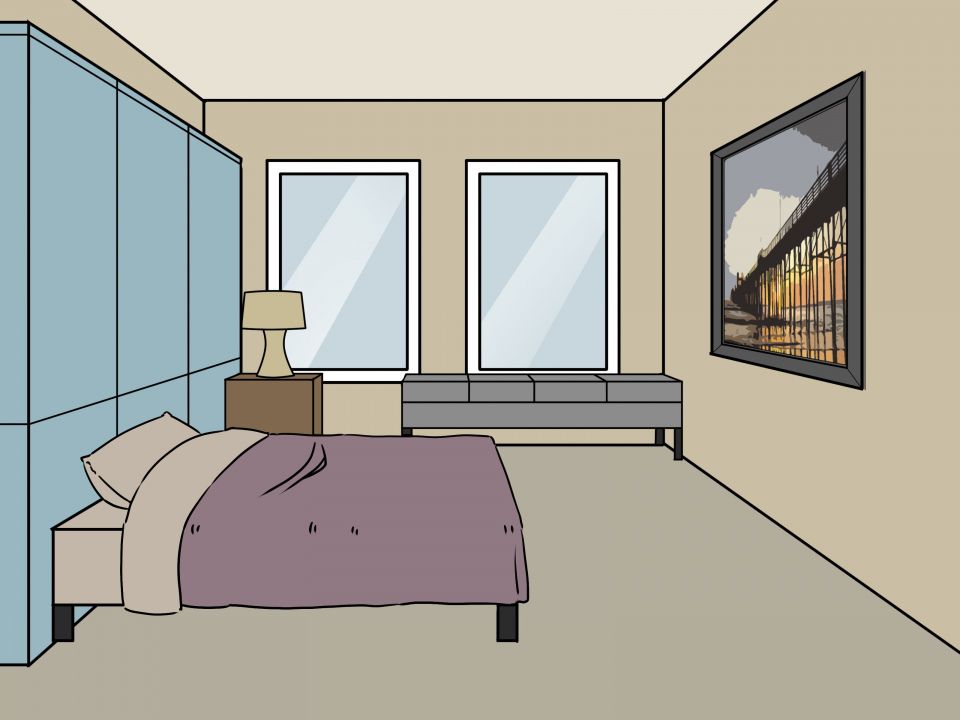
Before you get out the torches and pitchforks for that comment though, let me just say I’m speaking from personal experience here. It’s amazing how much my tastes have evolved over the last 10 years. It’s not that I now dislike what I loved back then, it’s just that it’s not what I would choose to go with now.
That’s all. Just sayin’
The neutral sofa, chair, and coffee table would allow the client to dramatically change out the rest of this interior if they wanted. Interior design by Fletcher Rhodes, Sonoma CA. Photo: Thomas Kuoh.
So I would encourage you to consider giving yourself the gift of future flexibility. If you have simple foundation pieces that can go with a variety of decor styles, these big ticket items can continue to work for you if your style changes over time. This allows you to go nuts and have lots of fun expressing your style preferences du jour with the smaller things like occasional tables, lamps, accessories etc, without breaking the bank.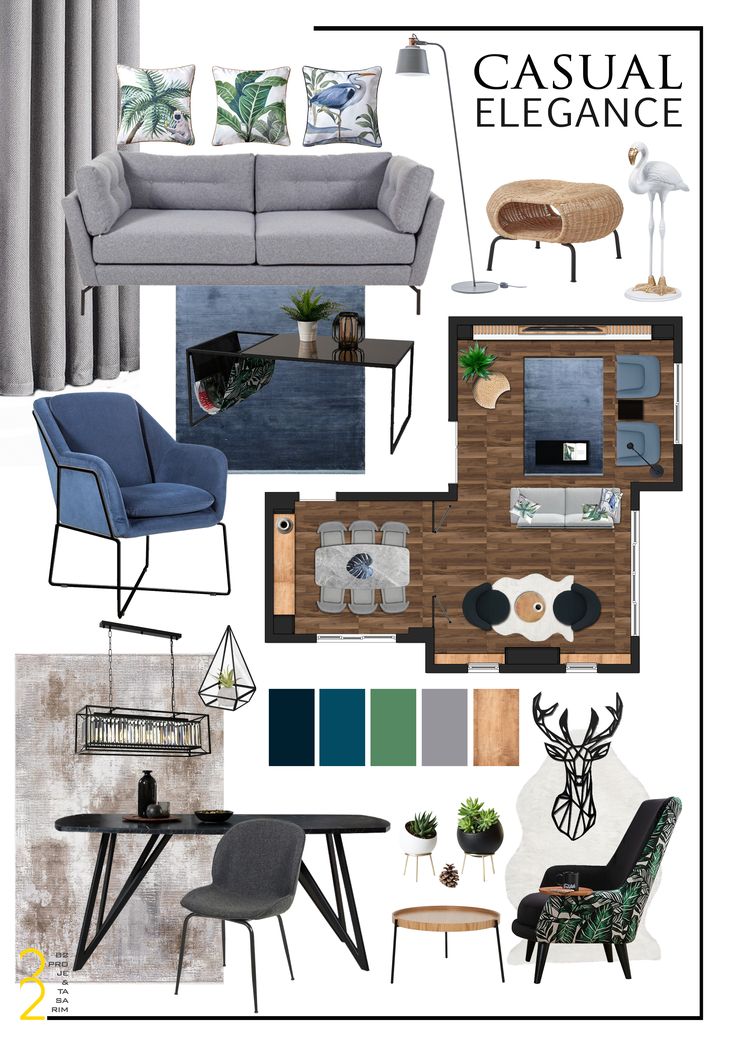
On the other hand….there’s the very real possibility that your kids and menagerie will trash whatever sofa or soft furnishings you purchase regardless.
I can certainly relate. After having twin toddler boys and a couple cats contained in a yard-less condo, by the time I finally jettisoned that olive-colored wannabe Pottery Barn couch back in the day, the thought of what running a black light over it would reveal was truly horrifying.
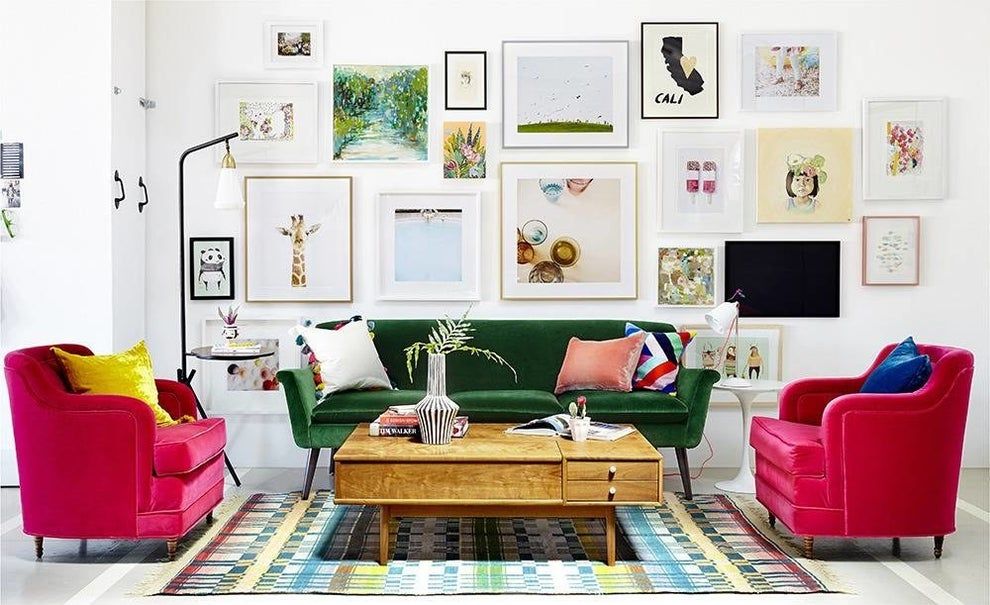
So at risk of completely contradicting myself above, this could also be license to throw caution to the wind and go for that tangerine sofa. It might not last much beyond the babyhood-thru-elementary years anyway.
The struggle is real. Kids, pets, and whatever else can wreak havoc on your soft furnishings. Source: Crypton
Pro tip: With this in mind, don’t blow your budget on super expensive soft-furnishings or think of them as “investment pieces.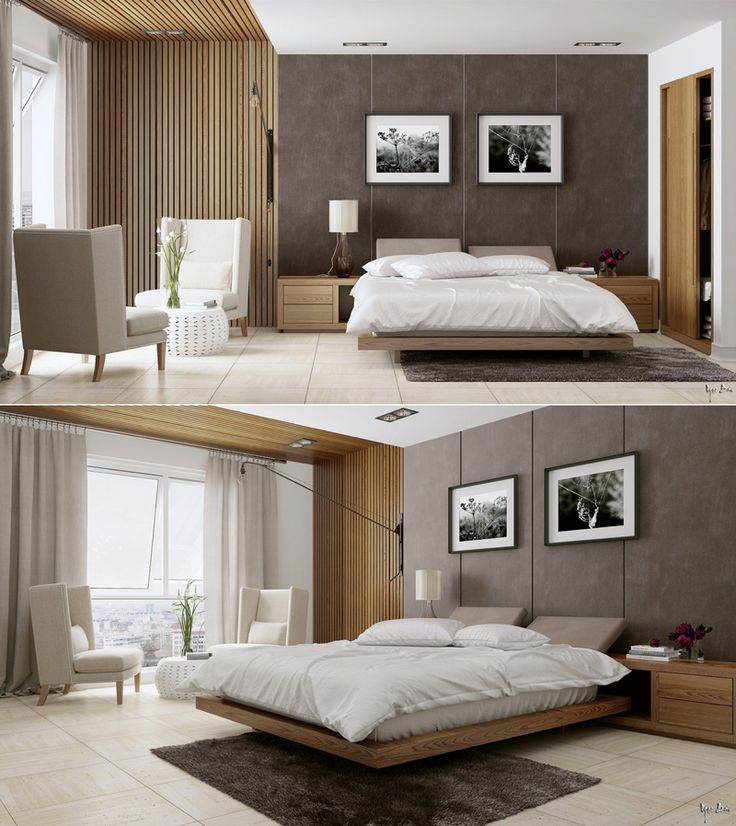 ” I’ve learned to buy relatively inexpensive sofas and upholstered furniture, and I’ve been more than happy with that strategy. Regardless, they still cost a lot, because they’re sofas and chairs, right?
First of all, they’re rarely statement pieces anyway. (Unless you do go for that tangerine sofa.) A neutral sofa often doesn’t look or feel all that different from a less expensive model, especially considering the sometimes jaw-dropping price differentials. That being said though, frame construction, fabric quality, down vrs synthetic cushions etc certainly makes a difference.
FYI just in case you entertain fantasies of reupholstering that investment sofa when needed, or like me, you found a “fabulous bargain” mid-century Asian style sofa at Goodwill and drug it home thinking “I’m gonna reupholster this sucker and surpass it’s original glory!” Let me share some truth - reupholstery almost always costs more than buying new.
Yes, sadly that mid-century sofa eventually made it’s way to the curb with a big '“FREE” sign on it.
So between kids, pets, and your clumsy uncle clutching a big glass of red, you don’t want to completely freak out when (not if) your couch suffers damage.
These mental images are what pushed me to go with my Bomar sofa from Joss and Main versus the pricey one that was on sale for 4.5 times the price at a local boutique in town. (Those down cushions were dreamy though!)
I’m very happy I did. I don’t want to be the mom or hostess who breaks out in a sweat every time food/drink/small and-or furry creatures get near my stuff.
I also believe that an upholstery/carpet spot cleaning vacuum with a wet-vac brush can be an excellent investment and sanity saver. I might not have survived toddler twins without mine.
Potential foundation furniture options:
1) Leather is great for kids - if they or the cats throw up on it, you can simply wipe it down, unlike upholstery. Do be sure it’s a durable finish though, specifically, aniline dyed leather which combines a protective treatment with a durable part of animal hide.
My TV room with a 12’ long leather sofa where my boys can eat greasy snacks without worry. It’s actually two pieces of a Thomasville sectional sourced through Ebay. I placed them end to end to create a “custom” sofa to fit this narrow room. Photo | TDW Media
In contrast is top-grain leather. Ever sat on one of those lovely, supple sofas or chairs that feel more like soft kid gloves or an expensive handbag than a piece of furniture? Most likely it’s top grain leather. The top layer is removed by sanding to get rid of surface imperfections. Because of that, the leather is very soft but isn’t durable and will stain easily. This is the kind of leather most handbags, wallets, and other expensive leather goods are made from as well.
Run your fingernail over leather furniture you’re considering. If it leaves a mark, run away. It won’t hold up to whatever your kids, pets, and red-wine slinging family and friends dish out.
2) Spill and stain resistant fabrics like Crypton or Sunbrella. They are sometimes indoor/outdoor as well, and they’ve come a long way in terms of how they feel, look, and perform since first hitting the home decor scene in the 90s.
Arhaus sectional sofa upholstered in Crypton stain resistant performance fabric. Source: Crypton
3) Slipcovers. Although I’ve never tried them, slipcovers also work so long as they come out of the wash in the same shape and size as they went in and don’t require 3 hours of ironing. (Not gonna happen.) Many who prefer light colored upholstered furniture swear by them.
4) Another stain defense strategy I deployed back in the day on my old Pottery Barn wannabe sofa was to put a large piece of fabric across the main seating area for a casual, boho vibe.
Ideas: a throw blanket, tailored bedspread, (I used a basic white cotton duck IKEA bedspread), a simple cotton tab-less drapery panel or 60” wide (upholstery width) fabric can all work.
- Drapery tabs can be cut off fabric and fabric hemmed without sewing using Stitch Witchery fabric adhesive) .
- You can even tuck the cloth behind any loose-back cushions for a tidy look and that helps keep it in place.
When liquid lands, hopefully the covered seat part bears the brunt of it and can be quickly thrown in the wash.
This slipcovered sofa from Serena & Lily comes in dozens of stain resistant fabrics.
Picking a paint palette
So after you’ve settled on the overall mood and style and thought about colors based on your mood board, and chosen any inspiration objects, it’s time for wall paint.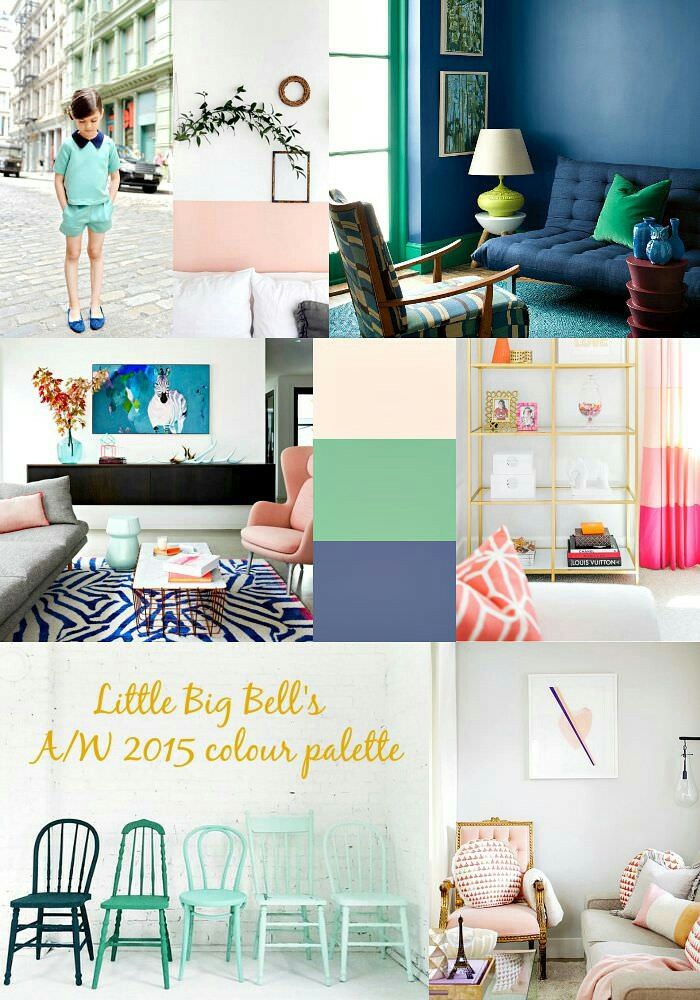
I’m the first to admit that choosing paint can drive me and everyone around me batty. (Read about my latest paint selection side-show here.) I really recommend reading the post and the other posts linked from it.
Paint is important and an expensive process and needs to be chosen carefully to avoid costly mistakes. Here’s the abbreviated version:
Going back to that Pinterest board, decide on what generally works for you; neutral or color.
If it’s neutral shades you’re drawn to, what kind? White? Gray? Taupe? Greige? (greige is a warm gray-beige combo) Then, consider the undertones: do you want a cool white/gray/taupe vrs warm white/gray/taupe, etc.
Photo: Shutterstock
Important note: neutral and color aren’t mutually exclusive. My living room is painted Benjamin Moore’s Richmond Gray, which is much more of a neutral green than a gray.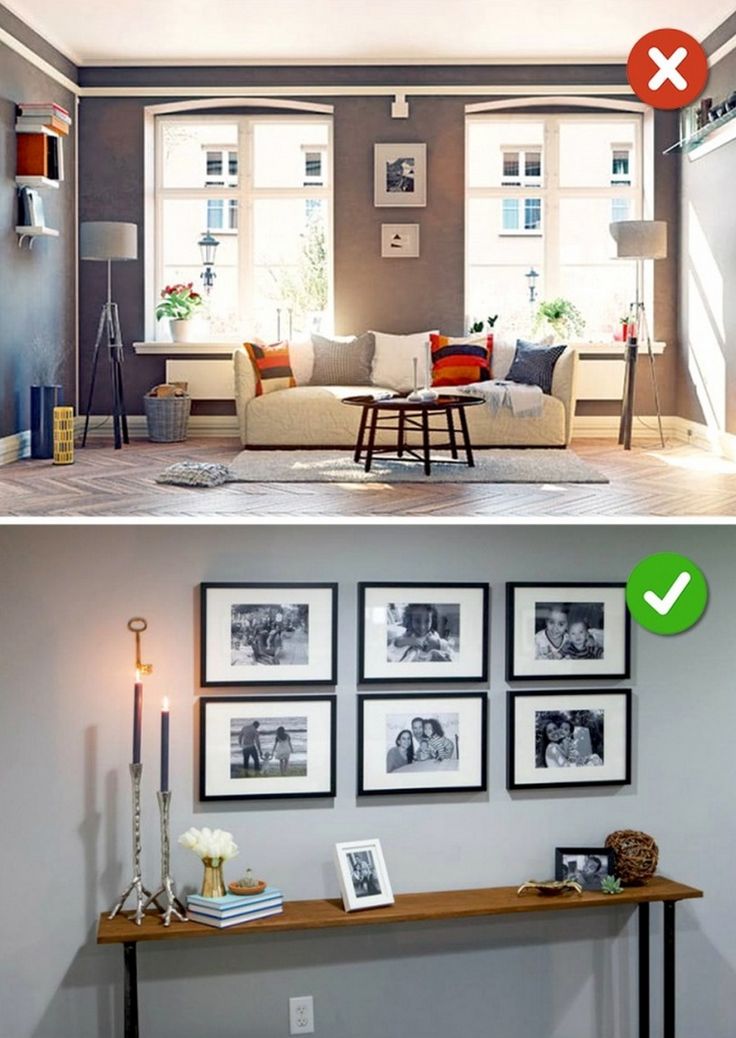 Same in my bedroom - it’s painted Benjamin Moore’s Sea Haze, which is a neutral blue.
Perhaps you want a mostly pale neutral with a subtle undertone of a color such as a white with a touch of green or a gray with just a hint of lavender. The same principals apply here as with stronger color.
You don’t have to choose between neutral and color if you don’t want to!
I’m not going to lie to you though, this can get tricky (and expensive) fast. What appears on a color chip to be the most subtle warm gray can be not so subtle lavender gray once it’s up all over the walls, especially where the corners intersect or where light hits it directly causing underlying tones to “glow” (not necessarily in a a good way).
My bedroom is painted in Benjamin Moore’s Sea Haze, which is a neutral blue on the walls but on the chip looks gray. Photo: Greenhouse Studio
Some tips to guide your paint selection process
Do some research on paint color palettes - once again, Pinterest is your friend.
 Lots of blog posts with titles like “10 best whites for interiors” for example, recommending paint schemes. Then go down the paint store and choose some chips.
 Bring them home and stare hard at them during different times of the day and determine which ones might be contenders. Then go back to paint store and buy samples of ones you like plus some white primer.
I always just paint directly on the wall, but you could also go to a craft store and buy some poster board. Either way, paint the white primer so it creates a border around your sample and then paint large samples and observe in different light at different times of the day.
Pro tip: Paint color will look more color-saturated on an entire wall than on the chip. Much more saturated. In other words, if you desire a hint of lavender to warm up your mostly gray paint choice, your paint chip that looks like a nice subtle French lavender gray might look a lot more like a purple Barney nightmare when covering an entire wall.
 ALWAYS paint a large sized sample including intersecting corners where color undertones reflect on each other. Trust me.
 Pro tip: The color of your existing walls can really, really affect how the potential new color looks. (Really!!)
I said this above but it’s so important I’m saying it again: After my last round of painting, my solution is to put up primer so I can paint samples on a white wall. At the very least, go with large white poster board and leave a border around the sample.
Pro tip: Interior designer or paint-expert vetted paint palettes exist for a reason! The shades they recommend generally work for most spaces, or at the very least, stand a greater chance of working than a random shade that looks pretty on a chip and then produces a hideous undertone once you get it on the walls.
Honestly, choosing paint can be so fraught with potential disaster, that perhaps the best piece of advice I can give you is to pick a designer recommended color (look for cross-references between recommendations) and thoroughly test it rather than “going rogue” with one of the bazillion other options out there. I hate to sound so conventional about this, but it really can be just that difficult choose a color you not only can live with, but actually love.
Again, I recommend reading the full post on paint color selection with the expert color recommendation links, and then doing additional research and sample testing on your own.
Scale up
I debated including this because I don’t want this taken as a blanket recommendation. However, in general, choose larger and fewer over smaller and numerous.
Too small and numerous = too fussy oftentimes. (Remember your elderly neighbor’s collection of ceramic miniatures?) More often, “too small” results in not making much of an impact and may create a feeling of clutter.
I would also say, “scaling up” applies more to accessory type objects rather than say, a sofa. The last thing you want to do is decide carte blanche to “go big or go home” and purchase a ginormous reclining sectional complete with drink holders only to have to shoehorn it into your space.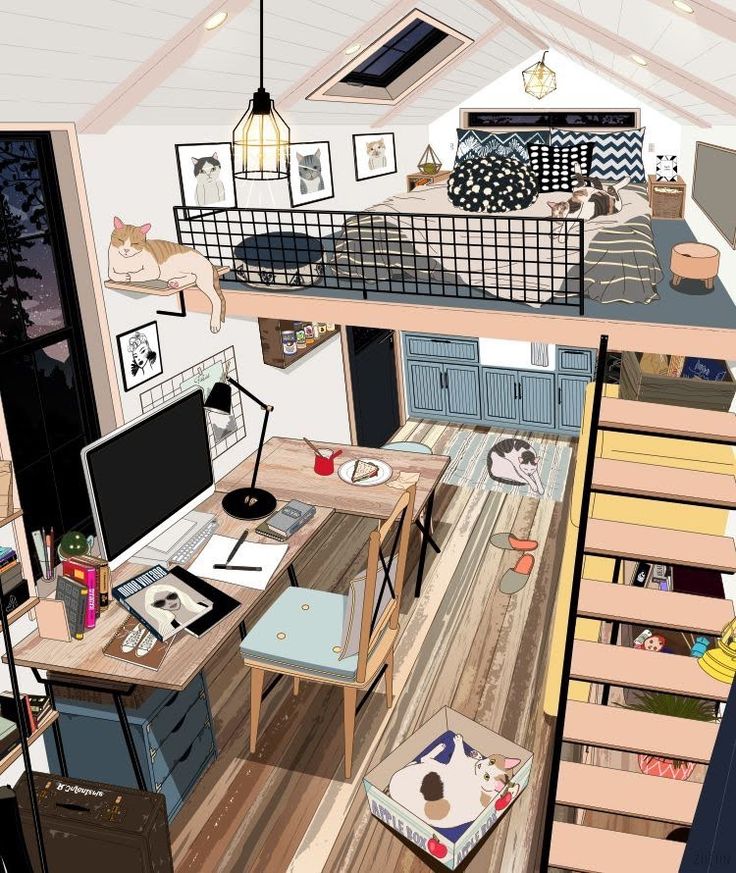 If this is your temptation, please re-read the Scaled Plan section above.
In the garden, it’s better to have 2 or 3 statement containers (depending if you’re going for symmetry vs. asymmetry) with large plants or small trees rather than 6 small containers huddled together.
This may seem more expensive initially, but often I find that I end up spending more on numerous small things over time than on a thoughtful, larger up-front investment.
Instead of many small objects, the bedside table has a large lamp and a few carefully chosen accessories. Interior Design - Fletcher Rhodes, Sonoma CA. Photo - Rebecca Gosselin.
Just like clothes, it’s often better and ultimately more economical (and environmental) to buy a few quality pieces rather than numerous mediocre items that are hardly worn and get quickly donated/discarded. (Guilty as charged on that one, but mucho better than I used to be at re-calibrating my notion of what is or is not a “deal!”)
Speaking of containers though, if you do have a group of smaller objects like a collection, decorative trays and platters can be used to corral and make visual sense of them. Example - decorative trays that house a collection of succulents in small pots.
A wood tray corrals decorative accessories. Source: The Home Index
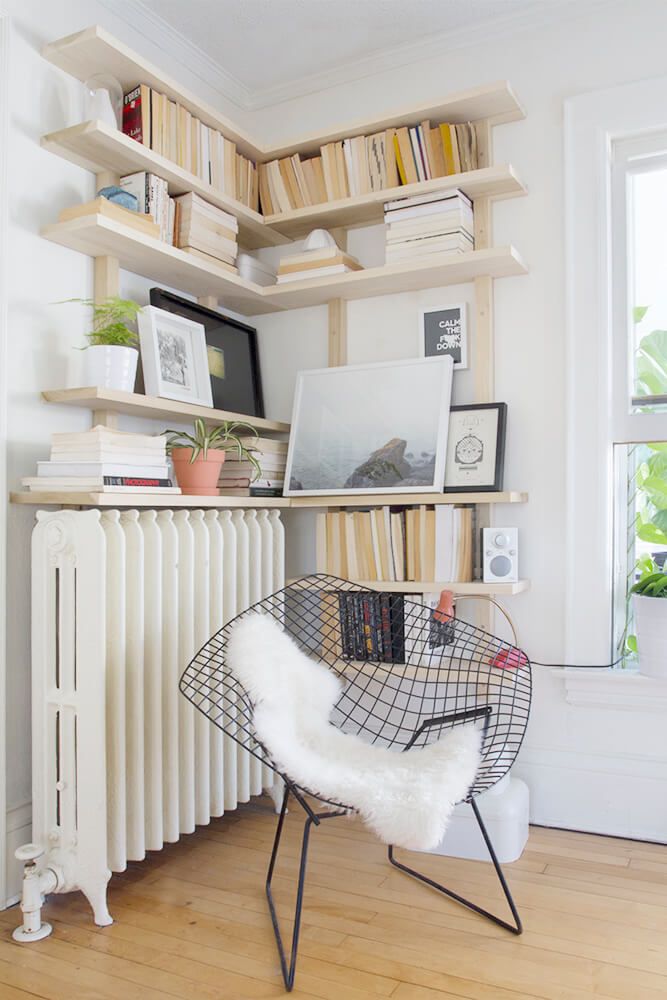
This can also apply to wall art. If you have numerous smaller framed pictures, group them into a gallery. When done correctly, the overall effect is that it looks like one large cohesive installation. (This concept reminds me of big schools of silvery sardines. They move in a giant group together because it fools predators into thinking they’re one big fish, but I digress..)
For tips on how to hang a gallery, refer to your interior design dimension standards mentioned in the “Create A Plan” section above and check out this gallery wall post by Pottery Barn.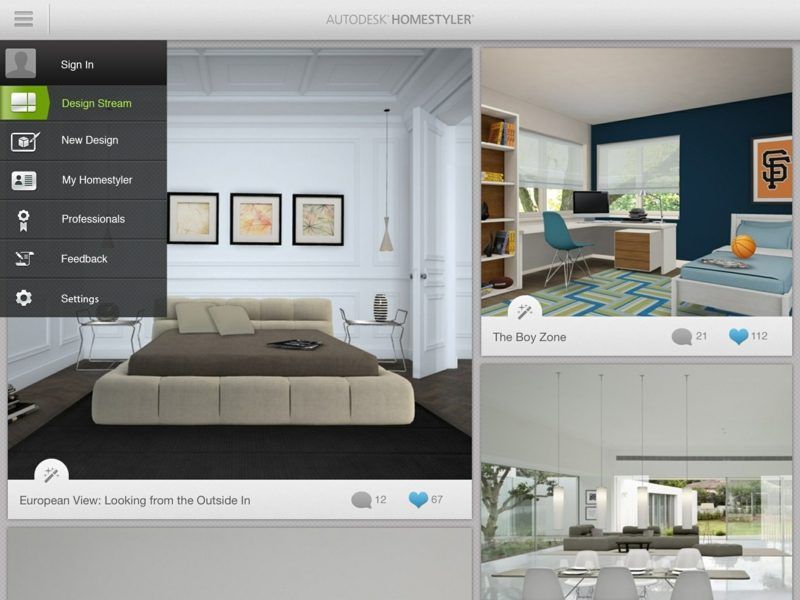
A beautiful green, white, and black gallery wall in an artist’s studio. Interior design + artwork: Margo Hubert
This is a pretty simple concept. What I’m getting at here is you don’t want your house to look like a Pottery Barn catalog for example. Using some items from Pottery Barn is great, but if the entire space is overly sourced from any one style or brand, it can create a flat, homogeneous look.
A good example of not overusing a single source or style is Magnolia Home - mecca for modern farmhouse, right? However, if you look closely at many Magnolia style shots, they often incorporate items that would be classified as something other than modern farmhouse.
Magnolia library & conference room renovation. Interior Design: Joanna Gains, Source: Magnolia
Note how Joanna Gaines has skillfully incorporated mid-century-style into the Magnolia Home corporate library and conference room through the mid-century classic Tulip table and Cherner side chairs.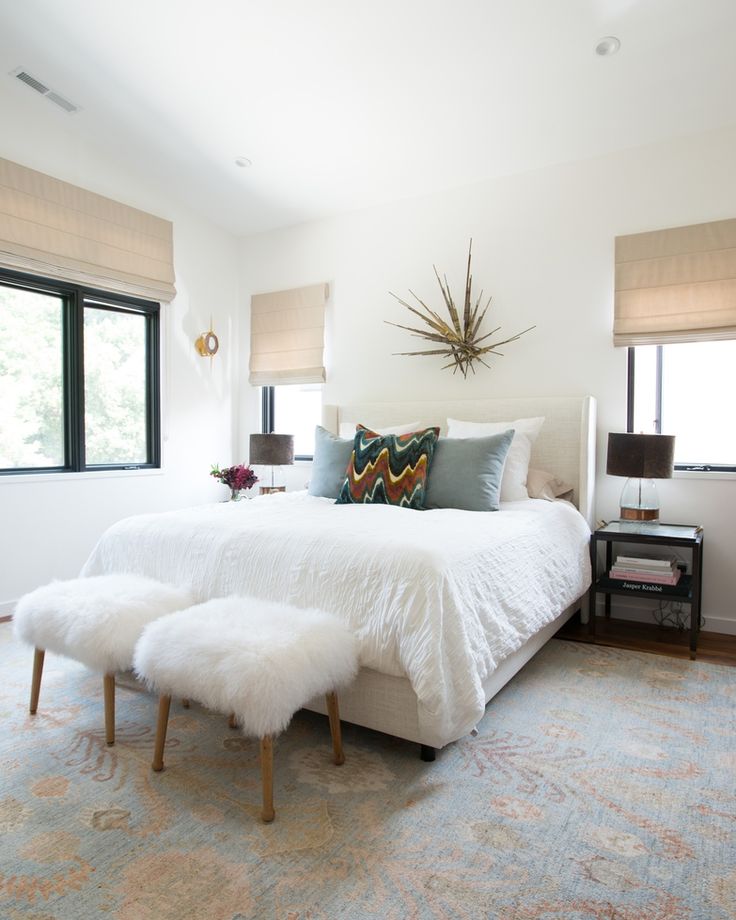 (LOVE Cherner chairs! Check out how to get your own Cherner side chairs for less.)
Mix it up: Back to modern farmhouse - if that’s your style through and though, that’s great, but within that, there are still style subsets you may want to play with and bring together.
If you love the shabby chic, chippy furniture pieces that look rescued from the back of a barn, create a more layered look by incorporating more streamlined elements of French, Scandinavian, or coastal farmhouse style. I would still encourage you to consider bringing in a few pieces from a different style or period altogether that compliments your design for a richer look.
So how in the heck do I “mix it up” you say? Go back to your Pinterest mood boards and look for unifying features like color, texture, and form like we talked about in the beginning. Then find pieces from a complimentary yet different style which at first pass may seem too different, but actually add harmony and depth to your overall design.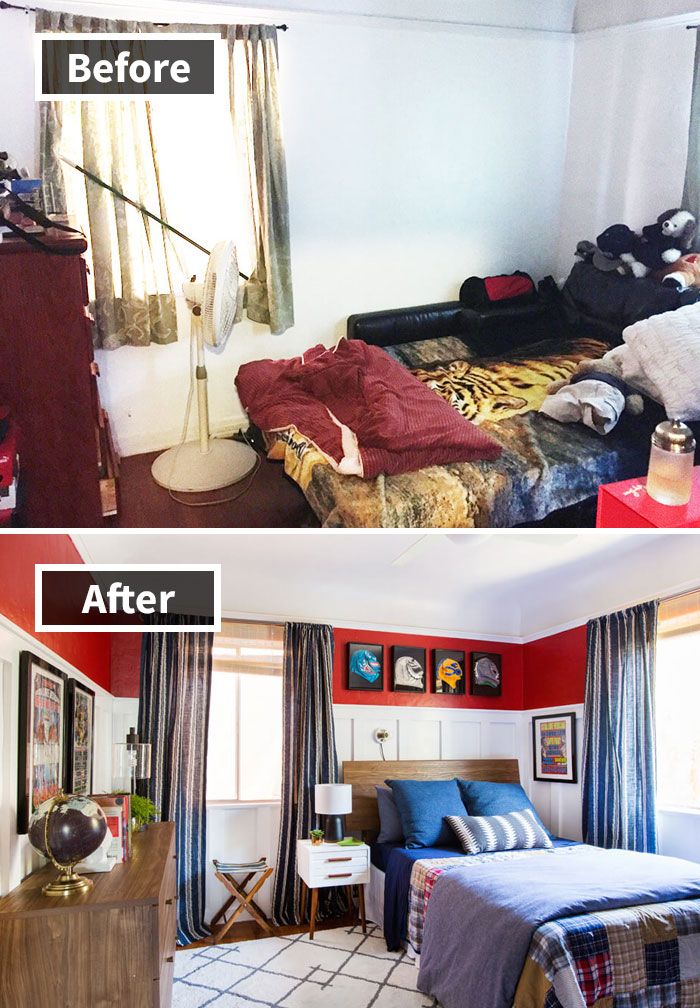
For example, say you have a mid-century room but you found this industrial side table you love with a black wrought-iron base. Use the black color in the base to tie the two styles together by incorporating midcentury pieces that have a bit of black in them as well. You’ve instantly created more depth and interest in the look of your space over a “one liner” type of design scheme.
Your rooms will love you for it, and you will love them back.
Pro-tip: Speaking of black, a common interior designer truism is that every room needs a touch of black. I know there are spaces that look amazing without any black, but 85% of the time, I agree. I think it adds drama while providing a grounding effect.
I would modify though by saying a brush stroke of charcoal, deep navy, or blackish-green will do just as well. Hey, if you don’t believe me, just look again at Joanna’s dramatic, moody conference room all done in that deep peacock blue-green.
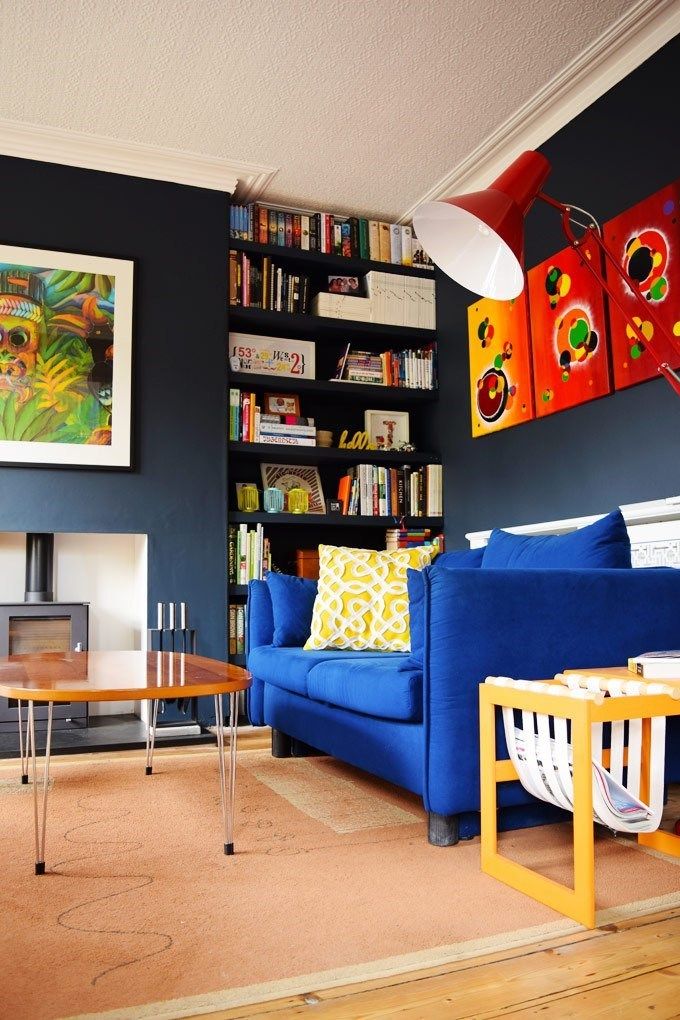
The black in this living room provides a grounding effect in an otherwise light atmosphere. Pamela Hope Design, Houston, TX.
Inject your own personal style and individuality
Now we get to the really fun part! You’ve done the heavy lifting of choosing foundation furniture and paint. With the smaller and usually less expensive pieces like accessories, accent tables, lamps, pillows, plants etc, you have all the freedom to express yourself about what ever makes your heart sing or speaks to your soul. This is your reward for suffering through the trials of paint selection!
Quirky, thrifted, found, natural, metallic, rustic, old, new.
A bowl that held a dessert bought at a school fundraiser is repurposed to hold a Moroccan astrolabe and brass beads lined with fabric samples.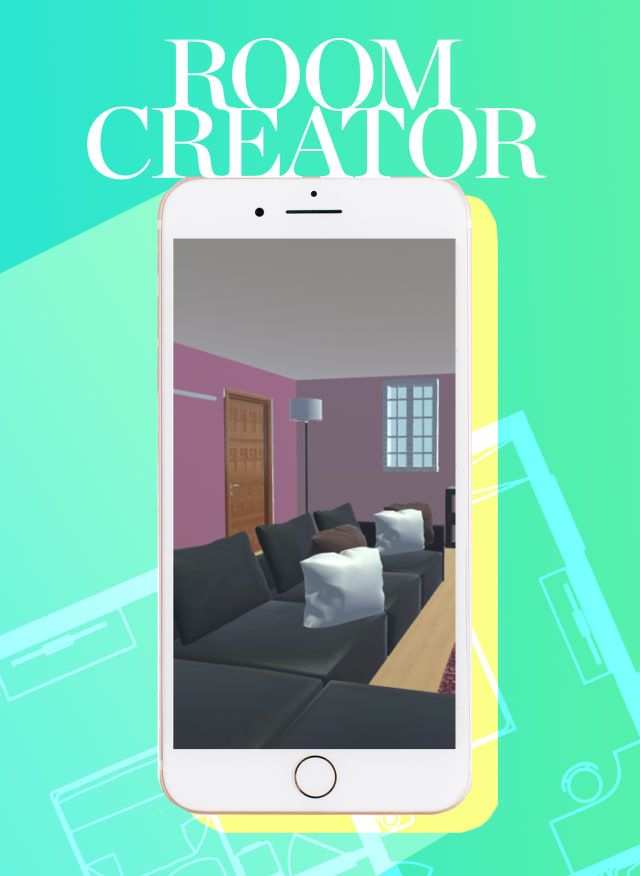 A thrifted brass snail sits on an Ebay limestone cocktail table.
This is your chance to experiment! Do it without fear, have fun with it, and I guarantee you’ll learn something in the process.
Try mixing old with new, high end with low end, rustic with streamlined, large with small, and just see what happens.
Read here for tips on how to decorate with natural and found materials and objects. See what interesting and eye-catching combinations and arrangements you come up with. Best of all, they will be a unique reflection of you and your personal style.
House of Harvest antiques does a brilliant job of incorporating eclectic objects together for a one-of-a-kind-curated look. Source : House of Harvest
So that’s my “manifesto” on how to design a space. I hope you got some helpful tips that you’ll be encouraged to try out in your own home.
It’s a lot of work to design a space but it’s also a lot of fun, and the end result is worth it. There’s nothing better than coming home to a place you love.
[Want more design inspo and helpful plant tips? Let's hang out on Instagram!]
Be sure to sign up below so we can stay in touch!
Enjoy the post? Pin it for later!
DIY, Home DecorTina Huffman12 Comments
Room Remodeling
There are many room remodeling options to make your living space more comfortable and better suited to your needs. The main condition here is that your redevelopment of the room, as well as the entire apartment, must comply with housing legislation and building and sanitary standards.
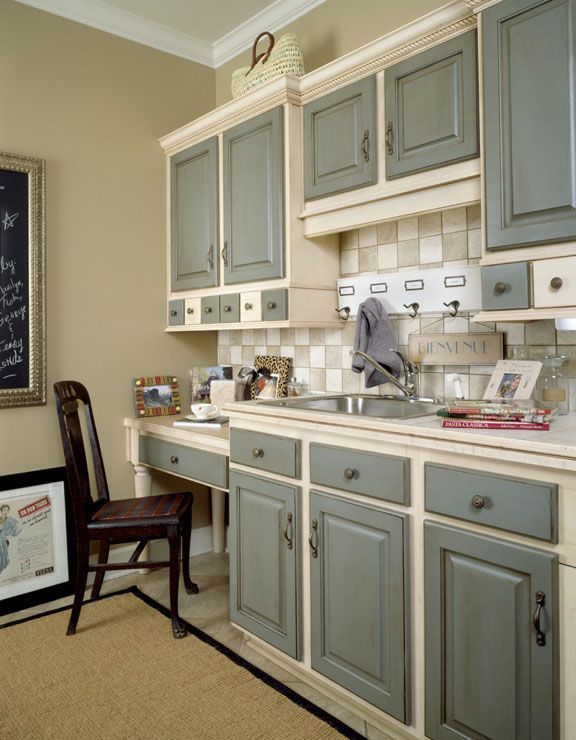
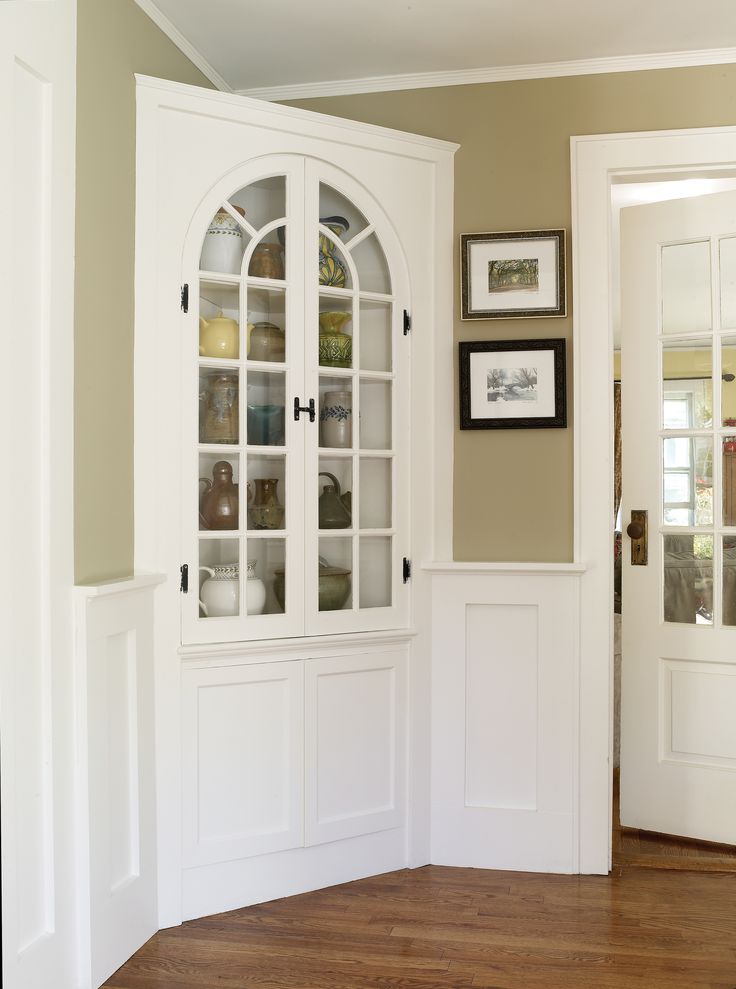
Built-in wardrobes and redevelopment of the room
Firstly, this is such an option as the redevelopment of the room with the dismantling of built-in furniture. Is a built-in closet a redevelopment? Since the built-in wardrobes are marked on the floor plan of the apartment and belong to the auxiliary premises, their demolition is a redevelopment. On the floor plan, they are indicated by a number and a letter (for example, 2a, 2b), where the number means that the cabinet belongs to the corresponding room, and the letter is its serial number. The expansion of the room due to the built-in furniture area is considered a simple redevelopment and does not require the development of project documentation. You can agree on it in a simplified manner - according to the plan before and after redevelopment.
It happens the other way around: sometimes apartment owners want to arrange a spacious dressing room in one of the rooms, fencing off part of the room with a plasterboard partition. Such a redevelopment of a room is similarly not difficult and takes place according to a simplified scheme.
Re-planning of adjoining rooms
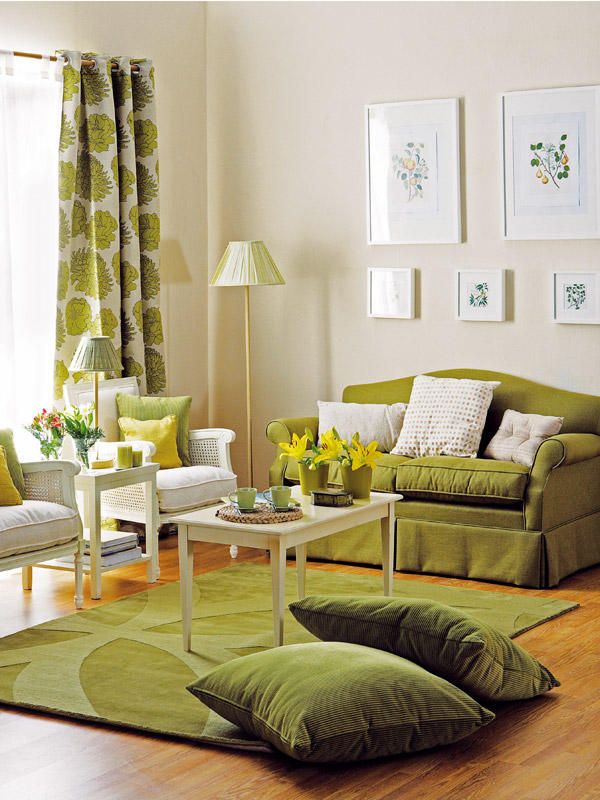
It should be noted that the re-planning of a room, most often, is not limited to built-in furniture. Often, owners want to get additional living space, for which they divide the room into two parts with a partition. At the same time, one should not forget about regulatory requirements. All living spaces, as well as the kitchen, should receive daylight through windows. Therefore, the new partition must be translucent (completely transparent, for example, made of glass blocks, or have a window). If you do not want a transparent wall at home, then you can get around this requirement by calling the dark room formed by it a pantry in the explication.
Another restriction on the redevelopment of adjacent rooms concerns the minimum living area. According to them, the area of the common room starts from 16 sq.m, and the area of \u200b\u200bthe "bedroom" from 8 (for one) or 10 sq.m. m (for two people).
Remodeling a room into an apartment
Residents of communal apartments sometimes want to convert their room into an apartment - put a shower and toilet in it. In most cases, this is impossible, since according to the norms, these premises should not be located above the living rooms. Accordingly, you can turn your room into an apartment with a shower and toilet only if you live on the first floor. But this fact in itself does not give anything, because pipes will have to be led into the room, which will go along the wall of the corridor. And he, in turn, is the common property of the residents of the communal apartment, and in order to run pipes along the corridor, the consent of all flatmates will be required.
Remodeling a balcony into a room
Sometimes we are asked - is it possible to make a living room on a balcony or loggia? In principle, no one will forbid you to live there. But as for such an attribute of a room as a battery, it is not allowed to transfer it to the balcony. Even if it is seriously insulated, there is still no place for a radiator - this is one of the "indisputable" prohibitions during redevelopment, which is put forward by both housing legislation and the authors of houses. The heating system of multi-apartment buildings is not designed to heat additional areas.
Regarding the connection of a balcony or loggia to a room, we note the following. It is usually possible to demolish the window sill (without touching the threshold and the window lintel) - as a rule. Not to fence off the balcony and the room from each other - no. The way out is to install "French" windows: without them, the redevelopment will not be approved.
Previously, it was allowed to combine a room and a balcony, but now housing inspections require them to be separated after the demolition of the window sill.
Find out more here
Redevelopment of the room and corridor
Sometimes part of the corridor area is attached to the living room. As a rule, this will require breaking or moving part of non-load-bearing partitions. If all the internal walls are load-bearing, then everything will become more complicated - it is impossible to break and move the main walls.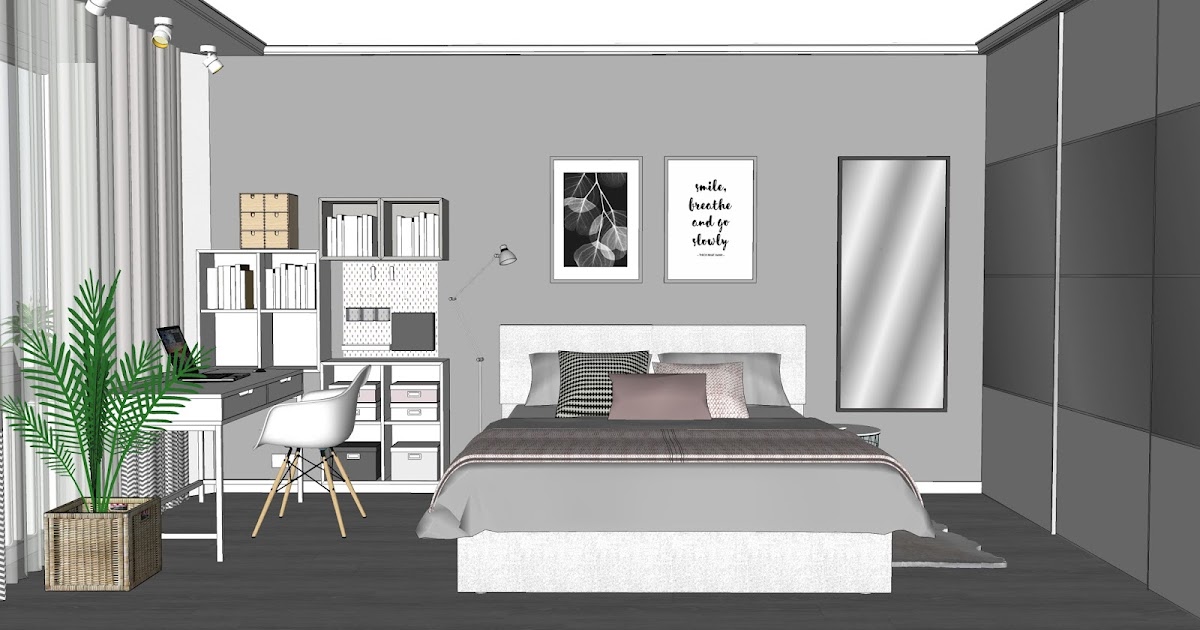
How to identify a load-bearing wall?
An example of a redevelopment of a room in a communal apartment.
In this case, the installation (change) of the floor structure and the replacement of the floor covering were carried out.
Apartment redevelopment in 2020: what has changed
What needs to be agreed upon and what does not
Two types of changes are agreed upon: redevelopment and reorganization. What is possible and what is not regulated by the Housing Code of the Russian Federation.
The reorganization includes the transfer of engineering networks, plumbing fixtures and electricians. For redevelopment - the demolition and erection of walls, the transfer and expansion of doorways. All these changes must be made to the technical passport of the apartment.
Changes are carefully calculated to avoid emergency situations - for example, the collapse of a house due to a change in load or flooding of the living room of neighbors from below due to the transfer of communications.
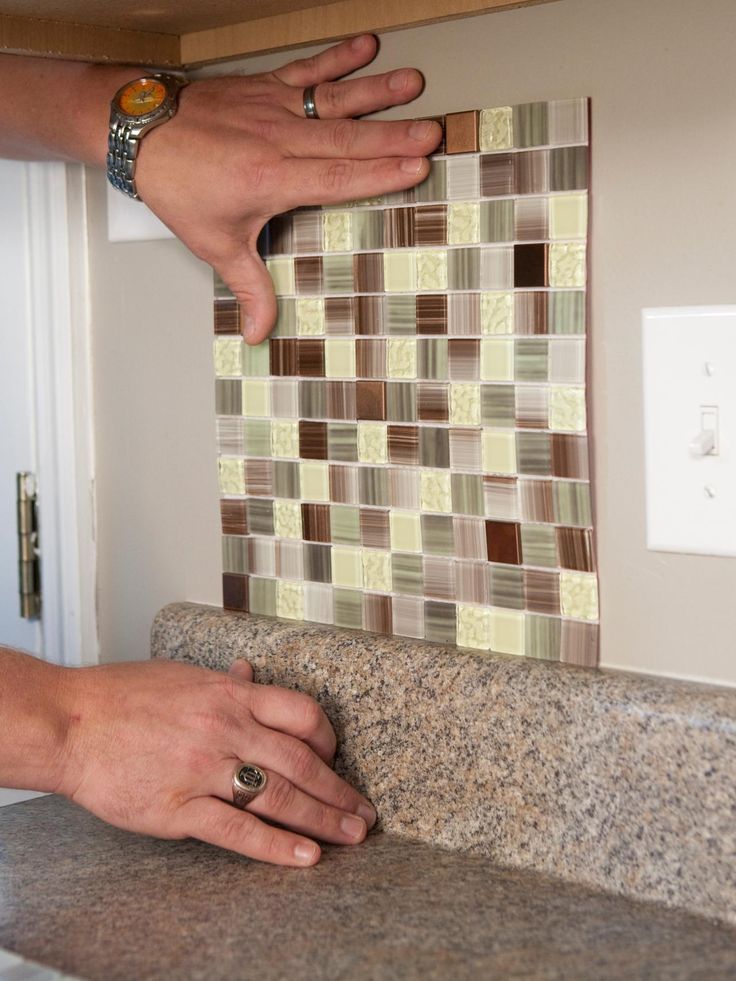
You do not need to coordinate ordinary repairs: replacement of wiring, pipes and plumbing, wall plastering, floor screed, wallpapering. Permission is not needed to install a split system, replace windows and doors.
What will happen if you do not agree on the redevelopment
Inconsistent planning will lead to costs or loss of the apartment. If it turns out that the owners have made changes to the configuration of the housing without registration, they will be issued a warning and required to return the premises to their original state. You can defend the redevelopment in court if it is safe and does not violate anyone's rights.
If the owners of the apartment refuse to return the apartment to its original state and do not go to court, their housing can be confiscated and sold at auction. They will get only a part of the amount from the sale - the costs of eliminating the redevelopment will be deducted from it (, article 29 of the RF LC ).
Changes in the approval of redevelopment in 2018
The process of approval of redevelopment and reorganization is fixed in Chapter 4 of the LC RF . In 2018, a number of changes were made to this document.
✓
First approval, then repair
It is no longer possible to make changes to the room configuration first and then approve them. Now, to start any redevelopment and reorganization work, you need to obtain permission from the local administration.
✓
Redevelopment prior to registration of ownership
Owners of apartments in new buildings can start coordinating redevelopment without waiting for registration of ownership in the USRN. Instead of an extract from the registry, they provide:
- acceptance certificate
- share agreement or assignment of rights
- copy of the permission to put the building into operation
If the act does not state that the apartment owner has fulfilled financial obligations to the developer, written confirmation will be required.
✓
Reduced package of documents
Now apartment owners do not need to provide a technical passport of the apartment and the conclusion of the authority for the protection of architectural monuments. If the ownership is registered in the USRN, an extract from there or a certificate of registration of ownership will also not be needed. This rule is enshrined in p. 2.1 art. 26 ZhK RF .
✓
Compulsory departure of the commission
When the redevelopment is completed, it must be accepted by the commission. She draws up an act and sends it to the registration authority. The members of the commission look at the compliance of the result with the agreed project, therefore, in order to avoid rework, it is important to monitor this during the repair process.
✓
Eviction instead of a fine
Previously, the main punishment for owners who carried out unauthorized redevelopment was a fine. Now the focus has shifted to more stringent measures. If the owners of the apartment ignore the warnings, the apartment will be taken away from them by a court decision and sold at auction.
Redevelopment and self-isolation
The self-isolation regime has made adjustments to all processes, and paperwork is no exception. From the point of view of the law, nothing has changed, but some of the procedures have moved online.
Documents for approval of redevelopment can be submitted to the MFC in person - for this you will have to sign up. Another option is to use online services that work in your city. For example, Muscovites can apply through the website of the Mayor of Moscow .
Part of the procedures cannot be carried out "on a remote basis". To draw up a project and accept redevelopment, an architect or BTI employee will need to visit. If your locality is still in self-isolation, these procedures will have to be postponed.
How to agree on the redevelopment of an apartment in 2020: step-by-step instructions
A redevelopment of an apartment is agreed in four steps.
1
Project Order
For a technical opinion and design documentation, contact a specialized company with SRO approval. If you are going to submit documents via the Internet, the project must be signed by the company's electronic signature.
2
Redevelopment approval
the body that coordinates the reorganization in your city, or in the MFC. Submit a package of documents there:
- application
- redevelopment project
- title documents, if the ownership is not registered in the USRN
If the apartment is rented out under a social tenancy agreement, the consent of all members of the tenant's family will be required.
Extract from the USRN, certificate of ownership, tech. a passport and a conclusion from the body for the protection of architectural monuments can not be brought on the basis of , paragraph 2. 1 of Art. 26 ZhK RF .
If there is a desire and opportunity, submit documents via the Internet. Please note that an electronic signature of the design organization on the conclusions and drawings may be required.
The application is considered within 30-50 days. The maximum consideration period depends on the region, it will be said at the MFC. If the redevelopment is agreed upon, a permit will be issued - on its basis, repairs can begin.
3
Repair work
Make sure that the builders accurately implement the project, otherwise there will be problems in the next step.
4
Acceptance
The redevelopment must be approved by the commission. Its members check the conformity of the result with the project. If inaccuracies are found, the builders will have to be invited again. If all is well, the acceptance committee draws up an act and sends it to the rights registration authority.
Are you planning to renovate your apartment?
Get a discount from "Masters of Repair" : 20% for repairs, 20% for kitchen units and 10% for finishing materials.