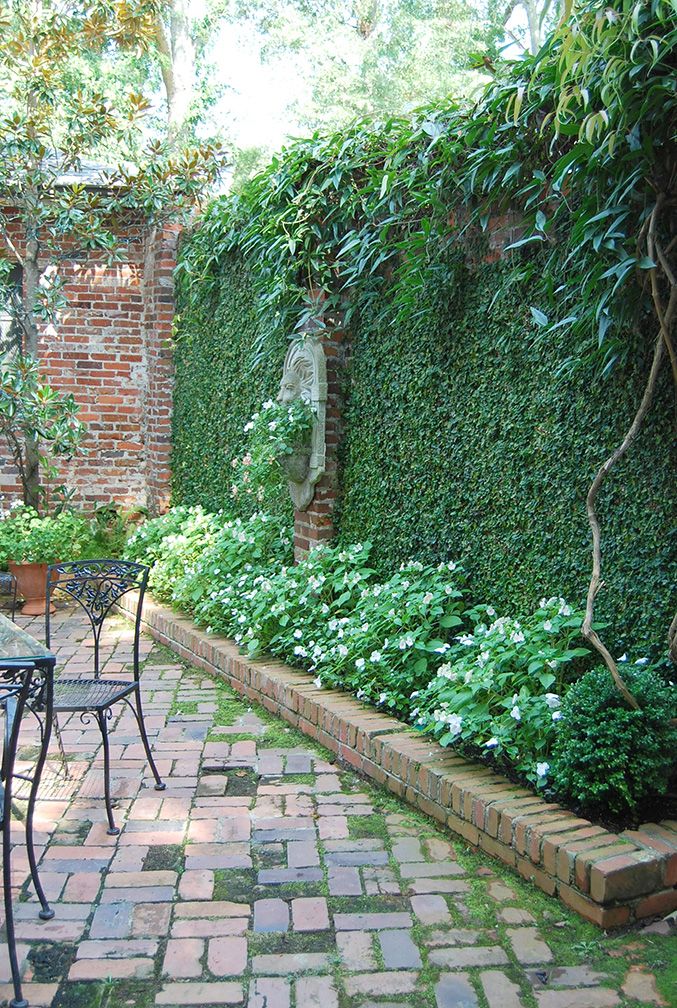
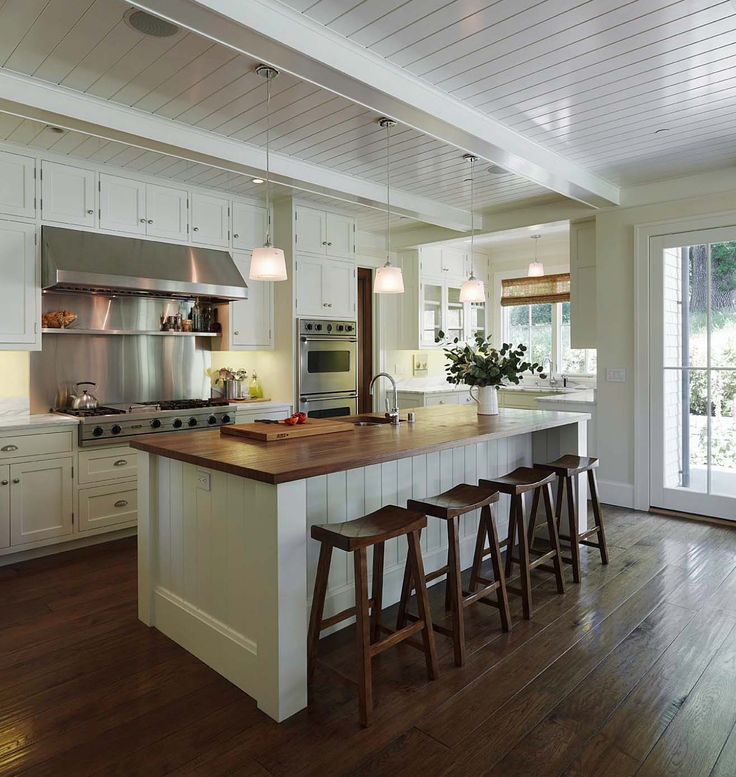
Brick walls for gardens
17 Best Garden Wall Ideas
Type keyword(s) to searchToday's Top Stories
1
Easy, Cheap, 30-Minute (or Faster!) Dinner Recipes
2
The Best Small Towns for Halloween
3
Apple Cider Donut Bundt Cake
4
12 Best Bathrobes for Women in 2022
5
Dad Jokes To Keep the Whole Family Laughing
Country Living editors select each product featured. If you buy from a link, we may earn a commission. More about us.
They can serve a multitude of purposes.
By Jill Gleeson
Carlina TeterisGetty Images
Whether really tall, or relatively tiny—those picturesque, surprisingly short stone walls scattered about New England, for example—humans have long been fascinated with structures that delineate and divide. Shakespeare created a character who actually was a wall in A Midsummer Night’s Dream’s fanciful play within a play; other famous walls include Hadrian’s, which marked the extent of Roman incursion into Great Britain.
But when it comes to yards, we’re happy to see that garden walls of all shapes and sizes have been standing straight for years and will for years to come. Garden walls can serve a range of purposes. From retaining walls, which hold back earth or water, to walls that screen, or just ones that make for beautiful outdoor spaces, these DIY and shoppable garden walls will sit pretty in your yard far into the future.
1 of 17
Bamboo Fencing
$105 AT WAYFAIR
Perfect to add privacy to your property, this fence made of thick rolled reed sticks can also be used to create a focal point in your garden.
2 of 17
Artificial Boxwood Hedge
$39 AT EFAVORMART.COM
If you’d love a living wall for your garden but don’t want the muss and fuss, get the next best thing—this stunning artificial boxwood hedge.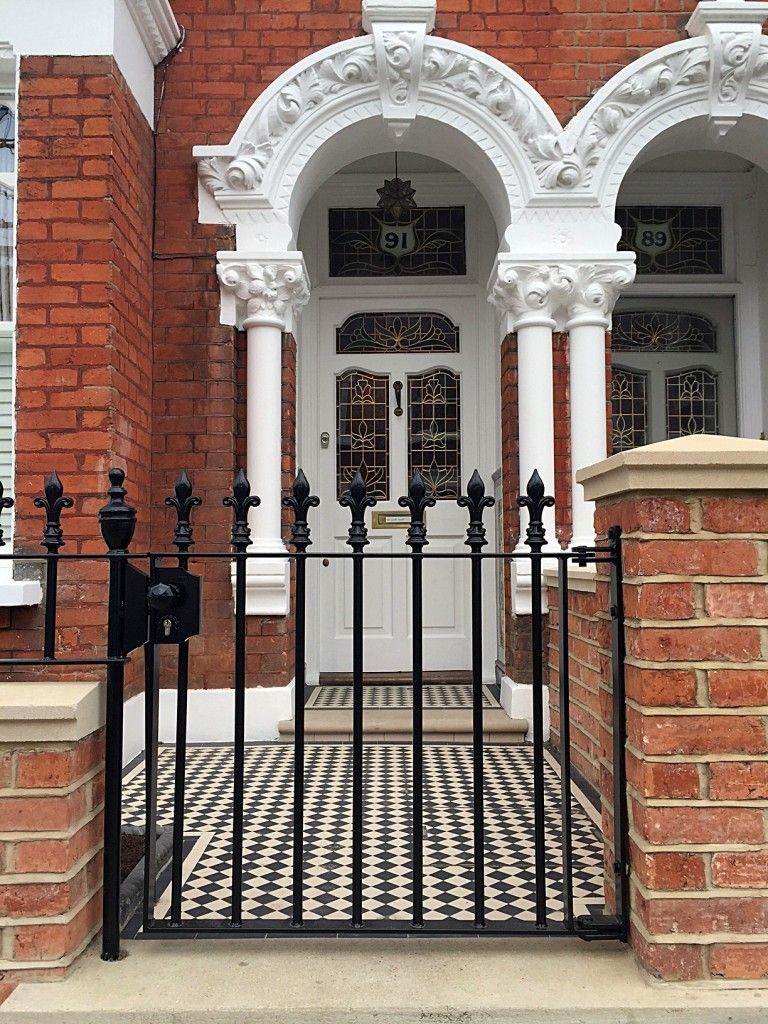
3 of 17
Vinyl Wall Trellis
$131 AT WALMART
Whether you want to plant clematis and other climbing greenery at its base, or leave it bare, this durable vinyl wall trellis will keep your outdoor space looking sharp for years to come.
Bliss Ranch
4 of 17
DIY Sculptural Cement Wall
Built to jazz up the area surrounding a hot tub, this wall was crafted with chicken wire and cement, then cured, stained and sealed. That nifty brick was also etched into the cement and stained.
Get the tutorial at Bliss Ranch.
Ruffled
5 of 17
DIY Pallet Vertical Garden Wall
Scoop up some pallets for free at a local warehouse and then get to creating this magnificent living wall, which serves as the perfect divider or backdrop for any outdoor space.
Get the tutorial at Ruffled.
Thirty Something Super Mom
6 of 17
DIY Retaining Wall
Made to withstand torrential midwestern rains, this sturdy brick retaining wall keeps earth from washing away. If you’re in an area with heavy storms, add gravel for extra drainage capability.
Get the tutorial at Thirty Something Super Mom.
A Crafted Passion
7 of 17
DIY Retaining Wall to Improve Curb Appeal
With just a couple days of labor, you can create serious curb appeal with this retaining wall that offers room for a raised flower garden. Be sure to lay down about an inch of paver sand to help keep the wall steady over time.
Get the tutorial at A Crafted Passion.
Dust and Doghair
8 of 17
DIY Stacked Stone Wall
It takes more than simply piling rocks on top of one another to make a stacked stone wall this lovely. Prep the area first by digging around a six-inch trench, then line it with landscape fabric and add drainage stone.
Get the tutorial at Dust and Doghair.
Home Made Lovely
9 of 17
DIY Vertical Garden Wall With Netting
This ingenious garden wall is crafted from an arbor overlaid over with wire netting.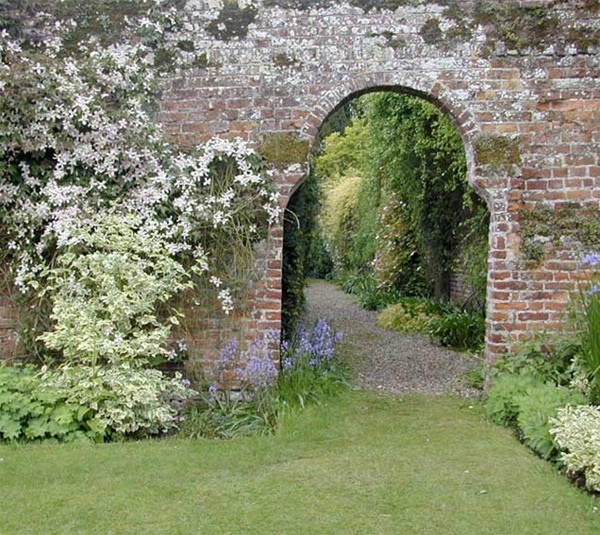 Fill little clay pots with pretty posies, hang them from the netting, and you’ve got a garden wall that will be the envy of the neighborhood.
Get the tutorial at Home Made Lovely.
Home Sweet Roman
10 of 17
DIY Stone Retaining Wall
With a sinous shape, this wall is a showstopper. Built with retaining wall blocks in gray charcoal that match the home it fronts, it also features a garden bed for perennials.
Get the tutorial at Home Sweet Roman.
Jennifer Maker
11 of 17
DIY Garden Retaining Wall
Long and low, with two circular flower beds in addition to the one running nearly the length of the porch it abuts, this retaining wall provides loads of planting space behind it.
Get the tutorial at Jennifer Maker.
Jessica Welling Interiors
12 of 17
DIY Wood Vertical Garden Wall
Made of fence boards stained to protect them from the elements, this vertical garden can be mounted against the side of your house in the patio area.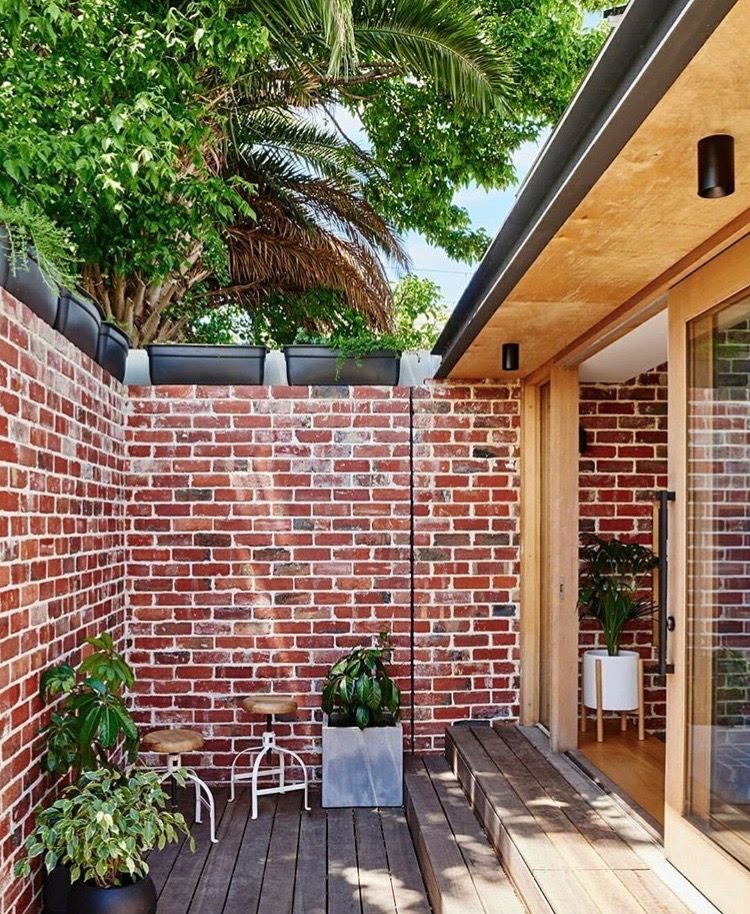 Then add succulents, or modify the plans to make deeper troughs for flowers or veggies.
Get the tutorial at Jessica Welling Interiors.
Remodelaholic
13 of 17
DIY Wood Slat Garden Wall With Planters
Made to transform an ugly concrete wall into a home for greenery goodness, this project uses 1x4 wood planks as a base from which to hang plant containers. You can make those planters extra eye-catching by coating them with durable rubberized spray paint.
Get the tutorial at Remodelaholic.
Remodelacasa
14 of 17
DIY Raised Garden Bed With Wall
This isn’t just a simple retaining wall, but instead a raised garden bed with a back wall made of pressure-treated lumber. Concrete retaining wall blocks line the front for a neat, nicely edged look.
Get the tutorial at Remodelacasa.
Simple Practical Beautiful
15 of 17
DIY Retaining Wall on a Slope
This project maximizes space in a downward-sloping backyard by leveling it off with a retaining wall.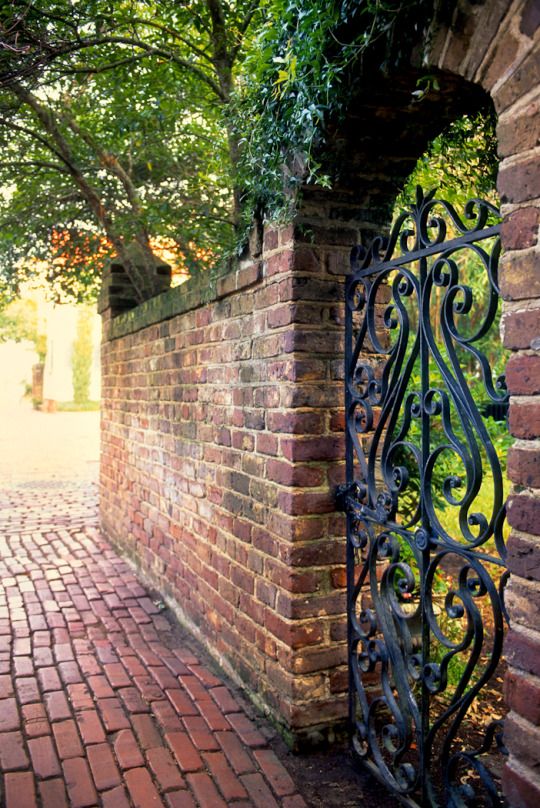 Use interlocking bricks that don’t need mortar for added ease and simplicity.
Get the tutorial at Simple Practical Beautiful.
Taryn Whiteaker
16 of 17
DIY Garden Slat Wall
Hide an eyesore like garbage cans or a shed - or just make an outdoor space prettier - with this slat wall made from cedar decking. Stain the wood before assembly, touching up after to save time.
Get the tutorial at Taryn Whiteaker.
The Handyman’s Daughter
17 of 17
DIY Garden Wall Planter
Featuring a big bottom planter plus plenty of smaller planter boxes, this easy-to-build piece doubles as a garden wall capable of concealing undesirable sights like air conditioning units. The boxes are removable too, to make plant care a snap.
Get the tutorial at The Handyman’s Daughter.
Beautify Your Front Door With These Plants
Jill Gleeson Jill Gleeson is a travel journalist and memoirist based in the Appalachian Mountains of western Pennsylvania who has written for websites and publications including Good Housekeeping, Woman’s Day, Country Living, Washingtonian, Gothamist, Canadian Traveller, and EDGE Media Network.
These Garden Layouts Will Suit Spaces of All Sizes
Amazon Is Selling a Walk-In Greenhouse for $90
11 Best Spring Flower Bulbs to Plant In the Fall
Pretty Purple-Flowering Vines, Shrubs, and Borders
Our Best Container Gardening Ideas
Red Flowers to Add Bold Color to Your Garden
These Are the Best Grow Lights for Your Plants
15 of the Best Air-Purifying Plants
8 of the Best Vegetables to Grow in Containers
10 Best Hummingbird Feeders to Buy in 2022
How to build a garden wall: tips for timber, brick, and more
(Image credit: Maksim Rumiantsev/Alamy Stock Photo)
Gardening Etc Newsletter
The Home Of Outdoor Living
Thank you for signing up to .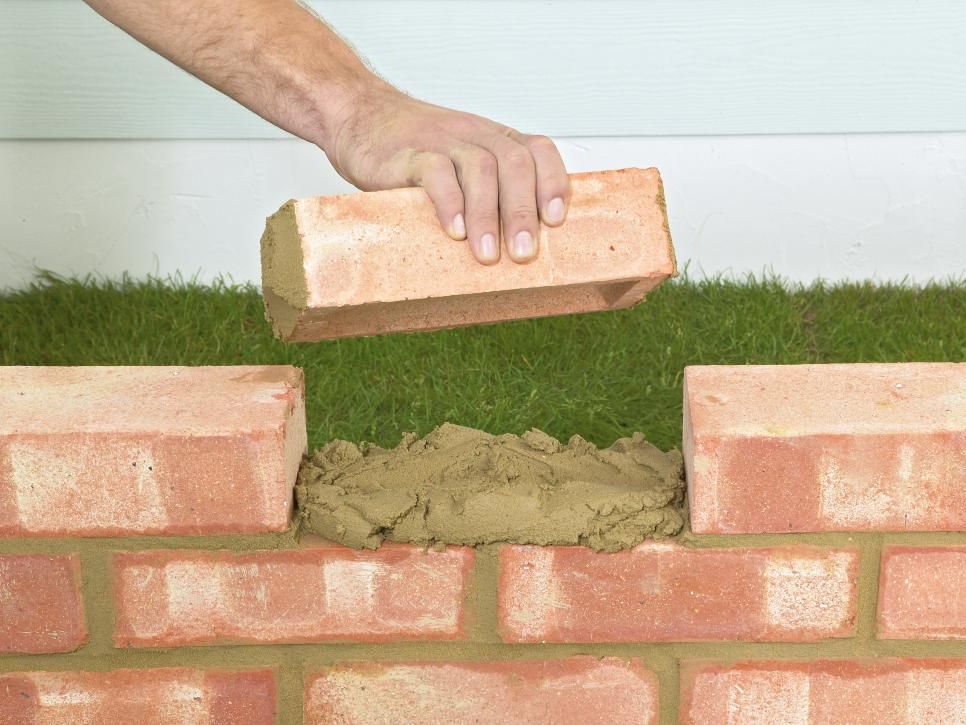 You will receive a verification email shortly.
There was a problem. Please refresh the page and try again.
By submitting your information you agree to the Terms & Conditions and Privacy Policy and are aged 16 or over.Want to learn how to build a garden wall for your backyard? It's a great weekend project, will save you some money rather than paying for a pro, and isn't that difficult.
Garden walls are key features in a plot for all kinds of reasons. They can provide shelter and privacy, divide your space into distinct zones, or, in the case of retaining wall ideas, hold back soil to create different tiers. And there are lots of styles to go for, depending on your budget, how sturdy the wall needs to be, and your preferred aesthetic.
We've brought together some straightforward guides on how to build a garden wall using different types of materials to help you complete your DIY project successfully.
How to build a garden wall from bricks
Perhaps the most go-to approach for building a garden wall is using bricks.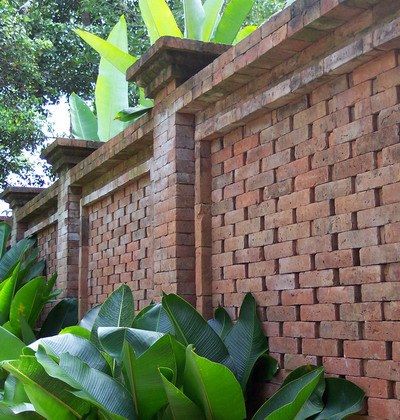 It's sturdy, economical, and if you've got a bit of DIY experience already, not too tricky to do.
To learn how to build a simple wall in this style, follow these step-by-step tips from Homebase below.
Laying a brick wall is quite simple once you have the know-how
(Image credit: Bogdanhoda/iStock/Getty Images Plus/Getty Images)
You will need:
- A tape measure, available at Amazon
- Thin pieces of timber
- Pencil
- Club hammer
- Bolster chisel – again, try Amazon
- Mortar, plus something to mix it in and a spade (our guide to the best garden spade has lots of great picks if you need a new one)
- String and line pins
- Spirit level
- Brick trowel
- Brick jointer
- Gloves to protect your hands while you work
- Safety goggles
Method:
- Lay a solid foundation for your bricks, and then decide how many courses (horizontal rows) of bricks you want.
 Using a pencil, measure out each course on a piece of timber – you can then use this as a guide to make sure your wall is straight as you build it.
 - Lay another narrow piece of timber along the edge of your foundation, where you wish to build the wall. This will also help as a guide for keeping it straight.
- Lay a bed of mortar on top of the foundation, then lay your first brick at one end.
- Add a small amount of mortar to the end of the second brick, then push this into place, next to the first, using the timber as a guide to keep it straight.
- Continue laying the first row of bricks, then use a spirit level to ensure it is all level.
- When building a wall, you need to lay the bricks so that the center of each is above the joints below. This means that some of your end bricks will need cutting to the right size. To do this, use a bolster chisel and a club hammer on a firm surface. Score where you want to cut it first, using the chisel and another brick.
 Then, with your safety glasses on, align the chisel across where you've scored and strike it with the club hammer to break the brick in half.
 - Lay mortar on top of the first three bricks at one end of the first course. Use your trowel to feather through it. Then, start laying the first few bricks of your second course, ensuring the end brick is square and level to the brick below by using a spirit level. Use your guide that you made earlier to check that it is at the right height, tapping the brick down if needed using your trowel. Repeat this at the opposite end, so that you have bricks on both ends of the second course, but a gap in the middle.
- Create a level line by using a length of string with pins attached to each end. Insert one pin at one end of the wall, into the mortar below the first course of bricks. Extend the line up and over the bricks, along the length of the wall, and down over the bricks at the opposite end. Insert the other pin into the mortar at this end, ensuring that the line is pulled reasonably taut.
 You can tension the string at each side by using a small amount of mortar and a brick laid on its side.
 - Apply a bed of mortar across the first course of bricks, between the two ends. Adding a small, feathered amount of mortar to each brick, lay each one next to one another to complete the course.
- Repeat the steps above to continue building your wall. Remember to keep checking it with your spirit level as you build to make sure it's straight.
- Once your wall is at the height you want it to be, fill in any gaps in the mortar using a brick jointer by smoothing the mixture over.
Climbing plants are a lovely way to soften a garden wall and add more color
(Image credit: villorejo/Alamy Stock Photo)
How to build a garden wall from timber
Garden walls can also be built from timber, including garden sleepers. Just ensure that the timber you use is weatherproofed to stand up to the elements.
Using timber is a popular approach for retaining walls as it gives a natural yet smart look that will complement your decking ideas and nearby planting well.
Leigh Barnes of Jacksons Fencing shares his tips on how to build a retaining wall from timber:
- The area for the wall and the space in front of it need to be dug out. Dig a trench below the new ground level to form the base of the wall – this should be approximately three layers of timber deep.
- Drainage is integral for a strong retaining wall, so lay gravel at the base of the trench. Laying a porous membrane (such as weed suppressant) on the bank behind the wall will prevent earth from sliding into the channel.
- You can then begin to layer the timber sleepers using a 'bricklaying' technique, ensuring at the corners that the ends overlap.
- Secure the structure using screws. For taller walls, you may require vertical timbers to support the wall.
- Leigh recommends installing a perforated drainage pipe along the line of the wall with one end clear to drain away. This will prevent water build-up behind the wall. He also suggests backfilling behind the wall with coarse gravel as you build, ensuring the porous membrane stays in place, to prevent blocking the drainage.
A retaining wall made from sleepers is used to border this flowerbed
(Image credit: Christine Whitehead/Alamy Stock Photo)
Of course, your wall doesn't have to be a retaining one. A simple timber wall makes a great garden divider between zones.
Mark it out first using string lines and pegs – this will help you keep it straight. When it comes to the build, ensure you construct it on a sturdy foundation. Some people choose to add a layer of concrete over a smoothed layer of fine gravel in their trench, then use coach screws on the bottom row of sleepers to secure them to the mixture as it sets.
Then, it's simply a case of stacking the timber, overlapping where they join, and using screws to secure each piece to the piece below. Regularly use a spirit level as you build to keep checking that it's straight. If you're building a tall wall, you may need to add a series of vertical posts for added support.
You can also use timber sleepers vertically to create a wall.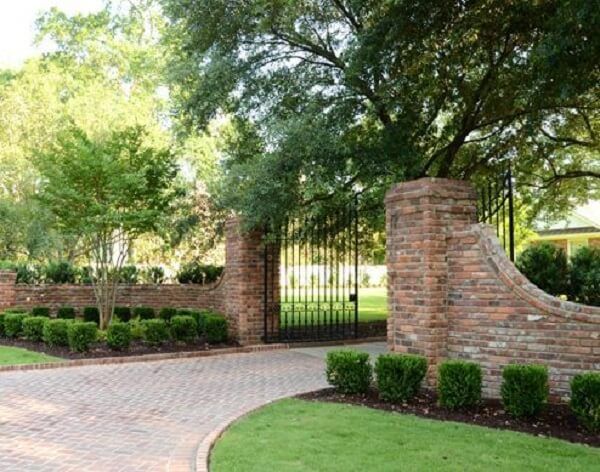 Cut them to the desired size, and line them up side-by-side in your trench filled with fine gravel. Then, when you're happy with their positioning, add in a dry cement mix and water to set them in place.
Sleepers can be used in other ways, too – our feature on garden sleeper ideas has plenty of inspiration.
Sleepers arranged vertically make a rustic boundary in this space
(Image credit: Joanna Henderson/Future)
How to build a retaining garden wall with concrete blocks
Building a wall with concrete blocks is generally the cheapest approach. Thomas Goodman, a construction expert at MyJobQuote.co.uk , shares his step-by-step guide on how to build a retaining design using this material.
- You can start digging the trench after you've marked out the arrangement. Dig a hole 4 to 6 inches deep and 12 inches broad, or twice the width of the block, to bury the first course or first row about halfway.
- You'll have to step up or down to keep the blocks level if the trench slopes.
 Create stairs with a torpedo level to ensure it is built correctly. If you don't want the wall to run parallel to the slope, use a hand tamper to compact the soil and maintain its level.
 - Fill the trench with about 3 inches of paver base and tamp it down with a rake. The foundation is strengthened by tamping the base. When everything is level, you can start putting the block in place. Then, starting at the end of the trench at the lowest elevation, knock out the flanges with a hammer and chisel so each block will lie flat, then set the first block in place and check for level.
- Place the next block on top of the first, making sure it's level. Continue putting in the first row, checking for level regularly. Fill in under a low block with a paver foundation or tap down a high block with a rubber mallet to level and keep the rows even.
- Then get ready for the second row by sweeping the dirt off the tops after each row is installed. You'll need to cut a block to stagger the joints for the second row.
 It should be marked and cut with a masonry blade.
 - Place the cut block in place, ensuring the flange is flush with the first row. Make sure it's level. You'll need to put drainage directly behind the block after installing the following few rows. Install landscape fabric behind the wall, leaving enough to reach the block's top.
- As you construct the wall, fill in the area directly behind it with gravel. Apply concrete glue to the wall block tops for the last two rows of a full block, then set the next row of blocks in place.
The process is more or less the same if you're creating a non-retaining wall, too. Just remember to build on a sturdy foundation, and they'll be no need to add landscaping fabric or gravel to one side as you build.
Building a retaining wall from concrete blocks is an affordable approach
(Image credit: Radharc Images/Alamy Stock Photo)
How to build a dry stone wall
Dry stone walls are a very traditional approach dating back hundreds of years.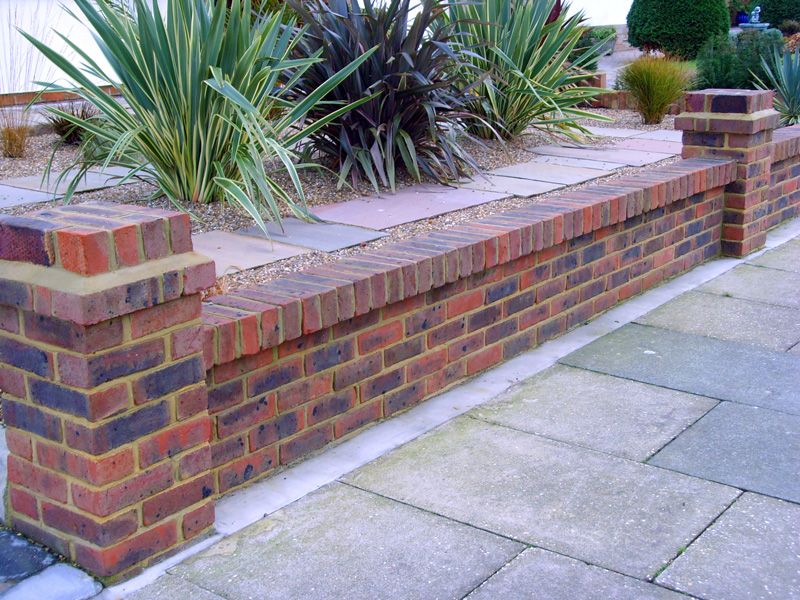 These walls don't use mortar, but they're still very sturdy and long-lasting.
They can be spotted all over the English countryside to mark field boundaries, but also make an attractive feature in a backyard. Because of all the nooks and crannies, they can be filled with plants and they're great for wildlife garden ideas.
- Prepare the site by marking out where you want your wall to be and digging a trench for the foundations.
- Use the largest stones you have at the bottom of the trench and fill in any gaps with smaller ones.
- Begin to layer up the stones, arranging them so that each lies as flat and horizontally as possible. The Wildlife Trusts recommends tapering the wall as it goes up, which will increase its stability. So, work in an A-shape, filling the middle with smaller stones.
- Larger walls benefit from the addition of large 'through stones' at regular intervals which span the entire width of the wall.
- Add a row of coping stones at the top of your wall.
 These should stand upright, be pushed closely together and have good contact with the wall beneath, and span the width of the wall.
Dry stone walls are perfect for adding a dose of cottage-garden charm
(Image credit: Rob Hadley/Alamy Stock Photo)
How much does building a garden wall cost?
According to HomeAdvisor.com , the cost of materials for a concrete block wall is generally between $3 and $5.50 per square foot (the equivalent of £2.25–£4.15), including mortar and structural reinforcement. This is generally the cheapest option if you're looking for budget garden ideas.
Timber for a wall can be around $15–$30 per square foot (that's £11.30–£22.65). Traditional bricks cost around $35 per square foot (£26.40), plus the price of the mortar and concrete, while natural stone costs $25–$80 per square foot (£18.85–£60.35) plus mortar and concrete if using.
Of course, one of the benefits of learning how to build a garden wall yourself means you won't have to pay the labor costs of hiring a professional.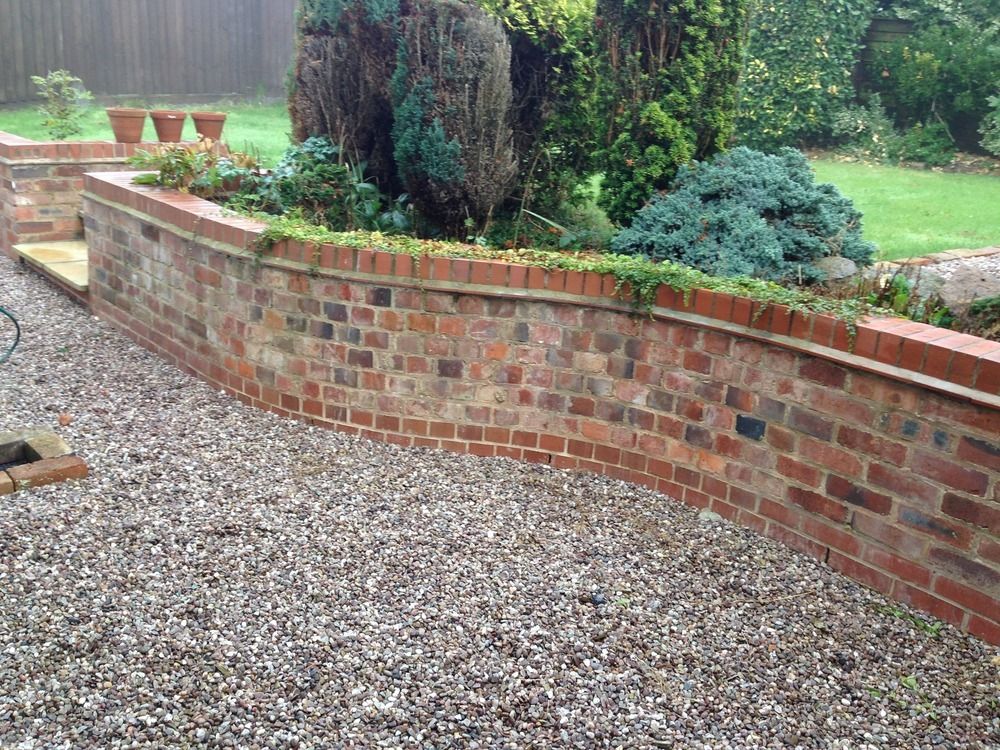 Looking for more info on how much landscaping costs? Our guide explains all.
Bricks can be a budget-friendly and stylish choice for your wall
(Image credit: Maksim Rumiantsev/Alamy Stock Photo)
Do you need planning permission to build a garden wall?
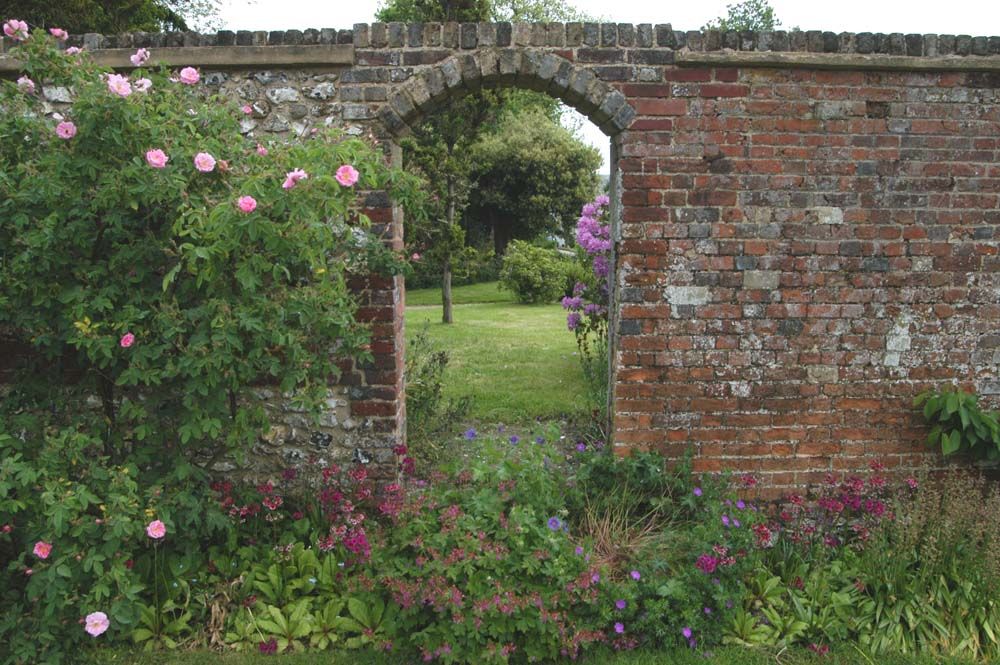
In the UK at least, you generally don't need planning permission for a garden wall as long as it complies with a few important factors. These include it not being over two meters in height from ground level (unless it is next to a highway used by vehicles, or the footpath of such a highway, in which case it should not exceed one meter in height). You'll also need to ensure you're not on a listed site.
Wherever you are in the world though, it's always worth checking with your local authority before beginning a project. In the UK, the Planning Portal is a useful resource.
Looking for more DIY projects to transform your backyard? Our guides on how to lay a patio and how to build a garden pond might be for you.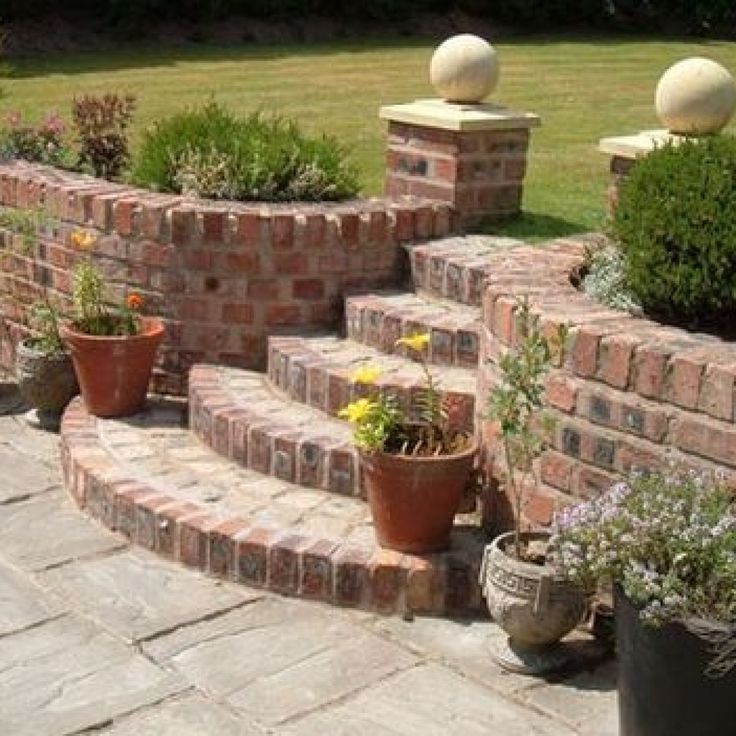
The garden was always a big part of Holly's life growing up, as was the surrounding New Forest where she lived. Her appreciation for the great outdoors has only grown since then. She's been an allotment keeper, a professional gardener, and a botanical illustrator – plants are her passion.
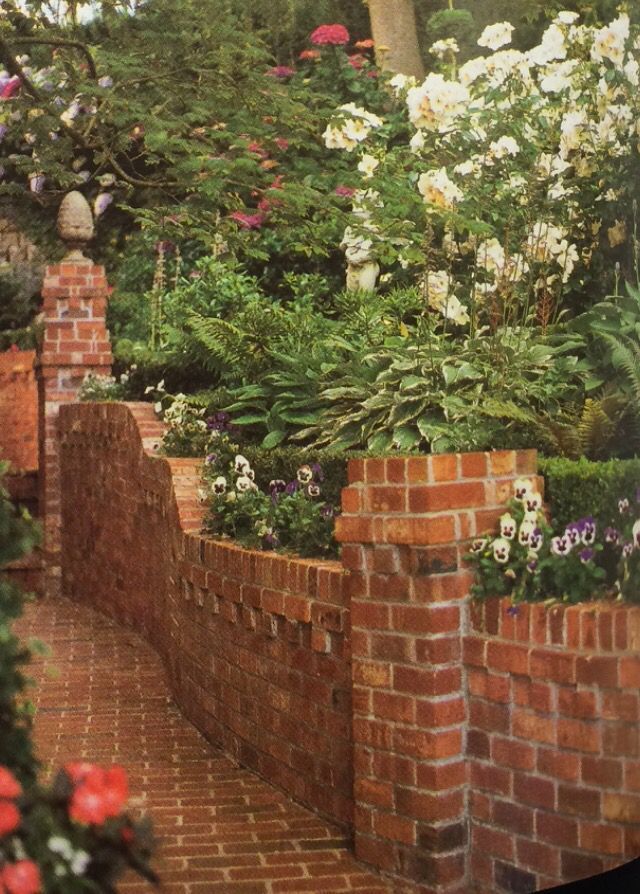
Making a brick wall in the garden
Category: Enclosures
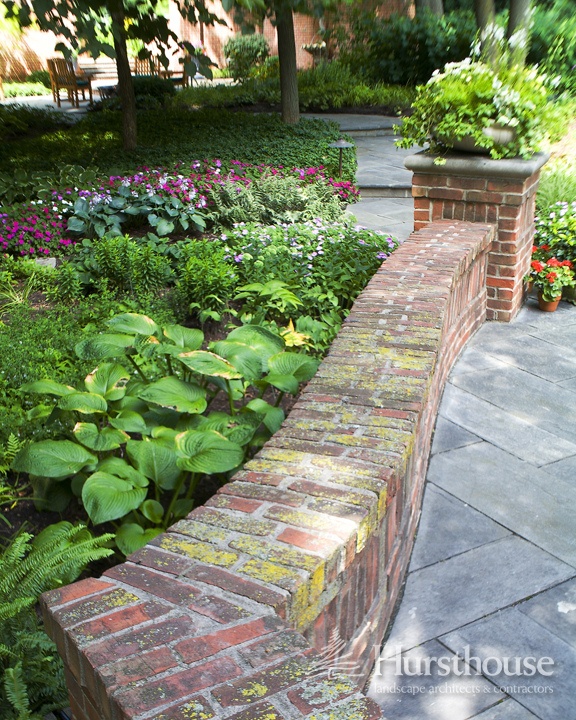
Walls protect thin plants from the wind, cast shade or create islands of sun - depending on how you build them. They can be used as a decorative feature in their own right, delimiting a lawn and a gravel path, for example. A brick wall will require a large financial investment, but will last a lifetime.
Planning
Plan your wall carefully. What height will she be? Where will it start from? And, most importantly, why do you want to build a wall? It is better to start with a scale plan on graph paper. Draw a diagram of the garden and put its main features on it, and then draw a wall, this will allow you to measure how long it will be and whether it is possible to lay it in principle.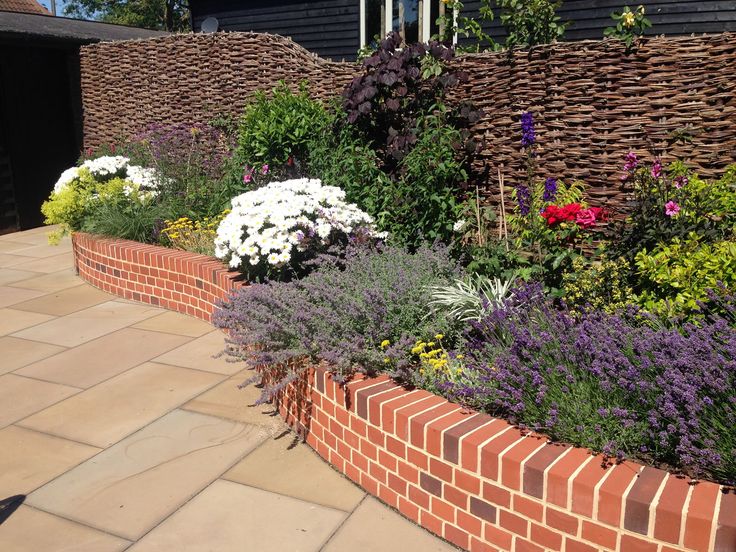 Another way is to do it directly in the garden, using landmarks and string to mark the position of the wall on the ground.
Materials
Whatever material you choose, make sure that it does not interfere with the materials your home is built with and the style of your garden. Also, you should evaluate your strengths. Can you build walls with your own hands from brick or already used stone blocks, natural stones or some other material? If you doubt yourself, you should hire a team of professionals.
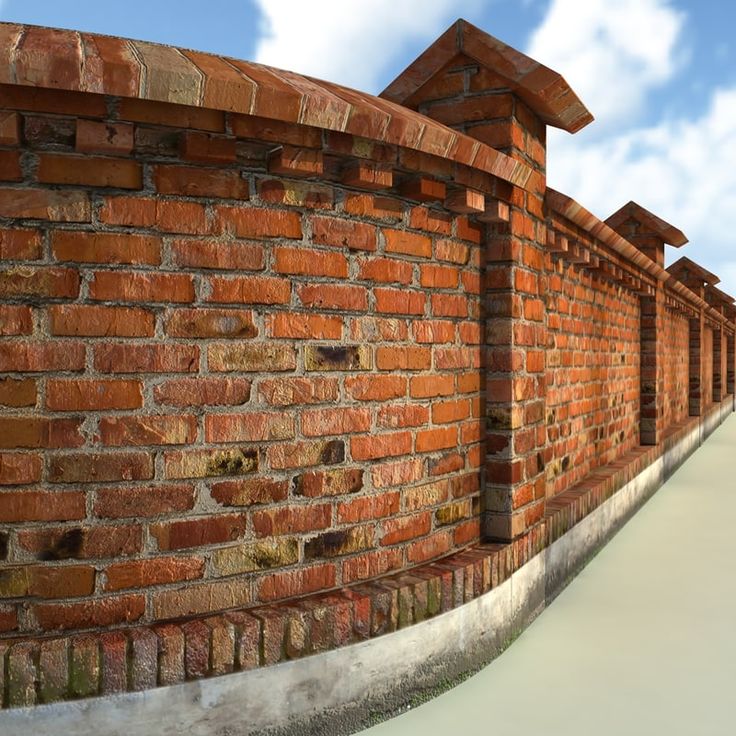
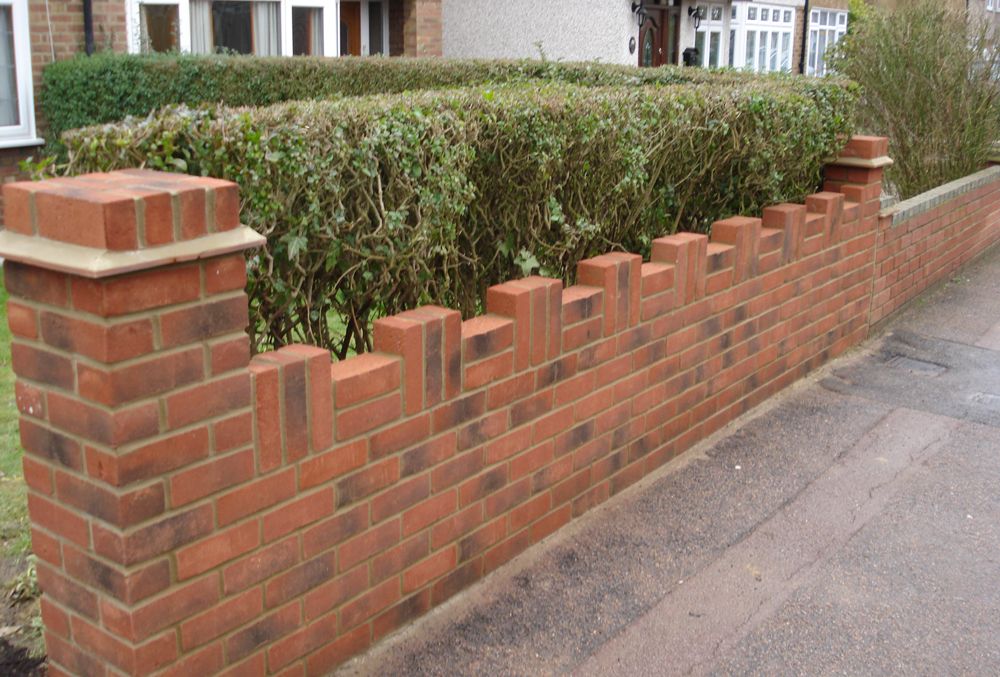
Brick shapes
The bricks used to frame the wall come in a wide variety of shapes and sizes. Beveled bricks are curved on one side, parapet rain bricks can be bent, chamfered or grooved. To achieve a strong bond, bricks with small holes (called "frog") are placed on top and filled with lime mortar before the next row is laid. Hollow bricks have through holes; penetrating through them, lime mortar holds the bricks together.
Types of masonry
Brick walls can be built in several ways.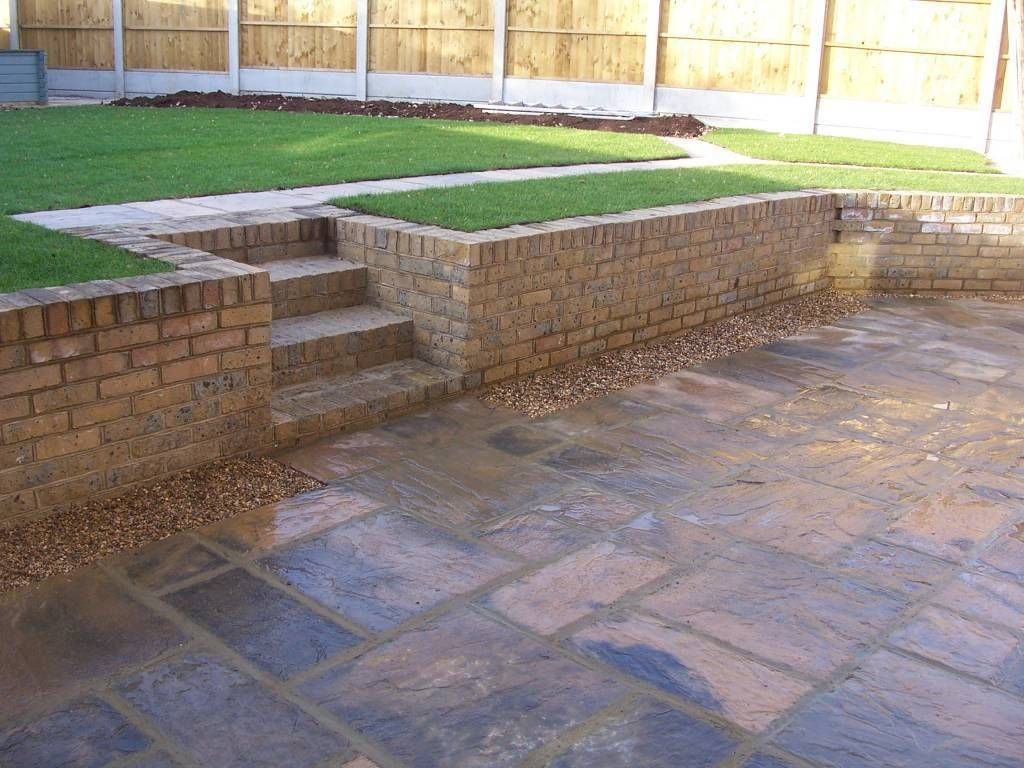 Types of masonry are chosen based on considerations of decorativeness and strength of the wall. For example, a supporting wall on a slope should have double masonry, while one that supports a shallow flower bed might be single. A wall that is more than one brick thick must have an extra bond inside the wall to prevent the two layers from falling apart. The most common types of masonry are running, Flemish and English. Running masonry is used for single walls.
Bricks must be cut - cutting bricks lengthwise is called a king cut, a cut across the width is called a bat, and a quarter cut is called a half bat.
Single or double masonry?
If your wall is fairly low, single masonry will not be strong enough and will need to be evenly pierced or staggered. It is best to make each layer of two rows of bricks.
Even with a single brick wall, courses must be laid so that the bricks overlap each other (cohesion). This locks them together for greater strength, however you will need to cut some of the bricks to support the pattern, especially at the ends of walls and possibly in corners.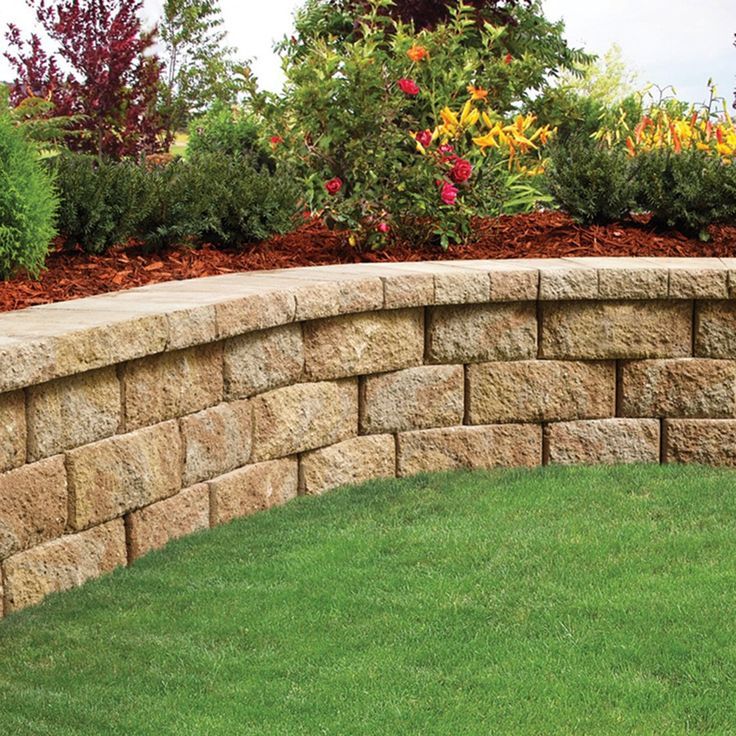
Preparing the foundation
The foundation usually consists of a strip of concrete that is three times the width of the wall and varies in depth depending on the height of the wall. This band is called the base.
For walls up to 60 cm high, a 10 cm layer of concrete placed on top of a 10 cm well-compacted hard layer (broken brick and rubble) will do, but for a wall above, use a 20 cm layer of hard concrete. On light, crumbly ground, these numbers should be doubled, and in this situation it would be wise to seek professional advice. Always make sure concrete footing is placed below the frost line to prevent rise during the winter.
Basic brick laying methods
Mix the lime mortar either on a large board or in a cement mixer, spread the mortar on the board. Mix as much lime mortar as you can use in an hour or less in hot weather; keep buckets and scoops for wet and dry ingredients separately.
Laying bricks
1. Set the template and lines, and spread a 1 cm layer of mortar over the concrete base. Level the surface with a trowel.
2. Lay the first brick and remove excess lime mortar. Lubricate the end of the next brick by pressing the loaded trowel across to form a wedge.
3. Place the grouted end of the brick against the clean end of the previous brick, again removing the excess mortar with a trowel.
4. After a few bricks have been laid, place a level on the tops and compare the level of the bricks by leveling them with your trowel's pen.
5. Use a trowel to place mortar on the tops of the bricks of the first row, level the surface and start laying the second row.
6. Lay the second row in the same way as the first, if necessary, insert half a brick (cut the brick in half lengthwise) to maintain the bond.
Practice separating a small amount of lime mortar and spreading it on your trowel by moving the blade from bottom to top. Learn how to place the mortar properly by holding the trowel over the area and pulling it back with a sharp twist.
Level the surface by running the trowel blade along the edges: leveling will help the brick and mortar bond and improve suction when the brick is pressed into place.
To mark the edges of the wall, move the plumb line while holding it vertically and scraping off the mortar with a trowel blade.
Once the mortar is dry enough to hold its shape and is no longer sticky, you must clean up the mortar joints. A good basic joint can be achieved by pressing the blade of a special trowel against the vertical joint, smearing the lime mortar against one side. Drive the blade along the horizontal seam, forming a bevel that will deflect rainwater away from the wall. Once the joints have hardened a bit, you can scrape off any leftover mortar from the bricks with a brush.
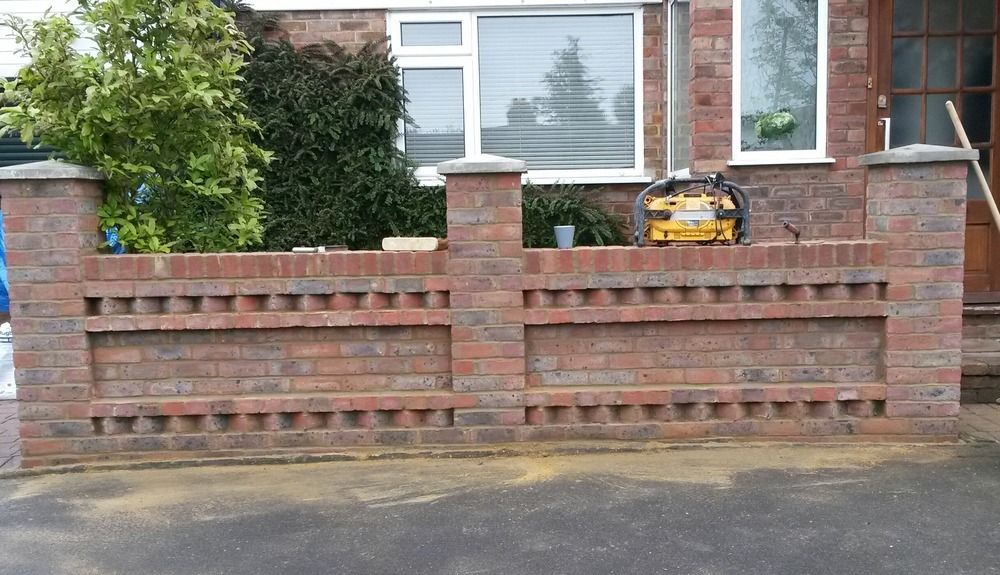
Decorative Wall Blocks
Decorative Wall Blocks come in a variety of geometric patterns, which is particularly suitable for patio screening as it allows cooling and filtering of light, but can also be used to build a low wall around a patio or dividing a garden.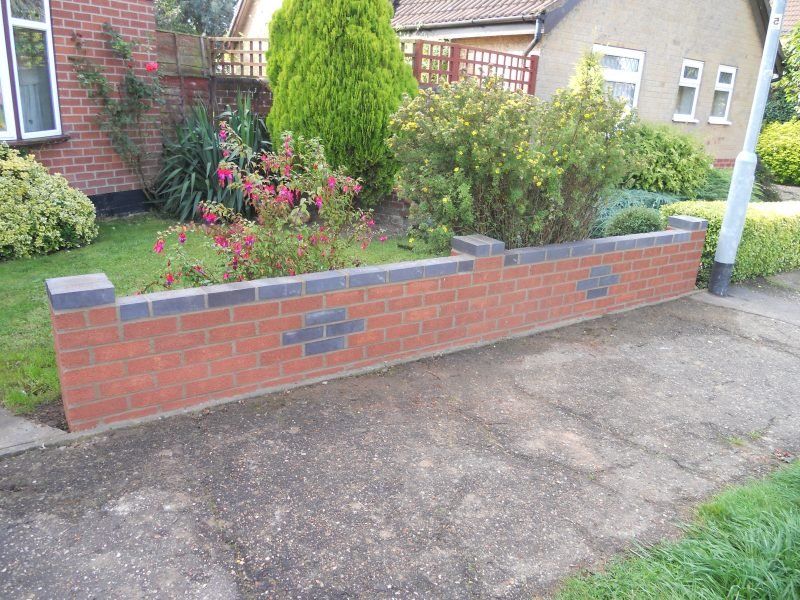
Installation of decorative blocks
1. Install the first block of the pier on the steel reinforcing bar directly on the base. Fill the void with lime mortar.
2. Continue building the rest of the pier in the same way, stacking blocks on top of each other and using a level to check if the pier is vertical.
3. When the pier is built, start building the wall, ie place the first cement block on the mortar, inserting its face into the hole in the pier. Using the lines of the thread, line up the wall.
4. Apply lime mortar to the outer edge of the first block and the next block; use a line of thread to line them up. Continue on in the same way.
5. Finish the wall by adjusting the hollow rocks at the top and the protruding parts of the pier to create a rainwater slope and a good view.
6. When the mortar begins to harden, use a piece of soft hose to create a concave joint to create a neat rounded look.
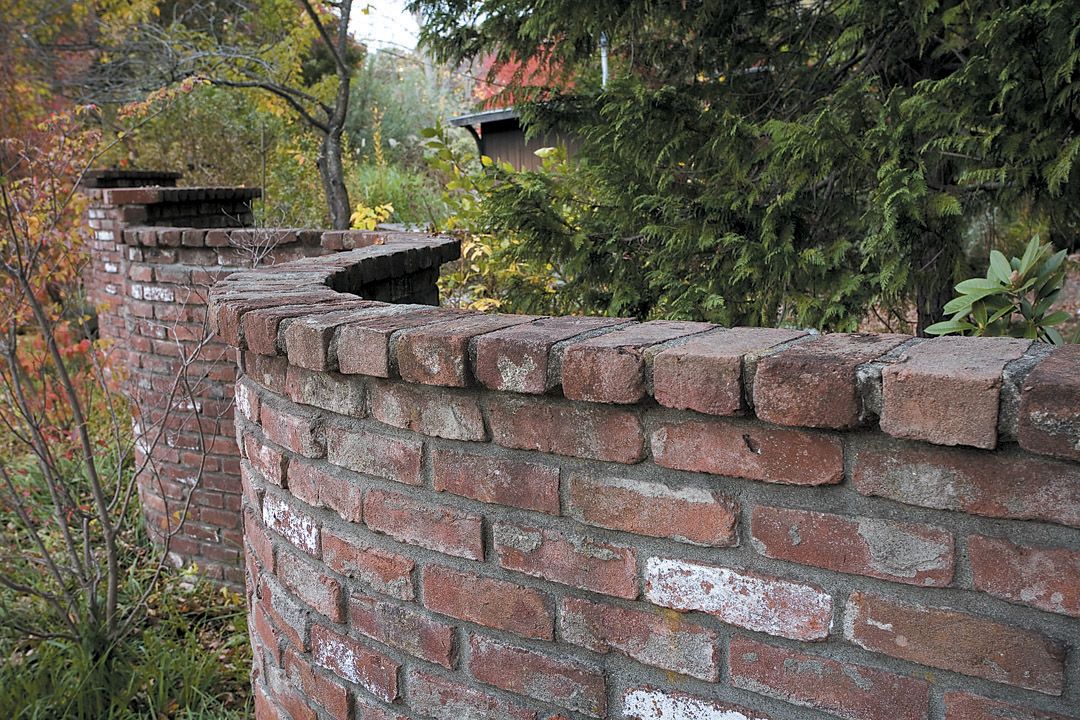
Corners and piers
Solidity is essential in the wall, and any straight wall sections greater than 1m high made of bricks or blocks must be reinforced in length with a pier at both ends.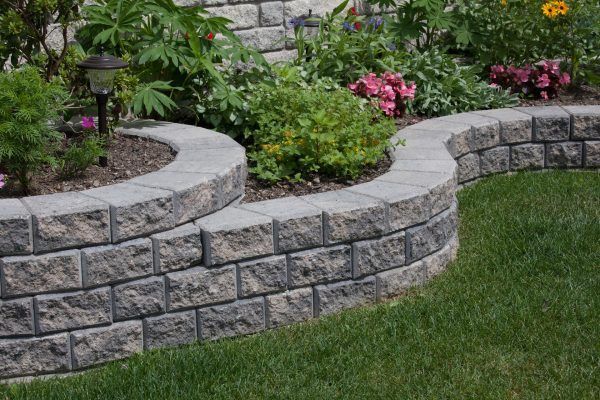 The piers should be twice as wide as the wall and built on a wider base than the rest of the wall. Hollow piers must be reinforced with steel bars at the base. Place the piers 1.8m apart. Through them, you can either continue the linkage pattern, or connect to the wall with metal joints between every third row.
For a corner wall, it is necessary to maintain the adhesion pattern, maintain strength and a neat appearance.
To form an intermediate pier, alternate a half brick and two three-quarter bricks in one row with two bricks lying side by side in the next row.
To make the end of the pier, alternate two bricks side by side with one and a half bricks side by side to maintain traction in the next row. To make a corner, rotate the bricks at the correct angles in each row. Use whole bricks rather than half-battens in the corners to maintain traction.
Rarely one on top of the other. To ensure a strong structure, the wall is divided by a vertical pier every 3 meters. Piers are built empty of cement blocks that have grooves on the sides, filled with lime mortar to connect the ends of adjacent blocks. If the wall is more than L8 m high, the piers are strengthened with a steel bar embedded in lime mortar into the holes in the middle of the blocks. They are mounted in a base of fresh concrete. They must be bent at the right angles at the base to hold firmly into the concrete. To check their verticality, use a level and install temporary supports until the concrete hardens. Before starting to install wall blocks, they first build a pier and wait for the mortar to harden.
Creating a profile
Dry masonry walls usually taper towards the top to add stiffness, this profile is achieved by two timber frames, one at either end of the wall. To align the stones, use scraps of wood, 5 × 2.5 cm in size, the frames should be approximately 1 m at the base and 30 cm wide at the top.
Dry masonry wall
Dry masonry walls are built without mortar, so the stones must be laid in a strict formula to make the wall strong enough.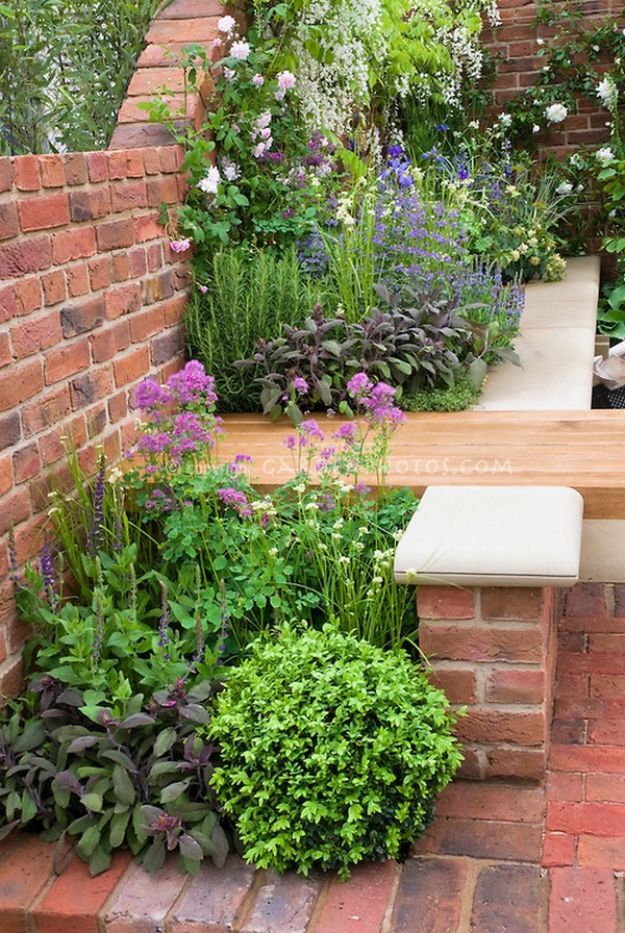 They have a natural look that is most suitable for rustic gardens. The soil can be packed into the crevices between the stones so that the plants can give the wall a softer look.
Stones can be purchased from garden centers you will need approximately 1 ton of stone per m3 of wall. Choose the hardest stone, such as basalt or granite, as it is more durable.
Dry masonry walls consist of the following elements: Foundation - A series of large, flat foundation stones placed over well-compacted subsoil.
Framing blocks are regularly shaped stones with at least one flat side, usually forming the front and back of a wall with a hollow in between. Fill stones are small stones, usually used to fill the hollow between the frame blocks.
Intermediate stones are large, flat, rectangular stones placed at irregular intervals across the wall, connecting the two sides of the framing stones.
Cornice or parapet stones (covering a course of masonry) - a series of large flat stones laid on top of a wall to cover a depression.
Flat stones - a layer of flat stones laid on top of the covering stones. They can be placed on the edge, alternate, for example, one with corners and one flat, etc.
Creating a drywall wall
1. Mark the edges of the wall and place a frame on both ends to indicate the shape. Tie two long threads between the two frames, on both sides at ground level, remove the soil and compact the subsoil to create a stable support. Place the layer of foundation stones with the flat edges facing out.
2. Then add a few rows of framing stones on both sides and at the ends with the flat edges facing outward, this will leave a cavity in the middle of the wall. Lay large intermediate stones evenly from side to side to tie two rows of framing stones together. Move the thread, aligning it with the construction line.
3. Fill in the gaps between the frame stones with small stones. Add a layer and tamp down, then keep adding layers until the depression is filled.
4. Add more intermediate stones along the wall to tie the two sides, then add more layers of framing stones by moving the thread. Completely fill the cavity with stones.
5. Lay a row of stones on top of the wall to close the depression and prevent rain from entering. You can lay them at a slight angle to make the water run off more easily.
6. Place a row of parapet stones on top, either side by side or alternating as shown.
Fencing - Building a brick wall in the garden
How to make a trendy brick wall with your own hands?
Brickwork in the interior is one of the most fashionable trends of recent times. This element of decor is especially relevant when decorating a room in a loft style. There are several ways to create a "brick wall" in a room. Each of them is good in its own way, but the choice should take into account the existing disadvantages.
Use of natural brickwork wall
The wall is cleaned of the remnants of old plaster, polished with a grinder with a petal disc, the inter-brick seams are corrected with a plaster mixture. To protect the wall from damage and shedding, its surface is coated with acrylic varnish or wax.
Pros:
Minuses:
Wall decoration with natural bricks
A backup masonry of natural bricks is made along the wall, and then a varnish or wax coating is used to protect the surface from external influences.
Pros:
Minuses:
-
The complexity of the process;
-
Loss of floor space;
-
Additional load on interfloor floors.
In order to minimize the disadvantages, you can replace natural brick with clinker tiles: it is much thinner and lighter, while retaining the properties of natural brick.
The tile can have a different shape, texture and color, which greatly expands the design possibilities when using this material.
Using tiles with a brick-like texture
Currently, it is not a problem to choose a tile on the market that imitates various types of brickwork. This option is ideal for the kitchen or bathroom.
Pros:
-
Aesthetic appearance;
-
Variety of finishes;
-
No need for additional surface treatment;
-
Surface resistance to mechanical damage and pollution;
-
Ease of maintenance.
Minuses:
Brick wallpaper
You can choose both the simplest wallpaper with a masonry pattern, as well as more expensive vinyl options that imitate the relief of a brick wall.
Pros:
Minuses:
Styrofoam tiles
To imitate brickwork, "bricks" made of polystyrene foam are glued to a plastered, pre-primed surface, and then painted.
Pros:
Minuses:
-
The work is painstaking, lengthy, requires accuracy;
-
The coating is subject to mechanical damage, fragile.
Imitation of masonry with plaster
The surface of the wall is plastered and given the appearance of a brick wall using special techniques.
Pros:
-
Maximum realism coverage;
-
Improving the heat and sound insulation properties of the surface;
-
Easy installation;
-
Low price;
-
No need for pretreatment of the wall.
Minuses:
5 ways to apply plaster "under the brick"
To create a "brick wall" with plaster, you can use the following compositions: tile adhesive mixed with gypsum plaster in a 1: 1 ratio; gypsum or shaped plaster; thick paint. There are several ways to create an imitation of brickwork using plastering:
-
The plaster solution is applied to the primed wall with a layer of 10-20 mm. Rectangular deep form in the form of a brick on the plastered surface imprinted relief bricks.
 The form must first be moistened. With a wet paint brush, the edges of the resulting relief are slightly smoothed, as a result, the surface acquires a characteristic “stone” texture. After the solution has completely dried, it is sanded and painted in the desired color. The work is quite painstaking, but the result is extremely realistic.
-
Narrow strips of masking tape are applied to a white-painted wall, recreating the masonry pattern. The wall is painted in a darker tone, after which the tape is immediately removed. This option is the easiest to implement and does not create the need to remove construction debris after completion of work. To make the “masonry” more realistic, you can use decorative plaster instead of paint. It is applied in a thin layer (about 3 mm), the tape is removed after some drying of the composition.
-
A stencil is applied to the wall, after which it is covered with tinted liquid textured plaster using a trowel or spatula.
 After 10 minutes, fine sand is applied to the dried solution using an airbrush. For strong adhesion of the sand layer to the surface, it is rolled with a rubber roller. After that, the stencil is removed.
-
A mixture of gypsum plaster and tile adhesive is applied to the wall with a stencil glued to it from construction tape. You can do this with a spatula or with your hands - this way the surface will acquire a more pronounced texture. The tape is removed immediately. After the layer dries, sharp corners are smoothed with sandpaper, the wall is primed and painted. With this method of finishing, a spectacular surface is obtained that imitates old brickwork.
Brick Wall Design Tips
In order for brickwork to transform the space as much as possible, and not create the illusion of an uncomfortable room, it is worth observing the following principles of its integration into the interior:
-
For uneven walls, it is recommended to choose more textured options - this will eliminate the need for careful leveling of surfaces.