How to tile kitchen walls backsplash
How to Tile a Backsplash (Step by Step Guide) • Ugly Duckling House
Disclosure: this post may contain affiliate links, which means I may make a commission if you decide to make a purchase through one of my links, at no cost to you.
8565 shares
This post may contain affiliate links. This won’t change your price, but may share some commission. Read my full disclosure here.
Want to know where to start on your kitchen backsplash? What supplies do you need? Tricks to cut around outlets, windows, and what to use if you hate bullnose tile? I’ve got you covered in this FULL backsplash guide!
Yesterday, I covered my timeline for getting the kitchen backsplash covered in subway tile. Tile that is still radiating all of those wonderful “damn, I look GOOD” vibes all over it.
And as promised, here are the full DIY details I learned, tools I used, and some handy tips for executing a subway tile backsplash of your own. I’ve stuck some affiliate links in here, just in case you want to bookmark and buy them online. Fair warning: this is a long post. So go ahead and run to the bathroom, and then come back (and while you’re at it, grab some coffee). If you’ve got crossed legs by the time you’re done reading, well… can’t say I didn’t give you a chance.
How to Tile a Kitchen Backsplash
First things first: you’ll want to make sure the surfaces are prepped for the job. Grab drop cloths for the surrounding areas and be mindful of the mess; once it dries it’s a lot harder to clean up. I also prepped the drywall in anticipation of my tile project, which you can read about here.
Tools and Materials
- Pre-mixed thinset: I bought the bigger bucket available off the shelf from Home Depot and honestly thought I’d bought WAY too much. Nope. I’ll probably need to buy another container of this size before I’m finished with the third & final wall. I chose it over tile mat (which is kind of like industrial double-sided sticky tape… and pricey) mainly because I wanted the ability to wiggle the tile around if there was an issue (I did what I could to even out the walls, but this is still an old house).
 Tip: pros will tell you all over the web that this isn’t really thinset, it’s just sanded mastic. Either is still fine for a kitchen backsplash, but “real” thinset mortar supposedly only comes in dry form that you then mix with water. Thinset vs. mastic makes a huge difference if you’re tiling a wet area like a bathroom shower, so just be sure you’re buying the right stuff for the right project. It sounds boring but this is where manufacturer’s instructions can prove extremely useful and keep you from making a costly mistake. That said, when pros post in forums about certain topics like this, they go a little overboard in my opinion about how much they dislike pre-mix stuff. But it worked just fine for me for a kitchen backsplash and I’ll probably use it again for the laundry room tile installation. (Update: I did!)
 - 4-in-1 tile adhesive spreader: I thought I was going to wind up using this for just the corners & hard-to-reach areas of the backsplash, and use the regular notched trowel (the one you need depends on the size of your tile – found via Bower Power), but noooope.
 I used just this spreader the whole time. And it’s only $2 when the trowel is usually $7-10 (and even cheaper online!). So even though it was a minimal amount of a financial difference, I still took the other trowel back when I realized I wouldn’t be using it (it’s the equivalent of a half box of subway tile, after all!).
 - Spacers: the tiles were self-spacing (more on that a little later), but I purchased some 1/8″ wedges to fit between the counter and tile. They were great for ensuring that my first row was nice and level (so that I could get up to 1/8″ wide spacing, but narrowed on one end just in case I needed to go narrower in some spots… luckily that wasn’t really a necessity and used the 1/8″ width the whole time).
- Rubber mallet: for tiles that don’t play well with others.
- Level: because no one likes tile that looks like a bad influence.
- Plastic wrap: since my walnut butcher block counter top is oiled and waxed, it didn’t make for a great surface for sticking down tape to protect any adhesive from dropping & sticking around (and this IS a messy project, so you’ll need protection of some kind, even if you’re not that afraid of having to scrape something off a waxed surface like me).
 So I sort of winged it with just a sheet of plastic wrap while installing the first row, then used painter’s tape to attach the plastic wrap to the first row of tile after it had set (to better keep the plastic protecting the entire surface & wouldn’t accidentally peel up while I was working).
 - Paper towels: (damp) for cleanup.
- Tile saw (not pictured, but you can see me using it during my bathroom tile install): I started and ended the project before I managed to find my tile nippers. I didn’t wind up needing them because I could easily make the cuts I wanted with a tile saw only, but a tile cutter of some kind is essential for each end of the wall to get the fit exact as well as around holes like outlets and windows.
- Putty knife/scraper: I love this thing for so many reasons. It’s got the perfect blade tip and shape to get under things (like stuck-on tile that needs to be reworked or to scrape off thinset that’s gotten too dry), the perfect width to scrape between tile, and a great grip.
 Just well made.
Small utility knife: I bought these in packs of 3 and use them constantly. Great for scraping away the thinset in between two tiles that are very close together without accidentally moving them. And opening boxes. And cutting wallpaper along cabinets. And everything else in my house that I need to absentmindedly stash small knives for.
Ready for the tutorial? Let’s get on with it!
Self-spacing tiles
Some ceramic tiles are manufactured to have tiny nubs or ridges along all four edges of each tile, called “lugs”. This allows the tile to butt up against each other and still have a grout line, but will provide near-perfect 1/16″ spacing and won’t require extra spacers in between (unless you wanted extra-wide grout lines, which I don’t prefer). They are a little hard to see unless you run your fingers along the tile, but I’ve done my best to capture a photo of what they look like during install below (arrows are pointing to a few, but they are on all sides of the tile).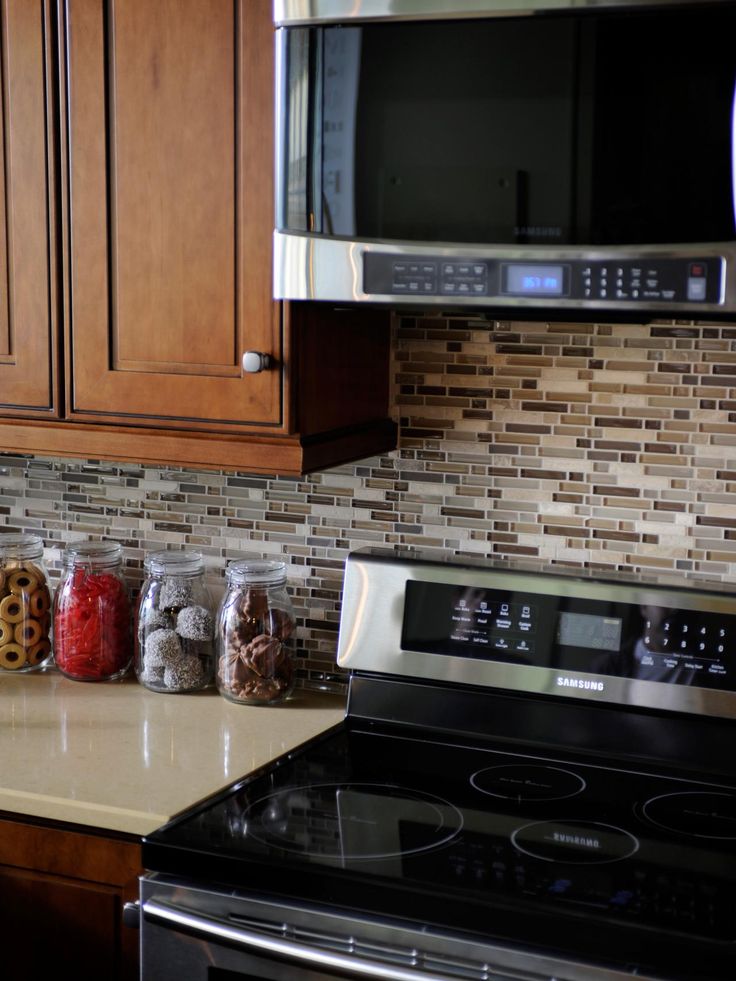
I bought my tile from Floor and Decor and didn’t realize that self-spacing was a possibility until one of the clerks corrected me when I asked about spacers. I looked to find similar tiles (also called “self-spacing” in areas where the word “lugs” would be confusing for most people) in my local Blue and Orange but didn’t see these available, so you may have to find a specialty store if you’re looking for them.
When you zoom out, they really don’t look at all significant (photo altered to bump up the contrast a little to make them easier to see). I got lucky on a few tiles and saw that one edge was coated, which allowed the lugs to stand out just a little bit more.
Spacing above the counter
Each tile was 1/16″ spaced, but I used 1/8″ tile spacers between the countertop and first row of tile. Since my wood countertop will most definitely expand and contract thanks to temperature and humidity levels, I didn’t want there to be any tight areas that would cause cracking. The space between these two will be filled with silicone caulk.
Where to start (planning your layout)
I chose to plan my layout by starting in the corner. Because the kitchen has an L-shape, I knew that if I were to start in the middle of the sink or stove (two very noticeable areas that you want to pay attention to layout-wise), there was a small chance that the tile wouldn’t be even by the time it reached the corner. Or, worse yet, I’d have a sliver of a tile every other row. It would look terrible. So, beginning in the corner it was. I used spacers below the first row of tiles and in the corner to account for any uneven spots in the wall (that way if the next row had a bump in the wall on the end, it wouldn’t force me to cut tiles to fit).
Once the bottom row was set though, I started all of the other rows in the center area of the sink (since I already knew my placement because of the first row) and worked out from there. I did this because now that the first row was down, I also figured that the tiny spacing between tiles had a decent chance that one or two might be ever so slightly off (even if they’re self-spacing, you’re dealing with other factors like uneven walls, which can sometimes lead to a wider-than-normal gap in one spot). If that were to happen, I didn’t want the entire row to look crazy on one end. By starting in the middle, I could make sure nothing got too out of whack by the time it reached the end of the run.
First Row
As I mentioned in yesterday’s post, I put down the first row of tile and let it set overnight (since I was using an adhesive that would have to settle as it dried, I didn’t want to risk the first level row from moving around with extra weight from more tiles on top). I didn’t want any adhesive to stick to the wall above the row I was working on, so to play it safe, I just “back buttered” the entire first row. What is “back buttering”, you ask? It pretty much goes like this:
- Spread the adhesive over the entire back area of the tile
- Scrape it just like you would do the wall with the spreader (45-degree angle to get those lines of adhesive over the back of the tile). The simplest explanation for why you need grooves is because it helps adhesion and ensures that you’re getting the right amount/depth of tile adhesive on the wall.
- Stick that bad boy up onto the wall & give it a little wiggle to make sure it’s sticking well. Use a level and your spacers to make sure the tile is level & adjust if necessary.
Second & subsequent rows
A brick pattern is pretty easy to do (which is why, for my first backsplash job, I went with this pattern). The next row after the first will break the first tile row exactly in half, which you can easily determine with a ruler. The next row after that will match exactly to the first row, creating an every-other-row pattern.
Did I seriously just explain the most self-explanatory pattern in the world? I’m going to blame the coffee.
Getting the hang of it
After the first few tiles, you will notice that you develop a rhythm of sorts. If you’re laying down full tiles, you just spread the tile adhesive over the surface area (if you’re working with smaller tiles, only spread about one or two square feet at a time to keep it from drying out too fast). Then use your notched trowel at a 45-degree angle and create grooved lines in the adhesive. Then plop a tile into place and wiggle it slightly to make sure the tile is set. You may notice that you’ll have to push on one corner to get it to sit flush with the tile next to it (especially if your walls are somewhat uneven), or you may have to push on the opposite corner of one tile to get another corner to lift slightly. You’ll eventually develop a flow and get pretty comfortable with it; just be patient and work tile by tile. If one is being particularly difficult, use a rubber mallet to gently tap it further into place.
Cutting around outlets and light switches
A tile saw is your best friend when needing to work around outlets. The easiest method is just to mark the tile with a marker and cut away the parts that aren’t necessary (seems pretty easy, right?). I marked mine with a small x to always note which side was the cutting side (so I wouldn’t accidentally cut things a smidge too short and account for the blade’s width). The marker I used washed off completely once it ran through the saw; so if I wound up reusing a tile I’d already marked, I could just wipe it off.
Corners are pretty simple, and you can always cut off a little bit more at a time if the first cut doesn’t fit (just like cutting anything else, start conservatively and then cut away more if you need to; you can’t add back what’s cut if you take out too much!). For tiles that need to be cut in the middle, you’ll need to cut slices every half centimeter or so. Fairly easy to accomplish with a wet saw, but be patient and don’t rush through. It will look like mangled teeth, but the point is to cut enough straight lines in the tile that when you gently (!) tap it with a mallet, the slivers of tile break off and leave you with the cut you need.
Note: outlets may need an extender or spacers in order to fit the new depth of your tiled wall. Don’t forget about this when you’re cutting space around the outlet (make sure the screws and metal tabs are all still accessible!).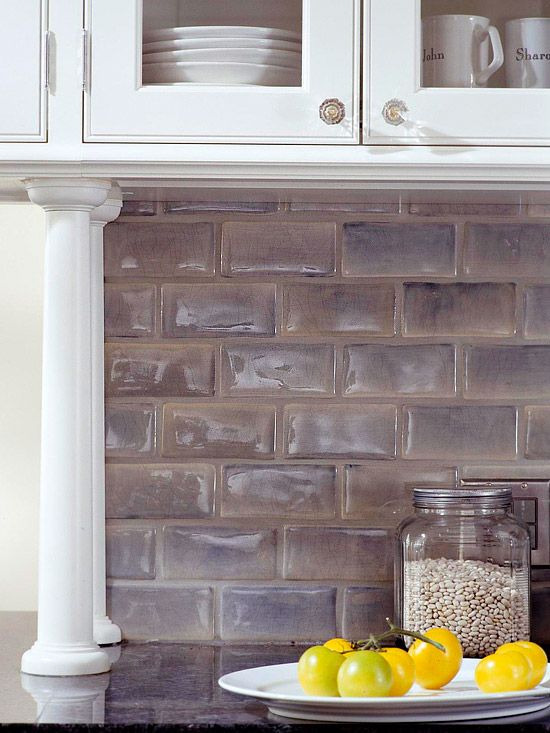 I haven’t addressed mine yet, but I’m going to need to extend them out slightly to fit the outlet covers back on. (Updated: see how I extended mine, and it took only minutes to do!)
Cutting around windows and trim
The easiest way to care for windows and trim is not to cut the tile to fit exactly, but to cut chunks out of the trim to slip the tile underneath (much like you would cut under door frames with a jamb saw). A multi-tool is great for this. However, I’m planning on using caulk to finish off the edges in certain areas of my tile job, and since my cuts were really straightforward, I didn’t bother to cut out the window trim and fit the tile in place. Instead, I just cut the tile corners where needed and called it a day (you’ll probably want to cut yours with a multi-tool, but I didn’t). I also pried the bottom piece of trim off of my window because of depth issues (if I had just installed it without removing the bottom piece, the bottom edge of the molding would actually be deeper set into the wall than the tile, which would look really odd). I’ve already received some questions about this, so I’ll show you how I re-attached it in a later post (there are just too many tips & this post is long enough already).
Exposed ends of the backsplash
It’s a matter of personal opinion, but I really dislike traditional bullnose tile, especially for kitchens (I have it in the bathrooms and don’t plan on retiling, but if given the choice, I probably wouldn’t use bullnose there either). So when it came to finishing off the tile where the cabinets end and the rest of the wall begins, I had to have a plan ready. I explored a few options and didn’t really find what I was looking for at my local stores, so I turned again to my outlet supplier at Floor and Decor, where they shared these little plastic end pieces with me.
They were inexpensive, matched the tile’s color and sheen perfectly, and would cap off the edges very nicely (for about the same cost as buying bullnose tile pieces). Updated: for those looking, this piece is often called a “tile cap” or “tile edging” and can be found at specialty tile stores (I also found a listing for them at Home Depot in various colors). To install, you just measure and cut to the length as needed and use a little tile adhesive to set it in place (use a level to make sure it’s straight). Then, your last tile on each end will cover the bracing material underneath (so be sure to plan your layout accordingly so you don’t have a sliver of tile on the ends).
Grout eventually fills in the rest of the line created (I’m still planning to use caulk to create a perfectly straight line, which I’ll be able to show you after grouting).
Keeping everything clean
If anything gooshes out, just clean it up with a damp paper towel or scraper. Be sure to keep anything between your tiles very tidy. If the adhesive dries between two tiles, it won’t leave room for grout. And adhesive is a lot easier to take care of before it’s dry. Your muscles will beg you to just stop and take care of the rest later but don’t. Take care of it now.
Your hands get messy as you tile, so damp paper towels are your best friend. Wipe the entire surface of the tiles down before walking away to let it tall dry.
A second pair of eyes
I discussed my game plan with my uncle and parents before getting started, which was helpful to keep the details in mind (you can easily get lost “in the zone” of laying tile after tile). Having a second pair of eyes is helpful for making sure you see the big picture and catch mistakes early (and if you’re sending teaser pictures to the competition, maybe sharing has a little more to do with bragging rights). By Sunday afternoon though, my project supervisor was more interested in the goings-on of the neighbors and couldn’t care less about how much I was staring at the wall.
And, before too long, (possibly a sore knot or two in your shoulders), you’ll have a wall of tile ready to grout. That you did yourself. Like a tiling badass.
Chances are, by the time you’ve now reached the end of this post, you either need a nap or you REALLY WANT TO TILE. Either way, I think I’ve accomplished something. I’m no pro, but as far as this DIY is concerned, I LOVE the outcome and am really looking forward to completing the rest. I’ll need to cover a few more items, such as grouting, caulking, tiling behind the stove, and re-attaching the window molding, but this post is LONG enough. Feel free to leave me your questions if you’ve got ’em!
Update: I had enough extra tile to also tile the laundry room upper wall. And if you need info on tiling around the window, I’ve got you covered here.
P.S. There are some tutorials I looked up before beginning my project. So a big thank you to Katie, Brittany, and Cassity, for giving me a little more info for research!
More Kitchen Remodeling
Want more kitchen ideas? From tiling a backsplash to installing counters and more, I’ve got you covered for your next kitchen project!
8565 shares
How to Tile a Backsplash --{A Tutorial for Beginners!}
I love tiling.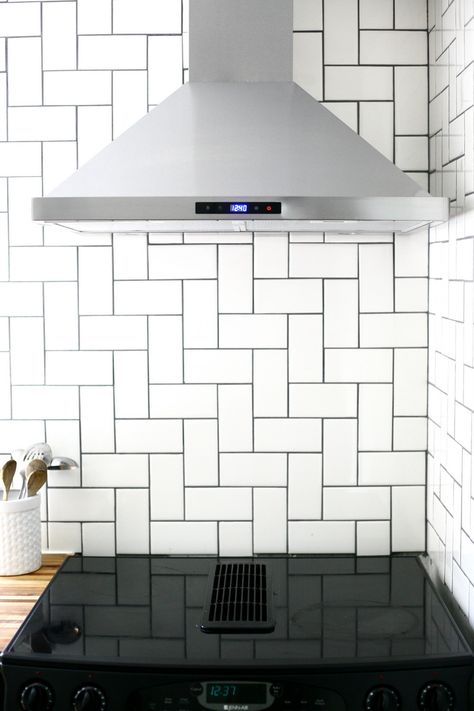 It’s like putting together a SUPER easy life size puzzle. Only, it’s way more fun. I’m going to show you how to tile a backsplash in today’s post 🙂
.
I’ve tiled a few things in my day…several backsplashes, a shower, some flooring. And while I’m definitely not an expert, I’ve learned a few things that I can certainly share with you.
I recently tiled the backsplash in my own little laundry nook (above) AND in my sisters new kitchen (below) and decided to put together a tutorial to show you some basics and how to get started.
Keep in mind that every space is a little different and you may encounter some challenges not mentioned in this post. This post is meant to give you some general information and basic ideas so that if and when you face that challenge, you may be able to figure out your own solution. It’s also intended for backsplashes only…tiling floors and showers require a few extra steps or different materials. But, if you’re good with that, let’s get started.
First, obviously you have to pick out your backsplash tile. If you’ve never done any tiling before, I highly recommend starting with something simple like a subway tile or larger rectangles as opposed to the smaller tiles that come in sheets. They’re just a little easier to work with.
.
Once you’ve got your tile, you need to pick up a few more items, then, you’re ready to go. I’ve got a quick video for you below and the materials list and step by step after that 🙂 This post contains affiliate links. See policies.
Tools and materials:
Level
Square
Backsplash tile (shown here in this tutorial is Jeffrey Court Tundra Grey Tile; shown in my sister’s kitchen is Jeffrey Court Casablanco)
Mastic
Trowel
Spacers
Tile saw
Painter’s Tape
Plastic or Trash Bags
Grout
Water
Mixing bucket
Clean bucket
Grout float
Grout sponge
Caulk
Step 1: Lay Out Your Backsplash Tile Design
When tiling a backsplash, the first thing to do is decide on a particular design and layout. Then, figure out the best way to start that pattern. If you are doing a straight wall—like my laundry nook, it’s best to start at the center and work your way outward.
However, if you are doing a corner, it’s better to start in the corner and work your way out.
But, if you have a large window AND a corner OR a straight wall like this kitchen, you may want to start in the center of the window and work your way out. That way your tile spacing will be even on both sides of the window since it’s likely the focal point. Either way, you need to figure out how will look best to lay out your tiles in your particular space.
So first, I laid out a few tiles (or sheets if you are doing a backsplash that comes in sheets) and made sure my spacing and everything looked good. In my case here in my laundry nook, I started at the center. So I measured and marked the centerline of the area.
Step 2: Prepare the Materials to Tile a Backsplash
I borrowed Danny’s uncle’s tile saw for this (and every other I’ve ever done haha) tiling project. It’s a wet saw with a diamond blade and it’s SO MUCH FUN TO USE. (Here’s me using it for our kitchen backsplash while we were building our house.)
I set it up outside on some sawhorses and poured water into the reservoir. Then I plugged her in and she was ready to go. Keep in mind, you will get wet while using the saw. It’s a WET SAW after all 😉
.
There are other tile cutting options as well, but I like the wet saw the best. Then I headed back inside and taped off the countertop with trash bags to protect it from the mastic and grout from the tiling.
Step 3: Begin With the Bottom Row
When installing tile on a vertical surface, start with the bottom row. The key is to get the bottom row level, then build on top of it.
.
So I applied mastic (it’s just a tile adhesive—you can mix it yourself, or buy it premixed. I buy mine premixed) to the back of the tile with the trowel. You can also apply this directly to the wall, but I think applying it to the tile is cleaner. It’s important to get plenty on the back, but evenly spread it. After a few, you’ll get the hang of it.
Too much mastic and you’ll have a bunch of squeeze out and too little and your tile could fall off the wall, or break.
.
NOTE: this mastic is NOT FOR WET LOCATIONS. If you are tiling a shower, this is NOT what you want to use. For that, you want to use a tile adhesive appropriate for wet locations–like a mortar. And you’d also need to take a few extra steps to prepare the wall to take the tile…like a cement board backer, possibly a waterproof membrane, etc. We are just talking backsplash in this post.
.
Then, I stuck the tile to the wall to line up with my markings and pressed firmly. I continued placing tiles along the bottom row using tile spacers below and in between the tiles. I used ⅛″ spacers for this.
PS I’ve been told this isn’t the correct way to use spacers. As long as you have the same space between the tiles, it doesn’t really matter and this method allows me to remove them easily and reuse them.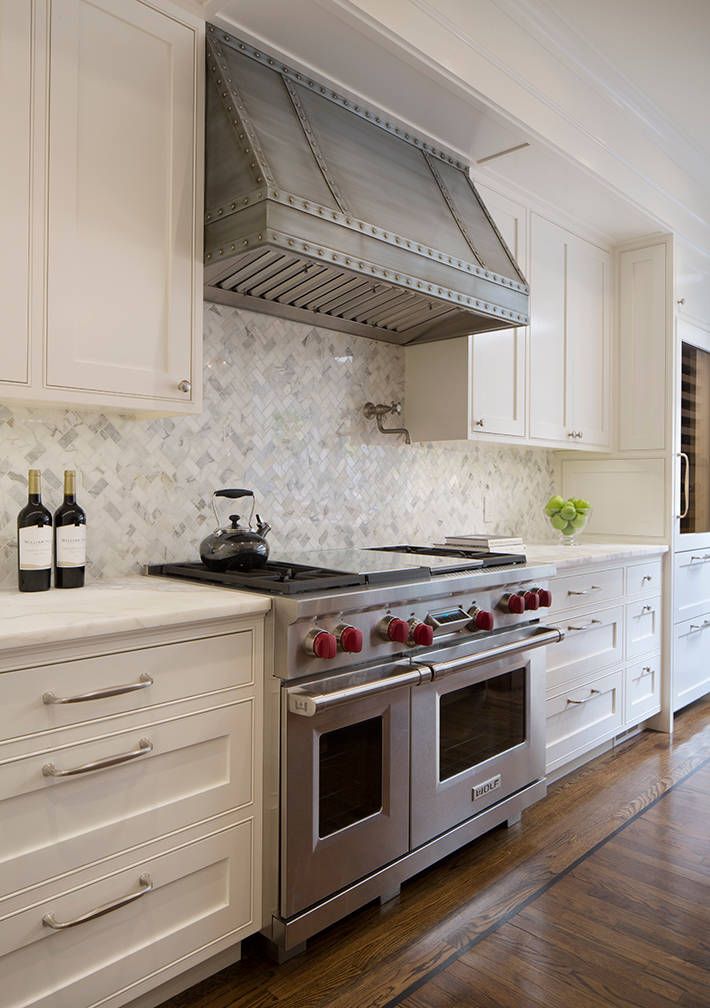
.
Once the bottom row was in place, I checked for level (see image above). This is the most important part of this entire process. I shimmed up as needed using spacers and painters tape to get this row as level as possible all the way across.
.
The second most important part is to remove any mastic squeeze out before it dries on the tiles. I’ll be grouting between the tiles, so I removed excess mastic from between them as I went. (Side note: I picked a grout color similar to my mastic color—white—so if I happen to miss any squeeze out, it will blend in with my grout.)
.
If I was using sheets of tile, the process is the same, just in sheets instead of individual tiles. Place the bottom row first, and get it all level. And if starting in a corner, cut the corner tile or sheet in half (or cut across a line that makes it easy to piece together a pattern) and place those in the corner first. See how this pattern flows nicely across the corner? PS It’s not caulked yet, so ignore the gaps.
Step 4: Cut End Pieces
Once I reached the edge of the backsplash, I had to cut pieces to fit. So, I measured the distance from the wall to the edge of the closest tile and subtracted 2x the spacer thickness (I was using ⅛” spacers, so I subtracted ¼”).
.
Then, I measured and marked that distance on the tile and placed painters tape along this line. The tape helps prevent chipping and also gives me a high visibility line to cut across.
I carefully cut along this line on the tile saw, then brought it back inside, applied mastic and stuck it to the wall. Easy as that.
Side note: You’ll notice above that I already laid a second row. I laid two full rows, then cut four end pieces at the same time just to save time. Once your bottom row is level, you can begin laying the next row.
Step 5: Repeat Tiling Backsplash
Once I had my bottom row in place, it’s level and cut, I simply built on top of it. I made sure to keep spacers between all the tiles and periodically checked for level and for square and adjusted as needed. I went with this super simple design, but you could also do other designs. The important thing with this particular design is to check often that things are square and you aren’t veering off one direction or another.
In my little laundry nook, I didn’t have any outlets or anything to cut around. BUT, if you come to an outlet or light switch or cabinet, etc, measure and mark where the tile needs to be cut and cut as needed.
.
Helpful hint: it’s easiest when you have to cut out a corner or just trim a tile length. However, when you come to a tile that needs a notch, use the tile saw to cut straight into the tile along the sides of the notch, then cut this notch out in tiny strips. You don’t actually cut along the middle line. If you cut thin enough strips, they simply break off to give you your notch. Imagine in the image below that the black marks are the saw cuts to make the notch. The thin pieces should easily break off.
PS It’s better to cut too large than too small. Make sure not to get too close to the outlet with your tiles. You can purchase larger plates to cover any gaps if needed. Also, once you tile a wall, you’ll have to install extenders on your outlets to compensate for the thickness so you can attach your plates back on.
Step 6: Finish Last Row of Tile
Once I got to the the top,I needed to trim the tile height to fit. Just like cutting the sides, I measured between the last tile and the cabinet, subtracted 2x the spacer width, then measured, marked, and cut the tiles to fit.
Then I stuck them in place.
Step 7: Grout Backsplash Tile
I let the tiles sit for a day or so, then removed the spacers from between the tiles. And I was ready to grout. I used sanded grout for this application.
.
Note: sanded grout is for spacing ⅛” or larger and non sanded grout is for ⅛” and smaller. Also be aware that some tiles can scratch easy and shouldn’t be used with sanded grout. Refer to manufacturers recommendations.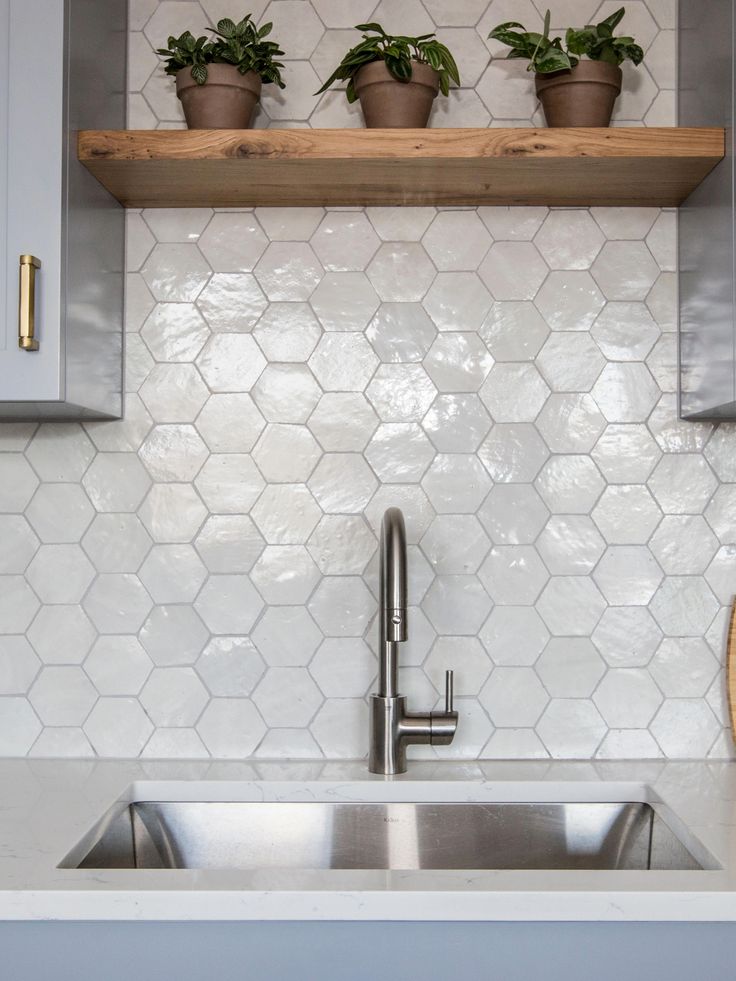
I mix my grout in a 1 gallon ice cream bucket if I have one (that size works well), but if not, any size bucket can work (even a milk jug cut in half haha). I mixed my grout with water until it was about the consistency of cake batter. Then, using a float, I scooped some grout out of the bucket and smeared it across the tiles.
It’s best to smear it at an angle—it helps it get into all the cracks. Basically, I’m trying to smush the grout into all the little cracks. I smeared the grout one direction, then the other direction and tried to scrape off the excess as I went.
It’s best to work in kind of small sections. I did as much as you could in approx. 15 minutes, then it was time to clean.
.
I grabbed a bucket of clean water and a grout sponge, wrung the sponge out well (you don’t want it dripping) and gently wiped the tiles to remove any excess grout. The key is not to just smear it around, but to WIPE IT OFF.
I rinsed out my sponge and changed the dirty bucket water often.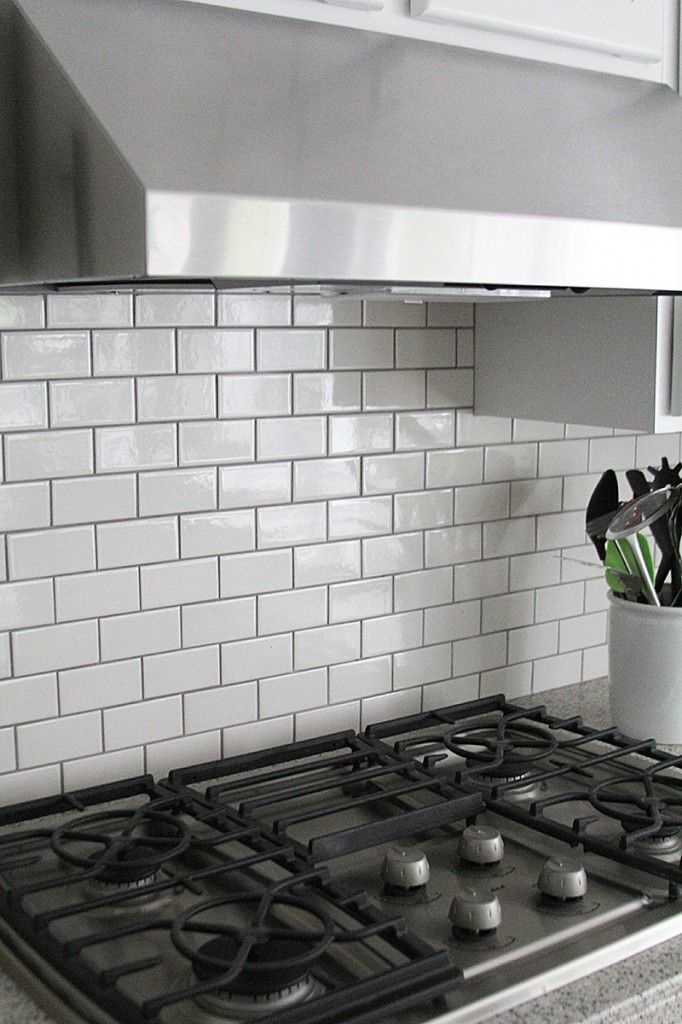 And I just repeated the process until the whole area was grouted.
.
I rinsed the tiles several times with clean water. Any remaining residue will make the tiles look cloudy once dry. I removed the plastic I had laid down to protect the countertop and wiped everything well.
Step 8: Caulk Edges of Backsplash
The last step is caulking. Once the grout was dry, I caulked the edges, corners, and where the tile meets cabinets, trim, or counter top with caulk that matched my grout color.
And, done. Check it out…we just tiled a backsplash!
See? It’s just like working a puzzle…only totally more fun 😉 I really love how a few tiles can transform a space and it’s really a pretty simple task to stick tiles on a wall and grout the gaps.
I hope this tutorial has been helpful and if you’re looking for some more laundry room (or any room, really) inspiration, be sure to check out the full reveal of this space here, and the butcher block countertop tutorial here.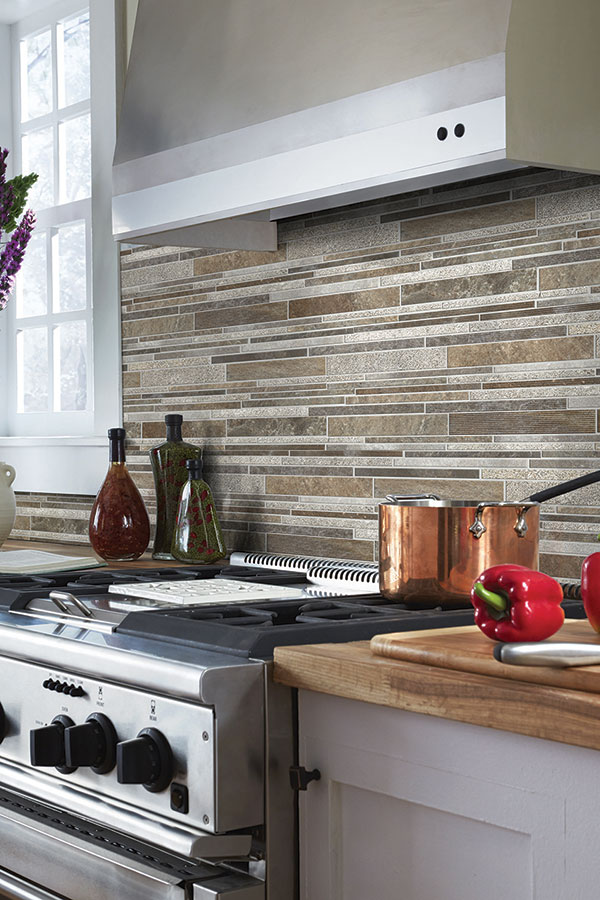
.
Thanks so much for following along and I’d love it if you’d pin this for later 🙂
Until next time, friends, happy…uh, tiling?? We will get back to building soon, I promise 🙂 Stick around…
How to finish the walls in the kitchen: 11 options for finishing materials
When decorating a kitchen, it is important to find a balance between beauty and practicality. One of the key rooms in the apartment also features a harsh environment with high humidity, heat and dirt in the work area. We share the best options for wall decoration in the kitchen.
Listed the main materials in the video
How to finish the walls in the kitchen
1. Paint
2. Plaster
3. Wallpaper
4. Photo wallpaper
5. Brick
6. MDF panels
7. Clapboard
8. Ceramic tiles
9. Porcelain stoneware
10. Artificial stone
11. Cork
Perhaps the most commonly used building material. It is easy to explain, it has many advantages.
- Manufacturers offer hundreds of shades. In addition, they can be mixed to create new tones.
- The paint is easy to care for, it is unpretentious. And besides, it will last more than a dozen years.
- One of the most important is the ease of application. You can do the repair yourself.
- Finally, you can choose the material based on the budget: there are both cheap and expensive paints.
Instagram @malina_interior_design
Instagram @malitskie
Instagram @giulianovars_interiors
One of the difficulties of working with paint is the need to prepare the surface before application. The exception is when the effect of smooth walls is not needed in the design.
Moisture-resistant paints are suitable as an option for wall decoration in the kitchen in the apartment. It is advisable to use a special category designed for this room - usually manufacturers make a note on the packaging.
-
Kitchen
How to decorate an empty wall in the kitchen: 10 solutions that will delight you
An eye-catching kitchen top that designers often incorporate into loft, scandi and minimalist interiors.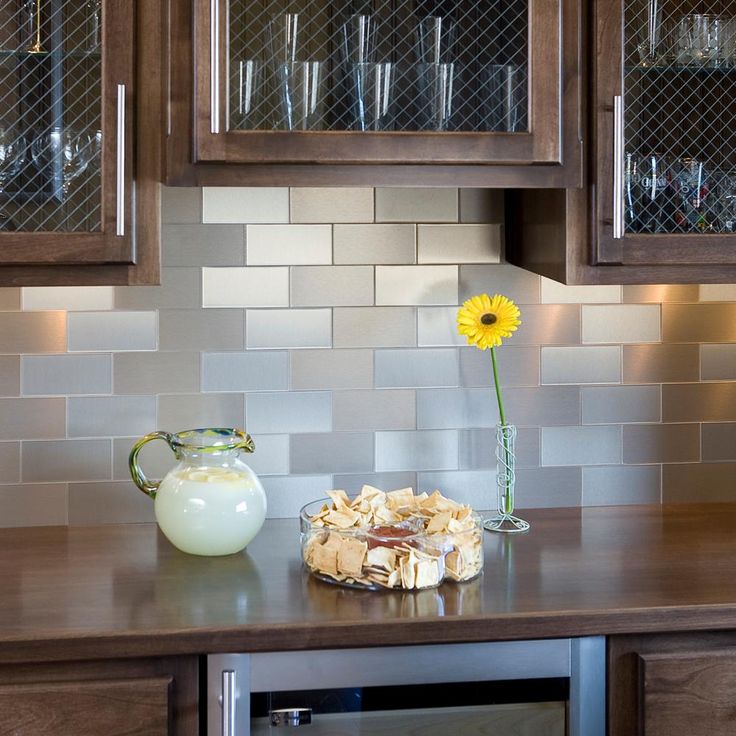 Concrete effect claddings are especially popular. Rough, as if faded, they add industrial notes to the design. Such decorative plaster looks interesting in eclecticism: for example, when neoclassical is mixed with a loft.
Like paint, plaster stands out for its durability and ease of maintenance. It can cover both wooden, and brick, and plasterboard partitions. The only negative is the price of plaster. It is more expensive than the same paint. And putting it on by hand can be tricky.
Instagram @design_marika
Instagram @katerina.guceva
Instagram @marideco.ru
-
Kitchen
5 not the most practical materials for finishing the kitchen (use with care!)
This option may not be the most up-to-date, but designers today skillfully fit wallpaper into projects in the Scandinavian and modern style.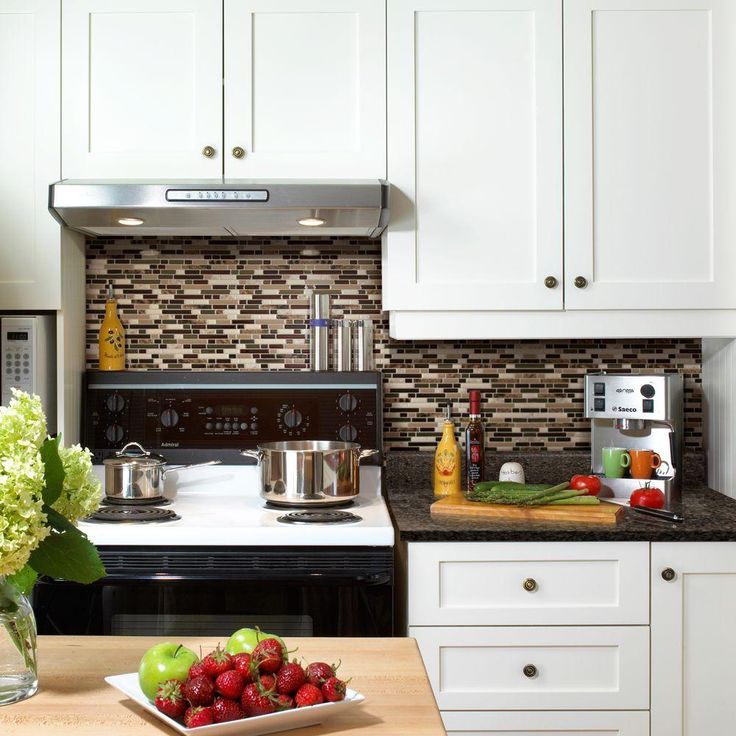 In the kitchen, canvases are used as the main finish and accent - for example, in the dining area.
Modern print and moisture resistance are the main criteria when choosing this cladding. The latter include options from vinyl and non-woven. And when choosing a print, we recommend paying attention to products of well-known European, including Scandinavian, and American manufacturers.
-
Finishing Materials
6 Common Kitchen Wallpaper Myths (And Why You Shouldn't Believe Them)
With all its advantages, wallpaper has several disadvantages. The main one is the complexity of the work, since vinyl often “sits down”. In addition, the coating must be handled with care: the wallpaper is easily scratched and dirty.
Instagram @kroon_karolina
Instagram @sandbergwallpaper
Instagram @kroon_karolina
Instagram @lillalivetandme
We made this cover separately, because mural differs from classic wallpaper in terms of decor. Although the physical characteristics of the photo wallpaper are the same.
This material is intended as an accent material for one of the partitions. The technique works very well in small spaces, murals visually expand the room, add depth to it and can adjust the proportions. But when choosing photo wallpapers, it is very important to pay attention to the relevance of the image and the quality of its printing. Graphic landscapes look good, for example, under a fresco, decorative natural motifs (it's just better to avoid photographs), designer prints. For inspiration, we recommend turning to today's works of professionals, it's just not worth looking for options on the net, there are a lot of outdated copies.
Instagram @sandbergwallpaper
Instagram @thekitchencurator
-
Kitchen
Wall murals in the kitchen: current solutions and anti-examples
The list would be incomplete without brick texture.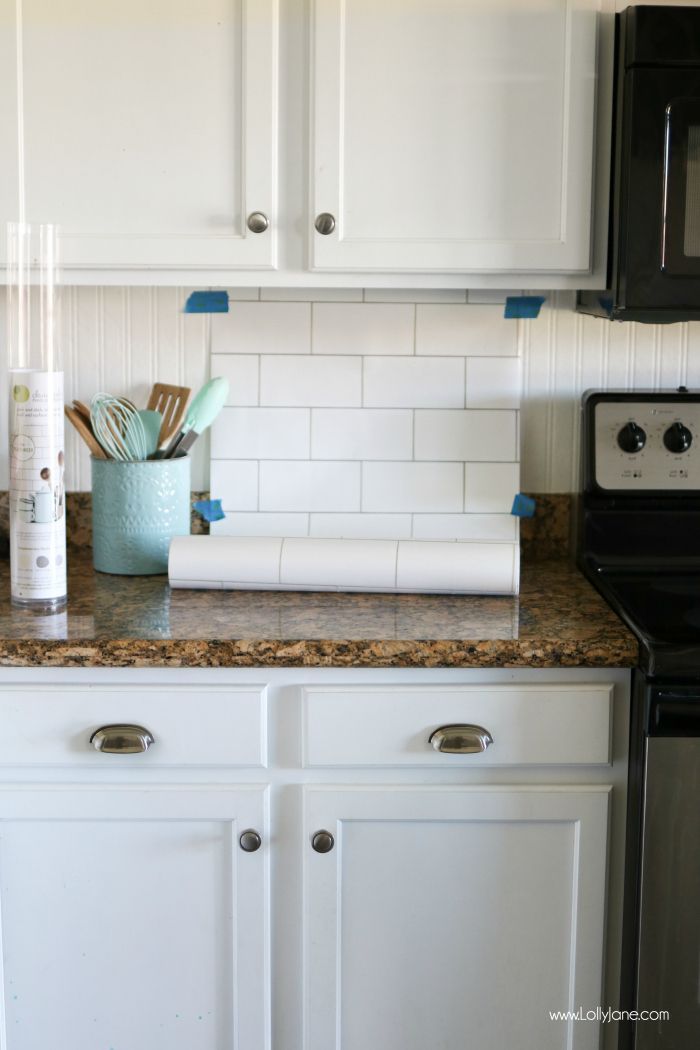 Such decoration is found everywhere today: in scandi, and in loft, and in modern, and in eclectic style.
Designers decide both to expose partitions and to create artificial turf. In this case, gypsum panels, concrete or real bricks are used (they are cut and recreated masonry).
- Brick is used for decoration in industrial interiors, or accent - in any other. Moreover, it can be painted, options in white are not uncommon.
- Brick - durable coating.
- Real stones are coated with a protective layer so that they do not generate dust.
- Decorative analogues are easy to install yourself.
Bricks require regular maintenance. Over time, dust accumulates on the edges. Also, it is better not to carry out work on exposing or laying out a cut yourself, this is trusted by professionals.
Instagram @alexey_volkov_ab
Instagram @dom_na_dobre
Decoration
6 unusual ways to fit a brick wall into the interior
Wood is back in fashion. Accordingly, MDF panels are again returning to interiors. Do not be afraid for wood, today there are also moisture-resistant products that can be used even in the bathroom, and even more so in the kitchen.
- The panels will fit into an apartment with uneven ceilings, they will easily cover all imperfections.
- The material is easy to care for, it is enough to wipe it with a damp cloth to get rid of dust and dirt.
- If you have building experience, you can install the panels yourself.
MDF panels look best as an accent. They are easy to match with paint. Even in large rooms, you should not get carried away with wood, visually it will reduce the space. As for colors, light shades and medium saturation are preferable. Dark wood can crush.
Instagram @mrtn_architects
Instagram @azbukadom
Suitable for decorating country houses, including small kitchens in the country.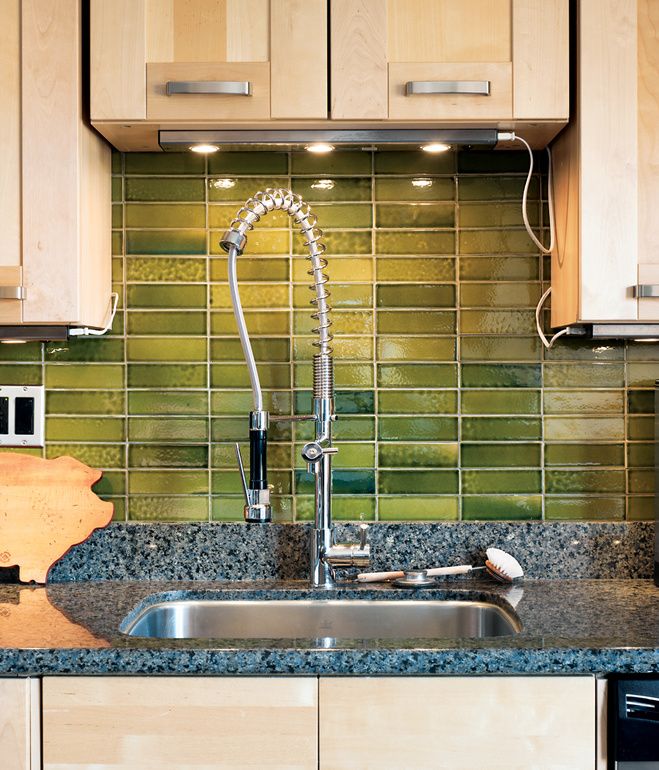 An unpretentious material that, with proper processing and proper care, will last a long time.
The lining can be painted in any suitable color - this is a significant plus in terms of space style. But even in this case, it is not suitable for every design. It will look good in country and modern style, you can also fit into eclecticism.
In this case, the lining is used as the main covering, when the board is located along the entire height. But it can also be combined with paint, wallpaper and other finishes.
Instagram @jacobsfarmstead
Instagram @nordiskakok
Instagram @goldenboysandme
-
Kitchen
Secrets of a beautiful kitchen lining and 71 photos of interiors
When talking about ceramic tiles, they almost always think of a backsplash. Although this is a good option for finishing material for finishing the main walls in the kitchen.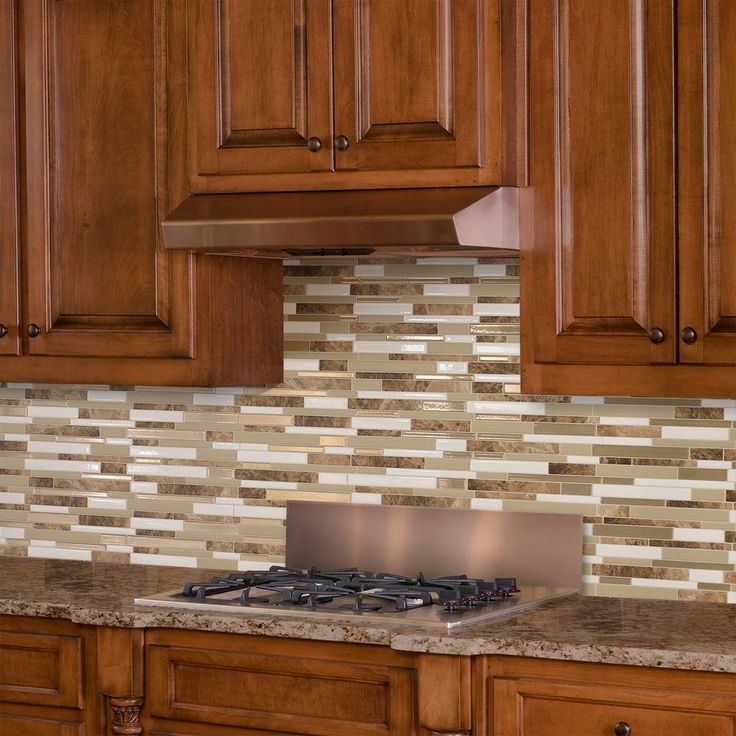 An interesting effect can be achieved by continuing the apron beyond. This approach is rare. It is only important to choose not too bright tiles, it is better to take more neutral products. Then the likelihood that it will bother you over time will be minimal.
- Tiles are durable materials. She is not afraid of temperature changes, high humidity and household chemicals.
- It is easy to care for, it is enough to wipe it periodically with a damp cloth. A regular dishwashing detergent will save you from drops of grease.
- Design and price range make it almost universal, you can choose a cladding for any budget.
There are almost no minuses. Unless the complexity of the work, of course, can be laid on your own, but without the appropriate experience it is better not to try.
Instagram @misses_popisses
Instagram @shannsd
Instagram @inside_ad
Unsplash
It differs from tiles in size, thickness and some parameters such as wear resistance. Porcelain stoneware withstands even more extreme conditions. Modern plates are so thin that even the ceiling can be finished with them.
In the design of the walls, options with natural textures are relevant: stone, concrete or wood. If you choose the grout to match, the concrete will be indistinguishable. Be careful with wood, porcelain stoneware should not differ from real wood either in the photo or in reality. When choosing, it is important to pay attention to the quality of the plates and the pattern.
Porcelain stoneware is used like a tile: partly for a backsplash, extending the coating. Plus, you can arrange the accent zone in this way, for example, near the dining group.
Instagram @anna_mikheeva_design_studio
Instagram @evgeniyayshkova
Instagram @bodes_studio
Stone texture is considered one of the most fashionable today. Thus, an apron is distinguished and accents are placed in the main design. But using natural slabs is not always possible. As an alternative, you can consider porcelain stoneware or artificial stone slabs, which cannot be distinguished even in the photo.
Unlike the natural one, the acrylic analogue has no pores. So it's much easier to take care of it. In addition, it does not leave traces of brightly colored products such as wine.
In addition, any chip on such a panel can be repaired locally. And you can even do it yourself. But artificial stone also has disadvantages. For example, it easily scratches. So washing acrylic with a sponge or abrasive is not recommended. Another point is the price. Good quality acrylic products sometimes come out more expensive than natural ones.
Instagram @sisalla_interior_design
Instagram @the.palm.co
Instagram @fxrauch
How to decorate the walls in the kitchen so that it is original and unlike anything else? Cork. In projects, it is still not very common. At the same time, it is one of the most environmentally friendly materials.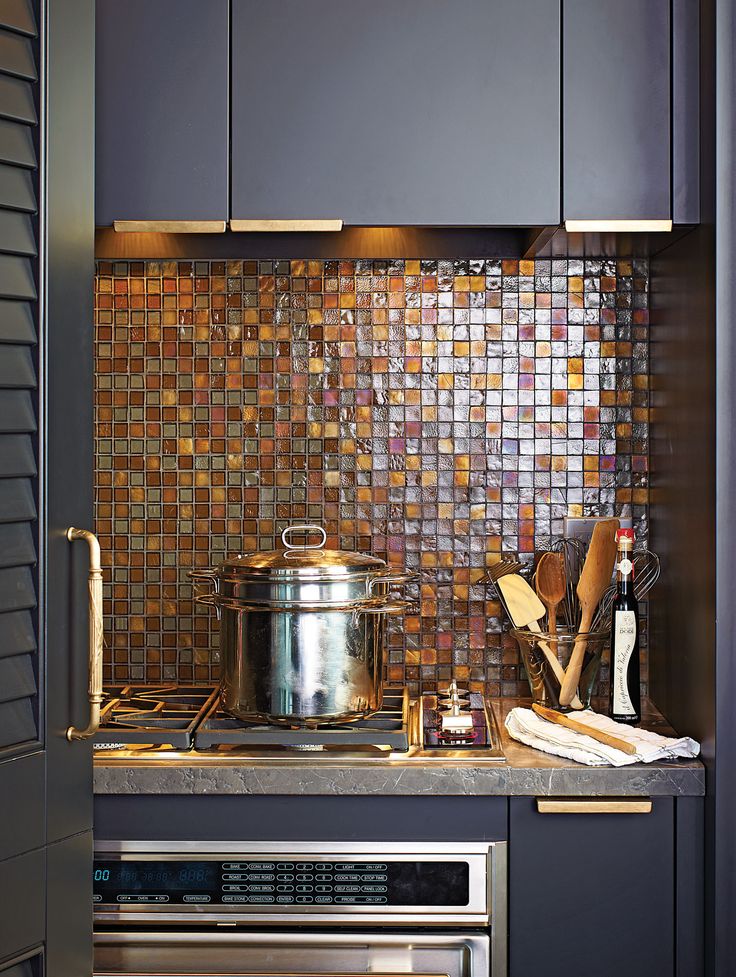 Lightweight moisture-resistant cork can even be used in the design of an apron. It fits into interiors with notes of eco-style, Scandinavian design and modern. It goes well with wood, ceramics and other natural textures. Can be used for partial accent or full decoration.
- It does not rot and is resistant to temperature changes. And resistance to water and steam can be enhanced by waxing.
- The cork will definitely last more than one season, with proper care, and for decades.
- It does not collect dust and is very easy to care for.
- Cork sheets can cover the unevenness and roughness of the partitions, this is a dense sheathing.
At the same time, we highlight two shortcomings. First of all, it's the price. Especially if you want to cover all the walls in this way. And the second is the complexity of installation. You can't handle canvases on your own.
Don't let the monotony of the cork texture fool you. In the lines of European manufacturers, you can also find more modern textures.
Instagram @aucoot
Instagram @ficture.studio
-
Finishing materials
Cork in the interior: environmentally friendly, fashionable and durable
Prepared by
Anastasia Khripunkova
Kitchen apron finishing: finishing options, photo
The cooking area is perhaps the most demanding part of the kitchen. The apron simply must be indestructible, protect the wall from moisture and high temperatures, while pleasing to the eye and easy to wash off grease and dirt. In this article, we will talk about the most popular materials for lining a kitchen apron. We will help you choose wall tiles for the kitchen under the apron.
Kitchen apron lining with ceramic tiles
Ceramic tiles are considered the most popular material for finishing an apron. But even a traditional tiled apron can look boring. For example, if you tile the entire surface up to the ceiling, the wall will take on a complete look. This technique is typical for open storage.
What is the best primer for walls under wallpaper?
Wall papering is still the most popular way of finishing. As materials change, so do technologies. If earlier the maximum preparation was reduced to the preliminary gluing of newspapers under paper sheets, today the walls need to be puttied, primed, and not in one, but in several layers. What primer is best for walls under wallpaper? Let's figure it out.
Pros: Tile is an environmentally friendly moisture and heat resistant material; easy to clean, resistant to external influences and relatively inexpensive. Ceramic tiles come in a wide variety of textures, patterns, shapes and sizes, making them a versatile tool for creating unique interiors.
Cons: The seams between ceramic tiles darken from moisture and dirt, it will be difficult to wash them.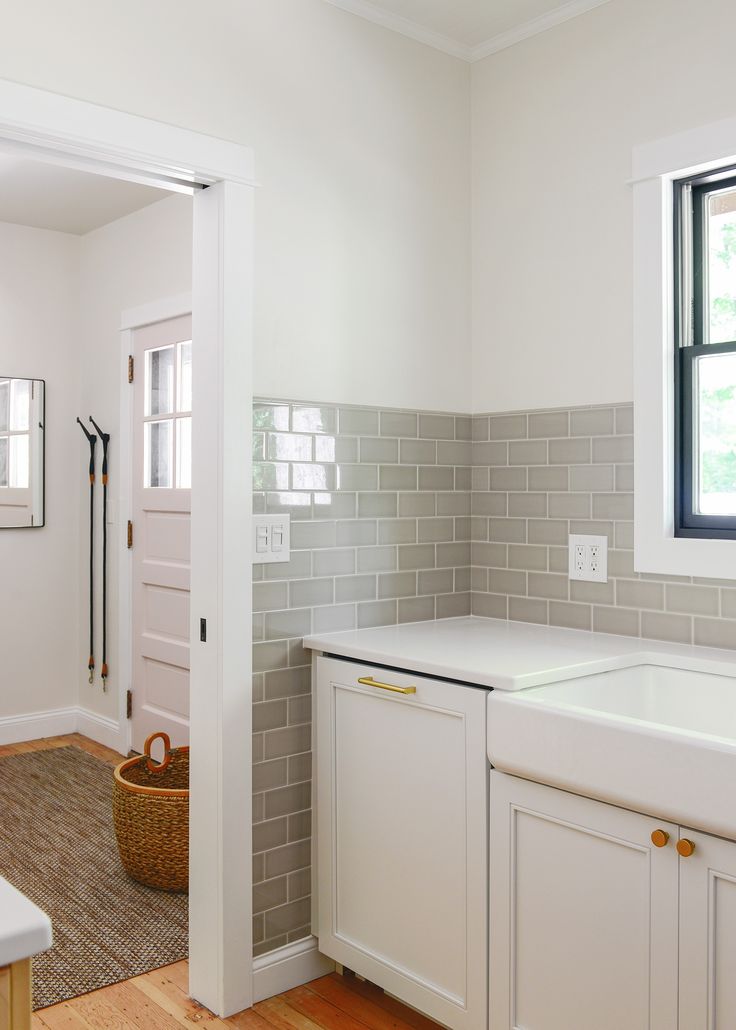 The grout will have to be renewed every few years.
Top 5 most popular backsplash wall tiles
this year:
● " Boar" or subway tiles.
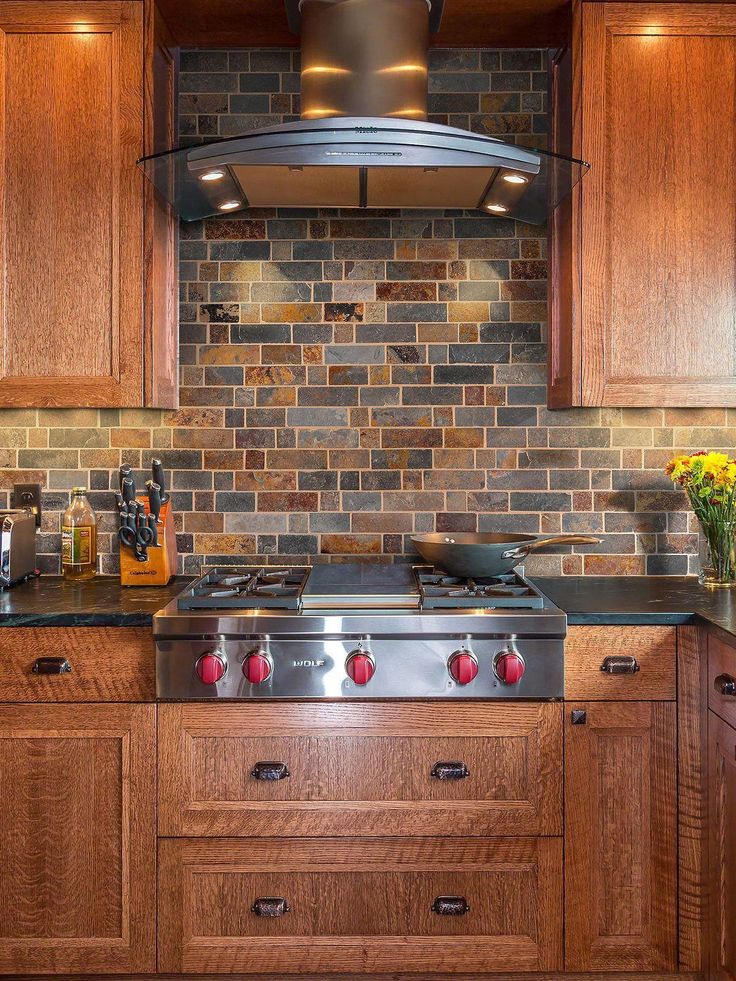
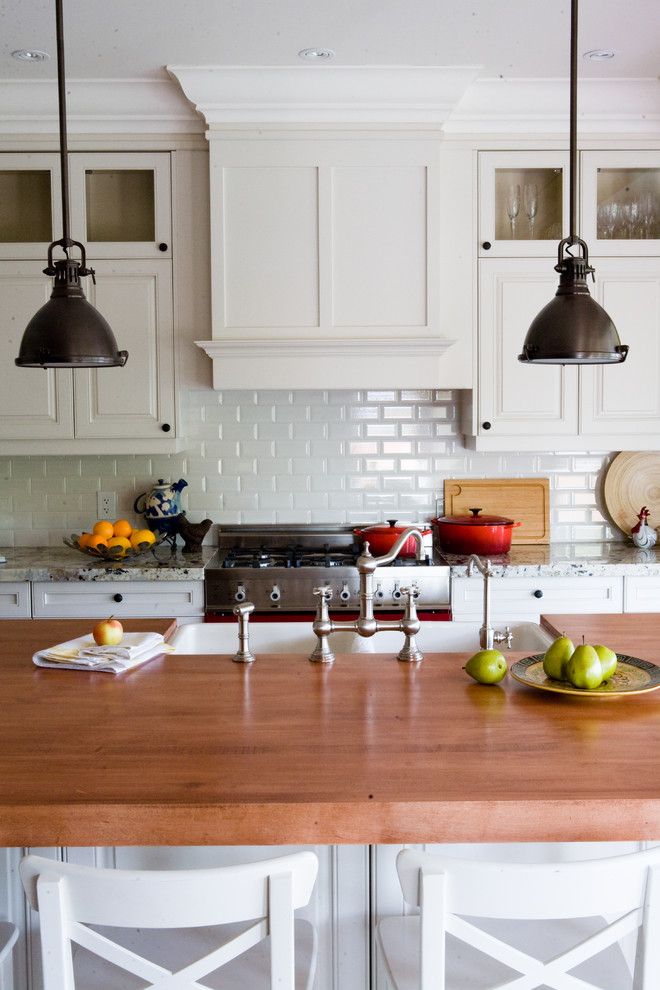
The "Boar" tile for the backsplash for the kitchen has not gone out of fashion for two decades. The classic glossy rectangle has a large number of layout options, so it meets any, even the most non-standard requests. In the loft style, subway tiles can be laid out in the form of brickwork. Stalinist Empire and retro interiors look good with herringbone tiles. It is easy to visually stretch the apron with the help of a hog with a vertical layout. The variability of this model makes it universal and popular.
● Tile " R honeycomb"
Hex pattern, classic hexagon or "honeycomb" is one of the most fashionable forms of tiles for the kitchen. For the first time in architecture, the hexagon began to be found during the period of domination of the Art Deco style in the 20s of the 20th century.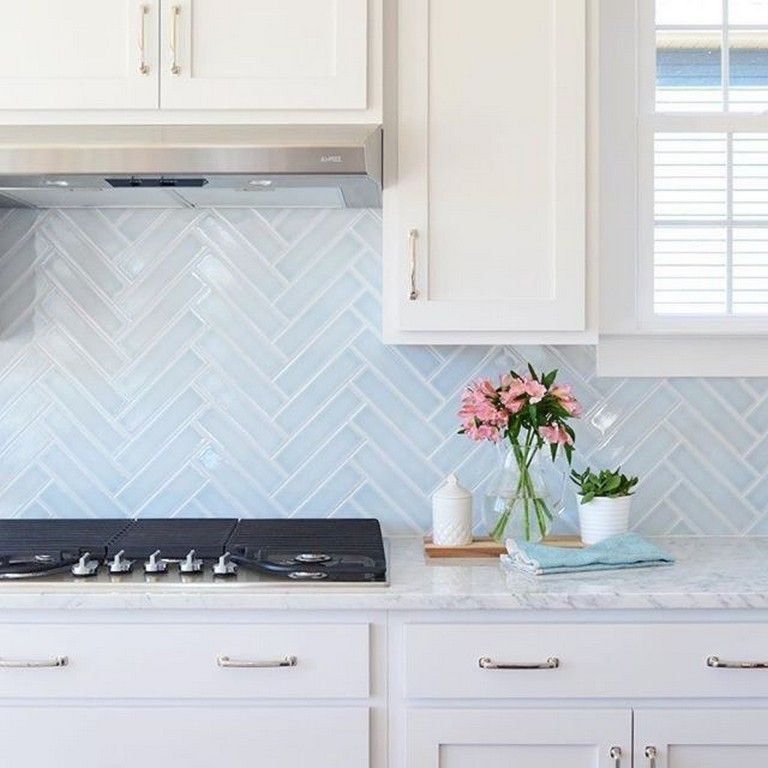 Today, the popularity of the hexagonal pattern is due to the relevance of natural motifs in eco and scandi interiors.
● Patchwork or majolica
Patchwork ceramic tile is associated with Portugal and is perfect for finishing a backsplash. First of all, because small pollution is less noticeable on a variety of colorful drawings.
● Fish scales
An original and no less popular tile in modern interiors is fish scales. It is customary to select different shades of the same color and lay it out with a gradient. The working wall of the kitchen with this decoration technique looks especially impressive.
● Patchwork or majolica Patchwork tiles are associated with Portugal and are great for finishing a backsplash. First of all, because minor pollution is less noticeable on a variety of colorful drawings.
● Arabesque
The complex shape of the arabesque tile evokes national Moroccan motifs.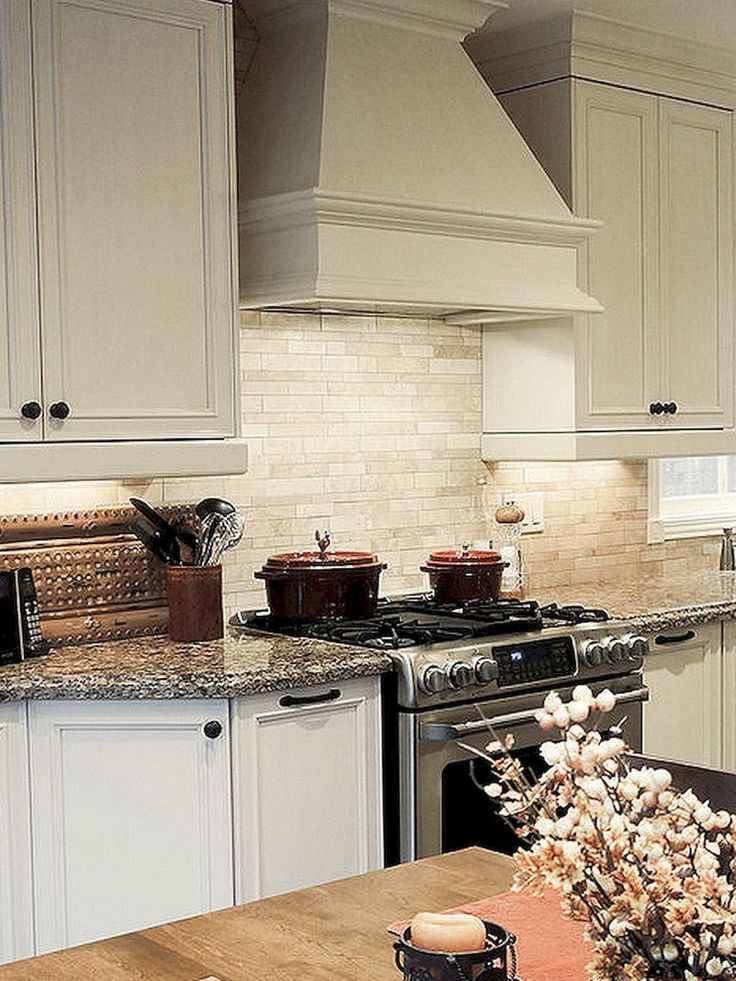 Even a calm modern kitchen will acquire an oriental vintage gloss.
Life hack: To make the kitchen apron easy to clean, pick up glossy tiles. Embossed and matte surfaces are more difficult to clean. Moisture-resistant colored grout will also facilitate this difficult task.
Mosaic
Decorating a kitchen apron with mosaics was popular in the zero years. It has lost its relevance due to the inconvenience of cleaning such a surface. Modern grouts are easy to clean, so mosaics are back in fashion. But if glass tiles were used earlier, today mosaics are increasingly bearing the texture of noble stones or porcelain stoneware. White marble and golden onyx are popular. Please note: the interior salon Mixturro Mosaico offers an exquisite solution - a mosaic made of natural mother-of-pearl.
Wall decoration in a children's room
One of the problems of modern renovation is wall decoration in a children's room: you can get confused in the assortment of shops.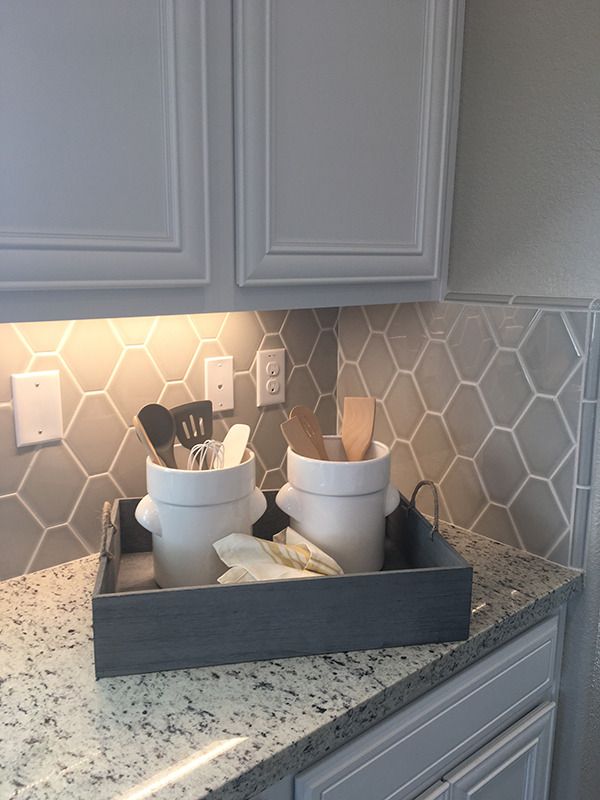 How to cover surfaces so that it is beautiful, safe and affordable? Let's figure it out.
Pros: Mosaic is great for finishing uneven or smooth surfaces. It opens up ample opportunities for composing complex decorative compositions.
Cons: More difficult to install and more expensive than standard tiles.
Life hack: If you need to save money, or you don’t want to do the entire lining with mosaics, but you don’t want to completely refuse, then combine it with tiles. You can lay out individual sections or borders with a mosaic.
Natural or artificial stone
Noble minimalism dictates the use of expensive materials. White marble with large gray veins entered the interior fashion. In the kitchen interior, it is combined with a matt handleless set with a click-on door closing system. The absence of decorative details allows you to draw attention to the noble texture of marble. The thickness of the marble or porcelain stoneware panel is 2 centimeters.
An interesting interior solution: The texture of marble can be mirrored in the countertop. This approach looks especially elegant.
Pros: Dense and hard material is highly durable.
Cons: The only argument against the use of stone in the interior can be its high price and the need for professional installation. In addition, natural granite sold without a certificate may be radioactive, so it is very important to contact reliable companies and request documents. For example, to the stone processing company Master Stone, which is responsible for the quality and safety of its products.
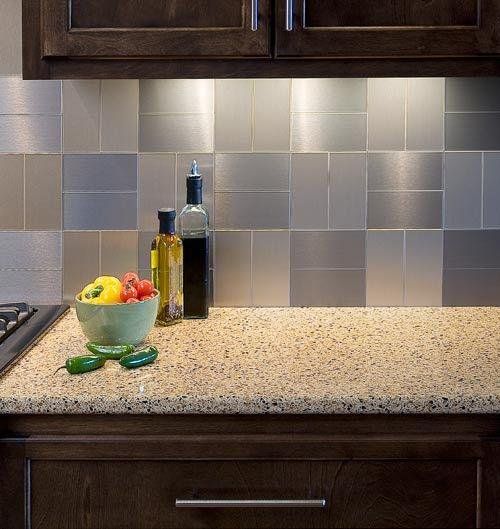
Metal panels for apron
A kitchen apron made of metal panels looks unusual, but does not suit all interior styles. The use of metal in loft and industrial interiors is organic. Silver metal surfaces will turn the kitchen into a "professional" one, while gold or copper ones will give a sophisticated look.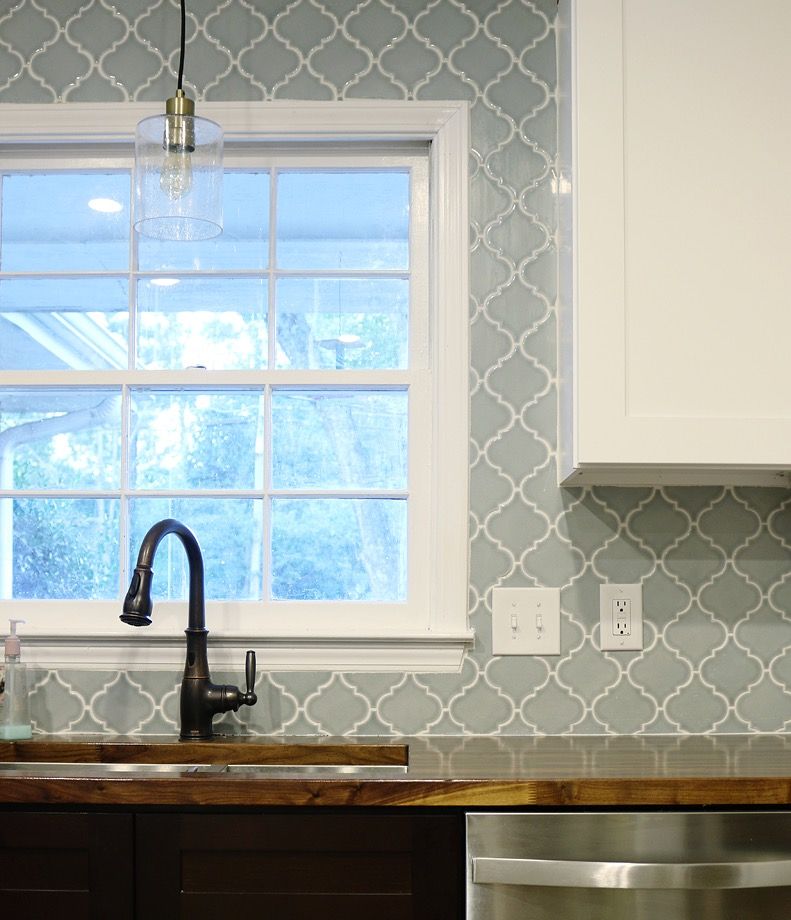
Liquid wallpaper: pros and cons
Wall decoration in an apartment or office is one of the “pain points” of modern renovation. How to achieve a beautiful and high-quality wall covering without much effort and with minimal financial and labor costs? A great option is liquid wallpaper.
Pros: Stainless steel is durable and wear-resistant material, it will be easy to wash such a surface.
Cons: Not suitable for every interior. The polished surface gets dirty easily.
Do I need an apron?
A very unexpected way to finish a kitchen apron is to do without it at all. An apron is needed to make it easier to wash the wall in the cooking area from greasy stains. If you paint the wall with anti-vandal paint, then it will be easy to clean it. From stains, non-uniform graphite paint is suitable, which will turn the apron into a chalk board for notes, recipes and free creativity.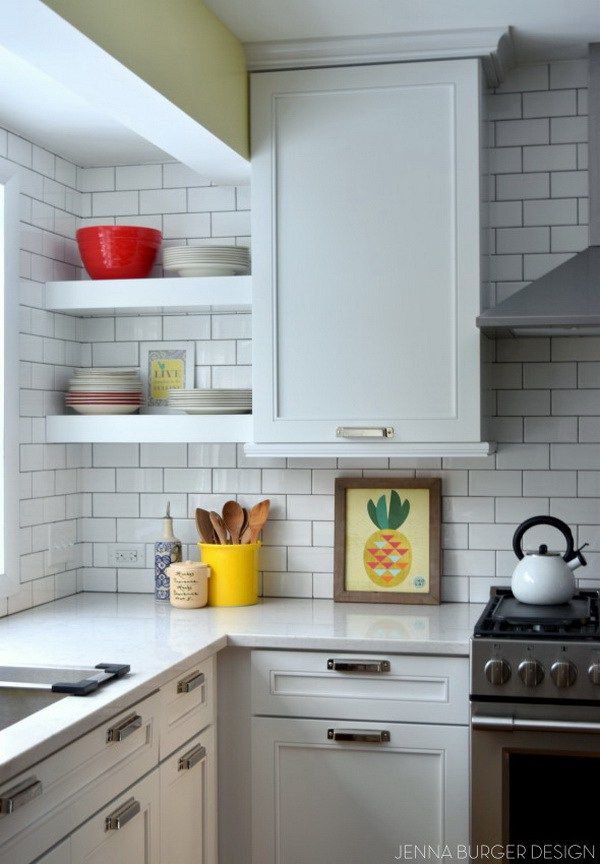
Life hack: The finishing touch is decor. It is not necessary to leave the apron empty. You can attach roof rails for household products to it.
Concrete
Concrete and stone panels will also cope with the task of lightly washing the surface. Such an apron will fit into the loft and industrial style.
Mirror panels
From the point of view of interior design, mirror panels have a lot of advantages: they visually increase the space and add light, they are perfectly washed, they are an element of decor. But you need to understand that the mirrors in the apron area will quickly get dirty. However, if you pick up artificially aged ones, then the dirt on them will be less noticeable. This technique will fit into the retro, provence and chalet styles.
Wood
With the popularity of natural aesthetics, there are more and more fans of wood finishes. Once, wood was considered unsuitable for use in the “wet” areas of an apartment, but with the development of the chemical and furniture industries, this material acquired moisture and heat resistance.
Learn more
- Green sofa decor ideas
- Best inexpensive toaster oven 2023

- Styles of front porches
- Pretty wallpaper for girls bedroom
- Rub and restore

- Shrub with red berries identification

- Built in dining room storage
- How to tile kitchen walls backsplash
- Green sofa decor ideas

- Best inexpensive toaster oven 2023
- Styles of front porches