Best time to repot christmas cactus
How and When To Repot
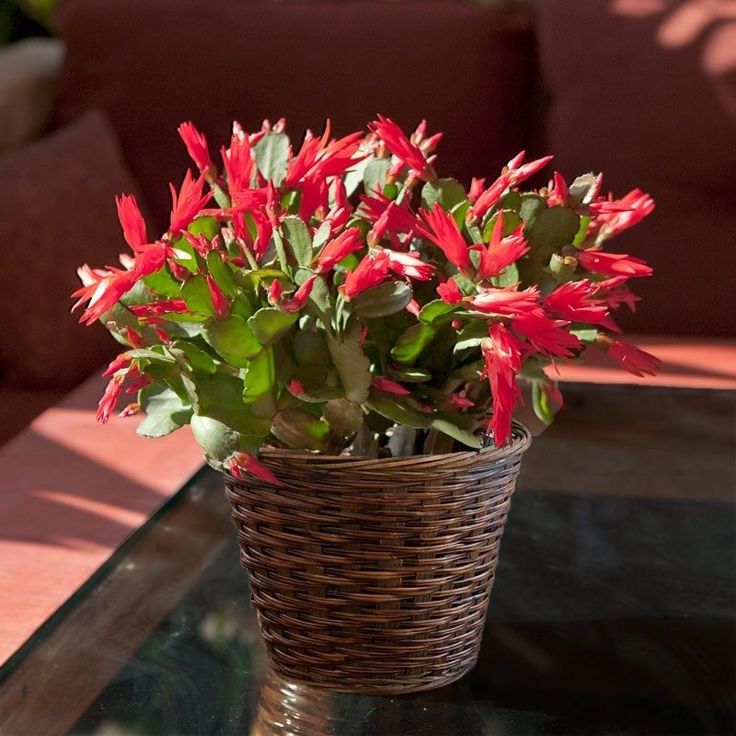
Although called a cactus, the Christmas cactus is not like desert-dwelling cacti. This type of cactus is native to a jungle setting and is an epiphyte that grows high in tropical jungles’ treetops.
PinChristmas cactus blooms in the wintertime and produces gorgeous flowers in a wide range of shades, including:
- Lavender
- Orange
- Purple
- Cream
- White
- Peach
- Rose
- Red
Christmas cactus is a bit faster growing than desert cactus and will need repotting more often. In this article, we discuss how and when you should repot your Christmas cactus.
Related: Why Doesn’t My Christmas Cactus Flower?
Does Christmas Cactus Need Repotting Every Year?
Although these are reasonably quick-growing plants, you may not need to repot your Christmas cactus annually. The plants do well when the roots are a bit root-bound. If you repot too often, you could damage your plant.
How Often Should I Repot Christmas Cactus?
Christmas cactus only needs repotting once every three or four years. If the plant looks a bit weary or the roots begin to grow out the bottom of the current container, your plant is ready for repotting.
When Should You Repot Christmas Cactus?
Springtime is the typical time for repotting most plants, but Christmas cactus blooms during winter and needs repotting immediately after the blooms fade. Never repot your Christmas cactus while it is blooming.
How Do You Repot Christmas Cactus?
Take care when repotting your Christmas cactus because its limbs and leaves are a bit delicate. If you have a large, heavy plant, you may want to trim it back and take cuttings before you repot.
Additionally, lightly wrapping Christmas cactus with lightweight fabric can help prevent breakage.
Get everything ready in advance so that you can transplant your cactus quickly and easily without too much fuss.
You’ll need:
Christmas Cactus Soil Mixes
You want a light, airy, well-draining potting mix for this epiphyte.
Soil mixtures made for succulents or bromeliads are ideal.
You can also make your own Christmas cactus mix using two parts high-quality potting mix and one part sand.
Another option is a mixture of equal parts packaged garden soil, coarse sand/gravel, and peat moss.
Never use soil that comes directly from your garden as it may contain bacteria, fungi, and viruses that would harm your Christmas cactus.
Container
Take care not to give your Christmas cactus a pot that is too big. Just move up to the next size pot. Make sure that the container you choose has lots of drainage holes.
Good drainage is a must. Christmas cactus is a moisture-loving plant, like most epiphytes, but it cannot stand in water. Use the soak and dry watering method whereby you pour water through light, airy soil and allow it to become almost dry before the next watering.
If the soil stays too wet, root rot will set in.
Follow These Steps in the Repotting Process:
1. To repot your Christmas cactus, begin by preparing the foliage as described above.
2. Put an inch or two of fresh soil mix in the bottom of the new pot.
3. Gently remove the plant from its original pot. Take care not to rip it from the soil. Instead, try to remove the root ball intact.
4. Once you have the plant out of the pot, massage the roots to loosen them and remove old soil. If the original potting mixture is quite compacted, rinse the roots gently to remove the soil.
5. Place your Christmas cactus in its new pot so that the top part of the root ball is approximately 1″ inch below the top of the new pot.
6. Pat the soil down lightly so that no air pockets remain.
7. Water your Christmas cactus moderately and place it in a low-light location for a couple of days. Once your plant has settled into its new pot, you can begin caring for it as usual.
NOTE: Too much direct sunlight can burn or bleach the leaves.
Do Your Best to Replicate Christmas Cactus’ Natural Environment
Just remember that Christmas cactus grows from nooks and crannies and treetops of tropical jungle settings in the wild. Their soil consists of natural compost composed of decaying tree leaves, bark, twigs, and similar items.
In the wild, these plants receive lots of water that runs straight through their substrate. The roots dry out and get plenty of air every day.
The closer you can replicate these conditions, the better off your Christmas cactus will be.
Repotting Christmas Cactus When & How To Transplant Christmas Cactus
Table of Contents
- 1 When To Repot Christmas Cactus
- 2 How Often Should I Repot My Christmas Cactus?
- 3 Choosing Right Pot For Christmas Cactus
- 4 Best Potting Soil For Repotting Christmas Cactus
- 5 How To Repot A Christmas Cactus
- 6 Repotting After Care
- 6.1 How Often Should You Water Your Christmas Cactus?
Thinking of repotting a Christmas cactus plant?
Read on to find out step-by-step on what you need to know about when why and how to repot a Christmas cactus (also known as Easter cactus, Thanksgiving cactus or simply holiday cactus).
All these variations are part of the Schlumbergera genus of plants.
Christmas cactus is a popular houseplant because of its dazzling lilac or pink tubular flowers that bloom for a long time.
If you already have a collection of Christmas cacti in your garden or in your home for a couple of years now, you might want to repot them to make their blooms even livelier.
Don’t worry since this article will guide you through the basics of repotting your Christmas cactus.
Just like any other cacti, this plant is relatively easy to take care of.
However, the only thing that this particular cactus has compared to its family of cactus is that it doesn’t live in an arid environment.
Natively, Christmas cacti live in branches of trees in Brazil’s rainforest.
It means that instead of arid areas, they’re used to a humid moist climate.
For those who want to know more about how to properly care for them, here are a few quick facts about the Christmas cactus.
- Names: Schlumbergera x buckleyi, Zygocactus buckleyi, Holiday cactus
- Native: Brazil
- Watering Needs: Requires moist soil to grow
- Light Requirements: Indirect sun Moderate light, partial shade
- Life Span: Can live for 20 up to 30 years
- Height: Maximum of 10 inches or 25.4 cm
- Temperature: About 65 and 75 degrees Fahrenheit
- USDA Hardiness Zones: 9 to 11 for outdoor Christmas cacti
- Season best planted in: Late spring
Welcome! I am so excited to help you learn all about repotting Christmas cactus.
I’ll also tell you why, how, and when to do it, and the best soil mix and correct pot size to use when transplanting a Christmas cactus!
When To Repot Christmas Cactus
Most of the time, spring is the best season to repot or transplant a houseplant. It is when almost all plants start to actively grow.
However, your Schlumbergera plant is a bit different. They actually prefer to be potted up right after they are done blooming.
Since they are dubbed the “Christmas cactus”, it is safe to say that they stop flowering by the end of January up to early February.
Some plants may take up to March to stop blooming.
How Often Should I Repot My Christmas Cactus?
The best estimate on when you should transplant Christmas cactus is about every 3 to 4 years.
Although some owners prevent their plants from being root-bound since they are a bit tricky to repot once they are, your Christmas cactus actually prefers being bound to their pot.
Don’t repot them frequently since you may cause more damage than good to your plant. They might also grow slower if they are repotted more than usual.
You’d be surprised how a root-bound Christmas cactus blooms more. It is because this plant likes its roots crowded.
It might be a bit different for younger and smaller plants or cuttings.
These little babies will prosper more if they are repotted once a year for their first few years but just until they are completely established.
Once they are mature, you can proceed to repot Christmas cactus once every 4 years or more.
Choosing Right Pot For Christmas Cactus
The first thing to prepare when transplanting Christmas cactus is the pot. Choose a container that is 1 to 2 inches bigger in diameter than the current one.
Be careful in picking a much bigger pot than what you have since it can also retain too much moisture that would cause rotting.
Note: Clay pots with enough draining holes are the best for your Christmas cactus since it provides better air circulation for your plant’s roots.
HOMENOTE 6 Inch Flower Pots, 10pcs Plastic Plant Pots Indoor Modern Decorative Pots for. ..
..
- 【Modern & Stylish Surface Effect】 These plant pots indoor are designed...
- 【Perfect for Macrame Plant Hanger】 6.2” in Opening Diameter, 3” in...
- 【Thick and Durable Material】 These planter pot are made of high quality...
Best Potting Soil For Repotting Christmas Cactus
For the soil, you can use your own mix as long as it drains well and is lightweight. In their natural habitat, Christmas cacti grow on rocks and other plants under trees and shrubs.
It means that they thrive from the nutrients coming from organic leaf matter that falls from the trees over them.
You can say that these plants are quite meticulous when it comes to soil. You can never go wrong with the usual porous mix for bromeliads.
Miracle-Gro Succulent Potting Mix: Fertilized Soil with Premium Nutrition for Indoor...
- Created for those who love growing succulents as much as we do, Miracle-Gro.
 ..
.. - This succulent potting soil is fast-draining and features a blend of...
- Great for helping to grow happy and beautiful succulent varieties like...
You can use potting soil that is peat-based.
It is recommended to add some soil amendments like perlite or coarse sand.
These components offer fast drainage while maintaining the damp soil that your Christmas cactus love.
A combination of 2/3 regular potting soil and 1/3 sand is good too.
One popular mix is one-third each of potting soil, cactus and succulent mix, and coco coir fiber and chips.
How To Repot A Christmas Cactus
Repotting a Christmas cactus isn’t a difficult task, however, you might need to be gentle when transplanting older plants or plans that are root-bound. What exactly does root bound mean?
Mostly, root-bound plants, in this case, some Christmas cactus, grow too much for their current container. Then their entire root system becomes bound with their pot.
The roots of your plant wind and twist up the pot until they become root-bound.
- Turn your plant on its side and gently hold the base. Carefully slide the plant out of the old pot. If it’s too compacted, gently tap the sides of the pot against a solid surface. You can also take the plant out by slicing around the edges of the pot using a dull knife or by squeezing the container.
- Carefully massage the root ball to loosen it slightly. Try to get rid of some of the dry, old soil from the roots. It is easier to do this if the roots are slightly moist, you can rinse them slightly if you prefer so the compact potting mix can be removed. Using your hands, gently tease the roots to avoid damaging them.
- Place about 1/3 of your preferred potting mix into the container then put the root ball on top. Fill the pot with more mix until the root ball is evenly placed approximately ½ to 1 inch from the container’s rim. This is the best time to add in compost as you fill it.
 Get rid of any air spaces by slightly patting the soil with your palms and by shaking the container gently.
 - Water the plant moderately for one to three weeks to let the damaged roots recover and to just give them enough moisture. Remember that damaged roots can have a hard time absorbing water than usual and your plant could rot if you give them too much water. You can resume your usual watering schedule after three weeks.
- Place your plant in a shaded area for a couple of days to let it acclimate to its new soil and surroundings. A patio where it can get indirect but bright light is good.
Sale
SONGZIMING 15 Pcs Succulent Plant Tools Set, Mini Garden Planting Watering Tool Kit for...
- Material: Made of plastic, wood, iron, rubber, stainless steel.
- 15 Various Tools Include: Miniature plant tools set Includes 1 spray...
- A Thoughtful Gift: Mini garden tool set a perfect gift for people who love.
 ..
..
Repotting After Care
You can resume caring for your newly repotted Christmas cactus like you’re used to after a week at best.
When it comes to watering, water your Christmas once the soil is dry. Since your plant loves moisture, keep it evenly moist by misting it frequently.
Christmas cactus thrive in natural and bright light on medium exposure. Direct sunlight might cause burn on your plant’s leaves.
Also, Christmas cacti love temperatures in the range of 60 to 70 degrees Fahrenheit and they’ll do just fine. Also, make sure that you increase the humidity in your home if it’s a bit dry.
Schultz Cactus Plus 2-7-7 liquid Plant Food, 4-Ounce
- Feeds through the roots
- For All Cacti and other Succulents
- Just 7 drops of water every time you water
Lastly, your Christmas cactus doesn’t really need to be fertilized.
But it also would hurt if you use a half-strength water-soluble formula like 20-20-20 during its growing season.
You can also just use worm compost with your potting mix.
How Often Should You Water Your Christmas Cactus?
Some prefer not to water their Christmas cactus for about a week or two before transferring them to a new pot.
It’s a good practice since it lessens the possibility of rotting.
However, if you currently have a root-bound plant, it is easier to repot your Christmas cactus if they watered about one to two days before repotting.
Kikunum 4 Pieces Plant Glass Watering Globes,Hand-Blown Glass Multicolored Glass Plant...
- Colorful mushroom glass globes are hand blown and painted.You can combine...
- Time saving-This set of 4 decorative glass watering globes are a perfect...
- Watering globes keep plants healthy by delivering the perfect amount of...
Lindsey Hyland
Lindsey Hyland grew up in Arizona where she studied at the University of Arizona’s Controlled Environment Agriculture Center. She continued her gardening education by working on organic farms in both rural and urban settings. She started UrbanOrganicYield.com to share gardening tips and tactics. She’s happy to talk about succulents and houseplants or vegetables and herbs – or just about anything in a backyard garden or hydroponics garden.
- Share
- Tweet
How to transplant a cactus into another pot and not get hurt by the thorns?
The cactus is one of the favorite exotic plants grown in the house on the windowsill. Caring for cacti is significantly different from other varieties of indoor plants. Home cacti require careful and attentive care, especially during the transplant process. Transplanting cacti is one of the most important things that a cactus grower needs to know.
WHEN SHOULD I REPLACE A CACTUS?
Cacti grow quite slowly, so the plant does not need to be repotted every year. As a rule, transplantation of a healthy plant aged 2 to 5 years is performed after 2-3 years. Older cacti are transplanted after 3-5 years. You can transplant a cactus into a florarium or a pot at any time of the year, it is recommended to carry out this procedure at the end of winter or early spring. Change the cactus pot and substrate when the roots of the plant emerge from the drainage holes at the bottom of the container. A newly acquired cactus also needs to be transplanted. Another reason to change the cactus substrate is root disease.
WHICH CACTUS POT TO CHOOSE?
The cactus is transplanted into a pot one size larger. For such types of cacti prone to decay as Astrophytum, Aztekium, Ariocarpus and Obregonia, as well as for rock cacti, the difference in the size of each subsequent pot should be small - 1-2 cm. For other types of indoor cacti, the diameter of the new pot should be larger than the previous one in 2-3 cm in diameter. When choosing a pot for a cactus, pay attention to the presence of drainage holes . They will help get rid of excess moisture during watering, which will significantly improve the vital activity of the plant.
Indoor cacti with a developed rhizome are best planted in deep pots, while cacti with a root system that resembles a bunch of fibers need a wide container. A cactus pot can be made from any material, but ceramic pots with an unglazed interior are preferred. It is heavier and more durable than plastic.
WHICH LAND TO PLANT A CACTUS? WHAT SHOULD THE SUBSTRATE FOR CACTUS BE?
You can mix the soil yourself to transplant the cactus, but it is best to use a purchased special peat substrate for cacti and succulents. Peat substrate is made on the basis of peat of various degrees of decomposition, with the addition of natural structuring components (purified river sand) and complex mineral fertilizer, which contains the necessary composition of macro- and microelements in a form accessible to plants.
Peat substrate for succulents and cacti is a slightly acidic, low-nutrient, high-density soil, with acidity closer to neutral.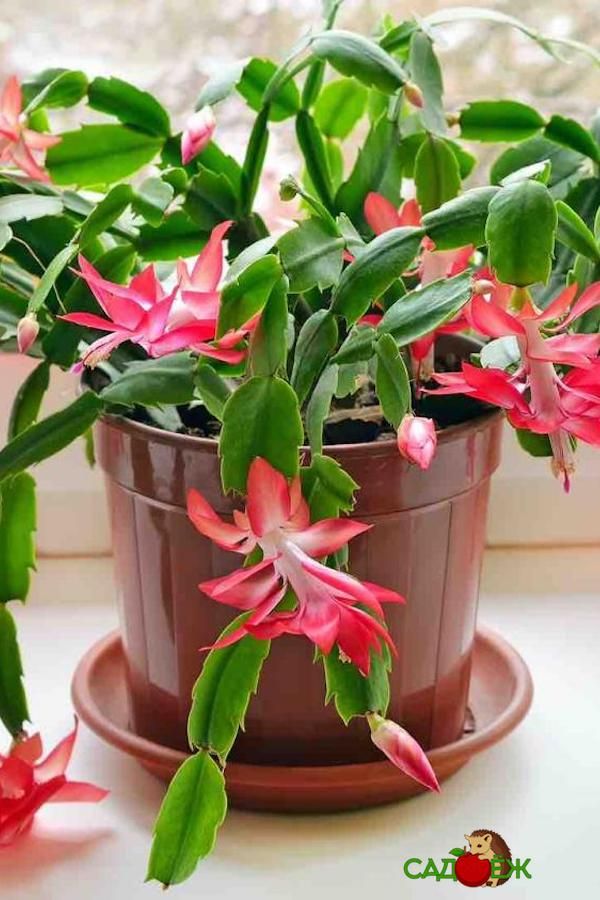 Peat soil for a cactus is quite loose, has a high moisture capacity, water and air permeability, which contributes to the proper development of the plant's root system, ensures its best growth and flowering.
Commercial cactus peat substrate is a ready-to-use soil that does not require pre-sterilization and preparation. To properly transplant a cactus at home, follow the step-by-step instructions below.
✓ Place some soil in the bottom of the new pot. To pull out a thorny plant and not get hurt while doing it, use a newspaper. Fold six or seven sheets of newspaper into a strip about 10 centimeters wide. Wrap the paper around the cactus, use the ends of the strip as a pen, and grasp it firmly.
✓ To remove the cactus from the old pot, turn it on its side and gently pull the plant. If the cactus is "stuck" in the pot and won't come out, you can push it through the drainage holes at the bottom. If the cactus is planted in a plastic pot, you should squeeze the pot from the sides, which will slightly loosen the substrate and make the task easier. If the cactus is in a clay pot, gently slide a knife between the wall and the substrate.
✓ Check the root system before placing the cactus in a new pot. Check for damaged roots or signs of hidden pests such as vine weevils or root mealybugs. If the cactus root is unhealthy, remove all rotten areas from it with a sharp sterile instrument, treat the wounds with charcoal and let them dry a little.
✓ Gently loosen the root ball if it is very tight to help the cactus adapt better and faster to the new substrate and pot. Grab some newspaper and carefully place the cactus into the new pot. Set the plant exactly in the center of the pot, then carefully remove the paper from the cactus.
✓ Add some soil to the sides of the pot, tapping gently on the pot so that the soil is evenly distributed on all sides. Gently press the peat substrate so that it sinks to the bottom and lies more tightly. No need to tamp and press hard on the peat substrate for a cactus in a pot. The peat substrate should only reach the root collar of the cactus. If a part of the stem is underground, it will begin to rot, or a dry brown cork coating will appear on the stem.
HOW OFTEN TO WATER A CACTUS AFTER TRANSPLANT?
Transplantation of the cactus into the new peat substrate is complete. Watering the cactus after transplantation is contraindicated. If the cactus transplant went without complications, the first watering is carried out after 5-7 days, but weak and diseased plants can be watered no earlier than after 10-14 days. Roots injured during transplantation should have time to heal and settle . Otherwise, after the contact of the cactus with the damaged root system with moisture, the process of root decay begins, which leads to its decay and death, and, therefore, the death of the plant.
The first time after transplantation (a week and a half), shade the cactus from direct sunlight. If the room temperature is above +20°C, you can spray the plant with a fine mist sprayer. Next, you should observe a moderate watering regime, as the soil dries completely, after which it is better to leave the plant in dry soil for 2-4 days and only then water it again. After three weeks, you can start feeding the cactus for best results. Feeding the cactus is carried out every 2-4 weeks when watering, using fertilizer for cacti.
WHERE TO BUY SUBSTRATE AND FERTILIZER FOR CACTUS?
You can buy fertilizer and peat substrate for cacti in the online store agrovinn.com. To do this, you need to fill out an online application or call us at the number indicated in the contacts. Our manager will tell you the current cost of the cactus substrate and tell you what the composition of the peat substrate for cacti is and whether it is possible to plant a cactus in a coconut substrate.
We directly cooperate with the manufacturer's plant, so we have the best price for peat substrates and fertilizers in Vinnitsa and Vinnitsa region.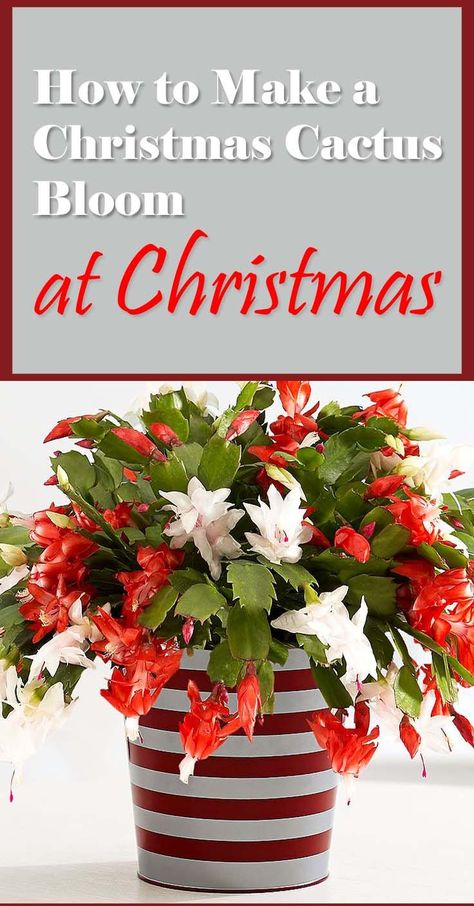 In addition, we sell peat substrates wholesale and retail.
You can pick up the sterile soil for cacti purchased from us on your own from the AgroVinn warehouse in Vinnitsa or order peat mixture for cactus with delivery in Ukraine. We will promptly process your order and send the peat mixture for cacti to Kyiv, Kharkov, Dnepropetrovsk, Odessa, Nikolaev, Kherson, Chernihiv, Cherkasy, Sumy, Poltava, Zaporozhye, Zhytomyr, Khmelnitsky, Kryvyi Rih, Chernivtsi, Ternopil, Lviv, Rivne, Ivano- Frankivsk, Uzhgorod, Lutsk or other locality. Contact us! We will be happy to help you properly grow a flowering cactus in a pot with your own hands and turn growing cacti from seeds into your hobby!
care, proper watering, fertilization, flowering, reproduction
Decembrist (Schlumbergera) belongs to the cactus family. Almost all cacti cultivated in room culture are hybrids. Their parents are Schlumbergera truncata and Schlumbergera russelliana, which grow as epiphytes in the rainforests of South America.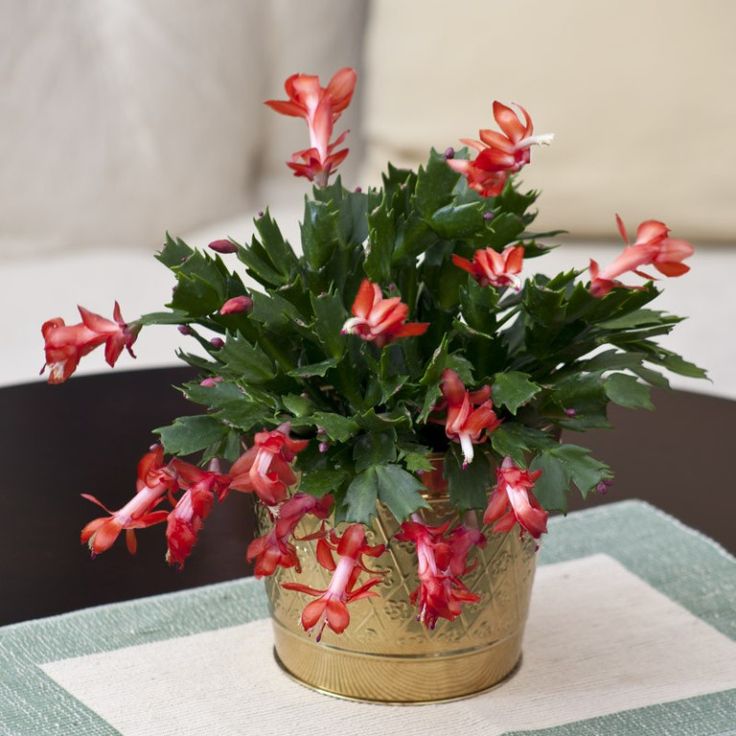
Flowers may be pink, red, orange or white. In room culture grows up to 60 cm in height.
Christmas cactus (Schlumbergera) or Decembrist (common name) blooms from late November to late January.
Origin: Brazilian tropical jungle.
The growing season runs from March to September. One flower blooms for several days, the total flowering lasts from one to two months.
Note! - when compiling a soil mixture or when buying it, it must be remembered that the Decembrist is an epiphyte cactus. Some species of this cactus are native to the highlands. The Decembrist in its natural habitat grows on the branches of trees or between rocks. The soil must provide a quick runoff of water.
Under natural conditions, the leaves of the trees regulate the illumination of the cactus and the amount of moisture it receives during precipitation. He receives the lion's share of dressings in the form of bird droppings.
The Easter cactus produces flowers much more easily than the Christmas cactus and tends to bloom more profusely. Both plants are quite hardy and easy to care for. In order for cacti to bloom every year, it is necessary to provide them with the recommended conditions of detention. In the Christmas cactus, the lateral branches form a V-shaped angle.
The best decorative properties of the cactus will show if you provide him with conditions close to natural.
Lighting
Optimal illumination - diffused sunlight. The cactus easily tolerates a decrease in light to partial shade.
In order for the Decembrist to develop and bloom normally, a couple of hours of diffused light is enough for him, and the rest of the time - partial shade. Note! - 30% penumbra is considered ideal. In autumn / winter, the maximum possible lighting for the plant is permissible.
During the period of vegetative growth, it is useful to turn the cactus every week by 90 0 to form a bush of the correct shape. During the period of budding and flowering, DECEMBER SHOULD NOT BE TURNED relative to the light source.
Watering
The optimal frequency of watering is with moderate drying of the earthen clod between waterings.
With the end of the growing season, the need for cactus water decreases. But the recommended frequency of watering is maintained - with moderate drying of the earthen coma. Due to the fact that the earth ball will dry longer, the intervals between waterings will increase. In autumn / winter, if you are in doubt about the need for watering, then it is better to water the plant the next day.
Overwatering is the main killer of Schlumbergera. The situation with excessive watering is exacerbated at ambient temperatures below 21 0 C.
After watering, do not leave excess water for a long time, which has drained into the pan.
Air humidity
Optimum air humidity is moderate (about 50-60% relative humidity).
Fertilizer
Complex mineral fertilizers containing N-P-K=10-6-8 are used as supplements. Top dressing is carried out from the end of March to August. After the buds are formed, we resume top dressing.
Feeding frequency - once every 3 to 4 weeks. Fertilizer concentration - ½ of the recommended for indoor plants.
After top dressing, if the fertilizer has got on the plant, it must be washed off within a few hours. Otherwise, chemical burns form on the stems, especially in hot weather.
Fertilizers containing N-P-K=0-10-10 are used for feeding young, recently established plants.
After the plant has faded, stop fertilizing for a month.
Flowering
Schlumbergera is a plant capable of flowering at almost any time of the year. For the formation of buds and subsequent abundant flowering, the following conditions must be met:
- optimal or close to optimal conditions during the growing season;
- optimal temperature for bud formation from +7 0 C to +16 0 C;
- the day length at which flower bud formation begins is approximately 12 hours;
- the length of the daylight hours at which flowering occurs - about 8 hours;
- bud formation period - 30 days.
When forcing Schlumbergera under industrial conditions during the formation of flower buds, the following temperatures are maintained:
- in the daytime +16 -18 0 C;
- at night +7-13 0 C.
After the end of the bud formation period, increase the temperature:
- during the day +21-24 0 C;
- at night +16 -21 0 C.
The development of Schlumbergera flower buds depends on the combination of temperatures and daylight hours; such a dependence is also called thermo- and photoperiodic.
Temperature
At temperatures above +16 0 C vegetative growth occurs, flower formation will be minimal, if at all.
Some Schlumbergera hybrids may have seasonally varying flower colors. A bright yellow hybrid may be dark yellow in the next flowering season, or a dark red may be light red, etc. This happens under the influence of temperature when Schlumbergera forms flower buds.
Temperature below 0 0 C is not allowed for Schlumbergera. Permissible temperature: from +2 0 C to +38 0 C. Optimum temperature for cactus development in spring and summer: from +18 0 C to +30 0 C.
On hot summer days at temperatures above +33 0 C, a slight wilting of the vegetative part of the cactus may occur (with a wet earthy coma). Exit: reduce the illumination of the plant - rearrange it in a shaded place, increase the humidity of the air or reduce the temperature.
Air temperature +38 0 C - critical. For several days, the cactus can tolerate this temperature without damage. Longer maintenance will lead to damage to the vegetative part of the plant (discoloration, partial necrosis of the ground part).
When the air temperature drops below +16 0 With the development of Schlumbergera becomes sluggish. When the temperature drops to +7 0 C and below, the development of the cactus almost freezes.
Cutting
Pruning Schlumbergera increases its density, and increases the abundance of flowers during flowering in the next season, and also promotes the development of the root system.
Cutting can be done with any cutting tool. The cut of the stem is always carried out at the point of narrowing of the stem - between two plates (the plates are also called phylloclades). After pruning, each stem produces two to five branches. With the correct formation of the plant, up to 300 flowers can bloom on it at the same time.
It is best to prune your Christmas cactus after it has finished flowering.
Soil
Permissible acidity of the soil mix pH 6.1 (slightly acidic) to 7.8 (slightly alkaline). The optimal acidity pH is from 6.5 to 7.0.
Schlumbergera differs from most cacti in that it prefers soil mixtures rich in organic matter.
Suggested soil mix recipe: 2 parts leafy earth + 1 part perlite or coarse sand + 1 part humus + 10% charcoal + 10% brick chips + 10% pine humus + 10g bone meal (for every 10l of mixture).
The use of ready mix for cacti is not recommended as it is poor in nutrients.
Transplant
The frequency of Schlumbergera transplants is once a year. The purpose of transplanting is usually:
- renewal of the soil mixture;
- flower capacity increase.
Transplantation is carried out in mid-summer / late summer / early autumn.
The material from which the pot is made is of no fundamental importance when planting Schlumbergera. In ceramic, unglazed pots, moisture will evaporate faster - it will be necessary to water the plant more often. The pot must have a drainage hole to drain the water.
When transplanting, the vegetative part of Schlumbergera is partially cut off (up to 50%).
When transplanting, do not use too large a pot (10% larger than the previous one), otherwise the plant will increase the vegetative mass at the expense of flowering.
When planting / transplanting Decembrist prefers to be planted in a wide, but not deep pot.
Decembrist reproduces vegetatively in room culture. Reproduction is carried out in spring or summer.
Part of the stem consisting of two plates is used as propagating material. After cutting the cuttings, the cut point is dried in the air for two days, in the shade.
Photo1. The upper (young) part of the cutting, not used for propagation
Photo2. Cuttings used for propagation
Photo3. Aerial roots
Photo4. Cuttings with aerial roots
We make a soil mixture for rooting cuttings. The composition of the mixture: 1 part vermiculite + 1 part charcoal + 2 parts leaf humus. The mixture must be sterilized.
For rooting cuttings I use disposable cups or technical pots No. 5 and No. 6. Pour the mixture into a pot, insert the cutting into it, deepening it by ½ of the plate. Watering.
Conditions for rooting cuttings:
- rooting period: 2-5 weeks;
- rooting temperature: +20 - 25 0 C;
- lighting - bright diffused light/partial shade;
- frequency of watering the soil mixture - with a slight drying of the earthen clod between waterings.
How good are disposable cups for rooting cuttings - you can see when the roots have formed. After the formation of roots, the young plant is transplanted into the soil mixture as for adult plants.
Diseases
1) Drechslera Cladophyll is a fungal disease. Schlumbergera are very sensitive to Drechslera.
The symptoms are growing black putrid spots over time. The entire above ground part of the plant is affected.
There is no effective treatment.
2) Erwinia (soft rot) - causes wet, slippery black lesions.
There is no effective treatment.
3) Pythium spp, Phytophora - root rots.
There is no effective treatment.
The main way to combat the above diseases is disease prevention (see the section of the site "DISEASES").
Pests
Snails, slugs, earthworms, mealybugs, spider mites, aphids, nematodes and thrips.
This list of pests is given taking into account the likely content of a cactus in the summer on the street.