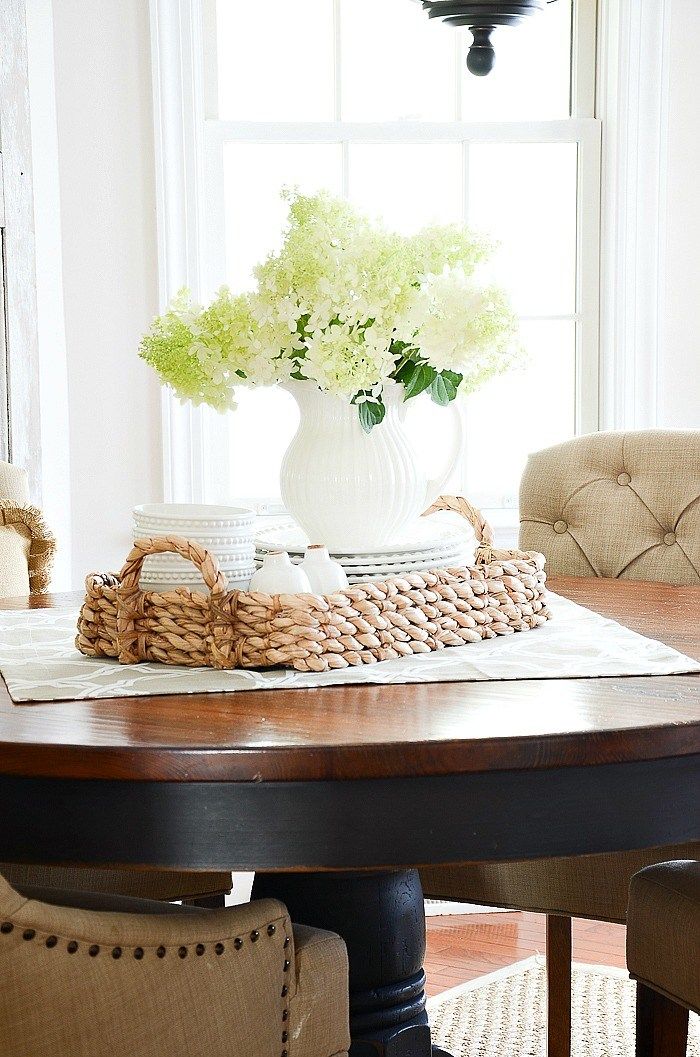
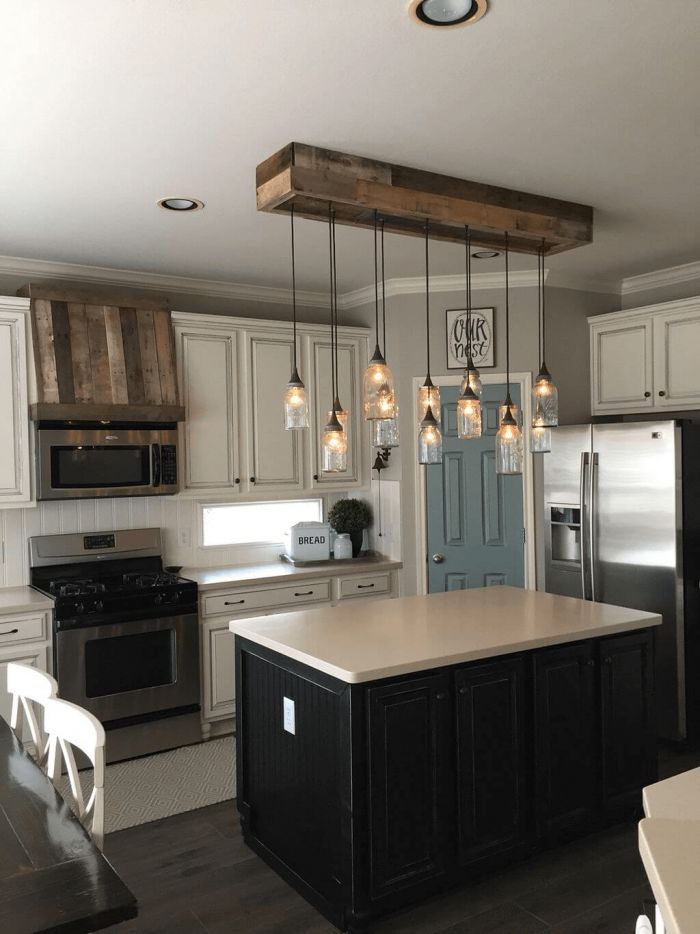
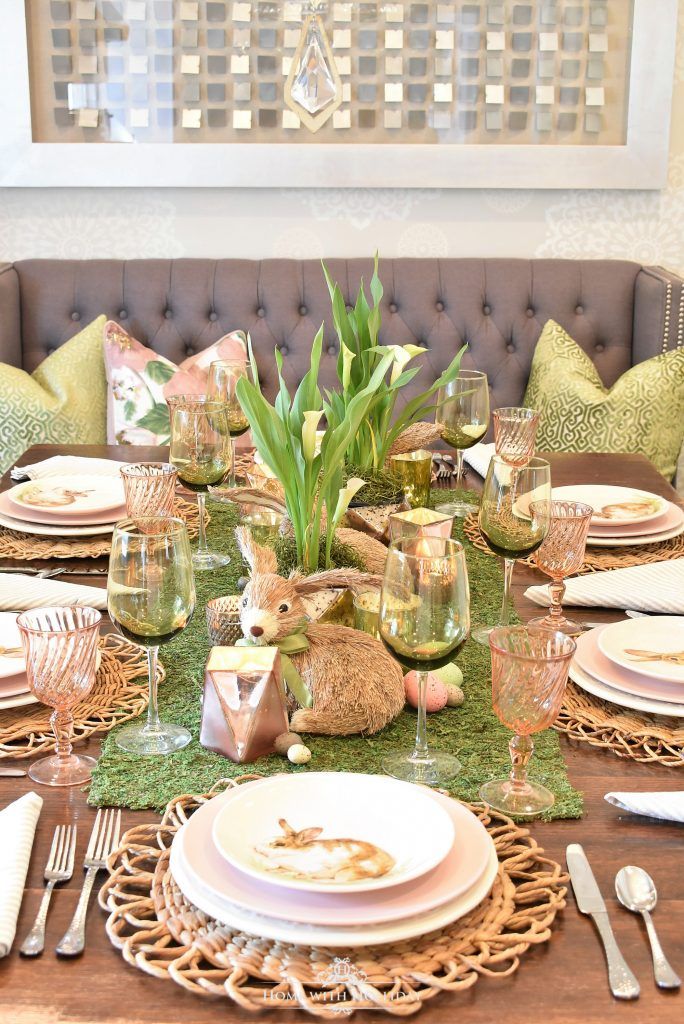
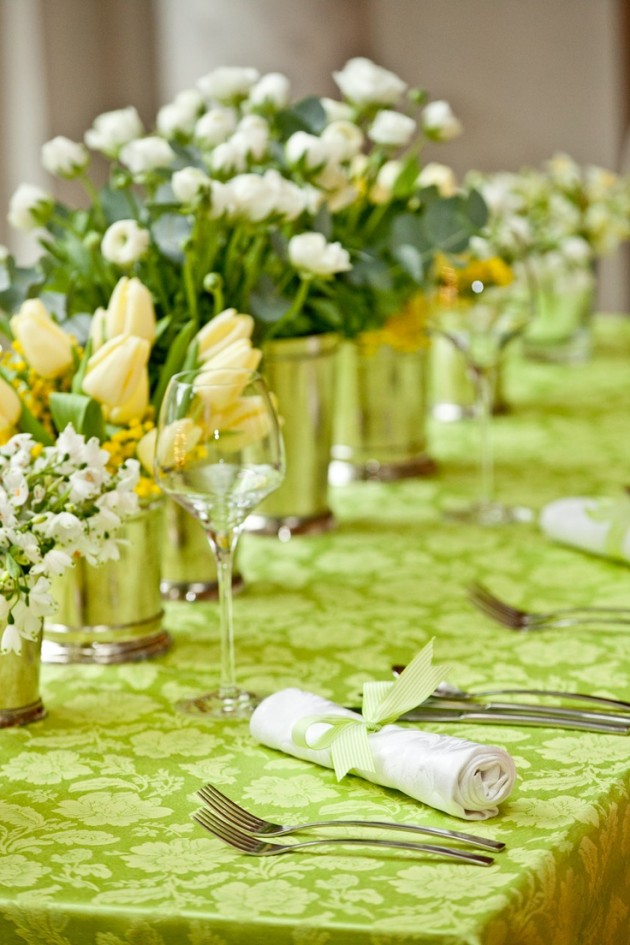
How to make a table centrepiece
12 Crafty Ideas for DIY Table Centerpieces
You don't have to spend a lot on decor. Look through these DIY table centerpieces to find something that's stunning.
1 / 12
Kari Me Photography via Love & Lavender
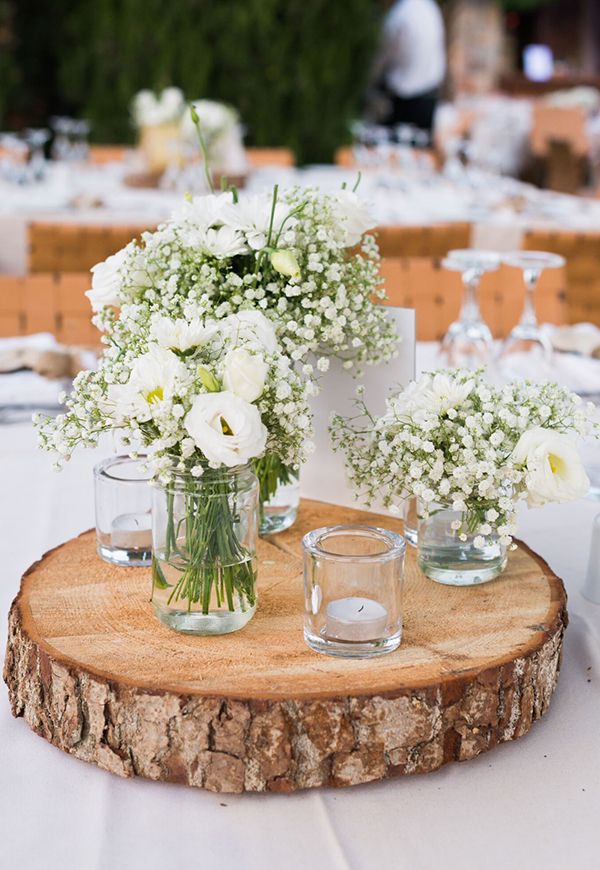
Enchanted ForestOnce upon a time, we decided to bring the outdoors in by using a natural wood slab as the base for some dreamy decor. Add dainty blossoms in antique mason jars along with vintage gold accents to round off this storybook-style centerpiece.
We think these dainty tea party recipes make the perfect pairing.
2 / 12
Thoughtfully Simple
Tropical TouchFeeling fruity? Hollow out the core of a pineapple to turn this summer citrus into a paradise-worthy planter. Pick blooms to match, in shades of bright pink, coral and golden yellow.
Bonus: Save the pineapple’s scooped-out center to make one of these tasty tropical treats.
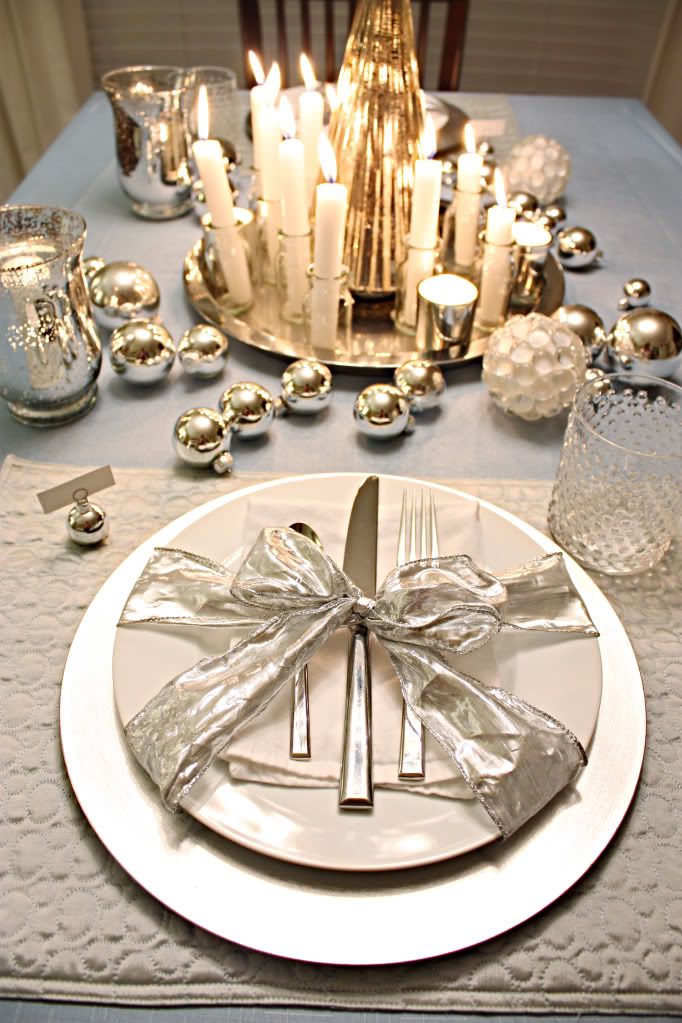
3 / 12
Liz Marie Blog
Bright WhitesThis cozy centerpiece has us dreaming of a white Christmas—just like these recipes. Just arrange a cluster of candles on a pretty platter, then nestle strands of wooden beads around the base. If you’re decorating for the holidays, stand an evergreen branch behind the candles for all the festive feels.
4 / 12
Summer Adams
Girly GourdMove over, Pumpkin Spice Latte! We found an even better way to enjoy our favorite fall squash: painted a chic shade of cream and set atop a classy cake stand, of course. Fill it with pink and white roses and eucalyptus branches for the most Pinterest-worthy pumpkin we’ve ever seen.
5 / 12
Cherished Bliss
Poured PlanterFor a centerpiece that Joanna Gaines would definitely approve of, make your own trendy tray out of distressed concrete.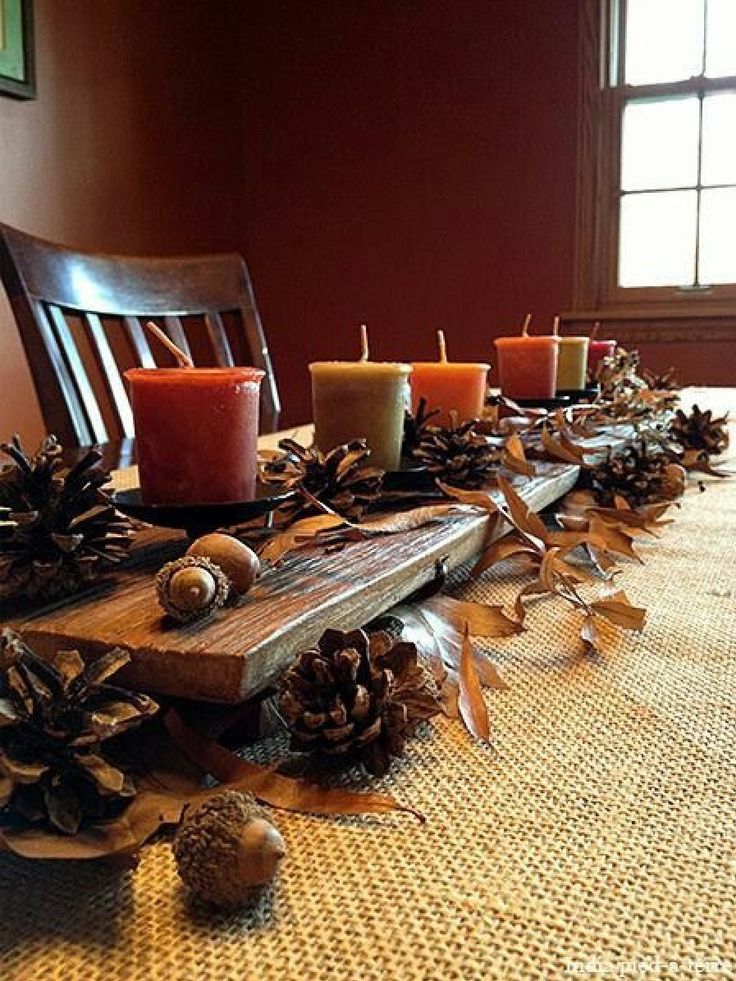 Embellish it with industrial handles and fresh greenery for a result that nails the modern farmhouse look, then put out a plate of Joanna’s famous biscuits for some Southern-style snacking.
6 / 12
Arin Solange at Home
Pretty In PaintChannel your inner artist with this bohemian centerpiece, inspired by one from Anthropologie. DIY it for a fraction of the cost by swirling paint around the inside of glass jars to create a hand-dipped look. For an extra-whimsical feel, choose mismatched jars in all different shapes and sizes.
7 / 12
A Beautiful Mess
Stylish CitrusOrange you glad this tasty tower made the list? After all, you only need a foam cone, a bag of mini mandarins, kale and toothpicks to make an effortlessly elegant centerpiece. If you have any leftover oranges, use them to whip up one of these recipes starring the juicy fruit.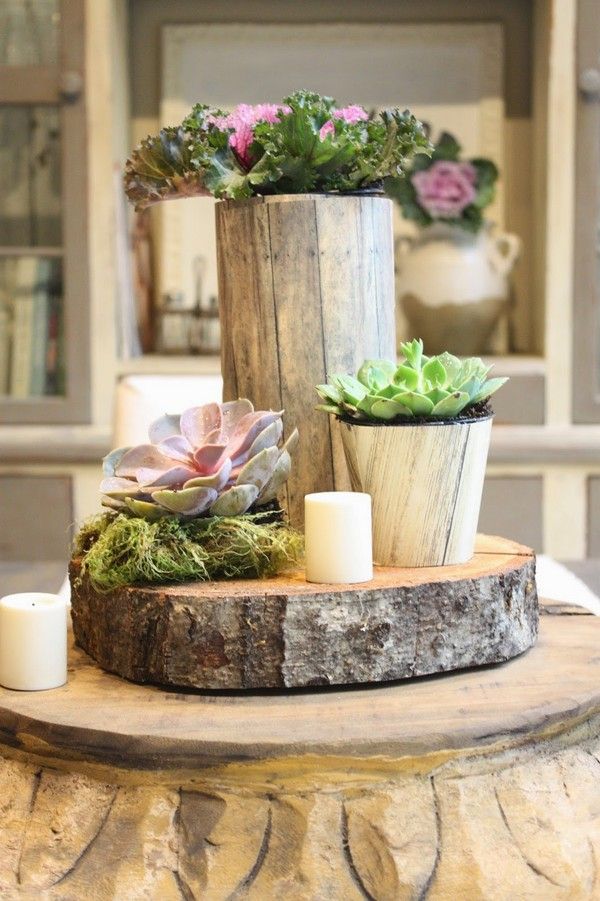
8 / 12
The Merry Thought
Cute CartonThink outside the flowerpot with this delicate decor made from empty eggshells. Recycle the carton into a pretty planter, then set soft spring stems inside the shells. Don’t let those eggs go to waste, either! Use them for tomorrow morning’s breakfast with one of these delicious egg dishes.
9 / 12
Ella Claire
Vintage VibesNothing says autumn more than deep, rich hues like burgundy, plum and navy. Combine them in this seasonal centerpiece, complete with mini white pumpkins and copper candle holders. Nestle in sprigs of bright berries and a smattering of fresh figs for the final fall touches. For more Thanksgiving table inspiration, take a peek at these pretty picks.
10 / 12
Oh Happy Day
Multicolored MasterpieceYour guests may not taste the rainbow, but they will see it with this bevy of bright blooms. Get creative and add other artsy accents in similar shades, too, like dyed eggs around Easter or glass bowls filled with painted seashells during the summer.
11 / 12
Monica Wants It
Spooky ChicDecorate if you dare with this creepy-cute table decor, perfect for a murder mystery party or other fright night festivity. Start with a wire bowl atop an old candelabra, then drape it with wispy webs, chunky gems and dark fall flowers. Serve one of these hauntingly good Halloween recipes to match the mysterious mood.
12 / 12
Homey Oh My
Mixed MetalsWhen it comes to textures and tones, the more the merrier if you want a quirky yet contemporary table-topper. This one from Homey Oh My combines some of our current top trends (marble! copper! turquoise!) in a way that complements, instead of clashes. The best part? The tray is a lazy Susan, so it’s fashionable and functional.
Originally Published: November 28, 2018
Amanda Tarlton
As both a freelance lifestyle writer and editor for a national teen magazine, Amanda spends most of her time creating #content. In those (rare) moments when she's not at her desk typing furiously, she's likely teaching a hot yoga class, reading the latest chick-lit or baking a batch of her famous scones.
How to make a table centerpiece
(Image credit: Future/Alun Callendar)
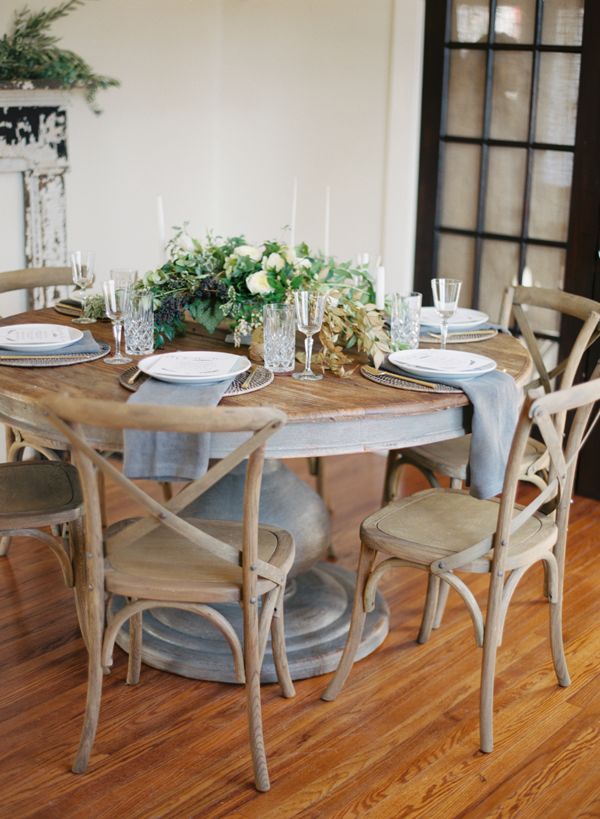
Floral table centerpieces have the ability to transform a dining scheme, raising its look from smart to sensational. They add drama and elegance to an otherwise plain dining space, and are especially welcome in a festive scheme.
While plenty of florists can create them from scratch have you every considered making your own?
- Check out these top designers' Christmas table ideas
(Image credit: Future/Paul Raeside)
According to a survey by online florist Serenata Flowers , flower arranging is in the top five list of new skills women would love to learn and there's no better time than in the run up to the holidays to take on a new challenge.
Creating your own table centerpiece is not as hard as you think. You obviously have an eye for design - you, wouldn't be reading this if you didn't - and it doesn't require a lot of time or effort, either.
So read on to discover this easy-to-follow step-by-step guide on how to create your own centerpiece for your Christmas dining table.
- Find more festive foliage decorating ideas in our handy guide
What you need:
- Flowers of your choice - choose a mix of small, medium and large blooms, making sure your color choices coordinate with the rest of your scheme.
- Framing foliage - try seasonal greenery like fir, holly or scented eucalyptus
- Base - choose a vase if you need height, or a plate or low bowl if you'd rather a low, wide centerpiece
- Block of Oasis/green foam (if not using a vase)
- Sharp scissors or knife
- Decorative ornaments, e.g. red berries, holly, cinnamon sticks, gold leaf decorations (optional)
(Image credit: Future/Alun Callendar)
There are a number of considerations you need to bear in mind when prepping your table centerpiece.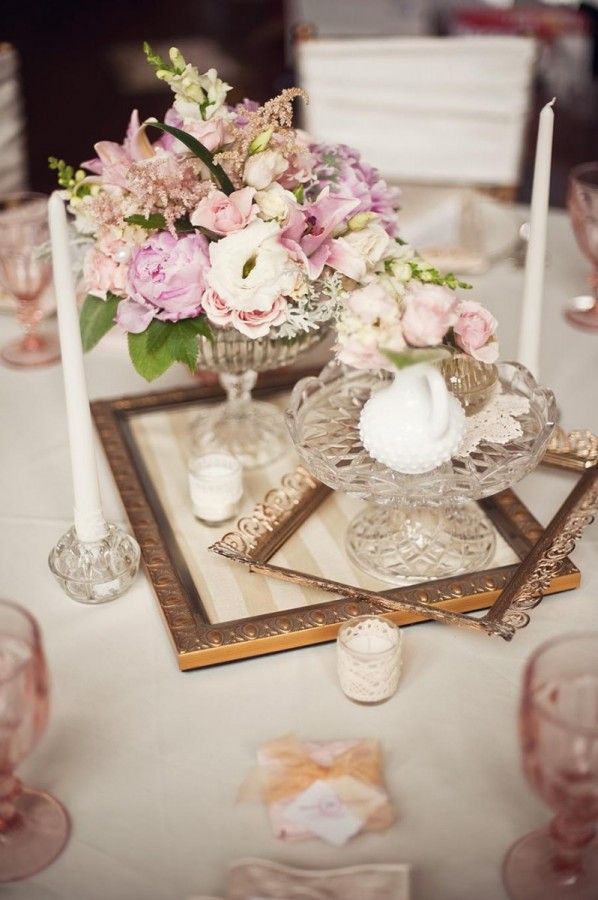 Start by choosing a range of flowers and foliage in different shapes, textures and sizes to create a more eye-catching arrangement.
Use a clean vase or container and check the size is right for your needs - too big and your flowers will flop over to one side, too small and they won’t have enough room to breathe. You can always cut your stems down to size if required.
If you plan to use a plate or bowl instead of a vase, place a block of oasis onto the base of your container so you can push your flowers and greenery into the foam to keep each stem secure and in place.
(Image credit: Future/Alun Callendar)
What to do
1. Start by preparing your stems. Chop off any leaves that will sit be below the waterline to stop the foliage rotting in the water. Trim the ends off the stems by at least 2cm, cutting them at a 45 degree angle to keep them as open as possible.
2. Fill your vase or container with warm water and add flower food if you have some.
3. Begin with the medium-sized flowers that you have the most of and arrange them around the rim of the vase, working your way from the outside in. Angle the stems diagonally across the vase in a criss-cross pattern. Save the largest or most showstopping flowers for later on.
(Image credit: Future/David Brittain)
4. Next, add any medium-sized flowers to the vase, rotating it as you do to keep the look symmetrical.
5. Now for your showstopping flowers. Add them one at a time, positioning them in the centre, with the medium flowers around the sides. Keep turning the vase as you work so you can see the display from all angles. Always make sure these flowers are the most prominent in your arrangement. If they sink down and disappear slightly around the rest of the blooms, gently pull them up so they're more visible.
6. Once you’re happy with your arrangement of medium and large flowers, use the smallest flowers to fill any obvious gaps, making sure your colors are well-balanced and evenly distributed throughout the arrangement.
(Image credit: Future/Mark Bolton)
7. If you're happy with your mix, you can start adding foliage to bulk it out. Use your greenery to frame the flowers, adding a pop of green wherever necessary.
8. For a final festive flourish, you can add ribbon, red berries or pine cones. Arrangements in oasis can also take tall candles securely.
9. To ensure it lasts, make sure you keep your arrangement in a cool place, away from direct heat and sunlight. And don’t forget to change the water regularly.
- How to make a Christmas wreath ? Take a look at our step-by-step guide
(Image credit: Future/Mark Bolton)
Ginevra Benedetti is Associate Editor on the Homes Content Team at Future. She has been writing about interiors for the past 16 years on the majority of Britain’s monthly interiors titles, such as Ideal Home, Country Homes & Interiors and Style at Home, as well as Livingetc and of course, Homes & Gardens.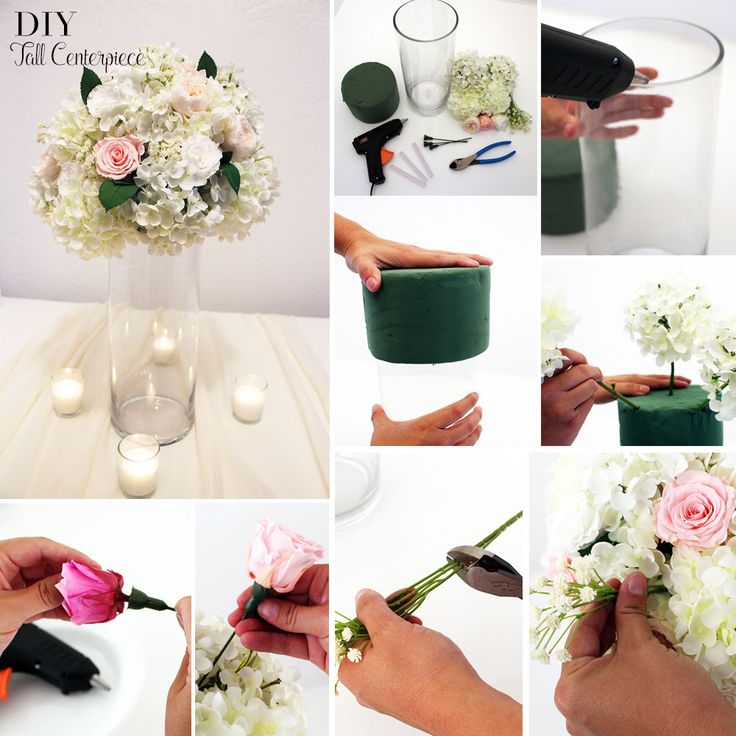 This naturally lead her into writing for websites like HomesandGardens.com.
How to make a table with your own hands from wood: detailed instructions with drawings
There is something special about handcrafted furniture. Making a table with your own hands out of wood is almost as symbolic as building a house yourself. Only it is much easier, cheaper and affordable for everyone. Furniture made with love and attention to detail has a completely different energy than purchased or ordered from a professional carpenter. In addition, with individual manufacturing, you can make a non-standard table that fits perfectly into your interior.
Content:
- Table types
- What dimensions should a homemade table have?
- Checklist for tools and consumables
- Table fastening options
- Simple design table with wooden top and prefabricated furniture legs
- Country table on two legs with tenon/groove fastening and dowels
- Outdoor table on carpentry joints
- Homemade table from pallet boards
- The simplest table from boards with assembly on self-tapping screws
Table types
First of all, tables differ in purpose: they are written, computer, dining, coffee, toilet.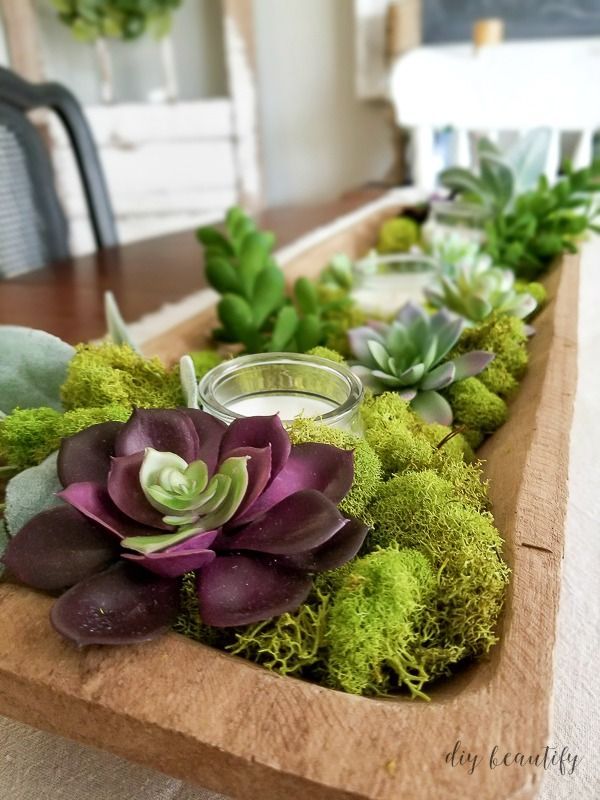 There are even transformers that change the purpose - for example, a coffee table, which, when unfolded, turns into a dining table. But the fundamental design of all these models is the same: there is a table top (work surface), legs and drawers - horizontal crossbars.
Tables can be classified according to design parameters.
Number of legs
The classic, familiar option is, of course, four legs arranged in a square or rectangle. Not so popular, but there are also models with three legs. Even less often you will see an option with two wide supports located at the ends of the countertop. One central leg is usually made in round tables. For long banquet tables, the number of legs is increased to 6-10 pieces, but such furniture is no longer used in residential buildings or apartments.
The number of legs determines the design of the table. If there are 3 or 4 of them, then usually they are interconnected by drawers - horizontal beams (timber or board) that form a frame. Drawers provide rigidity to the structure, and also often play the role of a support for the countertop. But it happens that the tsars are absent, and the legs are placed at an angle - they slightly diverge from top to bottom. This is done for greater stability of the structure.
In tables with two legs, a transverse connecting beam is provided, usually it is located approximately at the middle of the height of the legs. End supports can also be straight or curved.
The only leg is made strictly vertical and placed clearly in the middle of the countertop to keep it in balance. For stability, a crosspiece is provided at the bottom or an expansion of the legs is made.
Worktop configuration
The most common tabletop shape is a square or rectangle with straight or rounded corners. Also quite often they make a round or oval countertop. Less often you can see triangular or polygonal tabletops, angular (with a turn) or curved, irregular shape.
Material
There are many options here. Strong, reliable, durable, environmentally friendly and very beautiful tables are made of natural wood. In this case, the table can be made entirely of wood or combined with other materials (metal, plastic, glass, natural stone are used). Wood top and metal legs or carved wood legs and glass top go well together. Also, an expensive tree can be replaced with a more affordable imitation: chipboard, MDF, OSB, plywood.
Design
There are conventional non-folding products and transformable models with moving parts. Usually the size of the tabletop changes (due to the folding, plug-in or retractable part) or the height of the legs (fold, extend).
Naturally, the easiest way is to make a table in a traditional design. But if you wish and have some experience, you can make a folding table with your own hands, which turns into a compact cabinet.
Design
According to this parameter, all models are conditionally divided into two groups: simple tables with a standard design and unusual, somewhat decorated models. Furniture decor can be as diverse as possible: from skillful carving along the edge of the tabletop or a figured hole cut in the center to a non-standard shape of legs in the form of three-dimensional sculptures.
We will not dwell on exclusive author's furniture, but consider the instructions on how to make a simple wooden table with your own hands. That is, an option with ordinary legs and a regular-shaped tabletop in the form of a rectangle, square, oval or circle.
What dimensions should a homemade table have?
In the furniture industry, standard sizes are used in the production of kitchen or dining tables. They are designed for a certain number of users. It is believed that for comfortable seating at the table, one person needs an area of \u200b\u200b55-60 by 40 cm.
With this in mind, the minimum dimensions of the tables are determined:
-
for 4 people - from 80x120 to 100x150 mm;
-
for 6 people - from 80x180 to 100x200 mm;
-
for 8 people - from 80x240 to 110x260 mm;
-
for 12 people - from 80x300 to 110x320 mm.
Of course, if the dimensions of the living space do not allow you to put a large table, you can reduce the size of the countertop. But you need to understand that with a full "load" it will be crowded to sit behind it. If 3-4 people live in the apartment, and the table is made for 6 users (including guests), then temporary inconvenience can be tolerated. But if a large family always gathers at the table, it is better to maintain the minimum size.
Important notes
In addition to the size of the tabletop, you also need to focus on the distance between the legs. It should be enough for a person to sit down freely, without hitting his legs on his legs, and to be able to sit comfortably with his knees slightly apart. Here you need to take into account the height and complexion of users, but on average a person needs 50-60 cm. The normal width of the end of the table is 80-90 cm. This is enough so that people sitting opposite do not rest against each other with their knees.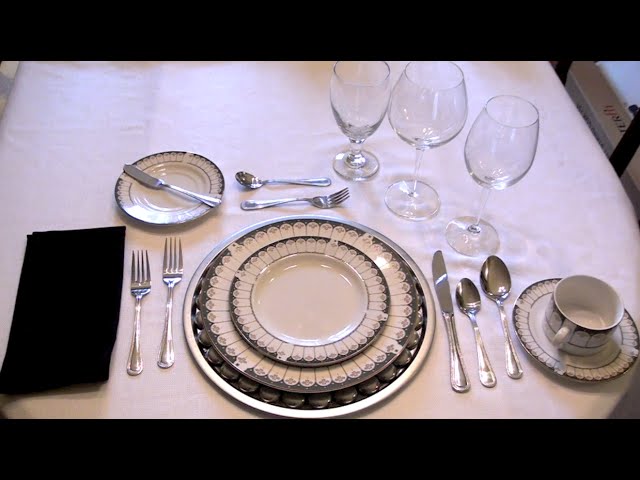
The height of the table is also standardized. The distance from the floor to the countertop is considered normal in the range of 80-85 cm. By the way, at the same height (about 85 cm from the floor) there are working surfaces in the kitchen: the hob, the sink, the cutting tables. With a chair seat height of 40-45 cm, there will be enough space under the table top for comfortable seating.
Important! When calculating the height of the table, you need to take into account how the sides are located. Usually they are fixed at least 3-5 cm below the countertop. Plus, they take some of the height themselves. The free space for a person's legs must be counted from the bottom of the beam to the seat of the chair.
The above sizes are for people of average height and build. Very tall or overweight people behind them can be cramped. This problem is easily solved if you make a table with your own hands.
- you can always increase the dimensions of the furniture for yourself.
Checklist for tools and consumables
Before starting the installation of the table, you need to pick up everything you need for its manufacture and assembly. The process will go faster if you have professional carpentry equipment, but you can make a simple table without it. It is enough to have basic tools.
List of tools for work:
-
Electric jigsaw or circular saw - allow you to quickly and evenly cut wooden bars. In the absence, you can use a chainsaw or even get by with a hand saw, but after cutting, you will have to grind the surfaces.
-
Sander - it is needed for finishing polishing finished wooden surfaces. You can replace the grinder with sandpaper or a sponge. You will need both coarse and fine-grained abrasives.
-
Drill - for drilling holes for fasteners.
-
Screwdriver - for quick connection of table parts.
-
A set of screwdrivers of various shapes and sizes (for tables with self-tapping screws), a hammer (needed when assembling on nails), chisels and a mallet for making mounting grooves.
-
Fasteners - metal corners, self-tapping screws, nails, reinforcing plates, washers.
-
Folding metal meter and construction pencil - for measurements and marking on wood.
Of the materials, first of all, you will need wood. You can make an inexpensive table from boards with your own hands, if you take boards with a thickness of 18 mm or more or a finished furniture board. If you want to assemble an expensive and reliable wooden table, choose a solid wood edged board or a slab - a longitudinal cut of a tree trunk with a natural uneven edge.
The legs for a wooden table are made of timber with a section of at least 40x40 mm. For products with solid wood tops, you need to increase the thickness of the legs, since natural wood is heavy. For the tsargs connecting the legs, a board with a section of 10-20 mm by 50-100 mm or a bar is suitable.
Carpentry and paint work will require protective clothing: an apron, oversleeves and, of course, work gloves.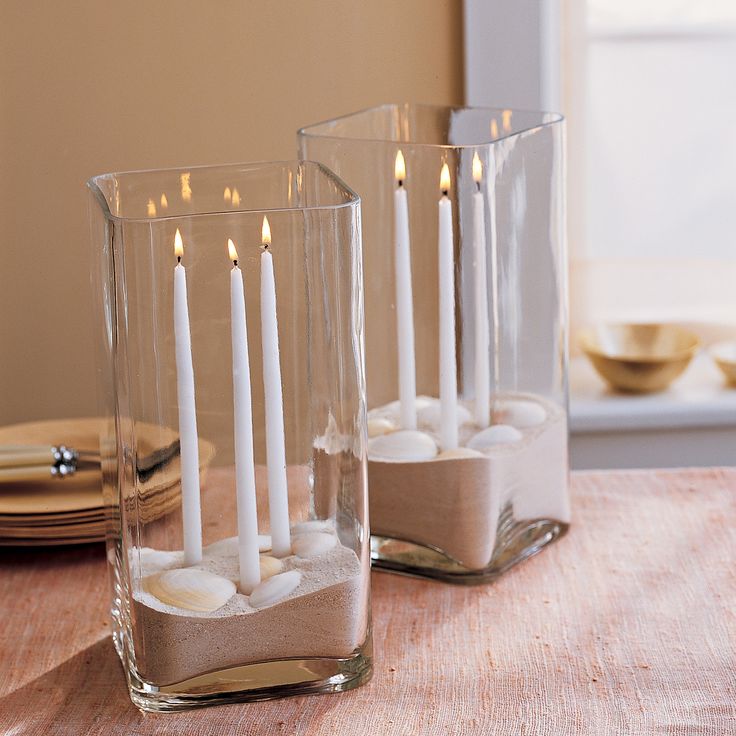
After cutting all parts to size, abrasive grinding and wood treatment with protective compounds are performed. It can also be done after the assembly of the finished product. Special antiseptic impregnation protects the tree from moisture, pests and mechanical damage, and also plays a decorative role. Tables for the street can be opened with paints and varnishes for outdoor use.
Table fastening options
Several methods are used on how to make a table with your own hands, the main difference between them is in the method of fastening parts. Structural elements can be connected to each other with carpentry joints, nails, metal staples, self-tapping screws, screws, glue.
The assembly sequence is as follows:
-
Tree markup - future cuts are outlined.
-
Sawing parts with a tool - clearly according to the drawings.
-
Treatment of parts with antiseptic compounds.
-
Cleaning and polishing elements.
-
Assembly of parts into a single structure according to the instructions.
-
Opening the finished product with varnish or paint.
To assemble a table made of wood with your own hands, you will need drawings - without them it will simply not be possible to correctly calculate the dimensions, design, and joints. The drawing does not have to be complicated, it can be a regular sketch built on graph paper. The main thing is that the details and connecting nodes are well drawn in it. A separate sketch is made for each detail with views from different sides. The table is assembled in the following order. First you need to assemble the frame: connect the sides and legs. Then place the tabletop on top.
Let us briefly analyze the features of connecting parts in different ways.
Joiner joints
This is a connection by landings, when the first part with a spike is superimposed on the second with a groove.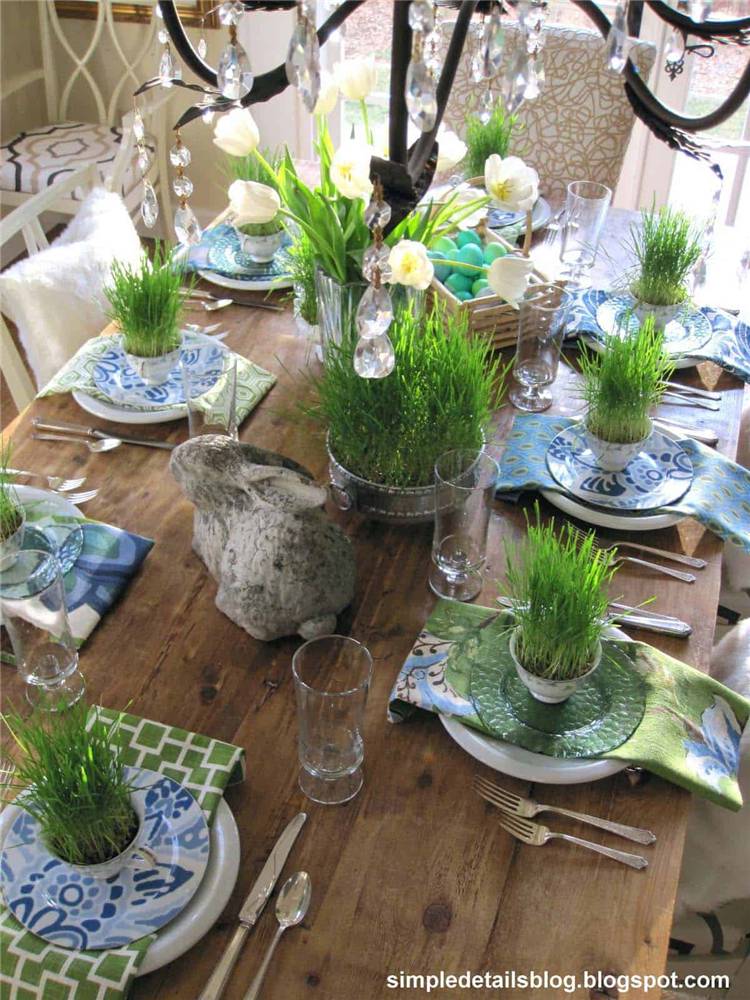 Depending on the shape of the parts in the place of the connecting node, the types of carpentry joints are distinguished: end, side, T-shaped, corner, cruciform.
This is a rather labor-intensive method of joining, requiring precise carpentry work on sawing grooves. But the frame is connected very rigidly, the table is stable and durable.
Nails or metal staples
Furniture nails are driven into the parts to be joined from the inside so as not to spoil the appearance of the product. It is important to choose their length correctly, it should not exceed the thickness of the part. For a regular table, nails 3-5 cm long are suitable.
Hammering a nail is not difficult, so this method of fastening is suitable even for novice craftsmen. For greater reliability, glue is used along with nails.
Threaded elements
Self-tapping screws are very convenient for connecting the frame and screwing the legs. They are screwed in with a screwdriver or manually.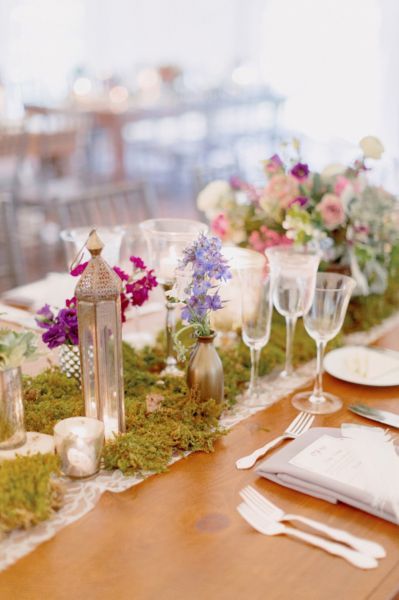 Due to the thread, the self-twisting screw is held very tightly. However, if the wood is soft, it is better to reinforce the corner fasteners on top with metal corners or wooden beams.
Furniture adhesive
Glue is used in addition to the main fasteners: with nails, self-tapping screws and wooden dowels - cylindrical fasteners that are inserted into holes drilled in the parts to be joined.
Consider several options for how you can make a table with your own hands - photos, drawings and assembly instructions are given below.
Simple design table with wooden top and prefabricated furniture legs
This is one of the easiest and fastest models to install. The construction market has a huge selection of furniture legs: there are classic and modern options, made of wood or metal. You can choose simple smooth or carved legs, single or in the form of a frame, flat panel, figured support. Some models are adjustable in height due to a telescopic mechanism or thread, so you can make an individual table with a height “for yourself”.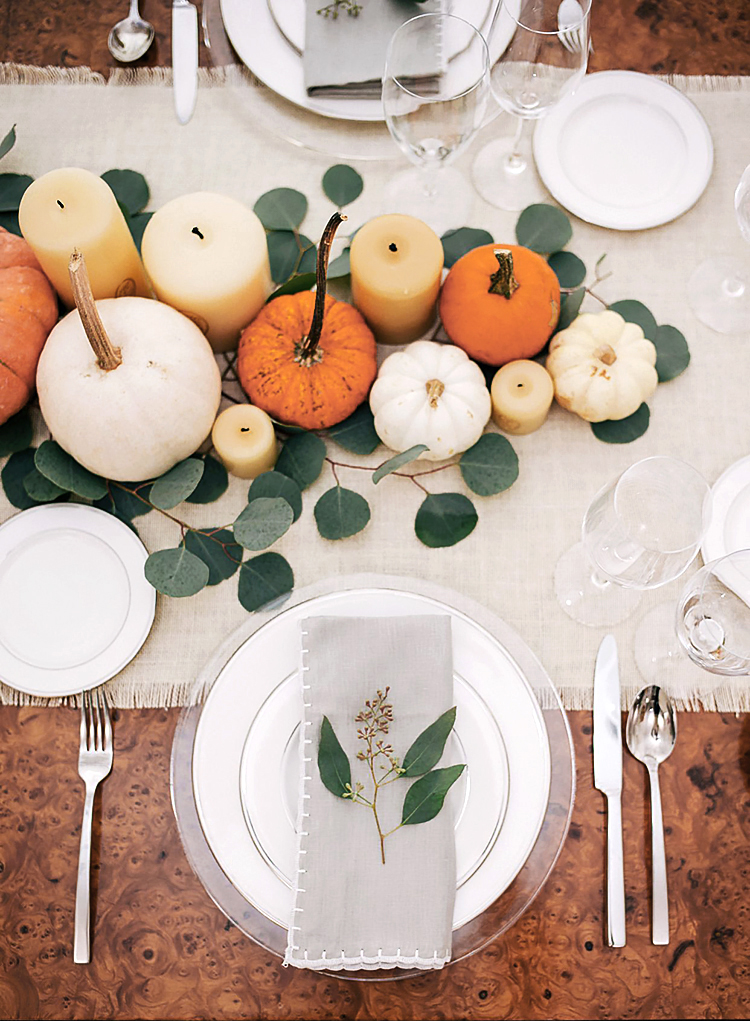
Thanks to the variability in the design of furniture legs, you can even assemble a festive table in haste, not to mention the usual kitchen or garden table.
Rectangular kitchen table with finished cylindrical metal legs. Fastening of the legs to the tabletop is provided in the corners with self-tapping screws. Suitable for a family of 3-4 people.
What you need
-
Solid wood countertop in rectangular or square shape - you can use a furniture board or a solid wood edged board. The main thing is that it should be a solid canvas.
-
4 finished legs of the desired shape - in some models, threaded fasteners are immediately provided in the upper part.
-
Special washers - they are driven into the mounting points of the tabletop to increase the supporting area and more evenly distribute the load.
-
Fastening threaded elements - self-tapping screws, screws.
-
Screwdriver, screwdriver set.
Assembly sequence
Using ready-made legs significantly speeds up the assembly process, because they are completely ready - they do not even need to be painted or decorated. You only need to make a wooden tabletop: sawn to the desired size, sanded, varnished or painted.
Then, markings are applied on the underside of the tabletop, indicating the location of the legs in accordance with the drawing. Reinforcing washers are hammered here, into which the legs are then screwed. Washers are fixed from below with self-tapping screws.
Self-tapping screws are also used if there are no threaded fasteners in the legs. For example, if the legs are made in the form of a frame or metal corners. In this case, holes are provided in the upper part of the legs for screwing fasteners.
Tables with finished legs look interesting and neat. However, they have a drawback: low strength. Fasteners screwed into soft wood do not hold well, they quickly become loose and the table begins to stagger.
Sturdy rectangular table with wooden top and two figured metal legs-supports. Welded legs make the table stable and reliable. The model is suitable for an apartment in a modern style or in the country.
Scheme of a round coffee table on a carved finished leg. For stability, a crosspiece is provided at the bottom of the leg. The tabletop is made up of circles of different diameters, which creates an interesting design effect.
Country table on two legs with tenon/groove fastening and dowels
Farm style model - a classic table for a summer residence. Only wood is used for its manufacture. Rectangular countertop type-setting, made of longitudinally laid boards. It rests on two stable cruciform legs-supports. The table is large enough for 6 people. It can be used both inside the country house and on the terrace or in the garden.
All parts of the table are connected on grooves and spikes. This also applies to the side X-shaped supports - they are made of two bars connected crosswise.
Wooden table for giving on two X-shaped supports. Connection of all parts on spikes and grooves. The supports are fixed with holders, which makes the structure reliable.
What you need
-
Board 320–380 mm - all structural elements are made from it.
-
Dowels for connecting parts to each other.
-
Self-tapping screws (optional).
-
Hand saw or chainsaw for cutting and cutting grooves, drill for drilling holes for dowels.
-
Glue, paints and varnishes.
Assembly sequence
We cut out structural elements from the board: tabletop details, side cross-supports and cross-holders in the form of an inverted trapezoid.
For the manufacture of a cross in boards at an angle, half the thickness is selected. It is most convenient to do the markup immediately in place, laying one half of the cross over the other and marking the intersection with a pencil. To make the cross holders, cut the board on both sides at an angle of 45 degrees.
To connect the holders to the cross, you can use dowels or screw in self-tapping screws. The holders are attached to the crosspieces from above on both sides (4 elements in total). If the connection is made with dowels, then first we insert the fasteners into the holes of the crosses, and then we “put on” the holders on them.
Support legs and holders form the base on which the tabletop is placed. We fasten it with self-tapping screws or screws, reinforce it with glue.
You can strengthen the table with a stretcher - this is a board that connects the X-shaped legs to each other. We fix the subframe in the center of the crosspieces with screws from the inside so as not to spoil the appearance of the table.
Pay attention. The subframe must be fixed horizontally. This can be controlled using the level.
By the same principle, you can make similar models, but with slightly different elements.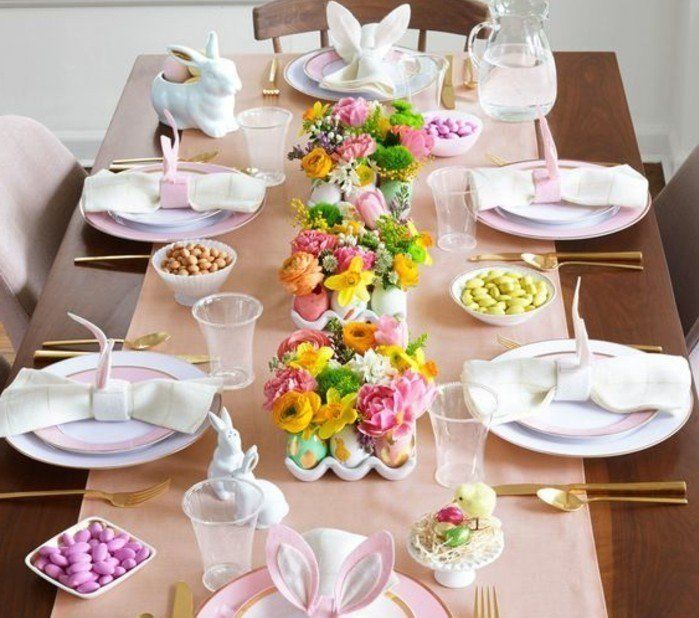 For example, to make a solid tabletop from a furniture board instead of boards. Or change the side crosses to flat panels with an extension at the bottom. You can also simplify the design a little by replacing the cross holders with drawers installed only from the inside.
Outdoor table made of boards with groove/thorn fastening. Lateral legs in the form of a cross are reinforced with a stretcher. In the upper part of the support, the kings are connected.
Another variation of the outdoor table with cruciform supports. Here the legs are made connected to each other by end tsargs at the top and longitudinal crossbars at the bottom. This technique gives the table rigidity.
Outdoor table with carpentry joints
You can also make a table with your own hands in the gazebo or in the country, using carpentry joints. This technology does not involve the use of metal fasteners - the assembly method is “without a single nail”.
The connection is performed by making protruding parts on one element (comb), and on the other - holes of suitable size (groove).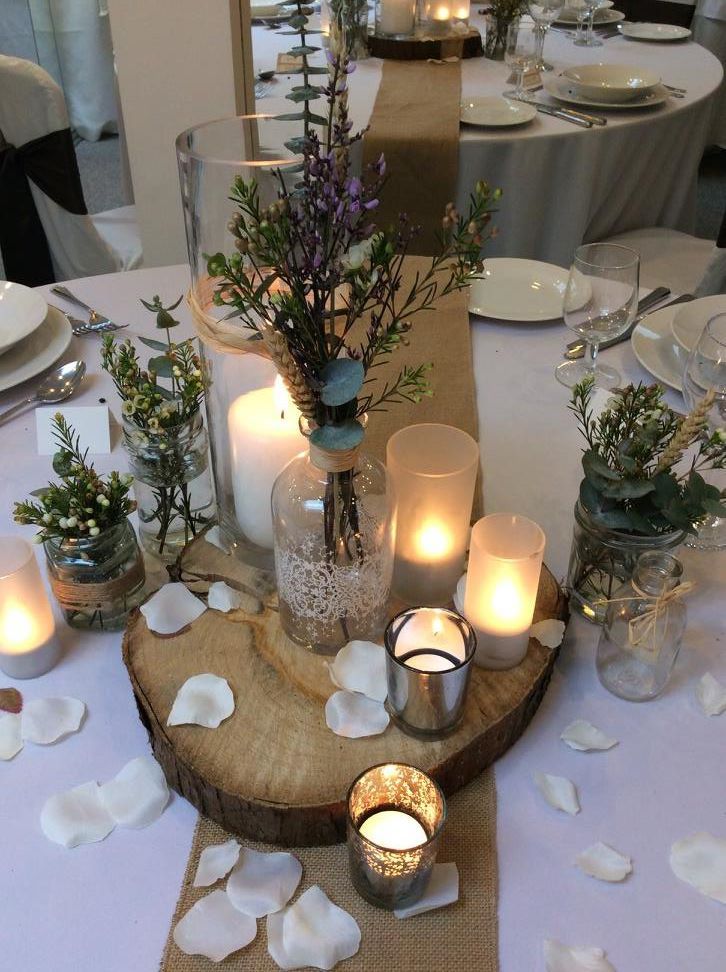 The ridges are not made to the full depth of the board, but only to a part. When they enter the grooves, a deaf, hidden connection is obtained.
According to this principle, both the boards of the table top and the frame (legs, drawers and footboards) are connected. Additionally, dowels or wedge connections are used in the frame. The work of assembling such a table is quite complicated and painstaking, it requires the presence of carpentry experience. But the result will be the real pride of the master.
Schematic diagram of the assembly of a wooden table with a table top made of boards and legs turned from a bar. Fastening of parts is provided by carpentry and reinforced with dowels. For stability, the legs are reinforced with additional crossbars.
A kind of carpentry connection - studded joints. Schemes for assembling spikes and holes. They can be used to connect drawers and legs, as well as tabletop elements.
What you need
-
Well dried hardwood board.
 Soft wood, such as pine or spruce, is not suitable for carpentry joints, as it will not provide the necessary strength of the connecting nodes.
 -
Bar 40x40 mm for four legs.
-
Dowels for additional fastenings.
-
Marking tool - ruler, pencil.
-
Tools for sawing, turning and drilling - circular saw, drill, chisels, chisel, mallet.
-
Screws, screwdrivers.
-
Varnish on wood for street work.
Assembly sequence
The bulk of the work in this model falls on carpentry. After sawing on the elements of the table by turning the part for carpentry joints. Accuracy and strict adherence to the drawings are important here.
Then we assemble the frame. According to preliminary marking, grooves are hollowed out in the legs from a square-section beam on both sides. Tsargs with protruding parts are inserted into them. Thus, the entire table frame is assembled. Additionally, this knot is reinforced with dowels (pins), which complement the carpentry connection.
Important. For simple, straight legs, this connection is sufficient. If carved or turned finished wooden legs are used, it is recommended to reinforce the corners with special metal ties. They are fastened with screws to the inner surface of the tsarg (to the frame).
We make the table top from three wide boards, interconnected from the end sides with deaf tips. The connection here is the same: there are protruding parts at the ends of the tabletop boards, and grooves at the tips.
We fasten the table top to the frame with screws. They are screwed in hidden, through pocket holes drilled from the inside of the side.
Homemade pallet board table
Now furniture made from recycled materials is popular, because it is not only interesting, but also beneficial for the environment. Tables can do this too.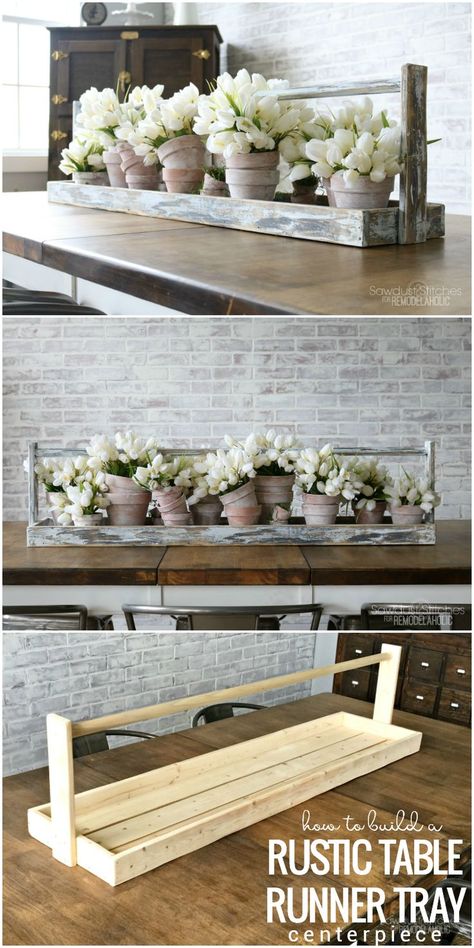 A beautiful and inexpensive table is obtained from wooden pallets. If we talk about the choice of product design, then there are two options.
Firstly, you can make an original table in haste. To do this, you just need to put a few pallets on top of each other and fasten them together. To make it convenient to use the table, the top rails need to be removed and broken more tightly with the addition of boards from other pallets.
The design will be very stable and a little bulky. But its heaviness will fit perfectly into such interior styles as loft or Provence, you just need to paint the table in the colors of the interior.
A coffee table made from unsorted pallets. Two pallets are fastened one above the other. Only the countertop has been redone - boards have been added.
Secondly, you can disassemble the pallets for spare parts in order to make a table from the resulting boards. For example, make a decorative countertop from pallet boards and put it on legs. Here you get a traditional version of the table with the original table top (as in the photo). Boards can be bought ready-made or made by hand.
Original table with pallet top and finished furniture legs. The upper part of the tabletop is complemented by closely stacked boards. The legs are threaded.
What you need
-
New Wooden Pallets - For a small coffee table, one pallet is enough, but for a dining table, you need to purchase several pallets.
-
Nail puller, screwdriver, hammer.
-
Electric drill, drills and abrasive nozzle for polishing.
-
Hacksaw or circular saw - to fit the rails to the desired dimensions.
-
Joiner's glue, self-tapping screws.
-
Clear nail polish.
Assembly sequence
First you need to disassemble the pallets into parts and get the nails out of them with a nail puller. The resulting planks will go to the sheathing of the tabletop, and the bars - to the legs. Part of the pallets must be left intact, they will be needed for the frame. Before assembly, all parts are carefully polished.
For a medium-sized table, we take two pallets and connect them together with glue. This is the base for the tabletop. From above, we lay the prepared boards from the dismantled pallets joint-to-joint on it, fixing them with self-tapping screws. Boards can be mounted in different ways: straight, diagonal or herringbone - each option looks beautiful in its own way.
Advice. If the option with a diagonal arrangement of boards is chosen, then you do not need to cut them immediately. It is easier to lay the boards whole on the frame, and then cut off the protruding parts around the perimeter with a circular saw.
The finished worktop must be well sanded with an abrasive nozzle on a drill or sandpaper until a perfectly smooth surface is obtained.
We make the legs from the remaining timber. For fastening to the countertop, we also use glue and self-tapping screws. You can also use furniture metal or wooden legs. Open the finished product with varnish.
The simplest table made of boards with assembly on self-tapping screws
You can assemble a very simple budget table from old boards and get solid, beautiful furniture as a result. To make a strong, comfortable table with your own hands, you will need drawings and basic materials. The design of the table will be as simple as possible: a rectangular table top and support legs. All fasteners are self-tapping.
Such a table is very ergonomic, because there is a lot of free space under the tabletop.
Scheme of a simple table made of boards with fastening on self-tapping screws. It can be used in the country house or in the yard of a private house. 6-8 people can sit at the table at the same time.
What you need
-
Boards 20x60 mm for countertops.
-
Boards 20x40 mm for table legs.
-
Bars 20x20 cm for the connecting bracket.
-
Tools for cutting and assembling - circular saw, drill, self-tapping screws.
-
Wood putty, wood paint for street work.
Assembly sequence
First, we collect the legs of the table. To do this, we cut their ends at 80 degrees and fasten them together with four short crossbars - two at the top and two at the bottom. Two trapezoidal supports are obtained. We connect the parts with self-tapping screws.
We make a tabletop: we lay 4 wide boards on a flat surface with a gap of 1 cm. We retreat 4 cm from the edge and attach the legs to the tabletop. We fix with screws. In the center of the tabletop, we attach a bar across, and from it we make wooden brackets to the lower rungs on the legs.
The finished table must be sanded and treated with impregnation. Disguise the places where the screws are screwed in with furniture putty, and when it dries, paint the entire structure.