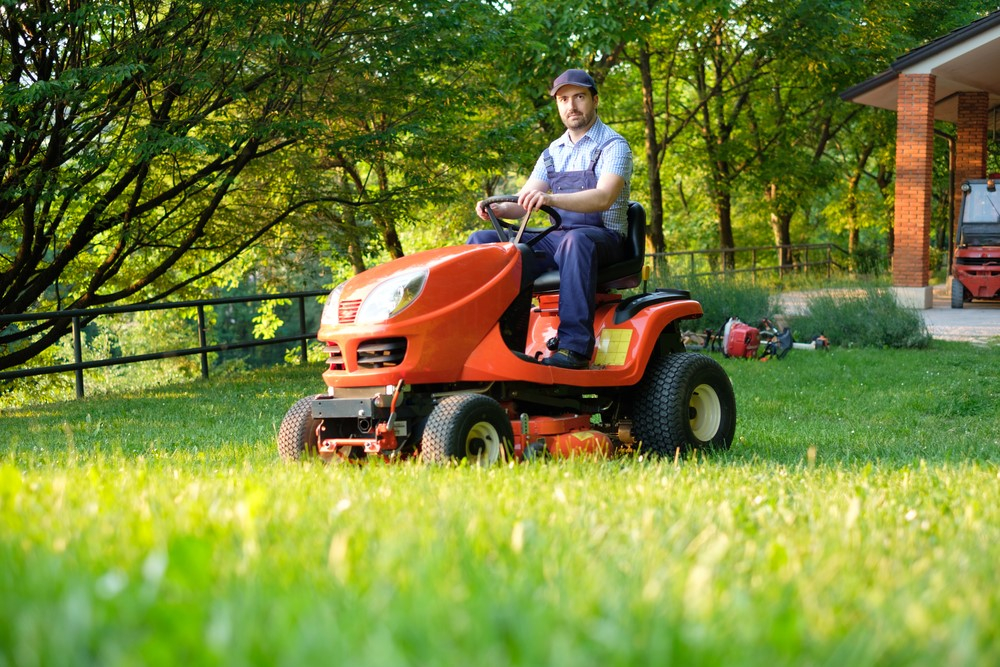
Residential riding lawn mower
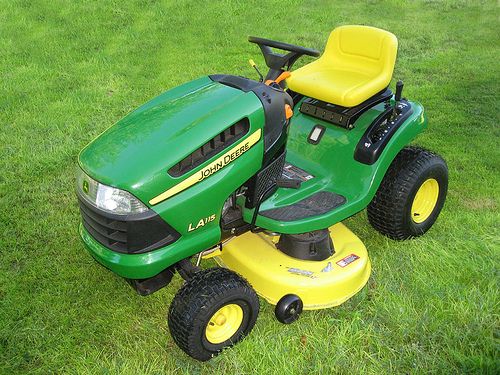
Lawn Tractors | 100 Series
Skip to main content
RUN WITH US ON A
100 Series Lawn Tractor
Built in Greeneville, TN, the 100 Series is designed to make yard work simple. With affordable prices, comfortable designs, and a bumper-to-bumper warranty1, it lets you focus on the real reason you have a lawn in the first place – to make memories.
Choose a 100 Series Lawn Tractor
S100
- 17.5 hp* engine
- 42” Edge™ Mower Deck
- Operator station is wide and comfortable
Find a Dealer
S110
- 19 hp* engine
- 42” Edge™ Mower Deck
- 15-in. Open-Back seat
Find a Dealer
S120
- 22 hp* V-Twin engine
- 42” Edge™ Mower Deck
- Easy Change™ 30-Second Oil Change System for convenient service
Find a Dealer
S130
- 22 hp* V-Twin engine
- 42” Edge™ Mower Deck
- Easy Change™ 30-Second Oil Change System for convenient service
Find a Dealer
S140
- 22 hp* V-Twin engine
- 48” Edge™ Mower Deck
- 15-in.
Open-Back seat and standard front bumper
Find a Dealer
S160
- 24 hp* V-Twin ELS engine
- 48” Edge™ Mower Deck
- Adjustable lumbar seat and standard front bumper
Find a Dealer
S170
- 24 hp* V-Twin ELS engine
- 48” Edge™ Mower Deck
- Heavy-duty hydrostatic transmission
Find a Dealer
S180
- 24 hp* V-Twin ELS engine
- 54” Edge™ Mower Deck
- Heavy-duty hydrostatic transmission
Find a Dealer
Offers and Financing
Explore current offers on new John Deere mowers.
No Interest if Paid in Full within 9 Months
3on New John Deere 100 Series Lawn Tractors.
View No Interest Offer Details
See more ways to save
Get the best deal by searching our sales and special offers.
View all mower offersApply for personal use financing
features
Features
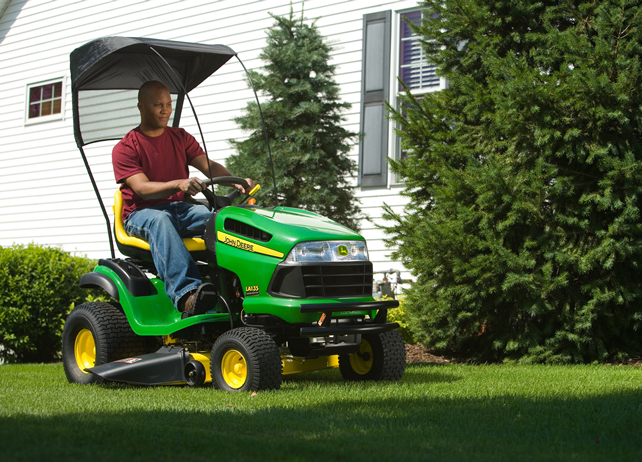
Comfort
The 100 Series has an ergonomic operator station with an adjustable seat so you can always have a smooth ride on your turf.
Side-by-side Pedals
Two-pedal foot control makes changing speed and direction effortless.
features2
Quality
The Edge™ Cutting System delivers an even cut no matter the size of your yard, with its 42-, 48-, or 54-inch mower deck sizes.
Easy Change™ 30-Second Oil Change System
We didn't just change the oil change. We revolutionized it. See how fast and easy it is to change your oil on 100 Series Riding Lawn Tractors with the John Deere Easy Change™ 30-Second Oil Change System2, exclusively from John Deere. Included on the S120, S130, S160, S170, and S180 models.
Compare
Compare our 100 Series Lawn Tractors
| Model | Engine | Deck | Transmission | Drive System | Warranty |
|---|---|---|---|---|---|
| 17. | 42-in Edge™ Cutting System | Two Pedal Hydrostatic | 2-wheel drive | 2 year/120 hour1 | |
| 22 hp* | 42-in Edge™ Cutting System | Two Pedal Hydrostatic | 2-wheel drive | 2 year/120 hour1 | |
| 22 hp* | 42-in Edge™ Cutting System | Two Pedal Hydrostatic | 2-wheel drive | 2 year/120 hour1 | |
| 22 hp* | 48-in Edge™ Cutting System | Two Pedal Hydrostatic | 2-wheel drive | 2 year/120 hour1 | |
| 24 hp* | 48-in Edge™ Cuttting System | Two Pedal Hydrostatic | 2-wheel drive | 2 year/120 hour1 | |
| 24 hp* | 48-in Edge™ Cutting System | Heavy Duty, Two-Pedal Hydrostatic | 2-wheel drive | 2 year/120 hour1 | |
| 24 hp* | 54-in Edge™ Cutting System | Heavy Duty, Two-Pedal Hydrostatic | 2-wheel drive | 2 year/120 hour1 |
 5 hp*
5 hp*Brush Guards & Bumpers
Carts
Lights
Material Collection Systems
MulchControl™
Where to Buy
Buying John Deere equipment is convenient and easy. Use the one that is best for you.
Buy Online Find a Dealer
Also available at:
Still Looking?
Explore our variety of mowers and find the one that fits your lifestyle.
More Lawn Tractors
Find a machine that's versatile and easy to use.
Discover more Lawn Tractors about More Lawn Tractors
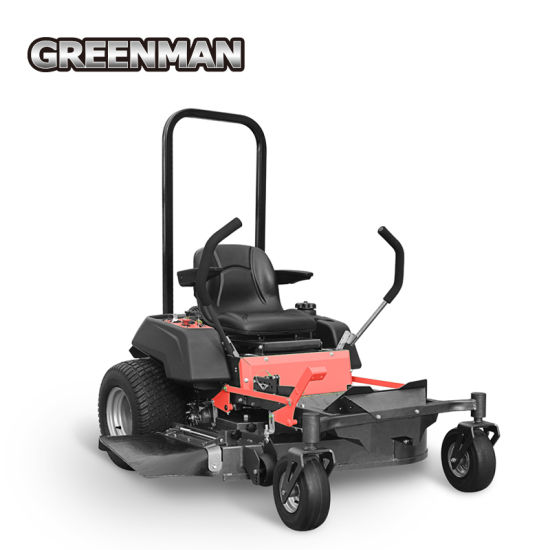
Zero-Turn Mowers
Get increased visibility, speed, and maneuverability.
Discover Zero-Turn Mowers about Zero-Turn Mowers
Additional Resources
*The engine horsepower and torque information are provided by the engine manufacturer to be used for comparison purposes only. Actual operating horsepower and torque will be less. Refer to the engine manufacturer’s web site for additional information.
**Term limited to 3 years or 200 hours used, whichever comes first, and varies by model. See the limited warranty for new John Deere Turf and Utility Equipment at JohnDeere.com or JohnDeere.ca/TUWarranty for details.
¹Term limited to years or hours used, whichever comes first, and varies by model. See the LIMITED WARRANTY FOR NEW JOHN DEERE TURF AND UTILITY EQUIPMENT at JohnDeere.com.
²Changing the filter removes the captured contaminants and replaces about 0.8 qt (0.76 L) of the engine oil.
3Offer valid on qualifying purchases made 29 October 2022 through 31 January 2023. Subject to approved credit on a Revolving Plan account, a service of John Deere Financial, f.s.b. For consumer use only. No down payment required. Interest will be charged to your account from the purchase date at 17.90% APR if the purchase balance is not paid in full within 9 months or if your account is otherwise in default. Available at participating U.S. dealers. Prices and models may vary by dealer. Offer available on new equipment and in the U.S. only. Prices and savings in U.S. dollars.
X500 Select Series Tractors | Lawn Tractors
Skip to main content
RUN WITH US ON AN
X500 Select Series Lawn Tractor
The X500 Series has Accel Deep™ Mower decks in two sizes, multiple features that help you power through any condition, and a 4 year/500 hour bumper-to-bumper warranty¹. Because the best memories are made in well kept lawns.
Choose an X500 Select Series Lawn Tractor
X570, 48-in Deck
- 24 hp* iTorque™ Power System
- 48” Accel Deep™ mower deck, compatible with optional MulchControl™ kit with one-touch technology
- Twin Touch™ forward and reverse foot pedals
Buy Online
X570, 54-in Deck
- 24 hp* iTorque™ Power System
- 54” Accel Deep™ mower deck, compatible with optional MulchControl™ kit with one-touch technology
- Twin Touch™ forward and reverse foot pedals
Buy Online
X580
- 24 hp* iTorque™ Power System
- 54” Accel Deep™ mower deck, compatible with optional MulchControl™ kit with one-touch technology
- 21-inch automotive-style, cut and sewn seat
Buy Online
X584, 48-in Deck
- 24 hp* iTorque™ Power System
- 48” Accel Deep™ mower deck, compatible with optional MulchControl™ kit with one-touch technology
- Power four-wheel steer
Buy Online
X584, 54-in.
 Deck
Deck - 24 hp* iTorque™ Power System
- 54” Accel Deep™ mower deck, compatible with optional MulchControl™ kit with one-touch technology
- Power four-wheel steer
Buy Online
X590, 48-in. Deck
- 25.5 hp* iTorque™ Power System
- 48” Accel Deep™ mower deck, compatible with optional MulchControl™ kit with one-touch technology
- Electronic throttle control and power two-wheel steer
Buy Online
X590, 54-in. Deck
- 25.5 hp* iTorque™ Power System
- 54” Accel Deep™ mower deck, compatible with optional MulchControl™ kit with one-touch technology
- Electronic throttle control and power two-wheel steer
Buy Online
Offers and Financing
Explore current offers on new John Deere mowers.
4.9% APR fixed rate for 60 months
2OR No Interest if Paid in Full within 9 Months3 on new X500 Select Series Lawn Tractors.
View Offer DetailsBuy X500 Select Series Mowers Online
See more ways to save
Get the best deal by searching our sales and special offers.
View all mower offersApply for personal use financing
Features
Accel Deep™ Mower Decks
Designed for a higher quality cut at even higher ground speeds. Available in 48- and 54-inch widths so you can cover more ground.
4-wheel steering
This exclusive feature allows for tight turns so you can go can navigate around trees, planter boxes, and anything else in your turf with ease. Standard on X584 model.
Traction Assist
This foot-operated control locks the rear transaxle, so both rear wheels work with maximum traction. In other words, tough terrain doesn't stand a chance.
Heavy-Duty Power Systems
Our heavy-duty iTorque™ Power System engines in all X500 models deliver long-lasting power so you won't be slowing down any time soon.
Warranty
We’ve got you covered from the ground up with our 4 year/500 hour bumper-to-bumper warranty1.
Compare
Compare our X500 Select Series Lawn Tractors
| Model | Engine | Deck | Steering | MulchControl™ Kit Options | Warranty |
|---|---|---|---|---|---|
| X570, 48-in. Deck | 24 hp* iTorque | 48-in. Accel Deep™ Mower Deck | Low-effort 2-wheel | Standard or one-touch MulchControl™ | 4 year/500 hour¹ |
| X570, 54-in. Deck | 24 hp* iTorque | 54-in. | Low-effort 2-wheel | Standard or one-touch MulchControl™ | 4 year/500 hour¹ |
| X580, 54-in. Deck | 24 hp* iTorque | 54-in. Accel Deep™ Mower Deck | Power 2-wheel | Standard or one-touch MulchControl™ | 4 year/500 hour¹ |
| X584, 48-in. Deck | 24 hp* iTorque | 48-in. | Power 4-wheel | Standard or one-touch MulchControl™ | 4 year/500 hour¹ |
| X584, 54-in. Deck | 24 hp* iTorque | 54-in. Accel Deep™ Mower Deck | Power 4-wheel | Standard or one-touch MulchControl™ | 4 year/500 hour¹ |
| X590, 48-in. Deck | 25.5 hp* EFI with constant-speed governor | 48-in. | Power 2-wheel | Standard or one-touch MulchControl™ | 4 year/500 hour¹ |
| X590, 54-in. Deck | 25.5 hp* EFI with constant-speed governor | 54-in. Accel Deep™ Mower Deck | Power 2-wheel | Standard or one-touch MulchControl™ | 4 year/500 hour¹ |
 Accel Deep™ Mower Deck
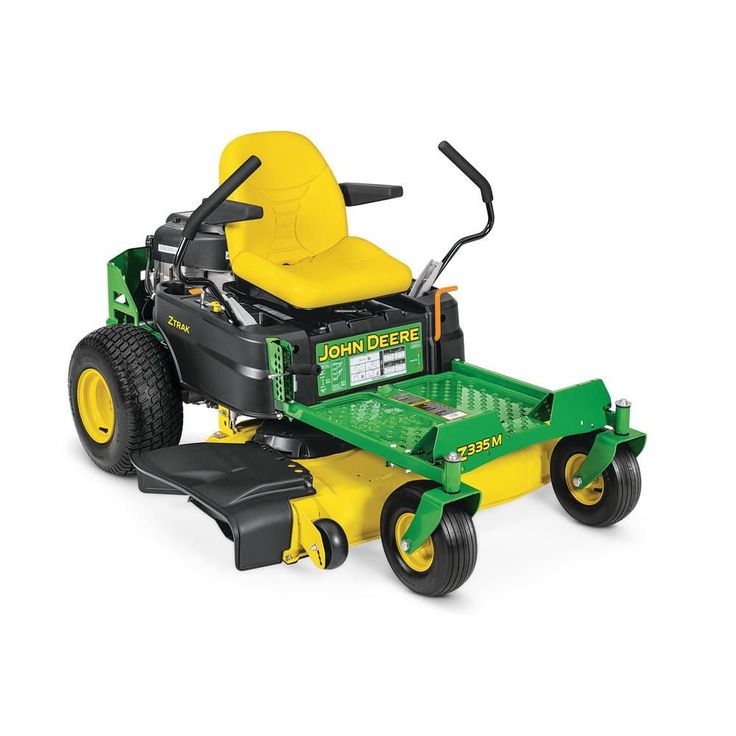 Accel Deep™ Mower Deck
 Accel Deep™ Mower Deck
Brush Guards & Bumpers
Carts
Lights
Material Collection Systems
MulchControl™
Ready to Run With Us?
Whether you’re ready to buy or have more questions, come discover why Nothing Runs Like a Deere™ at a dealer near you.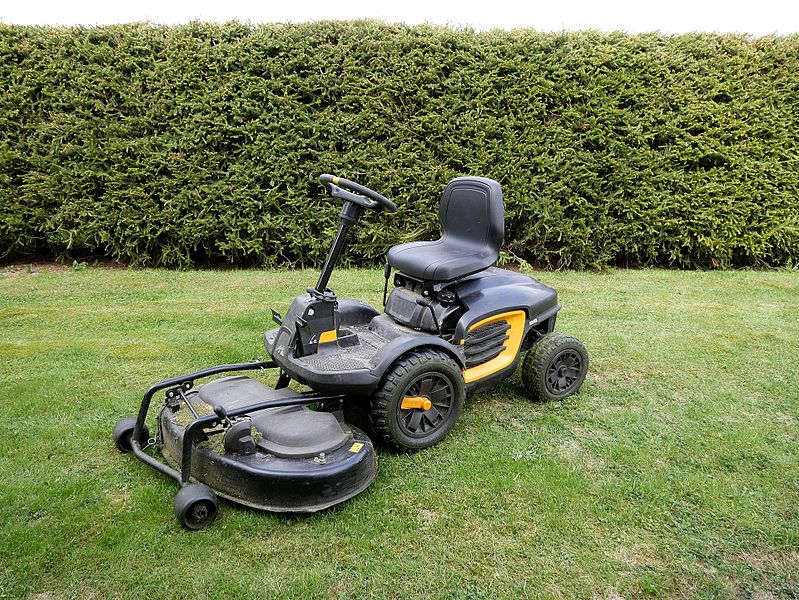
Find A Dealer
Ready to Run With Us?
Whether you’re ready to buy or have more questions, come discover why Nothing Runs Like a Deere™ at a dealer near you.
Find A Dealer
Want to explore more?
Discover more Select and Signature Series models and find the best fit for your yard.
View X300 Series
View X700 Series
Additional Resources
*The engine horsepower and torque information are provided by the engine manufacturer to be used for comparison purposes only. Actual operating horsepower and torque will be less. Refer to the engine manufacturer’s web site for additional information.
**Term limited to 3 years or 200 hours used, whichever comes first, and varies by model. See the limited warranty for new John Deere Turf and Utility Equipment at JohnDeere.com or JohnDeere.ca/TUWarranty for details.
1Term limited to years or hours used, whichever comes first, and varies by model. See the LIMITED WARRANTY FOR NEW JOHN DEERE TURN AND UTILITY EQUIPMENT at JohnDeere.com
2Offer valid on qualifying purchases made 29 October 2022 through 31 January 2023. Subject to approved credit on a Revolving Plan account, a service of John Deere Financial, f.s.b. For consumer use only. No down payment required. 4.9% APR is for 60 months only, regular Revolving Plan rates will apply after that. The regular Revolving Plan rate, which varies over time, is currently 21.25% APR (as of 01 November 2022). Available at participating U.S. dealers. Prices and models may vary by dealer. Offer available on new equipment and in the U.S. only. Prices and savings in U.S. dollars.
3Offer valid on qualifying purchases made 29 October 2022 through 31 January 2023. Subject to approved credit on a Revolving Plan account, a service of John Deere Financial, f.s.b. For consumer use only. No down payment required. Interest will be charged to your account from the purchase date at 17. 90% APR if the purchase balance is not paid in full within 9 months or if your account is otherwise in default. Available at participating U.S. dealers. Prices and models may vary by dealer. Offer available on new equipment and in the U.S. only. Prices and savings in U.S. dollars.
Lawn Mowers Snapper Inc. Horse riding, lawn mower, png
Lawn Mowers Snapper Inc. Horse riding, lawn mower, png Download PNG ( 246.93KB )- Image size
- 500x500px
- File size
- 246.93KB
- MIME type
- Image/png
resize PNG
width(px)
height(px)
Non-Commercial Use, DMCA Contact Us
- Lawnmower Snapper Inc. Riding Mulch, Snapper, miscellaneous, horse Riding png 973x1024px 809.
 89KB
89KB - Lawnmower Snapper Inc. Cordless mower Trimmer, Craftsman, miscellaneous, grass png 1909x2048px 2.61MB
- Lawnmowers Zero-turn Mower Snapper Inc. Riding horse Briggs & Stratton, lawn mower, miscellaneous, horse Riding png 500x500px 211.85KB
- horse riding, horse, child png 5124x5567px 2.53MB
- Lawn Mowers Horse riding, lawn mower, grass, mower png 1200x1150px 595.59KB
- Lawn Mowers Riding Snapper Inc. Rich's Lawn Mower Quality Tractor, tractor, png 800x676px 2.1MB
- Lawn Mowers Horse riding, lawn, mode Of Transport, lawn png 548x697px 112.02KB
- Thoroughbred Horse riding, horse racing, horse, miscellaneous png 800x556px 18.66KB
- Horseback riding Bystrica, rider, horse, miscellaneous png 1280x1106px 1.03MB
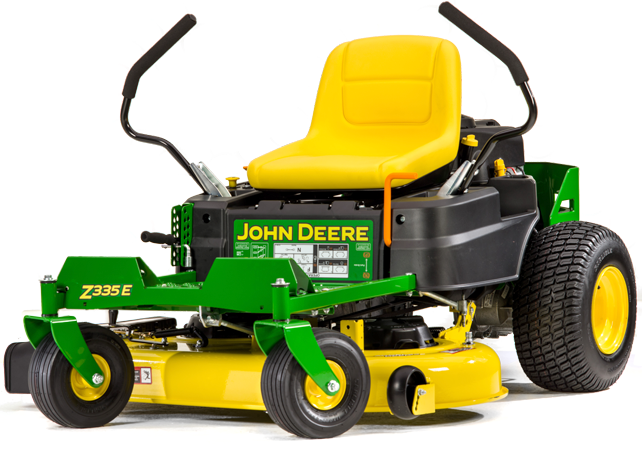
- John Deere Tractor-lawn mower riding Mower, tractor, mower, lawn png 800x576px 370.04KB
- Horse & Rider Equestrian Silhouette, riding, horse, animals png 600x600px 28.03KB
- Lawn Mowers Non-return mower Dalladora Riding, lawn mower, png 900x702px 523.35KB
- Lawn Mowers Reverseless mower Kubota Corporation Tractor, lawn, lawn, vehicle png 1000x1129px 630.94KB
- Mustang Clydesdale horse Drawing Cartoon, horse riding, horse, mammal png 678x600px 19.11KB
- Horseback riding Dressage English riding Bridle, riding, horse, animals png 800x599px 321.66KB
- male and female riding motorcycle, child, wedding png 2500x2500px 426.2KB
- Horse Drawing Cartoon, horse riding, horse, child png 5076x5376px 3.05MB
- riding cowboy horse, Miles City Bucking Horse Sale Rodeo Bronk riding, RODEO, horse, cowboy png 700x700px 472.
 35KB
35KB - Equestrian Stallion Dressage Equestrianism, riding, horse, animals png 630x588px 82.76KB
- Riding boot Leather Shoe, Leather boots, boots, fashion png 1100x1390px 720.4KB
- Riding shoe Motorcycle Leather, riding boots, leather, boots png 1200x701px 1.02MB
- Equestrian Pony Equestrianism, riding, horse, mammal png 564x564px 218.77KB
- Equestrian sport, horse riding, horse, animals png 4534x4733px 2.75MB
- Mustang Stallion Black, riding, horse, mammal png 1008x1251px 91.
 01KB
01KB - Lawn Mowers Horse riding, Man Mowing s, toddler, mower png 444x597px 69.39KB
- Lawn Mowers John Deere Riding mower, tractor, vintage Car, car png 512x512px 155.79KB
- Barrel racing Western riding Rodeo Horseback riding, horse racing, horse, animals png 744x607px 530.75KB
- Lawn Mowers Rotary mower Horse riding, others, lawn Mower, mower png 640x450px 47.01KB
- Horse show Equestrian dressage, riding, horse, animals png 2284x1604px 36.28KB
- Lawn Mowers Horse riding Zero-turn mower, Causeway Lawn Mowers, car, lawn Mowers png 825x685px 114.
 3KB
3KB - horseback riding, Horse and rider, horse knight, mammal, tack png 679x472px 111.66KB
- Horse Jockey Computer Icons, horse riding, horse, animals png 512x512px 11.51KB
- Horse riding Equestrian English equestrianism, riding, horse, animals png 1000x868px 49.14KB
- Riding mower Gear, Gear, canvas, painting png 8000x7542px 1.43MB
- Lawn Mowers Briggs & Stratton Riding Mowers Pressure Washers, snapper, miscellaneous, mower png 2048x1535px 4.51MB
- Riding boot Animated cartoon, Cartoon women boots, cartoon Character, purple png 1028x1224px 244.
 86KB
86KB - Lawn Mowers Snapper Inc. Pressure Washers riding Mower, Residental, miscellaneous, car png 500x500px 337.68KB
- Riding High Harley-Davidson Logo Stuttsman Harley-Davidson Motorcycle, motorcycle, text, orange png 800x400px 47.46KB
- with riding broom illustration, Witchcraft Humor Cartoon, Halloween Funny Witch, happy Halloween, vertebrate png 2800x2656px 1022.02KB
- Lawn Mowers Riding mower Zero-turn mower, lawn, miscellaneous, grass png 2400x1770px 678.98KB
- Lawn Mowers No-turn Lawn Mower Honda Riding Commercial Lawn Mower Inc, others, miscellaneous, lawn Mower png 600x600px 274.
 91KB
91KB - Lawn Mowers Reverseless mower Bobcat Company Swap & Shop Centre, others, mammal, logo png 800x424px 175.75KB
- John Deere Lawn mower Roller mower, lawn mower, mower, lawn png 642x462px 206.75KB
- Horseback riding Boots The Elder Scrolls V: Skyrim Shoe, boot, leather, accessories png 595x595px 311.88KB
- Lawn Mowers Husqvarna Group Riding Mower Garden power tool, others, lawn, lawn png 1515x800px 667.02KB
- Horseback riding Horse riding and rider, horseback riding, horse, miscellaneous png 2400x1961px 104.46KB
- Husqvarna Group Lawn Mowers Stringer Hedge trimmer, mower, lawn Mower, grass png 680x516px 71.15KB
- Horseback riding Horse Computer Icons Trail, horse riding, horse, mammal png 1600x1600px 32.2KB
- Car Peugeot 206 Brake pad Brake shoe, riding boots, car, motorcycle png 1400x1400px 446.51KB
- Child's play Animation Cartoon, Horse riding, child, illustrator png 5144x3922px 1.64MB
Cub Cadet OHV Series Self Propelled Lawnmower User Manual
OHV Series Riding Lawnmower
Persons under the age of 16 should not use this device - the minimum age for users is determined by local regulations.
This manual includes safety instructions that
indicate engine hazards,
indicate risks of injury, and
show how to avoid or reduce the risk of injury.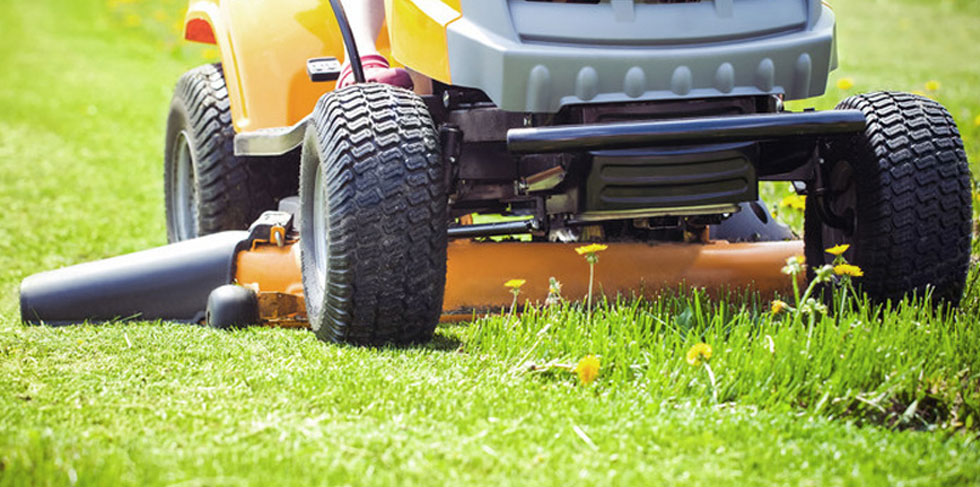
The safety instructions in this manual are labeled as follows:
Danger!
Indicates an imminent danger. Failure to heed this warning could result in death or very serious injury.
Attention!
Indicates a hazardous situation. Failure to heed this warning may result in minor injury or property damage.
Caution
Indicates tips for use and important information.
Engine housing specifications 10
These characteristics are very important for subsequent identification when ordering spare parts and for customer service.
Enter all engine data in the field (fig. 11).
For your safety
Attention
In general, the term "unit" is used in what follows. The engine can be installed in different units.
Danger!
Follow all safety and operating instructions contained in the instruction manual for the machine on which this engine is installed.
Explosion and fire hazard!
Gasoline and gasoline vapors are extremely flammable and explosive.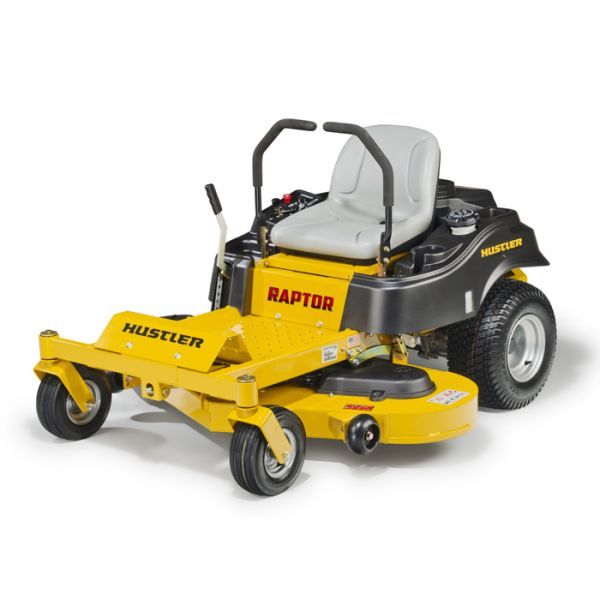 Fire or explosion can cause severe burns or death. If gasoline comes into contact with the body or clothing, immediately wash the skin and change clothing.
- Before refueling, turn off the engine and let it cool for at least two minutes before opening the fuel tank cap.
- Only fill the tank outdoors or in a well ventilated area.
- Use only approved fuel containers.
- Never fill a can of gasoline in a car, tractor or trailer with plastic panels. Always fill the gas canister on the ground and some distance from the vehicle.
- If possible, remove motorized units from the truck or trailer and refuel on the ground. If this is not possible, fill these devices from a can of gasoline, and not directly through the fuel pump hose.
- Always install and hold the fuel hose at the edge of the filler neck of a tank or can of gasoline until refueling is complete. Do not use the locking lever for continuous filling.
- Do not overfill the tank. Fill the tank to about two centimeters below the filler neck to allow the fuel to expand.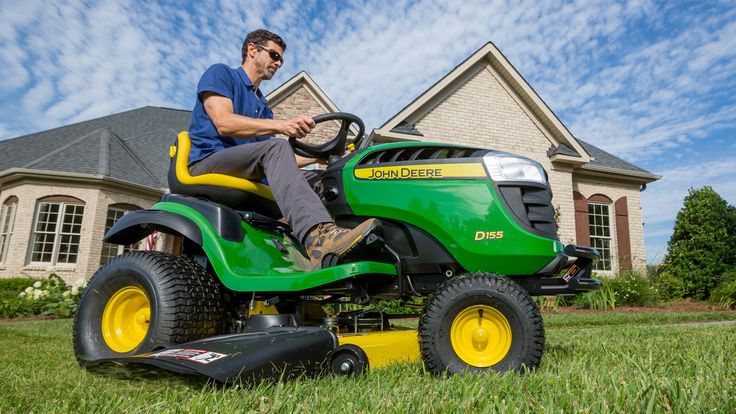
- Keep fuel away from sparks, open flames, pilot lights, sources of heat and ignition.
- Never refuel units in enclosed spaces as this produces flammable vapors.
- Do not smoke.
- Frequently check fuel lines, tank, fuel tank cap, and fittings for cracks or leaks. Replace if necessary.
- Make sure the spark plug, exhaust valve, fuel tank cap, and air filter are installed before starting the engine.
- Do not start the engine without the spark plug installed.
- Fuel has been spilled, wait until the fuel has evaporated before starting the engine.
- When operating implements, do not tilt the engine or implement so far that fuel can flow out.
- Do not use the choke to stop the engine.
- Transport units with empty tank only.
- Keep gasoline or units with a full tank away from heaters, stoves, hot water boilers, or other equipment equipped with warning lights or other sources of ignition as they may ignite gasoline vapors.
Explosion and fire hazard!
Engine sparks when starting.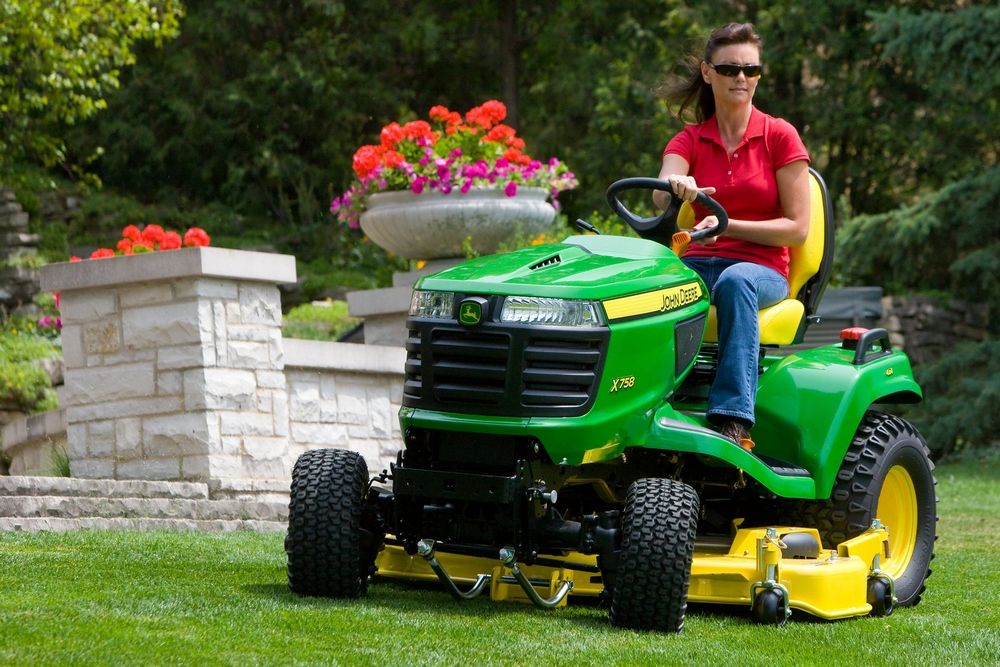 These sparks can ignite flammable vapors nearby. This may cause an explosion or fire.
- Do not start the engine near damaged gas equipment.
- Do not use pressurized starting aids as their vapors are highly flammable.
Choking hazard!
Engines emit carbon monoxide, urless odor and bellows. Breathing carbon monoxide can cause dizziness, fainting, or death.
- Start engine and operate outdoors only.
- Do not start or start the engine in an enclosed area, even if the doors and windows are open.
Risk of injury!
Starting the engine unintentionally could result in serious injury, fire, or electrical shock.
- Before doing any work, such as adjustments or repairs, always remove the spark plug terminal and keep it away from the spark plug.
- Use only an authorized ignition tester to test ignition.
- Perform an ignition test on the removed spark plug.
Risk of burns! Fire hazard!
A running engine generates heat. Engine parts, especially the exhaust system, are very hot. Do not touch or you may get severe burns.
Flammable objects such as leaves, grass, bushes, etc. may ignite.
- Do not touch the exhaust pipe, cylinder block or cooling fins until they are cool.
- Keep children away from hot or running engine.
- Remove flammable objects near the exhaust pipe and cylinder.
Danger of electric shock! Fire hazard!
Ignition sparks may cause fire or electric shock.
Risk of injury!
Rotating parts may touch or get caught in arms, legs, hair, clothing or parts thereof. This could result in serious injury.
- Operate machine only with guards in place.
- Keep hands and feet away from rotating parts.
– Tie up long hair and remove jewelry before starting work.
- Do not wear loose clothing, dangling laces, or items that can be caught.
- Directly connected components such as cutters, fan impeller, drive parts, etc.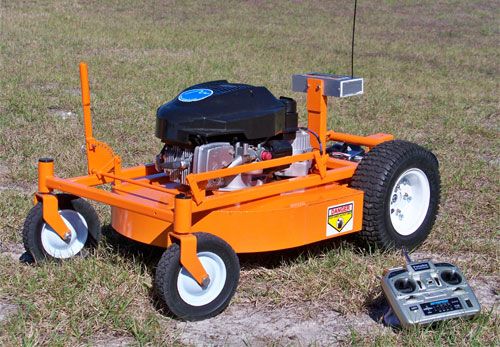 must be securely fastened.
Danger of electric shock if the engine is equipped with an electric starter!
When the ignition is on and the engine is running, never touch electrical cables or components. You may get electrocuted.
Risk of injury! Unit damage!
Do not change the engine settings from the factory.
Symbols on the device
Safety instructions and warnings, illustrated with symbols or pictograms, are located on the engine. The symbols have the following meanings:
Caution! Warning is a source of danger.
Read the operating instructions before switching on the machine!
Warning - hot surface!
Warning - toxic fumes!
Gasoline is flammable!
Use unleaded petrol!
Do not use the device in the rain!
Ensure that these characters installed on the device remain readable.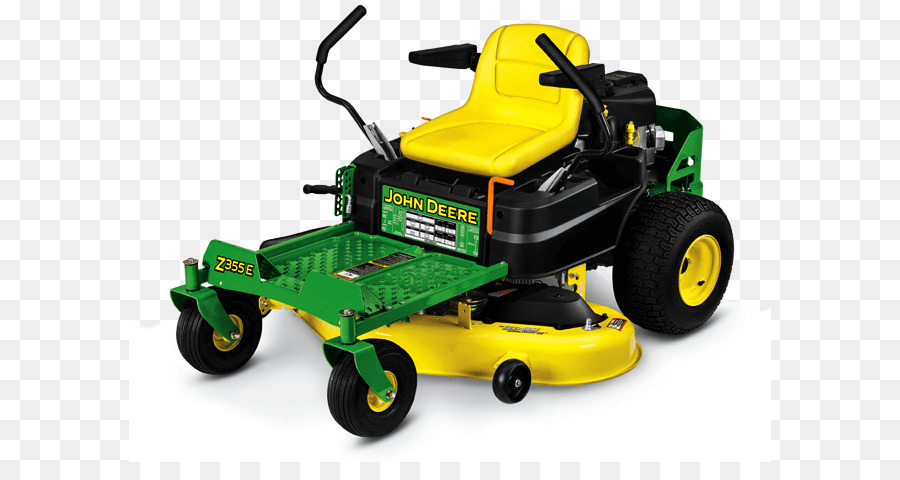
Replace damaged or illegible characters.
About the engine
Various models are described in this instruction manual.
Graphic images may differ in detail from the instrument purchased.
Compare fig. 1 with your device and make sure you know where the various controls and knobs are located.
Fig. 1
- Extract
- Drain valve
- Electric starter (depending on the model)
- Finger protection
- Air filter 9026 Oil filter
- Oil filler cap/dipstick
- Starter handle (depending on model)
Instruction manual
Checks before operating the unit Recommended oils
Attention!
The unit is shipped without fuel and with engine oil. If the engine is run without sufficient oil, the engine can be seriously damaged. This damage is excluded from the warranty.
Before starting the engine, check the oil level and top up if necessary.
Do not overflow. The oil tank has a capacity of approx. 1.4 liters. Use 4-stroke engine oil grade SJ or higher. Select an oil viscosity from the following table depending on the outside temperature:
SAE 10W-30 is recommended for general use in the normal temperature range. If an oil with one viscosity is used, the viscosity should be selected from the table corresponding to the average temperature in the area of application.
Attention!
The use of poor quality oil or 2-stroke oil can shorten engine life.
Oil level check
Attention!
When checking the oil, make sure the machine is on a level surface and the engine is off.
Always clean the area around the dipstick before removing it (fig. 3).
Fig 2
- Unscrew the oil filler cap (1) and wipe the dipstick clean.
- Insert a feeler gauge into the intake manifold and tighten.
- Pull the dipstick out again and check the oil level.
 If the level is too low, slowly add some oil up to the upper "max" mark on the dipstick.
 - Screw the dipstick firmly in before starting the engine.
Attention!
Do not add too much oil. If the engine is overfilled with oil, it can damage the engine, produce smoke, make it difficult to start, or smoke the spark plug.
Recommended fuels
Danger!
- Gasoline is extremely flammable and explosive under certain conditions.
- Refuel only in a well ventilated area with the engine off. Do not smoke near the tank or in fuel storage areas and extinguish all sources of ignition.
- Do not overfill the gas tank (there should be no fuel in the filler neck). After refueling, make sure the tank cap is closed and secure.
- When refueling, be careful not to spill fuel. Spilled fuel or gasoline vapors can ignite. If fuel has been spilled, make sure the area is dry before restarting the engine.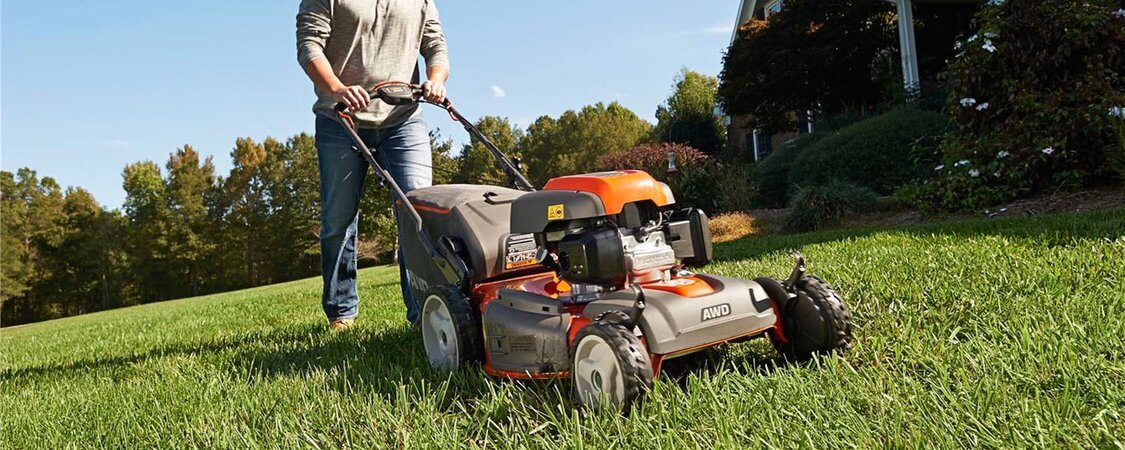
- Avoid repeated or prolonged contact with skin and inhalation of vapours.
Risk of engine damage!
- Do not mix fuel and oil.
- Use only clean, fresh, unleaded fuel.
- Use only fuel with an octane rating of 87 or higher.
- Do not use specification E85/E15 fuel!
- Store fuel only in quantities that can be used within 30 days.
- Do not leave fuel in the tank without stabilizer for more than 30 days - otherwise the warranty may be voided.
- Make sure the tank is free of dirt, dust or water.
Checking the petrol level
Attention!
Allow the engine to cool for at least two minutes before refueling.
Follow the instructions in the unit's instruction manual for checking the petrol level and topping up.
Fig. – see unit manual
- Before removing the fuel tank cap and refueling, clean the area around the filler neck.
- Fill tank approx. 2 cm below the inlet neck or until the fuel reaches the maximum level on the gauge (depending on the model), allowing the fuel to expand.
Starting the engine
Fig 4
Danger!
Keep hands and feet away from moving parts. Do not use pressure starting aids. Vapors are highly flammable.
Danger!
Follow all operating instructions contained in the instruction manual for the machine on which this engine is installed.
Notes
- Some models do not have a throttle.
The speed is set automatically.
The engine always runs at optimum speed.
- Some models do not have a choke.
The engine is automatically tuned to a certain starting process.
- It is not necessary to use the choke if the engine is warm or the ambient temperature is high.
- Allow the engine to warm up for a few minutes before working on the machine.
Turn off all drive units, place drive in neutral (N) and apply parking brake (if equipped).
Set the throttle valve (fig. 4b) to position .
If the engine is cold, pull out the choke (fig. 4a) or set the throttle to position (fig. 4b).
Electric start (depending on model)
- Disconnect charger from power source and instrument.
Turn the ignition key (fig. 4c/4d) until the engine starts (attempt to start no more than 5 seconds, wait 10 seconds before trying again).
Recoil start (depending on model)
- Set the ignition key (fig. 4c/4d) to position .
- Gently pull the starter handle (10, fig. 1) until it resists.
Then pull quickly and hard to overcome the compression and prevent play. Repeat if necessary.
Attention!
Do not allow the starter handle to be pushed away from the engine. Pull it back slowly to avoid damaging the starter.
When the engine starts
- turn the ignition key to position .
- Slowly push the throttle back in.
- Return the throttle until the engine runs smoothly.
Stop engine
Figure 4
Turn off all drive units, place drive in neutral (N) and apply parking brake (if equipped).
Move the throttle to the middle position.
Run the engine for approx. 20 seconds.
Turn the ignition key to position /0.
Remove the key from the ignition.
Apply the parking brake (if equipped) before leaving the machine.
Maintenance / cleaning
Danger!
Allow the engine to cool down before carrying out any work, such as maintenance and cleaning work.
Remove the ignition key.
To prevent unintentional starting of the engine, always remove the spark plug terminal.
Attention!
- The engine is optimally tuned by the manufacturer for power and consumption. Any change to these settings may only be made by the manufacturer or an authorized technician.
- If the engine must be tilted for transport, inspection of the unit, or removal of dirt, always ensure that the spark plug is pointing up when the engine is tilted, otherwise the engine may be damaged by fuel or oil.
- Empty the fuel tank before transporting the device in a vehicle.
- Spare parts must comply with the requirements set by the manufacturer.
- Therefore, only original spare parts or those approved by the manufacturer should be used. Repairs must only be carried out by a
workshop.
To maintain constant high power, the engine must be regularly checked and adjusted. Regular maintenance ensures a long service life. The required maintenance intervals and the type of maintenance work to be performed are shown in the following table. Intervals according to opening hours or other times/dates must be respected according to whichever comes first. If the engine is operated under severe conditions, more frequent maintenance is required.
At the end of the season, the unit must be checked and serviced by a specialist workshop.
Service schedule
| Service tasks | Before use | after the first 5 hours of work | once a season | every 100 hours |
| Check engine oil |
- Under heavy load or high ambient temperature
- Service more frequently if the unit is used in a dusty environment.
Oil check
- Always check the oil level before starting the engine.
- Make sure the correct oil level is always maintained. See Checking the Oil Level.
Oil and oil filter change
Danger!
– Used motor oil can cause skin cancer if it comes into contact with the skin frequently or for a long time. Although unlikely, provided that used oil is not handled daily, it is recommended that you wash your hands with soap and water as soon as possible after handling used oil.
- Drain the oil while the engine is still warm but not hot (oil drains quickly and completely).
- If the machine must be tilted to drain the oil, start the engine first until the fuel tank is empty.
Caution
Always dispose of used oil/oil filters in accordance with current environmental regulations. It is recommended to take used oil in a sealed container to a used oil collection point. Do not dispose of with residual waste or pour onto the ground or leave to seep.
Oil change
Figure 5
- Place the unit on a flat surface and secure it to prevent it from rolling.
- Remove the oil filler neck.
- Drain the oil into a suitable container:
– Remove the cap (2) on the oil drain valve (1).
– Turn the oil drain valve (1) 1/4 counterclockwise and at the same time pull it forward carefully.
Caution
If necessary, an additional oil drain hose can be attached to the oil drain valve.
- Close the oil drain valve again. Push in oil drain valve and turn 1/4 turn clockwise to close.
- Fill the oil tank with the recommended oil and check the oil level.
- Replace the oil filler cap.
Changing the oil filter
Fig. 6
- Drain the oil - see Changing the oil.
- Close the oil drain valve again.
- Unscrew the oil filter.
- Apply fresh oil to the O-ring of the new oil filter.
- Installing a new oil filter
- Screw in the oil filter by hand until the O-ring is seated on the engine housing.
- Tighten the oil filter 10 - 12 with the oil filter wrench, or hand tighten the oil filter an additional 1/2 - 3/4. - Fill with oil and replace the filler cap - see Changing the Oil.
- Start the engine and run it briefly.
- Stop the engine and let it cool down.
- Check oil filter for leaks.
- Check the oil level and correct if necessary - see "Checking the oil level".
Air Filter Service
A dirty air filter restricts air from entering the carburetor.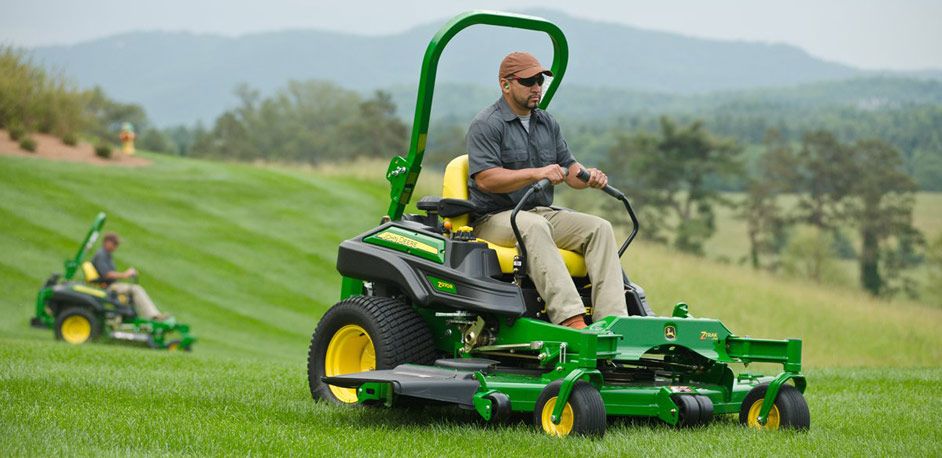 To prevent the carburetor from malfunctioning, the air filter must be serviced regularly. In a very dusty environment,
may require more frequent maintenance.
Danger!
Never clean the air filter with gasoline or low flash point solvents. There is a risk of fire or explosion.
Attention!
Never run the engine without an air filter. Otherwise, the engine may be damaged or subject to increased wear.
Caution
The filter paper cannot be cleaned.
Fig 7
- Loosen both wing nuts (1) and remove the air cleaner cover (2).
- Completely remove the air filter (3).
- Remove the foam pre-filter (4) from the paper filter (5).
- Replace dirty or damaged paper filter (5).
- Clean the foam pre-filter (4), replace if damaged.
To clean the foam prefilter, remove it from the paper filter and wash with a household detergent solution and warm water. Dry it thoroughly before reinstalling.
Caution
Never wet the foam pre-filter with oil.
- Completely assemble the air filter and properly position the round hole on the suction pipe (6).
- Attach the air filter cover.
- Tighten both wing nuts (1) finger tight.
Spark plug service
Danger!
Let the engine cool down too much.
Perform an ignition test on the removed spark plug. Do not start the engine without the spark plug installed.
To ensure proper engine operation, the gap between the electrodes on the spark plug must be properly adjusted and free of contaminants.
Fig. 8 and 9
- Remove the spark plug terminal (1) and unscrew the spark plug (2) using a spark plug wrench.
- Visually inspect the spark plug. Replace the spark plug if it is visibly worn or the insulator is damaged.
- Clean the spark plug with a wire brush if it is to be used again.

- Measure the electrode gap with a feeler gauge. If necessary, adjust the gap by slightly bending the side electrode. The gap between the electrodes should be 0.60 - 0.80 mm (Fig. 9).
- Check that the O-ring on the spark plug is in good condition, then screw in the spark plug by hand to avoid damaging the threads.
- With the spark plug hand-tight, tighten it with a spark plug wrench.
Attention!
Do not overtighten the spark plug. When tightening a spark plug with a spark plug wrench, observe the following values:
- new spark plug 1/2 turn max.
- used spark plug 1/8 - 1/4 turn max.
An incorrectly tightened spark plug can become very hot and damage the engine.
Fuel filter maintenance
These maintenance tasks may only be performed by a service center in accordance with the maintenance schedule.
Cleaning the engine
If the engine has been running, allow it to cool for at least one hour before cleaning. Remove accumulated dirt from the engine regularly. Clean finger
casing and area around the exhaust pipe. Use a brush or compressed air.
Attention!
Do not clean the engine by spraying it with water as this may contaminate the fuel. Water from a garden hose or high pressure cleaner can get into the outlet and damage the engine.
Danger!
Dirt accumulated around the exhaust pipe may ignite. Check and clean the area before using the device.
SP
Caution
Stabilizer can be added to the fuel if stored for more than 30 days. Contact your dealer or customer service center. Engines stored for more than 30 days should be free of fuel in the tank to prevent deposits in the fuel system, especially on critical parts of the carburetor.
- Leave the engine running until the tank runs out of fuel and the engine stops.
- Change oil. See Oil Change.
- Remove the spark plug and fill with approx.
 15 ml of engine oil per cylinder. Reinstall the spark plug and operate the starter briefly to distribute the oil.
 - Remove dirt around the engine, under the finger guard and under, around and behind the exhaust. Apply a thin coat of oil to areas that may rust.
- Store in a clean, dry and well-ventilated area away from devices that work with flames or warning lamps, such as heating equipment, boilers or dryers. Area
should also be avoided in applications where a spark motor is installed or power tools are used. - If possible, storage rooms with high air humidity should also be avoided, as this promotes rust and corrosion.
- Store the device on a level surface. If the machine is on a slope, fuel or oil may run out.
Procedure after extended storage
- Check the engine as described in Checking the engine before starting.
- If the fuel was drained before storing the unit, fill the tank with fresh gasoline.
 If you use a can of gasoline to refuel, make sure it contains fresh gasoline.
 - If the cylinder has been lubricated with oil during storage, the engine emits a small amount of smoke when starting. This is fine.
Warranty
The warranty regulations issued by our company or the importer apply in all countries. Defects will be repaired free of charge under the warranty if they are caused by a material or manufacturing error. If you need to claim under warranty, please contact your dealer or the nearest agency.
Troubleshooting
| Fault | Possible Cause | Action to Take | 05 |
| No fuel in tank | Fill tank with clean, fresh, lead-free fuel. | ||
| Stale fuel. | Drain old fuel into a suitable container outdoors. Fill the tank clean, fresh and lead-free fuel. | ||
Engine cold, choke not activated. | Pull out the throttle. | ||
| Spark plug wire not connected. | Slide the spark plug wire onto the spark plug. | ||
| Spark plug dirty or defective. | Clean the spark plug. Adjust electrode gap or replace spark plug. | ||
| Throttle not in place | Set throttle valve to position. | ||
| Clogged fuel line. | Clean the fuel lines *). | ||
| Fuse defective. | Replace fuse *). | ||
| Starter defective. | Check starter *). | ||
| Engine runs erratically (stuttering). | Choke lever set to CHOKE/ . | Set the choke lever to the /OFF position. | |
| Spark plug wire not connected properly. | Connect spark plug wire securely. | ||
| Stale fuel. | Drain old fuel into a suitable container outdoors. Fill the tank with clean, fresh, lead-free fuel.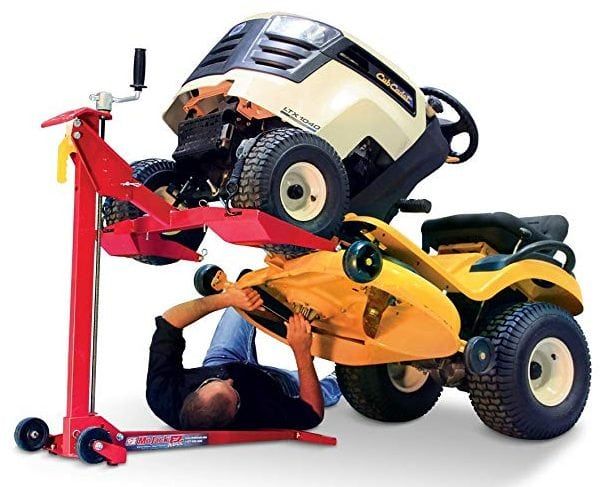 
|