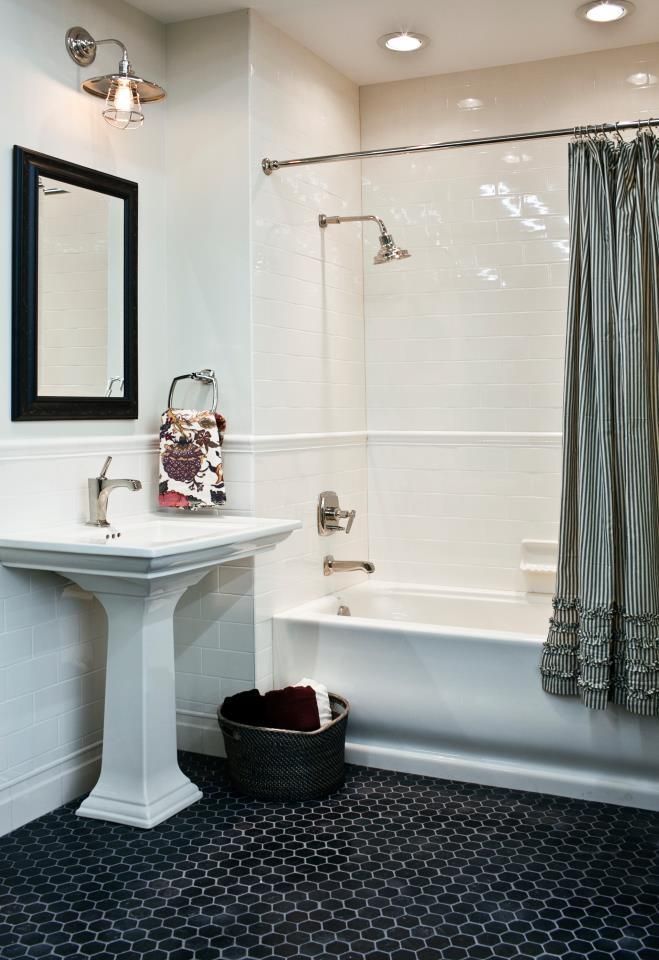
Adding tile to bathroom wall
How to Tile a Bathroom Wall - Granada Tile Cement Tile Blog
Tiling the walls of your bathroom, whether a guest room or the master, can boost the style of the space and add an extra protective layer to combat moisture damage and mold growth, and to enable easier clean up. Cement tiles are great materials for bathrooms to add a pop of color, pattern and durability.
Cement tiles are also fairly straightforward to install and can be done in a weekend. If you’re wanting to add some incredible style and durability to your bathroom renovation, follow our DIY guide for installing bathroom cement wall tiles.
Tools and Materials:
- Cement wall tiles
- Thin set adhesive
- Grout (preferably light colored; dark colored grout may stain tiles)
- Grout release
- Cement Penetrating Sealer (one of the best is STAIN-PROOF from DryTreat)
- Trowel
- Paintbrush
- Grout float
- Sponge
- Carpenter’s pencil
- Level
- Gloves
- Wet tile saw
- Power drill
- Backer board
- Tape measure
- Galvanized screws
Start by measuring your bathroom wall to determine the amount of tiles you need. Multiply the wall space by the number of tiles per square foot for the particular type of tile you’re planning to use. For example, let’s say your bathroom wall is 5’ x 10’, so you have 50 square feet to tile. The tile you decide to use is a 6” x 6”, so there are 4 tiles per square foot. When you are ordering your tiles, you want to order 50 square feet x 4 tiles/square foot = 200 tiles. Be sure to order 10-15% extra to have replacements in case any tile gets damaged or there was a slight mistake in the measuring.
Cement wall tiles can be applied on dry wall, plaster, cement block or cement backer board. You want the surface to be smooth, clean and dry, and for any chipping paint or holes to be sanded and patched. If you need to create a new surface for the walls, begin by measuring the area to be tiled and cut the backer board to this size. Cover the area with adhesive and attach the backer board to the wall.
Step 3: Determine the Tile Layout and Make a Layout ToolWhen figuring out the layout, the rule of thumb is to figure out the placement of tiles and the center point that will result in the largest size of cut tiles, avoiding any slivers.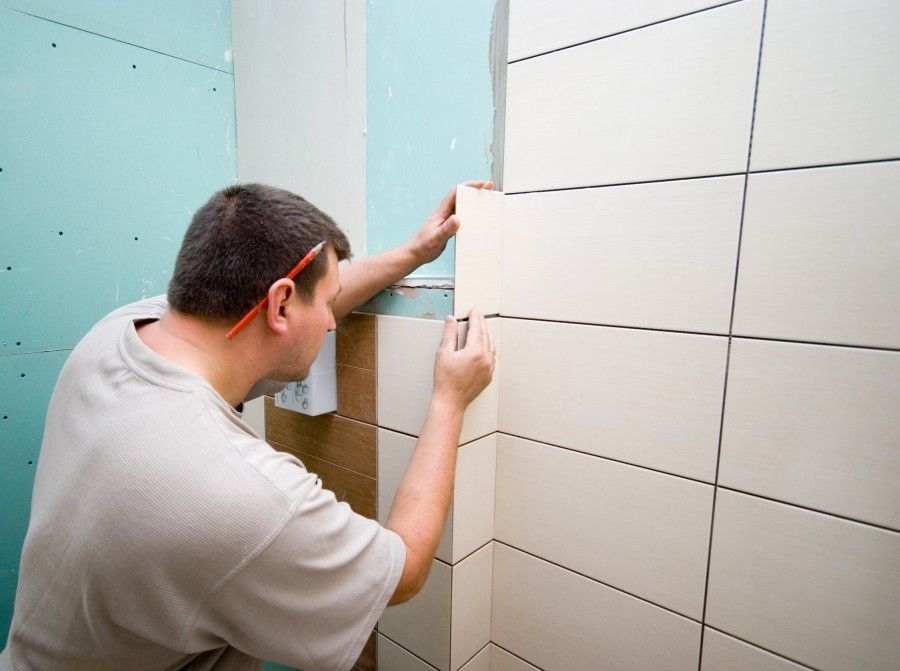 If you’ll be incorporating an accent tile or edge tile, figure out where this will go on the wall.
Create a layout tool to figure out the placement of the tiles. Cut a piece of wood just longer than half of the length of the wall, and place tiles along the wood, including spacers, and mark them. Using this tool, you’ll be able to see the placement of tiles by moving it horizontally along the wall. If the ends result in small pieces, then adjust the center point on the wall. Mark on the wall, from the edge, where the first full sized tile will start. Using the level, draw a line from this point up the wall.
Now, do the same process for the vertical side of the wall. Mark the start of the bottom row and mark this line along the horizontal wall.
Step 4: Install the DatumNow that you’ve determined the layout for the wall tiles and you’ve checked for pipes using a pipe detector, you’ll screw in the long, skinny wooden datum boards (which will act as your reference lines) along the horizontal and verticals lines you drew, to guide you on where exactly the tiles will go to create an even, symmetrical installation.
The type of tile adhesive or mortar you use will depend on the type of wall you’ll be tiling on, either dry wall, plaster, cement block or cement backer board. Follow the manufacturer’s instructions. Mix the adhesive with water to create a smooth paste.
Step 6: Install the Wall TilesSpread the tile mortar using the notched trowel working in small sections, and apply a thin layer of the mortar on the back of each tile before pressing it into the wall. Use the notched side of the trowel to create ridges that will help the tiles to stick better. Be sure to wipe off any excess adhesive or mortar on the tile surfaces as you go, and place spacers in between each tile to ensure the right space for the grout. Complete the first bottom row of tiles and check if they are even with the level. Remove the wood datum planks when you’re ready to install the outer edge tiles.
Step 7: Apply the Grout ReleaseOnce the adhesive or mortar has dried according to the manufacturer’s instructions, it’s time to apply the grout release or penetrating sealer. Cement tiles are porous, like natural stone. You’ll need a grout release or penetrating sealer to prevent the grout from staining the tile.
Apply the grout over the tiles using a grout float. Do not allow the grout to dry on the tile surface because it can absorb into the tile and stain. Remove excess grout with a damp sponge. Let the grout dry according to manufacturer’s instructions.
Step 9: Seal the TilesOnce the grout is dry, you’ll want to seal the tiles to protect them.
And that’s how you tile your bathroom walls using cement tiles! For more information or advice for installing your tile project, or for help choosing your cement tiles, contact the team at Granada Tile.
How to install wall tile in bathroom | HowToSpecialist
This article is about how to install wall tile in bathroom. The bathroom is one of the most important areas in our home, so we have to make everything possible to turn it into a cozy and neat space, by learning how to tile the walls.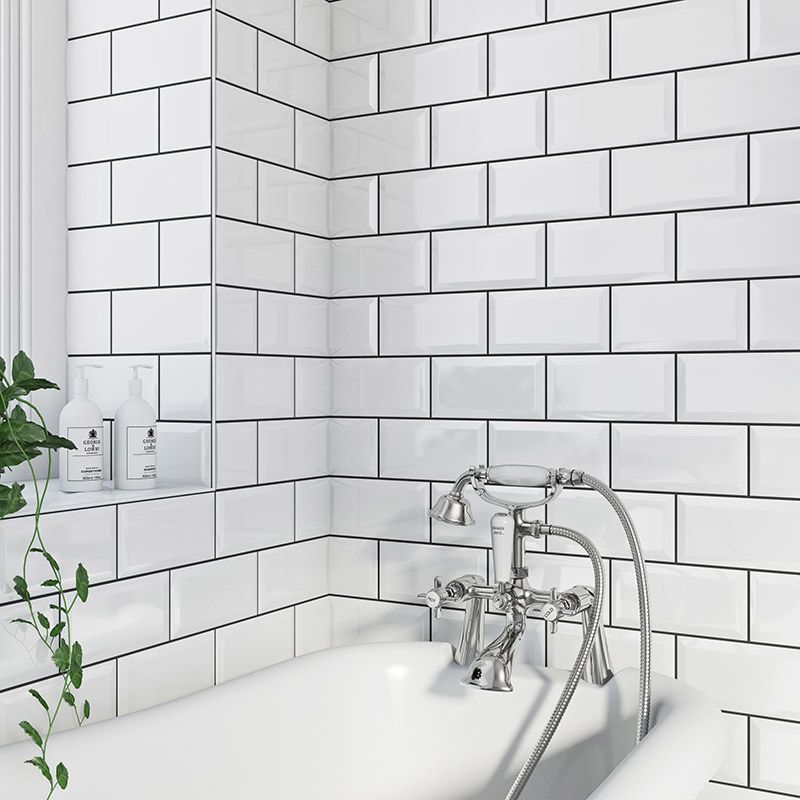 You have to use proper materials, as to protect the bathroom walls from the constant humidity and heat, which can damage the structure of our homes. In order to install the wall tiles properly, one has to know several basic techniques regarding this project: how to cut tile, how to set the wall tile layout, how to prepare tile adhesive or how to lay ceramic tiles. Therefore, you have to pay attention to all these aspects before tiling a bathroom by yourself and read carefully all our articles regarding ceramic tile.
You have to prepare thoroughly the walls before installing tile in bathroom. Make sure the walls are straight and level, without any irregularities or residues, otherwise the tiles won’t stick to walls or you could end up with a crooked wall. In addition, if you have to install wall tiles on drywall, you should prepare the surface thoroughly. Therefore, make sure you have installed green drywall (designed to resist water and moisture) or even better cement boards, in the areas exposed to moisture. These sheets of cement are made of materials which do not absorb water, making them the proper solution for your bathroom walls exposed to moisture.
The cement boards have to be secured with galvanized screws (to prevent them from rusting) to the structural studs, in the same manner as a regular drywall boards (use a stud finder to know were to drive in the screws). In addition, you have to use special fiberglass tape to mask and protect the joints between the boards. Remember that in the shower area, you have to insulate thoroughly the wall against moisture, so it is compulsory to use these cement boards. If your bathroom walls are covered with paint, you have to remove it, otherwise the tiles won’t stick to the surface. In addition, use sandpaper and a special solution (according to the type of paint), to remove the paint from the walls. After you have finished removing it, you have to clean the dust or residues off the wall.
Made from this plan
In order to install wall tile in bathroom, you need the following:
Materials
- Ceramic tiles
- Trim tile (optional)
- Plastic corner trims (for exterior and interior corners)
- Tile spacers
- Thinset
Tools
- Safety gloves, safety glasses
- Measuring tape, framing square, pencil
- Score-and-snap tile cutter, tile nippers
- Notched trowel, margin trowel
- Bucket, mallet, spirit level
Tips
- Decide the tile layout before installing it
- Check if the walls are plumb, after laying the wall tile
Time
- 6-8 hours for a surface of 100 ft2 / 10 m2, one diy-er
How to install wall tile in bathroom
Installing wall tile in bathroom
On the market, there are many products to choose from, so try to buy the tiles which fit best your needs and tastes. Nevertheless, make sure the bathroom tiles are designed to resist against water. Strange as it might seem, there are several types of ceramic tile that are not water-resistant. Consequently, pay attention before buying the ceramic tile from your local store. In addition, before placing the order, you have to measure the surface on which you are going to install tile (multiply the total length by the height of the wall), and add 10-15% for cutting waste.

Wall tile layout
Tile layout
Measure the height from the floor up to the ceiling. Then, lay your tiles on the the floor in a straight line, making sure you put spacers between them. Next, use a tape measure along the tiles to see how much you have to cut from the first row of tiles (you should install full tiles on the last row). In addition, you have to measure the width of the walls, to see how much you have to cut from the tiles around the corners. The tiles have to be wider than 2”/5 cm, otherwise you have to compensate from the opposite corner tile.
Wall layout
We recommend you to set up the layout of the wall tile from the very beginning. You can draw the layout on paper, or by using a computer software. In our case, we used Sketch-up to draw a random layout.
Smart tip: Remember that it is essential to pay attention to the exact dimensions of the room, otherwise you won’t get a proper sketch and the end result might not satisfy your needs.
Spreading adhesive on bathroom wall
Mixing tile adhesive
Mix a small quantity of tile adhesive in a construction bucket. Fill about 1/4 of the bucket with clean water and pour the thinset powder. Then, you should leave the adhesive to soak water for 5 minutes. In this manner, the water will activate the additives in the thinset.
Next, use a drill machinery with a mixing paddle to prepare the adhesive. Use your feet to lock the bucket into position, while you mix the adhesive with the paddle. From our experience, we recommend you to use average speeds at first and then increase it if needed.
Spreading out adhesive on wall
After you have prepared your bathroom walls, you can start installing the tiles. If the adhesive doesn’t fall of the trowel, it means that it has the right consistency.
Load a little adhesive on the trowel and use the straight edge to spread it on the wall. After you’ve got an even layer of adhesive, you should use the notched edge to comb it. Hold the trowel at 45º against the wall and press firmly, as to make sure the mortar bed is evenly distributed on surface.
Installing tile on bathroom wall
Installing tile in bathroom
Start installing the first row of full tiles from the most visible corner, when entering the bathroom door. Make sure the tiles are not scratched or nicked before you install them over the adhesive bed. Select only the best tiles, to get a neat look.
Smart tip: In order to lay the tiles properly, you have to twist them lightly, while you are pushing them firmly into the adhesive. After you have installed them, you should check if they are level and aligned.
Spreading out adhesive on bathroom wall
Continue spreading out the adhesive on small surfaces (as to prevent it from getting dried before you install tiles on the whole area), using the notched trowel. The pattern of the adhesive ridges is not important, provided the bed of mortar is even on the whole surface.
Installing wall tile spacers
Installing wall tile spacer
It is impossible to install wall tiles in bathroom properly, without using the right spacers. Generally speaking, tile spacers come in a large variety of dimensions, so it is up to you the type of tile you are using. Similarly, you could install small or large spacers.
The main role of the tile spacers is to help you maintain an even gap between the tiles and to ensure the joints are consistent. Work with great care and install the spacers every time you lay a tile on the bathroom wall.
Smart tip: Do not reuse tile spacers, as you will end up with a wrong tile layout. This is one of the biggest mistakes that can be done by an unexperienced diy-er. Not only the tile won’t be level, but they will be also vulnerable to impacts (they might break).
Installing wall tile in bathroom
In this image you can see an intermediary stage of our project. Consequently, you can notice the tiles are all level and the joints are even due to the proper installation of spacers. The tile pattern is not important, but if you use tiles of different colors, it is essential to decide the pattern from the very beginning.
Smart tip: Use the level on a regular basis, to check if the wall tiles are plumb. It is important to spot any mistake, as soon as possible.
Wall tile spacer
In this image you can see a close-up of a tile spacer. You should be able to notice that a tile spacer plays a fundamental role in the success of any tile project: it helps you install tiles properly and keeps the gaps even.
Smart tip: Remember that you can buy tiles that do not require the installation of spacers, at all. These kind of tiles are more expensive, but worth the money if you like their look.
Installing tile corner joints
Installing cut tile in corner
In most of the cases you have to cut the tile as to fit along the wall corners. Consequently, use a tape measurement to determine the dimension at which you have to cut the tile. Afterwards, you could use a score-and-snap cutter, a diamond blade or a wet saw, to make the cut in a professional manner.
The tile corner joints are very important when installing tile in your bathroom, as they are extremely visible, so you have to pay attention to this procedure. For an unique look, you can install corner trims, but make sure they match with bathroom tile.
Smart tip: You can notice that it is hard to spread out adhesive in such a small area using your notched trowel. Therefore, you have two alternatives: either you apply adhesive on a larger surface before installing the last two tiles, or use apply adhesive on the back of the cut tile, using a small trowel.
Tile corner joint
In this image you can notice the corner trim installed. We personally prefer the traditional way of installing corner tile, but it is up to your tastes. The greatest advantage of using corner trims is that it hides the poor cuts.
Smart tip: Install the corner trim properly, otherwise you will end up with an ugly gap between the trim and the wall. In most of the cases, the gap is created due to the use of too much tile adhesive on the wall.
Installing tile around bathroom window
Next, we also have to install tile around the bathroom window. This step is a little bit more difficult, as it implies a lot of measurements and cuts. Nevertheless, if you are using a level and a proper tile cutter, you won’t face any issues while tiling around the window.
Smart tip: Make sure the gaps between tiles are continuous from bottom up to top. If you pay attention to this aspect and make proper cuts, you won’t face any issues throughout the project.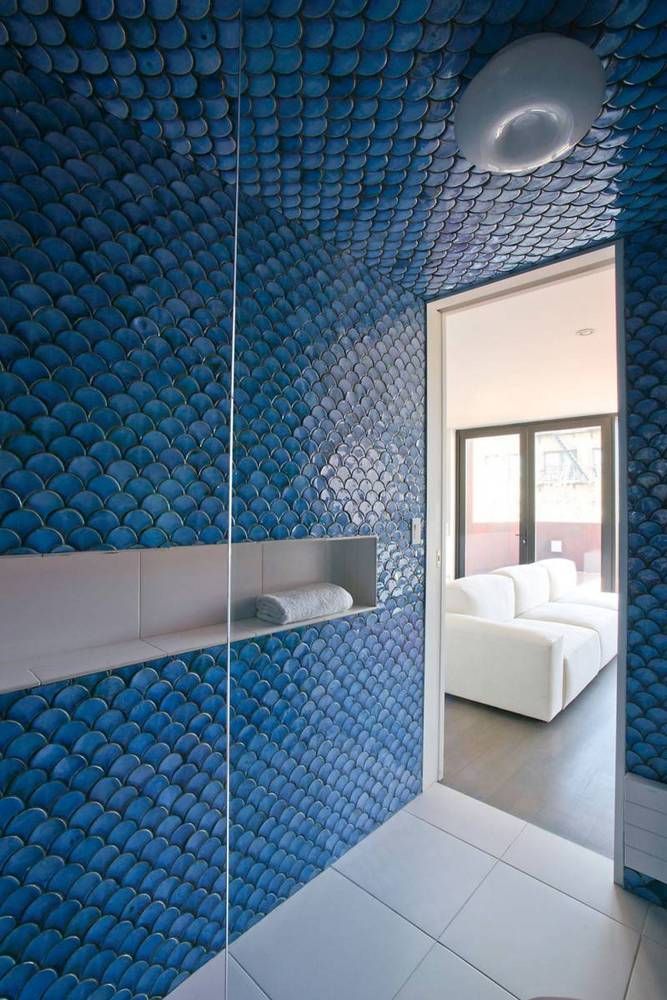
Exterior tile corner joint
There are more types of corner trim, on one hand there are interior corner trims, as on the other hand there are exterior corner trims. According to your needs and tastes, you can install both of these corner trims.
In addition, you can notice that the gaps between the tiles are continuous, even if we speak of the bathroom window. Use the edge of the trowel to clean the adhesive between the tiles, making sure you don’t move them from position. From our experience, we recommend you to clean the adhesive residues after several hours from the tile installation.
Smart tip: When installing exterior corner trims around a window, you have to use a miter saw, to cut it at 45º. Nevertheless, if the cuts are not perfect, you can fix the issue by using a little grout (of the same color).
Installing tile around window
After you clean the tiles and grout them, your bathroom window will look neat. Nevertheless, you could choose not to install tiles around the window, but we think that not only it would look better, but it also protects the walls from moisture and impacts. Therefore, you’ll see the results over time.
Cutting round hole in tile
When tiling the bathroom walls, you will face certain situations when you have to cut around pipes, drains or other obstacles. Consequently, you should use a hole saw drill bit, as to cut a perfectly round hole.
Smart tip: Alternatively, you can use tile nippers to cut out a roundish hole. Of course the fist option is better, but you can also do the job using the second method. If the hole is highly visible, you should buy the hole saw drill bit and attach it to your drilling machine.
Installing the last row of wall tile in bathroom
Installing last row of tile in bathroom
As we have already emphasized, you should install full tiles on the last row, as it is the most visible area from any corner of the bathroom.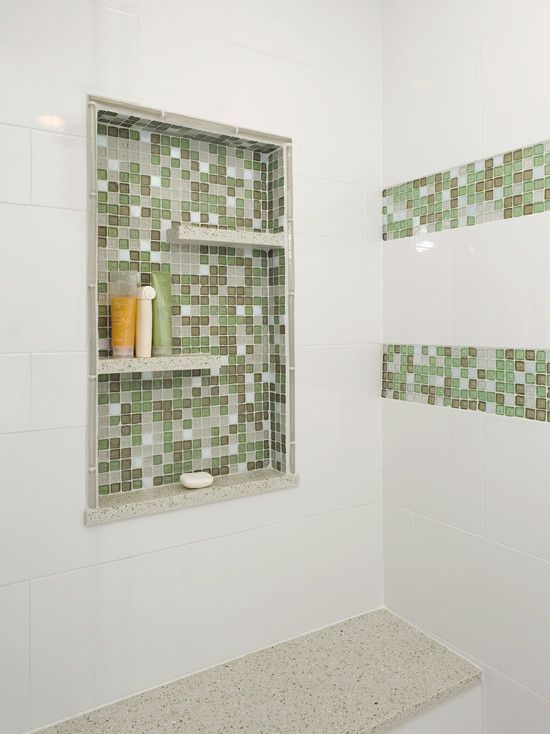 That is why, you have to make good calculations, before you start installing the tile in your bathroom, otherwise you might have to make additional cuts .
Tapping wall tile
In order to fix the tiles on position, you have to tap them either with a rubber mallet or by using your hand (we don’t recommend you to use this method, as you could injure yourself).
Use the level to check the alignment of the tiles, as after the adhesive dries out, it would be impossible to fix the problem. Use spacers to make sure the tile joints are even.
Wall tile in bathroom
After you have completed tiling the bathroom walls, you should also grout the gaps between the ceramic tile rows. You should also use a sponge and a bucket with clean water, to remove dust and residues off the tiles. In addition, use appropriate products to freshen up the look of your bathroom, every week.
Thank you for reading our article on how to install wall tile in bathroom and we recommend you to check the rest of our projects regarding ceramic tile. Don’t forget to share our projects with your friends by using the social media widgets. LIKE us to be the first that gets our latest projects and to help us create more free tutorials.
How to lay tiles on the wall with your own hands: the correct laying of tiles yourself
Tiles are the most common finishing material for wet rooms. In some cases, apartment owners make repairs on their own, laying ceramic tiles is one of the most difficult procedures. Let's see how to do this job correctly.
Tools
- Spatula with a straight edge is needed for applying adhesive to ceramic surfaces.

- Comb trowel allows you to remove excess adhesive.
- Rubber spatula for grouting joints.
- Clean containers for mixing mortar.
- Rubber hammer (mallet) allows you to seat tiles on the mortar without damaging the surface.
- Measuring tools: tape measure, laser and bubble levels, plumb line, rule.
- Cutting tools: grinder, tile cutter, glass cutter, ceramic pliers
The choice of devices depends on the complexity of the cut. In most cases, it is more convenient to manage with a tile cutter. The grinder is the most difficult tool to use for a beginner; when using it, it is imperative to use protective equipment for hands, eyes and respiratory organs. In addition, because of it, a lot of dust is produced. For curved cuts, it is better to use tongs. Read more about cutting tiles in a separate article
Leveling walls
Tiles must only be laid on even walls, otherwise problems may arise.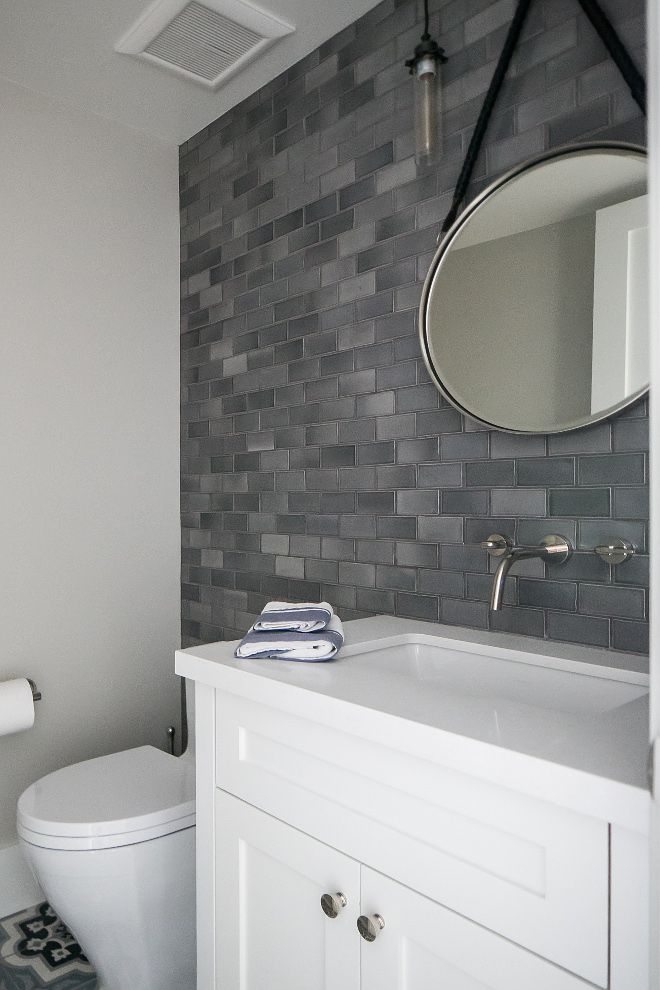 The tile can fall off, on the elements with decor, the differences will be especially striking.
How to detect irregularities
The wall may visually look even, because of this, alignment is not done and the tile is immediately started. In fact, this effect is deceptive, even small deviations (more than 5 mm) after cladding will be noticeable.
To detect deviations in the walls, you should pay attention to a number of points.
- Corners should be straight or close to 90 degrees, deviations will complicate the laying of tiles on the floor, the number of tile cuts will increase.
- The plumb test allows you to hit the vertical. If the wall has deviations to the bottom along this axis, then the load on the rope will hang at a distance from the surface.
- Applying a long bubble level is one of the quickest ways to check. If the tool does not rest with the entire sole on the base, then the wall has deviations.
Defects
Sometimes the wall has a flat plane without deviations, but there are local damages on it. Before laying, all these flaws must be eliminated. Defects are often related to the quality of the substrate.
- Brickwork must be plastered before gluing tiles. Particular attention should be paid to the seams: mortar leaks, bruises and blots must be eliminated.
- Concrete is characterized by sagging - these should be knocked down before leveling.
- If the wall is already tiled with the old tile, in most cases it is recommended to remove it, but laying on it is allowed.
- Old plaster should be filled with cracks and tapped to reveal voids.
You can read about repairing cracks in walls in a separate article
Is it worth removing the old coating?
Dismantling of plaster or tiles takes a lot of time, besides, you have to solve the problem of removing construction debris. Often the owners decide to lay tiles on the old finish, but there is a danger that both layers will fall off.
To resolve this issue, a simple construction rule should be followed: in multilayer structures, adhesion should decrease closer to the outer material. If the outer layer has a high peel strength, then it is likely that it will fall along with the base.
In some cases, materials with high adhesion (cement-sand mortar) lose their adhesion to the wall due to a violation of the technology. In this case, an air gap is formed between different materials. When tapping, the sound of surfaces with cavities is different, in this case, the builders say that the plaster “booms” - the adhesion of the material has decreased. If you stick a tile on such a surface, the glue will tear off the base.
If the wall is painted with oil paint, then the strength of its adhesion to the tiles should be increased. Usually, in this case, the entire base is not dismantled, but notches are made on it with an ax or other strong steel tool.
How to level the walls?
In some cases, wall irregularities are smoothed out by increasing the layer of tile adhesive. This is acceptable if we are talking about small differences (2 - 4 mm). The disadvantage is that tile adhesive is more expensive than plaster, and the thickening of the layer leads to poor adhesion. Consider the main methods of alignment.
Plaster suitable for brick, gas block and concrete walls. If the differences at the walls are more than 50 mm, then leveling with plaster is considered inexpedient from an economic point of view.
Read more about leveling walls with plaster in the article
Leveling with plasterboard involves the construction of a frame. At the same time, each wall takes 5-7 mm from the space of the room. In the bathroom, you can only use moisture-resistant drywall, you can also use GVL or akvalista sheathing.
When can I start laying tiles?
After completing the plastering work, wait for the mortar to gain strength. This usually takes one to three weeks. It all depends on the temperature and humidity level in the room.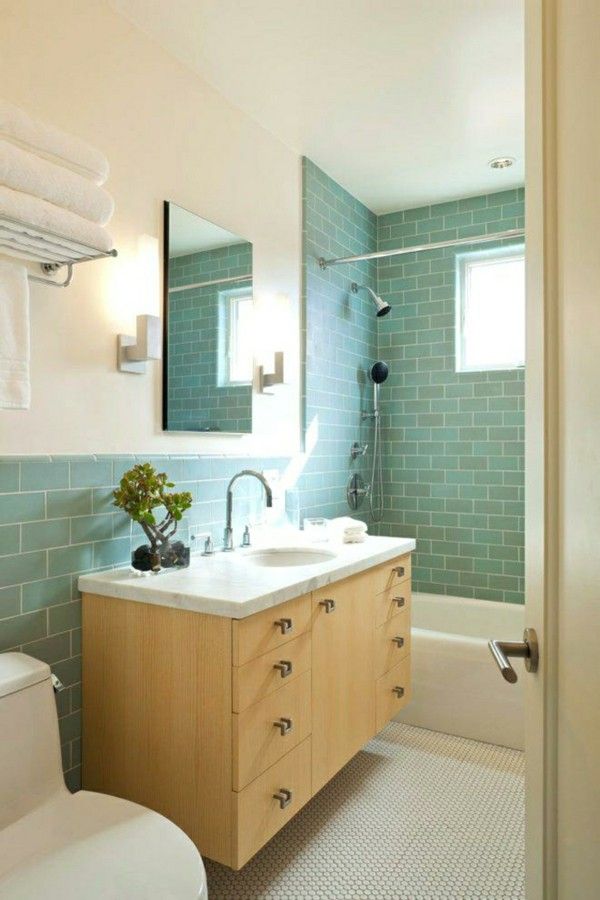 The most optimal temperature is 20 degrees, lowering slows down the solidification.
It is not recommended to force the process with a heat gun or directional light. Uneven drying leads to cracks.
Read the article about errors in wall plastering.
Preparatory work
Surfaces must be primed and waterproofed prior to tiling.
Waterproofing
We recommend waterproofing wet and damp areas in bathrooms. Processing can be both full and local. The choice of materials is also individual: the most budgetary option involves the use of polyethylene film, rolled and mastic compositions can also be used.
The choice of waterproofing scheme depends on the design of the house. In prefabricated buildings, where the sanitary cabin has not been dismantled in the bathroom, it is possible not to make a protective layer for all surfaces. Read more about waterproofing wet rooms in a separate article on the site.
Priming
These compounds should improve the adhesion of the adhesive to the substrate. The choice of soil depends on the nature of the foundation.
- Universal Primer will remove dust and slightly reduce water absorption. These compounds are suitable for most materials and cannot harm.
- Water absorption equalizing primers are needed for porous surfaces. They contain 10% or more solids. After drying, a protective film is formed, which does not allow the base to draw moisture out of the tile adhesive.
- Deep penetrating primers soak into the surface and strengthen it. Such emulsions are useful for fragile and loose walls.
- Betonkontakt should be used with care. It simplifies the application of cement and gypsum compounds on a smooth concrete base, but this is not always useful. This soil consists of a binder and an abrasive filler (quartz).
Concrete contact was originally intended for gypsum plasters, it sticks to the base and roughens the surface. Due to this, the gypsum can cling to the surface. For cement-sand mixtures, such a priming composition is not required, since they grow into the wall as a crystal lattice during the hardening process. Betonkontakt interferes with this process.
After applying the primer, wait for it to dry. In some cases, the agent is applied in several layers. Please refer to the user manual for details on how to use it.
Laying out
An important stage without which work cannot begin. The layout allows you to immediately think over the location of all elements and reduce the number of trimmings to a minimum. It is useful to pre-plan the placement of tiles on paper. Particular attention is paid to the line of adjoining walls to the floor and ceiling, as well as corners.
Distribution of elements
Sets of tiles are usually combined into collections, this is a single group of ceramic products in the same style, which is represented by background elements, borders and tiles with decor.
It is possible to lay out the wall with single-colour background tiles only. This option will be the most budgetary, because the background tile is usually the cheapest in the collection. Decor and borders are best placed in places where they will always be visible. Placing a tile with a pattern or a knot behind the shower cabin does not make sense. You also need to make sure that such tiles do not have to be cut - usually the trimmed decor always looks bad, there is a feeling of randomness and ill-conceivedness in the interior.
Types of layouts
According to the layout, the layouts are horizontal, vertical and diagonal. All these ways of arrangement affect the pattern and ornament. The easiest for beginners is the horizontal method, and with the diagonal there will be the largest number of trimmings.
The layout should start with drawing a row, for this you need to find out how many whole tiles are included along the length of the wall. Trimmings of less than half of the tiles at the corners do not look aesthetically pleasing, so we subtract one tile from the resulting number, and align the rest in the center. So we get a symmetrical layout, and the trimmings at the edges will be more than half the tile.
This method is associated with an increase in the consumption of materials, but there is another nesting method that is based on masking short cuts. They can be hidden behind the washing machine, shower, hanging cabinets. It is better to always lay solid tiles on outer corners, leave short pieces at the inner joints of the walls.
Before laying out, it is recommended to check the dimensions of the room with a measuring tape. Also, do not forget about the seams (2-3 mm), which must also be taken into account in the calculations.
When laying vertically near the ceiling, it is better to place solid tiles, and lay the trimmings next to the floor.
Work in progress
Laying tiles on the wall in the bathroom should be combined with other finishing operations.
- Measuring the dimensions of the room
- Laying the tiles
- Floor screed
- Leveling the walls
- Installing the support under the second row on the wall and laying it
- Laying the subsequent rows
- Installing the floor tiles
- The first row on the wall
This order of work is due to the fact that the laying of tiles on the wall starts from the second row, and not from the first and they do it before finishing the floors, but after the screed. The first row is usually edged and is performed after the floor.
Support for the second row
From the floor we need to measure the distance equal to the first row. Usually this size is taken from the layout. If the first row is solid, and trimmings are placed near the ceiling, then the size of the seams and the thickness of the floor tile along with the mortar must be added to the height of the tile.
At this height, you need to make a horizontal mark, for this you can use the laser level. Along the line we fix the support under the second row, it can be made from a wooden lath or from a drywall profile.
If the layout is diagonal, then the guide must be fixed at an angle of 45 degrees to the floor.
Preparation of tile adhesive
The adhesive is made from a dry mix, before mixing it is recommended to read the instructions on the package. To do this, you need a container and a drill mixer. All glue preparation equipment must be clean, as particles of the old solution can complicate the work and ruin the seam.
Violation of the consistency of tile adhesive is one of the most common mistakes, in the article on our website you can read about other shortcomings when laying tiles.
The tile adhesive must be suitable for the humidity and temperature conditions of the room. For the bathroom, it is preferable to use a moisture-resistant composition.
Laying the first row
Start work after the primer has dried. To apply the adhesive, you will need a regular and comb spatula, a level and auxiliary tools to set the same seam size. The adhesive can be applied to the wall, to the tile itself, or to both surfaces. The latter option is used for large deviations in the level of the walls (up to 5 mm). First, the solution is smeared on the surface, and then the excess is removed with a comb.
According to the quality of the base, the tooth of the tool is selected, 6 mm is suitable for even walls, 8 mm is the average option, and 10 mm is best used for uneven surfaces. If the solution is applied to both the tile and the base, then the strips from the comb on different planes should be perpendicular (on the wall - horizontally, and on the tile - vertically). Also, large combs are used for large fragments of tiles.
Examples of incorrect laying on "linden"
Avoid circular movements with a comb, in this case the adhesive is distributed unevenly over the surface of the tile: in the corner it turns out little, but on the opposite side - a lot. Also avoid laying on "linden".
SVP (tile leveling system)
In order for the seam to be the same size everywhere, different devices are used: matches, crosses, SVP. The first option was often used in the Soviet years, but now improvised means are practically not used. Crosses are the most affordable leveling device, they are inexpensive and readily available. SVP (tile leveling system) is a more advanced device, it allows you not only to set the same width of the seam, but also adjust its depth, which ensures the same level on the entire surface of the wall.
After installation, the tiles are tapped and checked with a bubble level.
It is better to trim the tiles after all solid elements have already been glued to the wall. In this matter, it is wrong to focus on the original markup, as small flaws or irregularities can fail.
When the grout has set, but not yet completely dry, two important procedures must be remembered: the removal of the crosses and the stitching. If the alignment systems are not removed, then after the adhesive has set, they will be difficult to remove and some of them may even remain inside. Jointing is needed so that there is room for grouting, this procedure can only be done when the solution has not yet hardened.
Grouting
Immediately after gluing the tile, wash its surface so that dirt does not interfere with grouting the joints. If this is not done, then it will be difficult to wash the dried glue. The seams are filled with a special composition, a fugue, it protects the inter-tile space from moisture and destruction.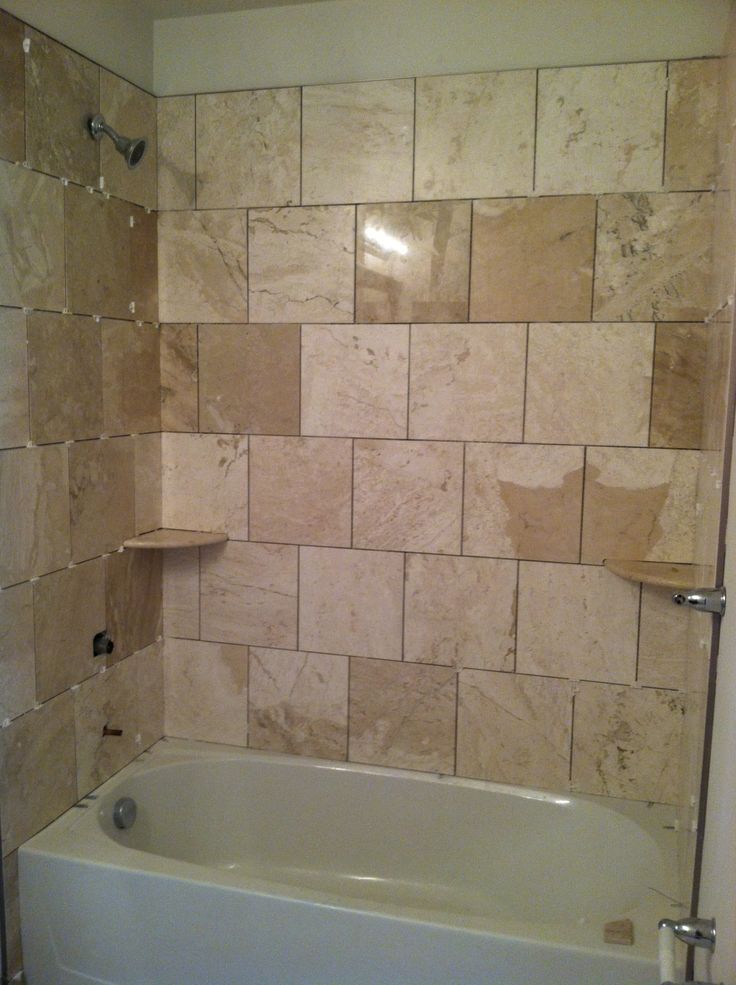 The grout mixture is applied with a rubber spatula, the composition should completely fill the recess.
After grouting is completed, do not forget to clean it from the tiles. To do this, you can use detergent and a sponge, but do not use a product with dyes, because it can change the color of the fugue.
Read more about errors when grouting tiles in a separate article.
Laying tiles on the wall with your own hands
- Home
- Articles Laying tiles on the wall Do-it-yourself tile laying Instructions for laying tiles
1. Surface preparation for cladding
It is unrealistic to simply take and start gluing ceramic tiles on the wall. Firstly, laying always starts with at least 2 horizontal rows. Secondly, the very surface of the wall must first be prepared, leveled, strengthened and removed various debris.
The final result of wall cladding with decor from the Armonia collection by Ape Ceramica.
The surface for laying tiles can be leveled or prepared as follows:
-
Plaster the surface along the beacons with a cement-sand mortar, if the walls are generally curved or not finished in any way.
-
Putty the walls with putty if the old plaster is of normal strength, but there are slight irregularities on its surface.
-
If the surface is drywall, then a fiberglass mesh is mounted on it and the entire area of \u200b\u200bthe wall along the mesh is puttied with cement putty or tile adhesive.
-
If the wall is puttied with gypsum putty, then to increase adhesion with tile adhesive, the entire surface is swept with a brush or broom, after which a penetrating primer, betogrunt, betokontakt or their equivalent is applied to the entire wall area with a roller.
Attention!
If priming is planned with a penetrating primer, it is imperative to sweep the surface from dust.
 If this is not done, the wet dust will curl up and roll over the surface with a roller, as a result, crystallization will occur - a thin film that does not increase adhesion, but, on the contrary, can make the adhesive not adhere to the wall at all.
 After all the necessary actions to level the surface, it is necessary to accurately determine the future location of the tile on the wall itself. To do this, you first need to find the highest point of the floor at the bottom of the wall. If the floor is not yet tiled, a long bubble level is passed along the perimeter of the room at the base of the wall and, thus, the area where the screed is most elevated is determined. In this place, 1 mark is made on the surface of the wall. Further, from 1 mark, about 10-15 mm are measured up the wall and a second mark is made - this will be the zero of the future floor tile.
Leveling the surface of the wall on which it is planned to lay the tiles.At the second stage, the height of the facing material, which is planned to be laid on the wall, is precisely measured with a tape measure.
 For example, the height of the tile is 30 cm, which means that this distance is measured from the previously found zero point up the wall surface and a mark is made. After that, a long bubble level is applied to the obtained mark, it is set to an even horizontal position and a straight line is drawn along the entire length of the wall along the level.
 All ceramic wall tiling will be done from the line described above. However, so that the tile does not slide down under its own weight, it is necessary to temporarily mount the stop along a solid line to the wall. As a stop, you can use a flat edged board, the remaining unnecessary metal profile or lining panel. Temporary mounting of the stop to the wall is carried out with ordinary metal dowels.
Popular wall tiles
Kerama Marazzi Russia
Blanche tile white edge 9.9x20
Article 19040 N
Format cm 20x9
1 234 ₽
Watch
Kerama Marazzi Russia
Porcelain tile Colliano ornament 30x30
Article SG914500N
Format cm 30x30
927 ₽
Watch
Creto Russia
Porcelain tile Calacatta extra white 60.
 7x60.7
 Article H90510
Format cm 60x60
2 220 ₽
Watch
Creto Russia
Forza Calacatta White Wall 01 25x60
Article A0426Y29601
Format cm 60x25
Watch
Creto Russia
Effetto Wood Ocher 03 25x60
Article R0425K29603
Format cm 60x25
1 650 ₽
Watch
Creto Russia
Effetto Base Gray Wall 01 25x60
Article A0425h39601
Format cm 60x25
1 386 ₽
Watch
Ragno Italy
Decor Frame Decoro Milk 25x76
Article R4YM
Format cm 76x25
3 920 ₽
Watch
Carmen Spain
Nomade Turquesa porcelain stoneware 13.
 9x16
9x16 Article
Format, cm 16x13
5 740 ₽
Watch
All collections of wall tiles
2. Determine the location of the future vertical cutting row
The wall is prepared, the tile stop is mounted, however, before you start laying the tiles on the wall, you must also decide where the vertical row of not a whole tile will be located. To do this, you need to measure the width of the tile and the total length of the wall. The length of the wall is divided by the width of the tile and determines how many full vertical rows of tiles will fit on the wall. As a result, there will be a small distance. If this distance is less than half the width of 1 tile, then such a narrow wedge on the wall will look ugly. In this case, two vertical wedges are made on the wall at each corner. If the distance described above exceeds half the width of 1 tile, then such a vertical row of cut tiles is placed in the corner that is least accessible to the eye.
Tip!
The area on the wall surface, which is the least noticeable, is located behind the door to the room or on the side of the entrance in the opposite corner.
To lay tiles on the wall, you need the following tools:
Production of working glue:
-
Mix the entire substance with a perforator with a mixing nozzle in the drilling mode until a homogeneous thick mass is obtained;
-
Leave the resulting adhesive mass for 10 minutes at rest, then mix the entire substance again.
3. The process of laying tiles on tile adhesive on the wall
First of all, the wall cladding is made with solid tiles, and cutting is done towards the end of the work. The prepared working tile adhesive is applied to the wall with a spatula or trowel and distributed to create a layer of equal thickness using a comb. Then the adhesive composition is applied to the reverse side of the tile and distributed in the same way.
 The tile is applied to the wall, resting on the mounted stop, and slightly pressed.
 In a similar way, several more ceramic tiles are laid nearby. After that, a level is set vertically on 1 first glued tile and with the blows of a rubber mallet it is given an even vertical position. Next, the level is applied to the entire row of 3-4 tiles horizontally, and the rest of the tile is adjusted according to the first 1 tile set according to the level. After leveling a small row of tiles, PVC crosses are placed in the tile joints.
On the first day, it is desirable to lay out the maximum area of solid parts of the facing material. On the second day, first of all, a vertical row of cut tiles is laid out on the glue. After that, bring the entire lining to the ceiling. On the third day, you can safely dismantle the stop nailed to the wall and proceed to finish the lowest horizontal row. Before gluing the lowest row of tiles, you first need to cut and prepare a dozen small strips of masking tape and chop more chips of different sizes from a wooden block.
The sequence of work when finishing the bottom row is similar. The glue is applied and distributed on the wall and the back of the tile, the tile is applied to the wall and leveled using a level and mallet. However, under the lowest horizontal edge of the tile, you will need to pick up and insert wood chips, while crosses are pre-installed in the upper section of the tile. In principle, wooden chips are enough to temporarily fix the tiles on the wall until the glue hardens, but to be sure, the glued and exposed tiles of the lower row are additionally fixed with the tiles from the upper row with strips of wide adhesive tape.
Leveling rows of tiles with PVC crosses.
4. Grouting
A few days after the wall is completely finished, using a knife and pliers, PVC crosses are removed from all tile joints. Also, fixing tape and bottom wood chips are removed from the bottom tile. All the seams between the tiles are passed with a sharp knife blade to remove excess glue and, if possible, deepen the seams.
-