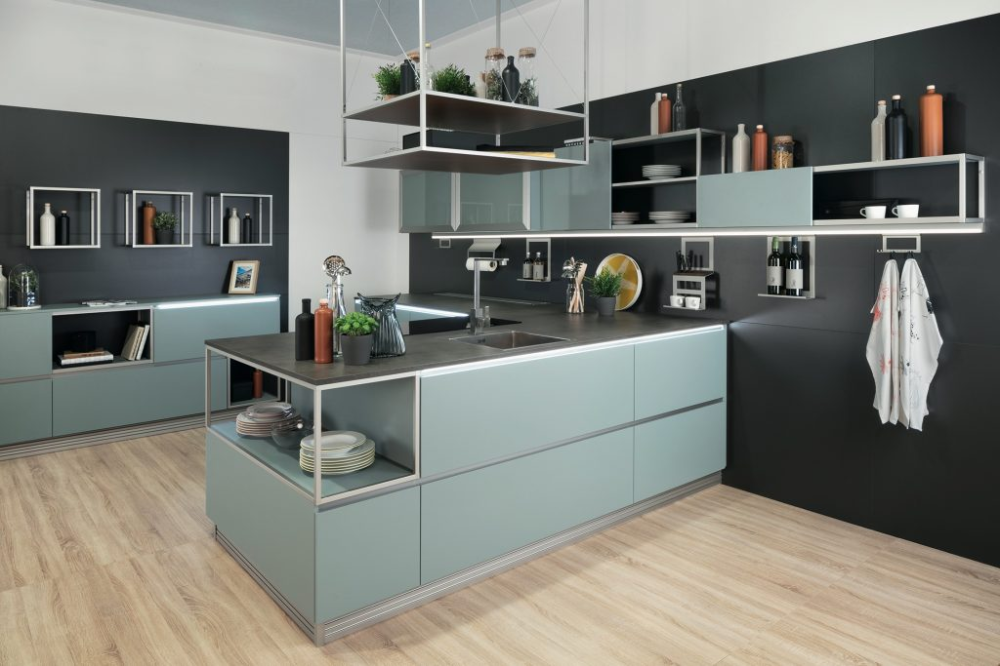
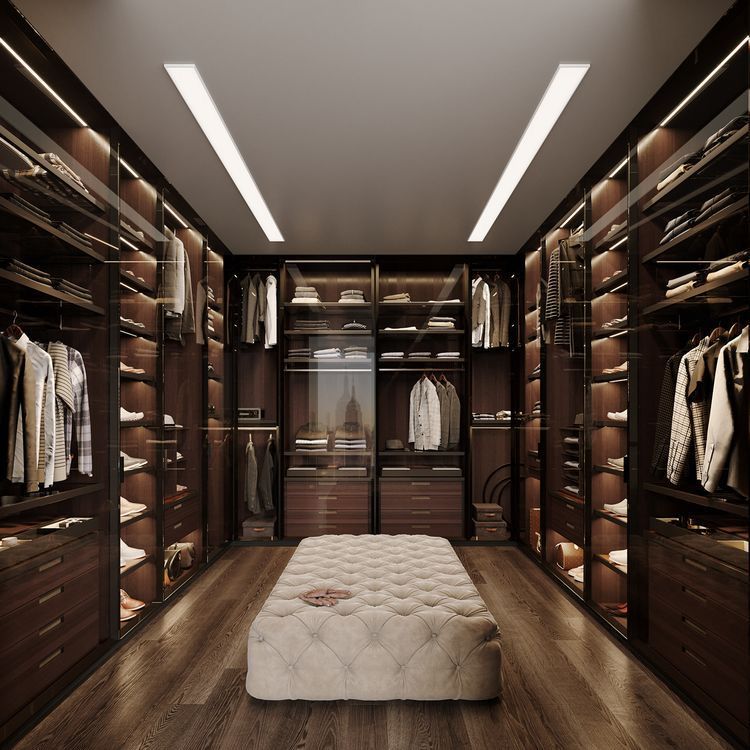
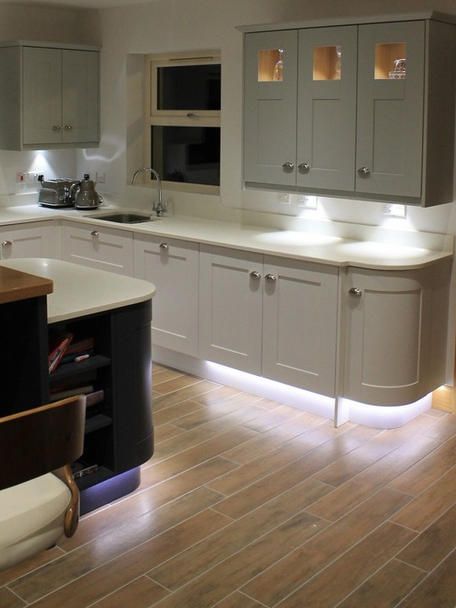
Plinth for kitchen
CAPITA Leg, white, 4 1/2"
PerfectCynthiaJust what I needed for a piece of furniture I made. They brought it up to the perfect height and look beautiful.5
Nice styleMARGARETEWorks great for what I wanted and like how it looks.5
GoodDIGNAI got this to put on the HUAGA sideboard. Just know that if you want to move the table from one play to another ; you must pick it up and move it, do not use the leg to slide it. These leg would not hold and will break if move that way. But beside that. I love it.5
Solid and good lookingLINDADue to uneven floors and old plaster-and-lathe construction, the suspension rail was inadequate for one of my cabinets. I bought these feet which have been worth every penny. Although I have the toe kick, this product is attractive enough to be visible.5
Great choice for cabinets on carpetKristineQuality and Value. Well made, well packaged. Looks great and has enough adjustability to compensate for unevenness of the floor. I used 6 of them for a 48" wide cabinet. Since the cabinet sits against a wall on carpeted floor, we adjusted the front legs to be longer to compensate for the carpet tack strip along the back.5
solidAnnjust what I was looking for. Using them to raise a platform for dog training, was suggested in a forum. fabulous quality, stable, solid.5
Like it alot!IgorAdded these to 40" sektion wall cabinets so I could have a taller island for my height. Love how they look.5
Good LegsRandiGave my cabinet the lift it needed4
Sturdy LegsJeffreyWe bought these legs for a not obvious use, to hold up our Kallax bookshelves and they worked perfectly.5
StandABRAHAMGood quality stuff5
Recommend this productLucyRecommend this product5
Perfect. Looks nice and clean.RICHARDPerfect. Looks nice and clean.5
Used to increase heightJeanetteI've bought several sets of these over the years. I've used them to increase the height on furniture. I used them to increase the height on the IKEA cubes to make a island in the kitchen. Looks very nice5
work great for my needsCHRISTINEwork great for my needs5
No badYassarNo bad5
Adds a bit of eleganceBRIANLove these metal legs in place of kick boards. Raises up the cabinets and gives a nice richer look to the kitchen and island. Individual leveling helps with warping floors in an older home too.5
Worked great!JANEUsed to hold up KALLAX shelving (also attached to wall). Makes the shelves at a better height for us.5
Need Different LengthsWAYNEThese are nice legs, and way better then the plastic alternatives. My only complaint is that they only come in 1 length. I was installing 15' of cabinets against one wall in my garage. Because most garage floors have slope built into them I had to cut the legs at one end, and shim them with 3/4" wood at the other end. If anyone is wondering, the plastic plug insert can be pulled out of either end of a leg, and then it can be cut with a plumbing pipe cutter.4
Legs MetalLauraWork well. Can use clios from plastic legs to add baseboard if you want5
Great legsDavidThey are easy to install, great price, durable and look great. 5
5
SEKTION Leg - IKEA
Do not buy these- DO NOTSun C.I bought our whole kitchen and purchased 7 sets of these. They are so flimsy and broke when we tried to move our kitchen cabinet in place. Slight slide to put cabinets in place during install will break these. I couldnt put my kitchen together and now have to look for alternate legs for support. Very very frustrating1
Cheaply made and not durableBrittany W.We renovated our entire kitchen with IKEA. When we went to install the cabinets, we had to put these feet on. These feet are plastic and EXTREMELY fragile. Every time we tried to move or install a cabinet, at least one foot broke each time. If they broke in a matter of minutes putting them on, I can only imagine how quickly they would break when the cabinets had any items in them. We ended up getting the capita metal feet, drilling them into the base of the cabinets and using the capita feet instead. Then, we only used these sektion legs to hold the tie kicks plate.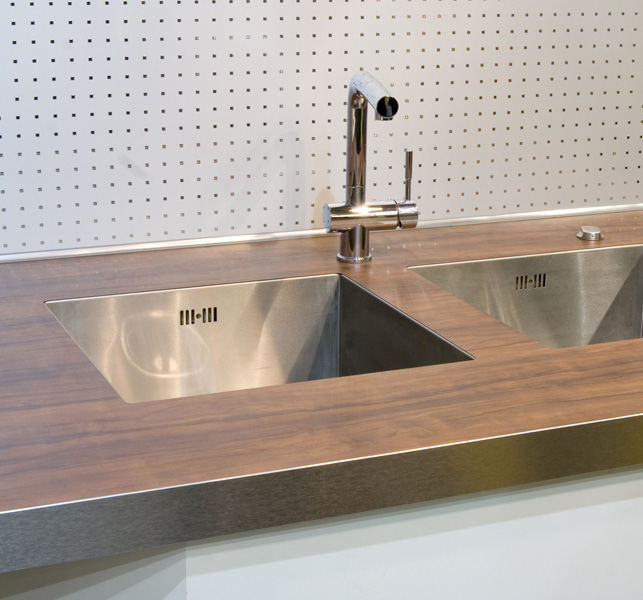 IKEA should switch to metal feet as the default for their kitchen cabinets. I was very disappointed and will be returning most of these sektion legs.1
Waste of moneyAndrew M.They are cheap plastic that break very easy. Horrible design1
Yes, they’re that bad…tracie c.Like many still shocked ikea could even find such low quality plastic… even moving slowly and carefully, they don’t stay on well at all so a small bend and they break. Frustrating after spending a pretty penny on cabinets :-/ if possible avoid this product at all costs1
Easy and secure assemblyJudI was not sure on these. But, once I actually assembled them, and placed them, made leveling my cabinets a breeze and not a struggle. My only concern is the listed load rating.5
GarbageYilin L.So flimsy for such a heavy cabinet. Broke into pieces with slight move, even tho we managed to get the cabinet up without breaking the legs. Cannot believe this is an IKEA product. And it's ugly AF.1
easy for what they areChad H. Do I wish they would hold up to having to tip the cabinet after installing a bit better - absolutely. Do I think they are over priced for what they are? Yes. But do I hate them? No - they are a necessary item and not likely to change any time soon.4
Returning theseChristyThese legs are absolute garbage, will be returning. Purchases the stainless steel ones instead1
Ikea, please discontinue this!Emmanuel I.I can't believe this passed Ikea quality control. These legs break even as you are lifting the base cabinet up. How would Ikea let a flimsy plastic hold a base cabinet and countertop plus all the other things that will be on the countertop? Don't waste your time and money.1
Not reliableMONICA M.They are so flimsy and brake with the wrong movement , as our at all cost and look for a different one1
Cheap plastic legsAnthonyCheap plastic legs2
Dangerous piece of junk!!Sinan B.All the legs got broken while we were lifting the high cabinet. Leg base and legs itself don’t stay put. We almost got injured while trying to pull the cabinet up, it fell on the floor because legs got broken, and yes we screwed the legs all the way, we didn’t leave any weak spot, they are all weak due to poor quality material anyway. Now we have 90” tall cabinet stays on the floor. What kind of engineering and junk material is this? It almost got us killed. Cabinet legs should be metal or wood not flimsy plastic.1
The cabinet legs are terrible.Larissa J.I love my new Ikea cabinets, assembly went great and following directions, it was not hard to put together. What was extremely difficult was maneuvering the cabinet into place with these flimsy legs that fall off once the cabinet is right-side up. We knocked them off while moving the cabinet into place, and with an 80" tall cabinet, one person could not hold it up to reassemble the legs. They are made of cheap plastic and don't even attach to the bottom of the piece. The cabinets themselves seem quite durable, but I am concerned about the integrity of these legs, and if the cabinets will be safe to use once any additional weight is applied (ie, I put things in the cabinets). Overall, the MOST frustrating part of assembling and installing my new cabinets has been these legs. They are CHEAP and poorly attach to the cabinet. I did not see an alternative leg to be used for these cabinets, I looked.1
New Cabinet InstallEricHad SEKTION cabinets installed and they are great looking.5
My new kitchenJoanWhile assembling ANYTHING is not fun, it wasn’t hard. The end result is so worth it. I don’t own this property so the project required the most cost effective and stylish I could find. IKEA Sektion cabinets fulfilled both parameters. I’m thrilled with the final result.5
Another partAngelaMore money for parts2
UselessMatthewSave your money not worth the price. Kept coming off. More for looks not mobility1
love itTISHlove it5
They didn't stay in placeRosemaryThey didn't stay in place and were flimsy. Kept falling out of cabinet and bending white trying to install cabinet2
Breakaway legsDAVIDDon’t try to slide the cabinet after you install these - the legs won’t stay on. If you lift the cabinet, then set it down, you should be fine.3
Plinth for the kitchen on the countertop (15 photos) - how to choose and install
When installing the kitchen set, the finishing touch of the furniture ensemble is the plinth for the kitchen on the countertop. In addition to the decorative function, the wall plinth for the countertop also performs a practical task, preventing the ingress of crumbs and the leakage of liquid between the edge of the table and the wall. But in order for this element to cope with the task assigned to it, it is important to correctly approach its choice.
Kitchen skirting boards are available in different shapes. The difference between them lies in the degree of rounding of the corners and the options for the execution of decorative elements.
The dimensions of the elements generally have standard values. On sale there are:
- equilateral - corners measuring 22x22 mm;
- versatile - corners with a fixed width of 22 mm, the height of which can reach 190 mm.
Almost all types of kitchen worktop skirting boards are designed to allow electrical cables and wires to be inserted into the mounting rail cavity.
At the same time, in case of need, they always remain free access.
What kind?
Depending on the material of manufacture, there are several types of kitchen skirting boards on the worktop:
1. Plastic - made from polyvinyl chloride. Due to co-extrusion, which plastic blanks are subjected to after molding, their surface can be painted in any pattern and color.
2. Ceramic - products made of artificial stone and porcelain stoneware are mounted vertically by leaning against the wall.
3. Aluminum – Aluminum products offer the highest level of practicality. They are quite elastic, thanks to which they are able to repeat minor errors in the geometry of the walls without damage.
Thanks to the use of modern technology, plastic wall skirting boards for countertops can easily imitate wood or natural stone.
Aluminum kitchen skirting boards are available in different versions. They can have a polished or embossed surface, decorated with a colored finish or without it.
The main advantage of aluminum countertop skirting boards is their resistance to high temperatures. Due to this, they can be safely placed next to a heating surface, for example, near the built-in hob.
Ceramic kitchen countertop skirting boards are renowned for their durability.
They are not afraid of heat and moisture, due to which they retain a presentable appearance throughout the entire service life.
Criteria for a competent choice
When choosing a kitchen skirting board for countertops, they are guided by two main parameters:
- technical characteristics;
- headset design solution.
Ideally, the width of the molding should match the gap between the edge of the worktop and the wall.
When choosing the version of the molding, the style design of the room is taken into account. The corner should not only favorably emphasize the color of the tabletop, but also be in harmony with the finish and fittings of the headset.
Installation instructions
Installing the skirting board yourself is easy. The element is mounted after the installation of all furniture and household appliances is completed.
Before attaching the skirting board to the kitchen worktop, the pre-cut pieces of the mounting rail must be fixed. To do this, markings are made on the wall in order to correct the location of the molding using the building level.
The rail itself is attached to the base using dowels or self-tapping screws 16 mm in size, or “liquid nails”. It is easiest to make holes for fixing the element with a drill. Professional pneumatic tools perfectly cope with this task.
Depending on the configuration of this element, fastening is carried out in one of three ways:
- Concealed - when the rail is completely covered by the outer side of the molding.
- Built-in - used for designs in which the sealing silicone edges are located on the mounting rail.
- Consignment note - involves laying the slats directly on the countertop with the subsequent installation of a molding on it.
In the concealed fixing method, the elements are connected by means of plastic inserts installed at the inner and outer corners. To do this, the outer part of the kitchen molding is inserted into place and snapped into place. The ends of the structure are covered with plugs.
Overview of worktop skirting boards
Author Angela To read 7 min Views 70.8k. Posted
So, you have renovated the kitchen and installed a new kitchen set in it. Well, or they returned the old one to its original place. Now it remains to make the final touch: purchase and install a plinth for the countertop in the kitchen. After all, this will not only give completeness to the appearance of the kitchen set, but also prevent liquid from leaking and crumbs from falling into the gap between it and the wall.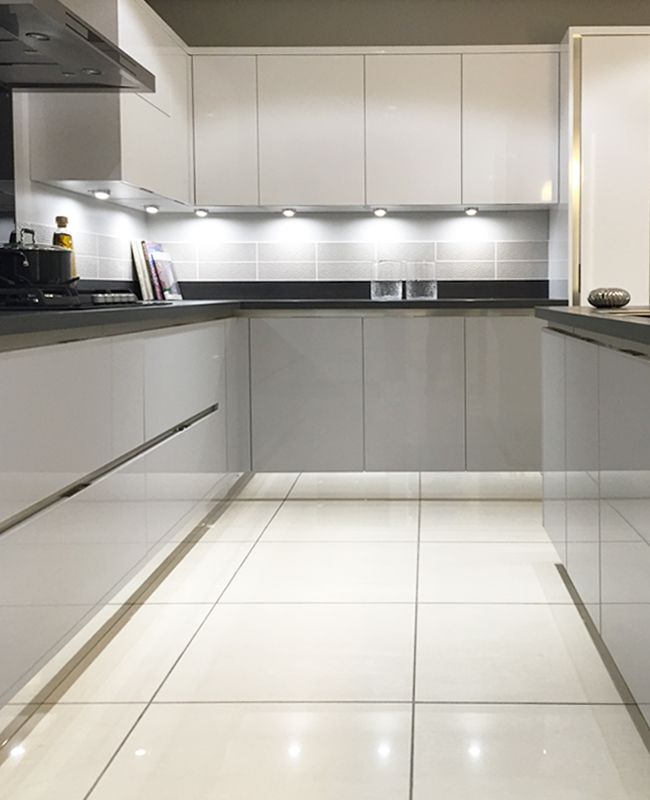
This article is an overview of kitchen skirting boards for countertops and instructions for installing them yourself.
Content
- Types of moldings for kitchen countertops
- Plints made of plastic
- Aluminum profile for countertops
- Pints made of artificial stone and marble.
- Dockeys in the form of profiles
- Installation of a kitchen skirting board for worktops
Types of moldings for kitchen worktops
Sometimes a kitchen skirting board comes with a ready-made set, and then you just have to install it in place. If not, you will have to go to the store and choose a desktop molding that is suitable in appearance and material for your headset and kitchen accessories.
Plastic kitchen skirting board
Plastic kitchen skirting board is made from PVC. Co-extrusion, which the profiles are subjected to after molding, makes it possible to give their surface any color and pattern.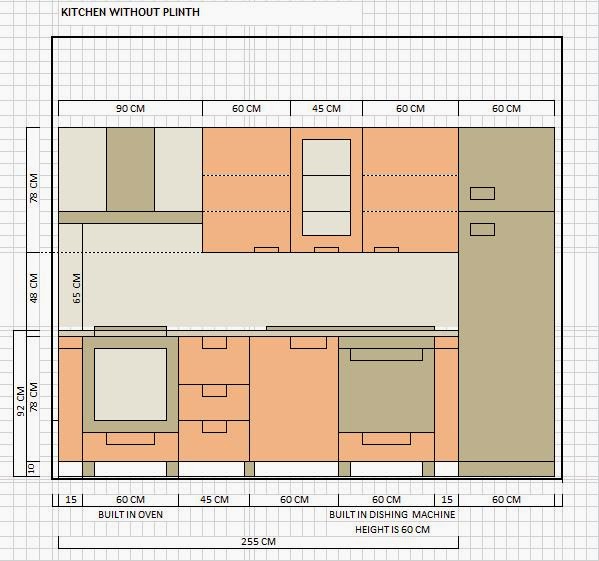 As you can see by looking at the following photo, such a molding can easily imitate artificial stone, marble or wood. This is a fairly popular way to finish countertops.
Plastic kitchen profiles are quite elastic, which means that they can repeat small errors in wall geometry. The price of this finishing material is relatively low, and its installation on the countertop will not require much time and effort. The negative point is that mounting it next to the built-in hob is undesirable, since PVC does not tolerate high temperatures very well. But as a molding for a sink box, plastic would be an excellent option.
Plinth furniture, kitchen. Manufactured from PVCAluminum worktop profile
Next in popularity after the plastic one is the aluminum worktop skirting board. It will cost a little more than a PVC molding, but in operation it will show itself better. Aluminum will last a very long time, it will be easy to clean it from dirt. In addition, metal molding has heat resistance that plastic does not, and it can be installed near heated surfaces.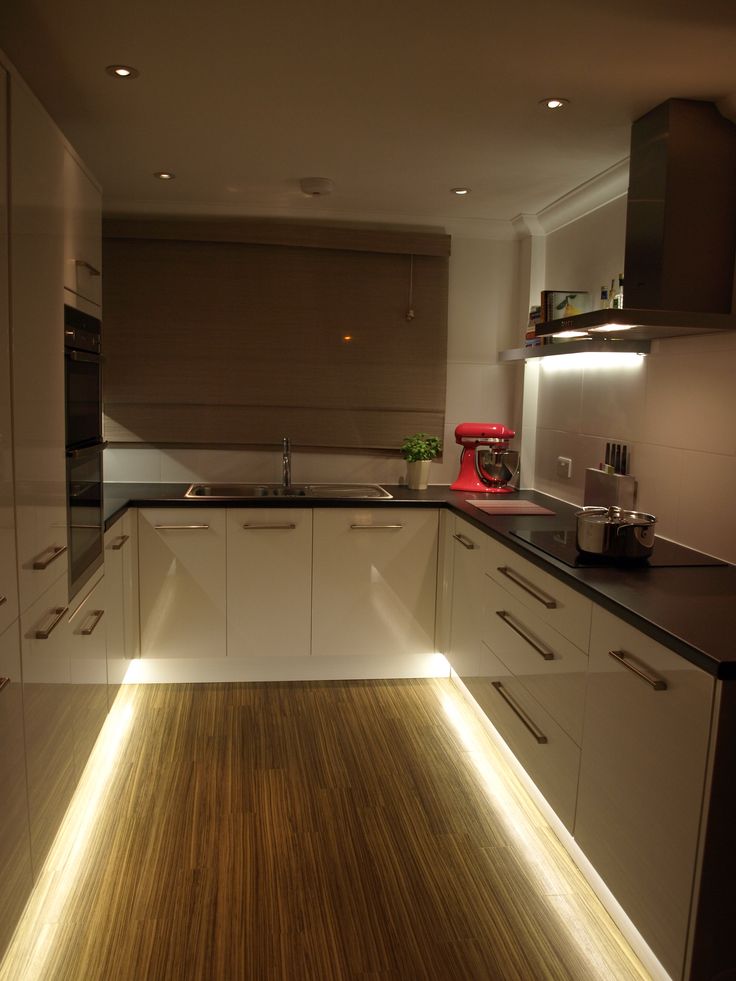
Aluminum kitchen skirting boards are available in different versions and with different types of coatings. The outer surface of such a molding can be plain, embossed or polished aluminium, with or without interchangeable colored trim. In the photo below - a furniture plinth with a glued colored strip: a molding and a separate tape are purchased separately, which will match the color of a particular kitchen set.
Kitchen skirting board, aluminium. The color is changed by gluing a special tapeKitchen moldings made of artificial stone and marble
These moldings are called side moldings, as they are mounted vertically, as if leaning against the wall. They are made from the same materials as the countertops. The installation of such a molding is carried out on glue, the same that is used during the sealing of the joints of the countertop parts: the sealing of the joints is very good as a result.
Stone kitchen skirting boards have a long service life and excellent appearance, they are not afraid of heating.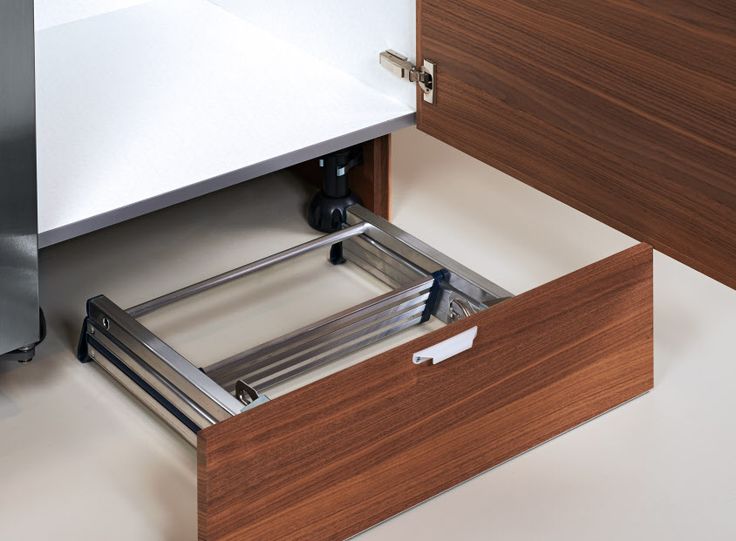 Such a molding also has disadvantages: a marble or stone plinth for a countertop does not bend at all, and therefore requires perfect alignment of the wall to which it will adjoin; high, compared with plastic or aluminum, price.
The principle of choosing a kitchen skirting board for a worktop
The choice of moldings for kitchen worktops is based on two parameters:
- appliances in the immediate vicinity.
- Accounting for the style in which the kitchen set is made, as well as the type of accessories that are located near the molding. So, if you have roof rails installed under the hanging drawers, then it makes sense to choose a plinth that is similar in appearance to them.
In general, the most popular option is to match the molding to the color of the countertop. However, a profile selected, for example, for the material of the sink, will look no worse, as in the photo below.
[su_label type="important"]Important:[/su_label] [su_highlight background="#F7D1CD"]it is best to choose a finish for a new kitchen worktop at the same time as buying the latter. In this case, you will be able to attach samples of moldings to the kitchen module and "live" evaluate which of them and how well they fit.[/su_highlight]
Installation of skirting boards for kitchen worktops
In principle, the installation methods for plastic and aluminum kitchen moldings are very similar. Roughly speaking, first fix the mounting rail, and then snap the outer part of the plinth onto it. The rail will be plastic in all cases, but its shape, like the shape of the kitchen plinth itself, may vary.
Differences in profile shapes
There are three options for fixing the skirting board to the worktop. The first, as in the photo, is when the mounting rail is completely covered by the outer part of the molding. Silicone strips, which ensure a tight connection between the profile and the tabletop, are also located on top. This design is more typical for polyvinyl chloride kitchen baguettes. The connection of elements in the same plane, as well as in external and internal corners, is ensured by special plastic inserts, as with PVC floor plinths.
The next type has silicone sealing edges on the mounting rail, and the outer part is just a decorative element. Such a structure often has an aluminum kitchen plinth for countertops. They are also found with the outer part of PVC, but less often.
How to install a kitchen plinth: mounting rail, with soft strips located on it And the third view. The mounting rail here lies flat on the countertop, and the molding is installed on top. As for the silicone strips, the bottom one is part of the mounting rail, and the top one is attached to the groove on the top.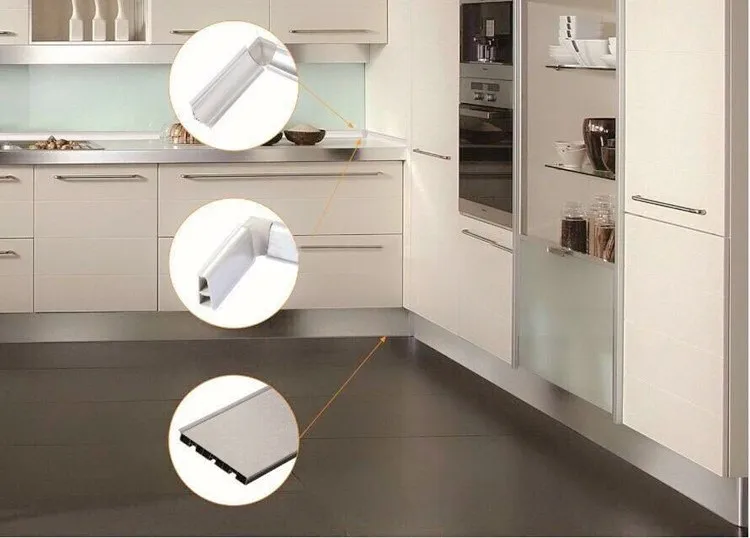 A diagram of this design can be seen in the upper right corner of the next photo. It is typical only for aluminum kitchen profiles. End caps, internal and external corners for these moldings are also made from aluminium.
Installing a kitchen skirting board for countertops
Now let's talk about the actual installation of moldings. As mentioned above, the mounting technique for aluminum and plastic profiles is almost the same. Therefore, the description of the installation of a skirting board for a countertop will be given using the example of a PVC profile.
The first thing we need to do is to cut the mounting rail and the outer part. To do this, you can use a hacksaw for metal. Now, using self-tapping screws (16mm) and a screwdriver, we fasten the mounting rail to the tabletop if it is made of MDF or plastic. Next, we insert the inner and outer corners into place and snap the outer part of the molding onto the rail.