Kiwi fruit planting
How to Grow Kiwi Fruit
, written by Benedict Vanheems
My earliest memory of kiwi fruit was when, as a young lad, I was taken off to the grocery store to buy one of these fabled fruits. In those days (mid-1980s) kiwis were seen as terribly exotic – at least to British shoppers. They cost a fair bit too, and so these small, fuzzy fruits were handled with reverence, brought home gingerly in their brown paper bag then sliced in half and spooned out with genuine excitement. To me they tasted of far off lands – somewhere sunnier, lusher and far more mysterious than the pedestrian suburbs of my youth!
They still carry an air of the exotic about them. But did you know that kiwis are a textbook case of marketing spin? Once more commonly known as Chinese gooseberries, the kiwi fruit got its second name from – no prizes for guessing – the New Zealanders, who cornered more of the market for growing them over the course of the 20th Century.
Nowadays kiwi fruit is more widely grown, so that today you can buy half a dozen fruits for the same money that would have got you just one not so long ago. I grab a net of kiwi fruit every week to drop into my morning smoothies. They are full of vitamin C, so I see them as a delicious defence against coughs and sniffles.
Growing Kiwi Fruit
Kiwi fruit originates from East Asia. They love sunshine and grow best in climates that are consistently warm. In more temperate climates you can still enjoy good results by growing them against a sunny wall where they can romp away to reach – get this – 10m (30ft) tall...wow! A warm wall also somewhat protects tender spring growth from frost damage.
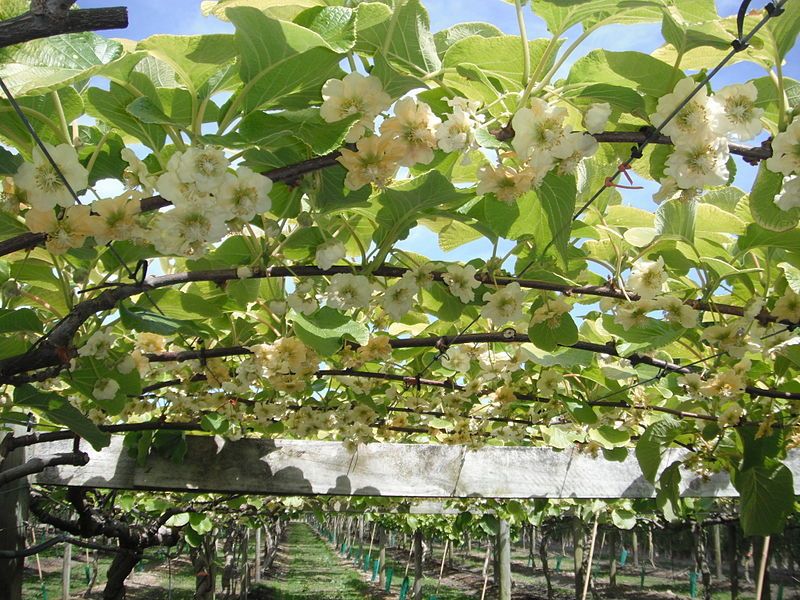
The vines grow okay in shade too, but at the expense of any fruits. That’s not necessarily a bad thing because this is one stunning vine, with chunky, heart-shaped leaves, red stems and pretty, fragrant flowers.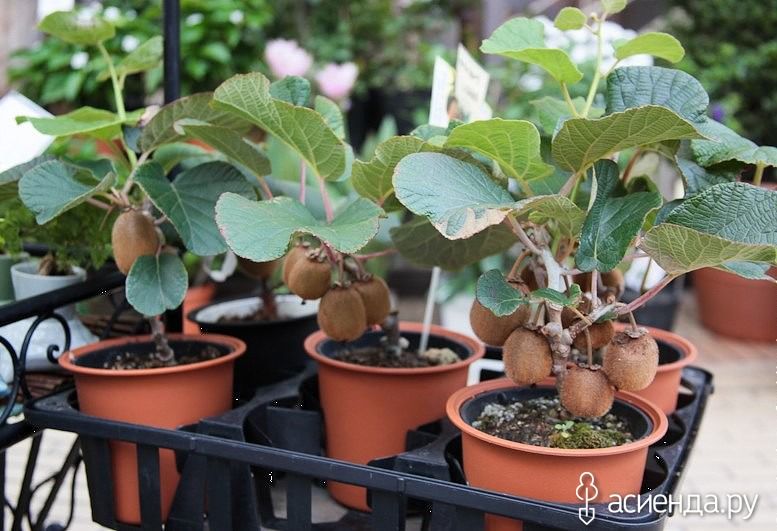
Such a lofty climber needs very sturdy supports. A series of horizontal wires properly anchored into the wall or fence every 45cm (18in) should give them the leg-up they need. Use a thick-gauge wire and tighten them into place with robust vine eye screws. You could also try growing a vine up a pergola or trellis – assuming it’s strong enough for the job.
Kiwi fruit vines are rampant, and need sturdy supportsThe plants are naturally dioecious, meaning the female and male flowers are borne on separate plants. ‘Hayward’ is one of the most popular female varieties with ‘Tomuri’ a good male companion planted approximately one to every six females. But not all of us have the space for multiple kiwi vines – and what if the male plant doesn’t bloom at exactly the right time? This uncertainty has disappeared with the advent of self-fertile varieties, which make things a lot simpler. One plant should suffice but like many self-fertile plants, pollination is even better when two or more plants are involved, and there’s one variety that crops up time and again for reliability: ‘Jenny’.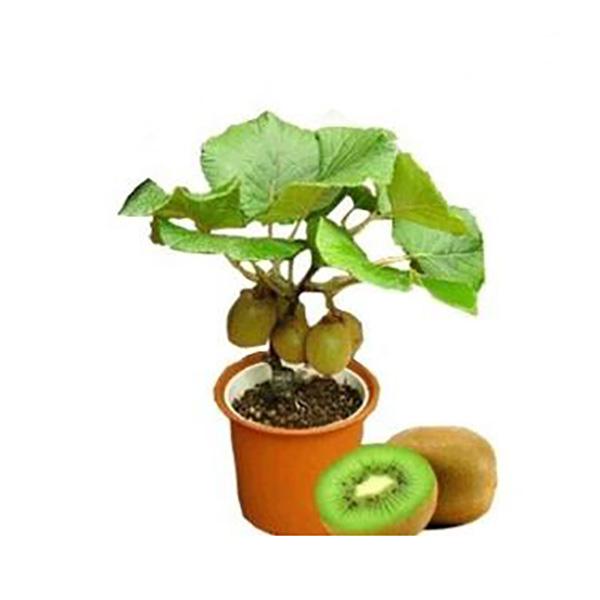
Plant your kiwi fruit into nutrient-rich, moisture-retentive soil. If you are planting against a wall then set the plant at least a foot away from the base so the roots don’t sit in a rain shadow. Space vines at least 3m (10ft) apart so they don’t get tangled up in each other but are still close enough to improve pollination. If you’re thinking about growing them in a greenhouse, don’t bother – unless you want it to completely take over in there to the detriment of everything else!
Kiwi fruit needs regular pruning to keep it productivePruning Kiwi Fruit
Kiwi fruit are not shy and retiring. They’re bold, brazen and will quickly become a thicket of stems and foliage if left to their thing. You have two choices to keep them tamed: train them into a formal espalier shape, or hack out the oldest stems every winter after they have finished fruiting. In reality the latter is a lot easier and perhaps more conducive to its rambling nature.
Fruits develop on side shoots growing from canes that are at least one year old.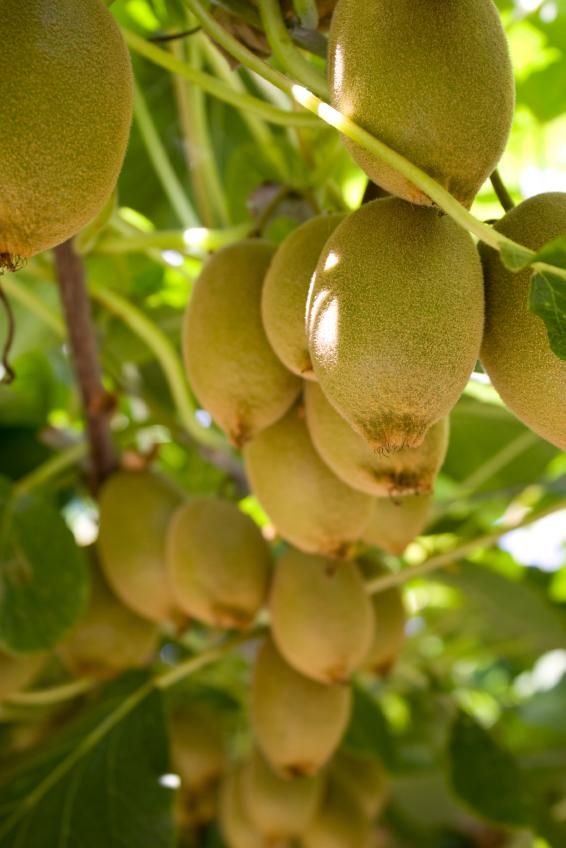 You want plenty of older canes for lots of fruit, but not too old that they become less productive. Stems older than four years are generally good for cutting completely out in order to allow younger, more vigorous stems to replace them. Don’t worry if you can’t tell which stems are what age – you’d be a champion pruner to work that one out – just aim to remove canes that look the oldest and thickest. Cut canes right down to ground level. Aim for an even spread of canes that will allow plenty of light to reach all parts of the plant.
Harvesting Kiwi Fruit
For all their bravado the fruits themselves are a long time coming, especially in cooler climates. Fruits typically ripen by mid-autumn, often just a few weeks ahead of the first frosts. Pick them when they look brown (because of the hairs) and give a little when pinched between finger and thumb. If a frost threatens but the fruits aren’t quite ready, harvest them anyhow and bring them indoors where they should continue to ripen.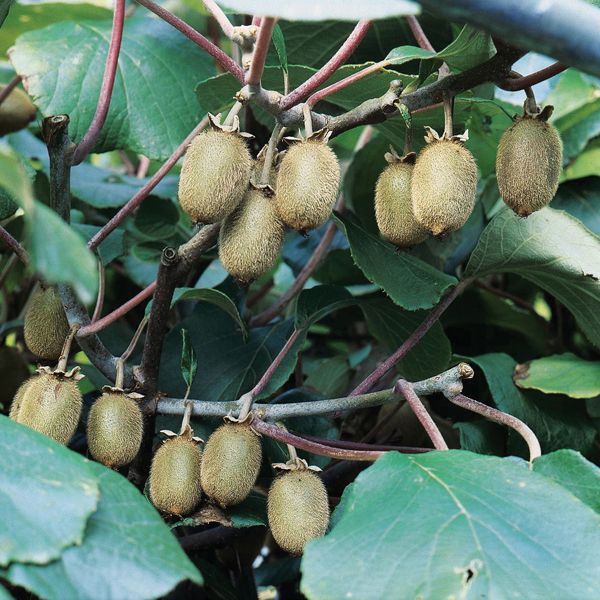 Keep the fruits in a cool, dry place and they should store for up to six weeks.
Back outside, lavish love on your kiwi vines; they may seem indestructible but that doesn’t mean they don’t need looking after! Layer on a thick mulch of organic matter such as well-rotted compost in early spring, and keep vines well-watered should you be lucky enough to enjoy a long, warm summer.
Have you grown kiwi fruit before? I’d love to hear how you got on with them and your favorite recipes using them. Please tell all in the comments section below.
Plants Related to this Article
Kiwi Grow Guide
Bugs, Beneficial Insects and Plant Diseases
Aphids (General) Guide
Millipede Guide
Spider Mite Guide
< All Guides
Garden Planning Apps
If you need help designing your vegetable garden, try our Vegetable Garden Planner.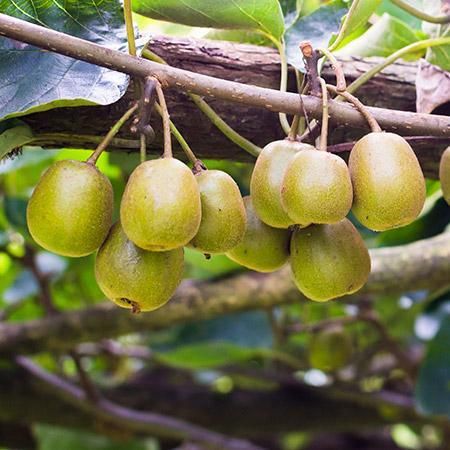
Want to Receive Alerts When Pests are Heading Your Way?
If you've seen any pests or beneficial insects in your garden in the past few days please report them to The Big Bug Hunt and help create a warning system to alert you when bugs are heading your way.
Plant Care & Growing Guide
By
Vanessa Richins Myers
Vanessa Richins Myers
Vanessa Richins Myers is a seasoned horticulturist, writer, and educator with over 10 years of training and experience as a professional horticulturist and gardener. She has a Bachelor of Science degree in horticulture, with an emphasis in landscape design and urban horticulture. She volunteers as a community garden specialist.
Learn more about The Spruce's Editorial Process
Updated on 06/01/21
The Spruce / K. Dave
In This Article
-
Care
-
Pruning
-
Common Pests and Diseases
If you enjoy the kiwifruit typically found at supermarkets and have wondered about growing them yourself, you're in luck.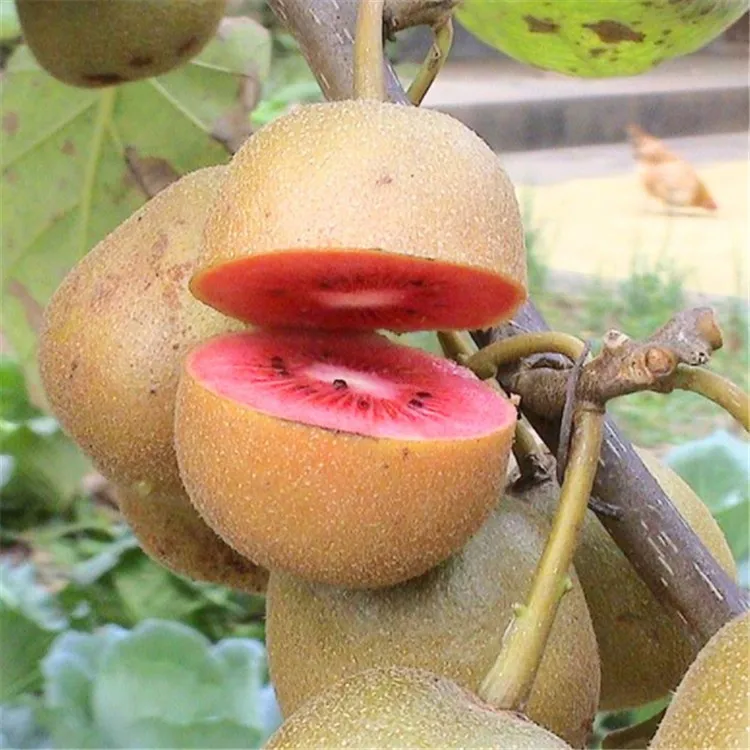 Kiwifruit, also known as Actinidia deliciosa, can be grown in many home gardens under the right care and conditions. Native to Asia (not New Zealand, as many may assume), kiwifruit is a woody vine that can be used to cover an arbor or similar garden structure where it will be both aesthetically pleasing and productive.
Best planted in early spring or late fall, kiwifruit will grow quickly in size, often adding between 6 to 12 feet a year. That being said, only mature female vines will produce fruit, and many won't do so until they're at least three years old. The best fruit production often occurs when the vine is eight years or older, and it can continue to produce for forty years or more.
| Botanical Name | Actinidia deliciosa |
| Common Name | Kiwifruit, kiwi, Chinese gooseberry |
| Plant Type | Fruit |
| Mature Size | 15–30 ft. tall, 6–10 ft. wide tall, 6–10 ft. wide |
| Sun Exposure | Full sun |
| Soil Type | Moist but well-drained |
| Soil pH | Acidic |
| Bloom Time | Spring |
| Flower Color | Cream |
| Hardiness Zones | 7–9 (USDA) |
| Native Area | Asia |
Kiwifruit Care
Growing kiwifruit can be a bit involved, but the payout—tons of delicious, sweet fruits—is more than worth it. The fruit is actually classified as a berry, with each kiwi measuring about 3 inches long and shaped like an egg, with a fuzzy brown exterior. Kiwifruit vines are ideal to grow on a wooden structure such as a gazebo, trellis, pergola, arbor, or fence.
When planning where to plant your kiwifruit vine, make sure you have enough room and supports for at least two vines, since you will need both male and female plants for successful pollination of this dioecious species. The flowers can be cream or yellow in color and will have a slight perfume to them. Proper watering and pruning are especially important for kiwifruit vines since the fruit is formed on year-old wood.
The Spruce / K. Dave
The Spruce / K. Dave
The Spruce / K. Dave
Light
Plant your kiwifruit vine somewhere where it can receive full sun or partial shade throughout the year. The more sun the plant gets, the better its fruit production will be, and you should aim for at least eight hours of light a day.
Soil
Kiwifruit vines prefer soil that is acidic, with a pH level between 5.0 and 6.8. When it comes to soil composition, the vine isn't super picky but does best in a blend that is fertile, moist, and well-draining. When planting your vines, space each one approximately 10 feet apart to give them plenty of room to grow and thrive.
Water
Your kiwifruit vines will need consistent watering and are not at all tolerant of drought.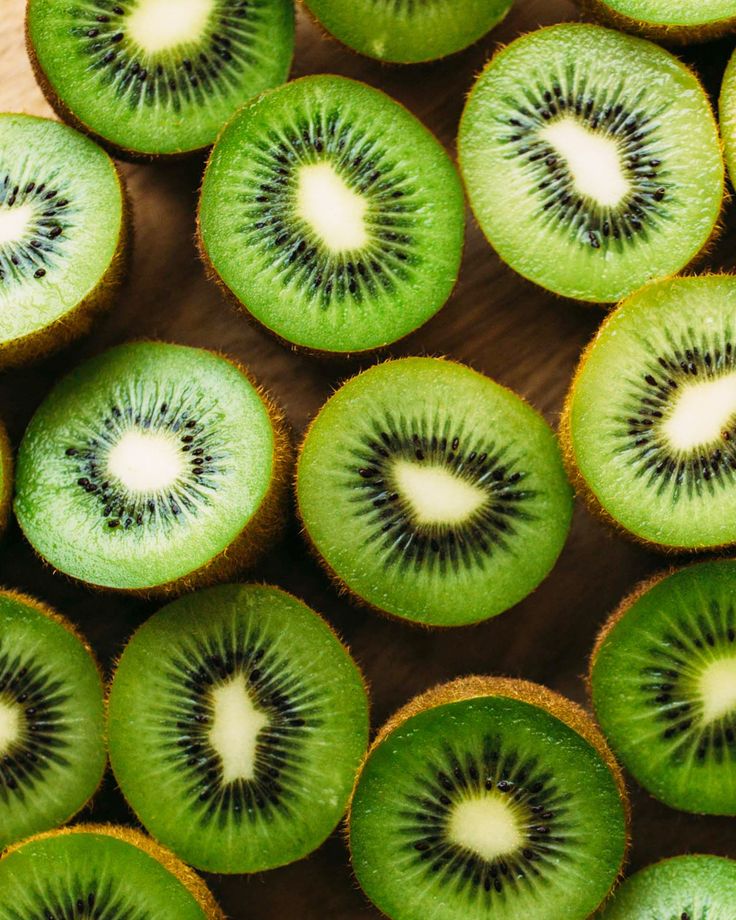 Because of this, you should never allow their soil to dry out. That being said, they also don't like wet feet, making well-draining soil especially imperative. If you notice any browning or drooping leaves on the vine, that's usually a sign that your plant could use more water.
Temperature and Humidity
True to their semi-tropical nature, kiwifruit prefers moderate temperatures, though they do need a period of cold (around 45 degrees Fahrenheit for at least a month) to set fruit. Additionally, the vines can tolerate hot summer temperatures up to 114 degrees Fahrenheit, though they will need additional water to compensate. When it comes to humidity needs, kiwifruit has no special requirements and will do just fine in the humidity levels of their USDA hardiness zones.
Fertilizer
Kiwifruit vines do best when planted in soil that is high in organic matter and nitrogen. If nitrogen isn't present in your soil upon testing, you'll want to amend your mixture with a fertilizer high in the nutrient. Regular feedings are especially important as the vine is growing and getting established. Plan to feed your plant upon planting, in early spring, and in summer after the flowers die off using a slow-release all-purpose fertilizer blend.
Pruning Kiwifruit
Properly pruning your kiwifruit vines not only helps encourage more fruit growth but also ensures the vines don't become unruly. Starting with a strong framework (via a trellis or other structure) is essential—from there, trim around the main stem frequently until it grows tall enough to begin to form a canopy overhead. The best time to prune your kiwifruit vine is during the winter season when the plant is dormant.
Common Pests and Diseases
Kiwifruit vines are susceptible to a variety of common pests like spider mites and thrips, both of which can be easily controlled with horticultural oil. Another common issue for kiwifruit vines are pests that feed on the plant's fruit, mainly leafroller caterpillars and Japanese beetles. Your best bet is to pick the fruit frequently and encourage birds, which are natural predators of these bugs, to visit your garden.
Kiwifruit: planting, care, reproduction, cultivation features in our latitudes
Exotic kiwi fruit has long been in high demand on our shelves, especially in winter. This is not surprising, since the content of vitamin C in these fruits is six times higher than its content in lemons and 4 times in rose hips. It also contains high amounts of potassium, calcium, magnesium and phosphorus. In our article, we will tell you how to properly plant and grow kiwi in our latitudes.
Description of kiwifruit
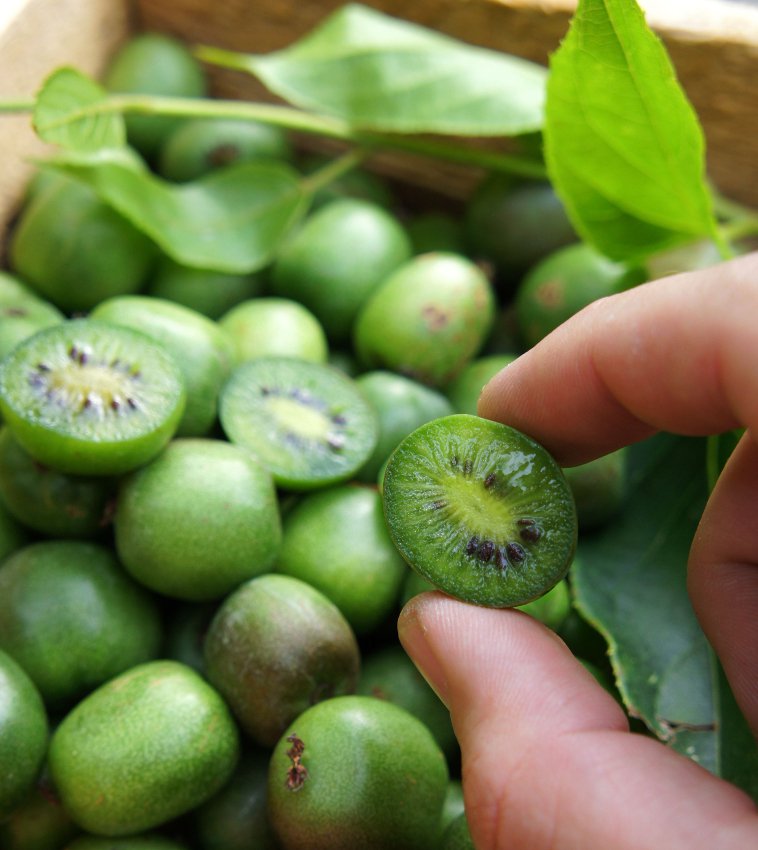
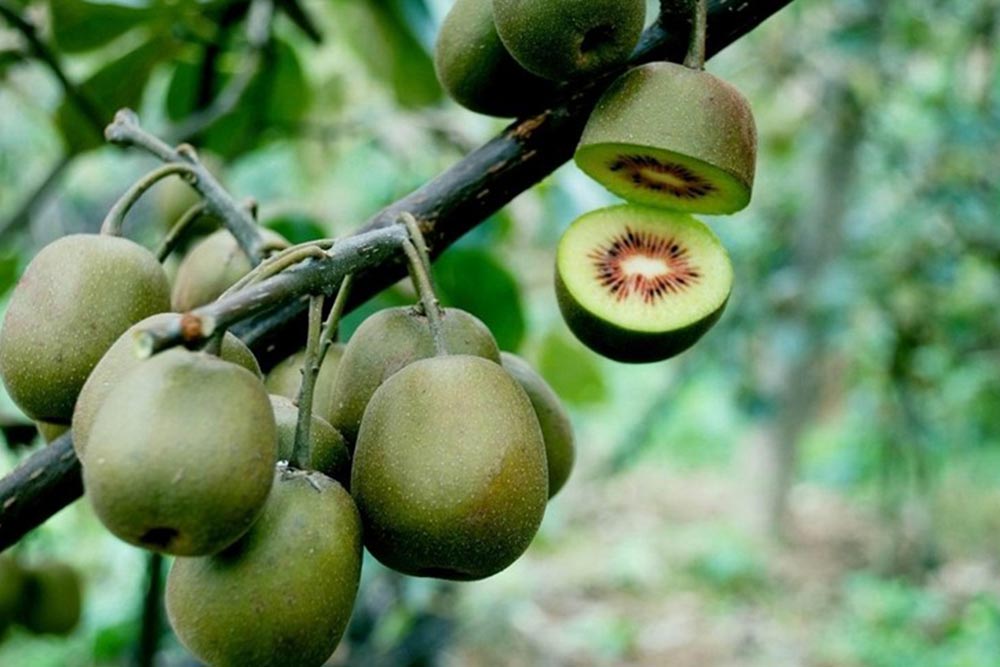
Kiwi came to us from China. It belongs to the Actinidia family. Initially, these were small shaggy berries, outwardly resembling a kiwi bird, which were called Chinese gooseberries. Over time, in the process of selection, the weight of one fruit increased to 100-300 grams. The tree is liana-shaped, has a height of up to 10 m. The fruits are ovoid, brown-green in color, covered with a dense grayish fluff.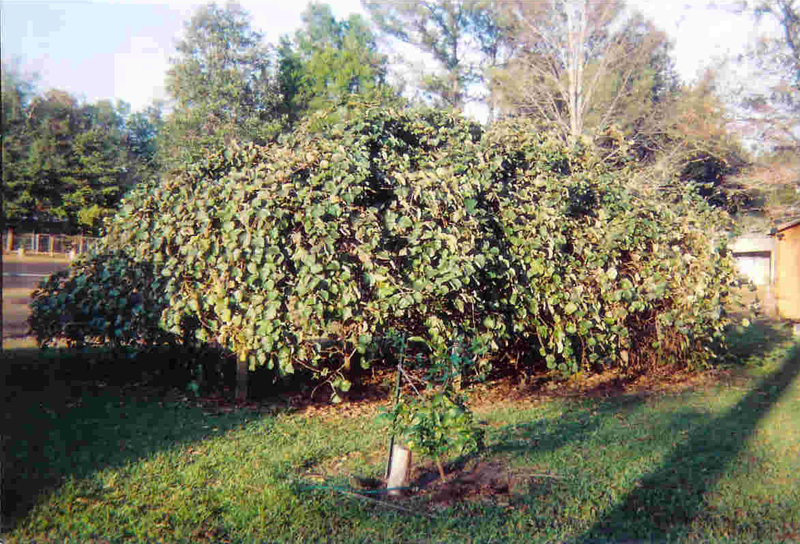 The skin is thin, the flesh is dark green at the edges and light green in the middle. It has a sweet pleasant taste and a light aroma of pineapple. Inside the pulp there are small black seeds.
During the breeding process, frost-resistant varieties were developed that are able to adapt to different climatic zones. This is a dioecious tree that begins to fully bear fruit 7 years after planting. A prerequisite for the formation of the ovary is pollination by insects. This is a deciduous plant that needs supports to wrap around in a spiral.
Planting kiwifruit
To plant kiwifruit seedlings, dig a hole as deep as a spade bayonet. Mix the extracted earth with sawdust. Lay a layer of soil mixed with sawdust at the bottom of the pit and place the seedling together with a peat container, sprinkle a layer of soil with sawdust on top, while compacting it well. Drive three wooden pegs one and a half meters high around the seedling, forming an equilateral triangle.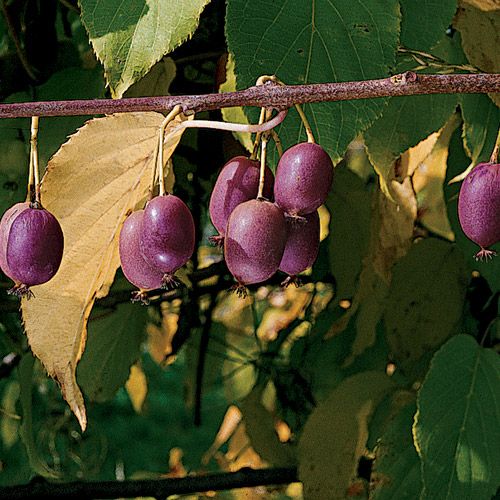 Tie a wooden stick 2-2.5 meters high to one of the pegs, which will serve as a growth guide. Attach white agrofiber to the supports with a stapler or small nails in such a way as to cover the plant from the penetration of small rodents or cats. Cats love to nibble on male kiwis in the spring, when sap flow begins. Kiwi planting is done in spring or summer before the onset of the first cold weather, so that the plants have time to form a strong root system and take root in a new place.
In the process of growing seedlings, all side shoots should be removed, leaving only the central point of growth so that it grows strong and shoots with fruits form on it in the future. After planting, compact the soil well and water it abundantly.
Kiwi growing and care
Kiwi care includes watering and shaping the tree. With good care, the vine can bear fruit for about 40 years.
- Top dressing. Kiwifruit should be fertilized with phosphorus-potassium fertilizers 200 grams per plant when planting seedlings.
 In the future, fertilizer should be carried out three times a season in parts. The first time in the first half of March, before the awakening of the kidneys. The second time - after the onset of a consistently warm temperature and the third time - in September, after the final formation of the fruit. One plant should have 0.5 kg of nitrogen-containing fertilizer, 135 g of phosphorus, 250 g of potash and 75 g of magnesium fertilizer.
 - Loosening weeding. Since the kiwifruit roots are in the upper layers of the soil, the bushes should not be loosened or treated with herbicides from weeds.
- Moisturizing. In dry, hot weather, vines are sprayed, watering is increased. It is recommended to mulch the soil under the trunk. This will retain moisture. Do not allow the top layer of soil to dry out. This may cause the flowers to fall off. Kiwi has a shallow root system. The main mass of kiwi roots is located in the upper layers of the soil within a radius of 1-1.
 5 from the central stem. It sinks to a depth of 40-50 cm. Therefore, in the summer, kiwi needs regular watering.
 - Cutting. Pruning and shaping of trees is carried out in late autumn after the end of the fruiting period. At the same time, the strongest healthy shoots are left, and all the rest are removed.
- Wintering . For the winter, no manipulations are required to prepare the vines for the cold. They tolerate frosts down to -27 degrees. The stems are not damaged, do not get sick and do not freeze. Do not need additional pruning, sheltering or pressing.
- Wood shaping . All work on the formation of kiwi should be carried out in the summer. They include pinching and cutting shoots. It should be borne in mind that kiwi stems are very juicy and pruning shoots in the spring during the sap flow can lead to wetting of the shoots.
- Diseases . The plant is very resistant to diseases and insects. Therefore, it does not need measures for chemical or any other additional treatment of plants for the purpose of prevention or treatment.
- Harvesting and storage of crops . The final formation of kiwi fruits ends in September-October. At this time, the fruits are harvested and placed in a room with a temperature of 0 to 5 degrees Celsius. In such a room, kiwi is stored until spring. Before use, the fruits should be placed in a warm room with a temperature of 25-30 degrees for a day or two.
In the second decade of March - the first decade of April, a constant positive temperature is established. During this period, active sap flow and bud break begin. Young shoots are green-reddish in color, produce alternate leaves, old shoots are brownish green and bear fruit.
Kiwi buds begin in May. If the spring is cold - in early June. The buds can stand closed for a long time and bloom only in warm weather, at the same time when pollinating insects begin to fly. Flowering begins at a stable temperature of about 20 degrees.
Creamy yellow flowers with six petals and yellow-orange center stamens. Since this type of creeper is dioecious, only male or only female flowers bloom on one plant. The flowering period lasts for a week. Flowering is abundant, on one shoot a large number of flowers are formed, each of which then gives the ovary to the fruit.
Kiwi propagation
Kiwi can be effectively propagated in two ways: by seeds and cuttings.
- Seed propagation . You should choose a healthy large fruit and let it fully ripen. After that, the seeds are separated from the pulp and combined with sand. The resulting mixture is placed in a container with soil, there should be drainage at the bottom of the container. From above it is covered with glass or film. Crops need frequent abundant moisture. The first shoots appear after three weeks. After the appearance of sprouts, the soil around them should be loosened regularly. To do this, you can use a toothpick or a wooden stick. As a top dressing, it is recommended to add complex mineral fertilizers to the water for irrigation.
 After the appearance of two true leaves, the seedlings dive into separate pots with a soil mixture of wooden hardwood soil and humus in equal parts. A ready-made mixture of humus and peat is also suitable. With proper care, a healthy sprout will grow, which needs to be fed regularly. The first flowering will begin after 6-7 years.
 - Propagation by cuttings . Cuttings are taken in autumn after all unnecessary stems are cut, which will prevent the plant from enduring the winter well. Cuttings are cut 25-30 cm long. They should have 4-5 healthy buds. Remove all leaves from the cutting and make an oblique cut at the end that will be planted in the ground. Pour the permite substrate into a tall 10-12 cm pot and place the cutting in it. Deepen it into the substrate 1-2 cm above the lower kidney. Compact the substrate around the cutting and water abundantly so that the substrate sags and the cutting is well strengthened. Place the pot in a greenhouse or cover with foil.
 This will create the necessary microclimate for the fastest rooting of the cuttings. To create high humidity inside the film or greenhouse, spray the cuttings from a spray bottle with plain water at room temperature 2-3 times a day. Cuttings take root within two to three months. During this period, you need to regularly air them by removing the film.
Peculiarities of cultivation in our latitudes
Despite the fact that kiwi is a southern fruit, breeders managed to develop some varieties that can be successfully grown in our latitudes. Ukrainian breeder Heinrich Straton developed a variety that can withstand frosts down to -30 degrees, can adapt to our climatic conditions and gives a good harvest. This variety is called "Kiwi Karpat Straton variant Valentine" and is distributed throughout Ukraine and Russia.
Join our group on Facebook
Kiwi - planting for autumn
Until recently, some plants seemed exotic, some plants are successfully grown in summer cottages. Long breeding work has led to an increase in the resistance of southern crops to cold weather and adverse conditions. You can grow in the garden and kiwifruit . How to plant a plant and care for it?
Planting kiwi in autumn
Planting kiwi seedlings on the site can be done in spring, before the start of the growing season, or in autumn, after its completion. Plants with a closed root can be planted throughout the season.
Planting kiwi fruit in autumn has several advantages:
- Plants get enough moisture through natural precipitation. Additional irrigation is not required for them, however, if the autumn is too dry and warm, the seedling should be watered at least once a week.
- High air humidity reduces evaporation and, as a result, eliminates the loss of turgor by the vegetative part. The leaves and shoots of plants remain elastic, the load on the roots is reduced.
- Moderate solar activity does not harm the plant.
 Seedlings do not need shading.
Planting in natural autumn conditions, ideal for planting, saves the grower a lot of time. In addition, the survival rate of autumn seedlings is higher if the planting dates are observed.
Popular cultivars: Hayward, Solo, Monty, Bruno, Abbott.
Landing dates
For the correct selection of the time for disembarkation, a combination of several factors is taken into account:
- climatic features of the growing region;
- weather conditions of the current year;
- terrain features;
- location of the landing site on the site.
The disembarkation period for varies significantly: in some cases, the difference in terms can be up to a month. The warmer the growing region, the warmer and longer autumn is predicted by meteorologists, the later you can plant kiwi. The timing should be calculated so that the seedling has at least 3-4 weeks of stable positive temperature for rooting.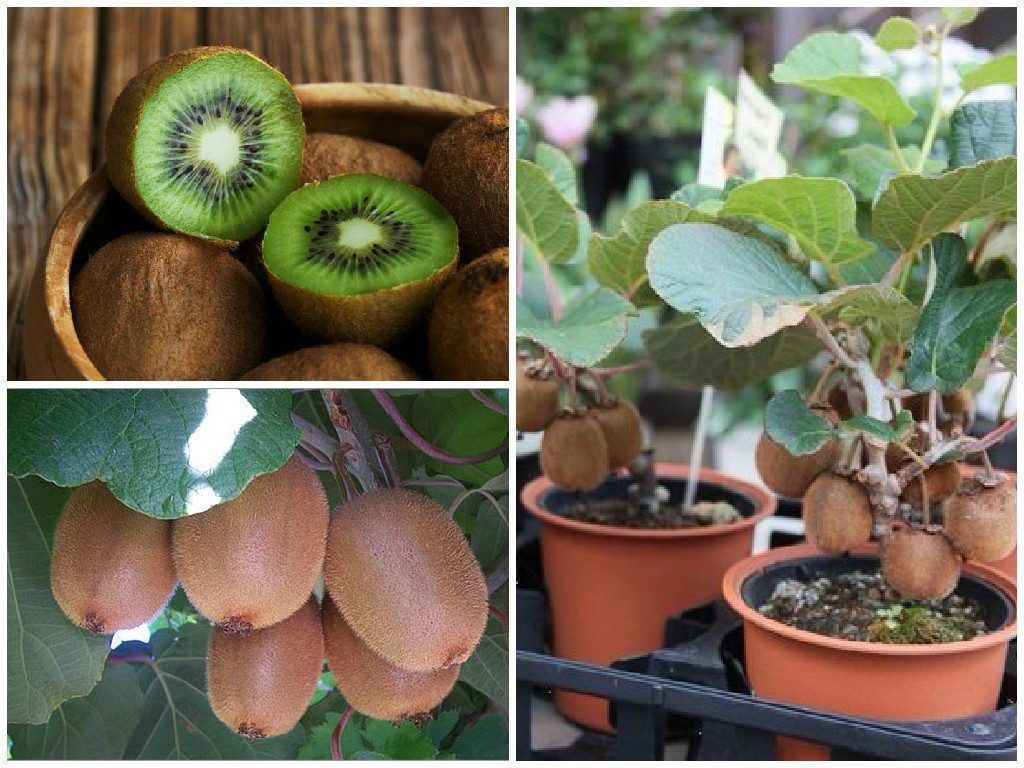 During this time, the seedling will have time to securely take root and prepare for wintering.
Ignoring the timing of planting leads to the death of a kiwi seedling. Too early planting during a long autumn will cause re-growth of shoots. Such vegetative parts will certainly freeze in winter, weaken the plant and lead to its death. Late planting is also dangerous: kiwi does not have time to take root, lacks moisture and nutrition, and as a result freezes out in the first winter. To minimize the impact of sudden frosts, the soil around the plant should be mulched.
Dry sawdust, wood chips or bark, agrotextile, grass cuttings, leaf litter are used as mulch. The mulch layer should be 10-15 cm. It will not only prevent soil freezing, but also protect against weathering of the soil, drying out of the root system.
Place of planting
The choice of a suitable place for growing also affects the establishment of plants. Kiwi is a powerful dioecious liana, therefore, for fruiting, it is necessary to plant at least one female and male specimen. For 1 male bush there can be up to 10 female ones. The distance between them is kept at least 1.5-2 m.
A well-lit place is selected for landing. If in the first years kiwi requires shading, then from 2-3 years of age the plant is not afraid of active insolation and easily tolerates direct sun. Soils are chosen well-drained, breathable. Waterlogged, heavy clays are not suitable for cultivation.
It is preferable to plant seedlings on the south side of buildings to protect plants from cold winter winds. In addition, the buildings will serve as an excellent support for the vine.
Winterizing kiwi fruit
Before winter, it is important to properly prepare young plants for their dormant period in order to minimize damage to them. To do this, the branches are removed from the support, placed on spread out boards and covered with agricultural fabric, by analogy with grapes. The root system must be mulched. When a sufficient amount of snow falls, the plants spud them.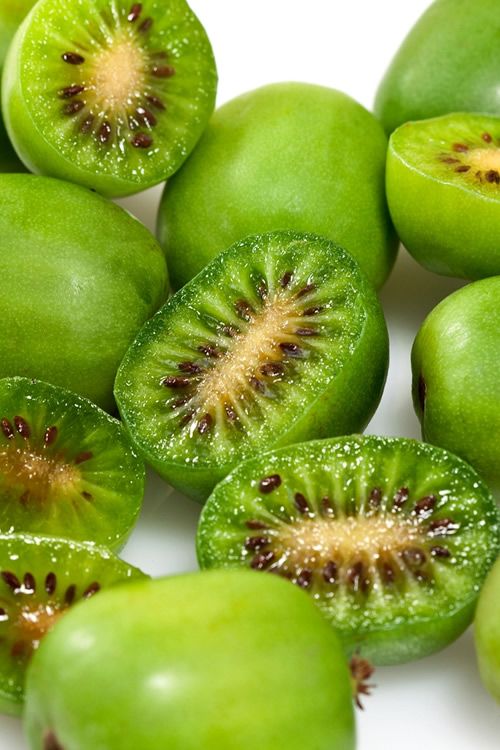 Adult kiwi winter without additional shelter, natural snow cover is enough. The shoots must be removed from the supports and bent to the ground.
Kiwi care
The sapling needs proper care so that it develops harmoniously and enters the fruiting period as soon as possible.
Watering
Actinidia - moisture-loving crop . During the dry season, it must be watered abundantly. However, moisture stagnation in the root zone should not be allowed, this will cause rotting of the underground part.
A feature of the kiwi root system is its superficial location. Therefore, the plant reacts sharply to the lack of moisture. The culture does not tolerate high occurrence of groundwater. It is better if the landing site is located on a slight elevation. For irrigation use only warm water, because. cold water can cause root rot and stress.
To protect the kiwi fruit from drying out the roots, mulch the soil with a layer of grass clippings, wood residues or compost up to a layer of 15 cm.