How to grow cress at home
How to Grow Cress for Grown-Ups
, written by Helen Gazeley
A salad leaf that's easy to grow, packs a powerful bite, and fills the gaps while slower crops get going sounds great, doesn't it? So how come only children grow it?
Cress suffers something of an image problem. There's no doubt that growing it on the windowsill is a great way for youngsters to learn about germination, but we seem to have forgotten that there's more to it than skinny white stalks topped with a couple of immature leaves.
Growing cress with children
First, though, back to basics. The easiest way to grow cress quickly is to find a shallow tray (a plastic food container from the grocery store serves well) and line it with paper tissues, cotton wool or kitchen towel. Wet the paper or wool well (though don't have it swimming in water), sprinkle seeds over the surface and cover the tray with cling film. A container that's around an inch or two deep is perfect, as this allows space for growth before the seedlings hit their heads on their "glass ceiling".
Germination takes place within a couple of days (24 hours, if you're lucky) and the cress is ready to harvest when it's around 1½ to 2 inches high (which will be, depending on the type you're growing, five to seven days later). Snip the stalks off at the base to use as a garnish, in a salad, or in sandwiches.
It's important to ensure that the kitchen roll, or whatever you're using, doesn't dry out, which is why cling film is so useful as it stops evaporation. You can grow the cress without covering with cling film, but you have to keep a strict eye on it as the paper/wool etc dries out very quickly.
An alternative to the kitchen towel method is to sprinkle them onto the surface of a three-inch pot (or larger) full of damp compost. This is the way to go if you want to grow the little seedlings on further, as they'll soon need the nutrients in the soil to progress and will starve on kitchen roll.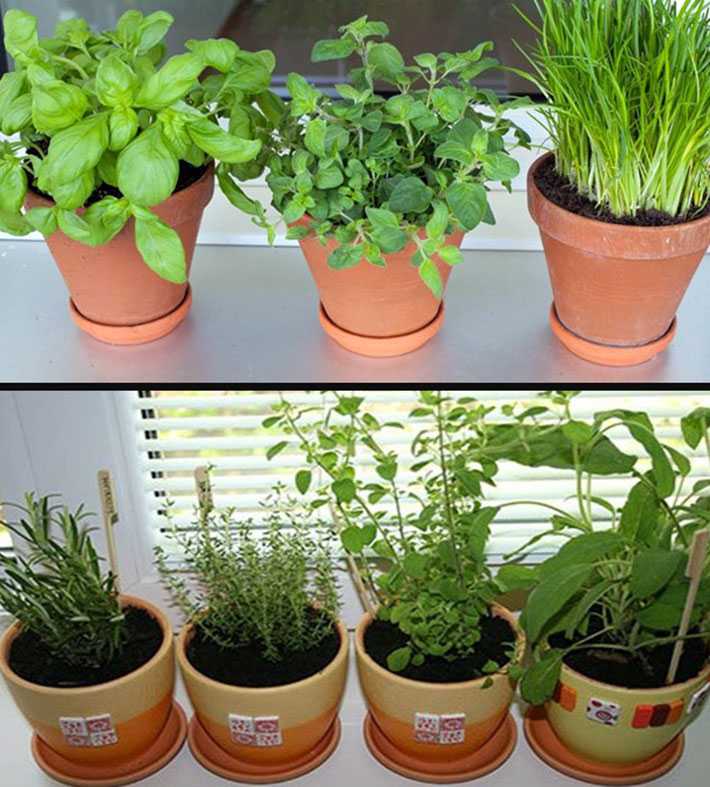
Growing grown-up cress
I don't really see the point of growing cress only to scythe it down when it's barely got going, and I'm moderately confident that, once you've tried the grown-up version, neither will you.
The great thing is that cress is something that you can grow on the windowsill all year round, or sow directly into outdoor beds any time frosts have passed. Seeds can be sprinkled over the surface of a pot or sown in the ground in either a block or row, quite close together (say half an inch or 1 cm apart). If cress becomes too hot and dry, it tends to bolt, so it's a good choice for an area that's a bit shady and, for best results, it needs to be grown in soil that remains moist. Because it grows so quickly, it's ideal for intercropping.
The choice of cress can be quite confusing, especially as the pictures on seed packets tend to look pretty similar but appear under various names such as Common, Curled or Greek Cress. To be honest, they are all pretty similar. In my experience, larger leaved varieties tend to be slightly milder. There's also one called Sprint, which does live up to its name and germinates just a touch faster than others.
The true leaves of cress are feathery and divided and plants grow to around six inches high in about four weeks. Leave it longer and it will begin to go to seed, but if this happens don't just throw them out. The fire in the leaves will have died down, but they're still tasty and the tiny white flowers are also edible and provide a tiny mustardy explosion in the mouth. If you harvest by snipping stalks just above a leafy growing point, they may produce a second flush of leaves, but my experience is that cress isn't very keen to regenerate. Sowing a new batch is a better way to keep cress in production.
So, I hope I've convinced you. For the effort of sowing a few seeds that would otherwise provide about enough garnish for a cheese sandwich, you will, by letting cress grow, gain handfuls of leafy growth. Cress tends to lose its flavor when cooked, but it certainly adds texture and a mustardy warmth to any salad.
By Helen Gazeley
Plants Related to this Article
Cress Grow Guide
Bugs, Beneficial Insects and Plant Diseases
Diamondback Moth Guide
Cabbage Worm Guide
Slug Guide
< All Guides
Garden Planning Apps
If you need help designing your vegetable garden, try our Vegetable Garden Planner.
Want to Receive Alerts When Pests are Heading Your Way?
If you've seen any pests or beneficial insects in your garden in the past few days please report them to The Big Bug Hunt and help create a warning system to alert you when bugs are heading your way.
How to grow cress: indoors or in the garden
(Image credit: Bogdan Kurylo / Getty Images)
Learn how to grow cress, and you’ll have a constant supply of healthy, tasty greens to add to salads and sandwiches.
As it grows so quickly, cress is often considered an ideal crop for children, yet its punchy peppery flavor is more likely to be appreciated by adults. It is the perfect first crop for beginners to add to their kitchen garden ideas, and will sow the seeds of excitement for home growing.
Cress is packed with nutrients, in particular Vitamins A, C and K, which will be perfectly preserved when you cut it fresh.
It is also highly space efficient, so even the smallest of homes can accommodate a tray of cress. ‘It’s the perfect size to grow on the windowsill,’ says Rob Smith, product development manager at Thompson & Morgan .
‘The trick is little and often – sowing a 4x4 inch (10x10cm) patch every couple of weeks will keep you in fresh, home-grown cress all season – perfect for salads and sandwiches.’
Once you have caught the growing bug, learn how to grow microgreens for a diverse supply of quick and easy superfoods.
How to grow cress indoors
- Firstly, choose a suitable container to grow your cress in.
 ‘You could use a plastic container with damp paper towel, or even use an old cup filled with moist cotton wool,’ says Smith. Bear in mind, cress usually grows better in soil, so consider filling your tray with a light layer of compost. Alternatively, you can use a growing mat or felt.
 - ‘Sprinkle cress seeds over the surface of the pot,’ says Chris Bonnett, owner of Gardening Express . Don’t be tempted to sow the seeds too densely, or the seedlings will be competing for space – keep to a light sprinkle.
- It’s important that the growing medium doesn’t dry out, so to keep the moisture in cover the pot with a lid or plastic wrap. If it does need watering, use a spray.
- Place your cress on a bright, warm windowsill.
- Cress seeds tend to germinate in around 24 hours, and the seedlings will soon be ready to eat. ‘You will be harvesting in a matter of 5-7 days,’ says Bonnett.
- To harvest cress, simply wait until the cress is at least 1 inch (2.5cm) tall, and snip it off with scissors.
(Image credit: Gaffera / Getty Images)
How to grow cress in soil
If you would prefer larger, more mature plants, you will need to learn how to grow cress in soil. You can sow the seeds in the ground, or include them in your vegetable garden container ideas.
- Prepare your soil by raking it to a fine tilth.
- ‘Sow cress seeds in the ground in a block or row, close together,’ says Bonnett.
- Lightly cover the seeds with soil, and water well. Do not allow the soil to dry out. When watering cress, take care not to drown the seedlings or allow them to become matted down in the soil – ideally use a water spray or watering can with a fine rose.
- Once the seedlings have reached 1 inch (2.5cm) tall, thin them out to give them room to grow.
- Harvest outdoor cress with scissors once the plants have reached 5-6 inches (12-15cm).
Types of cress
There are several types of cress you can grow, so experiment with different seeds and see which flavor you like best.
Common plain or curled cress grow very well indoors, as does mustard cress.
‘If you want to try a different type of cress, have a go at learning how to grow cress outside,’ says Smith. ‘Watercress, American land cress (which is like watercress, but easier to grow in a veg patch), or Greek cress can be grown outside in pots or in the open and are great added to salads.’
Does cress regrow once cut?
Usually when harvesting cress, you cut them close to the soil line. But if you leave half an inch on the seedlings when you cut them, then you may find that the cress regrows.
If growing cress on a paper towel, however, it will have no soil to draw nutrients from, so you will have better success starting afresh.
If you have the space, there is nothing to be lost by experimenting. If all fails, then it will only take a few days to grow a fresh new crop.
Where does cress grow best?
Cress grows best in moist soil. It requires plenty of sunlight for the seeds to germinate, so when growing indoors position it on a sunny windowsill.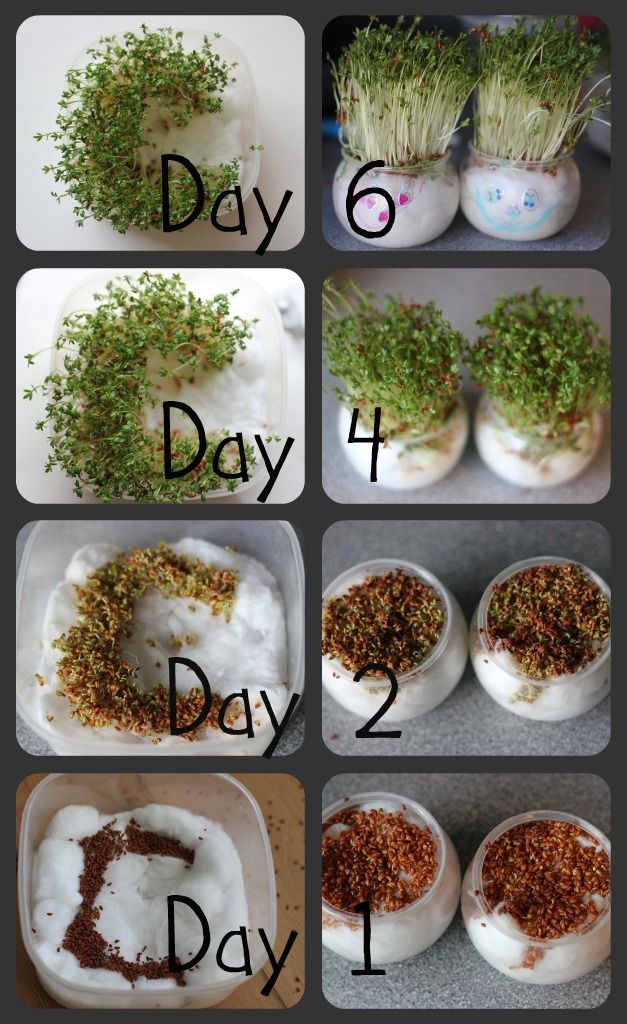
However, when growing outdoors, cress can struggle in high temperatures. ‘When cress becomes too hot and dry, it is prone to bolting,’ says Bonnett. You may find cress is a good crop to grow in a shadier area of the garden.
As editor of Period Living, Britain's best-selling period homes magazine, Melanie loves the charm of older properties. I live in a rural village just outside the Cotswolds in England, so am lucky to be surrounded by beautiful homes and countryside, where I enjoy exploring. Having worked in the industry for almost two decades, Melanie is interested in all aspects of homes and gardens. Her previous roles include working on Real Homes and Homebuilding & Renovating, and she has also contributed to Gardening Etc. She has an English degree and has also studied interior design. Melanie frequently writes for Homes & Gardens about property restoration and gardening.
Watercress on the windowsill: easy and simple
Author: Khromov Nikolai Vladimirovich Ph.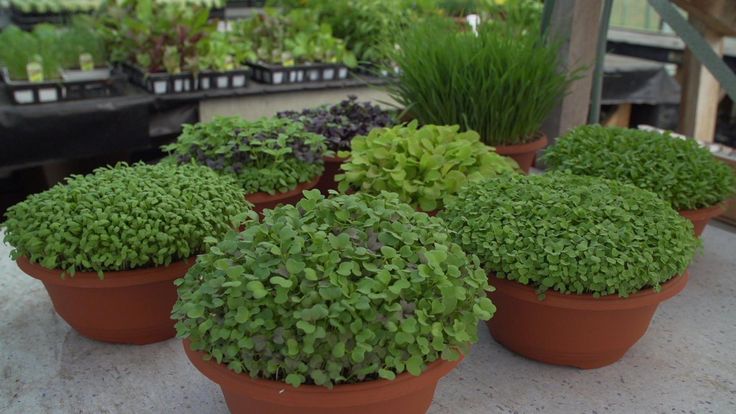 D., Art. scientific collaborator Federal Scientific Center for Horticulture named after I.V. Michurina, Scientific Secretary of the Academy of Unconventional and Rare Plants, member of the All-Russian Society of Geneticists and Breeders of the Russian Federation
We are all used to consuming fresh herbs literally every day during the warm periods of the season, and in cold periods it is more difficult to do this - you can’t grow greens in your own garden in winter. This problem can be easily solved by arranging a vegetable garden on a personal windowsill. For example, it is easy to grow watercress on a windowsill.
Useful properties of watercress
Watercress is a well-known vegetable crop belonging to the cruciferous family, which contains a large amount of vitamins (A, K, B 2) , essential oils (with a predominance of mustard) and a whole complex of various trace elements (most of all iron, iodine, phosphorus and potassium). It is authentically known that Hippocrates used watercress for medicinal purposes and recommended its use as food.
The calorie content of watercress is extremely low (32 kcal per 100 grams), so it is often included in the diet of people on a diet.
Other names of culture - horseradish, tsitzimati, tertizak, kotem.
The use of culture in food helps to strengthen the immune system, relieve coughing, improve the body's metabolic processes, the functioning of the gastrointestinal tract, and nerve cells.
Even lubricating compounds, lotions and infusions and decoctions are prepared from the culture, which are used to treat acne and other skin diseases.
Of course, this salad is not only healthy, but also has a pleasant taste, its taste is similar to that of horseradish.
Is it difficult to grow watercress
It is easy to grow this crop - both indoors and outdoors.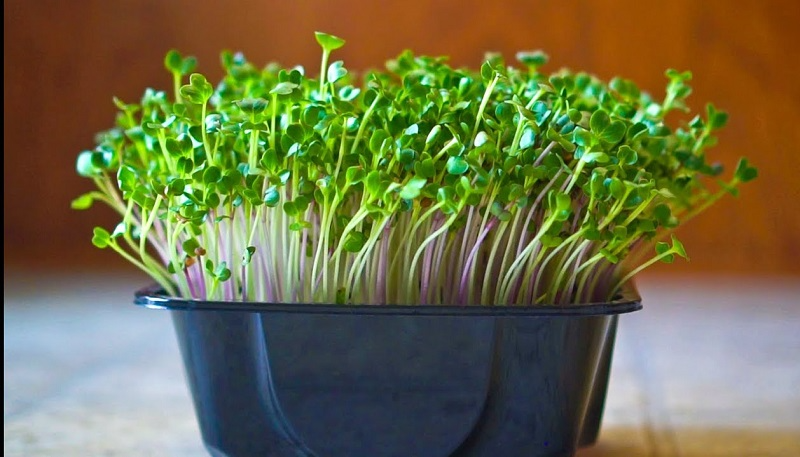 It practically does not require care, grows quickly, is a cold-resistant culture and is very shade-tolerant too.
Watercress has three main varieties:
- curly - having a small rosette of leaf blades 17 cm in size, as well as raised leaves with a strong dissection - a good cultivar - Openwork;
- sowing - characterized by a large rosette of leaf blades up to 21 cm in diameter, the leaves are horizontal, very wide and solid, good cultivars - Dansky and Zabava;
- whole-leaved - has an even larger rosette of laminae, which are very narrow and slightly indented, the best variety is Dukat.
How to start growing watercress
First you need to choose a variety. Good varieties of watercress suitable for growing on the windowsill: Flagship - after 11-13 days after germination, it can be removed;
- Piquant - can be harvested 16-18 days after emergence;
- Dukat - removed after about 19 days;
- Temp - ready to harvest after 19-20 days;
- Zabava – ready for harvest in 21-22 days;
- Accord - can be removed after 26-27 days.
It is best to purchase a plastic container, it can be in the form of a bowl, bowl, plate, tray, deep pot, for example, as for flower plants. The optimal height is 11-12 cm.
Next, you need to prepare the substrate, usually a mixture of soil, humus and river sand in equal proportions.
Growing watercress on a windowsill
It is necessary to take a container and put a layer of drainage (broken brick, expanded clay) in it 1 cm thick, making sure that the container has drainage holes. Next - the substrate with a layer of 2-3 cm, which must be very well moistened with water at room temperature, then add the substrate to a height of 8-9 cm and moisten again. After 10-15 minutes after the substrate has been moistened, it is necessary to make rows in it with a depth of 0.5 cm with a distance between them of 12-16 cm, depending on the variety of watercress - the higher it is, the greater the distance should be.
Next, we sow the seeds in the grooves, previously soaked in water for a quarter of an hour, and sprinkle with soil a centimeter layer.
After that, cover the container with the sown seeds with cling film or glass and make sure that the soil does not dry out, periodically moistening it with a spray bottle.
At the same time, the temperature in the room must be maintained at a comfortable level and +21 ... +22 about C and try not to drop below +18 about C, otherwise shoots will not appear soon, and did not rise above +25 about C - then even young plants will be very bitter.
Usually shoots appear within a week and, as soon as they appear, the film should be removed from the container and try to lower the temperature in the room to +16 about C. At this temperature, the root system of watercress develops more actively and in the future it will develop better.
Aftercare for watercress is completely simple and consists in periodic watering with water at room temperature from a spray bottle as the soil dries up, as well as moistening the air near watercress in the same way.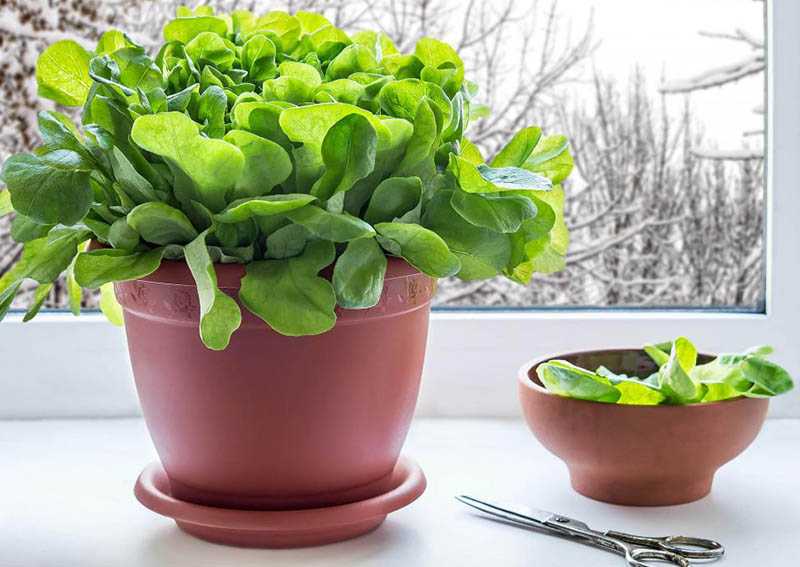 A week after the emergence of shoots, the temperature should be brought to normal, equal to +21 ... 22 o C.
After 8 days after germination, watercress can be fed with nitroammophos by dissolving a standard teaspoon of fertilizer in a bucket of water and adding 1 liter of the resulting solution, calculated per square meter of dishes. If the lettuce grows well, then it makes no sense to additionally fertilize the soil - act according to the circumstances and remember that excess nutrition can turn into harmful substances that accumulate in the leaves, so you cannot exceed the indicated dosage.
Irrig. It is extremely important to prevent even short-term drying of the soil in the container where the plants grow - if moisture is in short supply, the plants may die.
Lighting is sufficient from the window, for which the lettuce should be placed on the southern windowsill and once a day turned the other side to the light so that the plants develop normally.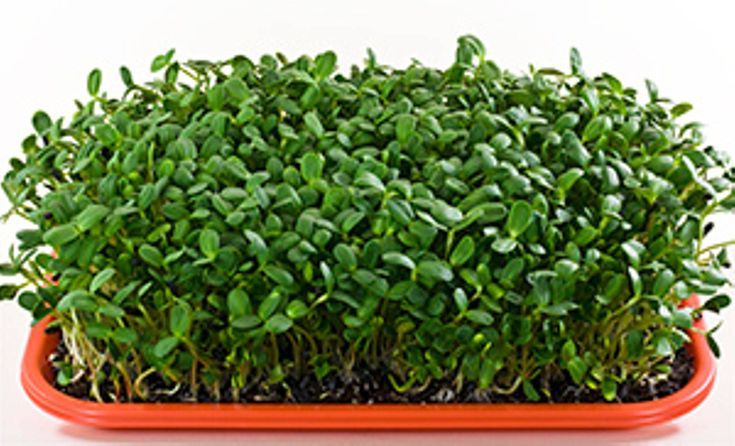
Watercress harvest
Usually after a couple of weeks (or a little less) lettuce can be cut, and harvesting watercress also has its own subtleties. So, the required amount of watercress can be cut when they reach a height of about 10 cm. It is better to remove the green mass when the plants are in turgor, in the morning or in the evening.
If the salad is not used immediately, then it can be stored in the refrigerator for about 24 hours, and if the cut green mass is placed in a container with water, it can be stored in the refrigerator for a couple of days.
When the plants reach a height of 15 cm, they should be cut off at the base of the container or removed completely, along with the root system. Remember that when overripe, the taste of lettuce becomes very bitter and can spoil the dish in which you add it, so it is better not to allow overripe.
Cut lettuce does not grow back, to prolong the period of its collection, the seed material should be resowed after 14 days.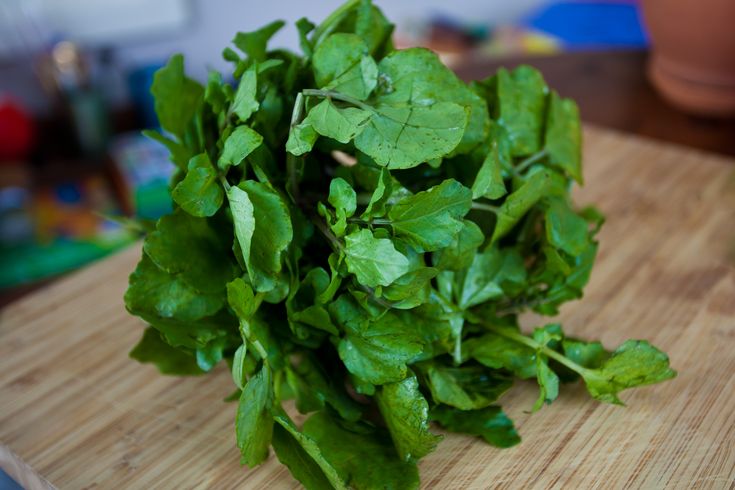 From a square meter you can collect up to a kilogram of greenery.
Plants with green leaf blades are considered to be especially productive, while purple leaf blades are less productive.
Growing watercress without a substrate However, you need to sow the seeds in moistened cotton wool or another substrate, laid in a layer of 2 cm and well moistened. In this case, seedlings appear a day or two faster than when grown in the soil, but it is necessary to strictly monitor the moisture content of the cotton wool - it dries faster than the soil.
They manage to grow watercress in an ordinary bowl with water poured into it, such a salad is eaten whole, along with roots and eat it when it reaches a height of 4-5 cm, and sometimes less.
This is how simple and easy it is to grow watercress on a windowsill.
best tips for growing at home
Do you love watercress as much as I do?
Whatever plant you take, it is inextricably linked with the history of mankind.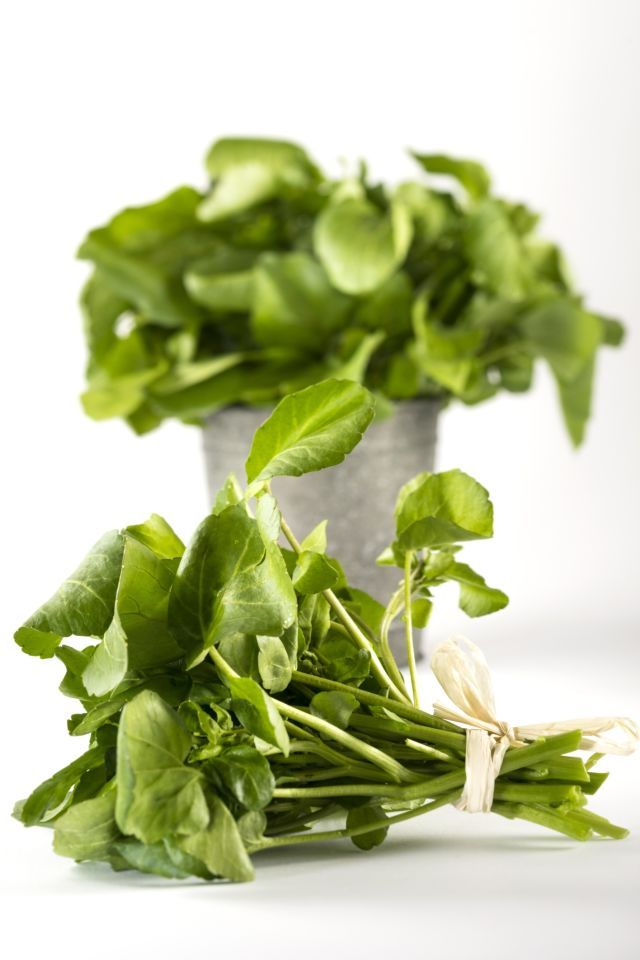 The weed that grows on your window has been traveling and growing with humanity for thousands of years. But there are not many plants that can be quickly and easily grown with your child. Watercress, or bedbug, is an ideal plant. It grows quickly and is easy to care for. And when vigorous sprouts begin to reach for the sunlight, the child's joy knows no bounds.
Watercress is undemanding to light, I would even say it is shade-loving. You can even grow it in your kitchen cabinet so your pets can't get to it (hello my cute kitty!).
Seeds can be easily and easily purchased at any agricultural seed store. A pack of seeds is usually thick :), the seeds will last for a long time.
I won't say seeds are cheap, but growing plants organically is never cheap. But the process is fun.
The optimum temperature for sprouting is +7°C...+15°C. If it rises above +15 °C, plant growth stops, and a local catastrophe may occur
Watercress - annual plant , its seeds are similar to mustard seeds.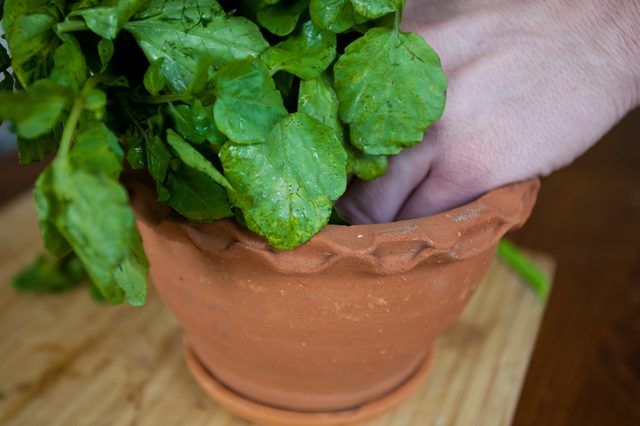 It grows quickly, and it is necessary to eat it when it reaches a height of 8-10 cm.
We harvest with scissors. Cut the lettuce exactly the amount you want to use in food: it does not keep for a long time. Therefore, watercress should be sown regularly, best of all - according to scheme 3 after 3 days.
There are a lot of varieties of watercress , and some grow faster, others slower. Most have green foliage, but some have purple. Green varieties grow faster. Usually, a future salad is drawn on a box of seeds - look and choose.
Ads by
Watercress farming:
- Take a container and place in it a layer of clay or peat soil about 3 cm high, or flannel (cotton cloth), or paper towels.
- Sow the seeds on the surface of the soil and carefully press them into the ground. Then water the crops with warm water and cover the container with dark paper or black film.
- Place the container in a warm place with a temperature of at least +7 °C and maintain a constant humidity in the room where the seeds are germinated.

- After the seeds have germinated, remove the film or paper from the container and place it in a bright place.
It is very important that the substrate is always moistened. Never allow to dry out in the molds you grow it in (pay attention to the wide holes at the bottom).
But if the stems of the seedlings break or rot, then the soil in the container is too wet. It doesn't matter what substrate you grow your watercress on, it should always be kept moist, but never wet.
Watercress does not need to be fertilized with , it is a very unpretentious plant.
How to use watercress and what to cook with it
This plant is only used fresh as a seasoning for salads, meats, fish, omelets, gravies and soups. When dried, it loses many valuable qualities
Many dishes can be prepared from watercress; it is combined with meat and fish, soups, salads, soufflés, gravies and sauces are prepared from it, seasoning for second courses and cold appetizers. It is good raw, and vegetarians also blanch it, cook it with wine and sugar, with oil dressings.
You can cook stews, cottage cheese casseroles and omelettes with watercress, and sandwiches with it are not only tasty and low in calories - they are very beautiful and look great on the table.
Children are delighted with the small grass-ant, grown with love with their own hands.
They really like to mix it all up and season it with sour cream or butter - quick, easy, interesting.
Pumpkin seed salad recipe
- First prepare the dressing: beat the juice of half a lemon with 1 tbsp. olive oil;
- Then add 3 carrots, grated on a fine grater, a bunch of watercress and mix.
- Topped with boiled eggs (2 pcs.), grated on a coarse grater.
- Pour a few drops of vegetable oil into a frying pan, add pumpkin seeds (1 tbsp), fry for 2 minutes, then add honey (1 tsp), remove from heat and sprinkle over salad.

Benefits of watercress
- Its fresh leaves are rich in mineral salts potassium, calcium, phosphorus, iodine, iron, magnesium, sulfur, copper, etc.
- Contain ascorbic acid, B vitamins, carotene, thiamine , rutin, riboflavin, mustard essential oil , including propsoline glycoside and giving it a specific smell and taste.
- Roots and aerial parts of the plant contain bitter substance lepidin , seeds - up to 50-60% semi-drying fatty oil.
- Watercress improves digestion, sleep, stimulates appetite, has antimicrobial and diuretic effects, lowers blood pressure, it is indispensable for respiratory diseases. It is good to gargle with juice squeezed from the grass, drink it when coughing.
- Due to the content of ascorbic acid, it has an antiscorbutic effect.
- The aerial parts and roots, containing the bitter substance lepidin, were used for fevers; juice from the leaves was used for anemia, powder from crushed seeds - instead of mustard plasters.