Average cost to replace kitchen flooring
How Much Does it Cost to Replace a Kitchen Floor in 2023?
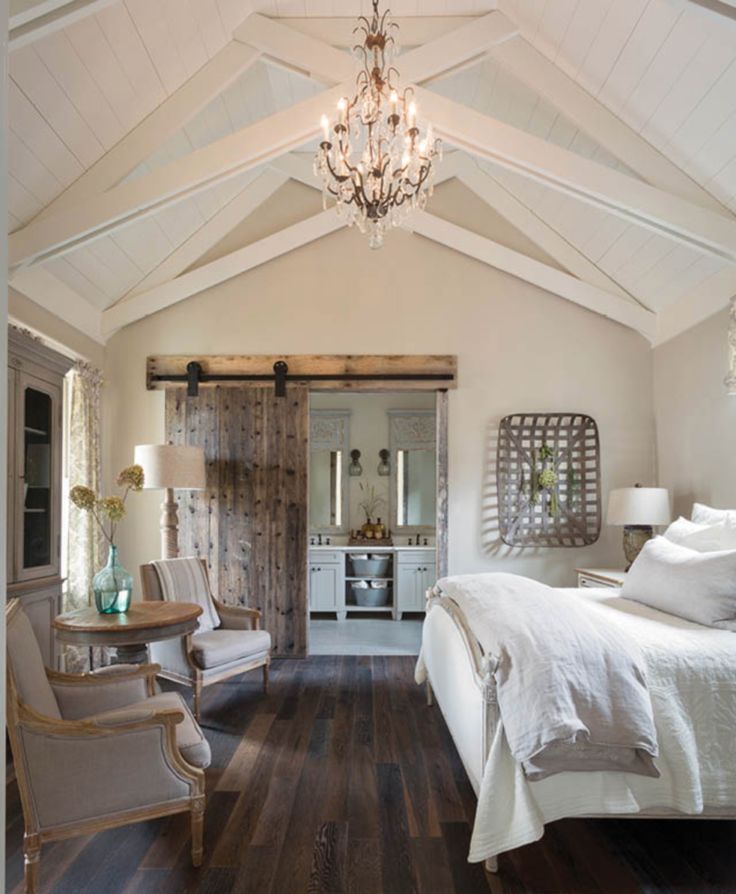
If your kitchen looks worn or needs a makeover, replacing the flooring can be one of the most rewarding projects. The typical cost to replace a kitchen floor is $3,115, with most homeowners paying between $1,435 and $5,520.
The costs can vary greatly depending on your kitchen size and the type of flooring you choose, but you can expect to pay between $3 and $22 per square foot, or an average of $11 per square foot.
In this article:
- Average Costs
- Cost Estimator by Kitchen Size
- Cost Estimator by Flooring Material
- Other Factors That Affect Cost
- Related Services
- Pro Cost vs. DIY Cost
- Cost by Location
- FAQ
Average Kitchen Floor Replacement Costs in 2023
| National Average Cost | $3,115 |
| Typical Price Range | $1,435 – $5,520 |
| Extreme Low-End Cost | $350 |
| Extreme High-End Cost | $18,325 |
The average costs for floor replacement in a 300-square-foot kitchen range between $1,435 and $5,520, or from $3 to $22 per square foot.
These costs can go up to $18,325 if you have a big kitchen and decide to use luxury materials like marble. Still, you can also pay as little as $350 for vinyl flooring in a small kitchen.
Kitchen Floor Replacement Cost Estimator by Size
If your floor tiles are not in good shape and you want to replace the laminate with porcelain tiles, you should know that kitchen flooring replacement costs depend on the size of the project.
The more tiles or laminates you need to install, the more hours it will take for your contractor to complete the project. And the more time it takes to install tiles, the more money you’ll spend.
Replacing flooring typically costs $11 per square foot on average, so you can use the table below to estimate your project’s costs based on your kitchen size. High-end materials will cost more than the average costs listed, whereas standard or low-quality materials can cost less.
| Kitchen Size | Average Overall Cost |
50 sq.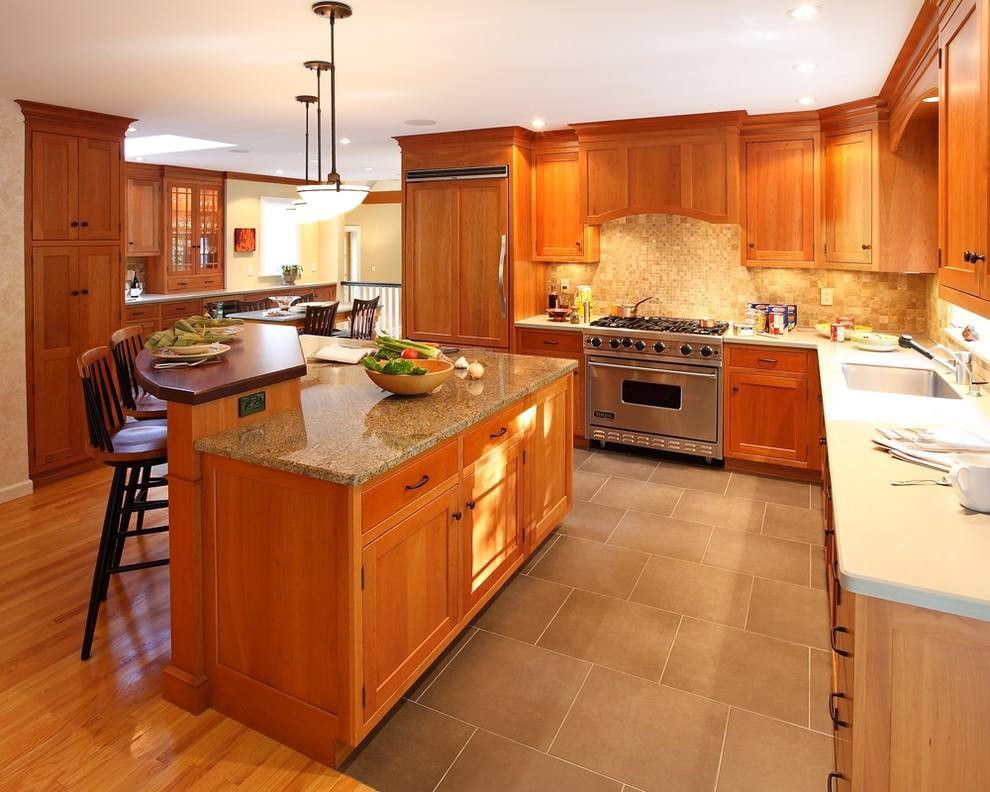 ft. ft. | $550 |
| 100 sq. ft. | $1,100 |
| 200 sq. ft. | $2,200 |
| 300 sq. ft. | $3,300 |
| 400 sq. ft. | $4,400 |
Kitchen Floor Replacement Cost Estimator by Flooring Material
The cost of replacing your kitchen floor depends on your chosen material. There are a lot of options when it comes to flooring materials, but only a few of them are appropriate for kitchen flooring.
Next, we will offer a quick look at what to expect when it comes to the different flooring materials and their associated costs:
Polished Concrete
What it is: Poured concrete that has been ground down with polishing tools.
Price (material only): $2 – $10 per square foot
| Pros | Cons |
| ✓ Ease of maintenance | ✗ Takes time to cure fully |
| ✓ Durable | ✗ Cold surface |
| ✓ Resistant to mold and mildew | ✗ Loud |
Vinyl or Linoleum
What it is: Vinyl is a synthetic flooring made from plastic, fiberglass, and PVC, whereas linoleum flooring is made of linseed oil and other natural ingredients.
Price (material only): $2 – $11 per square foot
| Pros | Cons |
| ✓ Easy to install | ✗ Difficult to remove |
| ✓ Budget-friendly option for wood floors | ✗ Shorter lifespan than wood floors |
| ✓ Ease of maintenance | ✗ Not eco-friendly |
| ✓ Durable and waterproof | ✗ Can’t be refinished |
Laminate
What it is: Laminate flooring is made of wood waste subjected to high heat and pressure, an image layer, and a transparent wear layer.
Price (material only): $4 – $11 per square foot
| Pros | Cons |
| ✓ Easy to install | ✗ Doesn’t add value to your home |
| ✓ Ease of maintenance | ✗ Can’t be refinished |
| ✓ Easy to remove | ✗ Can swell if there’s too much moisture |
Cork
What it is: Cork is made by grounding and processing the bark of the cork oak tree into sheets.
Price (material only): $5 – $12 per square foot
| Pros | Cons |
| ✓ Warm to walk on | ✗ Susceptible to scratches |
| ✓ Moisture resistant | ✗ Requires water sealing |
| ✓ Soundproof | ✗ Not as durable as hardwood |
Ceramic Tile
What it is: Ceramic tiles are produced with clay and other materials, which are then fired at high temperatures.
Price (material only): $2 – $20 per square foot
| Pros | Cons |
| ✓ Wide selection of colors and designs | ✗ Cold and hard |
| ✓ Ease of maintenance | ✗ Joints can separate over time |
| ✓ Durable | ✗ Prone to cracks and chips |
Porcelain Tile
What it is: Porcelain tiles are dense, smooth, and impervious to water, produced similarly to ceramic tiles.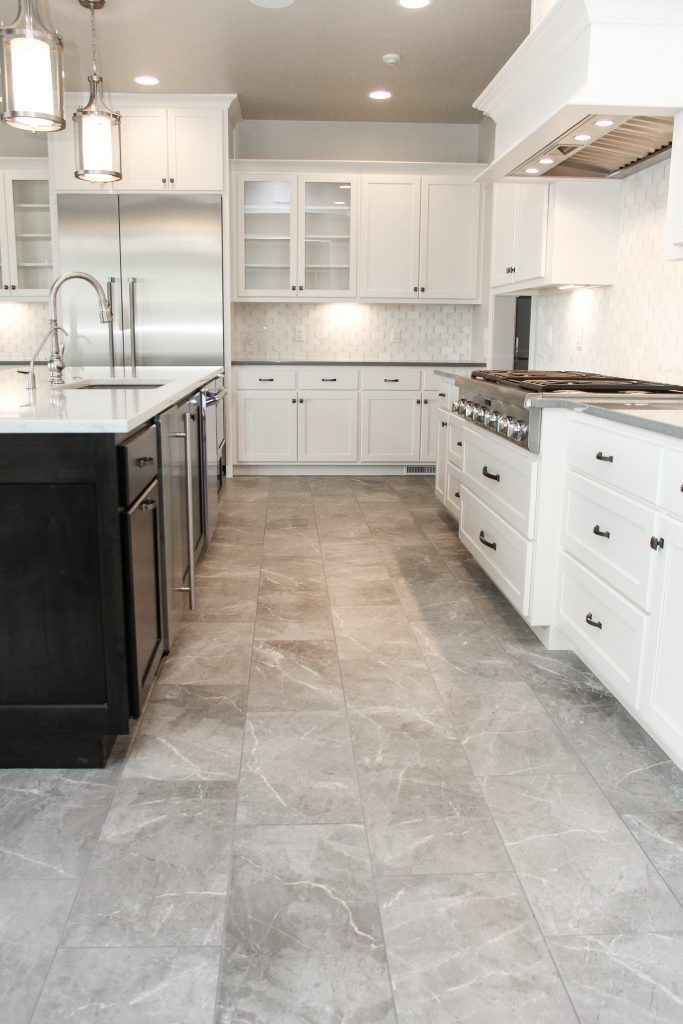
Price (material only): $2 – $30 per square foot
| Pros | Cons |
| ✓ Water resistant | ✗ Difficult to cut and install |
| ✓ Can be used for outdoor kitchens | ✗ Needs strong subfloors |
| ✓ Good for high-traffic areas | ✗ Difficult to repair |
Stone Tile
What it is: Stone flooring is a material cut from natural stone blocks. Some examples of natural stone tile include travertine, slate, granite, and marble.
Price (material only): $6 – $22 per square foot
| Pros | Cons |
| ✓ Easy to maintain | ✗ May need regular sealing |
| ✓ Durable | ✗ Costs can run high depending on the type |
| ✓ Doesn’t attract allergens | ✗ Some types can scratch easily |
Engineered Wood
What it is: Engineered wood is a material made by binding wood, scraps of wood, and shredded wood fibers with adhesives. A good example is plywood.
Price (material only): $5 – $17 per square foot
| Pros | Cons |
| ✓ More affordable than hardwood | ✗ Requires regular maintenance |
| ✓ Available in different finishes | ✗ Fades when in contact with light |
| ✓ More resistant to moisture than hardwood | ✗ Can be low-quality |
Hardwood
What it is: Hardwood is the most luxurious flooring option. There are several hardwood types, such as bamboo, pine, Brazilian walnut, and red oak.
Price (material only): $8 – $23 per square foot
| Pros | Cons |
| ✓ Adds value | ✗ Can be damaged by water and humidity |
| ✓ Durable | ✗ Requires regular maintenance |
| ✓ Possible to refinish | ✗ Can become creaky and noisy |
| ✓ Color doesn’t fade | ✗ Needs to be sanded from time to time |
Other Factors That Affect Cost
Many factors affect the cost of replacing kitchen floors besides the size of your kitchen and the material you choose. Let’s look at some of these considerations next:
- Labor
- Removing Old Flooring
- Subfloor and Underlayment Replacement
- Baseboard Replacement
- Moving Furniture
- Asbestos Testing and Removal
Labor
Labor rates can vary a lot depending on the flooring material and complexity of the job, but typically, installation costs range from $4 to $19 per square foot.
Materials like porcelain are more challenging to install, as they’re heavier and need a completely level subfloor to be laid on, and thus will cost more. On the other hand, vinyl and laminate are easier to install and will cost less.
Removing Old Flooring
Contractors will also consider the difficulty of removing the old flooring in the costs of installing the new one. For example, vinyl flooring can be easy to install, but it is not as easy to remove, and the same goes for cork.
The more complex one material is to remove, the more it will cost. On average, removing the old flooring costs between $1 and $4 per square foot.
Subfloor and Underlayment Replacement
While you’re removing your old flooring, you may notice that there are issues with the subfloor. A subfloor is a layer of flooring that lies directly below the finished flooring material. It’s usually made from plywood or other composite materials, and it’s what supports the rest of your floor.
Replacing the subfloors costs between $2 and $7 per square foot.
Underlayment is a layer of material that goes between your subfloor and the finished flooring material you put on top. It keeps moisture from getting through to the wooden subfloor, which can cause damage over time.
Underlayments are considered necessary for vinyl, laminate, and carpet flooring. Installing a new underlayment costs $2 to $5 per square foot.
Baseboard Replacement
If you’re thinking about replacing your kitchen flooring, you may also need to replace your baseboards.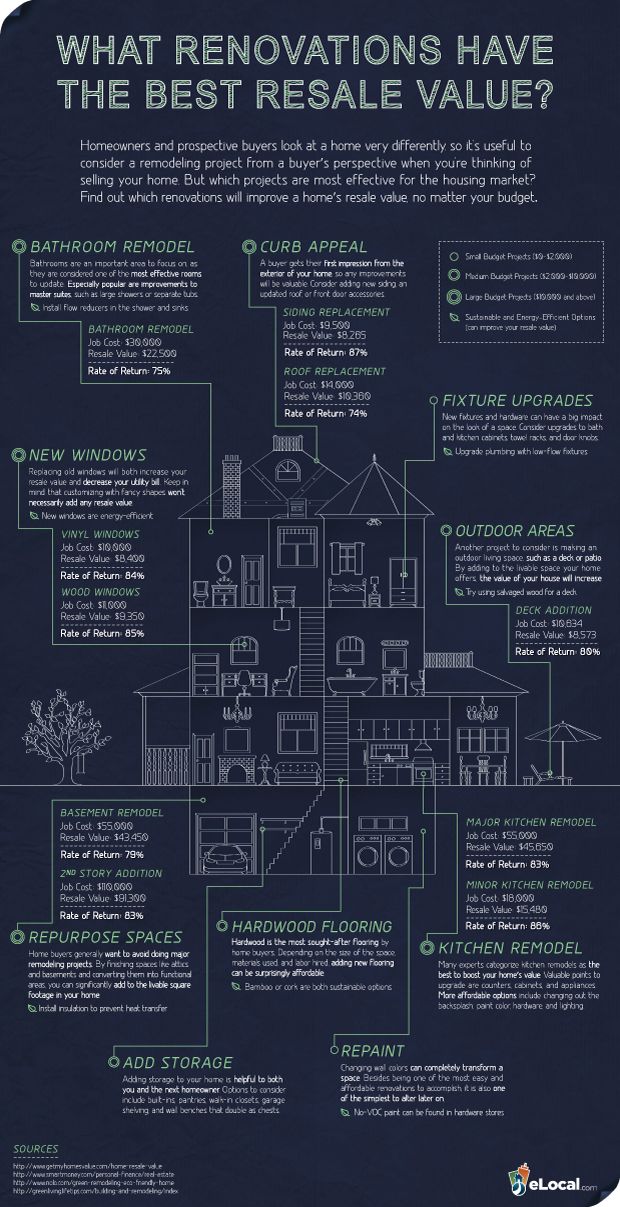 Baseboards are the trim that runs along the bottom of your walls and around the top of your cabinets.
Baseboards usually come in long strips, so if you’re replacing them, it’s best to do so all at once. Replacing baseboards costs between $1 and $4 per linear foot.
Moving Furniture
Another factor affecting cost is the prep work required before installation begins. For example, contractors may charge per hour to move the kitchen furniture out of the way so they can access the flooring beneath it—this counts as preparation time. You can save money by moving furniture yourself or asking friends or family members for help.
Asbestos Testing and Removal
Asbestos is a microscopic mineral fiber that was commonly used to insulate homes before the 1970s. It can cause lung diseases when inhaled and is commonly found in vinyl flooring and popcorn ceilings. Asbestos is usually fine when not disturbed, but it can crumble and flake in home improvement projects, such as replacing flooring.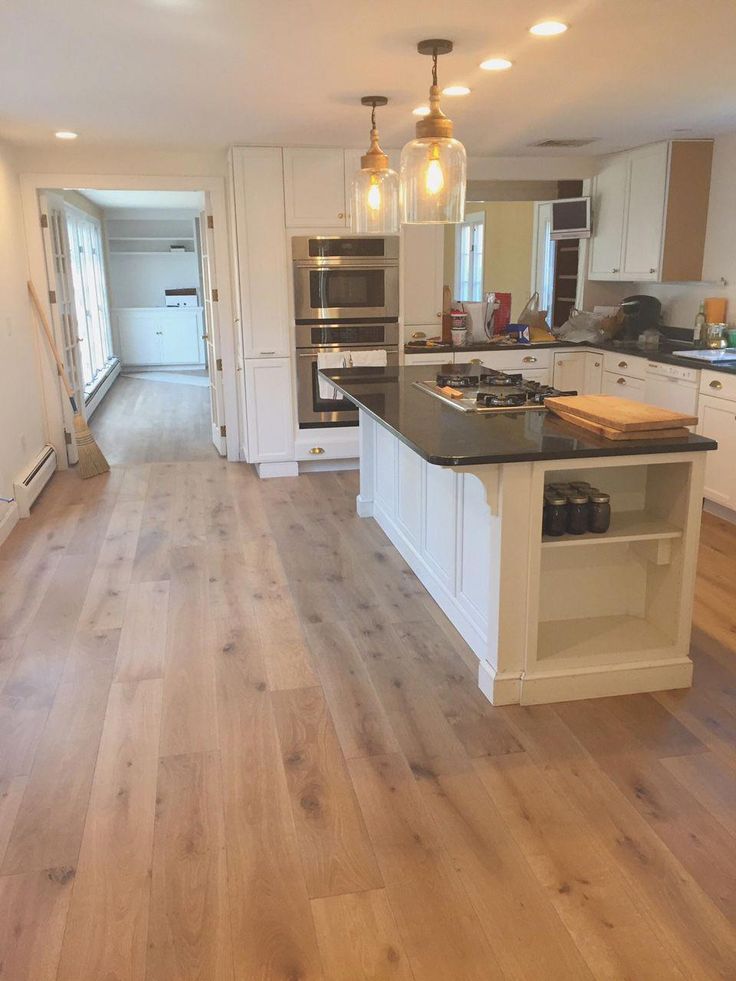
If you live in an older home from before the 1970s and you’re considering replacing the vinyl flooring, you may need to test for asbestos. Asbestos testing costs, on average, $495, with most homeowners paying between $235 and $785.
If the tests come back positive, the costs for asbestos removal range between $1,165 and $2,950, with an average price of $2,050.
Related Services
When you’re thinking about replacing your kitchen flooring, you might also want to consider the following related services:
Refinishing
If your hardwood or stone floors are in good condition, but looking bleak, don’t worry—you don’t necessarily need to replace them. Instead, they can be refinished to bring a new shine and life back into your home for about $3 to $8 per square foot.
Solid hardwood floors are often refinished with sanding and a clear topcoat, highlighting the wood’s natural beauty. This is a great way to preserve the original flooring while also giving it a fresh look.
Natural stone floors can also be given a new finish, providing an opportunity to fix any scratches or damage that may have occurred over time.
Kitchen Remodel
A kitchen remodel is an extensive renovation of an existing kitchen. It can be done for many reasons, but most commonly, it’s done to update the look and style of the room. This might be the answer if you’re looking for something more than simply replacing the flooring.
A full kitchen remodel costs around $23,320, with prices varying between $13,060 and $38,390. It can involve replacing cabinets and countertops, changing the design, and replacing appliances.
Kitchen Backsplash
The backsplash is the wall behind your countertops, and changing it is one of the easiest ways to give your kitchen a whole new look. It doesn’t have to be plain white or dull –you can make it unique to fit the personality of your kitchen with different colors and textures.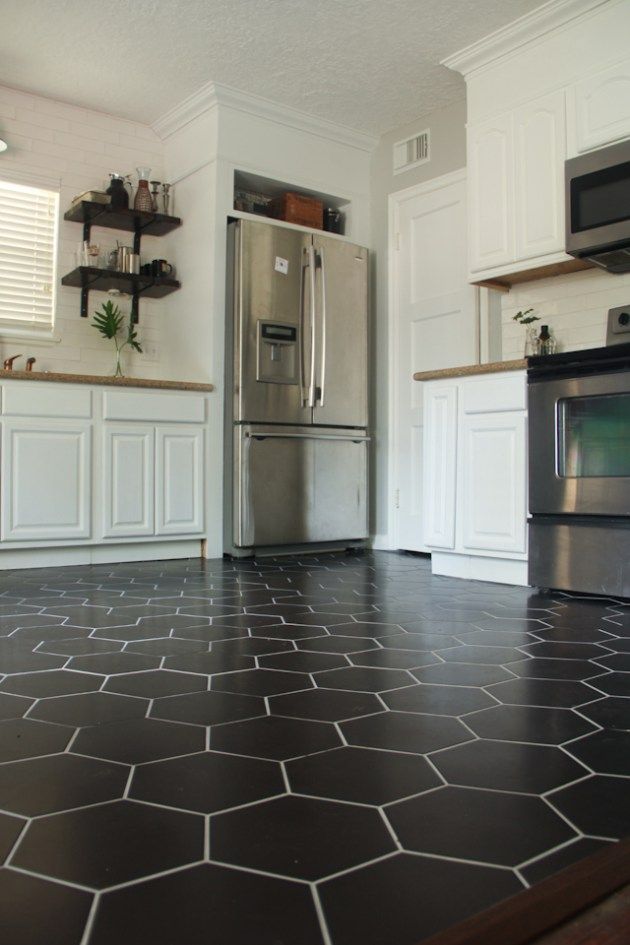
A new kitchen backsplash costs an average of $1,150 to install, with most homeowners paying between $695 and $1,705.
Pro Cost vs. DIY Cost
The easiest flooring material to install yourself is vinyl. You can use vinyl sheets or vinyl planks. Vinyl planks don’t have to be glued down to a subfloor; they only have to be clicked together to stay in place, whereas vinyl sheets are usually peel-and-stick, which means they come with self-adhesives.
The good thing about vinyl is that you don’t have to remove the old flooring before installing it, as it can be laid over different material types. You just have to ensure there aren’t any cracks or wide gaps. If you remove the old flooring, you’ll have to use a self-leveler to prep your subfloor.
| DIY Equipment for Vinyl Planks | Average Cost |
| Chalk | $1 |
| Tape measure | $18 |
| Utility knife | $12 |
| Pull bar | $18 |
| Level | $21 |
| Self-leveler | $35 (50 lbs.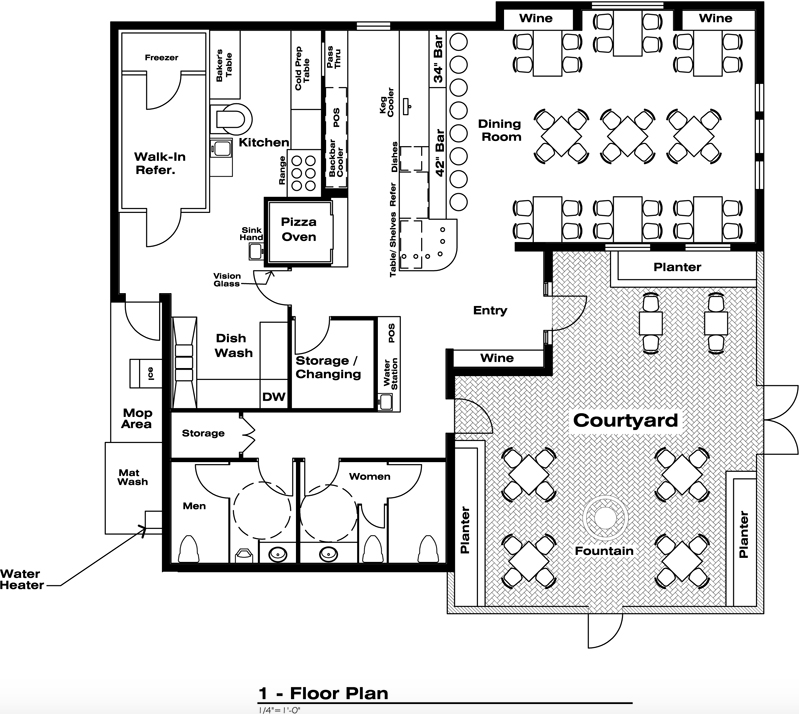 ) ) |
| Total cost: | $105 |
A DIY flooring installation will set you back about $105 for equipment and tools, plus the costs for the vinyl planks, but it will save you $4 to $19 per square foot on labor costs.
Suppose you’re planning to install tile flooring yourself, such as ceramic or porcelain. In that case, tools and equipment will cost you about $203, as tile involves using thin-set mortar, grout, tile cutters, and other equipment, which will cost more.
| DIY Equipment for Tile | Average Cost |
| Spacers | $3 |
| Thin-set mortar | $21 |
| Grout float | $12 |
| Flooring trowel | $7 |
| Level | $21 |
| Grout | $25 |
| Tile cutter | $100 |
| Safety goggles | $14 |
| Total cost: | $203 |
Cost of Flooring by Location
If you’re looking for kitchen flooring replacement services, it’s important to know that the price you pay will depend on where you live.
The same service in a metropolitan area will cost more than in a rural area because of the higher demand for labor and materials. That means if you live in a rural area, you might be able to get the same service at a lower price.
You will also pay more if you choose flooring materials that aren’t widely available in your area and have to be transported from far away.
FAQ
Can you replace the kitchen floor without removing the cabinets?
Yes, you can replace your kitchen floor without removing the cabinets. You can install the new flooring as closely as possible to the cabinets and cut the flooring pieces so they fit against the cabinet base. If you’re installing tiles, you will have to use a tile saw or a wet tile saw.
What is the cheapest way to cover a kitchen floor?
The most budget-friendly kitchen flooring option is vinyl. You can install vinyl flooring easily for $2 to $11 per square foot, and you’ll get a durable and easy-to-maintain surface that also looks very stylish.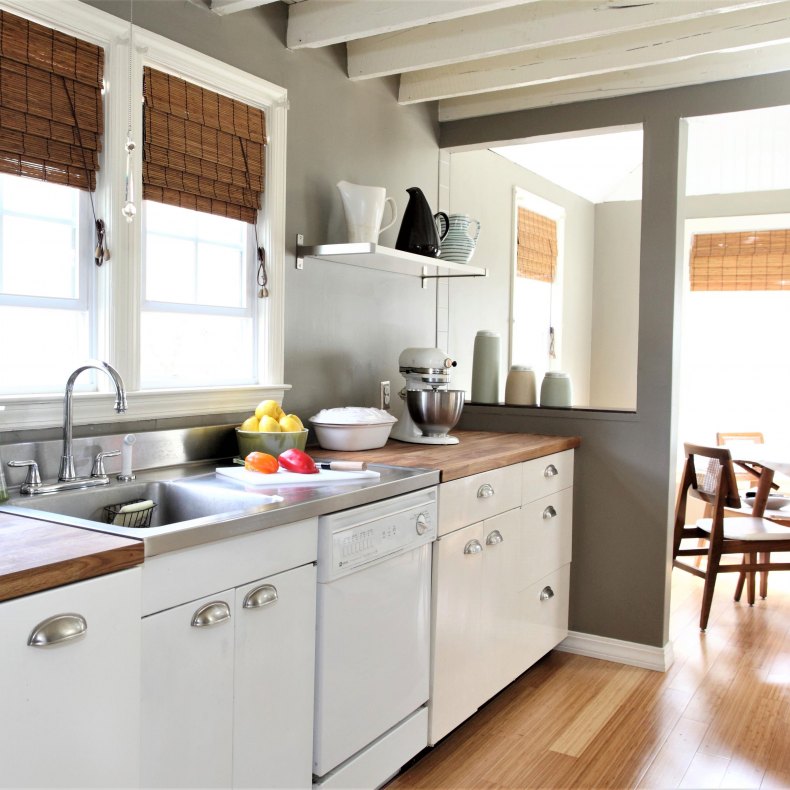
What is the best flooring material for the kitchen?
The best flooring material for the kitchen is porcelain or ceramic. These materials are easy to clean, durable, and can withstand high temperatures and moisture without getting damaged.
Final Thoughts
It may seem like a significant investment, but a new kitchen floor can change the atmosphere of your home. So, if you’re looking for your next home improvement project, this might just be the answer.
After you’ve considered all the factors that can affect costs, find an experienced flooring contractor in your area, so you don’t waste time and money on a project that will fall short of your expectations.
Main Photo by: Pixnio
Maria Isabela Reis
Maria Isabela Reis is a writer, psychologist, and plant enthusiast. She is currently doing a PhD in Social Psychology; and can't help but play with every dog she sees walking down the street.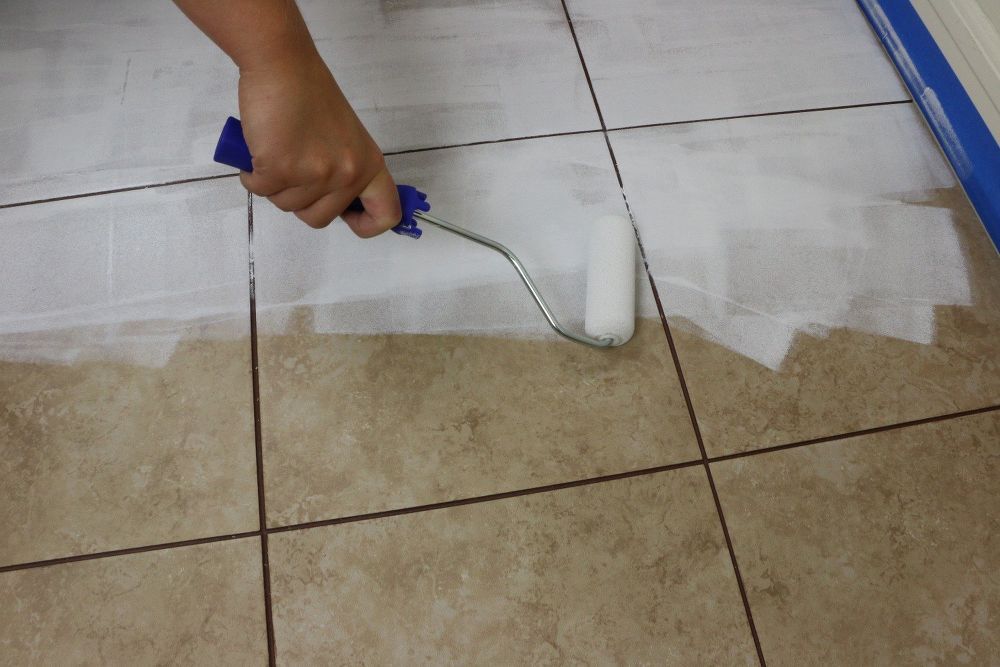
Posts by Maria Isabela Reis
Everything You Need to Know
Cost of Kitchen Flooring: Everything You Need to Know
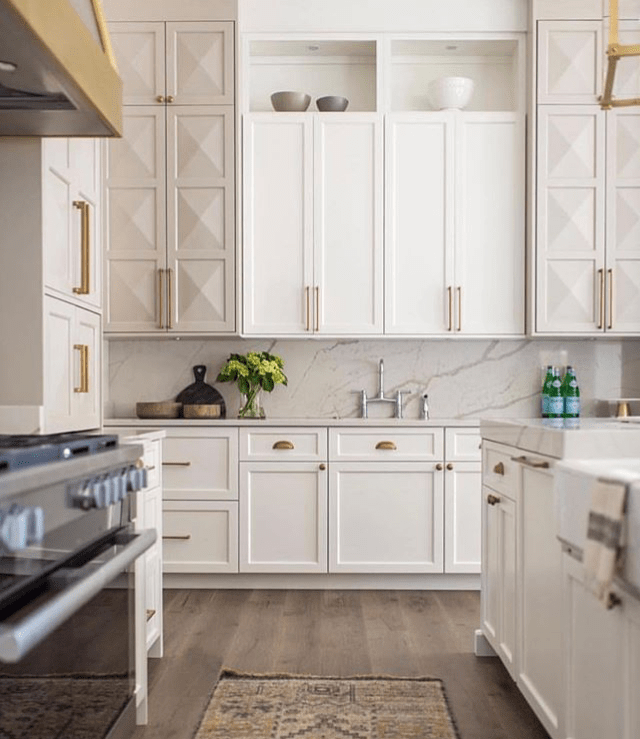
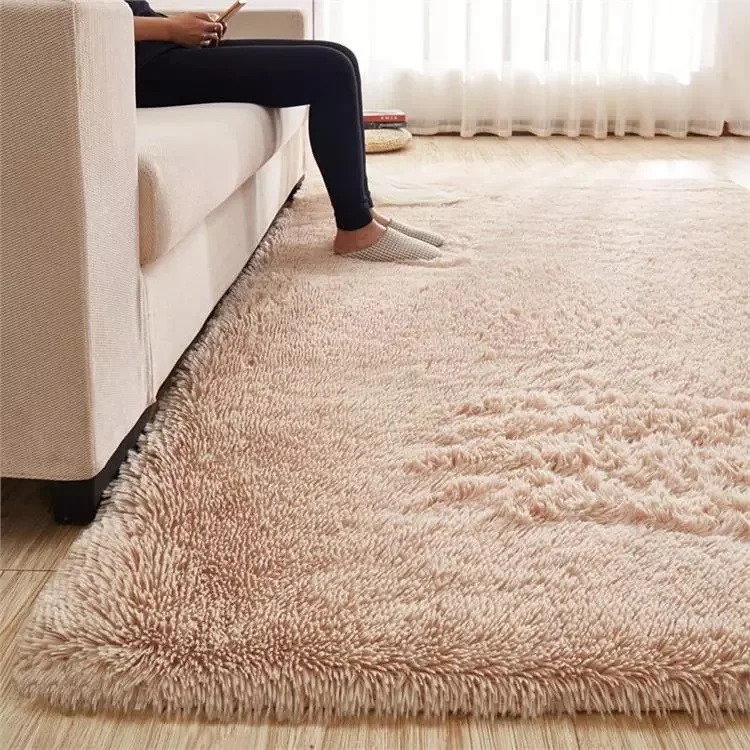
Kitchens are an essential part of the house, and you must look after them carefully and thoroughly. The flooring is a crucial element of the kitchen, and it must look and feel good. The cost of kitchen flooring varies, depending on several factors such as the material, the kitchen’s size, etc.
Many people opt for ceramic, vinyl, natural stone, and tile for their kitchen flooring. These materials offer many colors and styles, and their prices vary from single digits to hundreds of dollars. The cheapest material is peel and stick flooring but it is not really durable.
The quantity of the material used plays a vital role in deciding the total expenditure. And therefore, you need to choose the right material correctly. When picking out the material for your kitchen, keep in mind the budget you have set and whether the material’s look suits your kitchen décor.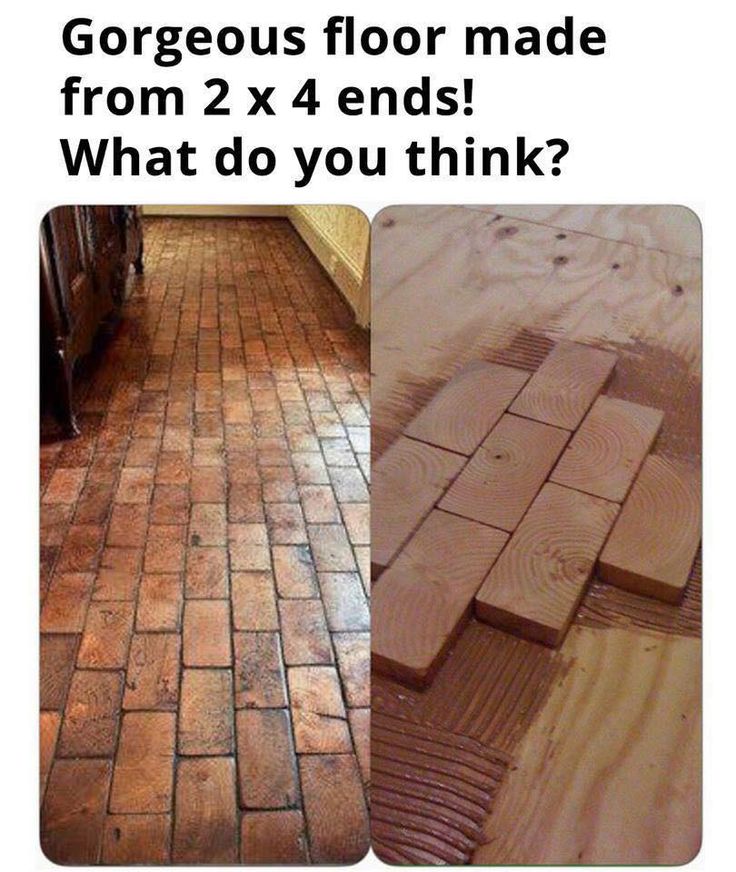
Here is a detailed breakdown of the cost of kitchen flooring to help you find the right kitchen flooring options for your kitchen remodel.
Cost per Square Foot of Kitchen Flooring
The highest your flooring material can cost is $18, and the lowest it can go is $3. On average, the cost of new kitchen flooring is $8 per square foot. The primary things you must consider carefully before finalizing any material are the local climate, dirt attraction, which part of the house you want to change the flooring in, and the foot traffic.
The budget you have set for new flooring is an essential factor that you need to keep in mind while deciding the flooring material. There are many options to choose from, and you must pick the one that suits your interest best.
People generally choose kitchen flooring that cost between $6 and $10 per square foot. As mentioned above, the final cost of kitchen flooring mostly relies on the material. The total cost depends on the installation method, the production cost, and whether you do it yourself or hire a professional to install it for you.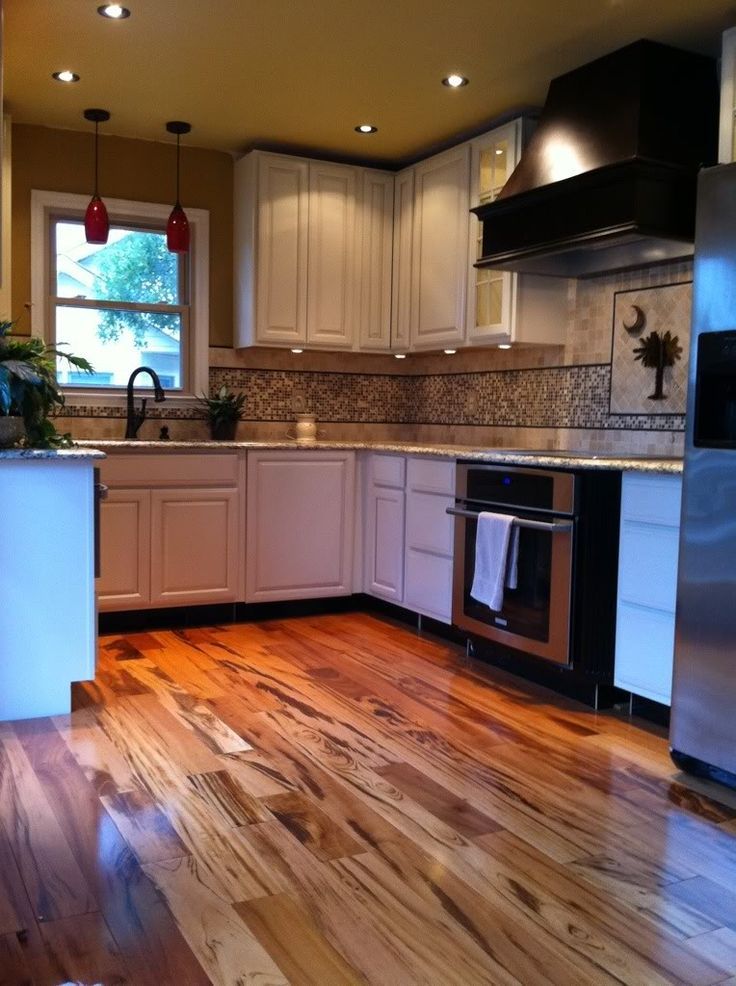
Different Types of Flooring Materials
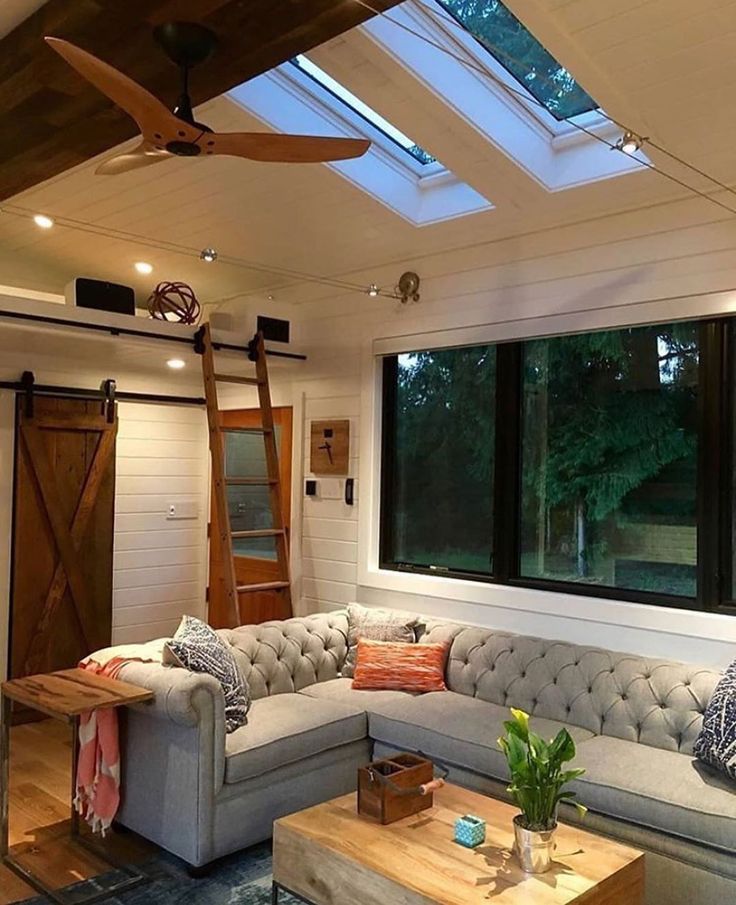
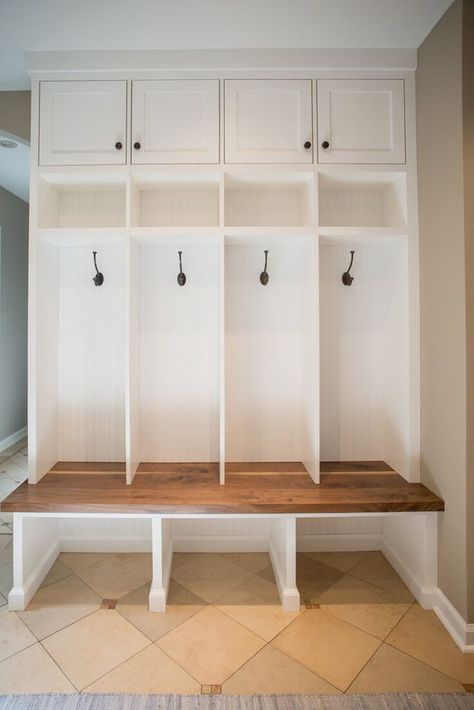
Photo by Watermark Designs on Unsplash
Different common flooring materials cost differently, from less than $1 up to $15. Here are a few materials for your new flooring with their average selling and installation costs for your next kitchen remodeling project.
Laminate FlooringBecause of its similarity with other high-end materials such as natural stone, tile, or wood, and its comparatively cheaper cost, laminate is preferred by many people. This makes it an excellent option for your kitchen flooring. Laminate does not even require a lot of maintenance, is very durable, and you can easily install it without removing your existing flooring.
The installation cost of laminate flooring is around $5500 for a 1000 square feet kitchen. Per square foot, the cost is between $6 and $9 on average. The cost to install laminate flooring with the help of a contractor and subcontractors is $36 per hour. The contractor takes a separate fee of 15% to 20% of the installation’s overall cost.
Because tile comes in many different materials, the cost can range from $6 to $20, depending on the type of tile choose for your kitchen remodel. It may cost you between $6000 and $20000 to cover a 1000 square feet room. The average cost of tile flooring ranges between $2 and $15 per square foot for your kitchen.
Tile flooring is easily maintainable and highly durable, and that is why people opt for it widely. It is also greatly water-resistant. The downside of installing this flooring in your kitchen is that tile can get challenging to install and needs professional help, costing you extra.
Another downside of these tiles is that they break very quickly, so you must avoid dropping things on the floor. They can also become quite slippery when it is wet, which is hazardous to the homeowners.
Vinyl and LinoleumThis material costs between $500 and $5000, and the cost to install vinyl and linoleum flooring runs between $3000 and $7000 for a 1000 square feet room.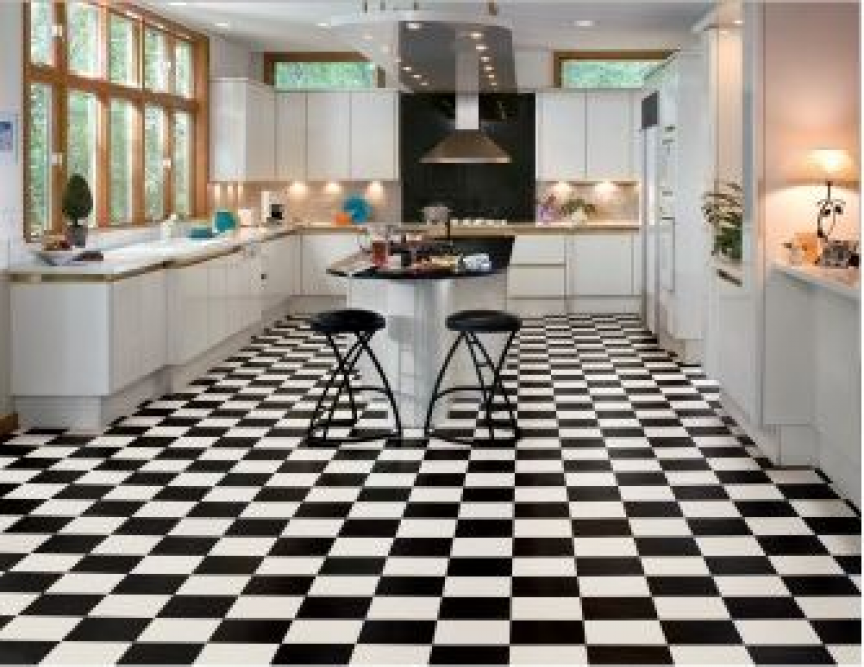 If you break down this cost, the average falls between $3 and $10 per square foot. In many places, vinyl or sheet flooring can cost you as low as $0.84 per square foot for your kitchen remodel.
Planks and tiled vinyl can cost you between $1.85 and $3, and luxury vinyl can cost up to $10 per square foot. The thing you need to keep in mind is that you must install vinyl on a flat surface.
Some other considerations are that you must seal linoleum after installing it and repeat it once every year. The good thing is that vinyl is very budget-friendly and has many options. It is also water and heat-resistant.
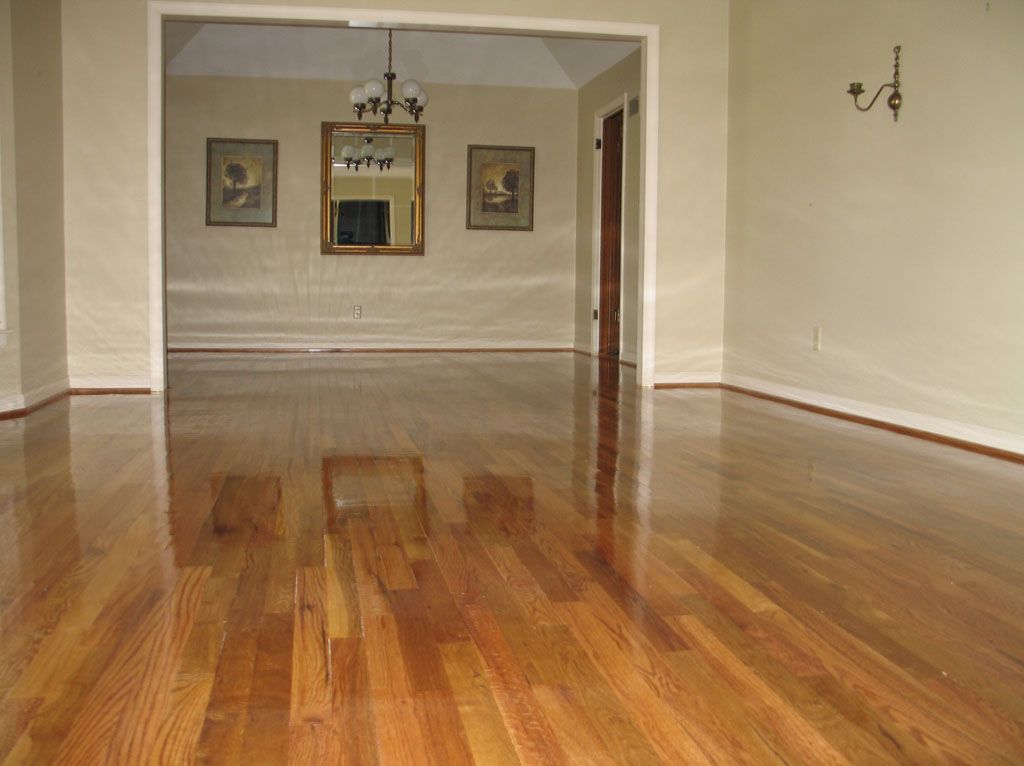
Hardwood FlooringHardwood flooring for your kitchen remodel can cost you between $6000 and $22000 for a 1000 square feet room. The average cost of installing hardwood flooring is $8000. Hardwood flooring has many options, such as parquet, engineered wood, and other lumber species that will cost you between $3000 and $14000.
People prefer to install hardwood flooring in their kitchens since it is very durable, it is suitable for any room of the house and décor, and the grain is palpable too.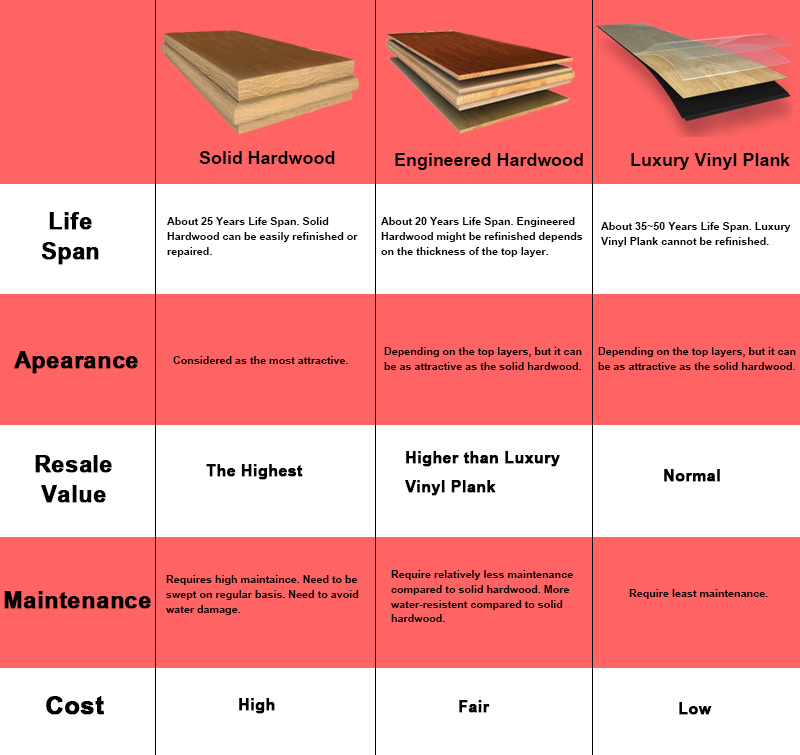 The colors range from a light and airy maple to dark mahogany or walnut. Hardwood flooring has different finishes also, such as satin, matte, gloss, and semi-gloss.
Flooring Installation Cost
Apart from the material cost, you also need to consider the installation cost for your kitchen remodel. It ranges between $3 and $22 per square foot on their flooring, depending on the material. The average cost of kitchen flooring ranges from $3 to $10.
The round-off figure would be between $1500 and $4500, depending on the size of your kitchen layout. People generally pay around $3000 for a 500 square feet kitchen.
How much does it cost to replace floors
Replacement of floors in a house or apartment is carried out for various reasons. The most common examples are the need to install sound and heat insulation, a decision was made to install a “warm” floor, there was a deformation of the coating, the boards began to creak or the humidity coming from the basement increased, just wanted something modern and new.
Be that as it may, you will have to do a huge job, consisting of several stages. A lot during material replacement depends on what material the old floors are made of and how you plan to see the new flooring. Moreover, you need to consider an additional function that would increase noise and heat insulation, as well as provide more reliable protection for the apartment.
In order not to surprise you with the complexity of the upcoming work, you need to find out not only how much the replacement of floors costs, but also get acquainted with the main stages of the upcoming events.
Dismantling the floor
This process is one of the most unpleasant. But no matter how scary it may be, you simply can’t do without such an activity, and therefore you should boldly take up work.
If the old floor in the apartment is wooden, then there will be no big difficulties and problems with its dismantling. For work, you need to prepare all the necessary tools, such as a hammer with a nail puller, an ax, a pry bar, a screwdriver, an electric saw or an electric jigsaw for cutting old boards (if you do not plan to reuse them), a shovel and garbage bags.
Dismantling the old wooden floor
- First of all, you need to get rid of the skirting boards by removing them around the entire perimeter of the room, and only then can you start dismantling the wooden flooring.
- If you plan to re-lay the boards or use them as joists, then remove them carefully, being careful not to cause serious damage to them. Therefore, using a nail puller, carefully pull out all the nails. If the boards were fixed with self-tapping screws, then this process will not cause any difficulty - most often they can be unscrewed with a screwdriver.
- If you do not plan to use boards in the future, it is better to take them out of the apartment immediately. Do not collect a bunch of garbage, as it will interfere with subsequent actions. It is also worth doing with other elements that you definitely will not need for installation work.
- Having freed up space, you can start dismantling the log.
 It is important to remember that they can be securely fastened to the floor, and they must be dismantled carefully, trying not to damage the base. Otherwise, you will add to yourself additional work and expenses that will be spent on sealing the holes that have formed.
- When you free the room from the old coating, it is necessary to carry out its thorough cleaning, as far as the foundation allows, of course. After completing this procedure, you can begin preparing the floor for installation work.
Removing a wooden floor: video
Removing a concrete floor
Removing an old concrete floor can be repaired only in extreme cases. Drastic measures are taken only if the old cement coating cannot be preserved. For example, it was constantly exposed to moisture without regular drying. In such a situation, mold and fungus could form in the concrete layers, which can cause health effects for residents - asthma, allergies, lung diseases, rhinitis, and others. Naturally, it is simply necessary to dismantle such a coating.
Another reason for dismantling is the low ceilings in the apartment. If you are going to install the floor with insulation, then be prepared for the fact that it will become higher, and the coating must be removed to make room for the sound and heat insulation structure.
If you plan to dispose of the screed, make sure it is laid on a concrete floor and proceed with extreme care.
To remove the screed layer, it is better to use a perforator. With its help, its individual pieces are removed. Typically, such a layer leveling the slab is from 50 to 120 mm.
When the old screed has been removed, cleaning activities must also be carried out. However, in this embodiment, it is unlikely that it will be possible to make an ideal cleaning, but you will have to make every effort.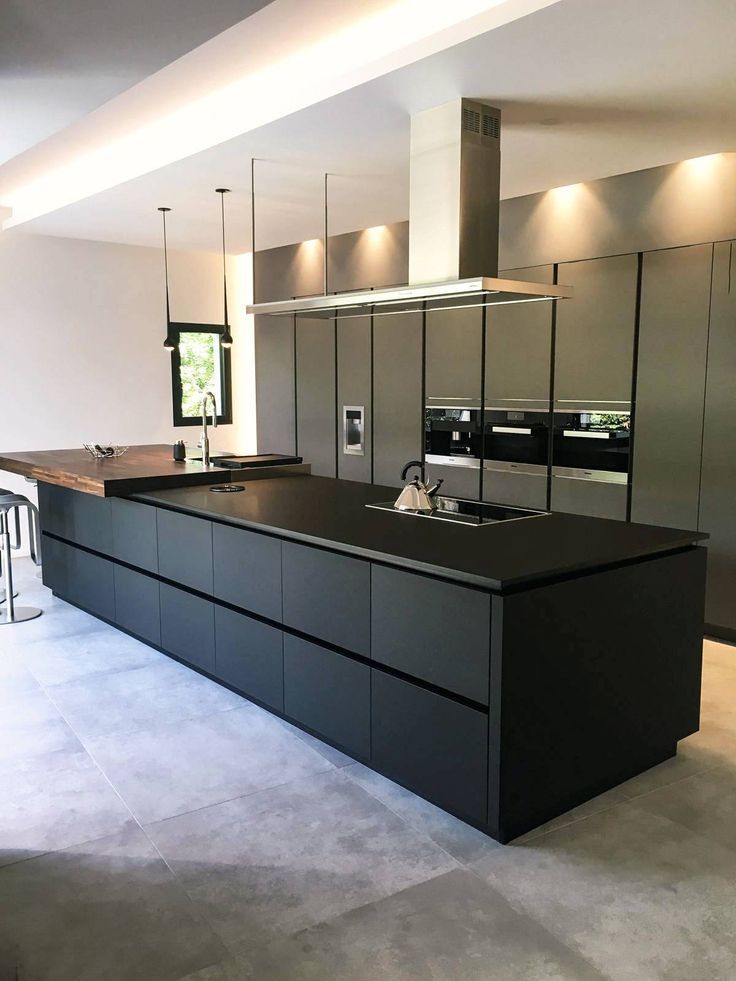
Preparatory work
In order for the new flooring to be installed properly, the cleaned base from the old floor must be brought into proper condition.
- Carefully remove all dust from the surface. This is done in order to detect serious flaws in the base (holes, cracks, crevices, areas of coloring or peeling, places where the concrete has been impregnated with certain compounds, or where traces of mold and dampness were visible).
- If you find such, they must be well sealed, otherwise they may reduce the effect of sound and thermal insulation. This can be done with mounting foam, cement mortar or sealant. It is necessary to make a choice of repair materials, starting from the size of the damaged base. In case of mold or fungus formation, the base must be impregnated with special aseptic compounds.
- Once the base is dry, the next preparation steps are carried out, which will depend on what type of flooring is being replaced.
 For this reason, these processes should be considered in conjunction with the installation of each type of floor.
But keep in mind that even if you are going to install a wooden floor instead of a dismantled screed, the surface will have to be leveled with a new concrete coating (small layer).
Making a new tie
There are many ways to make a new tie. If the base is more or less even, and a wooden coating is laid on top of it, then put it in perfect order by making a self-leveling floor. One of the best options would be to pour a self-leveling coating.
The self-leveling coating can hide small flaws or differences in the substrate. To do this, you need a ready-made dry mortar intended for self-leveling floors.
You will be able to get acquainted with the technology of preparing the solution on the package, and it must be strictly followed. Next, the finished solution must be poured over the surface, then distributed with a wide spatula or doctor blade, and then pierced with a spiked roller to release the remaining air bubbles.
The leveled floor must be left to dry to gain strength. All compositions are characterized by their maturation period, depending on the components from which the building mixture is prepared.
Then on the leveled floor, you can:
- lay a thin insulation and lay a decorative coating;
- to equip the plywood flooring with laying a special film of infrared floor heating;
- lay the wooden floor on the installed joists.
Expanded clay screed with insulation
The second type of screed is laid directly on expanded clay, which is a high-quality sound insulator and insulation. Moreover, the material is quite light, which means it will not make the interfloor floor heavier, which should be taken into account when performing a screed in an apartment. Moreover, the process of laying this screed is as follows.
- If screeding is carried out on the first floor above a cold basement, the first step is waterproofing. Its installation is carried out in various ways: cast, plaster, painting, pasting and others. It is applied not only on the floors, but also on the lower part of the walls, on a pre-primed surface.
- A dense polyethylene film is laid on the previously prepared waterproofed surface, extending over the walls by 20 cm. The sheets of the film must be glued together using a special adhesive tape.
- Further on, a damper tape is attached to the top of the film along the perimeter of the room, which helps to keep the screed intact during strong temperature changes.
- Further, beacons are installed on top of the film, aligned with the level. Usually they are fixed on a concrete solution. At the same time, the height of the beacons must correspond to the height of the expanded claydite layer to be filled in + the planned thickness of the screed.

- Further expanded clay is poured in a layer slightly below the installed beacons and well leveled.
- Then, a concrete solution is poured over the expanded clay, which is leveled over the top of the beacons.
- When the screed dries, it is likely to settle a little, it can be covered with a thin layer of self-leveling floor.
- Further, any decorative flooring is laid on top of this structure.
Uninsulated screed
An ordinary concrete mortar screed is produced to strengthen the floor for further wooden flooring or on floors of an apartment building where insulation is not required.
Next, a polyethylene waterproofing film should be spread on the prepared base.
A special damper tape is glued along the entire perimeter of the walls.
On top of the laid waterproofing film, it is necessary to lay a reinforcing mesh (fiberglass or metal), then install beacons that are leveled in a horizontal plane.
Next, the concrete mortar is poured 1.5-2 cm above the beacons, starting from the far wall of the room, after which it is leveled with the rule (it must be carried out strictly along the beacon guides).
Thus, the whole room is poured and leveled, after which the screed is left for 3-4 weeks, during which time it will harden and mature.
After it is ready, proceed with the installation of logs, insulation, and boarding.
Dry screed
Another option for arranging a new floor is a dry screed, which is perfect for installation in an apartment. She has proven herself well in that she does not have to knead the solution and breed a swamp in the dwelling. Floors made of dry screed are made as follows:
- A dense polyethylene film is laid on the floors, which should be 5-10 cm on the wall (height margin). A board is installed in the doorway to limit spillage of the mixture. The flooring should fit as tightly as possible to the surface of the base.
- Next, beacons made of even wooden beams or a metal profile are laid on the film. But in this version, the screeds cannot be fixed to the base, otherwise, after leveling the surface, the guides from the backfilled layer must be removed.
- The beacons themselves must be aligned to the building level to a flat horizontal plane.
- The next step is pouring the filler onto the film. Its layer should have a greater height (by several millimeters) compared to the installed beacons.
- Using the rule, the dry aggregate is leveled, focusing on the beacons.
- The last stage is the laying of gypsum-fiber boards with butt joints. Glue is applied to them, after which the next panel is laid. This is done in such a way that the lock parts fit perfectly. The plates are additionally fastened in these places with the help of self-tapping screws.
The finished floor is finished with a decorative finish, the choice of which depends on your personal preferences.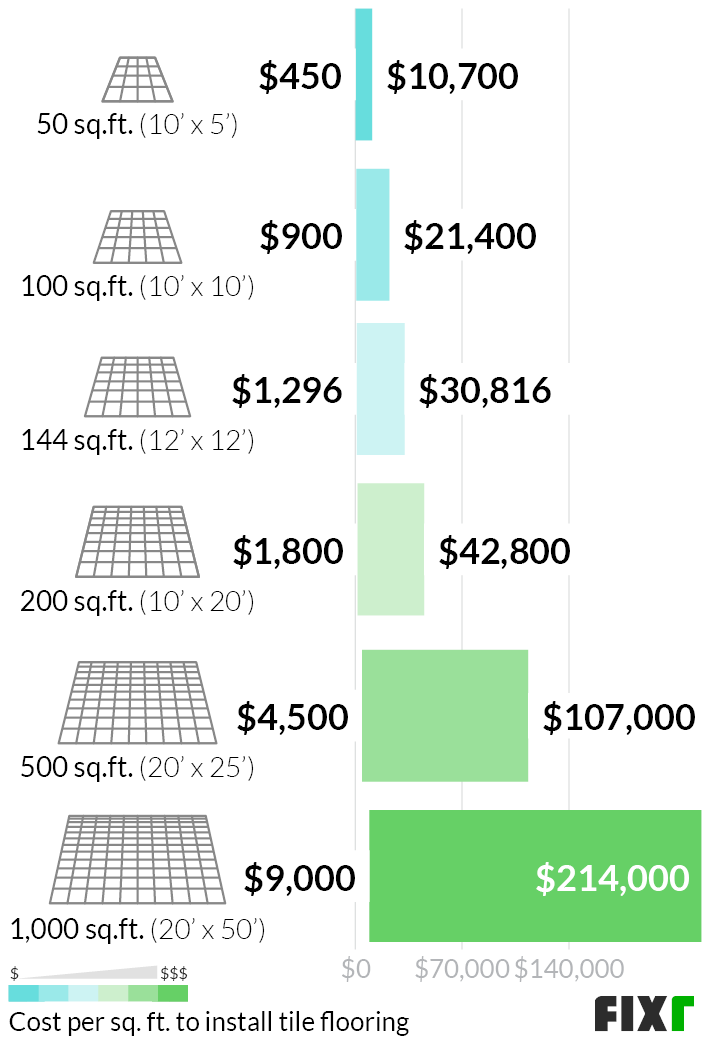
Wooden floor
A floor made of plywood or tongue and groove boards is installed on the prepared screed. Moreover, it can be laid directly on a concrete base or laid on logs.
The most popular of these options is the first one, because it has many advantages. For example, between the lags it is possible to lay sound insulation and insulation. Moreover, the surface is raised above the concrete, which in turn adds an insulating effect. Another advantage is that the lags add more rigidity to the coating, and it becomes more reliable. Floors on logs or bars are installed in several stages:
- Before attaching the logs, the room is marked out. The lines are beaten off with a colored stretched twine. The distance between the lags should correspond to the width of the insulation material (in the case of mineral wool, it can be reduced by 30-50 mm, it will be much better).
- Next cut the logs to the desired length.
 But it is important to remember that they should be at a distance from the wall, no less than the thickness of the insulation. As a rule, mineral wool is used for insulation - when using low-quality polystyrene foam in closed residential areas, the atmosphere will not be so environmentally friendly.
- Further actions are connected with the installation of the log to the base. You can fix them to the concrete base itself or raise them to a certain height using metal holders or studs.
- The distance between the log posts fixed to the floor should be within 40-50 cm. The level of the future floor can be brought to a horizontal plane by adjusting the height of the posts.
- At the end of this work, it is necessary to lay the insulation. First, this must be done between the wall and the logs, around the entire perimeter of the room, then lay it between the log bars.
- The next step is to cover the entire structure with a special vapor barrier film - it should be fixed to the logs with a stapler.
- Boarding is the most important process. Starting floorboards should be 5-7 mm from the wall, which will provide ventilation and compensation for linear expansion from increased humidity or thermal changes in the room.
- A plinth must be fixed on top of the floor made of planks along the perimeter of the room. And it should be fixed to the wall, and not to the floorboards.
- If you plan to lay plywood on logs, then provide a joint between two sheets so that it falls in the middle of the log bar. You need to calculate the size of the plywood. For surface rigidity, the sheets must be fastened according to the brickwork system, namely with a shift of the next one by half the sheet.
- As soon as you have completely laid the material, all gaps between the sheets must be filled with putty. After waiting for it to dry, cycle the surface.
- On top of the plywood, you can lay different decorative coatings, after which the skirting boards are installed, giving completeness to the floor.

In addition to the simple floors discussed in the article, recently heated floors - electric or water - have gained particular popularity. The device of these systems is considered by us in other materials of the site "Remontik".
With the right calculation, you can do the dismantling and installation of the cover yourself, which will save you money, since such work will be quite expensive. Now consider how much it costs to replace floors. We have provided a table with average prices in the market.
| Service name | Price in dollars per m 2 |
| Leveling and repairing screed | 2.5-4 |
| Floor removal | 1.5-2.5 |
| Waterproofing device | 1.3-1.5 |
| Floor insulation | from 1 |
| Laying a log, laying plywood on concrete, making a wooden subfloor | from 1. 5 5 |
| Wooden floor replacement | 2.25 |
| Screed reinforcement | 0.5 |
| Finish | from 2 |
10 practical tips - INMYROOM
For the beginning is to decide what kind of work is required: varnishing parquet, laying flooring, or replacing old flooring and screeds. From this depends on the cost, volume and duration of work. If your floor isn't rotten, don't plays, not numb, but only slightly worn out, then the capital repair may or may not be done. It is enough to smooth out small irregularities with plywood and lay a new coating on top. But in case of serious problems (large dents, deflections, irregularities, creaking and walking of the floorboards), a thorough repair will be required with the replacement of the base screed and the flooring as a whole. Our recommendations will help you.
Tip #1: Plan your steps carefully
Good a well-thought-out plan significantly speeds up and facilitates the repair process, saves the budget.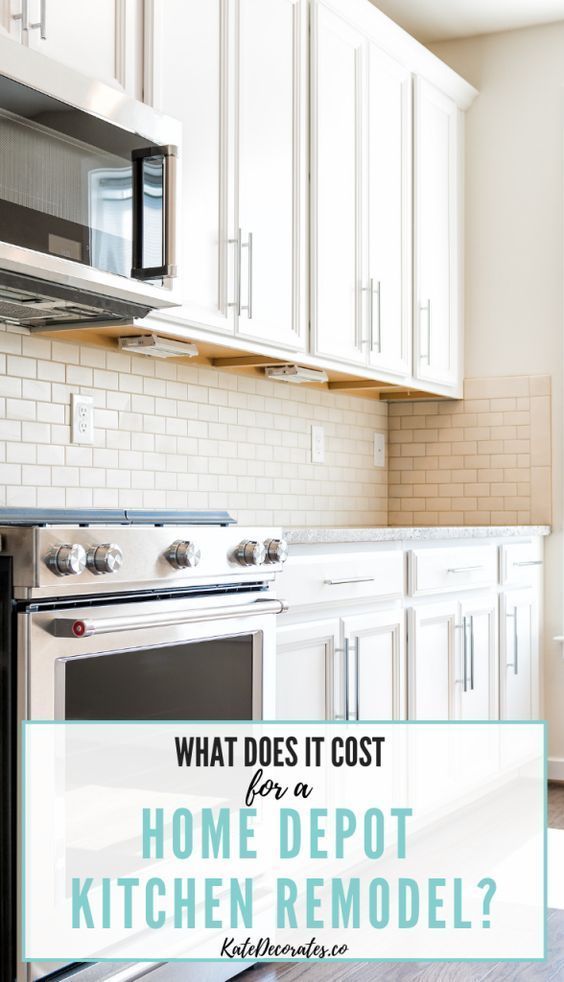 Typically, a floor renovation event consists of four main stages: selection of materials, dismantling of the old flooring and determination the degree of repair, leveling the floor with a screed, installation of the main flooring. Each stage also requires a thorough approach and a mini-plan so as not to miss anything.
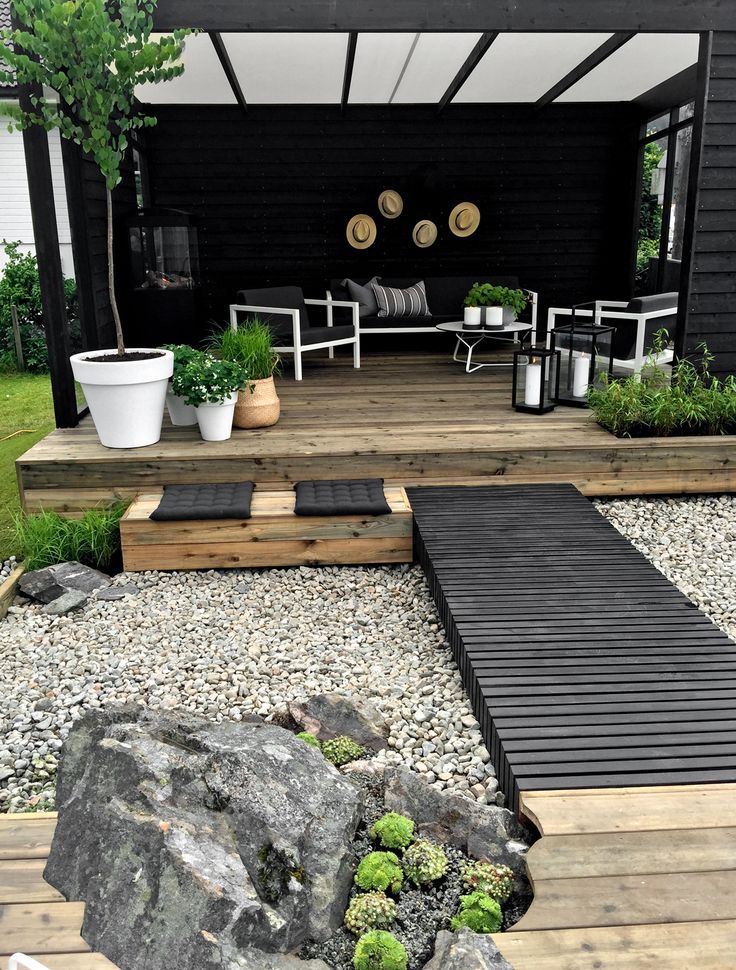
Tip #2: When choosing a floor covering, consider the purpose of the room
First of all, it is important to decide on the floor covering. After all, the entire construct of the floor depends on this, as well as the need for basic (thick-layer) or finishing (thin-layer) alignment. Consider not only the aesthetic, but also the functional component of the materials. The main guideline in choosing flooring is the purpose of the room. For the so-called wet areas (bathroom, kitchen), floor tiles or porcelain stoneware are best suited; for the hallway, corridors, pantries, linoleum or its variety - marmoleum is preferable; for a living room or office - laminate, parquet, inlaid floor; but for the nursery and bedroom, a cork floor is ideal.
The most popular materials for flooring in an apartment today are laminate and parquet laid on top of a leveling cement screed. They are suitable for rooms with even climate conditions. A more budget option is plywood and new flooring. The liquid self-leveling floor is noticeably gaining popularity. It is suitable both as a base for any flooring, and as an independent, decorative coating. It can be of any shades and with any 3D image.
Tip #3: Prepare the room and floor for renovation
Replacing the floor is a large-scale project, but quite feasible! It is most practical to do floor repairs sequentially, moving from room to room. In advance, free the room and the corridor leading to it from furniture, things, interior items. If the walls and ceiling are not planned to be finished, then for the time of repair it is better to close them with polyethylene, fixed with adhesive tape or buttons. This will eliminate accidental damage and save you the hassle of washing walls and ceilings from dirt.
Tip #4: Determine the same floor level in all rooms
Before starting work, determine the same floor level in all rooms, measure the height differences. Any of the building levels will help you with this. In many ways, the task is simplified by high-tech laser levels that determine the level of the floor using a laser beam. It is better to set the starting mark in the corridor, spreading the marks further through the rooms. Set the level on the base, mark the point on the wall where the beam points.
In this way, measure all the walls in the room, reflecting the horizon line. Connect the resulting points. From this line, a reference is taken to the base of the floor in order to find its highest and lowest point. The smallest measurement is taken as the reference point, and the thickness of the floor structure is subtracted from it. Then measure the resulting distance down from the horizon line. The resulting second horizon line is the finished floor line.
Tip #5: follow the conditions for pouring the base screed
If you need a thorough floor repair, then the room needs to be provided necessary conditions for creating a base screed: temperature range from 10 to 25 degrees of heat, humidity about 95%, absence of drafts and direct sunlight for the drying period mixtures. After that, you can do other repairs in apartment, and start finishing the flooring after finishing the walls.
Tip #6: Use beacons when laying screed
Before the basic leveling of the floor, it is necessary to remove the old screed, clean the base from debris and dust, vacuum it, and carefully prime it.
Draw a line on the wall around the entire room to indicate the level of the finished floor. Every 1.5 meters, set up beacons - a metal profile or slats. Their position is verified using a long rail-rule. When installing a “floating” screed (along the layer of heat / sound insulation), do not forget to separate the poured screed from the walls with an expansion joint in the form of foam plastic 1–1.5 cm thick or a special damper tape. The seam is also useful in the middle part of the room, so that the screed area does not exceed 4-6 meters.
It takes practice and skill to create an even base screed: the rule needs to be moved across, leaning on the beacons, cutting off excess material and creating a flat surface. Then, if necessary, the screed is additionally rubbed with a grater. At the end of the work, the beacons are removed. The finished screed is left for 30-40 days to dry completely. You can walk on it in 7-10 days.
Tip #7: Choose Modified Poured Mortars
One of the major disadvantages of traditional cheap cement-sand screed is its long drying time and the need for constant moisture after installation. If there is not much time for repairs, then it is better to prefer modern, high-tech types of mixtures - household self-leveling floors. This is an ordinary dry mix, modified with special polymer additives. Such materials are characterized by high spreadability, ease of application, cost-effectiveness, wear resistance and, most importantly, drying speed. And the technology for pouring them is simple - measure the base, set point reference beacons and boldly fill the floor. One, two - and you're done!
Tip #8: Use a Quality Topcoat
Even the most seasoned professional finds it difficult to achieve a perfectly flat screed surface. Of course, for tiles or porcelain stoneware, the evenness requirements are less stringent - small differences can be smoothed out with tile adhesive. But under a laminate or parquet board, the base should be very even. This difficult task can be solved in no time with the help of a thin layer of the finishing self-leveling floor. This material will allow you to easily level small (1–5 mm) floor irregularities.
When choosing a screed finish, pay attention to the thickness of the applied layer at a time, the mixture consumption per square meter, the curing speed to foot traffic and laying of the coating. Finishing floors with finely ground marble in the composition enjoy well-deserved respect from consumers, because the fine fraction of this filler (only 0.3 mm) allows you to get the highest surface quality - a mirror-smooth, even floor.
Tip #9: Waterproof your floor under screed
Waterproofing layer improves the quality of the screed and creates a comfortable moisture level for laying a variety of floor coverings. In addition, waterproofing prevents the penetration of moisture from the basement or from the lower floors, protects floor slabs from accidental leaks. Without a waterproofing layer, the screed will soon begin to collapse, and it will have to be changed again.
Tip #10: Leave communication channels available
Often various electrical or communication channels are laid under the floor. At repairing the floor, do not forget to provide easy access to them so that in case of new alterations or rearrangements of electrical equipment, the floor did not have to be opened due to diagonals. But for security reasons, all communication channels must be well insulated.
Expert opinion: things to remember when starting a floor repair
In order to prevent the floor repair from dragging on indefinitely or costing a pretty penny, it is important to choose the right materials for the rough finish before starting work. How to do it, says a professional.
Alexandra Brodovskaya – Product Manager at Saint-Gobain Construction Products Rus.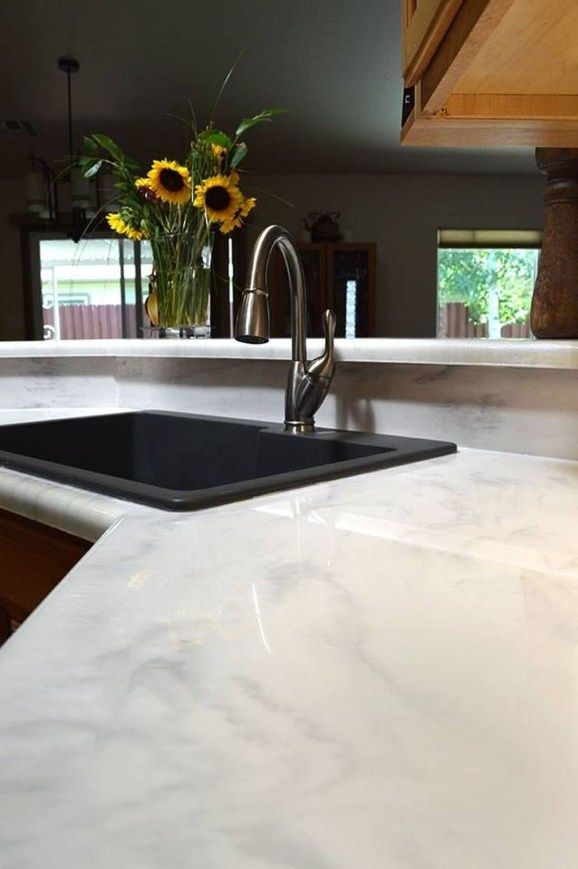 He believes that the modern design of studio apartments cannot be imagined without a harmonious combination of different types of flooring.
1. Decide on the flooring and only then buy a floor mix
Usually, separate areas of the room, for example, the dining room and living room, are distinguished by different coatings: part of the floor is tiled, the other is covered with parquet or laminate. However, laying a combined floor is associated with additional difficulties in preparing the base. This is where the weber.vetonit 3000 superfinish self-leveling floor will help - it is suitable for any type of coating.
2. The right product saves time and money
Choose a product with high flow (approximately 235-270 mm) - it will be the most ductile and easy to work with. Also pay attention to the consumption of the mixture: the lower it is (ideally: 1.5 kg per 1 sq. M with a layer of 1 mm), the more economical your repair will be.
3. Fast repairs can be high quality
Superfinish self-leveling floor weber.