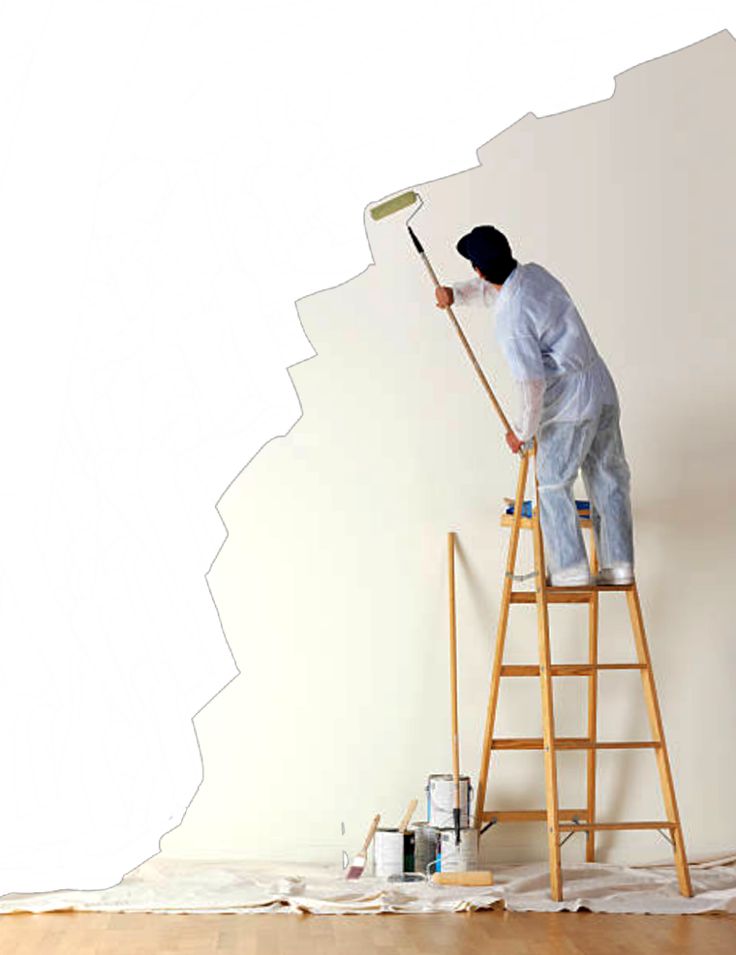
Steps to paint walls
How to paint a wall: 15 steps for painting walls for beginners
Painting a wall is one of the easiest and most affordable ways of updating any room. And you don't have to get professionals in to do an aesthetically pleasing job of it.
But, before you start to paint a room, it is a good idea to learn a few tips from top experts on how to paint a wall like a pro before you start.
After all, you're going to be looking at those walls for a long while to come. We've consulted experts from the likes of Benjamin Moore, Lick and Dulux for their insight into how to paint a wall to perfection – so that you can bring your paint ideas to life yourself.
How to paint a wall
Here, we tackle the basics of painting a wall – using the expert tips we've added will ensure you get a professional finish.
1. Measure your room and determine how much paint you need
If you've been browsing living room paint ideas and are wondering whether you could work the transformation yourself – and how much it costs to paint a room – the first thing to get to grips with is paint quantities.
'There is no "average room", so it’s important to roughly work out how much paint you will need to avoid buying too much,' says Helen Shaw, Director at Benjamin Moore . 'As a guide, it’s key to bear in mind that most paints will cover about 10-12sq m per litre. '
She continues: 'Firstly, we recommend starting by measuring or estimating the length of the room. A loose and easy guide for this is step it out – one step for an adult is about 1m, so start by standing against one wall and pacing out to the opposite wall. You can then do the same to estimate the width. Then add two times the length and two times the width together to get the perimeter.
'Most rooms have a standard 2.5m high ceiling, so if you simply multiply the perimeter by 2.5, you will have the total in meters squared. Although we would recommend that if you have particularly tall ceilings, it’s best to measure this rather than use the 2.5m estimate. If you have large windows or many doors or built-in cabinets, you can deduct this from the total to avoid buying too much.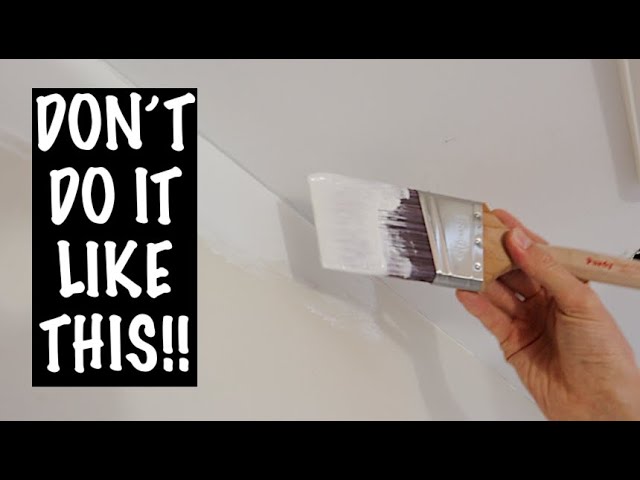 Finally, double the overall meter square total to account for doing two coats.'
2. Choose your color and get the right finish
Whether you're looking for organic, neutral or bold, statement living room color schemes, picking up a selection of sample pots is always a good idea to see how the hue reacts to the light in your space.
And don't forget the finish. 'The right paint finish for different surfaces and specific results is the key to a perfect result,' say the experts at Dulux . 'For example, mid-sheen and gloss finishes reflect light, while kitchen and bathrooms require moisture and stain-resistant qualities.'
3. Buy the right tools
When painting a wall, there's nothing worse than realizing too late that you haven't got all the tools and materials you'll need to do the job properly. You will need: a pot of paint; a paint brush and paint roller; primer; soap and water for cleaning; a painting tray; a dust sheet; painter's masking tape; and, if you have high ceilings, a roller extension pole is a good idea.
Benjamin Moore's Helen Shaw says: 'When it comes to the must-have tools, a firm favorite amongst consumers is to use a roller for painting walls and a 2in brush for cutting in around the edges. To ensure a smooth finish, a microfiber roller sleeve is best.'
4. Paint in natural light
For best results, always paint in natural, not artificial or low, light.
A Dulux expert advises: 'Whether you're rushing to get the job done just as the sun goes down or it’s dark and stormy outside, it’s always better to wait for bright, natural light to paint your rooms. Painting in dim or harsh artificial lighting can easily result in patches and imperfections that only show up in glaring natural light.'
5. Clear the area
Now you've got the right amount of paint in the correct finish and color of choice, you're ready to take the next step in painting a wall.
'Start by clearing your working area to give yourself ample painting space,' says Lick’ s Interior Design and Colour Psychologist, Natasha Bradley. 'Put away your favorite furniture items and anything you don’t want to get splatters or splodges on.
'Put a protective dust sheet down to save your flooring and any furniture that’s too heavy to move. Newspapers and bedsheets won’t be sufficient here, but either a canvas or a plastic drop sheet should work equally well.'
Helen Shaw, UK Director of Benjamin Moore adds: 'Before you jump in with your paint brush, make sure the space around you is prepped and cleared – you don’t want to be spilling paint over your new sofa! If there’s not enough space to clear the room entirely, push everything to the centre of the room and cover, don’t forget to also cover the flooring.'
6. Prep your walls
'Once everything is cleared and covered, you can then make a start on preparing the walls for painting,' says Helen Shaw. 'A key factor in ensuring you have a smooth finish is having a clean surface to paint on, dust, cobwebs or grime can stop your paint adhering and having the perfect finish. Most walls can be washed with a soft sponge and warm water, but if you’re painting in the kitchen then you’ll need something to help cut through the grease before rinsing with warm water.'
Speaking to H&G, a Dulux expert says: 'It’s very tempting to skip this crucial first step, whether it’s to save time or because you think your walls look fine to paint over. But, it’s often hard to see dirt, dust, scratches and cracks, until they rear their ugly heads through your new paint. Before you do anything, give your walls a good clean with warm, soapy water, fix any cracks or holes with filler and wait until the surface is totally dry before painting.'
Be ultra-vigilant about this step, says Lick's Natasha Bradley. 'Examine your wall for any flakey areas or little bumps. Use filler and sealant to fill up any cracks or holes or a scraper to even bumps and flaking paint. Don’t skip this step if you want to achieve a smooth and professional finish.
'Next, get your painting surface ready. Clean your walls thoroughly but gently using a soap and water mixture. Wipe clean and leave to dry.'
7. Apply your painter's tape
Once the surfaces are dry, use painter’s masking tape or good, old-fashioned masking tape to cover any sockets, switches and skirting boards in the area.
Helen Shaw says: 'You’ll need a roll or two of painter’s tape to protect any mouldings or switches from any drips and ensure a neat finish. Make sure you apply the tape carefully to get a good seal to avoid paint getting underneath and running.'
8. Time to prime
Using a primer will ensure a more professional finish and help you get the most from your paint color. 'Apply a smooth and even base coat of primer using a roller,' says Lick's Natasha Bradley. 'Work into smaller crevices using the tip of your paintbrush. Leave to dry for a few hours before starting to paint.'
She adds: 'Avoid the temptation to skip the priming stage if you want a vivid and consistent finish, especially if you’re painting over a darker color. '
'
9. Stir and decant your paint
After opening a paint can, stir the paint thoroughly for an even texture, before pouring some into your painting tray.
A Dulux expert says: 'As colors can vary slightly from can to can, it pays to decant paint into a smaller container or tray to mix it before you start painting. In terms of how to decorate while making the least amount of mess, this tip might just save your sanity. Imagine accidentally knocking over a 10 liter can of paint?'
Kathryn Lloyd, of Crown Studio , offers her top tip: 'Pour the paint into the roller tray and, for ease, you can use some aluminium foil within the tray to save you cleaning it out afterwards. Once you’ve finished with the paint you need, pour the residual paint back into the can and you can dispose of the foil without using tons of water.'
10. Cut in the edges
Before you start painting the walls, cut in the edges with a one or two-inch brush. This means first painting the areas that are too tight for rollers, like the ceiling line, corners and trim.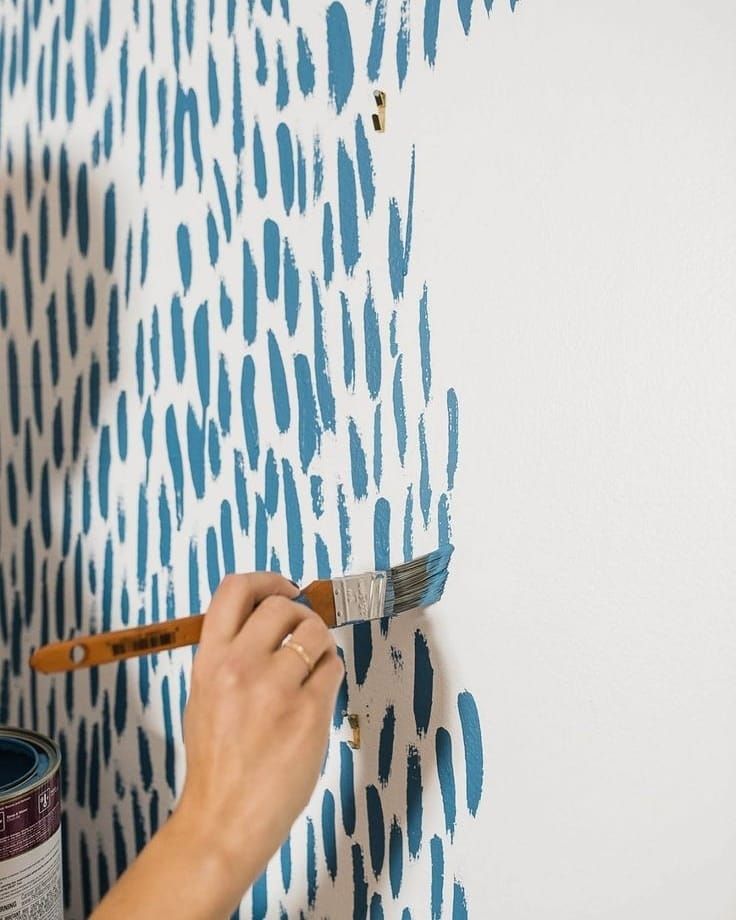
Benjamin Moore's Helen Shaw advises: 'To cut in with ease, a low-tack tape around the ceiling edges or skirting will help to get a sharp line and a clean finish. Gently remove the tape when the paint is still wet to ensure there is no bleed through or peeling.'
Kathryn Lloyd's top tips on cutting in while painting a wall? 'Apply some paint onto the brush, providing any excess has been removed to guarantee you have control when using the brush and keep the paint looking neat along the edges.
'With your paint brush in hand, start a little bit away from the edge of the wall, so that you have the right amount left on the brush to create a very sharp edge so that it’s nice and neat. Repeat this for the top, bottom and sides of the wall.'
From preparation to painting, work from the top of your room down, for best results. Start with the ceiling and the architrave. Then, paint your walls from the top down with your roller. Finish the job with woodwork and skirting.
12.
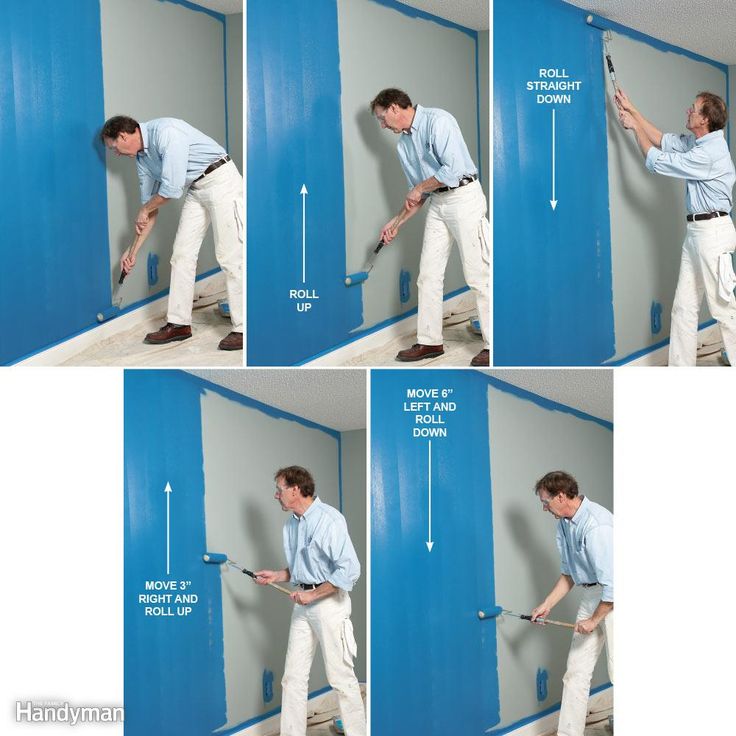
 Use this painting technique for best coverage
'If you’re flinging your roller around, you might not achieve the best coverage,' say the experts at Dulux. 'Instead, apply your paint in a W shape on the wall. Go over the W with an M shape to fill in the gaps, then reload your roller and move onto the next section in the same way.'
Lick's Natasha Bradley agrees this is a good technique for painting a wall, saying: 'Dip your roller into the paint tray and start to paint your wall in W or M motions for even distribution.'
13. Apply another coat of paint
Leave the first coat to dry for a couple of hours before you apply another coat.
'Most walls shouldn’t require more than two coats of paint,' says Natasha Bradley. 'Remove the painter's tape from the wall whilst the second coat is still drying.'
14. Don't forget ventilation
To make the experience more pleasant for you, open the windows and let some air in.
Natasha Bradley advises this will also quicken up the wait: 'Keep your work area well-ventilated to minimize drying time.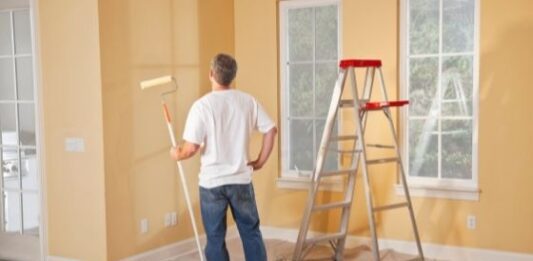 '
'
15. Clean up ready for the big reveal
Leave to dry for at least 24 hours and remove your dust sheets to reveal your brand new wall. Keep your brushes in good condition by cleaning them before you put them away. If you've used a water-based paint, a clean with soap and water will suffice.
Keep the colors you’ve used so you can touch up paint on walls as necessary and make sure to dispose of paint safely when you do finally come to changing to a different wall color.
Now it's time to step back, admire your own handiwork, and give yourself a well-deserved pat on the back.
10 Easy Steps - How To Paint A Wall
Painting walls is one of the easiest and least expensive ways to change the appearance of a room. Whether the change will be positive or negative depends on how well you understand what you need to do to get professional results. Below is a simple 10-step guide that explains how to paint a wall the right way.
- Tape the trim.
 After preparing walls for painting, using specialized masking tape, such as Shurtape’s Frog Tape, according to label instructions to cover the trim can help paint clean, sharp lines.
- Determine the type of paint you have on your walls. Since using the wrong type of primer or paint can lead to early paint failure, figuring out the type of paint you have on your walls is very important. Rub a small area with denatured alcohol. If the paint loses glossiness or comes off on the rag, it’s latex paint; if it doesn’t, it’s oil-based paint.
- Choose the right primer. For new drywall, use a drywall primer-sealer product to level surface texture and prevent flashing. Applying a stain-blocking primer over water stains, ink or crayon will prevent bleed-through along with blistering and peeling paint. For engineered wood products, such as medium-density fiberboard, use shellac or an oil-based primer to prevent swelling. You can also find primers that allow you to switch from oil-based paint to latex paint, or vice versa, as long as the surface has been properly prepared.
- Apply the primer. Start by pouring the primer into a paint tray or five gallon bucket with a roller grid, then dip the roller into the primer, removing excess primer to prevent drips. Place the roller half way up the wall, and roll upward, close to the ceiling, and downward toward the floor, slightly overlapping each stroke. Make sure that you also prime the ceiling and all corners properly using a brush. Let the primer dry completely before painting
- Paint the ceiling. Dip the roller into the paint tray and remove excess paint. Start in one corner and proceed diagonally across the ceiling in a “W” pattern, overlapping each stroke. Make sure that you cover the ceiling line previously painted?
- Cut in corners. With a 2 to 3 inch brush, paint each corner of the wall, brushing along the corner, outward a few inches. To smooth out brushstrokes, run the brush lightly over previous strokes. Paint the rest of the wall right away to smooth out any remaining strokes.
- Paint walls along the trim. Dip a 2 to 3-inch brush into the paint and run it against the taped trim and along the ceiling line. Work it along the tape line or ceiling outward about three inches from the tape/ceiling line.
- Apply the paint. Still wondering how to paint a wall the right way? Using a 12-inch roller, roll the paint in the same “W” pattern, overlapping strokes and cut-in corners and edges. For a uniform appearance, make sure there are no missed spots. Let the paint dry properly and apply a second coat if necessary.
- Remove the tape. Allow the paint to dry for at least 30 minutes. Remove the tape, peeling it off slowly and evenly to prevent paint damage.
- Finish off the trim. After removing the tape, one more thing you need to do is to paint the trim. Start as close to the wall as possible and work your way along the trim covering from top to bottom. Use a narrow, angled brush to paint thinner areas of trim and a wide, straight-edge brush for broader areas.
For more information on how to paint a wall correctly in order to end up with a professional-looking paint job, visit our blog or contact our staff at Performance Painting.
Topics: Commercial Painting, Miscellaneous
Wall treatment before painting: how to prepare the surface well
The performance and decorative characteristics of the paint largely depend on how you have prepared the surface. Errors in repair, negligence and neglect of professional recommendations will lead to the fact that the paintwork material will lie unevenly, peel off, and all wall defects will become noticeable. To prevent this from happening, read how to properly prepare the walls before painting.
Treatment of concrete walls for painting
We give an example of the most common base for paint - concrete.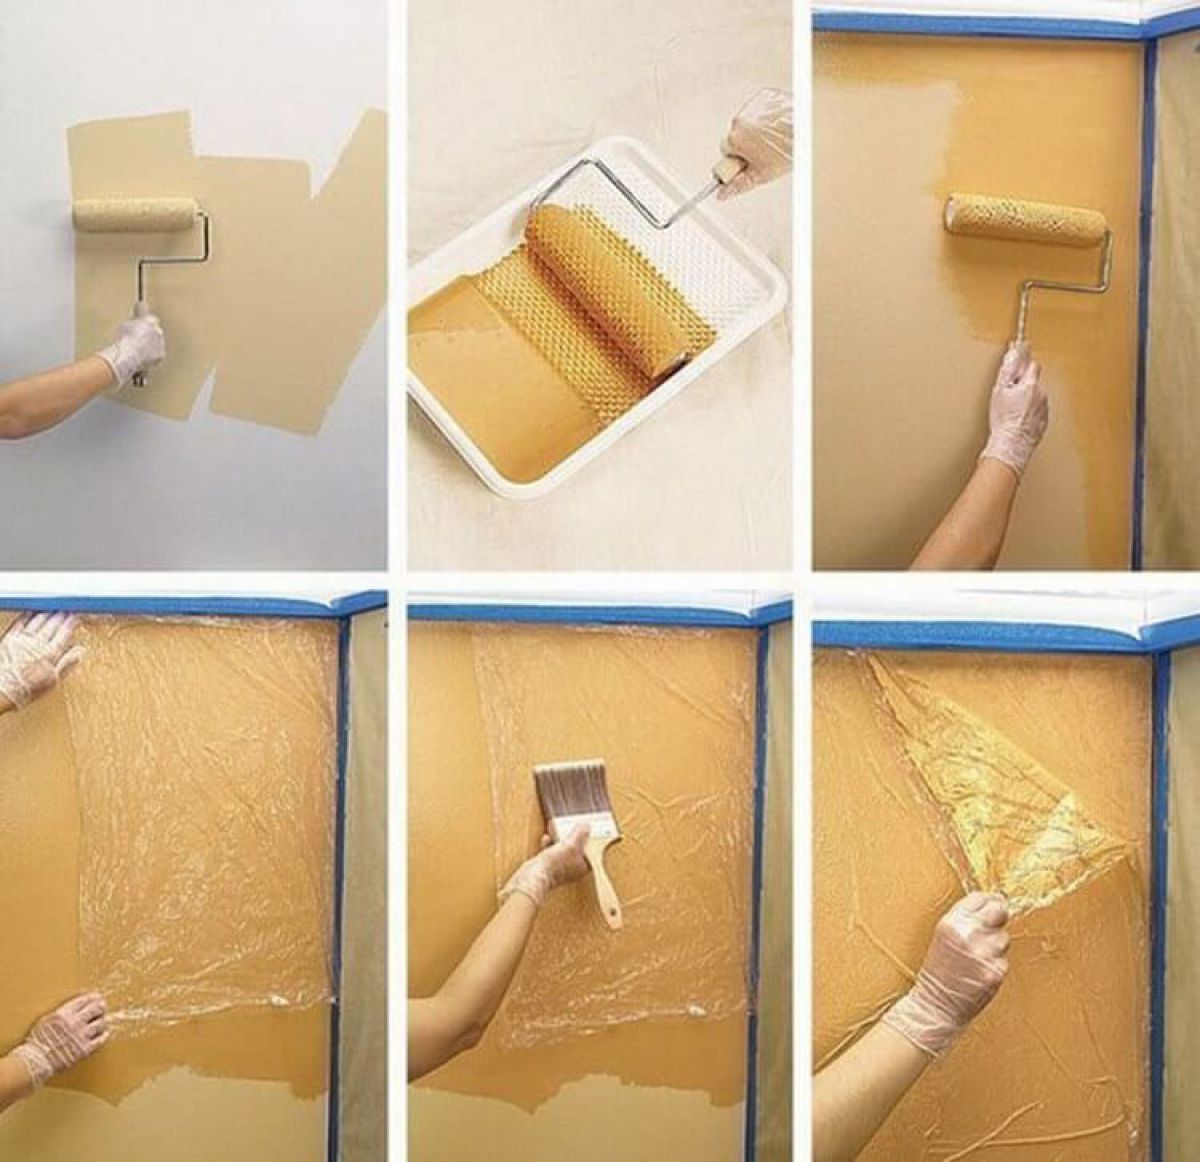 Its processing includes all the main stages of finishing and gives a complete picture of the amount of work to be done. Let's go over the process step by step.
Stage 1. Leveling the walls
In front of you is a base cleared of old plaster. If in some places it was not possible to remove it, tap on it with a hammer. If the sound is muffled, as if you are beating a drum, a cavity has formed under the material. Break the place to re-process, otherwise, over time, the surface will deform and cracks will appear.
Evaluate the evenness of the walls. For this, a visual inspection is not enough. The fastest way is to use a laser level. If this is not possible, you have two options for :
-
Walk along the wall with a rule or rail.
-
Hang plumb lines along the edges of the wall. Between them, stretch a horizontal thread, securing it so that it can be freely moved up and down.
Both methods allow you to identify recesses and protruding places on the wall. Immediately mark them with a pencil or stick masking tape over them. You will plaster the pits, and the bumps need to be cut off with a perforator.
Now you need to select alignment method . You have three alternatives:
-
Grinding is used for all grades of concrete, including those with the addition of marble chips. This is a noisy and dusty process that requires a concrete grinder. The equipment is expensive. It can be rented, but it is better to hire a specialist to work in order to save time and effort, and be calm about the quality of the repair.
-
With the help of plaster it is possible to eliminate cracks and holes, as well as to stretch the walls, making them even. Gypsum mixture is used for internal lining. We will not go into details of the work, because its volume depends on the curvature of the base. We list only the sequence of actions: primer, installation of beacons, plaster (if necessary, twice), re-primer.
-
If the walls are very uneven, they can be sheathing with drywall . To do this, the base is treated with an antiseptic, then a frame is made of profiles and sheets are fixed on them. The work is laborious, but the surface will become perfectly flat. It remains only to putty. When choosing this leveling method, keep in mind that the area of \u200b\u200bthe room will decrease by 3-4 cm on each side.
Aligned walls are primed with a roller or sprayer. The primer enhances surface adhesion and prevents shedding and cracking of finishing materials. Before starting the next work, at least 5 hours must pass so that the base is completely dry.
Stage 2. Starting putty
Plaster and drywall are not suitable for painting. The first is too porous and grainy: the paint will be unevenly distributed. The second absorbs paints and varnishes, which leads to a change in the saturation of the shade and reduces the durability of the coating.
In order for the paint to lay down evenly, the base is puttied. They do this twice. In this section, we will talk about starting putty. Its structure is finer than that of plaster, but larger than that of the finishing mixture. With its help, slight deviations of the wall from the level are leveled and cracks are closed.
To work, you will need two spatulas: wide (from 40 cm) and narrow (up to 20 cm). With small tools, you apply the mixture to a wide area along the entire length. Large distribute it on the wall. Do not try to make the starting coat perfectly smooth by reducing the edges of the layers. At this stage, these actions are inappropriate, you will waste your time. The main thing is to evenly putty the wall, leaving no gaps, and fill in the bumps.
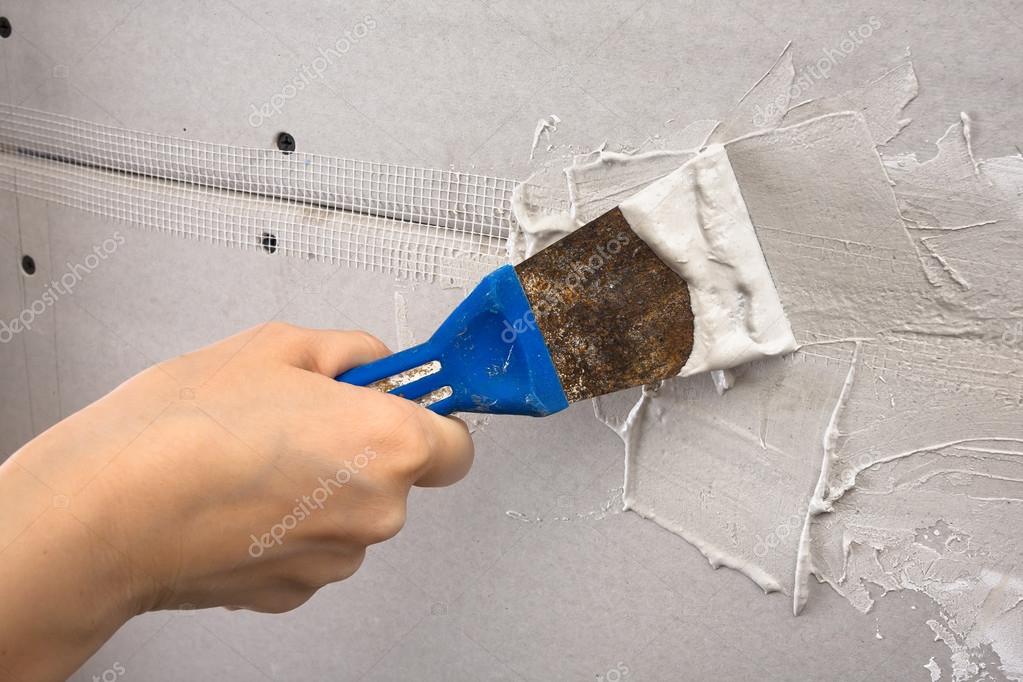
Cracks, external corners and joints of walls with door and window openings can be reinforced with a reinforcing mesh (serpyanka). It enhances the strength of the coating, prevents shrinkage of materials due to temperature changes, aligns corners and joints.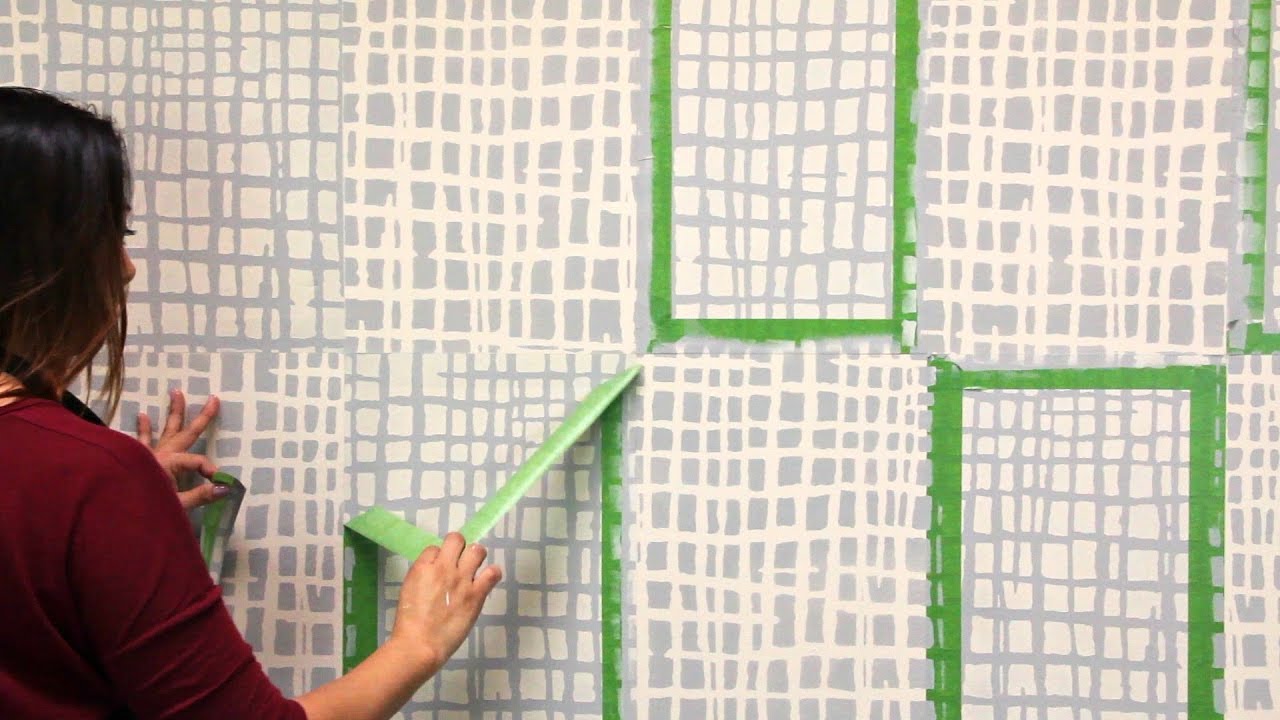 To use it, apply a thin layer of putty and glue the sickle vertically. If you need several strips, they are overlapped. Now move on to the main puttying.
Corner shaping tape will help to give a neat, regular shape to the inner corners. It is fixed in the same way as sickle, on a small layer of putty, then the transition between the tape and the wall is eliminated, then the walls are puttied in the usual way.
Wait for the finish to dry - at least 6 hours - and sand the surface. Use a 120 grit sanding sponge or mesh. This will remove imperfections and small bumps. But it is still impossible to paint the wall: it has a coarse-grained texture, and the paint will fall poorly.
Stage 3. Finishing putty
In order for the paint mixtures to lay down in a uniform layer and not change the shade, a finishing putty is used. Its composition is devoid of large particles, so the coating is smooth. In addition, it prevents paint from seeping into the inner layers of the finish, which reduces the consumption of materials and prevents discoloration.
The process is similar to the previous one, just try to distribute the mixture with a layer of no more than 2 mm, otherwise it will crack. At the end of the work, sand the wall with a grid with a mesh size of 60-80. Do not overdo it so as not to chop off the entire finish coat.
The quality of the final finish is checked with a lamp. Point it at an angle to the wall and inspect the surface. Even tiny bumps give a shadow. Sand them down.
Stage 4. Final primer
After the putty has completely dried, clean the walls of dust with a dry cloth or vacuum cleaner and apply a primer. The solution will protect the finish from moisture and reduce the absorbency of the paint. The coating will lie more evenly and last longer. If the room is humid, choose a mixture with antifungal additives to prevent mold from forming.
Preparing textured plaster and wallpaper for painting
In order for the paint to lie evenly and reduce its consumption, decorative plaster, fiberglass and non-woven wallpaper are primed before painting. This is not to say that these are mandatory manipulations, but if you want a quality repair, do not neglect them.
Wall surface requirements vary depending on the future decor. If you plan to use textured paint, they do not have to be completely even. The relief of the coating will hide minor defects. But if you want to apply a solid shade, draw a pattern using a stencil, decorate the walls yourself with a sponge or cloth, the surface must be flawless. Otherwise, all the flaws will be noticeable. Consider this nuance when processing walls before painting.
Preparation of walls for painting - stages and sequence
04/21/2014 00:30
Undoubtedly, modern paints and varnishes for wall decoration can transform a room beyond recognition. Those techniques and methods of painting walls that exist now are fundamentally different from the primitive and simple method practiced in Soviet times. Now modern and high-quality wall painting provides great opportunities in the implementation of various design ideas, in creating unusual interiors.
However, the effect of using all the advantages of modern materials can only be seen when the most thorough preparation of the walls for painting is done . Otherwise, you can get the opposite result, in which all the flaws and shortcomings of the wall will become even more noticeable.
If the walls in the room are not curved and relatively even, and there is not enough time to prepare and paint the walls, we recommend that you paste over the walls with light wallpaper. If you intend to paint the walls and do it efficiently, then you cannot do without sufficient experience and the best option would be to contact a specialist master.
A good wall preparation for painting begins with first washing off mold, peeling layers of plaster and traces of leaks. To eliminate the negative consequences of wall damage by a fungus, it is recommended to treat the surface with a special antibacterial composition. On stone, brick and concrete walls, small defects are eliminated with a grinding stone.
Next, you need to prime the walls for painting. To do this, we recommend using a deep penetration primer, which improves the adhesion (adhesion) of paints and varnishes, makes the surface structure stronger. Priming the walls before painting also reduces the consumption of building materials and saves the budget.
For wall plastering, guides are installed, which are used as rails of great length, then beacons are mounted. The plastering of the walls on the lighthouses is done so that the walls become really even. This process is done only after the primer has completely dried and is the most important step in preparing the walls for painting.
The next is surface filler, which is required to eliminate small defects in plaster work. At this stage, grinding and priming of the last layer is mandatory. In some cases, at the last stage of preparing the wall for painting, grinding (sanding) is done under the lamp. That is, by the light of a special lamp applied to the surface of the wall, uneven and protruding places will be clearly visible.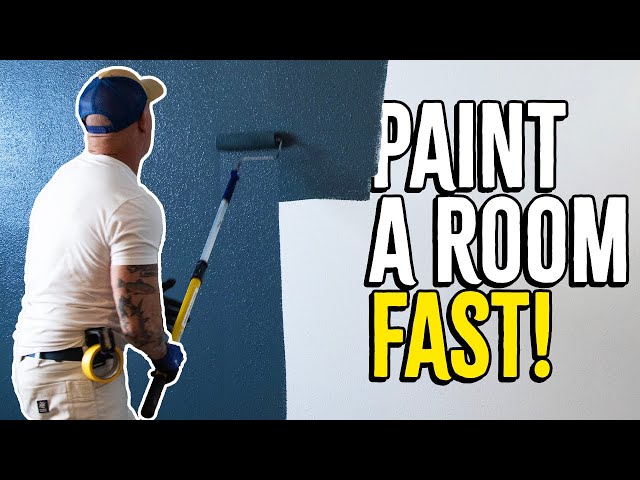
To strengthen the wall even better and prepare it for painting more carefully, a special mesh is fixed on the surface of the wall, in other words, a cobweb. Reinforcement of walls before painting eliminates the appearance of cracks and tubercles on it.
A special putty is applied to the cobweb with a thin layer, which is designed specifically for painting. This putty absorbs and holds paint well. Sometimes it is required to apply putty in 2-3 layers with a thickness of each 0.5-1.5 mm. Each layer of this putty must be thoroughly dried and sanded.
The final layer of putty must always be primed. The final primer removes dust from the surface and prevents the appearance of fungus and mold on the wall prepared for painting. Its composition is chosen in accordance with the further type of paint, which is intended for painting walls. After it dries, the walls will be prepared for high-quality painting.
As you can see, wall preparation technology for painting is a complex process, including many stages and finishing works.