Restoring kitchen cabinets
Tips for Refinishing Kitchen Cabinets
While it may be tempting to rush through—or even skip—the preparation process, if you truly want your finish to look good and last a long time, prep is the most important step. And the techniques you employ, and the products you use, can make or break your outcome. Follow these steps and you’ll be on your way to a foolproof finish.
The “Before”
Courtesy Nick SlavikThe wood cabinets were in great shape, but the dark finish was outdated, and made the space feel small and dreary.
Protective Measures
Courtesy Nick SlavikStart by laying down floor protection, and then cover countertops so they can double as a work surface. You can use canvas drop cloths, but personally I prefer builder’s paper, as it protects well, it’s affordable, and it’s easily discarded/recycled.
Preparation Pays Off
Courtesy Nick SlavikYes, some people would say I go a little crazy with prep, but from experience I know that it’s not wasted time. Remove all of the doors and drawers, label/number them carefully (you’ll thank me later), and stage them for cleaning. Plastic and tape off all of the insides of the cabinet boxes to keep dust from getting in, cover all backsplashes with plastic, and seal all appliances to keep them clean.
Degrease
Courtesy Nick SlavikOn to the cleaning process. Scrape off any food residue from the cabinets and then wash/scrub with synthetic steel wool and soap and water. For tough grease, use TSP (trisodium phosphate) and water; the TSP actually emulsifies the grease and removes it much more efficiently than soap alone. Let dry completely before moving on.
Prep, Part One: SVT
Courtesy Nick SlavikThis is the key step to prep: SVT (Sand, Vac, and Tack). Sand the cabinets with medium-grit sanding sponges and/or 180-grit sandpaper on a random orbital sander. It’s not essential to remove all of the finish, but you must scuff it to give it “tooth” and promote adhesion. Once 100% of the surfaces are sanded, use a shop vac with a brush attachment to remove the majority of the dust. The last step is to tack-rag off the residual dust. The best method is to use a microfiber rag with water–but remember to wring out almost all of the water, as residual water will leave spots.
Prime Time!
Courtesy Nick SlavikChoosing the correct primer is so important. The wrong primer will leave you with chipping cabinets, an uneven finish, and even stain bleeding from the wood. KILZ 3® Premium Primer, in my experience, is easy to apply, adheres wonderfully and blocks stains. A major benefit is that it has low odor, so families can continue to live in the house while work is done. (This is unlike most traditional oil primers which have a very noticeable odor.) And KILZ 3 Premium Primer dries to the touch in 30 minutes and can be top-coated in one hour; this will help with achieving a dust-free finish.
Application
Courtesy Nick SlavikPriming is fairly straightforward: apply as uniformly as possible, and be super thorough. Application can be done with brush, roller, or sprayer. For this project I’ll be demonstrating brush and roller application. The best brush for painting cabinets will have super-fine nylon bristles. This will leave a finish nearly devoid of brush marks. Don’t skimp on this. Expect to pay between $15 and $25 for a good brush. Properly cleaned, it will give you decades of service. When choosing a roller for painting cabinets, I prefer a very high-quality woven cover. This will prevent shedding of fibers and a flawed finish. For the nap, I like ¼” or ⅜”. Anything thicker will leave excessive stipple.
Prep, Part Two: Repeat SVT
Courtesy Nick SlavikOnce the primer is dry I like to repeat the SVT process: lightly scuff-sand to promote adhesion and remove any minor flaws left on the cabinets, and vacuum and tack-rag again before caulking any cracks. I prefer to caulk cracks (where the cabinets meet walls, crown molding, etc.) after priming. Caulk will always stick better to a primed surface than to bare wood. However, never caulk the panels on cabinet doors—they’re actually called “floating panels” and need to move with seasonal temperature and humidity fluctuations. I’ve seen some really bad effects from caulking these panels, such as peeling caulk and even cracked door panels. It’s tempting to caulk these, but you’ll have to abstain—trust me on this one. Let any caulk dry completely before moving on.
Top It Off
Courtesy Nick SlavikNow that you have a perfectly primed surface, it’s time for the top coat. The application techniques are the same as priming—use a high-quality nylon-bristle brush and/or roller, and take your time to ensure smooth, even coverage. Start by coating the back sides of the doors and lay them flat. Laying doors flat will help with the leveling of the enamel and give you a smooth finish. Once dry, you can flip the doors over and coat the fronts. For the cabinet boxes, try to keep a wet edge (don’t start and stop, allowing the paint to dry). I recommend applying a second top coat for added protection and an even shine.
De-Prep (Almost There!)
Courtesy Nick SlavikOnce everything has dried to the point where you can handle it, start by removing the tape and plastic from the cabinets. Install the doors one by one. (Now, you get to see if your door labeling system was effective!) Save any adjustments of the doors until the end. I use only hand tools when installing doors and drawers; drills tend to strip out delicate screws. Install any knobs or pulls, and make any necessary adjustments to get them all straight. Pro’s Note: Clients love when you install new clear rubber bumpers on the doors and drawers (they were removed during the prep process). It’s a small detail, but well worth the effort.
Photo Finish
Courtesy Nick SlavikTake one final walk-through to look for touch-ups; if you’re satisfied, then you can go ahead and remove the plastic, paper, and tape from countertops, appliances, and floor, and consider your job well done!
KILZ 3
® Premium Primer is designed for use on interior and exterior surfaces including woodwork, drywall, plaster, paneling, masonry, brick, painted metal, and properly prepared glossy surfaces. To learn more, visit KILZ.com
 for a fresh new look |
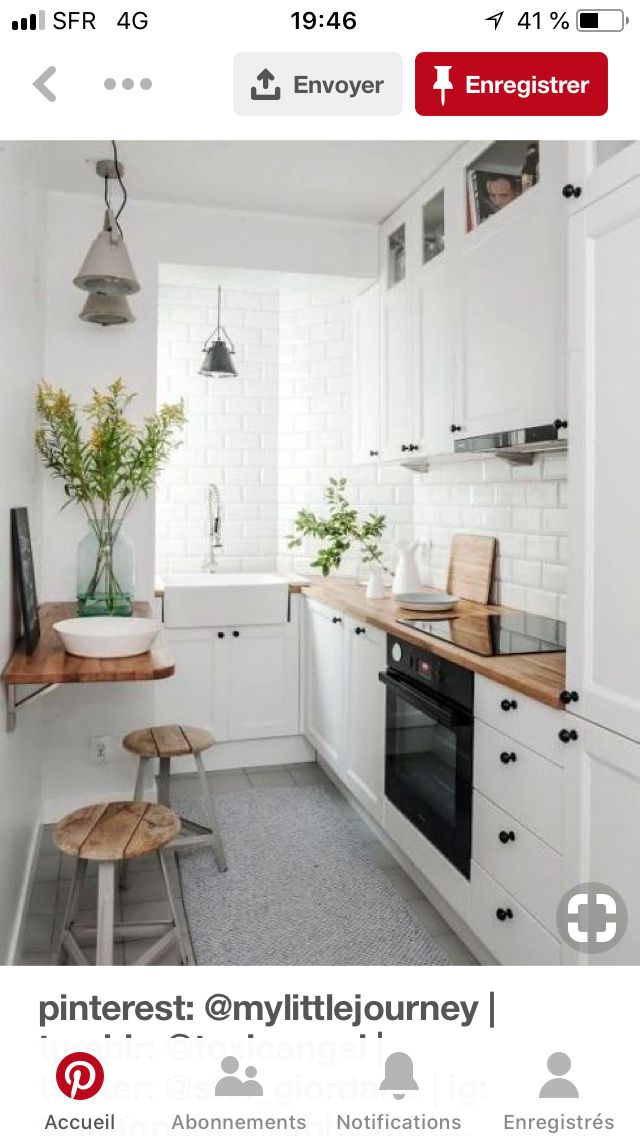
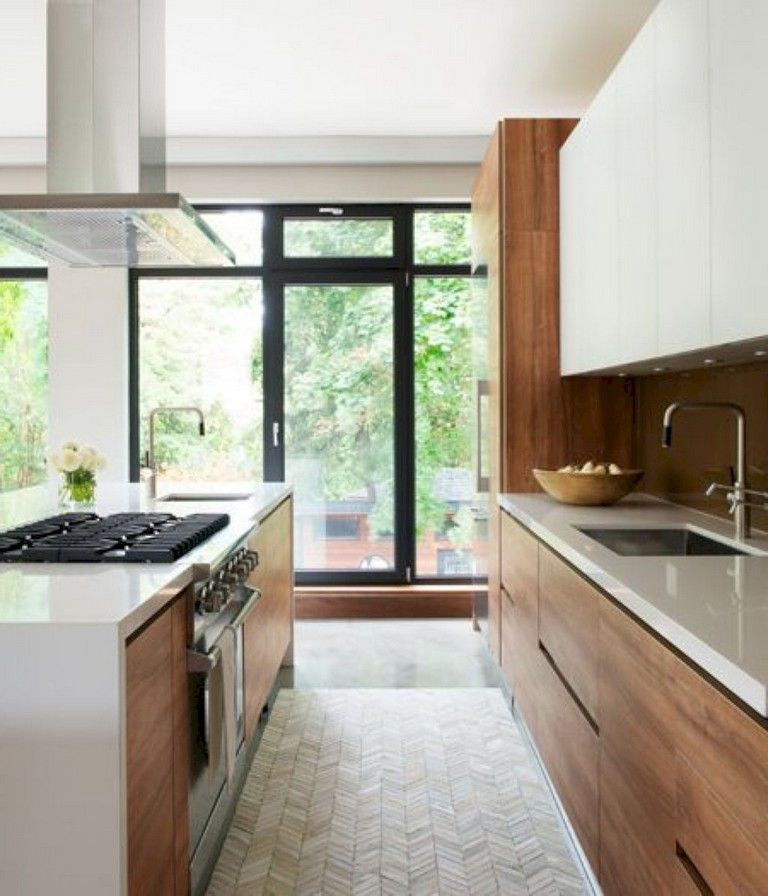
(Image credit: Alamy)
Refinishing existing cabinets is the perfect solution when you want a new kitchen but don’t have the energy, time or money to invest in ripping the old one out and starting again.
‘Rather than replacing with new, refinishing your kitchen cabinets not only saves money but it’s also a more eco-friendly and sustainable solution,’ says Lucy Searle, Global Editor in Chief for Homes & Gardens. ‘Painting kitchen cabinets is a great option for wooden or painted kitchen furniture, for example, and it can easily be done over a weekend. All in all, refinishing is a great way to update kitchen cabinets without replacing them.'
‘Before you even begin this process, the cabinets need to be super clean,’ advises Looeeze Grossman, founder of The Used Kitchen Company . ‘Wipe them down with a good multi-purpose cleaner or dish soap and water, which also works really well. Follow with a sugar soap formation to remove any residue. Once this is done you need to lightly sand the cupboards down. Use a low-grade sandpaper and go gently over the surface. Fill in any chips with wood filler.’
Below, we take you through the process of refinishing kitchen cabinets, step-by-step.
How to refinish kitchen cabinets
As well as painting or staining kitchen cabinets, there is the option to varnish them to refinish the surfaces. It will give the room a makeover without the need to remove kitchen cabinets that are tired or damaged and install kitchen cabinets you’ve selected to replace them.
‘After sanding, I’d always choose a non-toxic finish to varnish the cabinets,’ adds Looeeze. ‘It’s more sustainable and less harmful to your household members and pets. I use an extra-wide paint brush to stain the facia of the cabinet, using a waterproof finish.'
Here's how to refinish kitchen cabinets, whatever the existing finish, with advice from experts.
1. Protect the area
Before you start, make sure the kitchen is well protected. This means laying down plastic sheeting, building paper (which is more eco-friendly) or canvas cloths on the floor as well as over the countertops, appliances, table and chairs and any other items within the space. This will protect them from dust and sanding during your refinishing process.
Next, you want to remove the doors and drawers from your cabinets. Remember to label or number them so you know which door or drawer goes where once you’re finished. Now you need to plastic and tape off the insides of the cabinets to protect from dust and don’t forget to cover up backsplashes too.
2. Prepare the surfaces
Preparation is key, and the results will depend on how much care and attention you give during the preparation process. ‘To refinish wooden kitchen cabinets, first remove the doors, handles and hinges,’ says Ryan McDonough, interior design expert at My Job Quote . ‘Clean all surfaces with sugar soap to remove stubborn grease and dirt. Lightly sand with a fine grit paper and work with the grain rather than against. Hand sanding is best for working around detail such as bevelling on cupboard doors and decorative trim.’
Cleaning the doors and drawers takes a lot of hard work. You can scrub and wash them down with synthetic steel wool and soap and water and for tough greasy stains, use TSP (available at Amazon) and water. Leave everything to dry once you’re done.
3. Clean hardware
As well as the cabinet doors and drawers, it’s a good idea to clean handles and hinges too. Place in a large bowl of soapy hot water for around 30 minutes and scrub gently to remove any grease and residue. Rinse with clean water and dry. If needed, you can always give them a polish.
3. Strip the cabinets
Make sure you open all windows and doors to ventilate the room. Even better if you can take the cabinet doors and drawers outside. Next, you need to check what finish is already on the timber as this will determine which stripper agent is needed. In most cases, a varnish remover will do the job. After you’ve stripped the finish, you can repair any holes or scratches in the wood.
If yours is a painted kitchen, it may not be made from timber. If this is the case, skip this step and move on to sanding.
4. Sand kitchen cabinets
Next, either hand sand with sandpaper or use a sanding sponge to scuff the existing finish and provide an adhesive surface. Ideally you should use a low-grade 100 or 15-grit sandpaper.
A hand-held vacuum dust buster is ideal for clearing up the dust afterwards, though it is also worth wiping down the sanded surfaces with a slightly damp microfiber cloth to remove all traces of dust. Allow to dry before moving on.
5. Refinish in your chosen varnish, wax or paint
Finally, you can apply your chosen finish. For wood kitchen cabinets, you might use a product that brings out the natural beauty of the wood, such as Restor-A-Finish or Feed-N-Wax (both at Amazon). You can find tips for painting kitchen cabinets in our separate guide, including the best paint finishes to choose.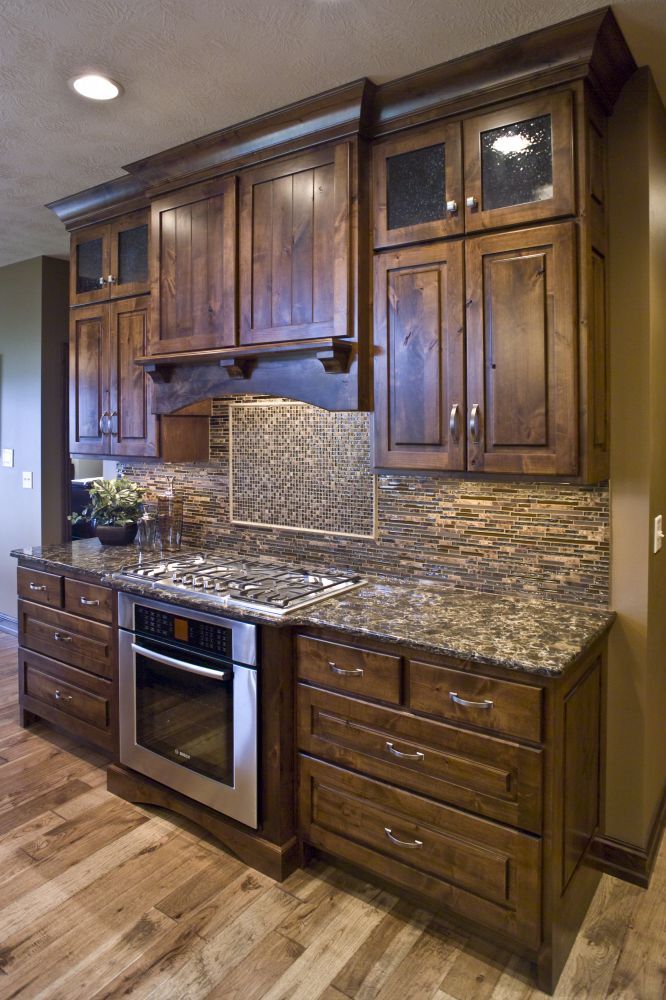
Once you’re done and it’s all dry, replace the handles – or install kitchen cabinet handles in a different material or style – and fix the doors and drawers back into place.
How can I refinish cabinets without sanding?
To refinish cabinets without sanding, simply use some mineral spirits and a rough sponge to clean and gently scuff up the area.
What is the difference between refinishing and refacing?
Refinishing kitchen cabinets involves changing the finish or color of the existing material whereas refacing kitchen cabinets means placing a new material on top.
Hayley is an interiors journalist, content provider and copywriter with 26 years experience who has contributed to a wide range of consumer magazines, trade titles, newspapers, blogs and online content. Specialising in kitchens and bathrooms, she has twice won the CEDIA Award for Best Technology feature. Hayley writes for H&G about kitchens, bathrooms, cleaning, DIY and organizing.
how to repair facades and other elements with your own hands set
To change or update the kitchen, it is not at all necessary to change the set, especially since such expenses significantly affect the budget. One of the advantages of modern furniture is high maintainability, and the kitchen is no exception.
Restoration of a kitchen set is actually a very interesting job, although not an easy one.
Restoration of coating
Restoration of kitchen facades depends on both the base material and the finishing layer. In most cases, if the main material is damaged, then the entire facade will have to be replaced. The exception is small scratches and chips, which can be repaired with a special wood putty or wax pencil. nine0003
Damage to the finish is not so simple.
- PVC film. M The material does not adhere very well to chipboard or MDF due to its different nature. Over time, as well as under the influence of moisture and temperature changes, the film peels off. The advantage of the material can be considered that the restoration of such a coating is quite possible.
In case of small defects, the PVC film is simply glued: PVA glue, “Moment” is drawn into the syringe from the needle and the area under the film is filled. Then the coating is smoothed and fixed with adhesive tape for 4 hours. If the damage is great, you can remove the entire old film from the facade by heating it with a hairdryer, and stick a new one in the same way. In this case, it is better to use liquid nails. nine0003
- Melamine and acrylic films have much better adhesion to wood material, so peeling is rare. Small areas are glued in the same way, but with extensive damage, the facade cannot be repaired at home: the coating will have to be changed in the workshop.
- Acrylic panel. This kind of kitchen renovation is not possible. In case of severe chips, scratches, the sash must be replaced with a new one.
- Veneer is as easy to stick as PVC film. nine0015 Replacing it is also not difficult: the material is produced with glue already applied to the back.
- Enamel. Do-it-yourself kitchen facade repair is quite possible, although the work requires extreme accuracy.
 Firstly, it is necessary to clean up scratches or delaminations, secondly, to choose exactly the same shade, and thirdly, to apply very carefully. With a large area of damage, it is better to entrust the work to a professional.
Renovation with PVC foil
Restoration is not always understood only as the return of facades to their original appearance and replacement of fittings. Modern methods of decorating allow you to change the look of the kitchen beyond recognition, using quite affordable means.
One of these options is a vinyl film, or rather a sticker with an image on a PVC film. Moreover, the image can be anything - from a wood pattern to an ornament of any complexity or landscape.
Quite often, this technique is used to change the style of the kitchen or just diversify the design. To do this, decorate a zone or two sashes with a sticker. If you want to update your entire suite, all facades are pasted over with vinyl film. The choice is entirely determined by the style of the room.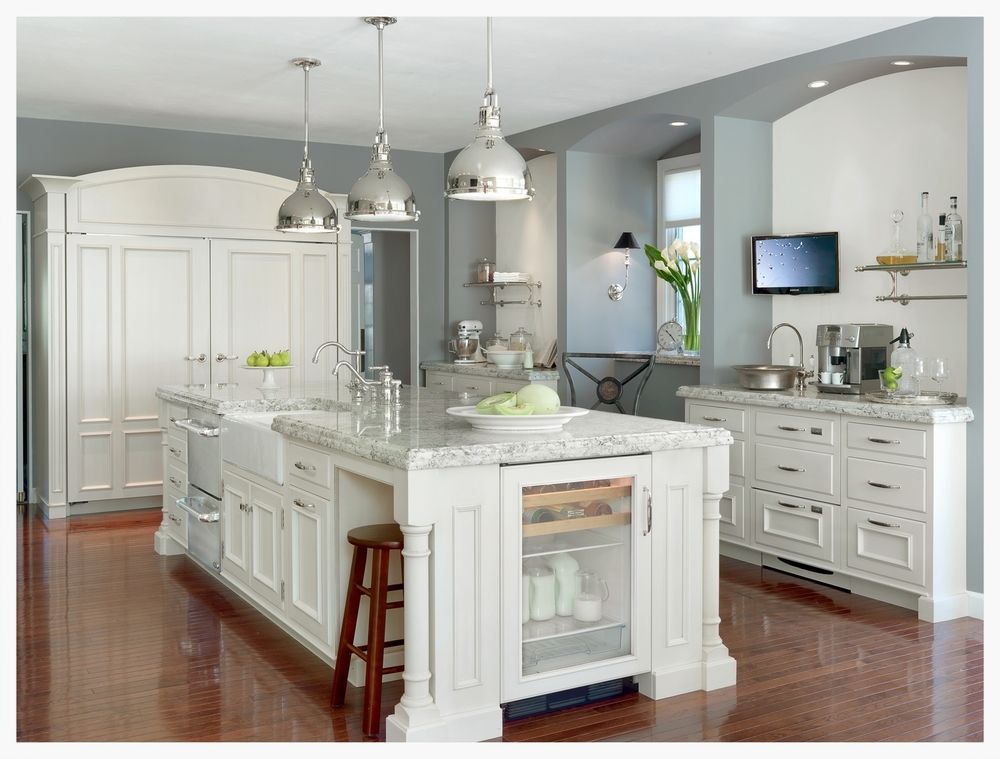 nine0003
Panel fronts are very suitable for such kitchen renovation. At the same time, the frames are painted or also pasted over with a film of a different color, and the inner plane is decorated with a self-adhesive film.
In the photo - a good solution in the Art Nouveau style.Staining
Restoration of kitchen facades with staining is the second most popular method. It is worth noting that it is far from being as simple as it seems at first glance. All facades are painted with the exception of MDF doors with acrylic panels. nine0003
Polyurethane enamels are preferred for kitchen materials. They are resistant to moisture and temperature extremes, are not afraid of light, dry quickly and are safe. In addition, the palette of colors includes all sorts of shades and textures - from matte to high-gloss, literally with a mirror shine.
How to restore a kitchen set with painting?
- Remove all fittings from the sashes, then remove the facades themselves.

- The finishing layer is completely removed, the surface is cleaned with sandpaper. nine0018
- The material is primed - a water-based polyurethane primer is recommended. The procedure should be repeated and wait for the primer to dry completely.
- Apply the paint using a roller and brushes of various sizes. The paint must be applied in several layers, after allowing each layer to dry completely. The carved parts of the product are especially carefully painted. Using a stencil, you can form a pattern, ornament or image on the sash.
- When restoring the facade, do not forget about the final stage - varnishing. No matter how good the enamel is, the varnish will prevent its mechanical damage. nine0018
Staining techniques are different. Depending on your own skill, you can simply paint the facade in one color, you can paint it, you can paint the kitchen set with “metallic” paint - it includes aluminum powder.
A fashionable aging effect is obtained in this way: the facade is covered in two layers of paint of different shades, and after drying, a solvent is applied to the surface. In this case, the top layer is covered with cracks. With proper skill, you can also get the “chameleon” effect: this will also require painting in two colors, but after drying, the facades are covered with glossy varnish. nine0003
Decoupage
To restore the facades of kitchen furniture, sometimes they resort to not quite traditional methods. Decoupage has become a trendy retro kitchen touch. But in practice it is used quite rarely, as it requires taste and accuracy in execution.
Decoupage material is special napkins with bright original images. In fact, in this capacity, you can use newspaper clippings, pieces of fabric, fragments of lace, your own old photos, a finished image from albums or books. In the kitchen, decoupage using small items will be very useful: coffee beans, herb stalks and spikelets, dried flowers, and the like. nine0003
The decoupage technique is quite simple: do-it-yourself kitchen set is sanded with large and then fine sandpaper. Painted with a background color - acrylic paint is used, and then with the help of stationery glue, the image or objects are fixed on the surface.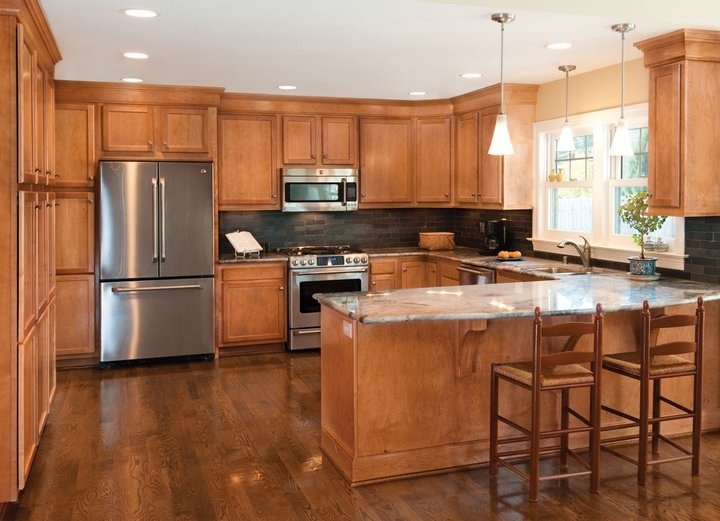 Be sure to cover the craft with several layers of transparent furniture varnish after the glue has dried.
Lacquering
Repair of a kitchen set made of wood comes down to restoration, especially if the material is quite expensive wood. Yes, and old wooden furniture today, and centuries ago, is perceived as a symbol of solidity. In addition, wooden kitchen sets are not that difficult to update. nine0003
Varnishing and toning are the most popular techniques, and they are often combined. The varnish can be used as a matte transparent, glossy or even colored. It does not radically change the color palette of furniture, but gives a shade. Stain is used in cases where they really want to change the color of the facade by a couple of tones.
The technology of both processes is similar.
- Facades are removed from hinges, fittings are removed.
- The surface is cleaned of old varnish or other finishes, treated with sandpaper, coarse and fine, and then carefully sanded.
 nine0018
 - The cleaned surface is primed.
- After the primer has completely dried, a layer of varnish is applied to the facade with a brush. After the varnish has dried, the procedure is repeated at least twice.
The stain is applied in the same way, after the primer has dried. Depending on how much they want to change the color of the furniture, tinting is carried out from 1 to 4 times. Then the product is varnished at least twice.
Molding will help to diversify the look of the updated furniture - a furniture plinth of various shapes. It is very diverse in size and configuration. The molding is glued to the facade surface and can be painted and varnished together with the sash. nine0003
Unusual solutions
The imagination of home craftsmen literally has no limits, so completely unexpected things can serve as material for a kitchen renovation.
- Photowall-paper - the material in terms of density and strength is by no means inferior to PVC film.
 To the surface of chipboard, MDF and even plastic, it is fixed with liquid nails. Photowall-paper is cut according to the sizes of facades and pasted in the most usual way. After the glue has dried, the products must be varnished. If you wish, you can order photo wallpapers with images from your personal archive. nine0018
 - Tiled. As a rule, walls are finished with ceramics. However, nothing prevents the use of this beautiful material as a decoration for a flat or paneled facade. The tile is cut and fixed using the same liquid nails.
- An even more interesting, but also time-consuming option is porcelain mosaic. Broken dishes from one apartment are not enough for this, so the fragments will have to be obtained somewhere: if you agree with the nearest cafes and restaurants, then the material will be typed pretty quickly. The fragments are sorted by color, they form a pattern or just a color gradient with their help and stick them on the surface of the facade.
 The gaps between the fragments are sealed with grout. nine0018
Restoration of kitchen furniture should first of all restore functionality. However, the process is creative, exciting, so that as a result, the kitchen can completely change its appearance.
Restoration of kitchen furniture and kitchen sets
We usually choose kitchen furniture carefully, taking into account all the parameters we need - after all, it will have to function for many years in the most used room in the house - in the kitchen. Whatever kitchen set you choose, it must meet exactly your requirements. The nuances of the sea. This is ease of use, and storage of kitchen utensils, and of course beauty. Just the last moment can worsen over the years and the kitchen that has been loved for years loses the brightness of colors. During operation, chips, scratches, defects appear on the facades of the kitchen set. Color fades. Separate elements break, etc. Especially in the room where family members spend a lot of time.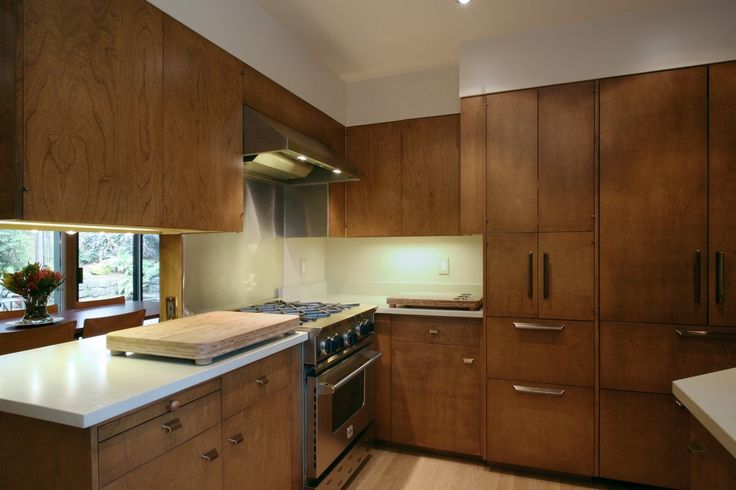 And for the hostess, who sometimes spins in the kitchen all day long, it is very important that all the doors open and close properly, the furniture is pleasing to the eye and uplifting and does not upset with chips, scratches, broken parts...
Restoration of kitchen furniture helps a lot in such cases. It helps to preserve the necessary pieces of furniture, make them comfortable and safe to use, restore their beauty and attractiveness.
Our services:
- Restoration of kitchen
- Retouring of the kitchen
- Retouring of kitchen facades
- REPAIR OF CHILE
- RECOUSE OF THE ARE
- RECOMING of kitchen from MDF
- Repair of kitchen facades
- 0018
Of course, the restoration of kitchen furniture made of wood will not be a big deal, solid wood facades are quite durable. And in general, wooden furniture is the most environmentally friendly and pleasant for any home. Time, of course, makes its marks, but you can update the kitchen set by contacting Elite Vintage. Kitchen furniture restored by our professionals can serve for a very, very long time. And not just to serve, but also to decorate your home.
A very common question is repainting kitchen facades. They started a renovation, decided to change the style in the dining room and in the kitchen??? And here the question of replacing the kitchen set becomes acute. Often this is not necessary, the kitchen that has been loved for years has not outlived its own, it also serves faithfully in everyday life - change the color of the kitchen set. Repainting a kitchen is a more profitable process than buying a new kitchen, prices for kitchens are constantly growing, and often buying new furniture is fraught with a serious gap in the family budget. Another significant plus of repainting facades is uniqueness. Here you can realize the most unusual fantasies. Repaint the kitchen from dark to white, or paint it in a unique azure, add patina, gilding, silvering effects - this is just a drop of possibilities.