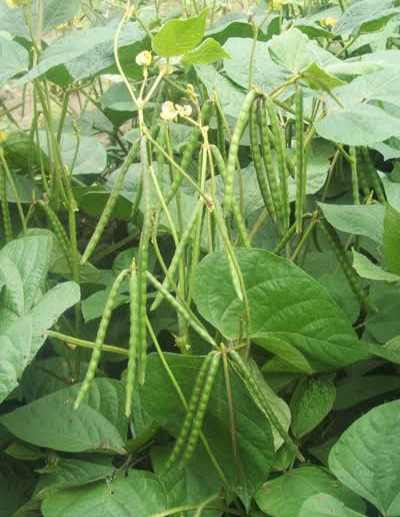
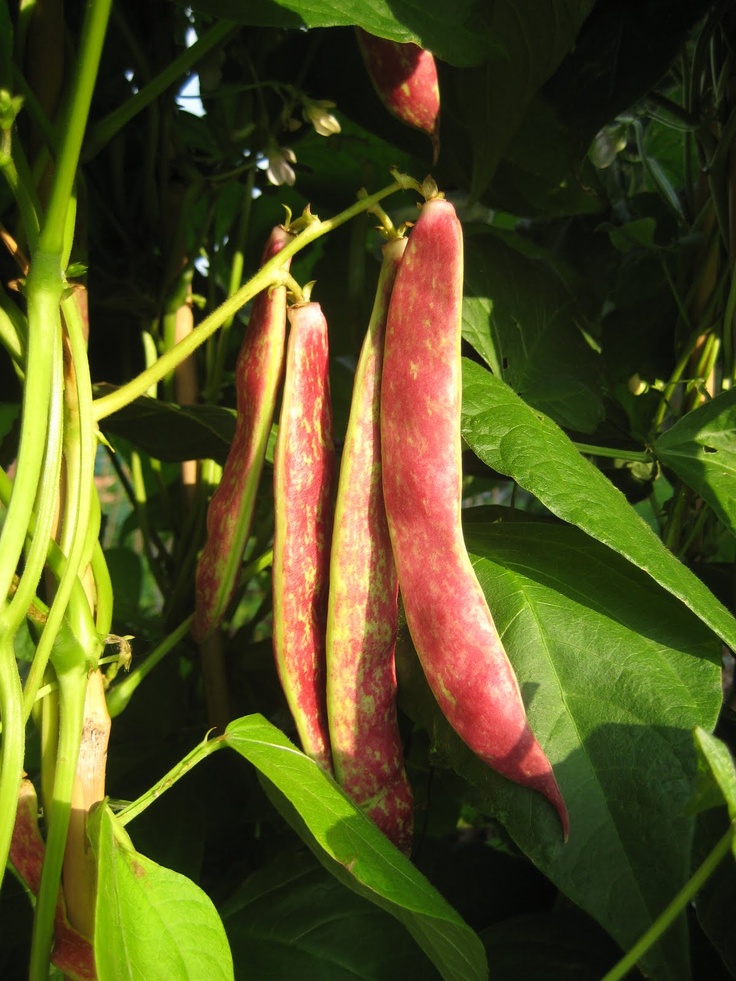
Red beans plants
How to Grow Red Kidney Beans
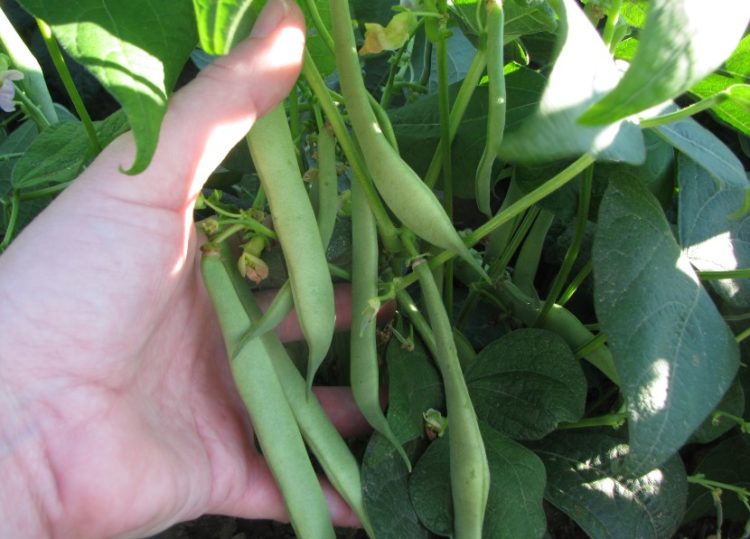
Red beans, also called kidney beans, are both a healthy inclusion to your diet and an excellent crop for the home garden.(Photo: Marco Verch/Flickr)
Red beans, also called kidney beans, are both a healthy inclusion to your diet and an excellent crop for the home garden. High in proteins, they have antioxidant properties, vitamin B6, folic acid, and magnesium. They are also a rich source of cholesterol-lowering fiber.
David’s Garden Seeds – Red Kidney BeanRed beans are an essential pantry mainstay and a staple in vegetarian fare. Medical professionals and nutritionists recommend healthy servings for people with diabetes, hypoglycemia, or insulin resistance. The fiber in the beans keeps sugar levels in the human body from rising too rapidly.
Beans, in general, do not respond well to transplanting. That’s why experienced gardeners suggest sowing red beans directly on the ground just after the last spring frost.
The plants require a long growing season, spanning about 80 days. But both the bush and vine varieties will rot in cool, damp soil. If you want an early start, put down black plastic in your garden to warm the soil.
Here’s how to grow red kidney beans from seed in your garden.
Planting Red Bean Seeds
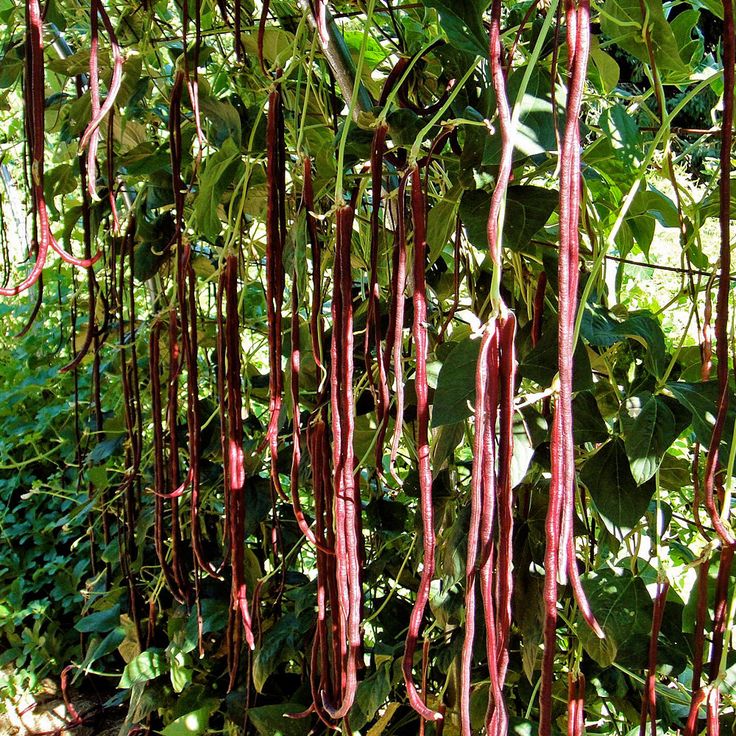
Plant red beans eye side down in full-sun, one to 1 ½ inch deep in moderately fertile, well-draining soil. Space seeds for vining varieties about 4 inches apart. Plant seeds for bush varieties 8 inches apart. The vining varieties will need some kind of support or trellis for climbing.
Water the seeds immediately. Keep in mind that bean plants should be well-ventilated to promote proper development. Good ventilation likewise deters mildew or mold, which are likely to trouble plants that grow without proper air circulation. You should not grow beans in the same spot more than once every four years.
You should not grow beans in the same spot more than once every four years.Caring for Red Bean Plants
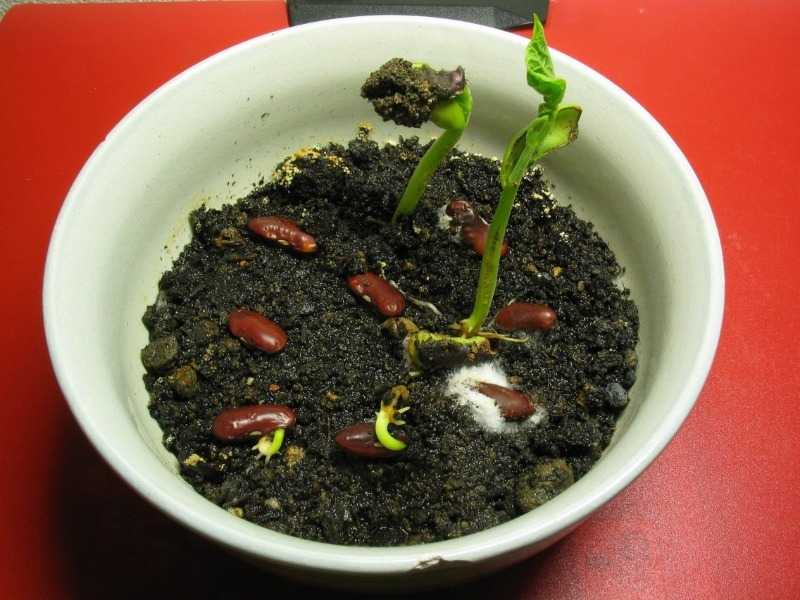
Red bean seedlings should emerge within 10 to 14 days of sowing.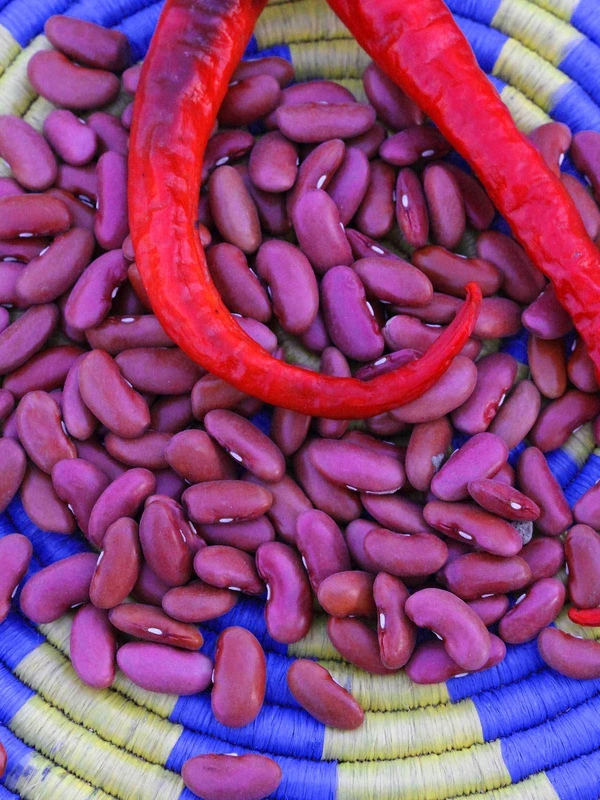 Pole beans may require some initial help climbing. Other than that, the plants will require minimal care. They produce their own nitrogen so you will have no need to apply fertilizer.
However, if you think some fertilizer is necessary, be sure not to use a product that is high in nitrogen. Such fertilizers will only stimulate lush foliage, not bean production.
Red bean seedlings should emerge within 10 to 14 days of sowing.(Photo: Mirishfaqhussain/Wikimedia Commons)
Keep the area around the plants free of weeds. Water the plants regularly, but when watering, try to avoid wetting the leaves. Wet leaves are likely to encourage unwanted fungus growths.
Most types of beans are fairly drought resistant, but check the surface of the soil frequently. Keep the soil moist but not soggy. A good layer of mulch will deter weeds and help maintain soil moisture.
Bean plants produce their own nitrogen so you will have no need to apply fertilizer.Harvesting Red Beans
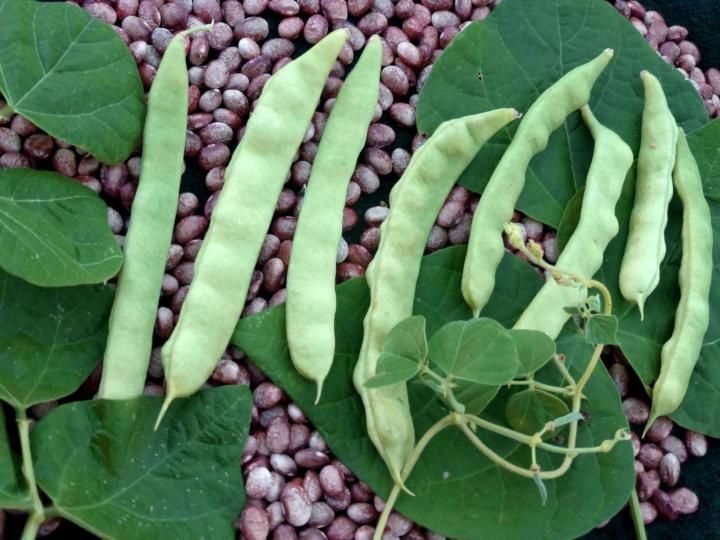
Red beans should be ready for harvest within 100 to 140 days of planting. Stop watering the plants when the pods start to dry out and yellow.
If the air is not too humid and you’ve allowed ample space between plants, the beans may well dry on the vine or bush. They will be hard as rocks and desiccated.
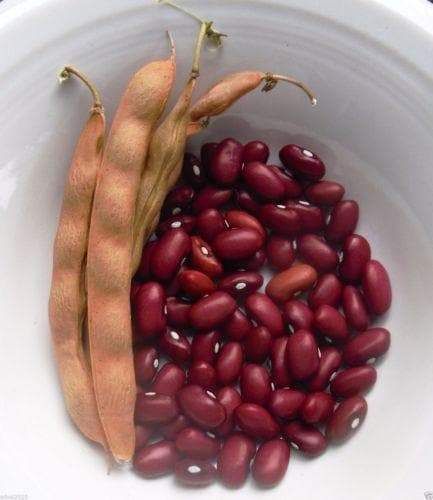
Otherwise, remove the entire plant from the soil when the pods turn the color of straw. Hang the plants upside down in a dry place to allow the beans to dry.
Once the beans are completely dry and cured, you can keep them in a tightly sealed container for about a year.
|
||||||||||||||||||||||||||||||||||||||||||||||||||||||||||||||||||||||||||||||||||||||||||||||||||||||||||||||||||||||||||||||||||||||||
 They are sometimes called ‘chili beans’ for their inclusion in this popular thick soup. Native to Mexico, they require around 95 days from germination to harvest. Red Kidney beans are typically harvested at complete maturity as dry beans.
 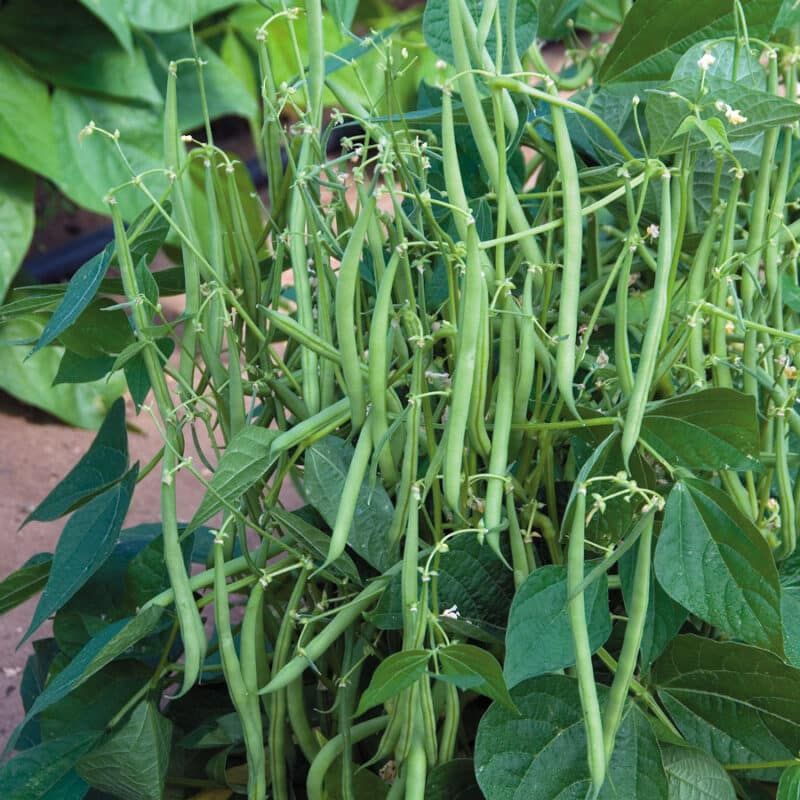 The most important point about growing beans is not to plant them too early. They will rot in cool, damp soil. Even so, many beans require a long growing season of 80 days or more. To get an earlier start, you can put down black plastic, to warm the soil.
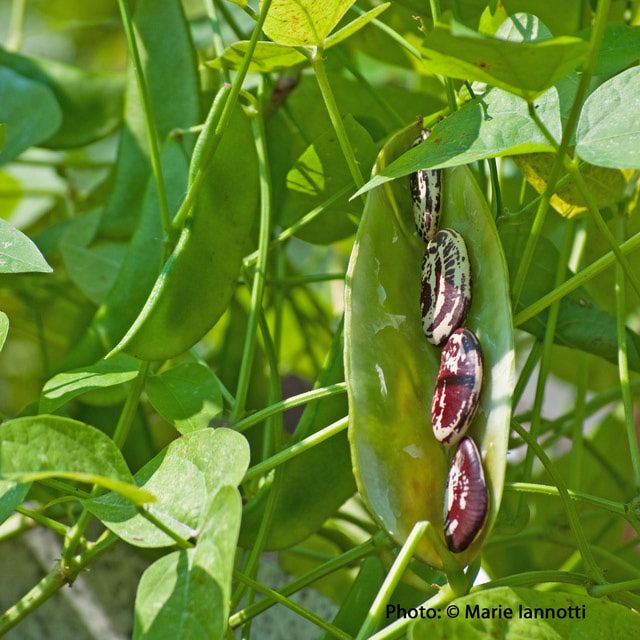 Pole beans will need some type of support to grow on. Be sure the trellis, teepee, fence or whatever is in place before you seed. Plant seeds at a rate of about 3-6 seeds per teepee or every 6 inches apart.
 Staggered planting, every 2 weeks, will keep your bush beans going longer. Pole beans need time to grow their vines, before they start setting beans. The pole bean crop will continue to produce for a month or two.
 You can start to harvest anytime, but gardeners usually wait until the beans begin to firm up and can be snapped. They are generally about as think as a pencil then. Don't wait too long, because beans can become overgrown and tough almost overnight. Harvest by gently pulling each bean from the vine or by snapping off the vine end, if you are going to be using the beans right away.
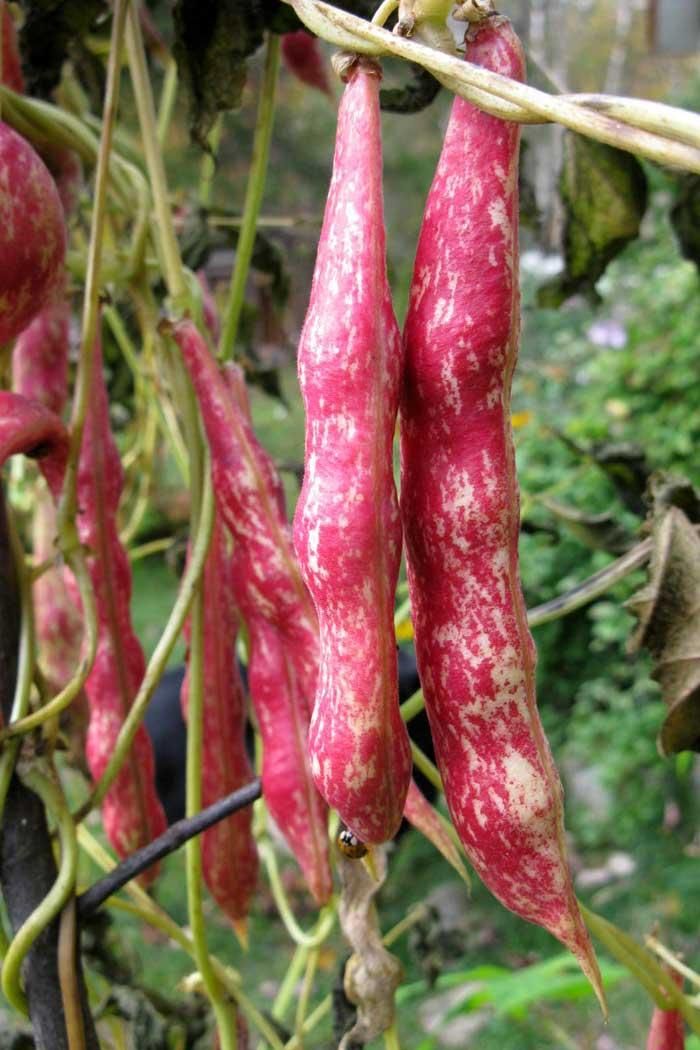 Perhaps the best simple indicator for snap beans is the diameter of the pods. Generally, most varieties will yield the best snap beans with a diameter between ⅛-1/4". Maybe the best way to determine suitability for harvest is to sample a pod or two before making a complete harvest. It is worth noting that many varieties of snap beans that are allowed to develop completely also make good dry beans.
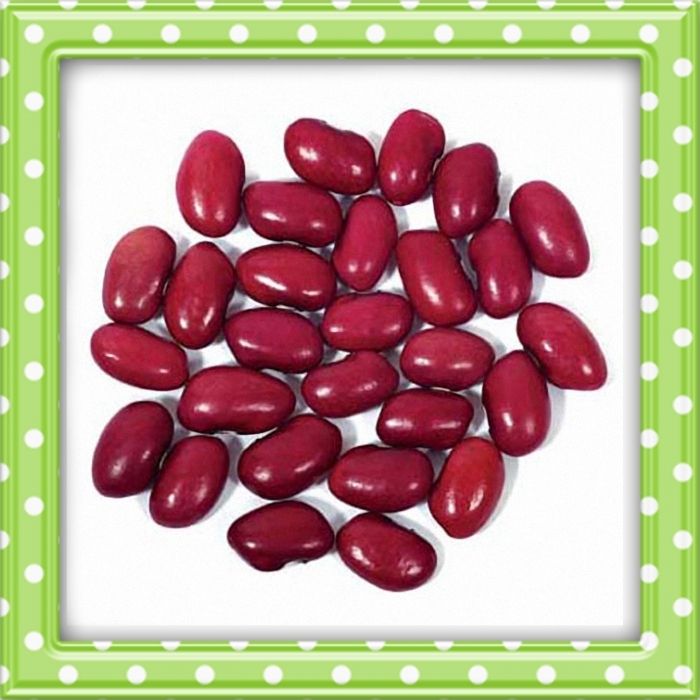 If experiencing a spell of rain late in the season once pods have matured, plants can be removed from ground and hung upside down indoors to allow dessication to continue.
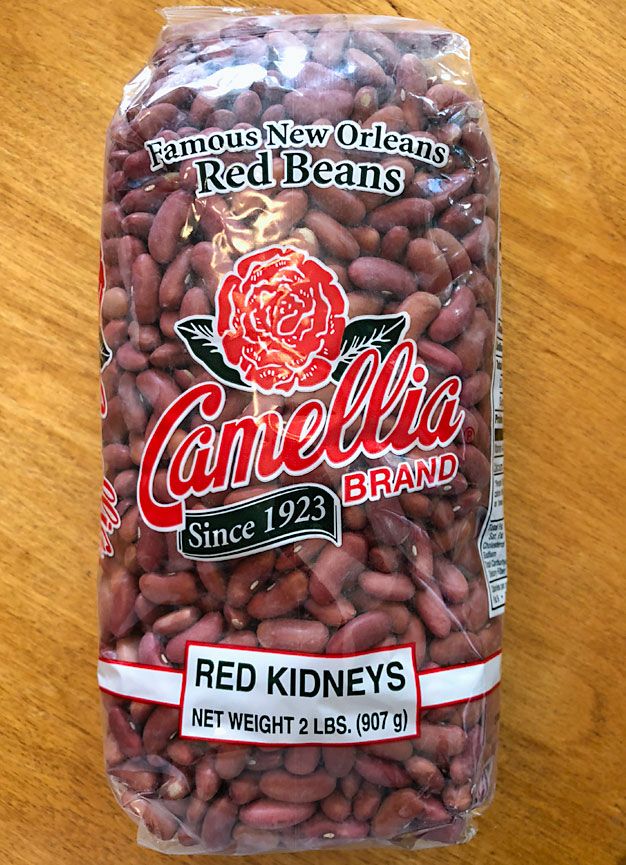 If you grow a lot of beans, this may not be a practical option, but you could try it with one or two plants perhaps. Store the roots in a frost-free place, buried in slightly moist sand or leafmould, or something similar.
planting, care, cultivation, harvesting and storage of crops
Red kidney bean is a heat-loving crop valued for its high content of vegetable protein, taste and dietary properties. Learn how to plant, grow and store beans for the next harvest.
The history of red beans
The peoples who inhabited the South American continent were the first to grow beans. The wild plant was cultivated more than 7 thousand years ago. Somewhat later, beans began to be grown in Egypt, the Roman Empire, and China.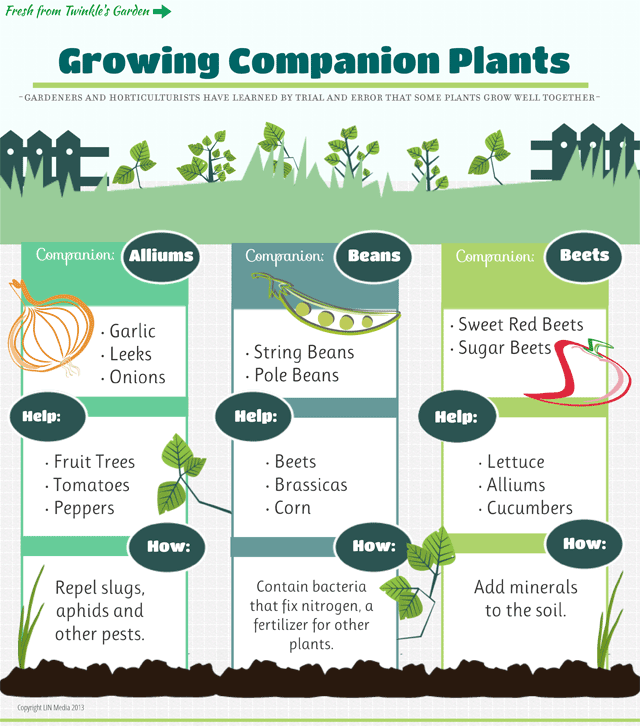 nine0003
By the Middle Ages, beans, for unknown reasons, were forgotten in Europe. Another meeting with her took place thanks to the Spanish sailors. It was they who, after the voyage of Columbus, brought bean seeds to Spain, which soon became one of the most nutritious and sought-after crops here.
Red beans were brought to Russia in the 16th century. At first, it was perceived here as an ornamental plant, and as a food crop they began to grow only in the 18th century.
There are about 150 types of beans in the world, and red beans are just one of them. nine0003
The best varieties of red beans
This variety is distinguished by the shape of pods and beans, taste, ripening time, type of bushes (upright and climbing) and other features.
Popular varieties of red beans:
- Red common. Bushes grow up to 50 cm in height. The length of the pods is 10-12 cm. Each contains 8-10 red seeds. The weight of one bean is 3 g.
 From 1 square. m collect 2.5 kg of beans. Ripening time is average. nine0028
 - Little Red Riding Hood. Red pigmentation predominates in beans. There is some white. This is a late-ripening variety with bushes up to 45 cm high. Pods of medium length contain 8-10 beans. Productivity - 3 kg per 1 square. m or more.
- Chocolate girl. Late large-fruited variety with bushes 40-55 cm high. Pods up to 15 cm long, each containing 6-7 red-brown beans. Each bob has a white stripe. Productivity - over 3.5 kg / sq. m.
- Early ripening. An early variety with pink-red beans. There are white patches. The length of one bean is up to 2 cm.
The benefits and harms of red beans
Any bean contains vegetable, easily digestible protein, which successfully replaces meat. Red beans contain approximately 25% protein, and in terms of their energy value, they are equal to their animal counterparts.
Benefits of red beans:
- promotes weight loss;
- appetite suppressant; nine0029
- prevents diabetes and cardiovascular disease;
- improves circulation;
- normalizes the functioning of the digestive system;
- promotes the elimination of toxins;
- strengthens the immune system.
Red beans contain a record amount of boron, calcium, copper, magnesium, potassium, aluminum. It also contains a lot of vitamins C, E, K and group B.
Beans are strictly forbidden to eat raw, as this can cause poisoning. Fresh beans contain toxins that are easily neutralized by heat treatment or soaking. nine0003
Beans are eaten with caution in:
- Gout. It is not recommended to eat a lot of beans and predisposition to this disease. Beans are high in purines, substances that release uric acid when broken down, which the kidneys may not be able to remove.
- Diseases of the stomach and intestines.
 Beans cause gas and bloating.
Rules for planting red beans
The main condition for successful growth and high yield of beans is the right timing and well-prepared soil. This heat-loving plant should not be planted before stable heat comes. nine0003
Terms of planting for seedlings and in open ground
Beans are a heat-loving crop, so seeds thrown into cold ground will not germinate, they may even rot. Planting begins when the top layer of soil is 10-15 cm, warms up to + 12 ... + 15 ° С.
It is impossible to rush to plant beans, they are planted after the temperature has established and night frosts have been excluded. Seedlings die at +1 °C. For active growth and development, the culture requires a temperature of + 20 ... + 25 ° C.
Terms of sowing beans in the ground:
- in the Urals - at the beginning of June;
- in Siberia - in the second decade of June;
- in the central region - at the end of May-beginning of June;
- in the North-Western region - in the first decade of June;
- in the south - in the second half of April.
You can plant beans for seedlings in early April. Also a favorable period is May.
Site selection and soil preparation
Beans are planted in well-lit areas that are free from drafts and strong winds. Any soil is suitable, except for excessively heavy clay soils - water stagnates in them, so plant roots can rot. nine0003
In autumn, dig the soil as deep as possible, after spreading organic and mineral fertilizers over the area. For 1 sq. m area add:
- humus or compost - 4 kg;
- dolomite flour - 1 tbsp. l.;
- ammonium nitrate - 1 tbsp. l.;
- superphosphate - 2 tbsp. l.
Beans are recommended to be planted after:
- cabbage;
- tomatoes;
- cucumbers;
- potatoes;
- eggplant; nine0029
- pepper.
Undesirable precursors - all legumes. Beans do not grow well after peas, soybeans, lentils, peanuts. It is planted on the site after these crops no earlier than 3-4 years later. Beans grow well next to carrots, beets, onions, tomatoes, cucumbers, cabbage.
Planting red beans outdoors
It is recommended to soak the seeds overnight in water before planting. If you use ash infusion instead of water, soaking is reduced to 2-3 hours. Immediately before sowing the seeds in the ground, they are kept for 3-4 minutes in a weak solution of boric acid. nine0003
Order of planting red bean seeds in the ground:
- In the area dug up and fertilized since autumn, make furrows at intervals of 40 and 50 cm for bush and climbing beans, respectively. The depth of the furrows is 5-6 cm.
- Place the seeds in dry grooves at intervals of 20-25 cm and 30-35 cm for bush and climbing varieties respectively. To increase germination, plant seeds more often, but then the extra seedlings will have to be removed.
- You can make holes instead of furrows. Then put 3-4 beans in each of them. When shoots appear, leave the healthiest sprout, remove the rest or transplant to another bed.
 nine0029
 - Cover crops with loose soil and level with a rake.
- Water the area using the sprinkler method.
- If in doubt about nighttime temperatures, temporarily cover crops with foil.
Planting in seedlings
In regions with cold, long springs, it is recommended to grow beans in seedlings in order to bring the ripening of the pods closer by 2-3 weeks.
Beans for seedlings are grown in large containers or in individual containers, including peat pots. The recommended container for growing seedlings is individual glasses of 250 ml and 8 cm in diameter.
Sowing order for seedlings:
- Soak the seeds before planting in the ground. It is desirable that they have sprouts.
- Make drainage holes in the glasses. Put them on a pallet and pour the soil mixture. Soil options:
- Mix peat, humus and garden soil in a ratio of 1:1:2.
- Take compost, soddy soil and sand in a ratio of 1:1:0.1.
- Mix garden and turf soil with sand in a ratio of 3:2:0.
 1.
1.
- Sprinkle the soil and make small depressions in the center of the cups. Hole depth - 4-5 cm. When sowing in containers, leave intervals of 7-8 cm between seeds.
- Place 1 or 2 beans in each hole. Preferably sprouts down or to the side. Fill the holes with soil and compact a little.
- Cover the crops with foil and place them in a warm room. Remove the covering material from time to time (2-3 times a day) for 10-15 minutes so that condensation does not collect on it. nine0029
- When sprouts appear, remove the film and lower the temperature by 2-3 °C. Place containers with seedlings closer to the light.
- Water seedlings when the soil dries out. You can also apply a mineral complex fertilizer to the soil, for example, Diammofoska (dissolve 3 g in 1 liter of water). The frequency of top dressing is 1 time in 10 days.
Fertilize only after the first true leaves appear on the seedlings. Before fertilizing, water the soil a little so as not to burn the roots.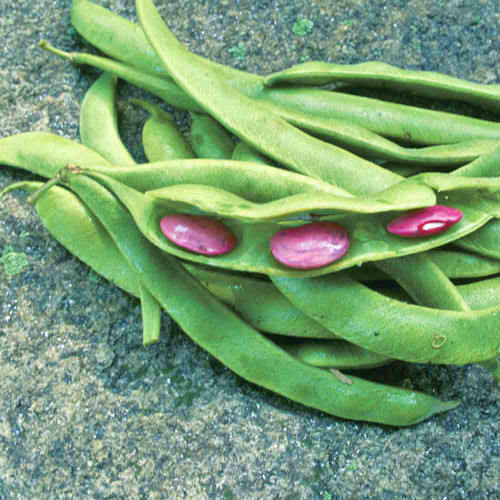 nine0029
Transplanting seedlings in open ground
Bean seedlings are planted one month after sowing the seeds. It is impossible to delay planting, so it is better to sow the beans a little later so that you do not have to plant seedlings in cold weather.
When to plant seedlings of beans:
- in the Urals - late May-early June;
- in Siberia - beginning or second decade of June;
- in the central region - the second half of May-beginning of June;
- in the North-Western region - the end of May - the first ten days of June; nine0029
- in the south - in the second half of April-early May.
The procedure for planting bean seedlings in open ground:
- 2 weeks before transplanting seedlings into open ground, start hardening them. Expose every day, preferably in the morning, containers / glasses with seedlings to fresh air. First for 30-60 minutes. Gradually increase the time.
A couple of days before transplanting, leave it outside overnight.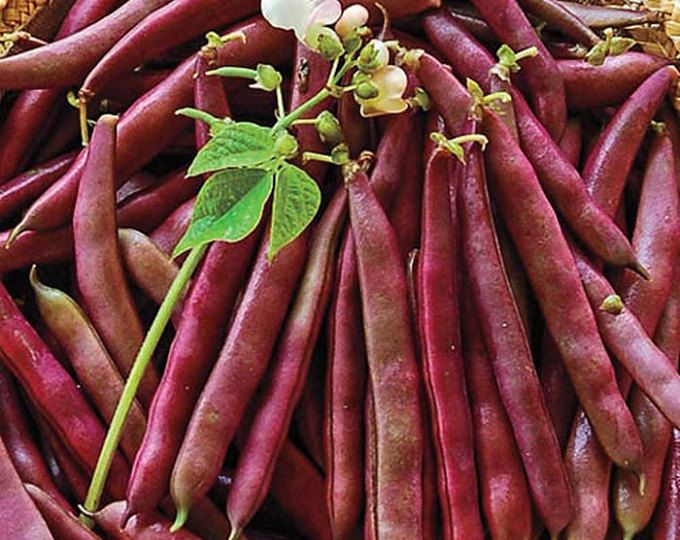
- In prepared beds, dug up and leveled with a rake, make indentations every 15-20 cm. Leave a distance of 40-50 cm between rows (depending on the bean variety). nine0029
- If the beds have not been fertilized, add compost and wood ash to each hole - 50 and 20 g respectively.
- Pour warm, settled water over each well.
- Remove the seedling from the container together with the clod of earth and move it to the hole. If the seedlings grew in peat pots, put them together with the seedling in a recess.
- Cover the seedlings with soil and compact it gently.
- Place supports when planting climbing beans.
Water the seedlings before planting to make them easy to remove from the planting containers.
Care and cultivation of red beans
Beans are one of the most unpretentious plants that do not require special attention from gardeners. He has basic needs - moisture, warmth, nutrition, soil clean from weeds.
Watering rules
Beans love moisture, so they should not be left without watering. It is especially important to water the culture at the first stage of development. Recommended watering frequency is once a week. nine0003
Irrigation rates, l per 1 sq. m:
- after germination - 5-6;
- during flowering - 10-12;
- in the phase of formation and maturation of beans - 16-18.
Water the beans in the morning or evening. For irrigation use settled and rain water. It should not fall on the aerial parts of plants. It is best to pour water into the aisles.
Loosening the soil
Loosening the soil begins after emergence. As the beans grow, loosening is combined with weeding. Thanks to the loosening of the row spacing, oxygen enters the roots of the plant, contributing to its growth and development. nine0003
Tips for loosening red beans:
- Skin must not be allowed to form, even before emergence. Sprouts, breaking through, can break on a hard layer.

- Bush varieties are hilled three times. Raking the ground to the stems, increase the stability of the bushes. The first time the beds are spudded at a plant height of 10 cm, the second - 20 cm, the third - at the stage of closing neighboring beds.
Top dressing
Beans do not require additional top dressing if fertilizer was applied before digging or in holes during planting. But if this has not been done, or the soils are infertile, and the variety requires additional nutrition, they resort to top dressing during the growing season. nine0003
Feeding features:
- Potassium and phosphorus are mainly introduced. The culture extracts nitrogen from the soil on its own, thanks to nodule bacteria.
- At the initial stage, it is recommended to apply superphosphate, during flowering and the formation of ovaries - potassium salt. Application rate - 30 g per 1 sq. m. The solutions are poured through the narrow spout of the watering can, trying not to get on the leaves and stems of plants.
 nine0029
Garter
Only climbing red beans need a garter. Without supports, the plants will be on the ground, they will hurt and rot. Yields will drop, or the pods will not ripen at all.
Tips for tying climbing red beans:
- Wooden stakes 1.5-2 m long are used as supports. Plastic and metal supports are not suitable - plant stems will not be able to trail along them.
- The second option is tapestries. Two supports are placed along the edges of the beds, between which they stretch a wire, a thick twine or a mesh with large cells - bean stalks will cling to them. nine0029
- Another garter option is slanted wooden slats installed along the entire bed at an angle.
Diseases and pests
Red kidney bean, not prone to disease, but under adverse conditions is affected by fungal and viral infections, bacterial rot. Usually they are caused by a malicious violation of agricultural technology, non-compliance with crop rotation and ignoring prevention.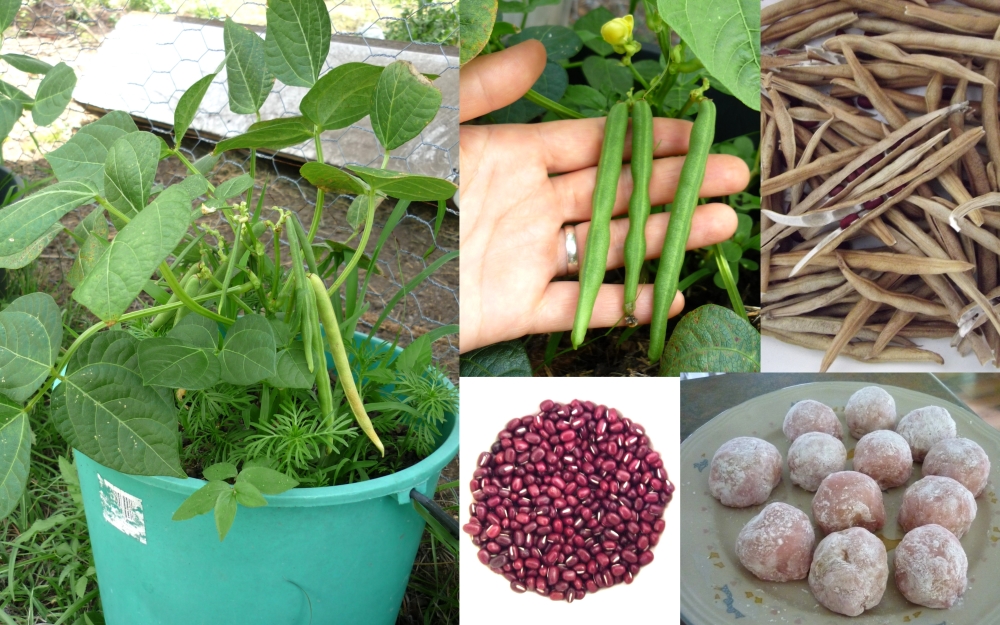
Common diseases:
- Mosaic. Plants become mottled, leaves shrivel, blistering may appear. This viral disease has no specific treatment. Affected plants are pulled out and destroyed. nine0029
- Anthracnose. A fungal disease in which the leaves become covered with light brown spots. On the leaves they are rounded, and on the stems they are elongated. The pods rot and the beans inside become sources of infection. Fungicides help fight the disease.
- Root rot. Attacks seedlings. The people call the disease "black leg". Has no treatment. Prevention is needed - prevention of waterlogging, soil disinfection, crop rotation.
- White and gray rot. A fungal infection affecting all plant tissues. White or gray coating covers the stems, leaves, pods, they soften and rot, the plants die.
- Powdery mildew. The causative agent is a fungus. Appears at high humidity.
 It spreads quickly and is highly contagious. The leaves of the plants are covered with a white powdery coating. The plant turns yellow and dries up.
Anti fungal agents:
- Spraying with 1% Bordeaux liquid 1 or 2 times with a break of 10 days.
- Treatment with biofungicides - Fitosporin, Mikosan, Trichodermin and others.
- Spraying with colloidal sulfur solution - especially effective against anthracnose and powdery mildew.
Various types of pests are interested in beans, some eat the leaves and gnaw the stems, others suck the juice out of them, others eat the beans. Preventive measures, insecticides and folk methods help to cope with them. nine0003
Most common pests:
- Slugs. They are nocturnal, eating all parts of plants. They are scared away from the beds with lime and ash - they are scattered in the aisles.
- Aphid. Sucks juices from leaves, gathering in colonies on their reverse side.
 Folk methods help to drive away insects - spraying with infusions of tomato or tobacco tops, onion peel, celandine.
 - Pea weevil (bruchus). Beetle larvae damage beans by eating their flesh. Crops are treated with Gaupsin, Bicol, Verticillin. These drugs are effective in the fight against pea weevils and pea codling moth, thrips and spider mites. nine0029
Harvesting and storage of red beans
Harvesting of shell beans - for grain, begins when the beans are fully ripe. We must wait until they become hard and acquire a color corresponding to mature seeds.
Harvest time depends on variety and growing region. It can be harvested from the end of July - in early ripening and early varieties, until the end of September - in late beans. If the leaves have dried up and the pods have turned yellow, it's time to harvest.
How to collect and store beans:
- Pull out the bushes. And it is better to cut it off so that nodule bacteria remain in the soil, saturating it with nitrogen.

- Lay out the bushes on a film or burlap - this will allow you not to lose the seeds that have fallen out of the pods. If the weather is unstable, it is better to fold the crop under a canopy so that the rain does not wet it.
- When the pods are completely dry, start peeling. Put the collected beans in canvas bags or plastic bottles and store in a cool, dry place.
Some gardeners do not peel the beans, but hang the bushes from the ceiling - in the barn or shed, and then take the pods from them as needed.
Pods and green beans can be frozen. Fresh beans are not stored for a long time, they quickly wither and deteriorate. Within 8-10 days it must be eaten, frozen or canned. Beans are blanched for 2 minutes before freezing, and then placed in containers.
Cultivation of red beans does not cause any special problems, its agricultural technique is simple and accessible even to novice gardeners. The key to a good harvest is the right choice of planting dates, abundant watering and preventive measures. nine0003
Author of the publication
description, features, recipes and useful properties
Red bean (lat. Phaséolus) is an annual herbaceous plant from the legume family. Red bean beans are considered the most important basis of the diet and are part of the national dishes in many countries - for example, in Mexico.
The history of appearance
Archaeologists found bean seeds during excavations of settlements of the 3rd millennium BC, which indicates the early cultivation of the species. In Europe, beans appeared after the second journey of Christopher Columbus in the 15th century. Beans came to Russia from France in the 17th-18th centuries, so Russian peasants often called them "French beans". At first, beans were grown as an ornamental plant, and after noticing the similarity of beans with peas, they began to grow it as a vegetable crop. nine0003
Benefits and harms
Red beans contain up to 30% easily digestible protein, which makes them an excellent alternative to meat and suitable for a plant-based diet. Beans are also full of various trace elements and vitamins - B vitamins, potassium, calcium, magnesium, zinc, iron and phosphorus. The fiber in red beans helps keep you feeling full longer, regulate blood sugar and cholesterol levels, and flush out toxins from the body. Raw beans contain toxic substances, which is why they must be cooked and not eaten raw. In addition, beans are a heavy food, and people with gastrointestinal diseases should use them with caution. nine0003
How it tastes
Red kidney beans have a pronounced sweet taste with a nutty tinge. Of all the species, it has the densest shell and tender, oily flesh. Unlike white beans, red beans are rarely used in full-fledged dishes due to their characteristic taste.
As it is
Red beans are an important base for many dishes, from everyday to festive. To cook the beans, they must be soaked for several hours in cold water, and then boiled for a long time. But, if this method of cooking is not very suitable for you, you can choose canned beans.