Painting bedroom furniture ideas
15 Stunning Painted Furniture (Before and After) Makeovers
DIY Vintage Painted Furniture TransformationsIf you need some inspiration for your next furniture makeover, check out these painted furniture before and after reveals which also include step-by-step tutorials and a video!
With all the different ideas online for furniture makeovers, it’s hard to know what style to choose or which products won’t cost an arm and a leg. In this post, I’m sharing my best tips for not only the right color and look but also the right process for a beautiful and long-lasting finish. (Don’t forget to download my free furniture painting cheat sheet here!)
Furniture transformations mean so much more to me than just slapping a coat of paint on an antique. Not only do I love sharing instructions on how to prep and paint furniture to provide a flawless and durable finish, but the process itself is so relaxing and enjoyable for me. Sometimes I joke that furniture painting is just as effective as therapy (but cheaper!) and I’d love to show you why!
These curbside rejects often remind me of how far I’ve come in my own restoration process and my true source of transformation. Here are my best ideas for giving antique furniture a modern makeover while sharing my absolute favorite aspect of DIY furniture makeovers.
LET ME SHOW YOU:
- Stunning furniture reveals to inspire your own unique transformations!
- How to get a beautiful and durable finish easily without the high cost of chalk paint
- Tips for picking the best paint color for furniture
- The benefits of using paint as a faux stain on painted or previously-stained furniture
WANT TO SAVE THIS FOR LATER? CLICK HERE TO SAVE THIS PIN TO YOUR FAVORITE PINTEREST BOARD
(As an Amazon affiliate I earn from qualifying purchases.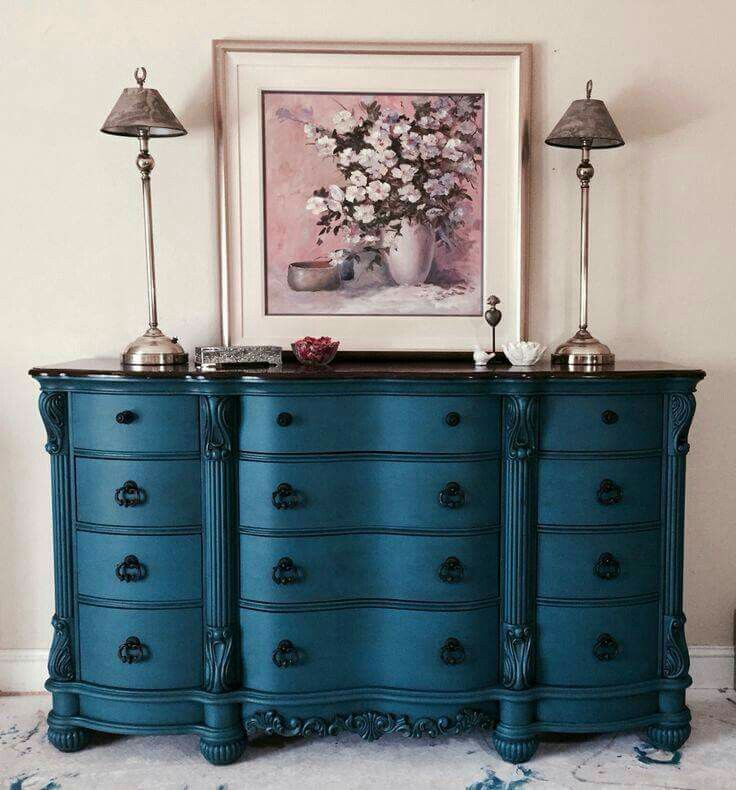 Please see my full disclosure HERE).
More than a couple of years ago, I returned to college a little early after Christmas break during my sophomore year at Texas A&M. I was the only one at our little rental house that weekend out of my 6 roommates. At the time, I was pretty down about something – probably a boy, a roommate issue, or one of a myriad of possible problems that college girls deal with on a day-to-day basis.
An elderly couple owned the house and all of its outdated furniture. I looked around the living room that day and saw the coffee table which looked as awful as I felt. I found some creamy white latex in one of the closets, put an old sheet on the floor, and decided to start painting.
I remember being amazed at how something so simple could be so enjoyable. Before I knew it my bad mood was melting away with every brushstroke of paint on the old coffee table.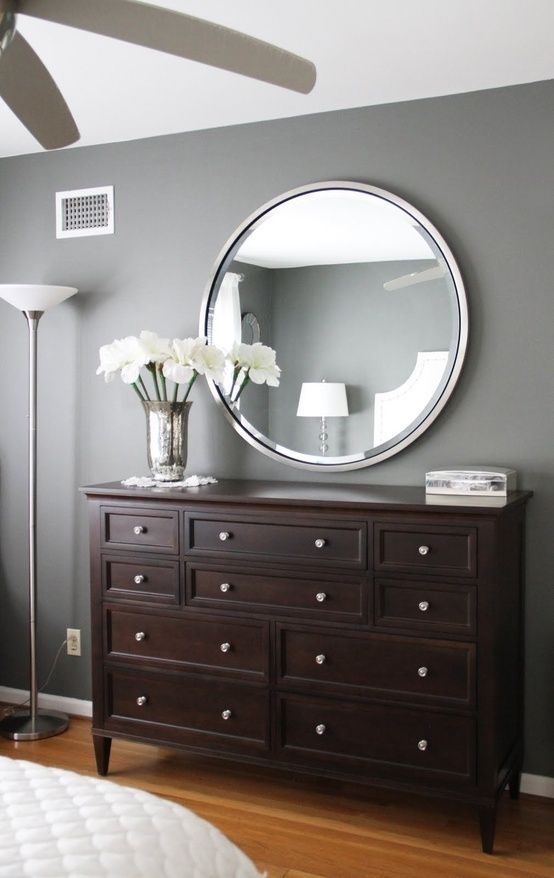
What was previously a surface of chippy brown laminate was now a beautiful clean slate. Suddenly, I felt the same way about the new semester.
I didn’t realize how therapeutic and peaceful painting furniture could be or the joy I could experience by giving a piece of furniture new life. Little did I know, that the coffee table was one of many furniture pieces I would paint and this blog is an attempt to document those makeovers as well as the transformation the Lord is doing in my own life daily.
Renovated Faith: What’s in a Name?God never leaves a project half-done…He continually works on each one of us, as a lavish expression of His amazing love and grace. So many of my DIY projects remind me of how God renovates our hearts. If you are a work-in-progress, just like I am, check out the Renovate Your Faith Devotional at the bottom of this post. Click here to get a weekly reminder of new posts by email.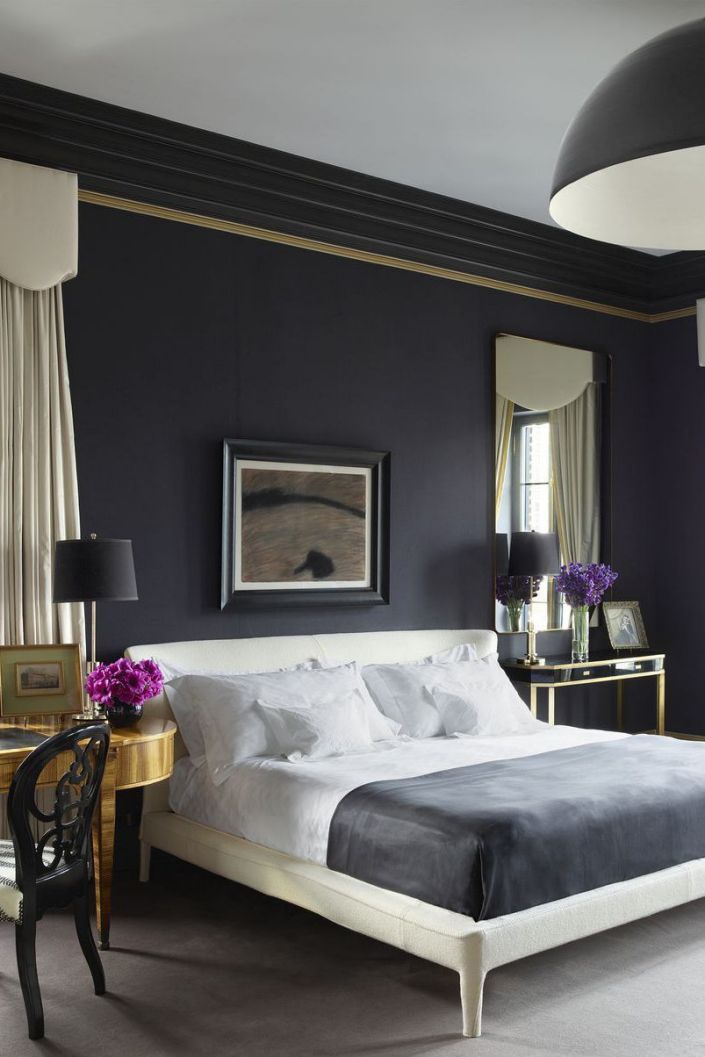
Painted Furniture: Before and After Transformations:
I’ve had the opportunity to refinish lots of furniture pieces through the years but with this post, I’ve tried to narrow them down to my absolute favorite reveals and I can’t wait for you to see them! (To see ALL of my furniture makeovers, you can click here: Project Gallery)
Tips for Painting Bedroom Furniture: Before and After Transformations
I often get questions about ideas for painting bedroom furniture which includes dressers, headboards, side tables, and vanities. A couple of the pieces below have lots of sentimental value because they were my grandparents’. I was happy to get them from my uncle who drove them in a U-Haul from New Mexico to College Station, Tx. (Don’t forget to download my free furniture painting cheat sheet at the end of this post!)
Painted Dressers: Before and AfterAntique dressers are so easy to come by! You can find them anywhere like Facebook Marketplace, Craigslist, or your local resale shop.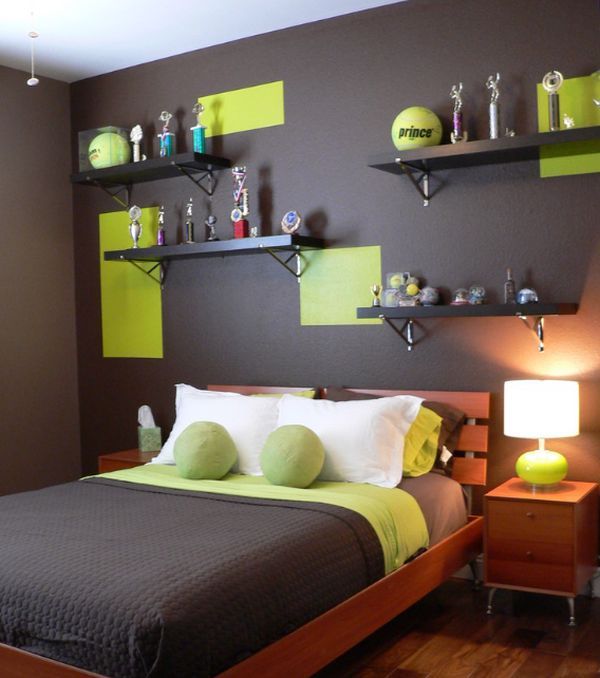 Just make sure to check all the drawers on the dresser before you bring it home to make sure they are in good working order.
This painted dresser is one of my favorite furniture pieces in our home because it belonged to my grandmother, Cornelia Moseley. She used it every morning to put her makeup on. I wanted it to be a sophisticated dark blue without being too flashy so I picked Benjamin Moore’s Hale Navy. I love that it is such a pretty navy and has a gray undertone while still being a true blue. Needless to say, Hale Navy did not disappoint!
Navy Antique Dresser Makeover – See the full tutorial here.What I love most about this dresser are the intricate designs on each drawer. My mom told me she would run her fingers through the scrollwork when she was a little girl. I also love the long turned legs with wooden wheels. They definitely add lots of style to such a beautiful piece.
My grandmother was a seamstress and I remember she had a big box of rolls and rolls of intricate lace. She would often make dresses and hem lace on the bottom edge.
For that reason, I added a lace detail to the inside of each drawer so that I can remember her every time I open this navy painted dresser. Because the wood drawers weren’t very smooth, I did a lot of experimenting and was able to find a way to stencil on any wood surface without bleedthrough: The Easy Way to Stencil on Wood
How to Stencil on Wood Perfectly Every TimePainted Furniture Ideas: Dresser Painted with Chalk Paint AlternativeOne of the first furniture makeovers I included on the blog was this antique dresser where I showed how to get the look of chalk paint and wax with a much cheaper and more durable alternative. The results were great and the process is easier than chalk paint! (A Better Alternative to Chalk Paint)
This dresser doesn’t require the maintenance that is needed with waxed furniture pieces and the finish is more durable. To hear more about why I stopped using chalk paint and this transformation, click here: Why I Stopped Using Chalk Paint on Furniture
I included this coastal blue dresser makeover because of the backstory. In the post, you can hear about how a frog in my shoe caused me to be late to meet my husband and the owner of the piece here: Coastal Dresser Makeover with Driftwood Top
BEFORE of Coastal Dresser Makeover – See the full tutorial here.So why is having a frog in my shoe relevant? I was running late to meet Jeremy at the storage facility where the dresser was located. Therefore, he had loaded it before I saw it and I didn’t get to do my usual 4-point inspection.
Coastal Blue Dresser Makeover with Driftwood Top – See the full tutorial here.When we unloaded the dresser, I realized that it reeked of cigarette smoke, old lady air freshener, and some other …organic smell.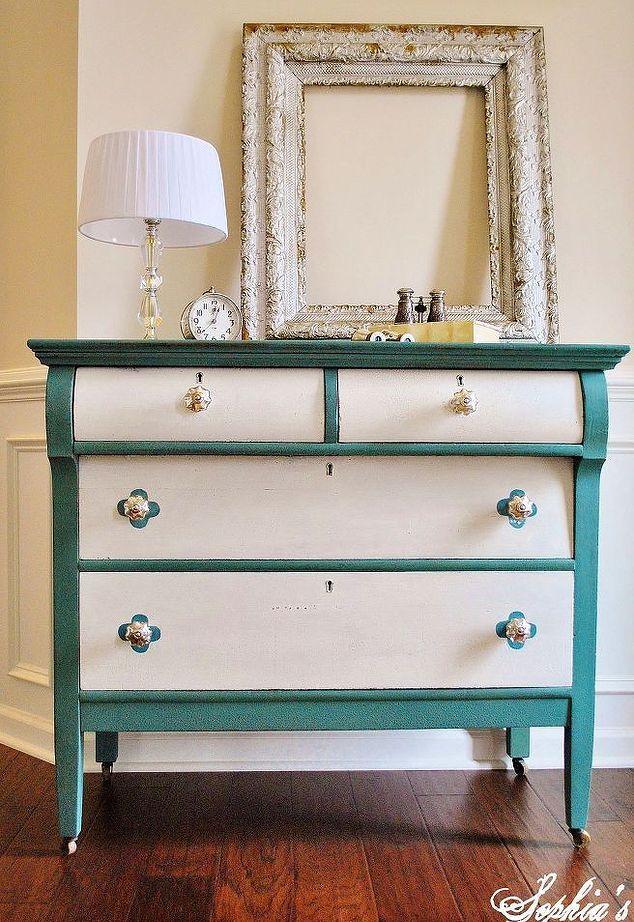 It REEKED! Also, there was a massive chip in one of the drawers that I had no idea how to fix.
I would have never bought the dresser if I’d known about the damage and smell, but there it was, stinking up my garage. Fortunately, I learned some new skills in refinishing this piece and wrote blog posts on them here: How to Get Musty, Moldy Smells Out of Old Furniture and here How to Fix Damaged Furniture for Refinishing
Easy Driftwood Finish for Furniture – See the full tutorial here.This is the first furniture piece where I used a faux finish to get the look of wood. You can read more about my driftwood finish here and more faux stain shades here: How to Faux Stain Wood With Paint
Furniture Redo Ideas: Side TablesAfter painting numerous furniture pieces, I have found some time-saving tricks and also learned from mistakes along the way. I have included all of these tips in my Must-Have Furniture Painting Cheat Sheet. You can get it for free by filling out the form at the bottom of this post. Now, on to side tables!
This is one of my simplest transformations that still had the biggest impact. Sometimes all you need for a dramatic transformation is the right color of paint. This beautiful shade of Dovetail Gray accented the marble tops of these beautiful side tables.
BEFORE of Marble Side Table Makeover – See the full tutorial here.Most of my posts have a Renovate Your Faith section where I share a little about how God is transforming me. In this post, I share not only the full end table restoration but also share some encouragement if you find yourself stuck in the comparison trap: How to Stop Comparing Yourself to Others (Marble Side Table Makeover)
Marble Side Table Reveal – See the full tutorial here.Two-Tone End Tables (Painted Wooden Furniture Makeover)My mother-in-law had the idea to restore the stain on the drawers of Jeremy’s grandma’s old side tables while painting the rest navy.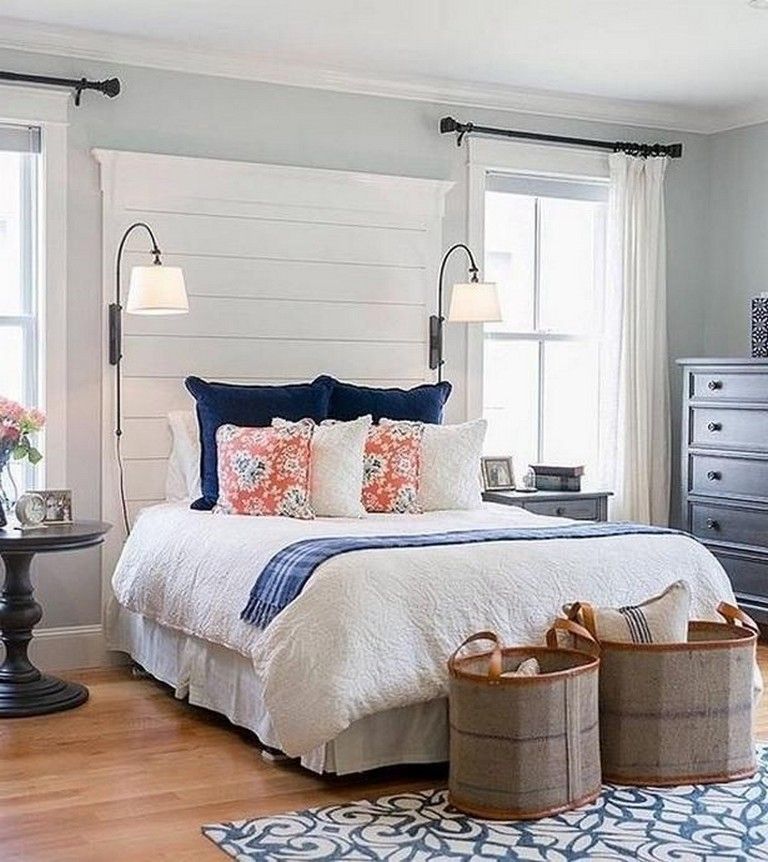 I’m so pleased with the results and am thankful she had such a great idea!
You can see the full transformation and also how to fix damaged furniture here: A Beginner’s Guide to Fixing Furniture Damage
If you need help on installing new hardware or filling old hardware holes, click here: How to Install Handles and Knobs on Furniture and Cabinets
How to Fix Damaged Wood Furniture – See the full tutorial here.Painted Antique Furniture: Vintage Vanity MakeoverProbably my favorite furniture restoration to date is this vintage vanity makeover. It was initially intended for my grandmother to use but my grandfather actually used it more. He would put his wallet and keys in the top right drawer. I sit at this vanity every morning to put my makeup on but I use the top right drawer only to store some things that belonged to him.
BEFORE of Vintage Vanity – See the full post on how to refinish furniture here.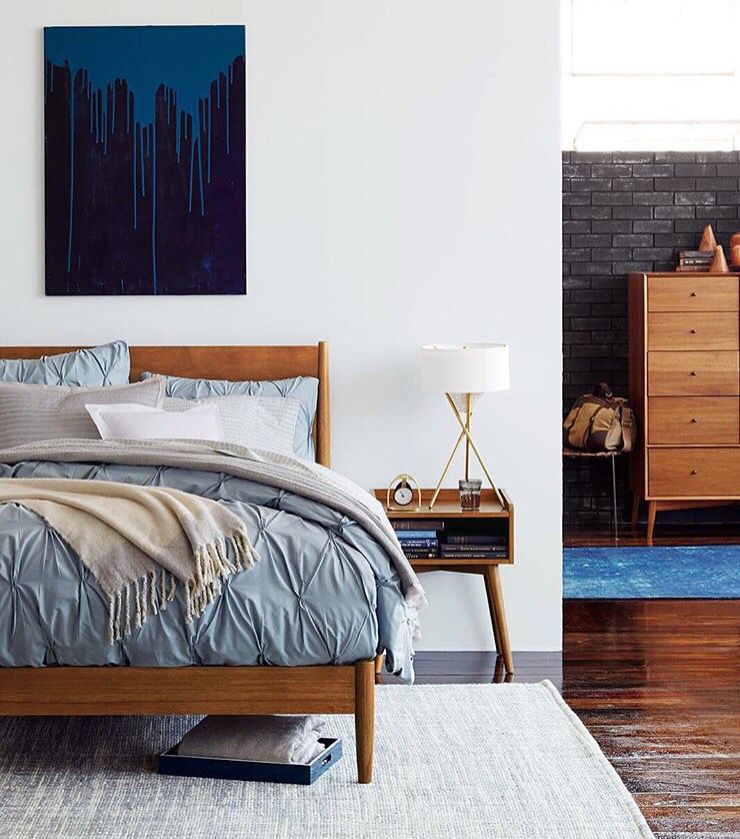
You can see the entire process from start to finish in this post: A Beginner’s Guide to Painting Furniture It is one of my favorite transformations not only because of the dramatic transformation but the sentimental memories behind this piece.
A Beginner’s Guide to Furniture Painting – See the full tutorial here.More Painted Bedroom Furniture IdeasFor more pictures of painted bedroom furniture, you can check out my project gallery here: Painted Furniture by Renovated Faith
Painted Dining Room Furniture (Before and After)
I recently refinished the top of my breakfast table as it had a lot of water damage from cold glasses, because, well…we live here. I used my Dark Walnut faux stain to match the chairs and I love how it turned out. You can see this shade and 5 others here: How to Faux Stain Furniture with Paint
How to Faux Stain Furniture With Paint (6 Shades to Choose From)Easy Faux Raw Wood Finish For Any Surface
One of the biggest trends in furniture today is a bleached raw wood finish.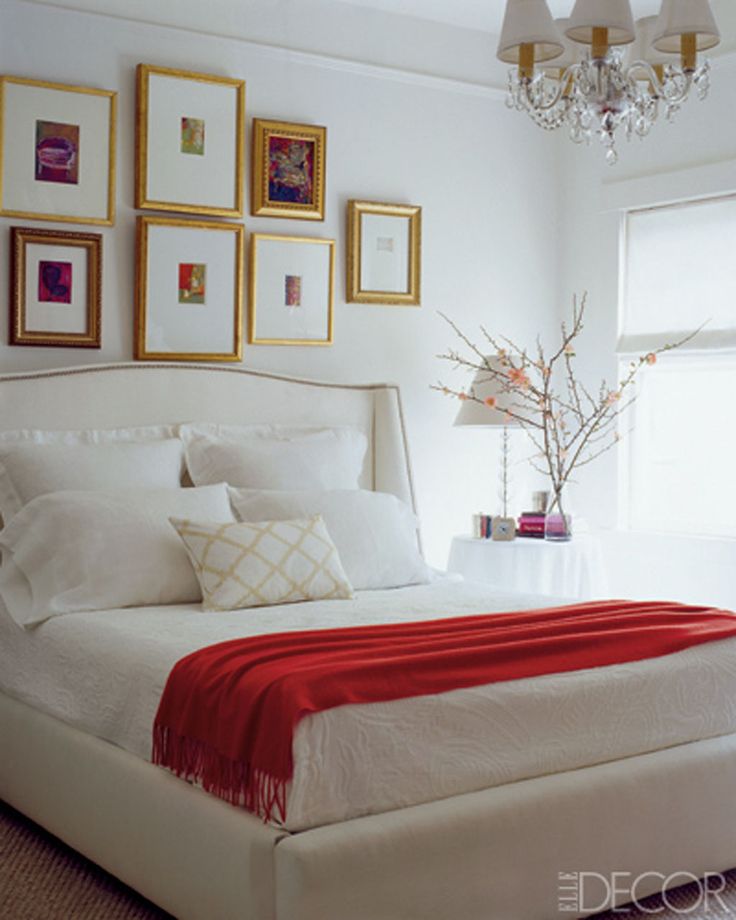 These furniture pieces are stunning but the look is hard to come by without the use of furniture stripper and bleach. But this tutorial will show you how to get the same look on any surface (the console is white laminate) with just paint!
After a long, hard day, I was driving home one night and was nearly home when I saw a dark, eerie figure on the road-side. I slowed down to see what it was and could see in my rearview mirror it was an old hutch or china cabinet. Even though it was dark and I was overtired, turned around to see what shape it was actually in.
To my dismay, it was a huge antique china cabinet. It was old and dirty but the glass panes and shelves were nicely wrapped in newspaper and laid inside.
On it was a sign that said, “FREE, Please Take!” So, I did! I loved refinishing it and decided to paint the inside Behr’s Sonata Blue so that my china would stand out more.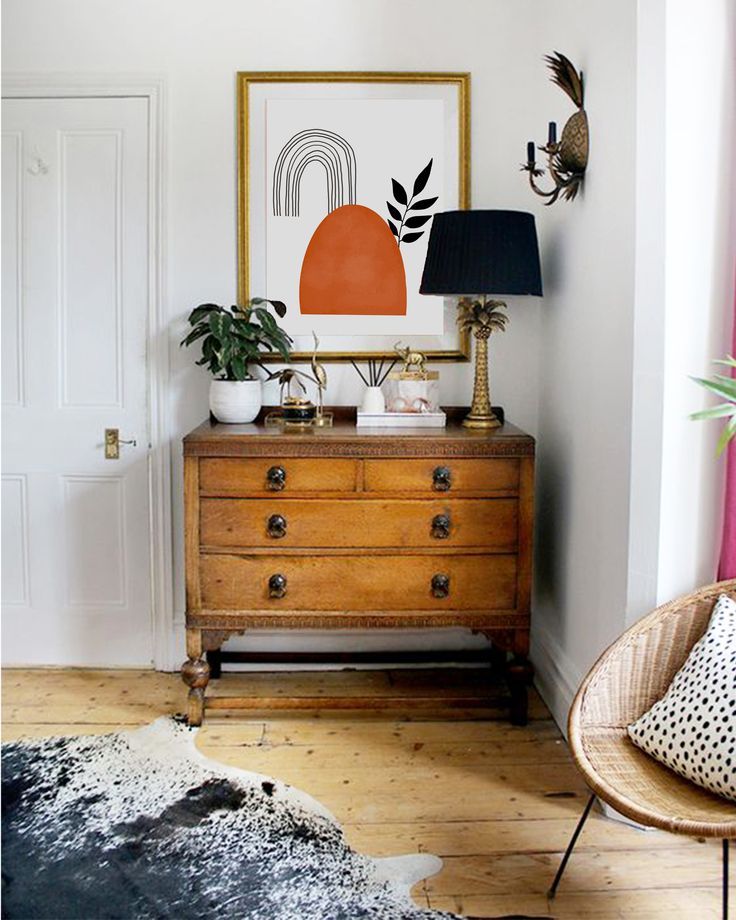
This china cabinet is such a special piece of furniture. The reason I had such a rough day when I first saw it was because my mom had just started chemo for breast cancer. She just recently hit her 5-year mark and is now a breast cancer survivor!
This piece is such a reminder of how God can transform any situation for His glory – no matter how bad it looks at the time. You can see the complete makeover here: White China Cabinet Transformation
White and Sonata Blue China Cabinet – See the full tutorial here.Dining Table Before And After: Raw Wood Finish (coming soon)Painted Chairs Before and After (coming soon)Before and After Pictures of Painted Furniture: Rolltop Desk Restoration
I always shied away from roll-top desks because I wasn’t sure if I could refinish the tambour (the rolly part).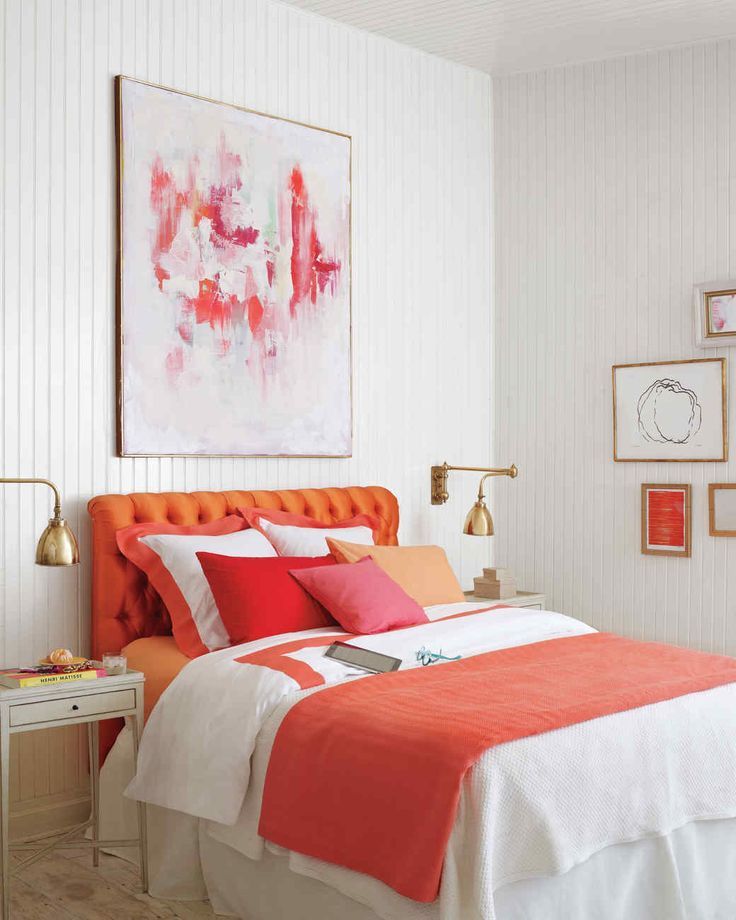 Fortunately, after some trial and error, I found a way to refinish it with white latex and gel stain. I even added some tiny drawers on the inside. You can see the full transformation here: Rolltop Desk Makeover
As I write this post, I’m sitting at my upcycled desk that I made from two Ikea cabinets and an old door. I added a thick piece of glass to the top and it has been the best desk, giving me plenty of room to sprawl out and lots of storage drawers. You can see the full transformation here: How to Make a Desk Out of A Door You can also see my best tips for painting IKEA furniture in this post: What To Know Before Painting IKEA Furniture
☑️ MY ALL-TIME BEST FURNITURE PAINTING TIPS (FREE PRINTABLE)
Want to transform a furniture piece but don’t know where to begin? Download your FREE step-by-step printable checklist that shows you the exact process I’ve used on dozens of furniture pieces while saving you time and money! And it costs you nothing.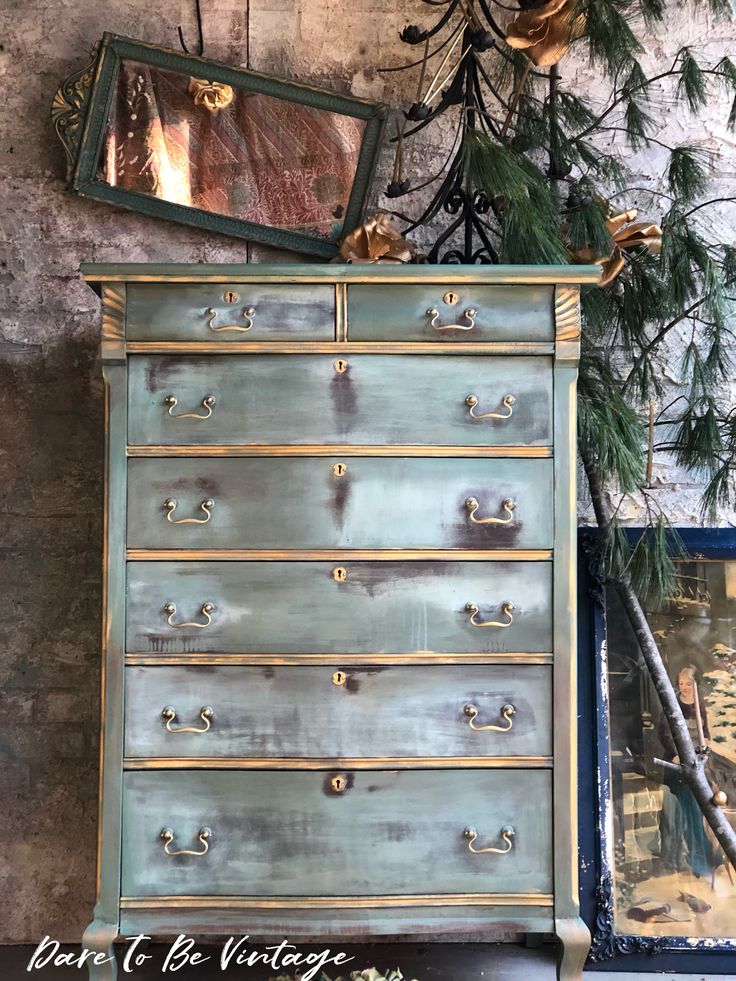 #confetti toss Click here to access your checklist now: FREE Must-Have Painting Checklist
Painting Laminate Furniture
Have you ever walked into a used furniture store and saw a great piece to refinish only to realize that it was laminate? Painting laminate furniture can be tricky if you don’t include one simple step. In this post, I show you all you need to know on how to paint and stain laminate easily: How to Paint and Stain Laminate Furniture (with Video Tutorial)
How To Update A Wire Shelf Unit to Look Like DIY Industrial Pipe Shelves
We all these chrome wire shelf units somewhere in our home or garage. They hold a lot of weight and come in lots of versatile sizes but they aren’t much to look at. With a few easy updates, you can transform your own wire shelf rack into a low-cost industrial style shelf you can be proud of: DIY Industrial Shelves (Wire Shelving Hack) You can also see how I transformed it into a DIY grow light stand: DIY Grow Light Shelves
Here is the before photo.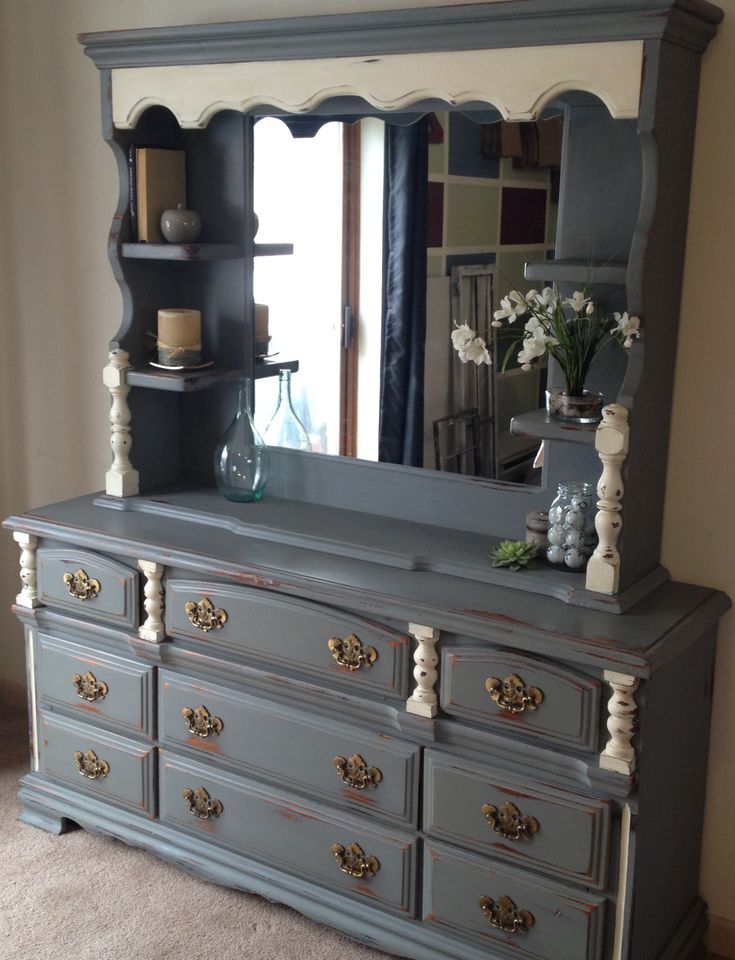 How to Make Painted Furniture Pinterest-WorthyHow Do You Paint Furniture?
There’s more than one way to paint furniture but I’ve had the BEST results with latex paint as long as you keep a few specific tips in mind. Several other options today are chalk paint, milk paint, and General Finishes furniture paint. I have tried them all and have found the easiest and most flexible option is a process involving latex paint. Because the same paint is often used for cabinets, it ensures a beautiful but durable finish every time in almost any color imaginable: A Beginner’s Guide to Painting Furniture
What About Chalk Painted Furniture?What is chalk painted furniture? Whether you use Annie Sloan Chalk Paint, Rustoleum chalk paint or any similar products, chalk paint is known for it’s matte, chalky finish. The additives that give it this chalky finish help it to stick to furniture in some cases but the finish isn’t durable long-term and other options will give you fewer brush strokes.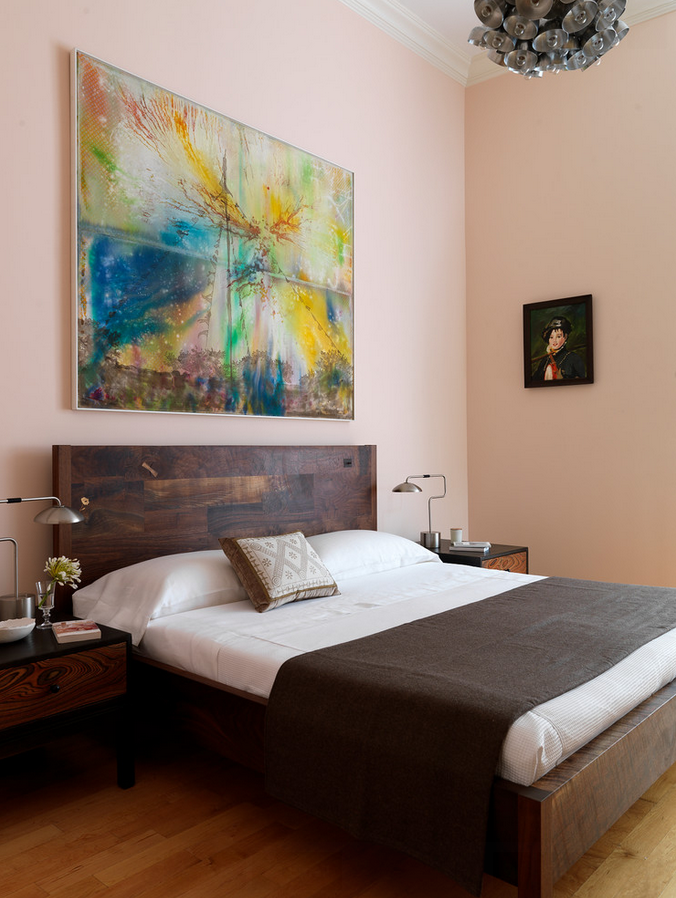 For a side by side comparison of some of the most popular paint options for furniture today, click here: Chalk Paint vs. Milk Paint vs. Latex
If you want a cheap, easy, and lasting way to paint furniture while achieving the same farmhouse look of chalk paint, be sure to check out the link below. I feel like there are a few misconceptions about chalk paint and when family antiques are at stake, I think it’s worth explaining why it’s not always the best or easiest way to refinish furniture. Here are the reasons I stopped using chalk paint: 7 Reasons I No Longer Use Chalk Paint on Furniture: A Better Alternative.
Can Painted Furniture Be Stained?To stain painted furniture with a traditional stain, you usually have to completely strip off the old stain with a chemical stripper which is pretty messy. Another option is to sand off the existing paint. HOWEVER, I know of a process that allows you to faux stain using latex paint.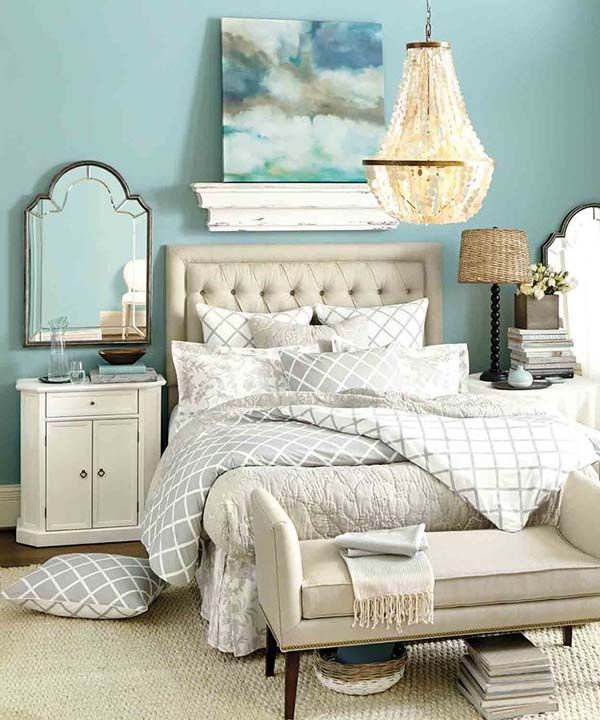 You can simply paint over the existing surface without stripping or sanding off the old finish. See the full tutorial here: How to Faux Stain with Latex Paint (6 Shades to Choose From)
After I blind-tested and reviewed 24 furniture paints, I recommend Benjamin Moore Advance. You can see the full results for each paint brand here: The Absolute Best Paint for Furniture
Can Wall Paint Be Used On Furniture?Wall paint can be used on furniture but not all wall paint is created equally. The term “latex paint” can cover lots of different grades of water-based paints. My favorite paints for furniture that also can be used for walls are Sherwin Williams ProClasssic and Behr Marquee (at Home Depot). Lowe’s also has a line of Sherwin Williams paints that I’ve had good results with.
How Do You Paint Over Painted Wood Furniture?Before you repaint painted furniture, you want to very lightly sand the surface.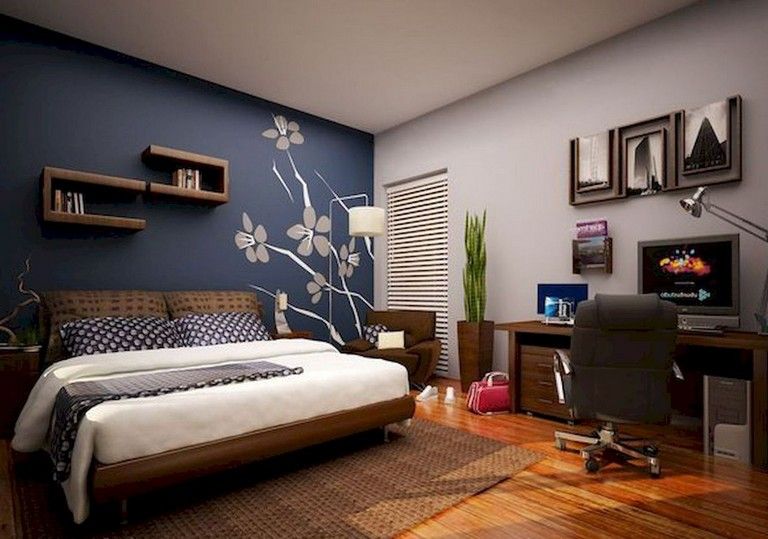 I know that I probably just lost your interest when I said the “s” word. But remember, you don’t need to sand off the old paint layer. Instead, you are just going over the surface with sandpaper or a mouse sander to slightly rough it up so it accepts a new layer of paint. You can see how I do that in this post: How To Sand Furniture in Less Than 5 Minutes
After painting furniture, you want to add some kind of protective finish. I wasn’t sure what to seal painted furniture with as there are so many options of topcoats. But on high-use pieces like dining tables or coffee tables, it’s important to know what to put on painted furniture to protect it. So, I did a little experimenting and placed cold drinking glasses of water on top of samples of different clear coats overnight. In terms of durability and also the finish, Varathane’s Waterbased Polyurethane came out on top in every test (Best Clear Coat for Furniture).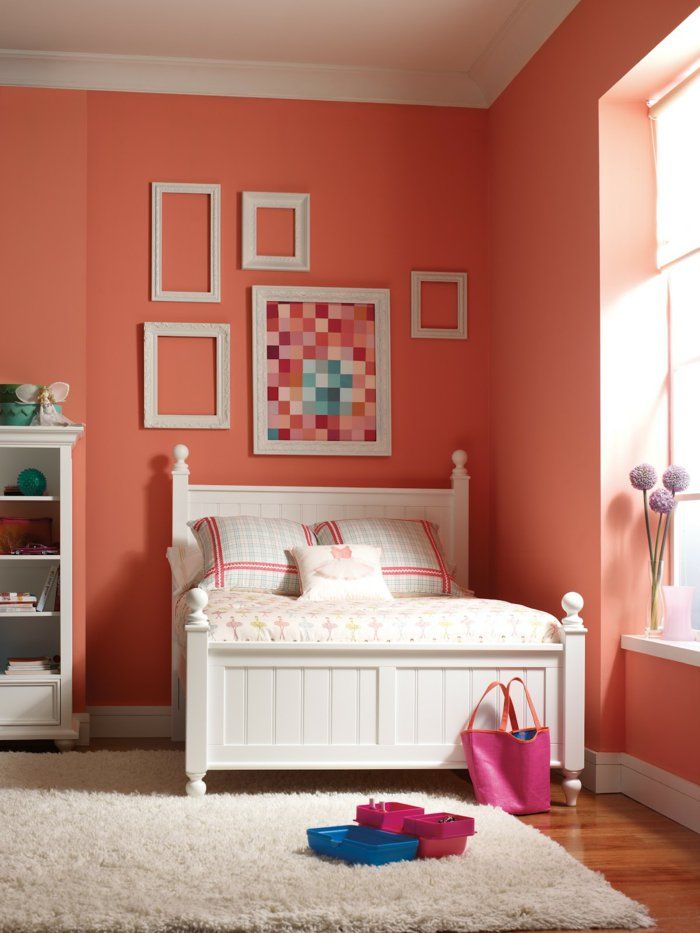
Even if you chalk paint furniture, I recommend using a clear coat like the one I mentioned above instead of wax. Applying wax is time-consuming and there is also a special technique that requires a specific brush. But a clear coat is easy to brush on in the direction of the grain to seal your furniture piece. If you use latex paint, you don’t need any kind of protective coating unless it is a well-used furniture piece that needs added protection. Chalk paint however always needs some sort of sealant.
When to Wax Painted FurnitureFurniture wax needs to be maintained. In other words, it will have to be repeated every 6 months to retain the durability of the wax.
When To Seal Painted Furniture with a Clear CoatPieces painted with latex don’t need an additional topcoat unless they will be used quite a bit like a kitchen table or coffee table. A clear coat can be brushed on in several layers whenever the piece is painted.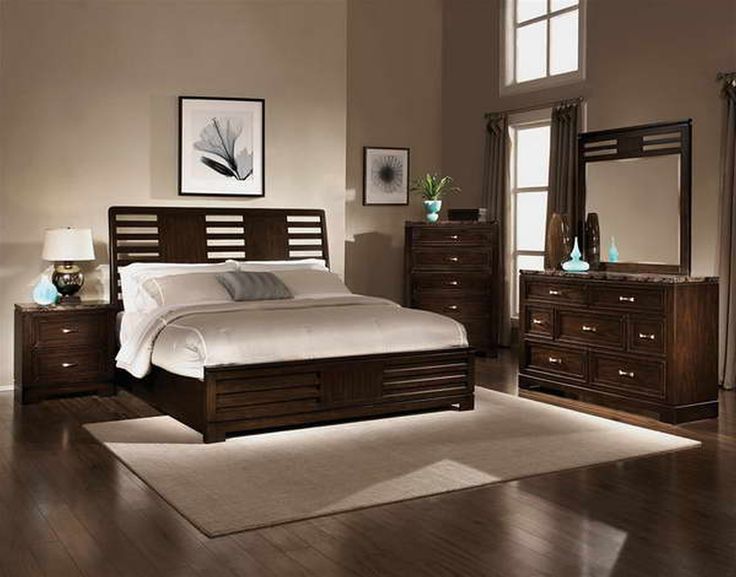 There is not long-term maintenance with a top coat – brush it on and you’re done! See a video on how to add a top coat here: Best Clear Coats for Furniture
Painted furniture is classic and while color trends stage, painted furniture is a staple in home decor. One of the biggest trends in furniture right now is a raw wood or Restoration Hardware-style finish. Right now I’m working on a faux stain that will give you a raw wood finish with paint – no stripping or bleaching required! That post will be out in a couple of weeks.
How to Paint Furniture White – See the Full Tutorial HERECan You Mix Painted Furniture With Wood Furniture?When it comes to mixing styles of furniture, feel free to mix wood furniture and painted furniture as long as the painted furniture works with the colors of the room.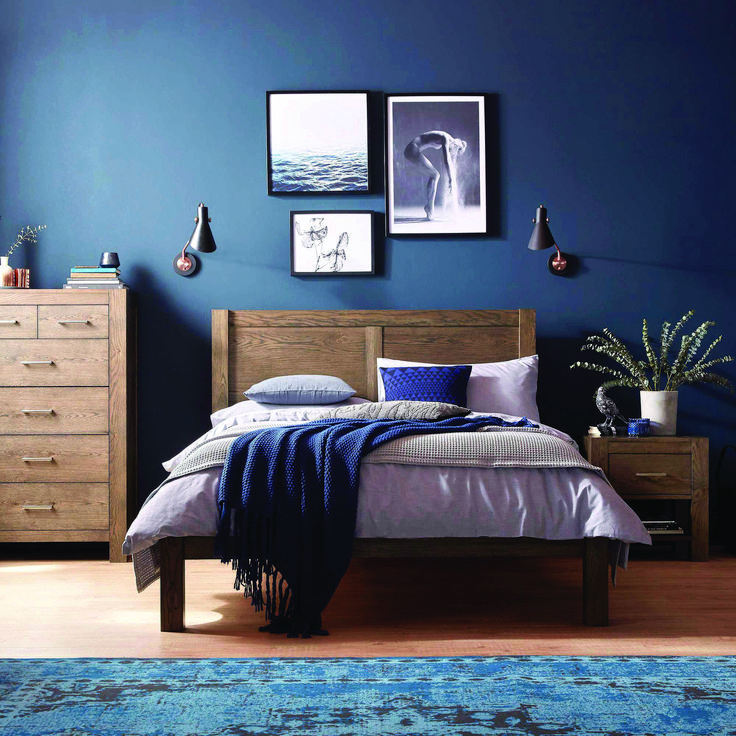 The one thing you don’t want is for every piece of furniture in your room to exactly match. You do want furniture pieces to coordinate but matching bedroom sets are a thing of the past.
Updating your existing painted furniture to have a modern look can be as simple as changing the hardware or adding more modern legs. You can check different options for knobs and handles here to give you some ideas. Also, a different shade of paint can do wonders to modernize your furniture.
RENOVATE YOUR FAITH: The Author of Transformation
Whether a vanity, rolltop desk, or even marble side tables, there are a couple of things they all have in common. Yes, they are all inexpensive furniture makeovers but, I also see a lot of my own journey in these DIY furniture transformations.
Whenever I rescue a piece of furniture from the side of a road or old storage facility, I can’t help but think about how God also rescued and saved me. Often these pieces are broken down, painted an odd color, or are just plain outdated. Often, they smell and are covered in spider webs. But no matter how dingy or damaged a piece is, I like to wonder about its history and imagine what it could one day become…
In John 4, we see Jesus making his way from Judea to Galilee. The shortest route was through Samaria but many Jews would take an alternate, much longer route to avoid being around Samaritans.
The Jews saw Samaritans as perpetually unclean and religious compromisers. Many Jews had such disdain and hatred for them that when Jesus’ enemies wanted to insult Him, they called Him a “Samaritan”. On that same day, a Samaritan woman went to a well in Samaria to get water.
Jesus approached her. It was rare for Samaritan women to come to the well that time of day and culturally unacceptable for a woman to be alone in public.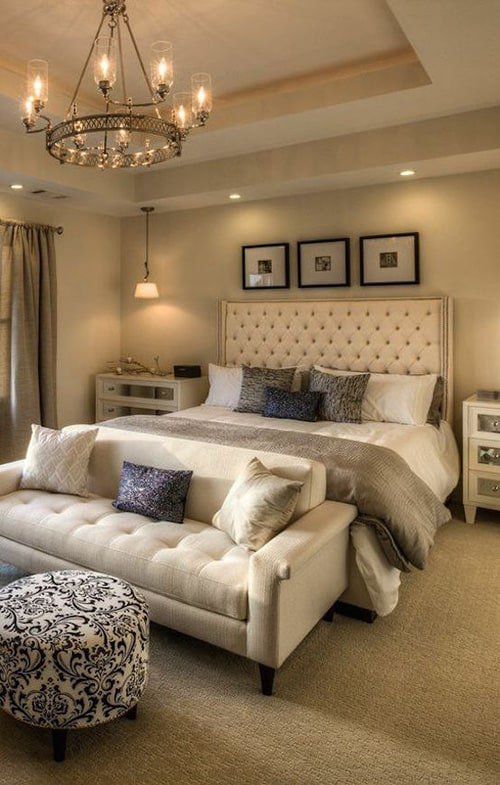 Scholars believe that perhaps she was seen as rejected in her community and knew others wanted to avoid her.
But Jesus does just the opposite. In those days, Jews were prohibited from speaking to strangers, to women, and always to Samaritans. She already had three strikes against her.
Also, she had a very questionable past…
But despite the cultural requirements that surrounded Him, Jesus sought her out. He purposely came through Samaria and went to the well, not to get water but to give this one woman the only thing that could satisfy her thirst.
As they began to talk, Jesus described to her the living water that can only come through knowing the Father. At the time, the women thought he meant physical water but the Lord doesn’t seek to only heal us physically but also spiritually.
Our greatest need is not just on the surface.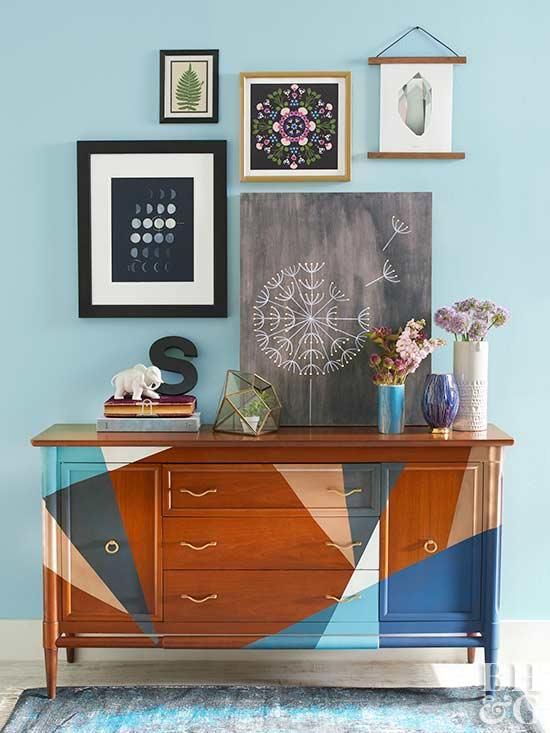 When God reaches out to pull us from our brokenness and despair, He doesn’t just bandage our wounds, but he makes us fully whole.
Jesus knew her story…every ugly detail. He knew she had lived a life of impropriety with several men but He still sought her out as one of His own.
Like recovering a broken piece of furniture from a trash heap, Jesus sought her out. In the same way, Jesus pulls us from our state of despair. He fixes our hurts, sands our rough spots, and makes us whole again.
But he doesn’t just make us a new version of our old selves. Instead, he makes over our hearts, giving us the opportunity and capability to be who we were always created to be.
“Therefore, if anyone is in Christ, he is a new creation. The old has passed away; behold, the new has come.” 2 Corinthians 5:17
Our Savior seeks us out. He chases us down. And despite our failures and shame, He will never ever leave one of His sheep behind.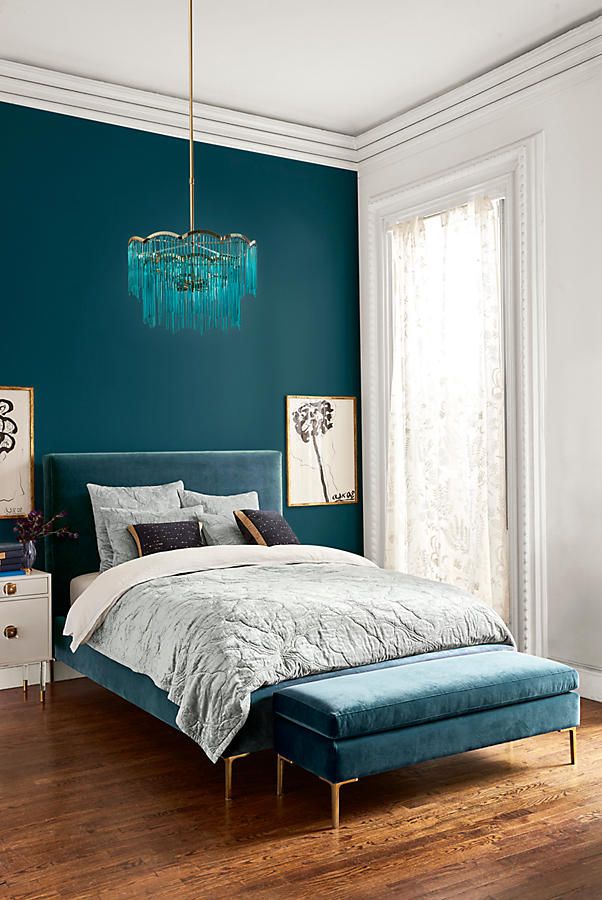 He actively seeks us out to give us new life in Him.
If you are struggling with feelings of rejection and shame, know that your heavenly Father loves you more than you can possibly comprehend. He wants you to take His hand and trust in Him, the only one that can give us what we truly need.
As someone who has struggled with feelings of rejection, know that there is one person who will never reject you. No matter your failures, no matter your struggles or your past, He will never let go of your hand.
So many of the furniture pieces I’ve refinished should have been thrown in the trash a long time ago. They weren’t worth my time, my effort and they cost me more than I could ever get in return.
Thankfully, regardless of what we may deserve or who has rejected us in the past, the only one who should have rejected us didn’t. In Him, we can have new life and purpose, if we trust in Him.
If you are wanting more information about a relationship with Jesus Christ, please don’t hesitate to contact me at [email protected].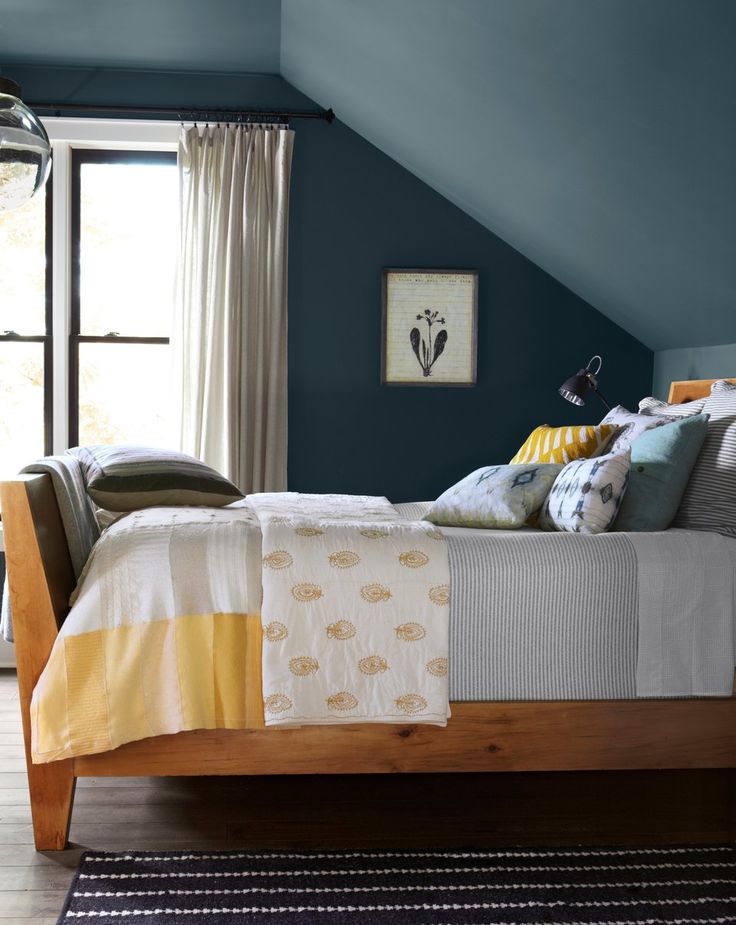
If you want a fabulous resource on rejection and shame, you have to listen to podcast number 12 from Journeywomen. She is one of the podcasters I listed in my post-Best Christian Podcasts for Women and the information in this episode was life-changing for me!
For more spiritual encouragement, click here for the rest of my project posts that also include Renovate Your Faith devotionals.
☑️ My All-Time Best Furniture Painting Tips & Tricks (FREE PRINTABLE)
Don’t forget to download the FREE step-by-step printable checklist that shows you the exact process I’ve used on dozens of furniture pieces while saving you time and money!
FAQ’s: Painted Furniture Ideas (Before and After Makeovers)Can You Whitewash Painted Furniture?To whitewash furniture, simply add water to white latex paint in a 1:1 mixture. Brush some of the paint mixture on one surface of your furniture piece.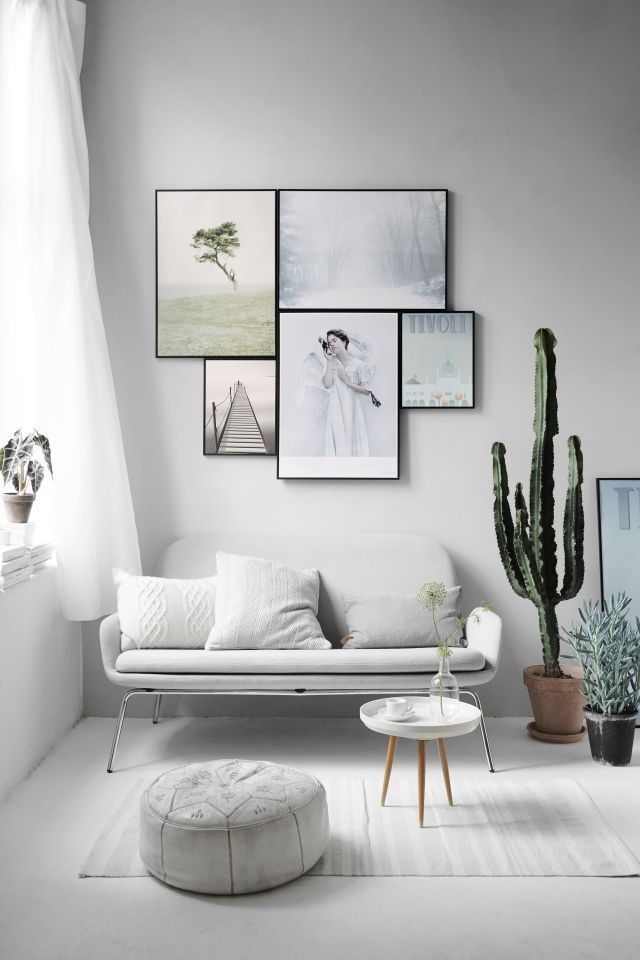 Then, wipe off the paint mixture in long strokes with a moist rag in the direction of the grain. Keep wiping off until you get the look you want.
If you aren’t interested in painting your furniture piece, there are lots of talented furniture painters around the country that can help you out. The best way to find them is by doing a Facebook search based on location. If you have a gift shop that sells painted furniture, they are bound to know of someone to assist you.
What Painted Wood Furniture Sheet Looks Best?Stain or matte (flat) sheens are most popular now. Satin is slightly shinier than matte but also satin paints tend to be a little more durable.
Can Chalk Painted Furniture Be Used Outside?Chalk painted furniture can be used outside as long as it is protected with an exterior clear coat. I suggest Spar Urethane. Be sure to add several coats to give your furniture piece maximum protection.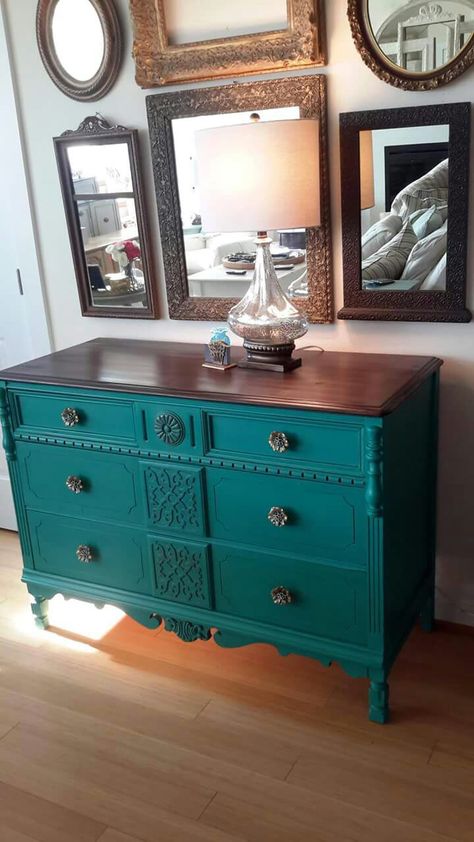 Do not wax the furniture piece before applying the clear coat.
You can always sell painted furniture on Facebook Marketplace or Craigslist for a quick sale. However, if you want to maximize your profit for painted furniture, check into local craft malls where you could set up a booth. You can also check with local gift stores. Often, they will allow you to put your painted furniture pieces in their shop with a for sale tag. They can use your furniture piece to display their merchandise while also getting your furniture in front of potential buyers.
Whimsical Painted Furniture (Decorating Furniture with Paint)
For ideas on how you can add whimsical details to furniture, my favorite source of ideas is Miss Mustard Seed. She has an incredible knack for adding intricate details on furniture without it looking too busy. She is truly an artist and her tutorials can be found here: Miss Mustard Seed
More Posts Related to Painted Furniture Pictures and TutorialsA Beginner’s Guide to Furniture Painting (Vintage Vanity Reveal)The Absolute Best Furniture Paint (24 Brands Blind Tested and Reviewed)
Why I Stopped Using Chalk Paint on FurnitureThe Best Clear Coat for FurnitureHow to Faux Stain with Paint (6 Shades to Choose From)7 Tips for Painting Furniture WhiteHow To Build a Farmhouse Table with Pocket Holes (A Beginner’s Guide!)
41 of the Best Gifts for Christian Women
Easy Curb Appeal on A Budget
RELATED LINKS: Before and After Pictures of Painted Furniture- Renovated Faith on Pinterest: Painted Furniture Inspiration
- Chalk Painted Furniture: Before and After
- Upcycled Furniture Ideas: Before and After
- Before and After Shabby Chic Furniture
- Spray Painted Furniture: Before and After
- Milk Paint Furniture: Before and After
- Painted Furniture Ideas: Modern Farmhouse
- Funky Hand Painted Furniture Ideas (Crazy Painted Furniture Trends)
Don’t forget to download my Free Furniture Painting Cheat Sheet.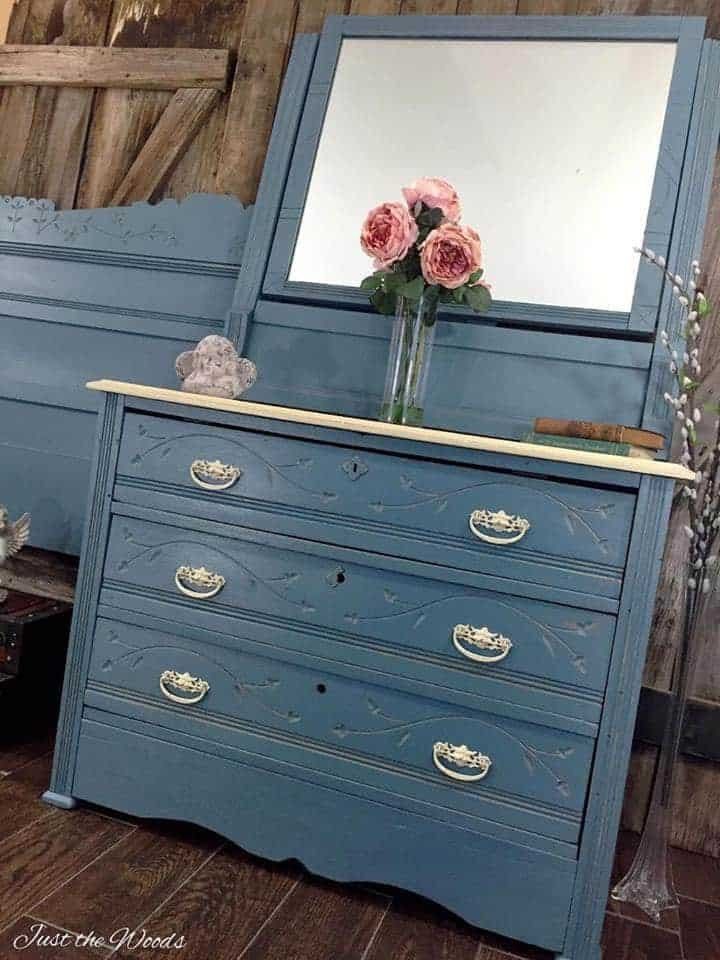 To get your printable, sign up for my weekly newsletter which also grants you free access to my resource library full of wall art printables, checklists, and project plans!
There are so many ways to paint furniture but hopefully, this post explained what has worked well for me to get stunning and long-lasting results every single time! With these tips and tricks, you can have a beautifully painted piece of furniture in no time. You might even find yourself enjoying the therapeutic benefits of furniture painting like I do.
WANT TO SAVE THIS FOR LATER? CLICK HERE TO SAVE THIS PIN TO YOUR FAVORITE PINTEREST BOARD
I love to hear your thoughts and questions! Scroll down to leave a comment and I WILL reply! ❤️
Blessings,
Be sure to follow the fun here!
Email Subscription | Instagram | Pinterest | Facebook | Twitter
Best Tips for Painted Furniture: YouTube VideoKarin Peters
Welcome to Renovated Faith, where I share about DIY projects, my faith and everything in between! When I’m not spending time with my family, you will find me redoing furniture in the garage or watering plants in my greenhouse. This blog is about transformation. Anyone can renovate a house but only God can transform our hearts!
15 Chalk Paint Ideas for Bedroom Furniture - Home Design and Room Decorating Ideas
Your first thought might be to associate chalk with a classroom board, but there are plenty of chalk paint ideas for bedroom furniture that won’t remind you of school. While some chalk paints are the type that you can write on, the majority have other uses that make them a versatile option. First of all, generally no prep or primer is required when using chalk paint. If you’ve spent hours preparing your furniture just to start painting it, then you’ll be pleased to skip those steps.
As well, chalk paint has a matte finish that dries quickly and is easy to blend.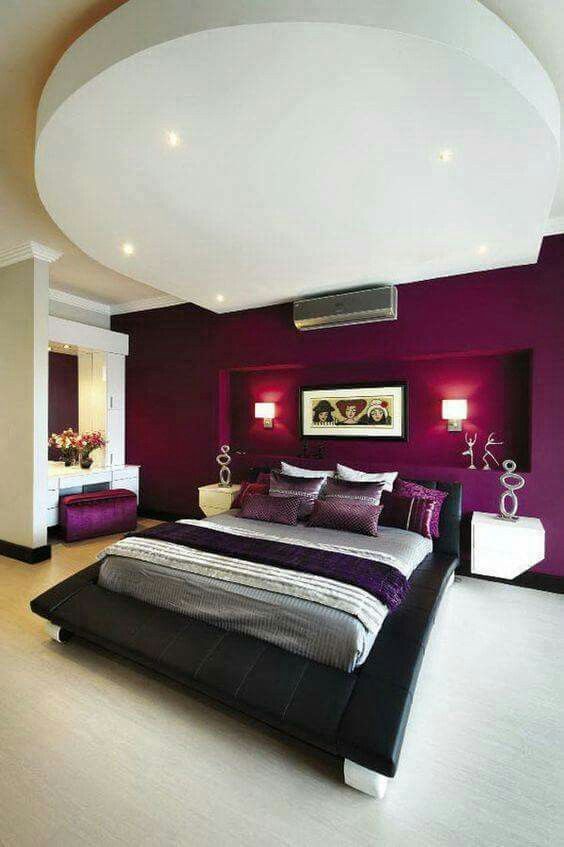 These features make it a great material for artistic designs. Similarly, it is easy to create a distressed look simply by using a washcloth. This makes this type of paint incredibly flexible for all of your decorating needs. For extra inspiration, check out these great tips for making hand painted furniture. I’ve collected my favorite ideas so that you can give your bedroom a touch-up with a can of chalk paint.
Table of Contents
Furniture Ideas
Bed
Chalk paint is available at Annie SloanI love the striking matte finish of a bedframe painted all black. This is a great option for furniture that has some carving work on it such as the bed pictured above. Thanks to some coats of chalk paint, the final result is chic, making it the perfect backdrop for this elegant decor. Using black paint is especially noticeable because the matte finish is so distinct from glossy black.
Dresser
This charming dresser displays how chalk paint can be used for a subtle finish no matter how dark the color.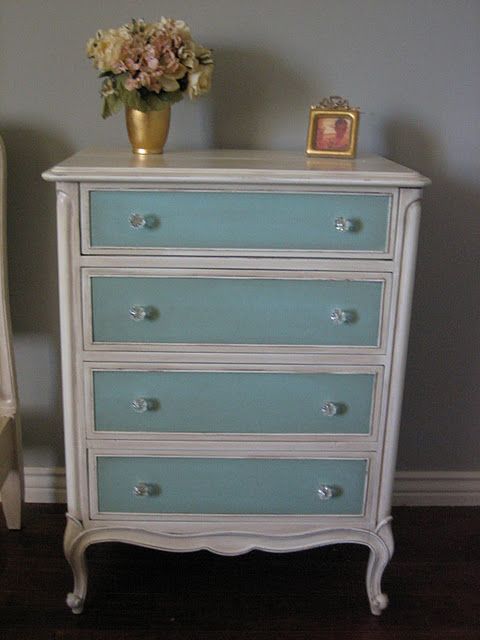 While the effect is not huge, variations in the layers of paint create a slightly faded look that remains sharp. Add some detailed brass handles and the design is complete. Source: Salvaged Inspirations.
Vanity
This vanity is a stunning piece, highlighted by the use of chalk paint. A slightly weathered look is incredibly charming thanks to the detailed carvings on this piece of furniture. Pastel colors work really well with this style if you don’t want the distressed effect to overpower the other features.
Side Table
I love how this side table pairs chalk paint with a chalkboard paint top for a charming and fun look. A shade of gray works well with the intricate carving work, highlighting the varying texture. On top of that, using chalkboard paint for the top is a quirky idea for writing notes or doodling. Source.
Cabinet Drawers
These cabinet drawers use a mix of chalk and chalkboard paint to label the different compartments.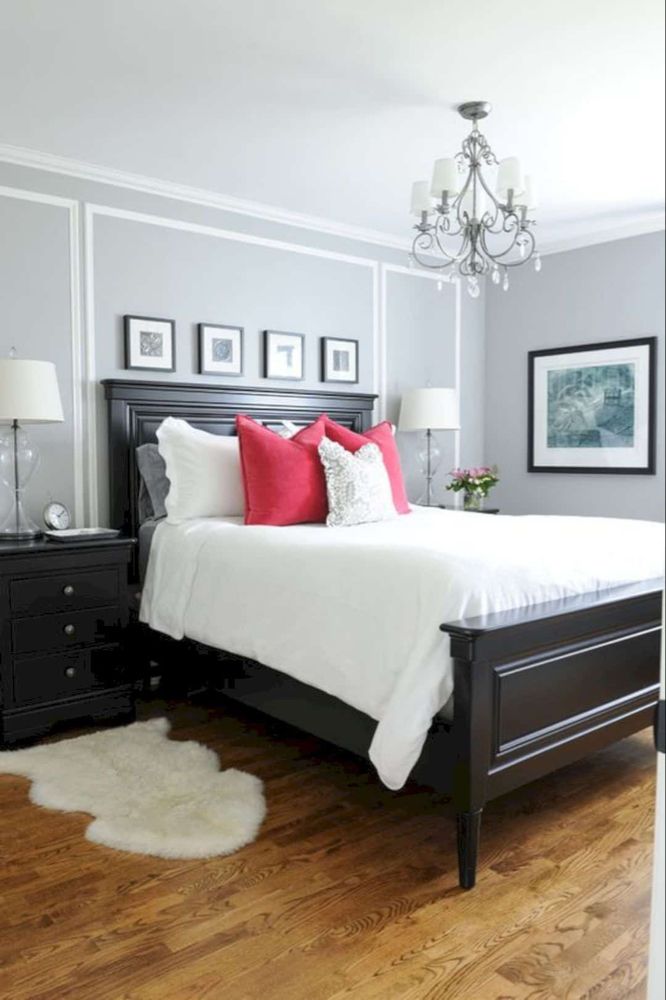 I love the contrast of the black and white look, perfect for a captivating piece of furniture that easily matches the rest. The matte effect of white chalk paint is a great pairing that blends in seamlessly with the black.
Matching Bed Frame and Dresser
Matching your bed frame to your dresser is easy to do with chalk paint. Thanks to its simple application which doesn’t require plenty of prep like other types of paint, you can complete both pieces in an afternoon. I love the matching style in the picture above and the way the furniture creates the ideal base for the patterned wallpaper and bedspread. See how this painted furniture was made at The Boondocks Blog.
Picture Frame
If you want to start small with your painted furniture projects, a picture frame is a good place to begin. If you’ve never used chalk paint before, testing it out with an ornamental piece is less daunting than your bedroom dresser! This beautiful frame is intricately detailed with decorative carving, which makes it a striking backdrop for this soft distressed look. Source: villabarnes.com. Check them out on Etsy.
Design Style Ideas
Distressed
As mentioned, one of the great benefits of chalk paint is that creating a distressed look is extremely simple. There are different techniques depending on the effect you want. For example, you can paint your furniture, wax it, and then sand it or use a damp cloth to wipe off the area you want to distress. Alternatively, you can paint, sand, and then wax. Distressing parts of the furniture at random is a good way to avoid a manufactured look. Aim for edges and corners to keep the distressed effect natural.
Pastel Colors
I love how this gorgeous dresser displays the soft blended look you can get with chalk paint and pastel colors. By blending some white into a pale color, the dresser appears to have subtle highlights. Paired with detailed fixtures and decorative moldings, this dresser is a stunning piece of art. Source: One Girl in Pink.
Bright Colors
Although some of my favorite chalk-painted pieces of bedroom furniture are pastels, I love the effect of a bright and vibrant color and the way it shows off different shades in the paint.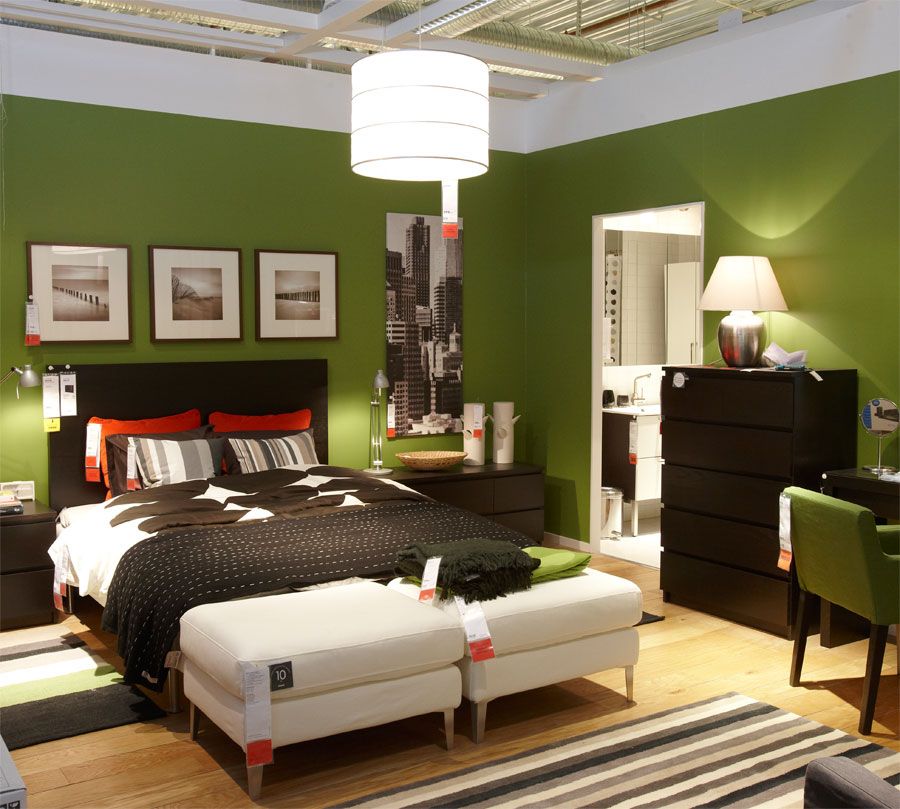 This striking chest pictured above is an attractive example, showing off the beauty of chalk paint. There’s no need to create a perfectly uniform color either, which makes it much easier to make your hand-painted furniture! Source: generalfinishes.com.
Two-Toned
There’s no need to stick to one color when using chalk paint. I love rustic-style ideas like the dresser pictured above. Simply incorporate some distressed accents into the piece for a coastal cottage style. Opt for a dark and light color to contrast the tones or choose hues that are more similar for a matching style. A two-toned style looks great for your bedroom furniture whether you choose to go for a distressed look or not. Source: The Lily Pad Cottage.
Shabby Chic
Here is another two-toned look with a subtler distinction between the two hues. Together with the glamorous ornamental detailing on the side of the dresser, it displays a shabby chic vibe. The great part about keeping the style slightly shabby is that you don’t have to worry about painting perfectly uniform layers. I’m always up for a redecoration project that doesn’t require hours of tedious work! Source: Marty’s Musings.
Antique Style
No one will know that your gorgeous armoire isn’t a prized antique once you’re done with this spectacular idea! If you’re looking for a centerpiece for your bedroom to add a stylish touch, painting a large piece of furniture such as an armoire or dresser with an antique look is one of my favorite ideas. Use a distressed effect, incorporating dark wax into the paint to add an aged look. Source: boispassionsetcie.com.
Vintage Flowers
Chalk paint is a fantastic material for artistic endeavors such as the charming floral pattern pictured above. Thanks to its blending capacities and ability to dry quickly, layering an image is easy to do. Much like watercolor painting, chalk paint can be applied smoothly for a whimsical design. Source: ReDesign with Prima.
Source: Decoris Vintage Designs.
Wood
I love how the top part of this vanity is left with the original wood. By painting the rest of the piece with a solid color, the final effect is polished and sophisticated. This style is striking since it leaves a bit of natural wood visible while adding a splash of color. Source: General Finishes.
Silver and Gold
This dazzling vanity is truly a work of art. I love how silver and gold accents are incorporated into the intricately carved details of this piece of furniture in order to make it stand out. For an extra glam factor, silver, gold, or bronze trimming is definitely my favorite idea. See the step-by-step guide on how this vanity was painted.
the role of shades and the arrangement of elements in the room, color combinations
In this article I will consider all color aspects regarding the bedroom. How a palette is selected, what to look for when choosing a color and whether it affects our emotional state. I'll tell you about the features of the location of the bedroom, its dimensions. Does this affect what color to paint the bedroom.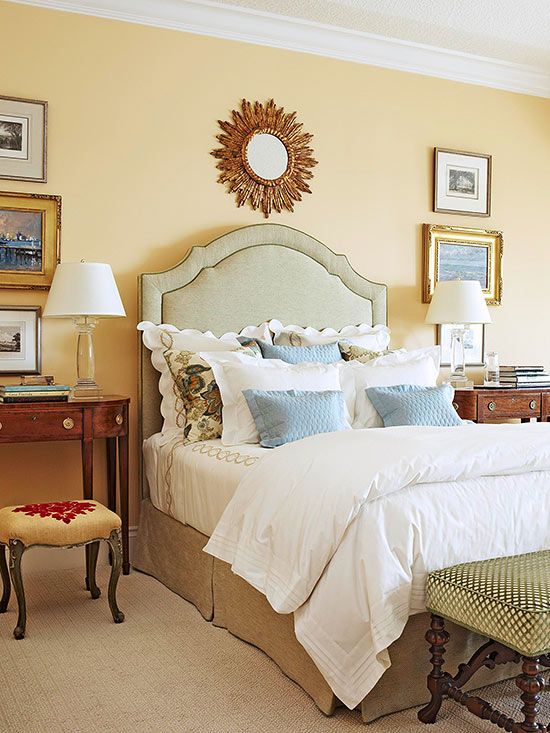
The role of color in the interior of the bedroom
The bedroom is the place where we start each new day. We spend a third of our lives in it. The mood, perception of the surrounding world, emotions and much more depend on the design and color scheme of the room.
With the help of the right color scheme, you can hide the flaws and reveal the advantages of the home.
The human body is designed in such a way that colors can affect its concentration. Some shades of the spectrum inspire joy, tranquility, peace, optimism. Others exert pressure, reduce activity, cause insomnia.
For a bedroom, it is especially important to choose the right color scheme, because this is a room where a person must relax emotionally and physically.
Chocolate and beige are a very good combination for the bedroomWhat color to choose
Interior design is not just about preferences
The perfect picture from the cover of a magazine can sometimes not match the dimensions of the room.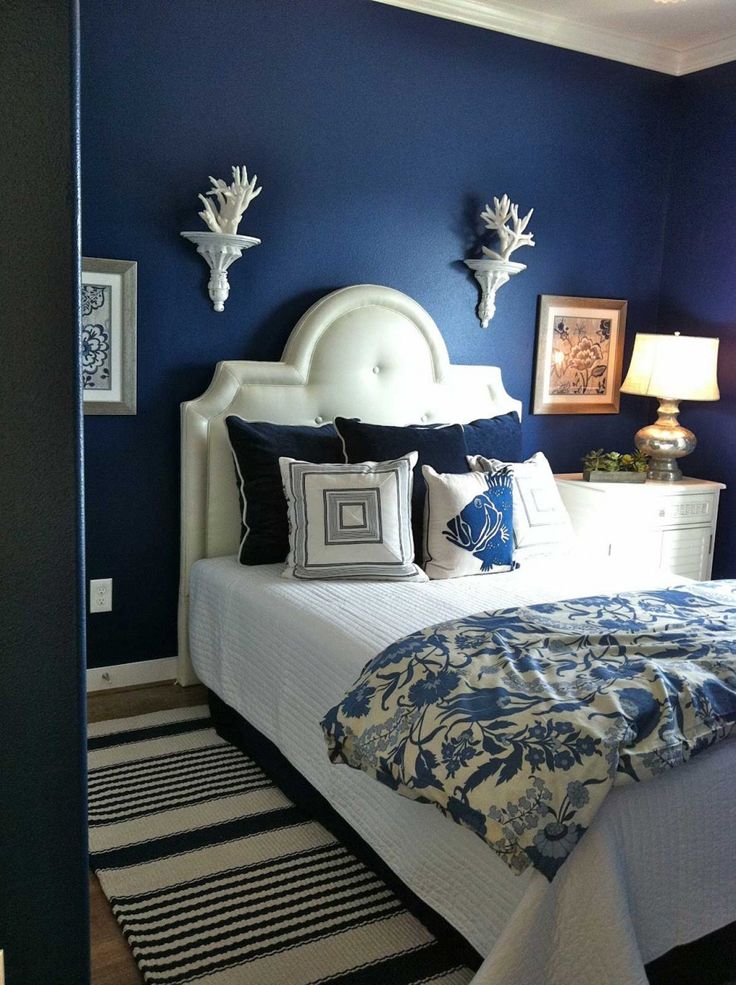 All the bright accents placed in it, combined with deep contrasts, will look too catchy and cramped if the room is small in size with low ceilings.
Creating a design, you need to pay attention to many points that affect the final result.
The location of the bedroom in the house
The location of the bedroom solves the problem of choosing a color palette. The northern placement of the room indicates that it is necessary to add light. Warm shades will make the bedroom cozier.
Preferred colors: herbal, peach, cappuccino, cream, yellow and gold.
Opposite south position allows you to contrast cool paint colors such as silver, white, blue, turquoise, cool pink.
Pastel grass color will add light to the bedroom when it is lackingDimensions of the room
Take a sober look at the room. Assess the scope of the work. Immediately exclude all complex tones if the room is small. Light shades visually expand the space, so their use is a priority.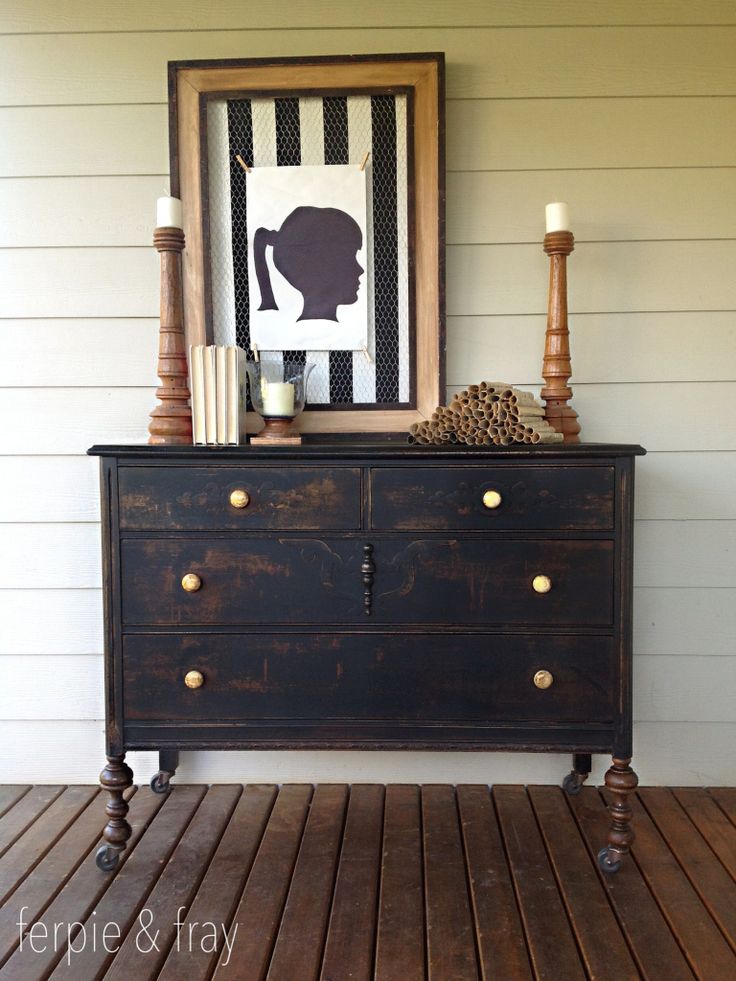
You can play with light and bright combinations, for example:
- light gray and pink;
- dark beige and white;
- milk blue;
- light blue and burgundy.
If the bedroom is small, more light colors should be used in the interior.
When there is enough space and the walls do not constrain your imagination, you can choose unusual color schemes with dark and light combinations of paint shades or wallpaper. Contrasts of light and dark colors of the same gamut will look harmonious.
Light colors of walls and floors will help visually increase the size of the roomWindows
Consider the number of windows in the room. It is necessary to paint the walls in light shades and correctly place color accents. Dark tones hide the light, make the room gloomier.
The less natural light, the more artificial light needs to be madeFurniture
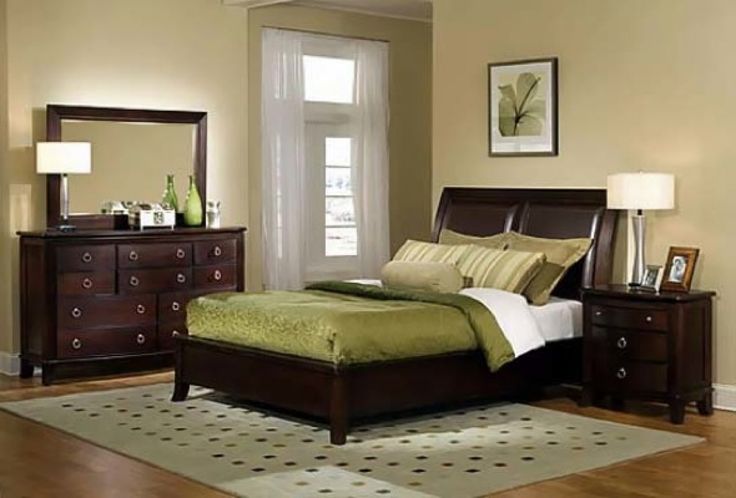
Furniture is the first attribute that you should pay attention to when starting to repair a bedroom.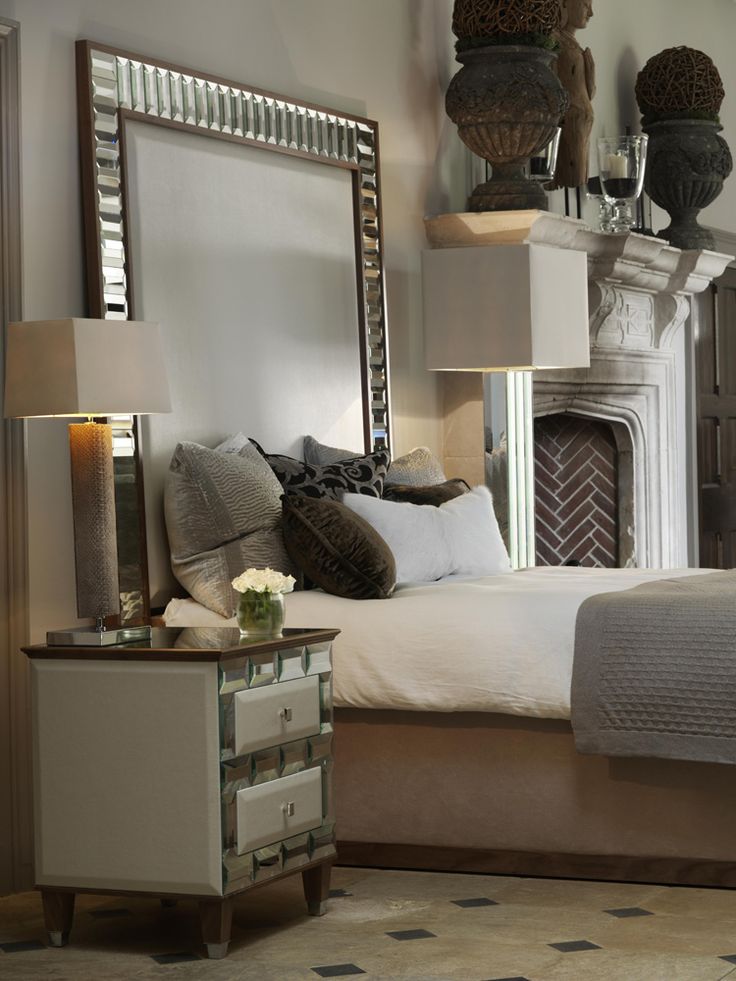 The lady of the room is the bed. Based on its shade, you need to select the design of the walls.
Bedside tables, wardrobe, dressing table are selected according to the dimensions of the room, also matching each other. If the bedroom is small, you can use multifunctional furniture, thereby freeing up some space in the room.
If the furniture has already been purchased, you need to take into account its color when decorating the walls.Paintings and other small interior attributes will help to revive the space. In a bright bedroom, you can arrange dark furniture, as if focusing attention on it.
It is advisable to purchase a bedroom set. It will look aesthetically pleasing, match one style and color.
Style direction
Classic style, minimalism and hi-tech are best suited for bedrooms.
In high-tech style there are no restrictions on color combinations Classic implies a combination of several light shades. White is a must. For example, a white ceiling with blue walls.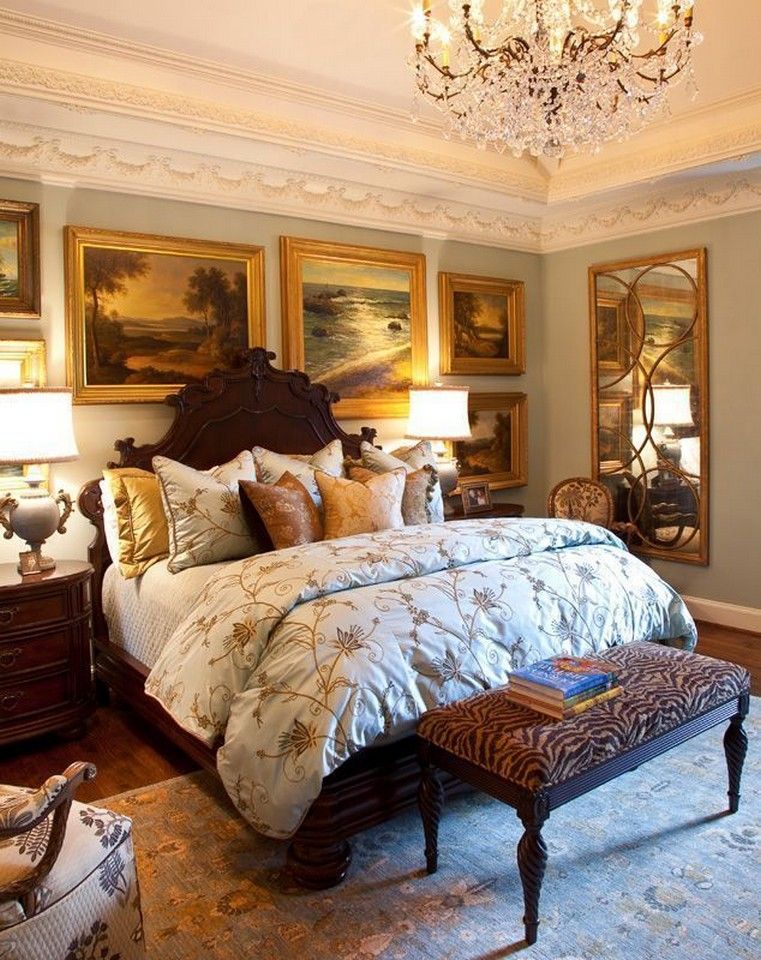 You can play with the second one, add blue or a sea wave.
Minimalism and hi-tech are suitable for small spaces. The play of colors does not limit the imagination.
In minimalism simplicity of finishing is preferredPsychological moments
The color palette of the room affects the psychological state of a person
Through experiments, scientists have proven the visual perception of color in a room on well-being. Shades of red make the heart beat faster, cause anxiety and aggression. Blue, purple provokes a state of depression. Yellow is calming.
White is associated with calmness and silence, but it is desirable to dilute it with another palette. The pink ones are annoying. It is better if it is a pastel shade. The optimistic color is green. It promotes relaxation, relieves stress and fatigue.
Green has a calming effect, which is so necessary for relaxationLighting and wall decoration
For wall decoration, calm shades are more often chosen, which promote relaxation.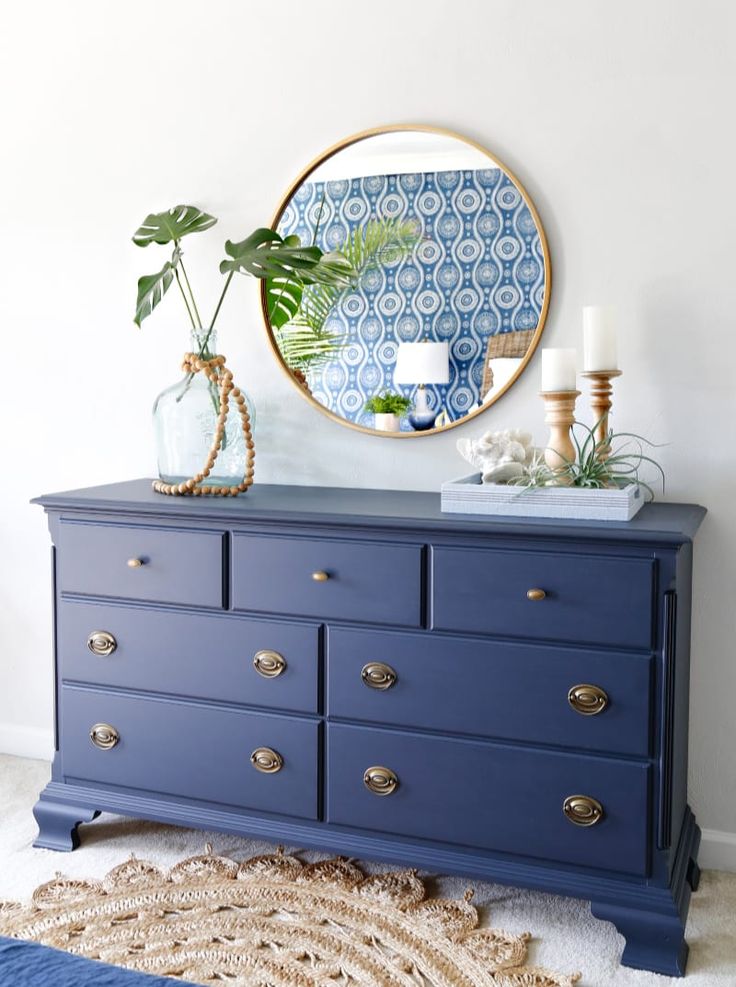 Remember that when choosing the color scheme for the bedroom, you should consider the interior of other rooms.
Designers do not recommend using more than three main color trends in the design of an apartment. A small space can be made visually wider by using mirrors on painted walls and light colors.
Don't get carried away with mirrors. For a rest room, a large mirror cabinet is enough.
Cool lighting reminiscent of an office, work environment. For relaxation, subdued, warm light is suitable. At the same time, the chandelier performs a more decorative function.
It is necessary to focus on the lamps near the bed and dressing table.
Color combinations
Three colors are usually chosen for the interior. The first is the main, the second combining and accent. The latter gives the interior brightness, originality. The harmony of the palette is repelled from the main shade.
For example: gray is combined with yellow, brown, pink, blue and lilac.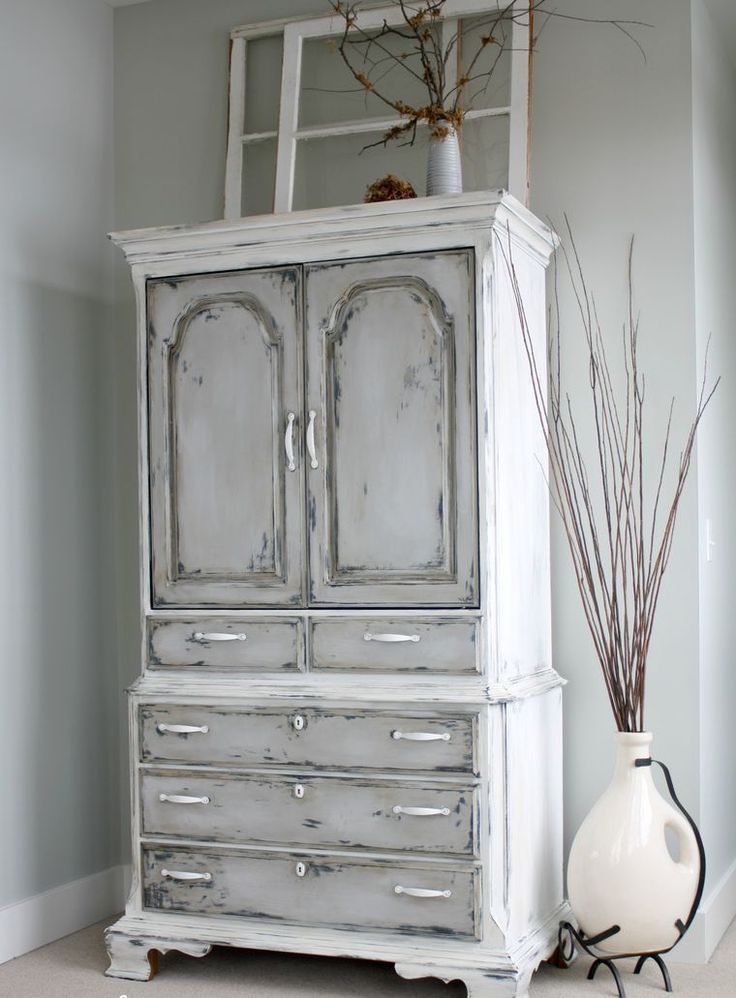 Not compatible with green and orange. Green is best combined with shades of red and black. White color is universal. Its combination is unlimited.
Blue loves blue, pastel purple and red. Bordeaux, gold and yellow are not suitable.
You need to be careful with the purple color, excessive brightness will keep you in suspense all the timeBeautiful bedroom options in different colors
Successful combinations and ideas for the bedroom:
- white, milk, sand;
- grass, turquoise, brown, white;
- grey, lilac, pink;
- beige, white, turquoise;
- mustard, berry, chocolate;
- mustard, red, blue;
- white, black, blue;
- coral, beige, sea wave.
Creating comfort and coziness depends entirely on the situation. The main task is to get a color balance that will create an atmosphere of harmony and relaxation.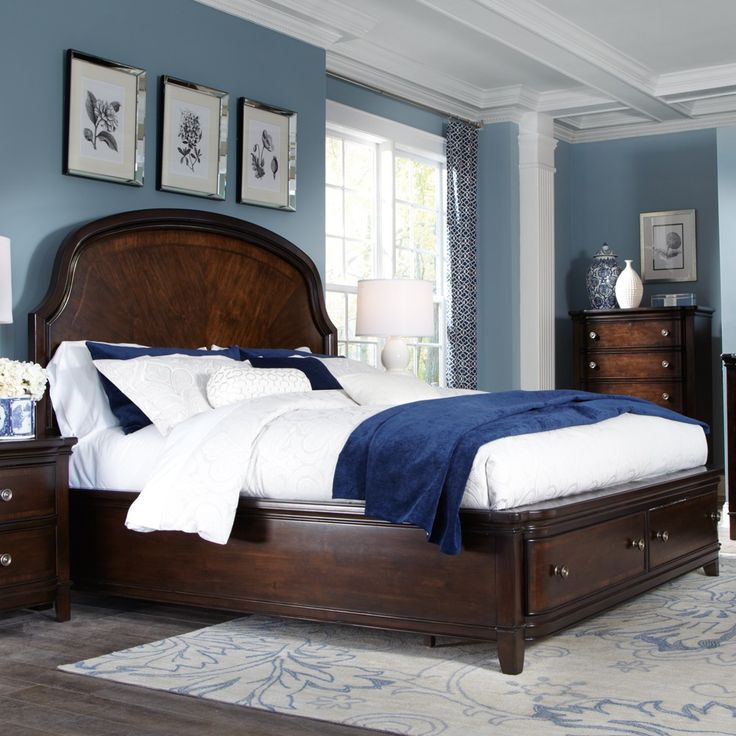
Easy way to repaint furniture and doors - INMYROOM
DIY
You can repaint everything - even varnished doors. It would be a wish!
Often, in order to change the interior, repairs are not necessary. It is enough to refresh the textiles, decorate one accent wall with wallpaper, change the carpet and do something with the furniture. But what? Really buy a new one? Do-it-yourself repair expert Kristina Nikiforova shared tips that will help save time and nerves if you decide to repaint an Ikea table or an old grandfather chair yourself.
Kristina Nikiforova
craftsman and blogger
Made a budget repair in Khrushchev, maintains a blog about self-repair remont_devochki
I won’t tell you the easiest way to repaint, everywhere you need to make an effort.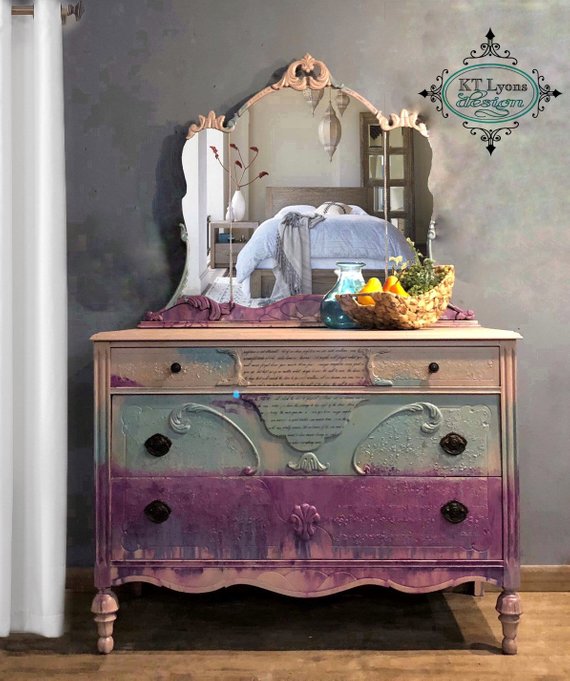 But if there is a desire and a mood, then everything will work out. I have the following sequence of actions: wash, sand a little, remove dust, degrease, cover with primer in 1-2 layers, cover with paint in 2-3 layers, then wax. I'll tell you more!
What can be painted:
- furniture made of chipboard in foil;
- MDF in a film, for example, a kitchen;
- lacquered furniture;
- doors, both made of wood and film;
- tables, cabinets, beds, cabinets.
Where to start?
Wash first! Thoroughly remove stains, grease, dirt, and odors—anything that makes old furniture look old. To do this, move the furniture away from the wall, cover the walls and floor with a protective film, prepare a soapy solution and wipe your product with a sponge soaked in it. Try to remove hardly soluble stains with vinegar, alcohol, white spirit or acetone. Don't forget to wear gloves and a protective mask!
If you want to get rid of the film, heat it up with a heat gun: it will come off easily.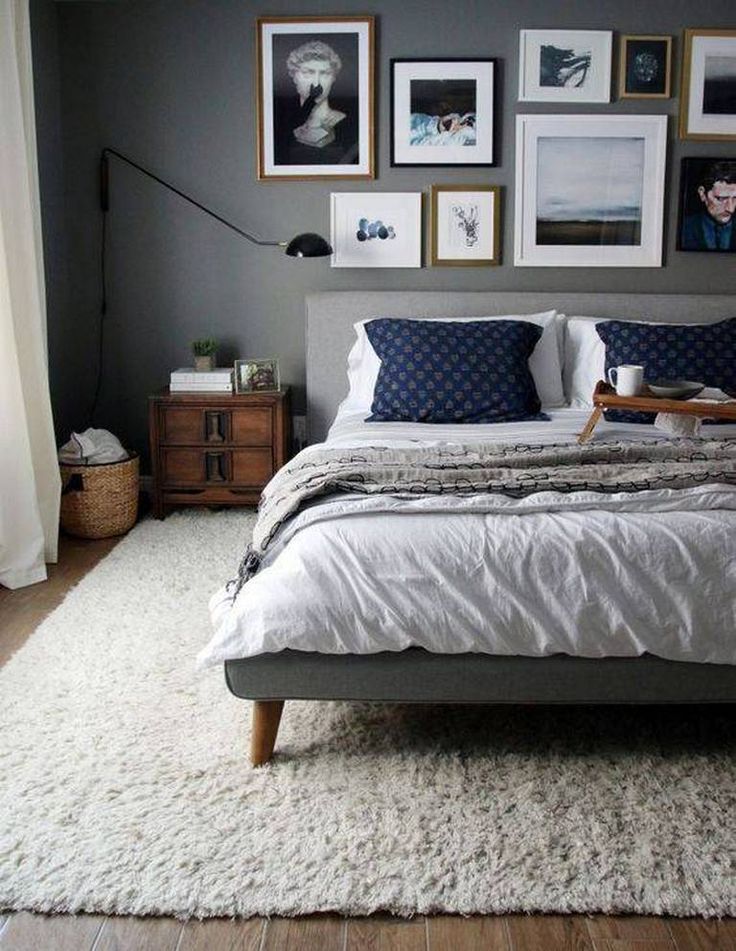 If the film is glued too tightly and does not come off, it is better to paint over it, after sanding it.
View this post on Instagram
A post shared by . To do this, use fine sandpaper, but if one of your friends has a grinder, it's time to remind these friends about yourself.
Prepare for painting
To do this, dedust and degrease the surface: wipe it with a damp cloth, and then with a cloth with a degreaser or alcohol. The remaining adhesive from the film will also have to be sanded and degreased. After that, you need to putty products: remove all holes from old handles, shelves and fixtures, cracks and bumps. After that, sand and degrease the surface again.
View this post on Instagram
A post shared by0186 Aug 5, 2019 at 1:29am PDT
Apply primer
To make the paint adhere to the surface, prime the surface.