How to tile
A beginner’s Guide – The Created Home
I’ve thought long and hard about what kind of tiling tutorial to bring you in this, the third week of the One Room Challenge. And here’s what I think I know about you, person reading this. I think you are a competent DIYer who found your way here because you need to learn to tile. So I’m going to show you, oh capable beginner, the basics of tiling a wall and a floor.
In the past couple of weeks we have worked to do both in our bathroom, as well as the shower. In the interest of focus and depth, I am not going to cover shower wall tiling. This is mostly because I would have to spend a good deal of time explaining how to figure out and layout the pattern, which is both a headache to do and to write about. And anyway, you should start by getting comfortable with other tile work first.
Ceramic and porcelain tile
This tutorial is good for tiling with either ceramic or porcelain tiles. In fact, the floor tile you’ll see us using is porcelain, while the wall tile is ceramic. The basic differences have to do with density and water absorption. Porcelain is the harder, more water impervious choice. And heavy. Dang, it’s heavy. Ceramic is generally less expensive, and easier to cut. However, both are absolutely approachable.
*As an Amazon affiliate I earn from qualifying purchases. This disclosure pertains to all the links in this post. You can learn more about affiliate links here.
What you will need:
Tile (I like to factor in a 10% overage)
Tile saw (wet saw and/or manual variety)
Mortar (thinset)
Notched trowel
Spacers (these and these are the two we like most)
Level
Grout
Grout float
Sponge
Face visor
If you want to skip all the reading and just watch the video, here it is:
How to tile a floor
For this project you will need all of the above materials, excepting perhaps the level. Substitute a tape measure instead.
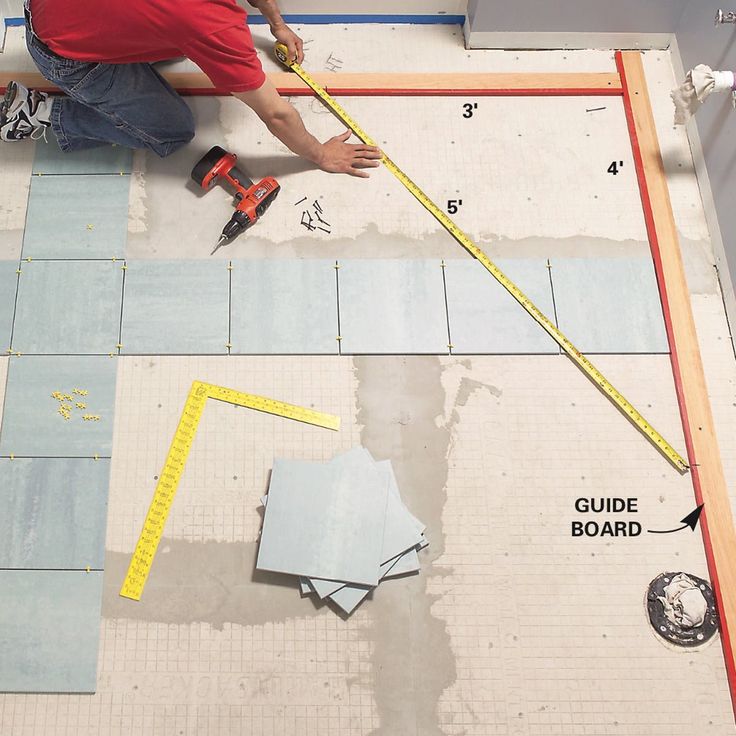
LayoutThe first part of tiling is spending some time planning your layout.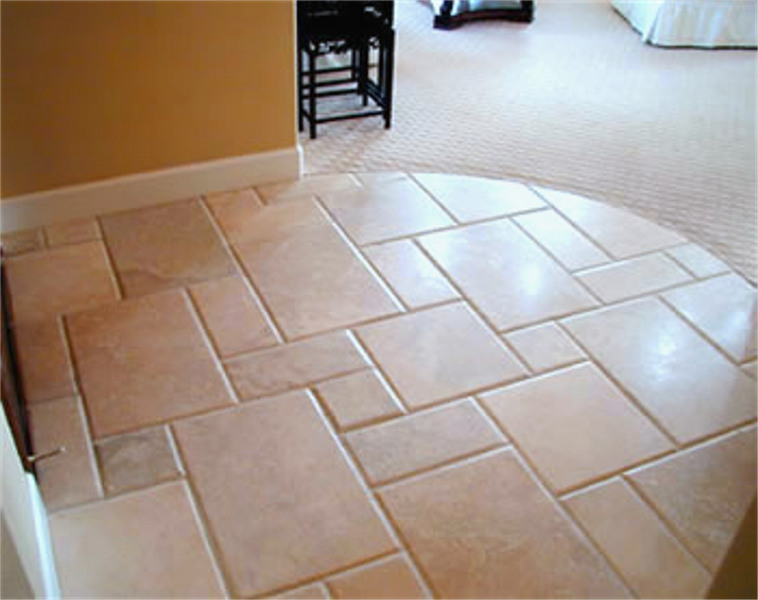 Place as many tiles down on the floor where you want them so you can see how many cuts you will need to make, and if any of the cuts will be problematic. Planning allows you to see problems before you start putting mortar down and it’s too late to turn back. Are there places that will be too difficult to cut – where pieces will be too small or the pattern will look funny? How does the tile line up with objects in the room, or with flooring in the next room where it will meet up in the entry?
Laying out the pattern also allows you to plan for out of square areas. For example, we discovered that one wall dived in about ¾” over an 8’ span, and were able to arrange the pattern so that the tiles that would have to be cut to fit were in an out of sight area.
*Tip: Avoid butting cut sides up to factory edges, or where they will show. Hide them where they will not show, such as against walls or where they will be covered by baseboard or other tile.
Cutting the TileTile can be cut using a wet saw or a manual tile cutter (that scores and snaps the tile). I recommend a tile saw. We have used this little Ryobi for I think six years now, and through I believe 6 bathrooms, 4 kitchens, and 1 fireplace. It’s an inexpensive little saw that has paid for itself many times over.
Manual tile cutters are good for small tile pieces like these hexagons tiles in our shower. For larger formats they just don’t do a clean enough job. Here is a link to the tile cutter we use and have liked the best. If you use a manual variety tile cutter just be sure to score the tile repeatedly before snapping.
*Tip: If you don’t want to invest in a wet saw check out your local tool rental place, as they likely have one. Though, really, for the cost you’ll spend you may find an inexpensive saw like the Ryobi is a better bet.
Wet Saw OperationWet saws resemble table saws in design, but utilize a diamond blade and have a reservoir of water that the blade runs through to keep it cool while cutting. Set the cutting distance on the fence (using a tape measure for accuracy). Any lines you draw on the tile will likely be washed away during the cut, so I find it best not to rely on those.
Move the tile slowly through the cut, being especially slow and careful at the end of the cut so as not to chip the tile. Unlike a table saw, you can and will need to get your fingers a little closer to the blade.
*Tip: Wear waterproof clothing, because the spray from the blade turning through water will soak you. I also like to use a visor like this one to both protect my eyes and keep my face dry.
*Bonus tip: It is possible to cut curves on a tile saw! Make several straight line cuts up to the line, then carefully run the blade along the rough edges left behind to knock off the points. Check the video out to see this in action.
Mixing the MortarMortar can come either premixed or in powder form. The pre-mix is nice for when you want to do a little work at a time and not worry about the mix drying out quickly.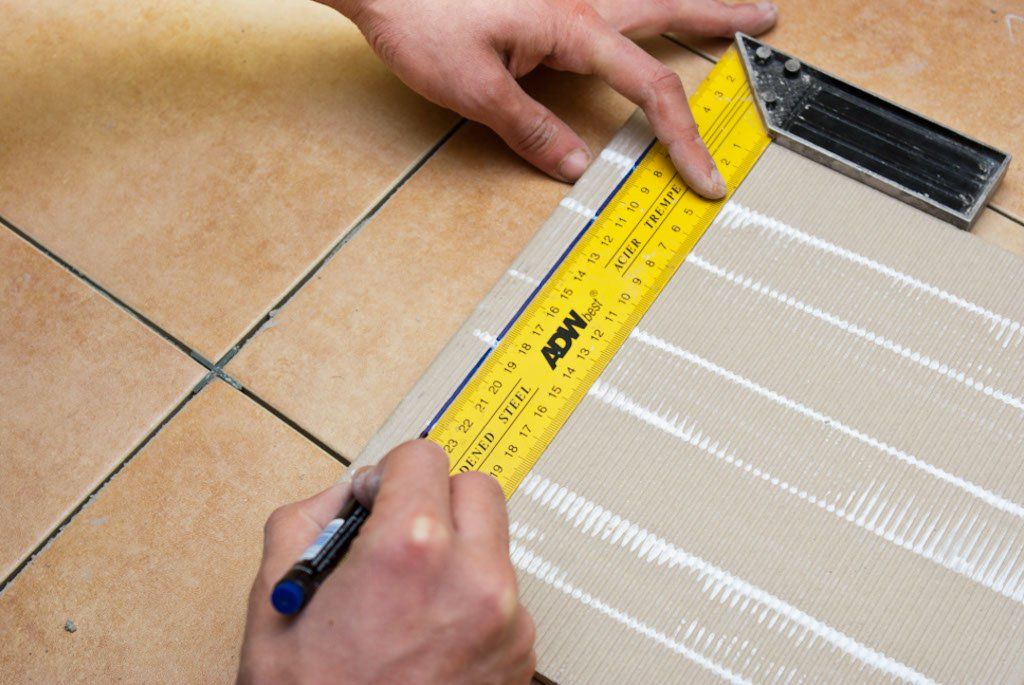 However, it doesn’t always set up so fast or so well, and in some applications is not recommended at all. We used pre-mix to tile our wall, but in the shower we only used the stuff we mixed ourselves.
You will need to closely follow the instructions for whatever mortar that you go with. Your mix should be thick but not runny. It needs to be able to hold the grooves that you will create using a notched trowel. If that’s confusing, read on to the next step…
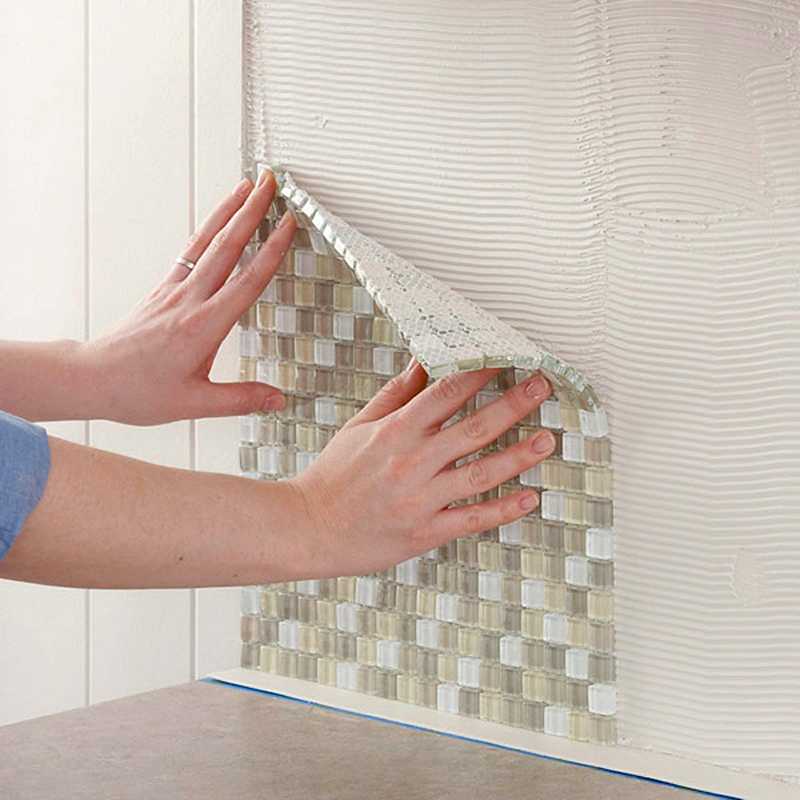
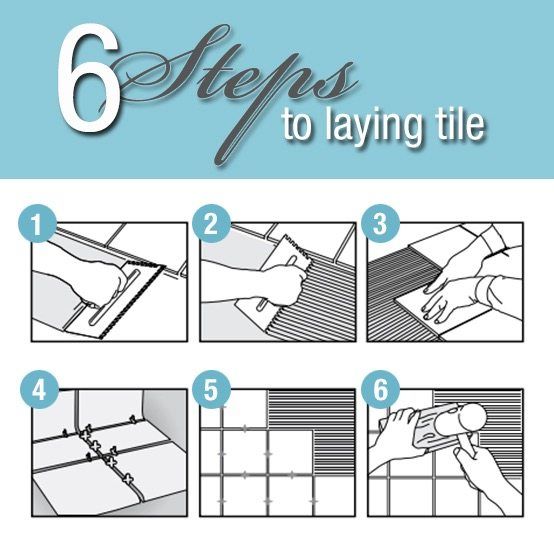
Setting the tileStart by setting your full size pieces, and then move to the cut pieces. To set a piece of tile you will butter the back with the mortar. Yeah, “butter.” That’s the term, I didn’t make it up. Just don’t take it to literally – it refers to the action, not the amount or consumption.
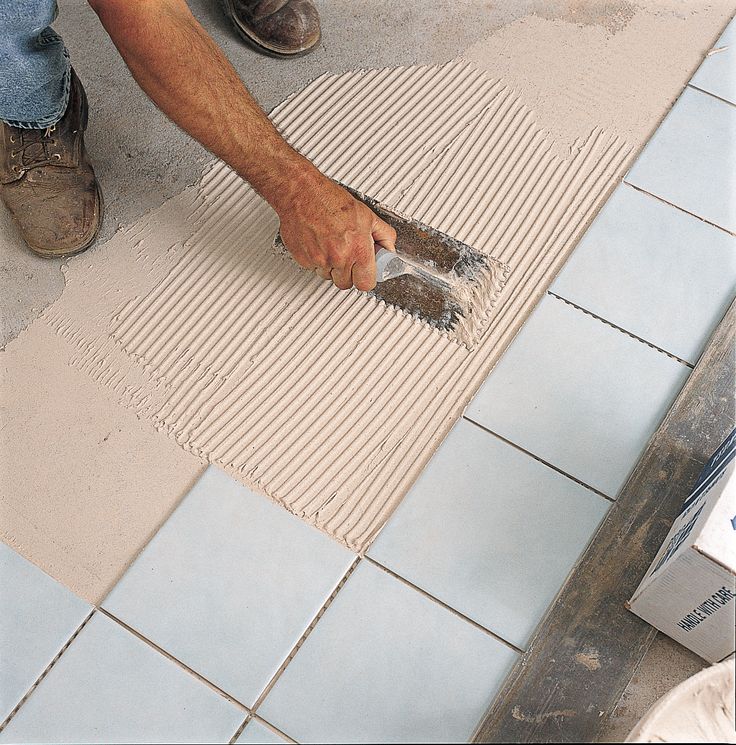
To butter the tile you’ll use a notched trowel – we used a ¼ x ¼ trowel for both the 4×12 subway tiles and the 8×8 floor tile in our bathroom. Spread the mortar across the back of the tile, then hold the trowel at an angle (around 45 degrees or so) and run notches through the tile in a left to right direction, as opposed to an up and down direction.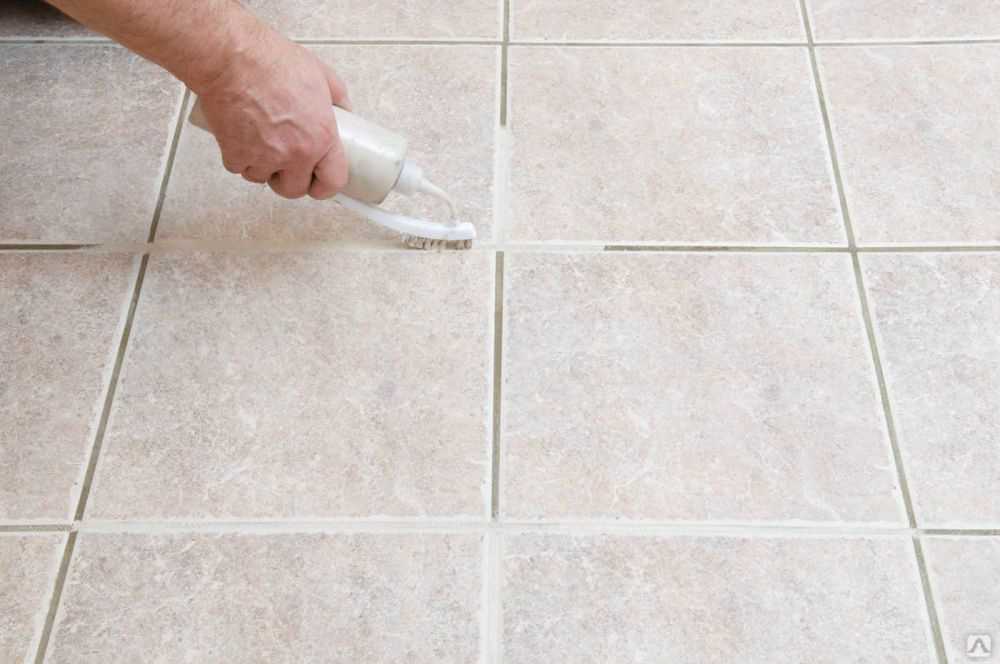
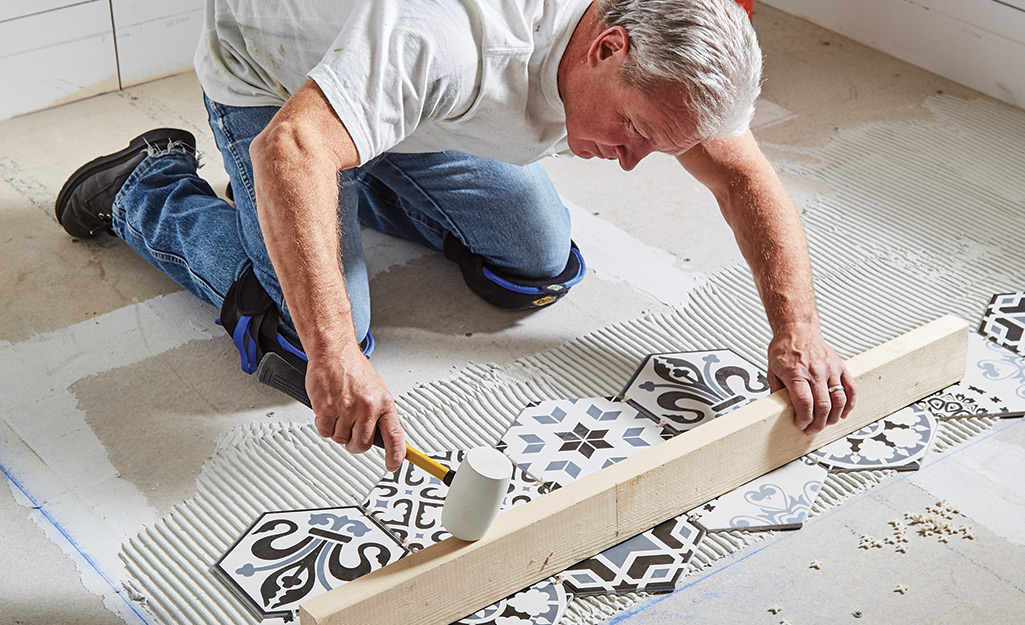
When you set the tile in place use a firm amount of pressure, and move it around a bit to settle into the grooves you created with the notched trowel. Grooving the tile helps the mortar to settle into position without trapping air behind the tile and weakening the installation.
Check out these videos if you want a really good look at what it takes to set tile. They explain everything you need to know, and more.
There are some different schools of thought out there about how to properly set tile. If you watched that last video, they say butter the back and the surface to be tile. My husband grew up tiling with his grandfather, who was a builder, and only buttered the back. (Obviously if you are using small format mesh tile, this doesn’t apply). I was dubious that this would provide the right level of coverage, but after testing it for myself repeatedly, it indeed does just fine, which is why you see us only back buttering in the video.
Let me just say that you can try both ways out for yourself, and test them by pulling off the tile after setting it to check coverage. If you have blank spots where you set it or on the back of the tile, switch it up and get that coverage. You don’t want tiles coming loose.
SpacersTiles need space between them. The common increments are either 1/16” or 1/8”. Or, I guess, ¼”, but honestly I’ve never seen it. There are a number of variety of spacers our there, so try a few to see what you like. We have collected so many over the years that use just keep them all in a bucket and use whatever is best for the space. I’ll link the three we use the most.
Round spacers
Stay in place spacers
Lever type spacers
Rubbery cross ones
You have covered a lot of ground, so let’s save the grouting tutorial for sometime in the next week. I promise that’s only partially because I haven’t actually completed the grouting in our bathroom and need video footage.
Okay, it’s mostly because of that. Look for that soon, as well as some pointers about sealing the newly installed tile.
Tiling a wall
Honestly, most of what I wrote about tiling thus far applies to tiling a wall as well. There are only a few extra pointers that I want to include here.
LayoutYou need to know where your tile will begin and end. So if, for example, you are tiling a half wall like we did you need to plan it out to see whether you can use the full width of tile or if one row will have to be cut down. Then you need to decide whether that cut row will be at the top or bottom. For our half wall the cut row is at the bottom. This is because the wall tile needed to line up all around to our shower curb, and the curb needed 1 ½ pieces of tile. And because we preferred to keep the cut pieces down low. In the shower, however, we have a full row at the bottom, and up high where the wall meets the ceiling will no doubt be cut. (We aren’t there yet, so ask me in a few days.)
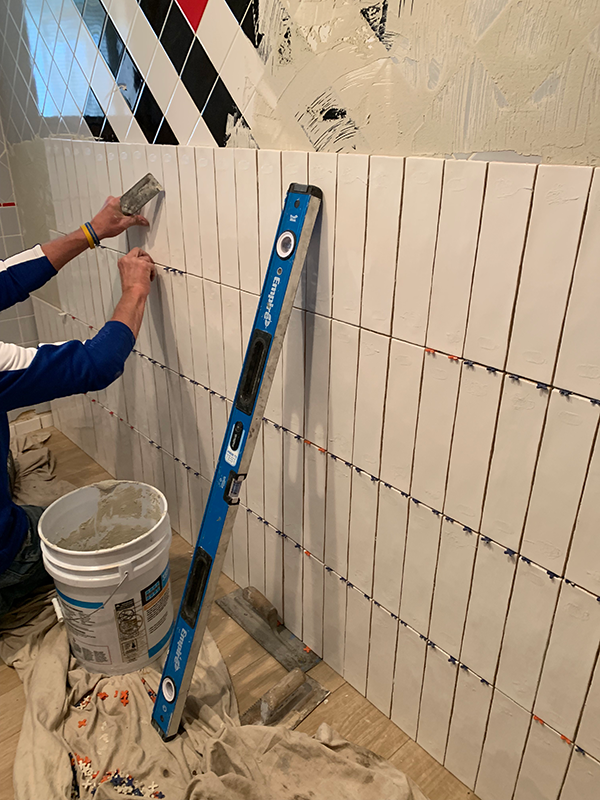
It’s very easy to get a little off and end up running the tile out of level. For that reason you should start with a level line, then check it periodically to make sure that is staying true. Getting off track down low can lead to some pretty shoddy looking work once you reach a little way up the wall.
Turning CornersWhen running the tile from one wall to the next you need to think about the tiles as continuous pieces, even though they will have to be cut. So if, for example, 4” of a 12” tile piece are on one part of the wall running into a corner, then I’ll do a 8” piece starting the row on the next wall. Check that out in the video if it is confusing. It’s also helpful to make sure that the cut end is facing the corner so that it is not seen.
Finishing the top edgeIf your tile has a terminal point that is not against a wall or a ceiling you will need to think about what you want to show.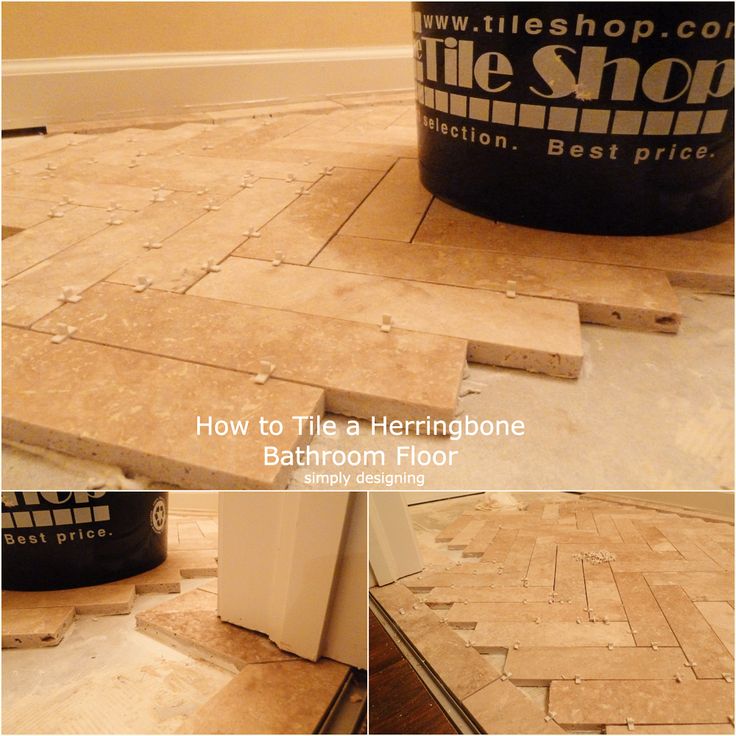 If the tile edge looks good, you might be just fine leaving it. But more than likely you will need a decorative piece, such as a bullnose tile, to finish off the space. For our wall we elected to use these decorative metal edges by Schluter. They match the edges used in the shower and we really like how they finish the space.
There you have it, a beginner’s guide to tiling a floor or wall. Next time I’ll cover how to grout all of your hard work so you can have a truly professional looking job.
Happy tiling!
How to Tile a Bathroom Floor, in 5 Steps
We may earn revenue from the products available on this page and participate in affiliate programs.
When we asked the experts at Block Renovation how to tile a bathroom floor, one common thread kept popping up: Overplan, always. Unlike paint jobs and hardware updates, this is one DIY project that’s harder to fix when gone awry—but that doesn’t mean it’s not worth trying.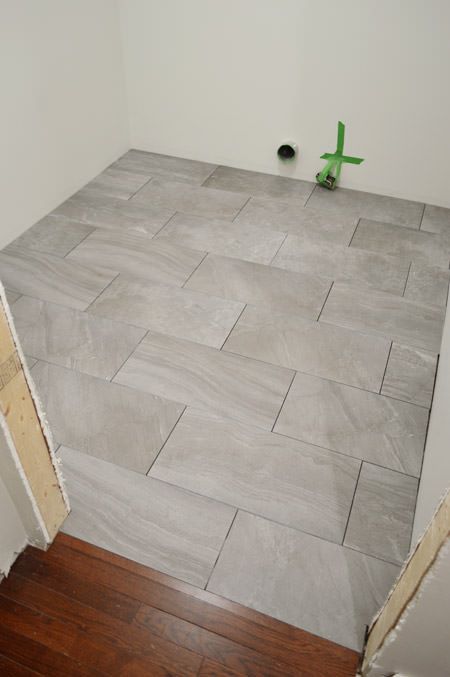 Revamping your flooring makes even the tiniest space look more personal, and the extra prep work will be worth it in the long run.
First, you’ll need to demo and level your existing surface (you can either hire a pro or try your hand at it; A Beautiful Mess has an easy-to-follow tutorial)—once you have the backerboard (the surface over which you’ll be tiling) in place, then comes the fun part: Planning your design. “Sketching is a great tool,” says Stephanie Lee, a designer with the company. “That way you’ll be able to anticipate any weird conditions and can adjust before you start installing.” Some of her other tips for making the process go smoother:
- When in doubt, over-order. This will account for anything that gets broken and any required cuts you need to make to fit angled walls.
- Choose larger pieces of tile. The fewer you have to lay, the easier it will be.
- Opt for basic silhouettes. Shapes like squares and rectangles are way simpler to map out than hexagonal options.

Expect the tile laying to take anywhere from a few days to a week, depending on the complexity of your pattern and the size of the room. Crank up your favorite playlist, rope a friend into helping out, and take your time with the process. We tapped Eric Heinowitz, a construction supervisor at Block, to share the lowdown on how to get the tiled bathroom of your dreams.
advertisement
The Supplies (amounts needed will vary)
- Thinset mortar (follow instructions on the package to mix)
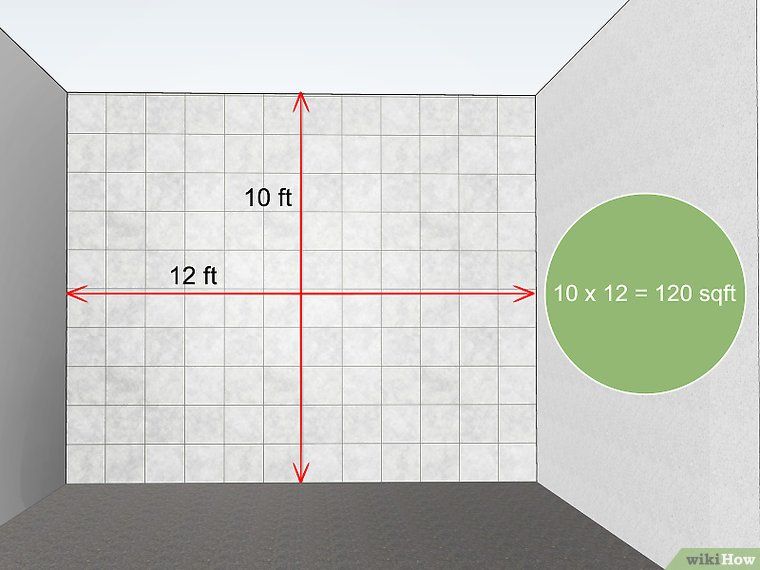
- Tile (to figure out how many square feet you’ll need, multiply the length of your room by its width)
- Spacers
- Grout
- Notched trowel
- Tile saw (optional)
- Rubber grout float
- Stone sealer
- Sponge
Do this before applying any sort of adhesive to catch problems before they happen—according to Heinowitz, it’s most common to start in the center of the room and work your way out, but if you have oddly sized corners (or oddly sized tiles, like a hexagon), begin at the edges of the room to account for any tricky gaps. You can also sketch a layout directly onto the floor, if you’d rather fill in the lines that way.
This is also the step where you’d cut tiles to fit any custom floor plans: If you need to do this, measure and mark the cutoff point on each little shape, and use the tile saw to trim it down.
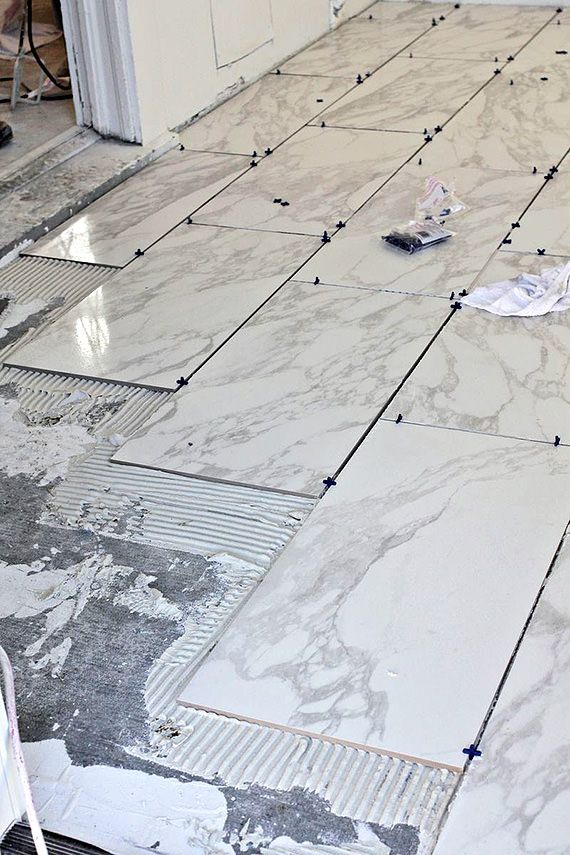
Step 2: Install the TilesFor smaller tiles, slather an even coat of thinset directly onto the backerboard, working in a small section at a time and using a notched trowel to texture the mortar. If you’re installing natural stone or large format tile (anything greater than 12 inches in any dimension), follow this step and then “back butter” each one: Apply the mortar to the back of the tile with the trowel in a straight line. Then lay and firmly push each square to set in the desired location.
Step 3: Insert the SpacersUse spacers or leveling clips to keep the distance between each stone piece even—this will come in handy for the grouting step. Let it set for roughly 24 hours before removing these tools.
advertisement
Step 4: Spread the Grout
It may seem like a small choice, but picking the right grout tone makes a big difference in the final look. Heinowitz suggests choosing a matching shade as your tile if you want a seamless finish, or a contrasting color for something a little edgier. Pro tip: Darker grout will stand up better in high-traffic areas and show less wear and tear.
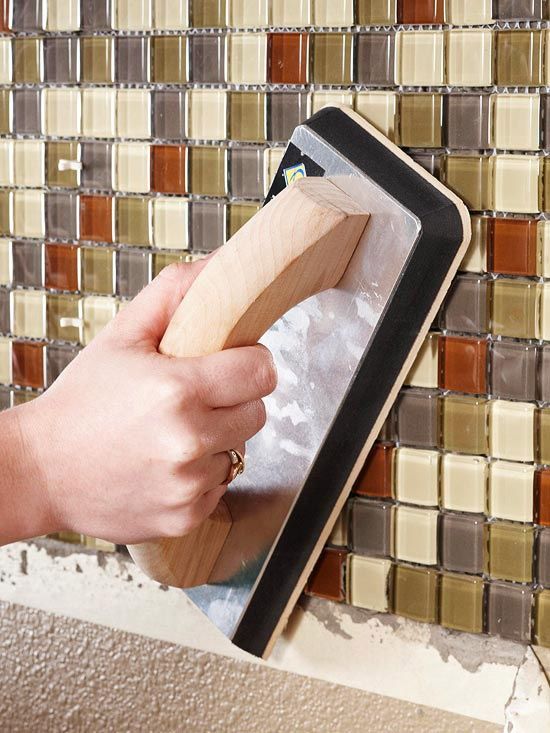
To prepare the paste, make only as much as you need (anything leftover will quickly solidify) and mix thoroughly to ensure a consistent coloring. Then, using the float, evenly work the grout into the tile spacing, focusing on small areas at a time. Wait for it to harden—this should only take a few minutes—then wipe away any excess with a damp sponge, being careful not to pull any out from the corners or edges.
Step 5: Add the Final TouchesOnce the grout is completely dry, finish off the room with a sealer approved for natural stone surfaces.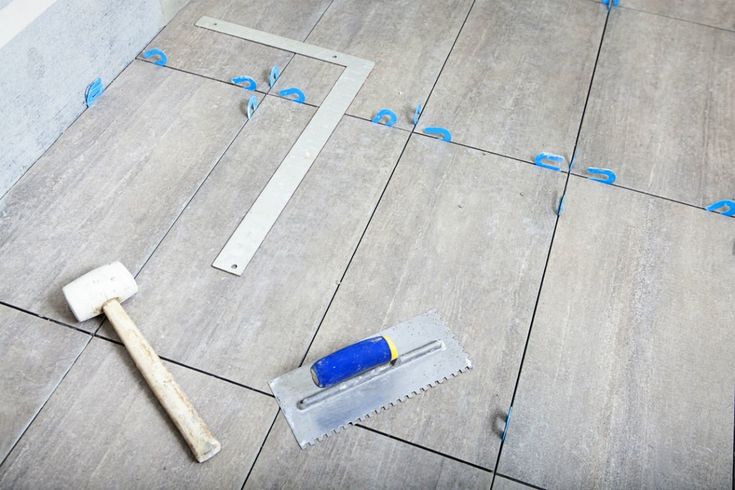 And you’re done! Get ready to enjoy your new customized bathroom.
See more bathroom tile stories: 9 Ways to Refresh the Humble White Subway Tile 7 Grey Bathroom Floor Ideas That Are Anything But Blah 12 Porcelain Bathroom Floor Tiles That Will Make You Forget About Paint
advertisement
Laying tiles on the wall with your own hands
- Home
- Articles Laying tiles on the wall Do-it-yourself tile laying Instructions for laying tiles
1. Surface preparation for cladding
It is unrealistic to simply take and start gluing ceramic tiles on the wall. Firstly, laying always starts with at least 2 horizontal rows. Secondly, the very surface of the wall must first be prepared, leveled, strengthened and removed various debris.
The final result of wall cladding with decor from the Armonia collection by Ape Ceramica.The surface for laying tiles can be leveled or prepared as follows:
-
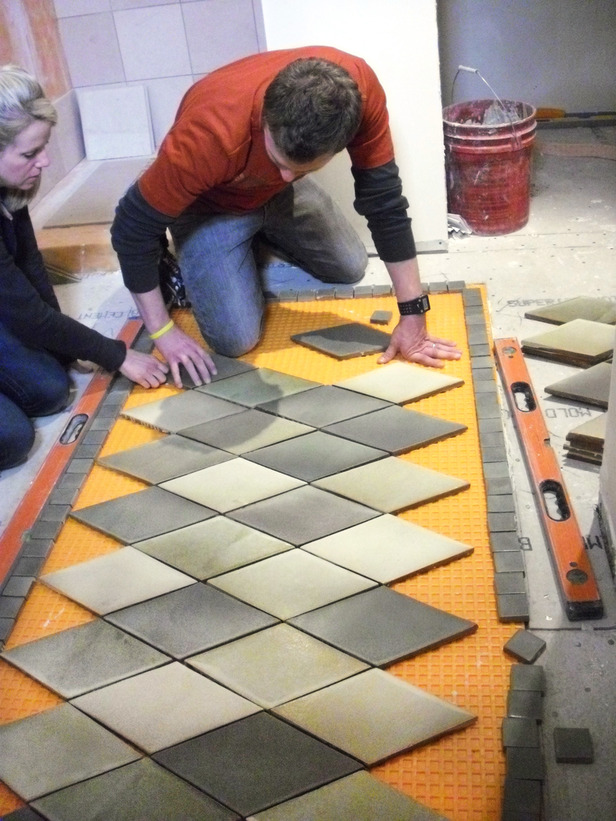
Plaster the surface along the beacons with a cement-sand mortar, if the walls are generally curved or not finished in any way.
-
Putty the walls with putty if the old plaster is of normal strength, but there are slight irregularities on its surface.
-
If the surface is drywall, then a fiberglass mesh is mounted on it and the entire area of \u200b\u200bthe wall along the mesh is puttied with cement putty or tile adhesive.
-
If the wall is puttied with gypsum putty, then to increase adhesion with tile adhesive, the entire surface is swept with a brush or broom, after which a penetrating primer, betogrunt, betokontakt or their equivalent is applied to the entire wall area with a roller.
Attention!
If priming is planned with a penetrating primer, it is imperative to sweep the surface from dust. If this is not done, the wet dust will curl up and roll over the surface with a roller, as a result, crystallization will occur - a thin film that does not increase adhesion, but, on the contrary, can make the adhesive not adhere to the wall at all.
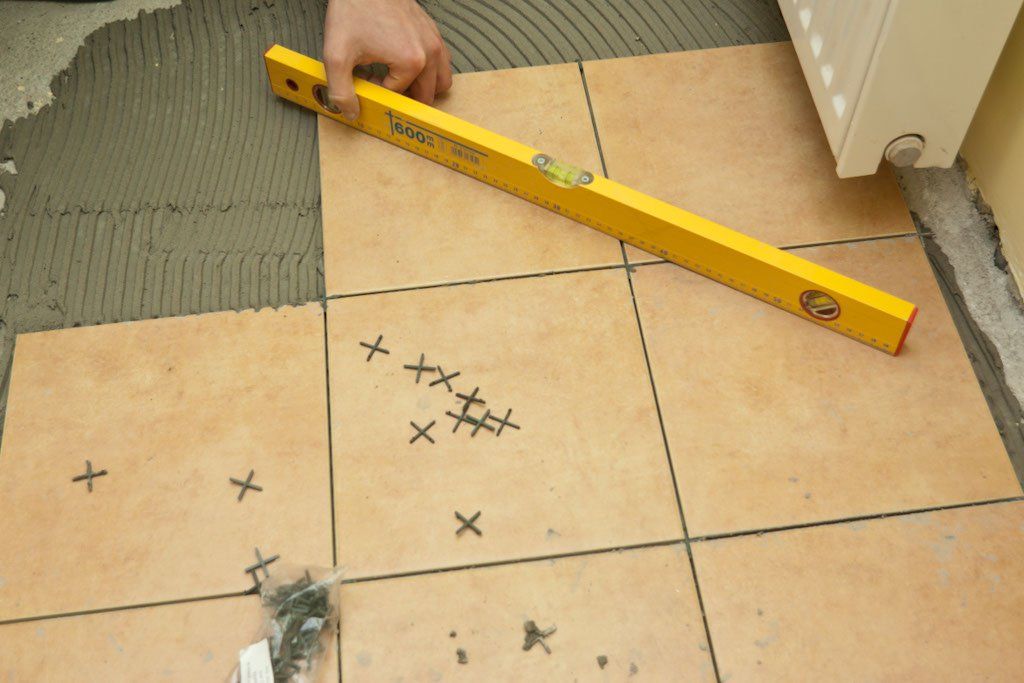
After all the necessary actions to level the surface, it is necessary to accurately determine the future location of the tile on the wall itself. To do this, you first need to find the highest point of the floor at the bottom of the wall. If the floor is not yet tiled, a long bubble level is passed along the perimeter of the room at the base of the wall and, thus, the area where the screed is most elevated is determined. In this place, 1 mark is made on the surface of the wall. Further, from 1 mark, about 10-15 mm are measured up the wall and a second mark is made - this will be the zero of the future floor tile.
Leveling the surface of the wall on which it is planned to lay the tiles.At the second stage, the height of the facing material, which is planned to be laid on the wall, is precisely measured with a tape measure. For example, the height of the tile is 30 cm, which means that this distance is measured from the previously found zero point up the wall surface and a mark is made.
 After that, a long bubble level is applied to the obtained mark, it is set to an even horizontal position and a straight line is drawn along the entire length of the wall along the level.
 All ceramic wall tiling will be done from the line described above. However, so that the tile does not slide down under its own weight, it is necessary to temporarily mount the stop along a solid line to the wall. As a stop, you can use a flat edged board, the remaining unnecessary metal profile or lining panel. Temporary mounting of the stop to the wall is carried out with ordinary metal dowels.
Popular wall tiles
Kerama Marazzi Russia
Blanche tile white edge 9.9x20
Article 19040 N
Format cm 20x9
1 234 ₽
Watch
Kerama Marazzi Russia
Porcelain tile Colliano ornament 30x30
Article SG914500N
Format cm 30x30
927 ₽
Watch
Creto Russia
Forza Calacatta White Wall 01 25x60
Article A0426Y29601
Format cm 60x25
1 386 ₽
Watch
Creto Russia
Effetto Wood Ocher 03 25x60
Article R0425K29603
Format cm 60x25
Watch
Creto Russia
Effetto Base Gray Wall 01 25x60
Article A0425h39601
Format cm 60x25
1 386 ₽
Watch
Ragno Italy
Decor Frame Decoro Milk 25x76
Article R4YM
Format cm 76x25
Watch
Carmen Spain
Nomade Turquesa porcelain stoneware 13.
 9x16
9x16 Article
Format, cm 16x13
5 740 ₽
Watch
Italon Russia
Porcelain tile Millennium Silver 60x120
Article 610010001458
Format cm 120x60
3 520 ₽
Watch
All collections of wall tiles
2. Determine the location of the future vertical cutting row
The wall is prepared, the tile stop is mounted, however, before you start laying the tiles on the wall, you must also decide where the vertical row of not a whole tile will be located. To do this, you need to measure the width of the tile and the total length of the wall. The length of the wall is divided by the width of the tile and determines how many full vertical rows of tiles will fit on the wall. As a result, there will be a small distance. If this distance is less than half the width of 1 tile, then such a narrow wedge on the wall will look ugly.
 In this case, two vertical wedges are made on the wall at each corner. If the distance described above exceeds half the width of 1 tile, then such a vertical row of cut tiles is placed in the corner that is least accessible to the eye.
 Tip!
The area on the wall surface, which is the least noticeable, is located behind the door to the room or on the side of the entrance in the opposite corner.
To lay tiles on the wall, you need the following tools:
Production of working glue:
-
Mix the entire substance with a perforator with a mixing nozzle in the drilling mode until a homogeneous thick mass is obtained;
-
Leave the resulting adhesive mass for 10 minutes at rest, then mix the entire substance again.
3. The process of laying tiles on tile adhesive on the wall
First of all, the wall cladding is made with solid tiles, and cutting is done towards the end of the work.
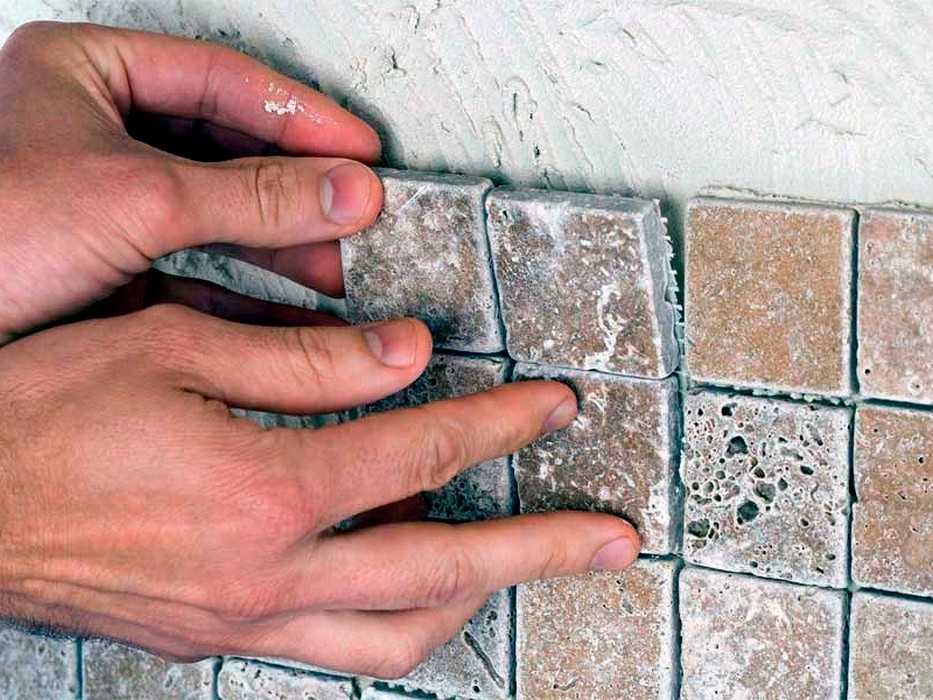 The prepared working tile adhesive is applied to the wall with a spatula or trowel and distributed to create a layer of equal thickness using a comb. Then the adhesive composition is applied to the reverse side of the tile and distributed in the same way. The tile is applied to the wall, resting on the mounted stop, and slightly pressed.
 In a similar way, several more ceramic tiles are laid nearby. After that, a level is set vertically on 1 first glued tile and with the blows of a rubber mallet it is given an even vertical position. Next, the level is applied to the entire row of 3-4 tiles horizontally, and the rest of the tile is adjusted according to the first 1 tile set according to the level. After leveling a small row of tiles, PVC crosses are placed in the tile joints.
On the first day, it is desirable to lay out the maximum area of solid parts of the facing material. On the second day, first of all, a vertical row of cut tiles is laid out on the glue.
 After that, bring the entire lining to the ceiling. On the third day, you can safely dismantle the stop nailed to the wall and proceed to finish the lowest horizontal row. Before gluing the lowest row of tiles, you first need to cut and prepare a dozen small strips of masking tape and chop more chips of different sizes from a wooden block.
 The sequence of work when finishing the bottom row is similar. The glue is applied and distributed on the wall and the back of the tile, the tile is applied to the wall and leveled using a level and mallet. However, under the lowest horizontal edge of the tile, you will need to pick up and insert wood chips, while crosses are pre-installed in the upper section of the tile. In principle, wooden chips are enough to temporarily fix the tiles on the wall until the glue hardens, but to be sure, the glued and exposed tiles of the lower row are additionally fixed with the tiles from the upper row with strips of wide adhesive tape.
Leveling rows of tiles with PVC crosses.
4. Grouting
A few days after the wall is completely finished, using a knife and pliers, PVC crosses are removed from all tile joints. Also, fixing tape and bottom wood chips are removed from the bottom tile. All the seams between the tiles are passed with a sharp knife blade to remove excess glue and, if possible, deepen the seams.
The next step is to pour about one and a half glasses of water into a small bucket and pour dry grout for the joints. The entire resulting mass is mixed with a spatula until there are no lumps. Next, the prepared grout is applied sequentially to all cleaned and prepared tile joints with a rubber or silicone spatula. After filling the joints, wait about 30 minutes for the grout to harden a little, after which a dry cloth and sponge are passed over the entire surface of the tiles.
Attention!
It has been described above how to work with cement-based grout. If the cladding is done in a bathroom or any other room with high humidity, it is recommended to use a grout based on epoxy or furan resin.
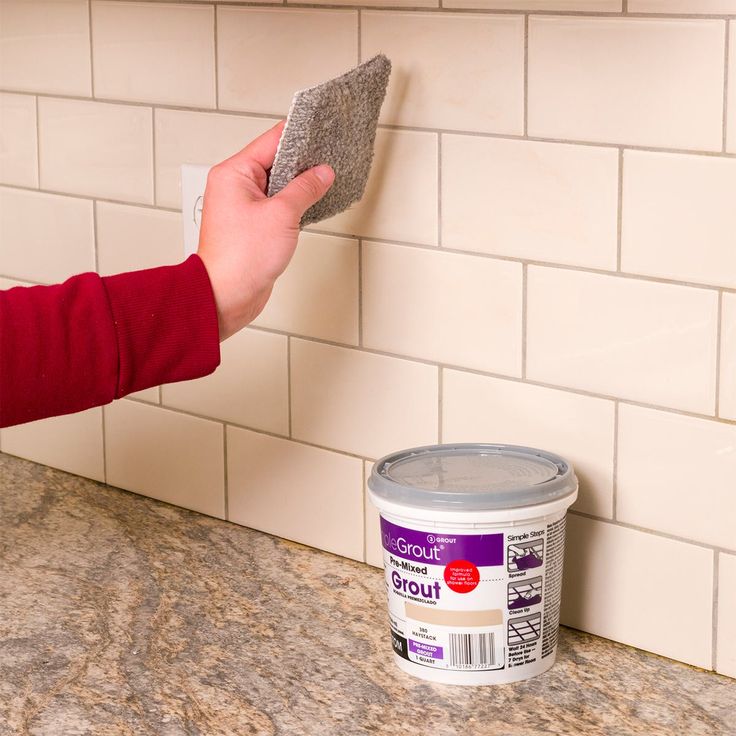 In this case, it is necessary to specifically study the manufacturer's instructions indicated on the container with grout.
5. The last step is the most important!
We call all our acquaintances, friends and relatives, show them our new finish in the bathroom and boldly declare to everyone: - I did it all myself!
For all questions related to the purchase of materials, please contact our consultants.
How to lay tiles on the floor correctly with your own hands: step-by-step instructions
Tiles are traditionally used for floors in wet areas, it is believed that this work is best left to a professional. Let's figure out how to lay the tile on your own.
Step-by-step instructions
When laying tiles on the floor, it is important to properly prepare the base, as tiles on an uneven surface will “walk” a lot, this spoils the appearance of the coating and is felt when walking. Another problem when finishing the floor is to create the same level in all rooms.
Consider the general order of work:
- Floor leveling (screed, self-leveling floors).
- Leveling walls (plaster or drywall).
- Laying tiles on the wall from the second row, leaving the first empty.
- Laying floor tiles.
- Laying the first row of wall tiles.
The reason for this order of work when laying tiles, we analyzed in detail
in the article about laying tiles in the bathroom on the wall.Required tools
- Smooth-edged trowel
- Comb trowel
- Rubber putty knife
- Laser or water level
- Bubble level
- Crosses or Tile Leveling Systems (SVP)
- Rubber mallet
- Containers of different sizes for mixing tile adhesive, cement-sand mixture and grout
- Rule
- Drill mixer
- Roller with long shaft for spreading primer
- Spot Primer Brush
- Tile cutter
- Porcelain cutters
- Roulette
- Construction square
It is advisable to use a separate container for each type of binder.
 For grouting, a small tray will be enough so that the mixture does not come into contact with the remains of cement compositions.
 Required building materials
- Tiles
- Tile adhesive
- Cement-sand mix for screed
- Steel profiles for lighthouses
- Priming compounds depending on the type of surface
Joints and cracks in the substrate may require putty or foam.
Step 1: Level the surface
It is advisable to lay the tiles on a flat surface, as distortions will lead to an increase in the consumption of tile adhesive. In addition, the differences will be visually noticeable.
Leveling can be done in different ways: wet, dry, semi-dry screeds or using a self-leveling floor. Differences in the level of the base in new buildings can be from 3 to 20 cm, the average is 7 cm. This means that at the lowest point of the apartment there will be 7 cm, and at the highest - at least 3 mm if a cement-sand screed is used.
The most universal is "wet" leveling with cement-sand mortar, we will consider this method in the article.
- At the first stage, you need to prepare the room for work: remove all debris, collect fine dust with a construction vacuum cleaner.
- Checking the floor surface for drops. This information will be required to set the beacons, which must be on the same level.
- Usually the floors in all rooms are brought to the same level, so you need to find the zero point.
Zero point is the highest point of the floor in a separate room or in the whole apartment.
It all depends on whether you want to make the base level the same in all rooms.
At the zero point, the screed will be the thinnest.- We set a horizontal line on all walls of the room with a laser axis builder. The distance to the floor is usually taken equal to an integer (10 cm, 50 cm, 1 m) to make it easier to count, but the specific value does not matter when the device is first set up.
- We apply the beginning of the tape measure to the floor and measure the distance to the beam in different corners of the rooms. If we transfer the device to other rooms, then we take the height that was used initially. For convenience, marks can be applied to the walls with a marker. The place where the height will be minimum is considered to be a zero value.
- We add the thickness of the screed to the minimum distance to the beam (3 cm, 5 cm - with a warm floor). At this stage, we need to mark on the square the height from the screed to the beam on the construction square. If initially the distance from zero to the horizontal was 10 cm, then we raise the level by 13 cm, and mark 10 cm on the square.
- To test the calculations in practice, you can put a small block on the floor to represent the screed. To increase the height, we screw a self-tapping screw into it, apply a corner to it. In order not to spoil the tool with marks, we glue masking tape on it and make a mark at the height of the beam.
- Seams, joints and cracks in the floor are sealed before the beacons are installed. A plastic film can be laid on the base to prevent leakage of moisture from the solution to the lower floors. Sometimes soundproofing is laid in the screed, then the thickness of the floor needs to be made larger. These figures are taken into account in the calculations.
If the apartment has already been tiled in separate rooms, then the thickness must be taken into account (usually it is 1.1 - 1.7 cm). The size of the layer of tile adhesive depends on the size of the tooth on the trowel-comb.
- Now you can start installing beacons. For a 3 cm thick screed, it is recommended to use a 1 cm high profile. The beacons are placed on plastic mortar cakes, the joints are laid with a slight overlap so that the rule does not cling to the joint when leveling.
Outdoors and in areas of high humidity, it is better not to combine gypsum mixture with cement, as the contact of their components with water leads to a chemical reaction - the formation of ettringite.
- The distance between the beacons must correspond to the length of the rule. We put a construction corner on the profile at the most protruding point and press it into the solution until the mark on the masking tape coincides with the beam of the axle builder.
- We do this procedure on all parts of the floor until the mark on the corner everywhere coincides with the horizontal of the laser.
- When the beacons are on the same level, you can fix them. To do this, grease the voids under it with a solution.
- Now you can start leveling, the voids between the profiles are filled with mortar. The rule is to cut off the excess solution. A wet screed gains 100% strength in 28 days, 70% - under normal temperature and humidity conditions, is achieved after 7 days. Most masters believe that after this period, you can proceed to the subsequent finishing.
Read more about pouring wet screed in a separate article on our website.
Laying floor tiles depends on the differences in the walls. If there are no 90 degrees in the corners, then in these places the tiles will need to be cut.
Step 2: Marking for the layout
Before laying the tiles, it is important to estimate the layout of the elements on the surface. This can be done on paper or marked on the floor. The layout serves two purposes: to minimize undercuts and to determine the location of the seams. The appearance of the floor depends on the laying method, we will give examples of layouts.
- Traditional (classic) is the most versatile, works well in all spaces and is easy to use for beginners. Tiles can be either rectangular or square. With this method, the seams go without displacement.
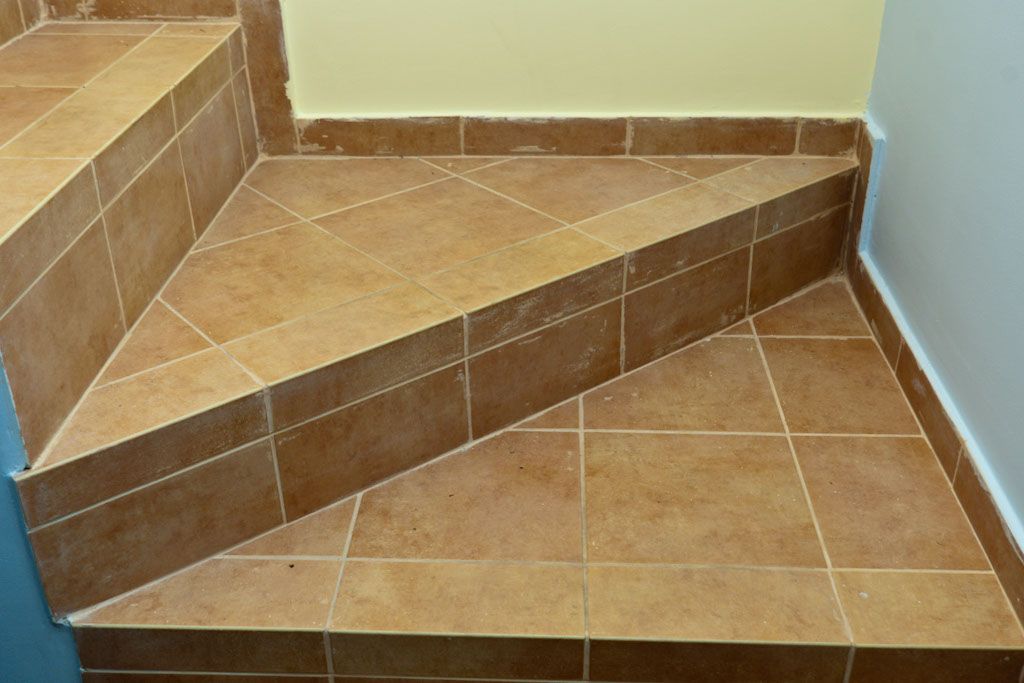
- Diagonal can only be used with square tiles. With this method, the number of scraps increases. At the walls, the tile has the shape of a triangle, while it is desirable that the size of these pieces be the same on all sides.
- Offset - can be diagonal or perpendicular to walls. In this case, the seam is obtained, like that of a brickwork. For this method, you need a rectangular tile.
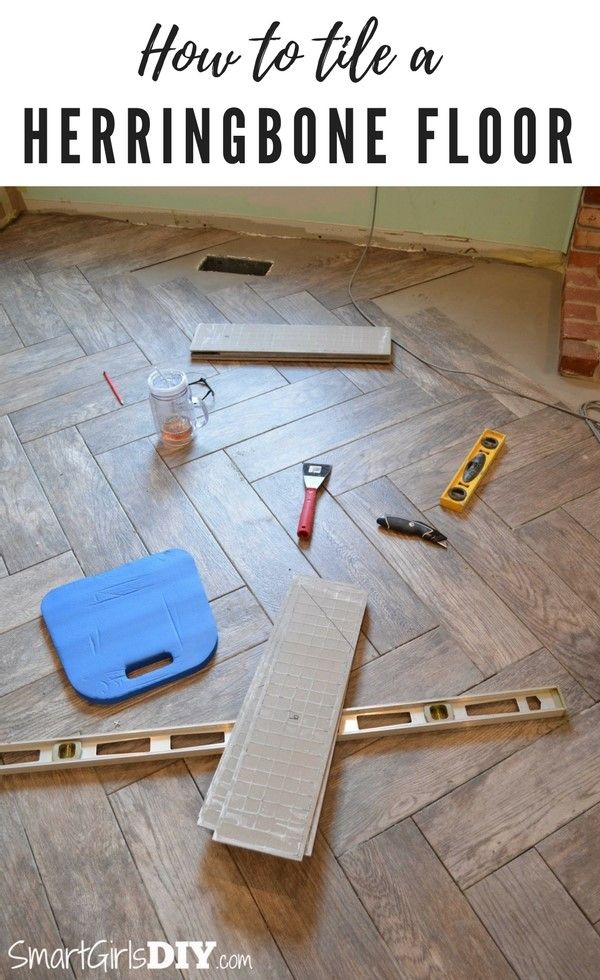
- Herringbone - this way of laying imitates parquet. The layout is difficult for beginner tilers and requires a lot of experience.
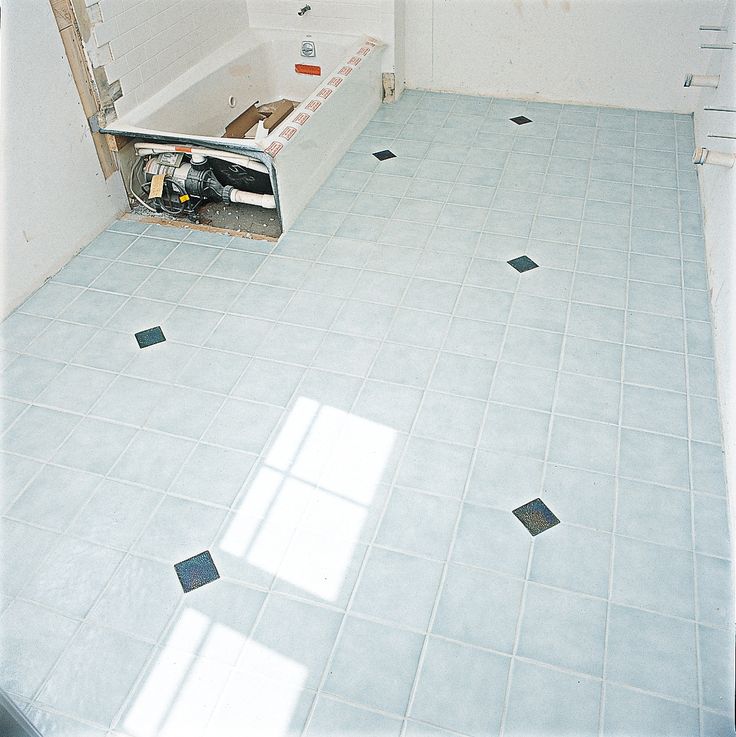
When laying out floor tiles, it is important to consider the position of the decorative elements. They are usually more expensive than background tiles, so you need to place them in a conspicuous place. Putting them under the bathtub or stove does not make sense, since no one will see them there. At the entrance to the room, it is better to lay a solid tile; in the far corners, you can lay the cut parts.
It is useful to tile the floor before starting work. The layout can be started from the most prominent corner or from the visual center of the room.
Step 3: Preparing the tile adhesive
The tile adhesive must be selected according to the room temperature and humidity conditions.
 In wet areas, it is better to give preference to compounds with low water absorption.
 Before preparing the adhesive, it is recommended to read the instructions on the packaging. Each glue has its own marking according to the state standard.
- Mixing requires a clean container free of old mortar residues.
- Water must be added to the container, and then the dry ingredients must be poured. This procedure is necessary to prevent the formation of lumps.
Tile adhesive does not require the addition of any additional ingredients.
- The solution is mixed with a spatula or drill mixer. The nozzle must be clean, traces of old mixtures must be cleaned.
- After that, the glue is left for 10 - 15 minutes to saturate with moisture, then re-mix. You need to achieve the consistency of thick sour cream.
Insert: The surface must be primed before the main work. We analyzed the choice of composition in detail in the article about laying tiles on the walls in the bathroom .
Step 4: Apply adhesive to tiles or floor
Adhesive can be applied in three ways. To do this, you need a spatula with a smooth edge and a comb.
- Application on the back of the tile
- Floor application
- Application on both surfaces
There is no fundamental difference between the first two methods. The first increases the pace of work, but is suitable for more experienced tilers. The third application method is used when the surface has irregularities, which requires an increase in the thickness of the binder.
Previously, tiles and surfaces were wetted with water.
This was done so that the ceramics and the screed would not draw water out of the adhesive. Modern binders and primers prevent moisture infiltration, so additional moisture is not required. Read more about errors when laying tiles in a separate article.The adhesive must be evenly distributed over the surface of the tile, avoid furrows in an arc.
 The comb must move horizontally or vertically. If the composition is applied to the wall and ceramics, then the directions alternate.
 There must be no voids between the tiles and the floor, otherwise a piece of ceramic will break off under mechanical load from above. Most often, such a defect makes itself felt when chips and cracks appear at the corners when solid objects fall.
Step 5: Laying the tiles
- After applying the grout, move the first tile along the layout. First, we put only a whole tile, the cut one is glued at the end.
- Use a rubber mallet to seat the tiles on the mortar. If the tile has a fragile decorative coating, then tapping can be done by hand.
- We test ourselves by applying the bubble level in different directions.
- We insert crosses or SVPs (tile leveling systems) into the seams so that the size of the gaps is the same everywhere.
SVP: wedge with clampLeveling systems are preferred by beginners because they not only allow the size of the joint to be maintained, but also fix the same height of the tile.
Step 6: Cutting the tiles
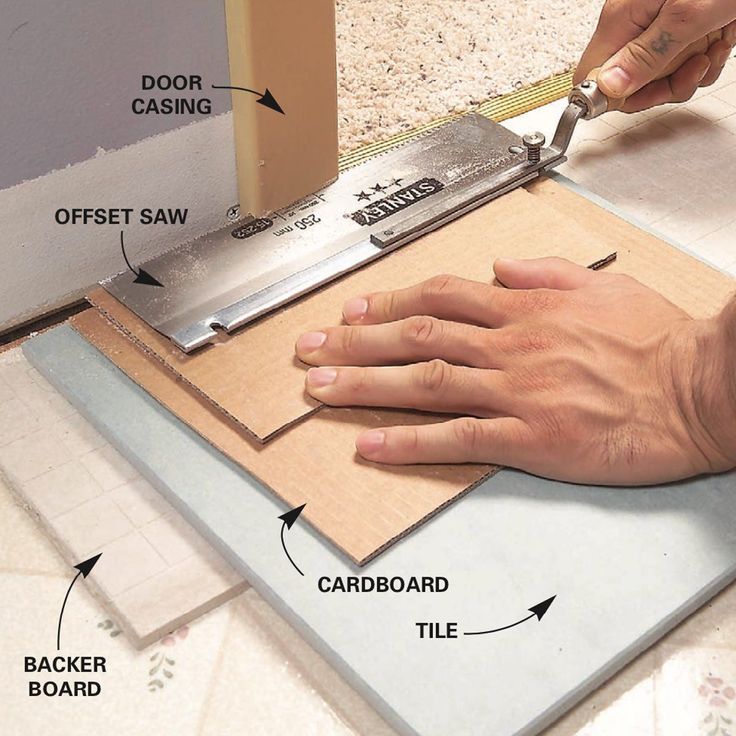
To cut ceramics, you can use a tile cutter, angle grinder, glass cutter, sharp sharpened drill, ceramic nippers. The choice of tool is individual, but the easiest way for a beginner is a tile cutter.
- Mark the cut line on the tile, place it on the platform. The mark must line up with the marks on the tool.
- An incision is made with the handle on the roller, then one half of the tile is broken off by pressing the lever.
When cutting diagonally, it is better to make a break with your hands, and an arcuate element is made with ceramic cutters. Read about other ways of cutting tiles in a separate article on the site.
Step 7: Grouting
Grout (fugue) is applied after the adhesive has cured, this process usually takes a day, but before this moment it is important to have time to do several operations.
- Tiles must be cleaned, if the adhesive dries on the surface of the tile, it will be difficult to remove.
 At the same time, fresh masonry can be moved, so you should not work with a sponge before the initial setting.
- While the adhesive is still wet, open the seams. For this, part of the solution is removed from them. Fugue will take this place in the future.
Read more about errors when grouting tiles in a separate article.
- Puffer is prepared from the dry mixture in small portions. To do this, take a clean tray. It is not recommended to interfere with the composition with a drill, as too much air will enter it. For this purpose, it is better to use a rubber or steel spatula.
- It is better to apply the grout with a soft rubber tool, because the metal can leave damage on the tile.
- After rubbing the mixture into the joints, the grout residues must be washed off the tiles with a sponge and a colorless detergent.
How to lay tiles on the floor in different rooms
Different rooms have their own operating conditions and requirements for floor coverings are different.
In the bathroom
- When forming a screed in this room, you need to make a slope from the bathroom to the threshold.
- If the bathroom is a shower room with a drain, then the slope is towards the drain.
Since 2012, it is impossible to make a ladder in a city apartment. By law, such a redevelopment must be agreed upon, but permission for it will not be obtained, therefore it is currently impossible to legally make a shower room with a drain in the floor in a city apartment.
- The entrance to the room is usually the main location of this room, the rest of the floor is hidden under the sink and bathtub.
- Moisture absorption of tiles should not exceed 3%.
- The bathroom must be separated from the rest of the apartment by a threshold. This element prevents the spread of water in the event of a leak. Often, during repairs, the threshold is broken - this is a violation of the requirements of SNIP.
The floor in the bathroom is often lowered below the level of the floors in other rooms, this is also a measure against communication leaks.
- Under the tiles in the bathroom, it is desirable to perform a waterproofing coating. Read more about this procedure in the article.
In the toilet
In the toilet, the requirements are the same as in the bathroom, since the sanitary equipment is located there. The set of measures against leakage includes slope, waterproofing and threshold.
The threshold can be tiled to match the flooring.
In the kitchen
This room also needs waterproofing. There are always a lot of people in the kitchen, often objects fall on the floor, in order to avoid damage, the tile must have an increased strength class and moisture absorption of no more than 3%.
How to lay tiles correctly on different types of surfaces
On a wooden floor
A wooden base is not suitable for laying tiles, but if you want to make such a floor, it is still possible, for this you need to create certain conditions.
- The coating must be free of gaps and must be sanded and sanded.
-


