How to make box garden
DIY Raised Bed Garden Box
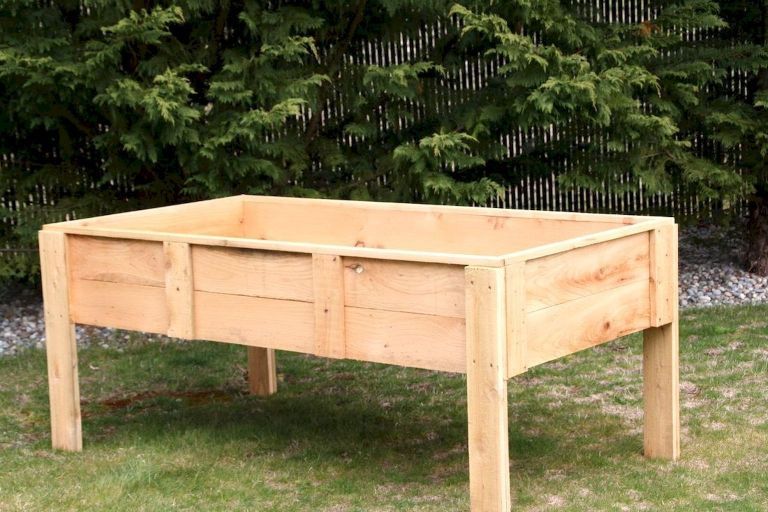
If you are looking for a way to add gardening space without having a “traditional” garden, these inexpensive, easy to make DIY Raised Bed Garden Boxes are the answer!
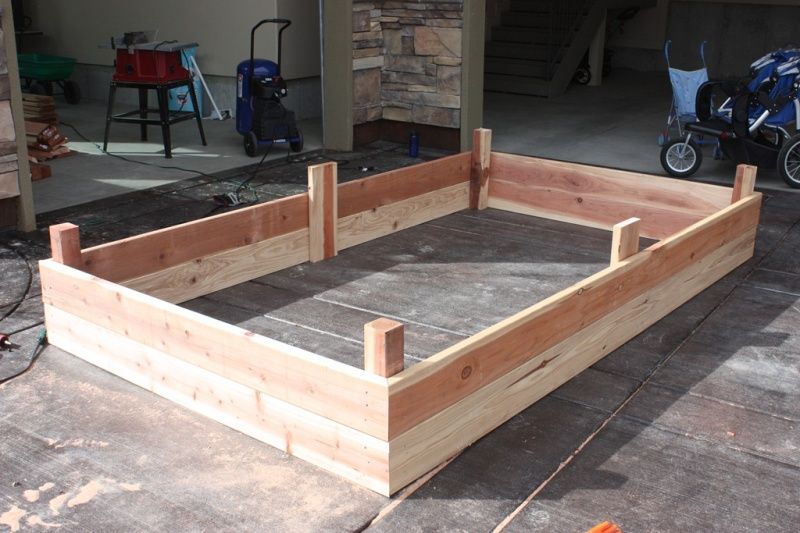
Created easily from ordinary 2×4 and 2×6 lumber, these attractive beds look great anywhere. Even better, at 3′ wide x 6′ long x 18″ deep, they allow a lot of space for growing.
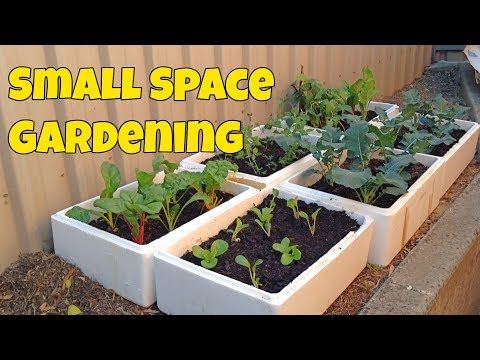
Simple and inexpensive to create, these sturdy raised beds allow plenty of room for growing your favorite plants. In addition, their attractive design fits into any outdoor space.Raised beds and containers are an excellent method for growing vegetables, herbs and flowers. Especially if you don’t have the room or time to tend to a large backyard garden.
Not only do they fit easily into smaller yards or on patios, they are extremely low maintenance. In addition, by their very design, the “raised” nature of the beds allow for easier access for planting, watering and harvesting.
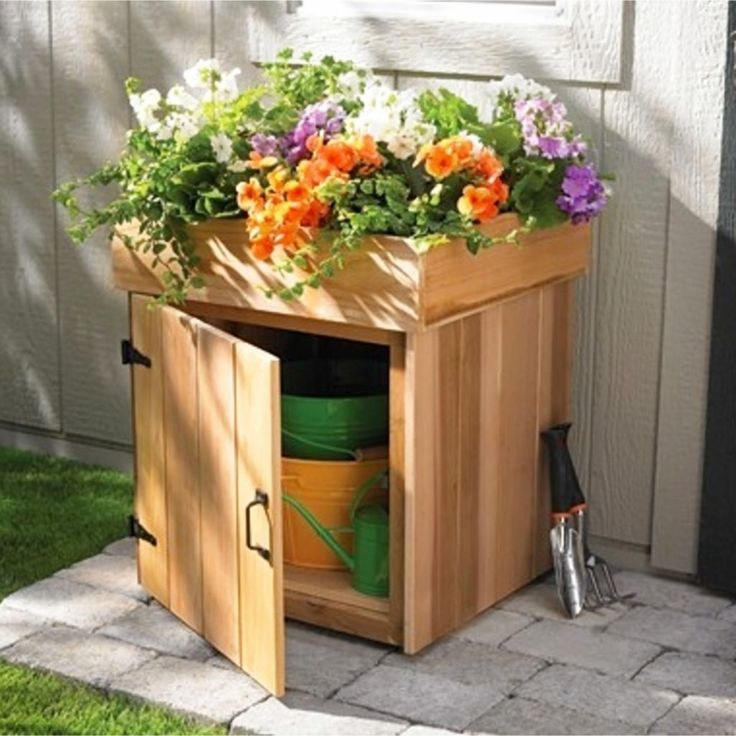
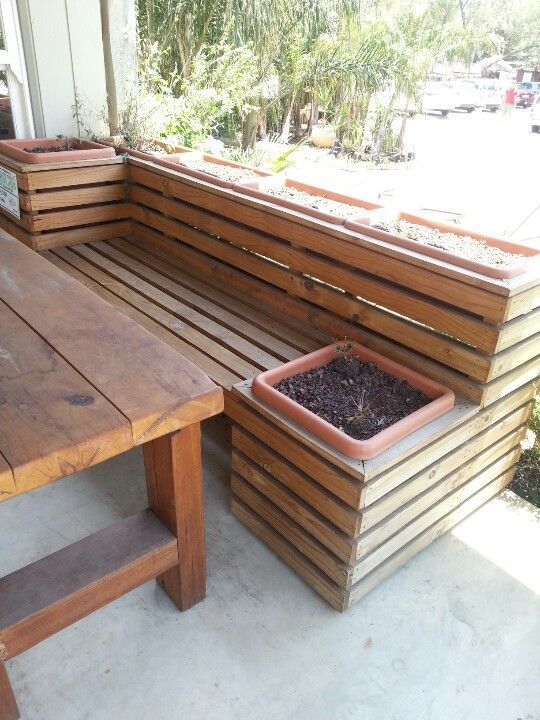
The raised bed boxes are great by themselves, or the perfect compliment to our bucket planter boxes pictured above.But perhaps best of all, raised beds require far less weeding and maintenance than a traditional garden. And wait until you see how easy they are to build!
Last year, when we introduced our 2×4 5 Gallon Bucket Planters, we never imagined how many people would discover container gardening.
So much so, that many asked if we could create a raised bed design to match that would allow for even more simple, low-maintenance growing.
At 18″ deep, the Raised Beds allow plenty of soil depth for strong root growth. The height also makes it easy to maintain the beds without having to bend all the way down to the ground.So we went to work on designing something that would be easy to build and easy on the budget. In addition, we wanted it to be able to look great by itself, or with the bucket planters too!
Each 3′ x 6′ raised bed allows for 18 square feet of planting surface. They are perfect for growing vegetables, greens, planting an herb garden, or growing all kinds of flowers.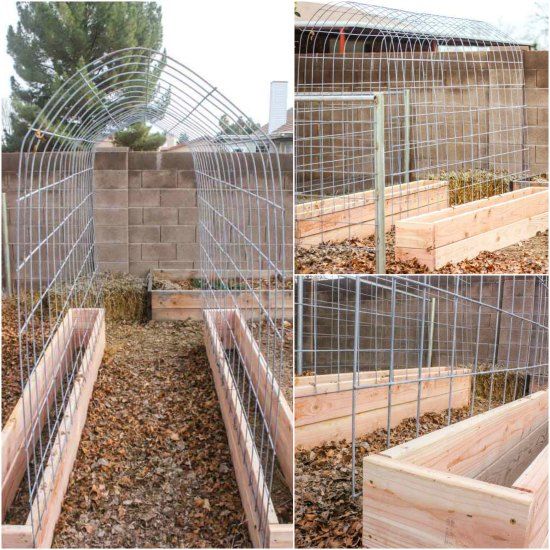
The 18″ depth of the unit allows for deep roots, which is ideal for growing large vegetables like heirloom tomatoes and peppers. Build several together, and you can have quite the outdoor garden!
The raised beds, much like our 5 gallon bucket planter boxes pictured above, is another great way to grow vegetables and flowers without a traditional garden.How To Create The DIY Raised Beds
The raised beds are easy to create with the most basic of tools. In fact, all you need is a tape measure, a drill, drill-driver and a saw. (You can see the complete step by step plans in our Etsy shop here : DIY Raised Bed Plans)
The beds use just (3) 2 x 6 x 12’s, (2) 2 x 6 x 10’s, and (5) 2 x 4 x 8 boards to create the entire unit. Although traditional untreated lumber works great, you can also substitute rough-sawn or even cedar if you wish.
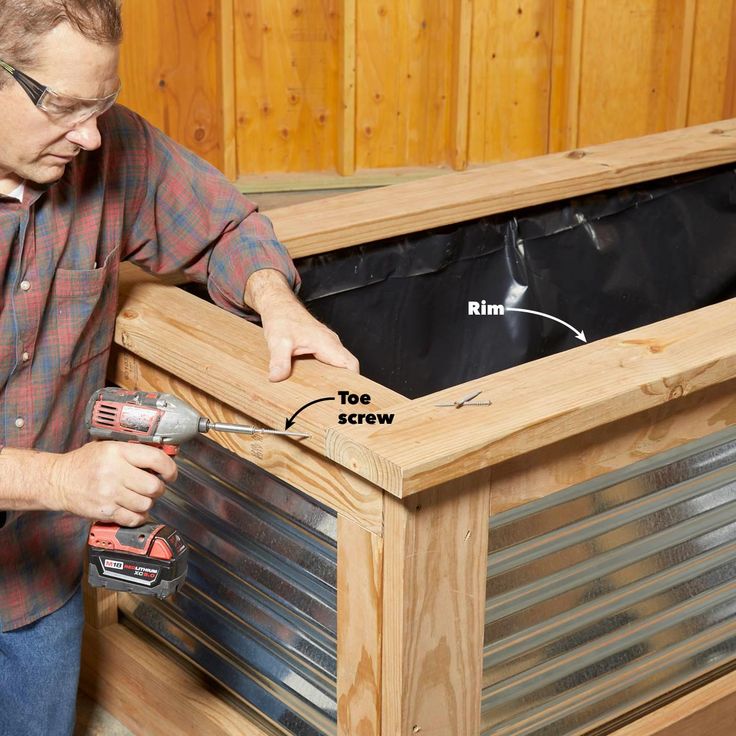
To create the garden boxes, three frames are created and then stacked together. The raised bed box is then assembled with 2 x 4 bed posts and an attractive top cover.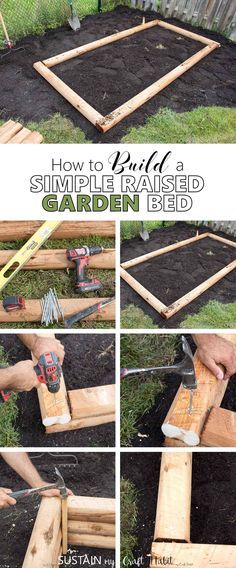
We prefer using traditional lumber and untreated rough-sawn simply for cost. And because neither contain harmful additives, there are no worries when growing vegetables or herbs.
As for the long term durability of untreated pine, it actually holds up reall well over time. Especially if you stain, seal or paint the exterior edges that do not come in contact with the soil.
Rough-sawn wood will even add a longer shelf life. The non-smooth surface is a naturally protective barrier that holds up even longer to the elements.
Rough-sawn wood adds an extra layer of protection that can keep it from rotting out for a longer period of time. The rustic look also goes well in gardens.With the thick 2x construction, these DIY raised beds will hold up for years and years. Unfortunately, many of the raised beds available in stores use 1x material, which simply won’t hold up well over time.
Completing The Project
After cutting all of the lumber to size, assembling it together is a snap.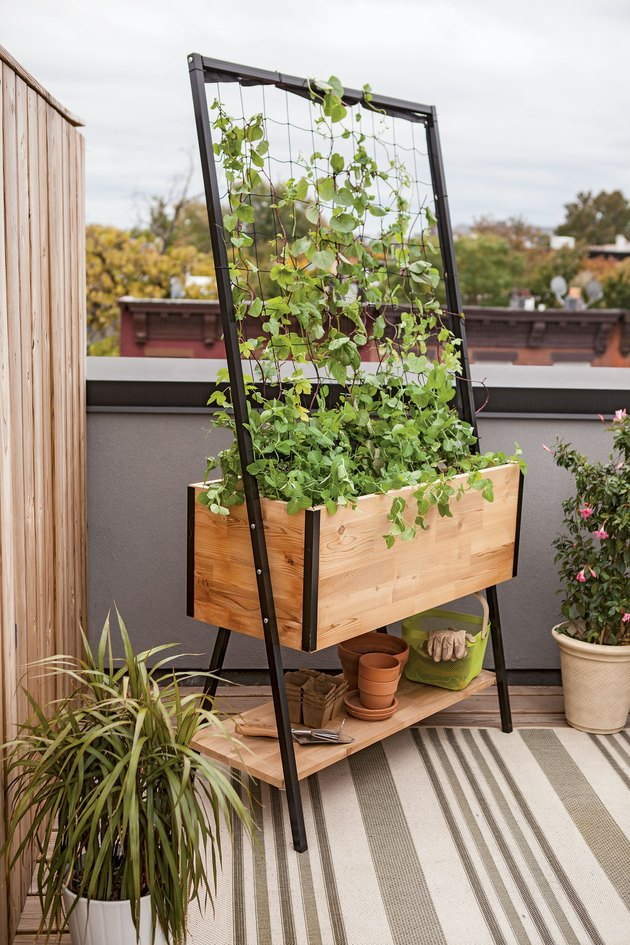 The 2×6 boards are placed together into a rectangle, and 2×4’s are then attached around all of the corners and mid-sections.
To complete it all, a 2×4 decorative top rail is placed on top! Not only does it serves as a nice finish for the piece, it also helps shed water off of the exposed leg posts, helping to keep the piece stronger over time.
You can then paint, stain, or leave the exterior of the DIY Raised Bed Boxes to weather to a natural grey. Then, simply fill them with soil and organic matter – and plant away.
Here is to creating your own DIY raised beds – and growing like never before next year! Happy Container Growing – Jim & Mary
As always, feel free to email us at [email protected] with comments, questions, or to simply say hello! You can sign up for our free email list in the subscribe now box in the middle of this article. Follow us on Facebook here : OWG Facebook. This article may contain affiliate links.
How To Build DIY Raised Garden Boxes and Beds
907 shares
- Share
- Tweet
Learn how to build large DIY wooden planter boxes for all of your vegetable growing needs.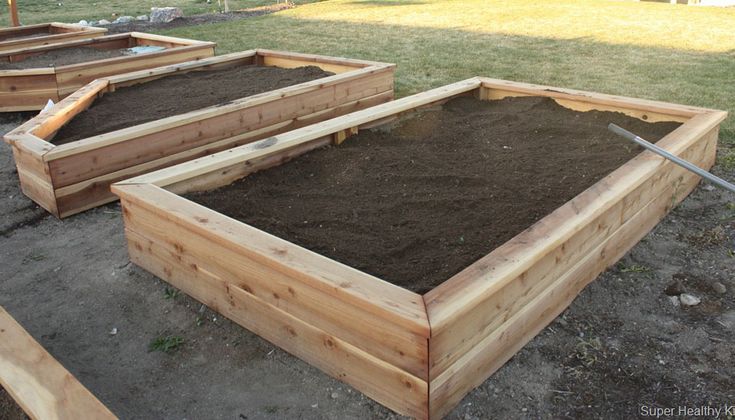 This outdoor DIY project is the perfect way to test out your green thumb.
*Disclosure: I only recommend products I would use myself and all opinions expressed here are our own. This post may contain affiliate links that at no additional cost to you, I may earn a small commission. Read our full privacy policy.
As we have talked about in previous posts, we really have been trying to update our backyard. We have added a DIY playset with a rock wall, a new porch and now had a great idea to add DIY raised planter boxes and raised garden beds.
Even though we are not professional gardeners, we thought container gardening would be a good idea for our yard. We hoped planter boxes would be a great solution to help grow our tomatoes, pepper, herbs, and whatever else we want to try our green thumb at.
Why build raised garden boxes?
- Boxes provide better drainage
- Great way to add to your backyard landscape or decor in your outdoor space
- Contain your plants (we have had years when our Mint has just taken over the bed on the side of the house)
- Looser soil allows room for roots to grow
- Easier on your back and knees
- Keeps animals out
In our backyard, we wanted a space that was specifically for growing vegetables and for our herb garden.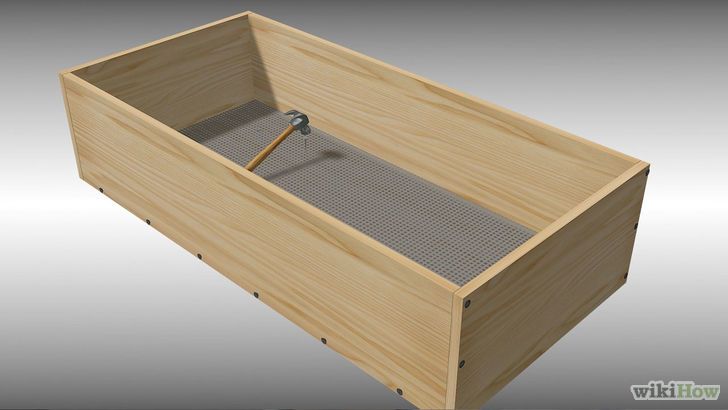 We also knew that the looser dirt in a raised garden bed would help our plants thrive.
In the past, our traditional garden has been on the side of the house. It was really hard to maintain and take care of. Adding planter boxes to our backyard would make it easier to take care of our garden while our kids were playing.
These raised garden beds or boxes also will make it easier on our backs this year. This is a huge plus.
And hopefully, that means my husband may actually weed and help take care of things.
Can you build raised garden boxes on a hill?
This was our biggest planter box design challenge. The place we wanted to build our raised garden beds was on a slight hill. Some of the steps we took (like setting the posts) would not have to be done if you are on a flat surface.
Our DIY planter box plans & dimensions
First, you will need to decide on the dimensions of your planter boxes. Here will talk about ours that were 7’0” long x 42” wide x 33.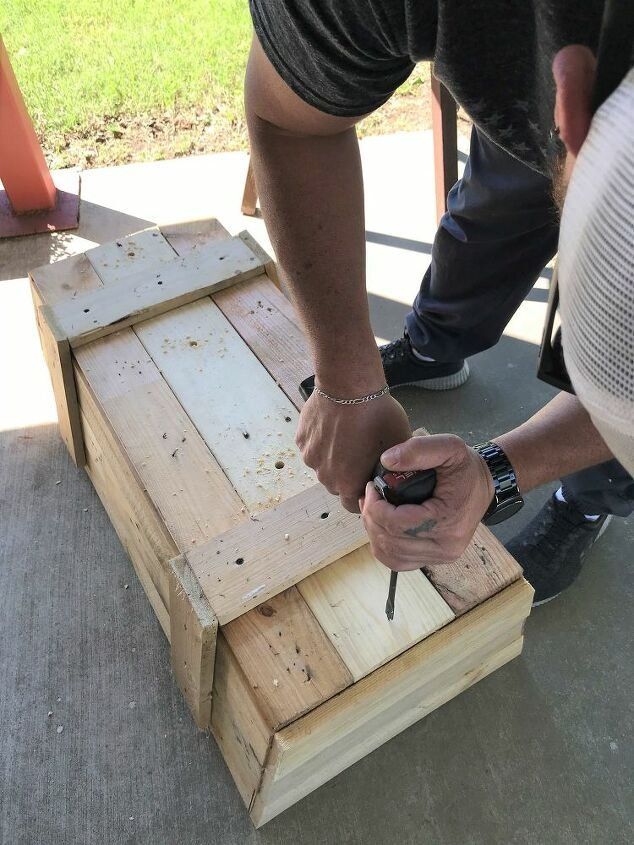 75” tall cedar planter boxes.
How To Build Cedar Planter Boxes & Beds
Recommended Supplies
- (3) 4” x 4” x 8’ Cedar posts (for our updated design)
- (10) each 1” (thick) x 12” (wide) x 8’ (long) Cedar boards
- (1) Cedar 2 x 4 x 8’
- 2.5” stainless steel screws
- Weed fabric
- Aggregate – #57 washed river rock or #57 limestone
- Bagged concrete (is setting posts because your boxes are on a hill)
Tools Needed
- 4’ level
- Speed square
- 1/8” drill bit
- Screw gun
- Drill
- Circular saw
- Sawhorses
- Wood clamps
- Staple gun
- Wheelbarrow
- Shovel
- Post Hole Digger
Note for our updated design you would need 6 posts.
Notes about actual measurements for posts and boards
- Posts really measure 3.5 ” x 3.5” x 8’
- Boards really measure 11.25 wide x 0.75” thick
- We purchased ours from the lumber yard, but here is a similar board
Why did we choose cedar for our planter boxes?
We chose to use cedar for our outdoor raised vegetable garden beds. Some people will use pressure-treated wood (as explained in this HGTV article), but we wanted our wood to be as natural as possible when dealing with growing vegetables that would be feeding our family.
Is there a cheaper cedar that you use to make your garden planters?
Instead of kiln-dried cedar boards, you could get a much more rustic look using cedar fence pickets. This is such a great option as it is a much cheaper way to create DIY planter boxes with untreated wood.
These fence pickets would still also naturally be rot-resistant. You would just need to cut the dog-earred fence part off to get an even board.
Can’t you just buy raised garden boxes?
Before we decided we were going to make this a DIY outdoor project, we did look into purchasing raised planters, boxes, and garden beds.
- Smaller Raised Garden Box on legs: This Amazon best-seller is a great starter planter box that you could fit in multiple places.
- 4ft Vertical Garden Bed-5 Tiers for Indoor and Outdoor Growing-This gardening item was very intriguing.
- Unfinished Cedar/Natural Raised Garden from Lowe’s-This would be great if you only wanted a smaller raised garden box.
- 4 ft. x 8 ft. Original Raised Garden Bed from Home Depot-Depending on the height you want for your raised garden beds, this one might be a good option.
- 20″ x 7″ Wood Box Planter Stand from Target- I love the look of this smaller and modern raised planter. I am not sure if it can go outside, but it sure would look cute on my screened-in porch with herbs in it!
Need more DIY outdoor inspiration? Here are 22 unique and fun DIY planters to add to your backyard.
Step-by-step instructions for creating a large planter box
One thing to note is we built a 3rd garden raised box and tweaked the design a little to add two more posts in the middle.
You will see “updated design” throughout this post to include those instructions and plans.
Our third planter box or updated design is 2 ft. longer and we wanted to ensure the stability of the box.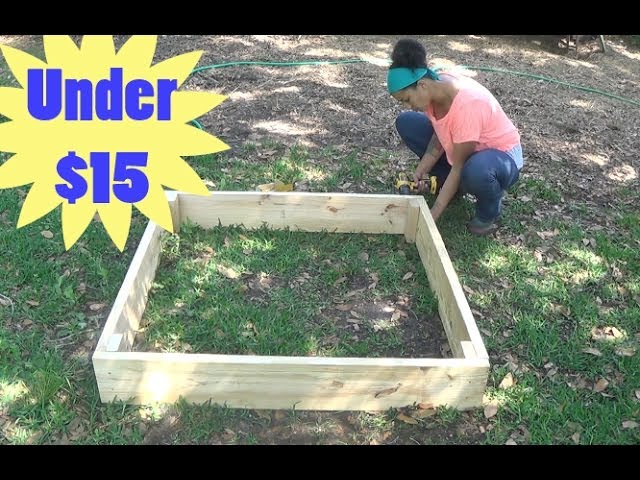 We think this is the way to go now for even the smaller boxes (even though ours have held up for the past 3 years).
You can see more information about this at the end of the post.
1. Cut boards to size. Our posts were 4’ long, our long sideboards were 7’ 1.50”, and our short sideboards were 42”.
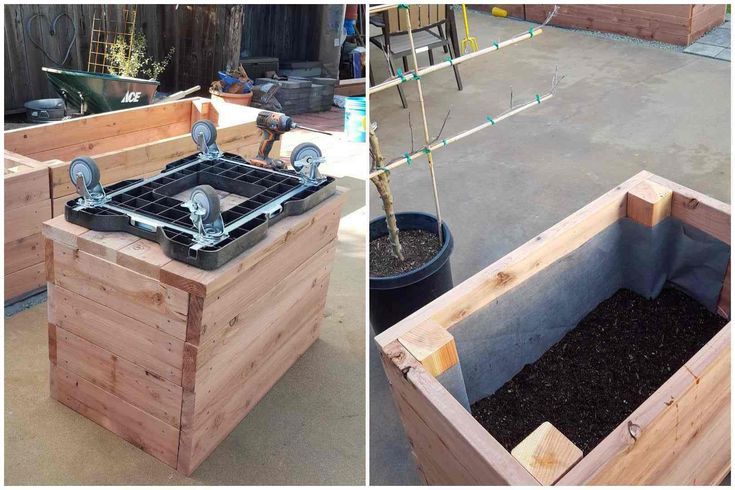
2. Pre-drill pilot holes in your 1 x 12 boards. Attach a clamp to the post and cedar board to help keep wood in place while building your raised garden boxes.
3. Screw long sides standing upright. You will need to determine if you want the finished (smoother) side facing out or in. You will repeat this step two times. Our 1 x 12 boards are 3”s above the top of the posts to leave room from the top of the board to the top of the dirt and mulch.
For extra support add a post in the middle of the boxes.4. Flip screwed boards upside down, on a flat surface with the bottom of posts facing up. Updated design: Add another set of posts in the middle of the wooden boards for extra strength.
5. Attach 42” section. Try to make sure the connection is square (we know that is easier said than done)!
6. Flip assembled rectangular garden box right side up with the boards on top.
7. Attach cedar 2x4s inside face splitting board joints in half. This will also allow one person to be able to move the planter boxes.
Updated design: attach the 2 x 4’s to the posts in the middle.
8. Dig four post holes using a manual post hole digger or a shovel. Or if you know you will be doing more outdoor DIY projects, you may want to get an electric post hole digger.
This does take some time, but if you build large boxes as we did you will want to do this.
Update design: Dig six post holes for the extra cedar post you added in the middle.
9. Set the planter box in holes. Since we are placing our garden boxes on a slight incline in our backyard it was important that we set the posts so that the box would not tip over. This also will help them stay level.
10. Place 4’ level on top of the boxes and level by raising and lowering the boxes in the post holes.
11. Mix and place bagged concrete in or by a wheelbarrow. Follow the instructions on the pack of ready mix concrete.
12. Fill holes to set posts in the ground with the mixed concrete to set the post. Make sure to let the concrete cure overnight.
13. Rip extra cedar wood to fill empty spots if your ground is uneven like ours was and attach it to the posts.
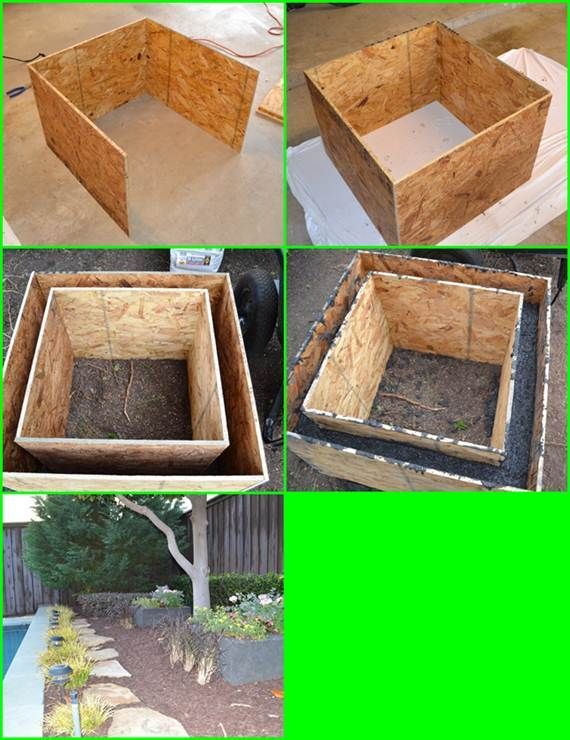
*****Please note, from the comments we have received we believe that people are not doing this step. I am sorry that we did not have a picture up of this until now, but hopefully, this will help. You have to create a barrier for the dirt to not come out. The weed barrier alone will not be able to handle the weight of dirt, etc on its own.
This is our garden box after 1 and 1/2 years. We live in a climate that changes and sees all seasons.Optional: You could figure out how to build some sort of base inside your box to help hold the dirt.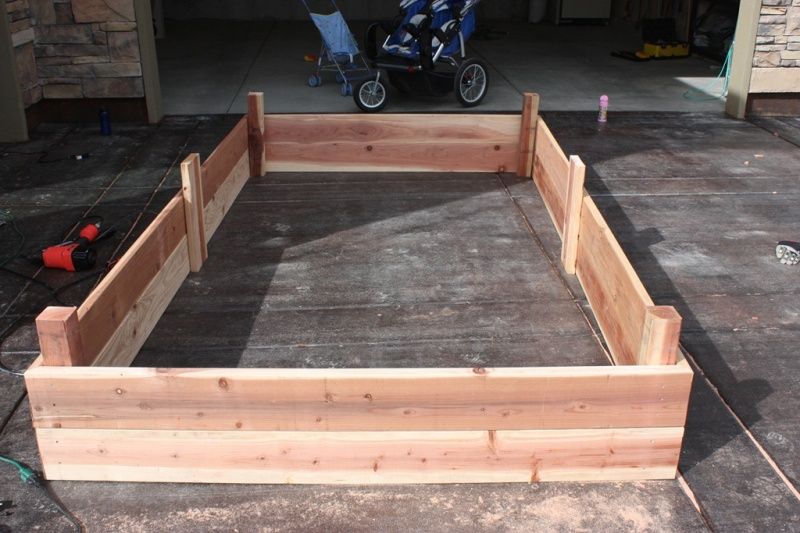 We just felt we could rip the wood to fill that empty space and hold the materials inside the box.
Tips for using ready mix concrete to set posts
- When mixing concrete, do not add too much water. It is better to be a little dry than too wet.
- Wear gloves when mixing concrete in order to avoid getting concrete burn.
Do your planter boxes have to be as big as ours?
No, definitely not. We would have still gotten the benefit of having a simple design even if we would have made them two boards high instead of 3.
My husband really wanted to make sure that it was easy to reach everything and keep the animals out. In two years, we have been lucky that we haven’t had any extra nibbles on our vegetables.
How to prepare raised garden boxes for plants
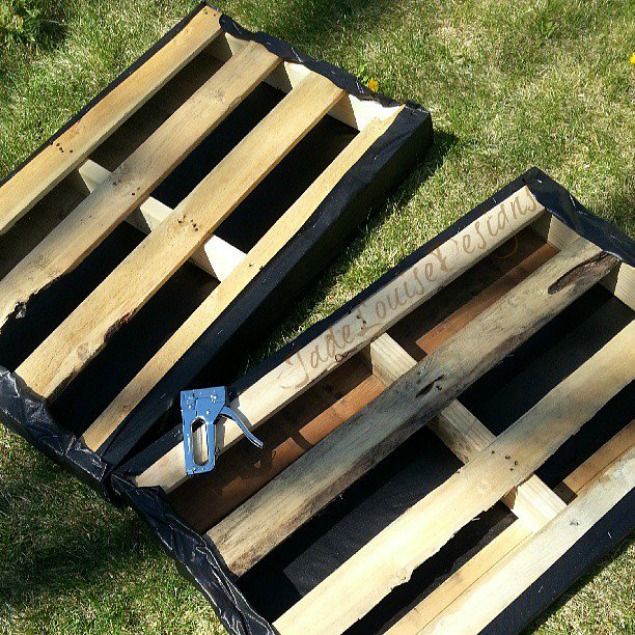
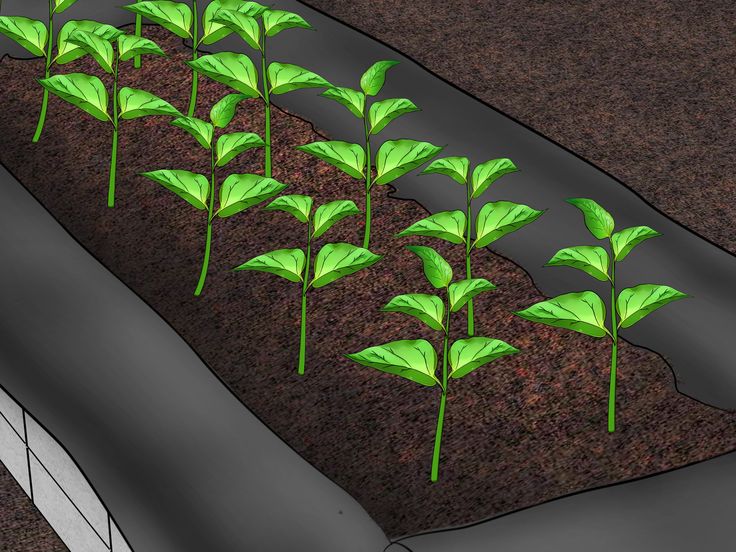
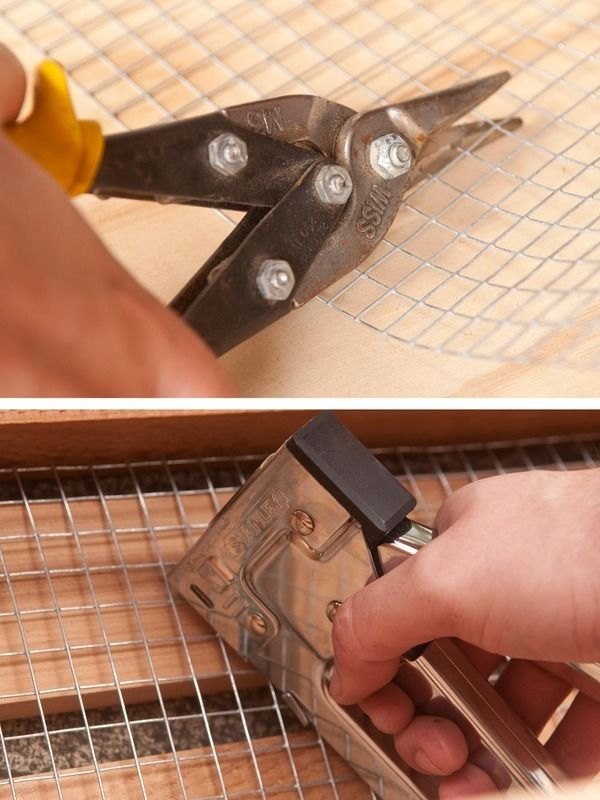
1. Put the weed barrier inside the bottom of the box.
2. Roll up the inside face 6 inches and staple it to the inside of the bottom of the box using a staple gun.
3. Place 11 inches high of materials that promote drainage.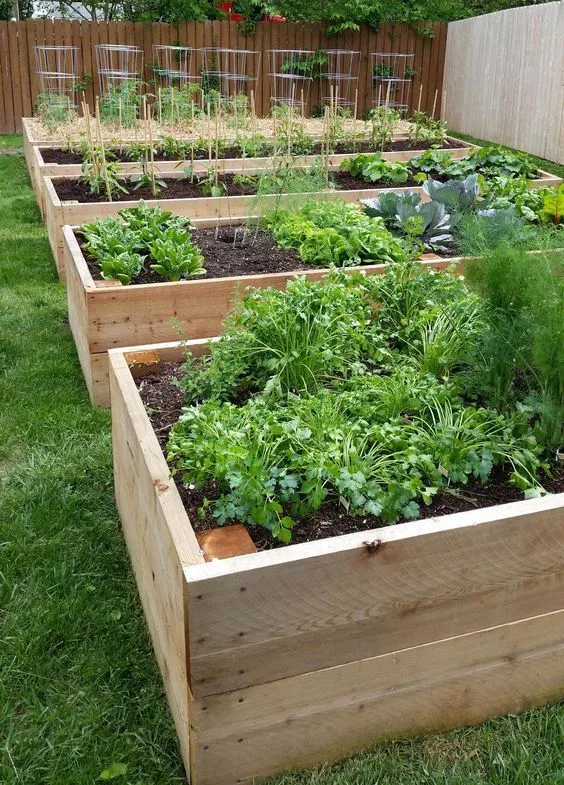 We used old bricks in one and landscape pavers and #57 washed river stones. We have seen other garden bloggers use other organic materials like logs to help fill their planter boxes.
4. Place 24 inches of topsoil and garden mix soil. Our son sure loved helping with this process. It does take time, but we love doing things ourselves. Depending on the size of your boxes, will depend on how much soil you need.
Tip: We used a local landscape supply company as you need a lot of dirt to fill your planter boxes. Most areas should have a company willing to deliver soil right to your driveway.
5. Place 2 inches of hardwood natural mulch on top of the dirt in your raised garden box.
6. Plant your garden accordingly. We plan on planting tomatoes, green beans, pepper plants and herbs in our raised garden beds. You will have to check back and see how our plants do this year!
Companion Gardening
You may want to check out this article about companion planting from the Farmer’s Almanac and how to choose what to plant next to each other in your garden boxes.
Or check out this post from DIYDanielle about easy plants to grow outside. If our vegetables don’t do well this year, I may need to revisit this list next year!
Future Plans
Next year we hope to try to start composting and add another raised garden bed. We will test our green thumbs out this year and see how we can add and improve our garden each year.
Here is an example of our updated raised garden box idea.How did we improve on the original DIY planter box design?
- Add a post in the middle of your boxes and not just in the corners.
- Attach the middle 2 x 4’s to the middle posts for extra stability.
- Used bricks on top of the weed barrier to help contain any materials leaking out. Our old boxes never had anything come out, but we really ripped the diagonal cedar to match our hill.
- Built this garden box on-site in the backyard instead of in one piece in the garage and carrying back to the site.
Follow us on Pinterest, Youtube or Facebook for more DIY inspiration!
We just love our new DIY planter boxes and can’t wait to see how much fun we can have growing in our own garden!
planting and care in the open field, reproduction and transplantation, photo
Author: Elena N.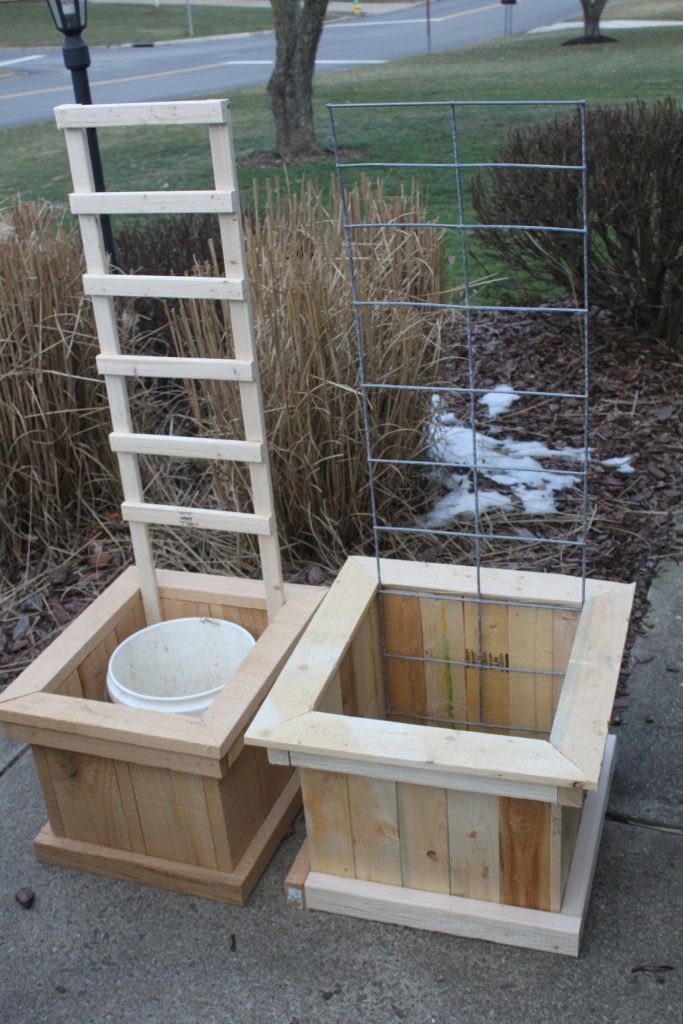 https://floristics.info/en/index.php?option=com_contact&view=contact&id=19 Category: Garden Plants Returned: Last amendments:
Content
- Listen to article
- Planting and Care for the Sanctular
- Botanical Description
- Planting Besshita
- When to plant
- 0007
In cultivation, the boxwood tree, one of the oldest ornamental plants, is grown as a pot and horticultural crop. In warm areas, boxwood bushes are used not only as hedges and borders - picturesquely formed boxwood bushes adorn gardens and lawns.
Boxwood at home is the most popular bonsai crop because it can grow in a small container, bushes well, has small leaves and tolerates pruning.
Listen to article
Planting and caring for boxwood
- Planting: from mid-September to early October, but if necessary, in spring and even summer.

- Flowering: the plant is grown as an ornamental leaf.
- Lighting: shade or partial shade.
- Soil: any, but better calcareous, loose and well fertilized.
- Mulching: at the beginning of May with a layer of organic matter 5-8 cm thick.
- Watering: after planting, the first watering is in a week. In the future - regular watering at the expense of 1 bucket of water per meter-high bush. In drought, watering is carried out according to the same scheme, but the consumption is doubled.
- Top dressing: after planting, fertilization is applied no earlier than a month later. In the future, during the period of active growth, organic matter and complete mineral fertilizers are introduced into the soil, and in the fall - only the potassium-phosphorus complex.
- Pruning: in April or early May.
- Propagation: often by cuttings, but also by seeds.
- Pests: boxwood gall midges, psyllids, moths, scale insects, false scale insects, mealybugs, felt mites, spider and gall mites.
- Diseases: root rot, rust, shoot necrosis, cancer.
Read more about growing boxwood below
Botanical description
The leaves of boxwood are opposite, entire, leathery, elliptical or almost round. The flowers are fragrant, small, unisexual, collected in axillary inflorescences. The fruit is a three-celled capsule that cracks when ripe and scatters shiny black seeds. Boxwood is a honey plant, but boxwood honey should not be consumed, since all parts of the plant are poisonous. Boxwood is valued by landscape designers for its beauty of the crown, shiny leaves, and ability to tolerate pruning well. Gardeners, among other things, appreciate decorative boxwood for its unpretentiousness and shade tolerance.
Planting boxwood
When to plant
If you follow the popular wisdom that plants that bloom in spring are best planted in autumn, and vice versa, it is better to plant boxwood in autumn, from mid-September to early October, giving it a month before the onset of cold weather for rooting. Although some gardeners successfully plant boxwood in early spring and even summer. It is best to plant a plant in a semi-shady or shady place, in clay, moist and permeable soil containing lime. In the bright sun, boxwood leaves are quickly damaged.
How to plant
Boxwood seedlings with a closed root system should be watered abundantly the day before planting in open ground to make it easier to remove the root system with an earthen clod from the container. It will be even better if you can take out the seedling and immerse its roots in water for a day. The pit for boxwood should be approximately three times deeper and wider than the earthen clod with the roots of the seedling.
 A drainage layer of perlite 2-3 cm thick is placed at the bottom of the pit, the earth taken out of the pit is also mixed with perlite in equal parts. The roots of the seedling are straightened, placed in a hole, and the roots are gradually covered with a mixture of soil and perlite, trying to avoid the formation of air cavities.
 After filling the hole, lightly compact the soil and water the seedling with settled rainwater (if the seedling is 15-20 cm high, you will need 3 liters of water). When, after watering, the earth in the pit sags, add more soil mixture, but do not compact it. The trunk of the boxwood should be strictly vertical. At 20-30 cm from the stem, pour a low earthen shaft around the circumference so that during further irrigation the water does not spread, but goes deeper, and cover the near-stem circle inside the circle with a layer of perlite 1-2 cm thick.
Caring for boxwood in the garden
Growing conditions
Growing boxwood is not at all troublesome, and if you do not know how to care for boxwood, follow the general rules of gardening and simple logic.
 After planting, if there is no rain, water the boxwood in a week. Water consumption during further irrigation is approximately one bucket per meter-high plant. Water must be poured inside the circle that you marked with an earthen roller. Boxwood should be watered in the morning or in the evening, and during drought or dry hot winds, boxwood should not be watered more often, but more abundantly.
 After watering, be sure to loosen the soil, at the same time removing weeds from the plot. In early May, when the earth is already warm enough, the near-stem circle of boxwood is mulched with a layer of peat 5-8 cm thick, but in such a way that the mulch in no case comes into contact with the shoots and trunk of the boxwood.
- Reproduction of boxwood in the fall - how to properly separate the stalk and where to plant it so that it takes root successfully
Boxwood care requires regular feeding of the plant. The first time boxwood is fertilized only a month after planting, if you planted it in the spring, since only a rooted plant can be fertilized.
 Later, during the period of active growth, complex mineral fertilizers or organics are introduced into the soil, and in the fall, for digging into the soil, only those fertilizers that contain potassium and phosphorus are applied, since the plant does not need nitrogen in autumn and winter.
 Transplanting
Transplanting boxwood is best done in spring so that the plant has time to take root safely and prepare for winter. Mature plants need to be transplanted along with a clod of earth. Boxwood transplantation is carried out according to the same principle as the initial planting, and if you do everything right, the plant will endure the procedure painlessly.
Shearing
Boxwood is pruned in April or early May. You can form a boxwood bush in the form of a geometric figure - most often these are cubes, cones or balls. You can grow boxwood in the form of a standard tree, leaving only the central, strongest shoot on it, and cutting out all the rest at the root.
 Young shoots growing in the upper part of the central shoot of the bole are usually given the shape of a ball. Once a plant has been formed, you only need to slightly adjust the shape, since boxwood grows very slowly.
 When correcting, usually only young growths are pruned, it can only come to pruning old wood if the bush has completely lost the required shape. Boxwood tolerates a haircut very easily, and it gets thicker the more often you cut it. Professionals recommend adjusting the boxwood crown monthly. However, keep in mind that the more often you prune a boxwood, the more often you will need to water and feed it so that it can make up for the loss of nutrients delivered to it by the cut leaves.
Pests and diseases
The main enemy of the plant is the box midge, which lays its eggs in early summer in young leaves at the ends of shoots. The hatched larvae eat into the tissue of the leaves and winter there, and in May, adult insects appear from their pupae. If the occupation of boxwood gall midge is total, its leaves dry and fall off.
 The fight against boxwood gall midge is carried out with the following drugs: Aktara, Karbofos, Fufanon, Tagore. If after one treatment you did not notice any improvement, repeat the spraying after ten days. The same insecticides will help you in the event of the appearance of felt on the boxwood, the vital activity of which is manifested by swelling on the leaves and withering of the shoots. The spider mite, which appears on the plant in severe dryness, is also destroyed by the listed drugs.
 Boxwood suffers from necrosis of shoots, accompanied by death of the ends of branches and spots on the leaves. This disease is treated with fungicide treatment, and possibly repeated. Worst of all, if boxwood strikes cancer. If this happens, cut off the affected areas of the plant, grabbing healthy wood, and treat the wounds with Fundazol.
Boxwood in Moscow and the Moscow region
Planting and caring for evergreen boxwood in Moscow and the Moscow region is not much different from the agrotechnics of the plant in other regions with a temperate climate.
 However, in places where winter frosts are very strong, one should not neglect the measures to prepare boxwood for winter. For information on how to ensure a successful wintering for the plant, read the appropriate section.
 - Skumpia: growing in the garden, types and varieties
Propagation of boxwood
Propagation methods
Most often, boxwood is propagated vegetatively, but sometimes the seed method of propagation is also used. The problem is that boxwood seeds lose their viability very quickly, but if you want to try growing a bush from a seed, use our recommendations.
Growing from seeds
Fresh, just ripened seeds are soaked for a day in warm water with a growth stimulator - Epin or Zircon. Then they are laid out between two damp (not wet) towels or napkins and wait until white sprouts appear - this usually happens after a month, and all this time you must keep the fabric in which the seeds lie moist. If sprouts do not appear within 2-3 weeks, place the seed towels in the vegetable drawer of the refrigerator for a few days, and then move them back to a warm room.

After the appearance of white sprouts, the seeds are sown in a mixture of peat and sand in equal parts, directing the sprouts into the soil, and cover the container with glass or film. The container is kept in a warm place in partial shade and shoots are expected, which should appear within two to three weeks. As soon as green sprouts hatch, the film or glass is removed, the container is rearranged in partial shade. Seedling care consists in watering and fertilizing young plants with fertilizers of a weak consistency. Strengthened and grown seedlings are planted in the ground after the return frosts have passed.
Propagation by cuttings
Spring cuttings of boxwood is the most common method of propagation of this shrub. For cuttings, young, strong, but not completely lignified shoots 10-15 cm long are harvested, which are cut obliquely, and, having removed the leaves from the lower third of the cutting, soaked for a day in a root-forming solution.
 Then the cuttings are washed and planted in open ground with approximately the following composition: old, long-rotted compost or humus, leafy soil and sand in equal parts.
 The composition may be different, as long as the soil is light and nutritious.
Bury the cuttings into the substrate up to the leaves and cover each with a 5 liter plastic bottle with a bottom cut out. In order to water the cutting, you will need to unscrew the cap of the bottle and sprinkle water from the spray bottle inside. In the same way, cuttings can be aired daily. Roots begin to form in a month, and after two, a root system will already form at the boxwood, and the bottle can be removed. Do not forget to cover the cuttings with spruce branches in the first winter, otherwise they will die.
You can also propagate boxwood by cuttings in autumn, but you need to plant them in pots, because before winter they will not have time to take root and get stronger, so they will probably die even under cover.
The cuttings must be brought into a room with a temperature of 10 ºC, where they will wait out the winter cold, and in the spring they are planted in a permanent place.
- Underestimated and beautiful skumpia - how to grow this shrub
Layer propagation
This is another reliable and proven method of vegetative propagation. In spring, boxwood shoots are bent to the ground and dug in. All summer they are watered and fed along with the mother bush, and when they take root and grow, they are separated and planted in a permanent place.
Boxwood in winter
Autumn work
Winter is the most difficult period in boxwood cultivation – the evergreen shrub is very sensitive to cold temperatures. In addition, the dormant root system does not provide the shoots and leaves of boxwood, awakening to life at the first ray of the sun, with moisture and nutrition, which makes them dry. That's why it's important to plant boxwood in the shade. And that is why it is so important to take all the necessary measures to prepare the boxwood for the winter.
Immediately before the onset of frost, in early November, it is necessary to conduct a plentiful winter watering of boxwood, which will saturate the plants with moisture for the long winter months. After that, you need to mulch the trunk circles with rotted needles or peat. Dry leaves are not suitable for this, because in wet winters they can support and provoke the development of fungal diseases in boxwood.
Boxwood shelter for the winter
When the air temperature drops to -10 ºC, start organizing the boxwood shelter. Before you cover the boxwood for the winter, standard plants need to be tied to a support so that heavy snowfall does not break the trunk of the boxwood. After that, the bole should be completely wrapped with non-woven material or tied with spruce branches. In adult boles, the trunk can be whitewashed, then only the crown of the plant will need to be tied with a cloth. A boxwood border or hedge also needs shelter - they are completely covered with two or three layers of non-woven fabric or burlap, which are fixed by sprinkling the edges with earth.
 But first, boxwood bushes need to be tied up - large masses of wet snow can break its branches.
 Rooted cuttings and young boxwoods are tied with spruce branches, mulching near-stem circles with peat or coniferous needles. They remove the shelter as soon as spring comes, otherwise the boxwood can rot in the heat. They do it on a cloudy day, and not everything is removed by coniferous paws and layers of fabric - leave one layer of burlap, lutrasil or spunbond and some spruce branches to shade from too bright spring sun. It is necessary to accustom boxwood to spring gradually.
Types and varieties
There are not many types of boxwood grown in cultivation, but it has very attractive garden forms that we want to introduce you to. So:
Evergreen boxwood (Buxus sempervirens)
Widespread in nature in the Mediterranean and the Caucasus, where it prefers to grow in the undergrowth of deciduous and mixed forests, even in dense shade. This tree is up to 15 m high, much less often - a shrub.
 The shoots of this species are straight, tetrahedral, densely leafy, green. The leaves are opposite, almost without petioles, glabrous, shiny, dark green on the upper side of the plate and dull light green, even yellowish, on the bottom. The shape of the leaves is elongated-elliptical, the length is from 1.5 to 3 cm. Small unisexual greenish flowers are collected in compact capitate inflorescences. The fruit is a small globular capsule with wings that open when the seeds ripen. All parts of boxwood evergreen are poisonous! Best grades:
 - Thuja: cultivation, reproduction, types and varieties
- Suffruticose is an evergreen shrub, slowly growing strictly vertically up to 1 m in height. The leaves are ovate or obovate, opposite, up to 2 cm long. The flowers are small. The plant is ideal for hedges and borders;
- Blauer Heinz is a squat, slow growing shrub with stiffer stems than Suffruticosa and leathery bluish-green leaves.
 This is a relatively new variety, which is used to create carpet ornaments no higher than 20 cm. It is more compact and frost-resistant than the previous variety;
 - Elegance is a dense shrub with a spherical crown up to 1 m high with straight densely leafy shoots and oblong variegated leaves with a white border. Drought tolerant.
Small-leaved boxwood (Buxus microphylla)
Unlike evergreen boxwood, this species is much less sensitive to winter frosts. This is a Korean or Japanese descendant of boxwood, which withstands thirty-degree frosts without shelter in winter, but nevertheless needs shelter from the bright spring sun. The most popular varieties in cultivation:
- Winter Jam is a very frost-resistant boxwood variety with a dense crown, which is great for creating small topiary forms. Handles pruning well. A fast-growing variety rare for boxwoods, reaching a height of 1.5 m;
- Faulkner is a compact, slow-growing shrub up to 1.
 5 m high, most often its bushes are pruned in the form of a ball, which favors the natural growth of the crown.
Colchis or Caucasian boxwood (Buxus colchica)
Slow-growing relic of the Tertiary period, which is the smallest and most winter-hardy European boxwood species. This species lives up to 600 years, reaching a height of 15-20 m, trunk diameter at the base - 30 cm. It comes from the Balearic Islands, southern Spain, Portugal and the Atlas Mountains in northern Morocco. This is the largest-leaved species of the Euro-Asian range: a leaf of Balearic boxwood reaches a length of 4 and a width of 3 cm. It grows quickly, has extremely high decorative qualities, but, unfortunately, is not at all winter-hardy.
There are several other types of boxwood that can be cultivated in our climate, but so far they are very rare in our gardens.
Literature
- Read related topics on Wikipedia
- Peculiarities and other plants of the boxwood family
- List of all species on The Plant List
- More information on World Flora Online
Salpiglossis: growing from seeds, types and varieties
The most beautiful shrubs for a summer cottageSections: Garden plants Garden perennials Garden shrubs Garden trees Garden medicinal and deciduous plants Plants on C Boxwood
This article is usually followed by
Add a comment
Boxwood: planting, propagation, care secrets
Boxwood is one of the oldest ornamental plants that has been and is used in landscape design for landscaping areas and creating hedges. This is an evergreen plant, so even in snowy and frosty winters it pleases with its impeccable appearance.
Types of boxwood and their distinctive features
The genus Boxwood includes about 30 species of plants that grow in the Mediterranean and some regions of Asia.
 Each species has a set of unique features that distinguish it from the rest: the color of the bark, the shape and color of the leaves, the distribution area, and the intensity of growth. In horticulture, evergreen or common boxwood (Buxus sempervirens) is used. As for the cultivation of tub plants, here the most suitable options are Chinese undersized species.
 Evergreen boxwood naturally distributed in the Mediterranean countries and the Caucasus. Feels good both in partial shade and in the sun. If not pruned, it can reach up to 3 meters in height.
Small-leaved boxwood , unlike its previous relative, is less sensitive to winter cold. He is able to withstand frost of 30 degrees without shelter. It is valued for its compact shape and decorative crown.
Balearic boxwood is the largest species of the family, its leaves reach up to 5 cm in length. The Balearic Islands of Spain are considered the homeland of habitat.
 Distributed in the mountains in southern Spain, Portugal and the Crimean coast.
 Planting
To plant boxwood, you do not need any special skills and knowledge in the field of gardening. For transplanting plants older than three years old, any time of the year is suitable, from early spring to late autumn. Younger plants are best planted in the fall season.
When choosing seedlings, try to buy only container options. Pay attention to the color of the leaves and shoots, they should be green and lush. Yellow spots on the leaves indicate that the plant will soon die.
Planting is best done on a cloudy day. Dig holes in the prepared area of the earth, slightly wider and deeper than the root of the seedling. You can focus on the size of the container in which the plant was located. If you plan to plant several bushes to form a hedge or border, dig a wide and deep ditch.
At the bottom of the trench, it is necessary to cover a layer of compost 10-15 cm high and mix it with the ground using a fork.
 When preparing seedlings, make sure that the roots are straightened and do not stick out on the sides.
 After the bush is covered with earth, form a depression around the trunk to collect water. The plant must be watered thoroughly immediately.
Soak the plant roots in water for about a day before planting
Reproduction
In horticulture, boxwood is propagated exclusively by cuttings, which are planted directly on the bed. The best time to plant is spring. You can also achieve a good result in the fall, provided that they are planted a month before the onset of cold weather. This is necessary in order to give the plants the opportunity to take root and prepare for winter.
Cuttings should be planted in loose, humus-rich soil. On average, about 80% of plants take root successfully, but at first it is better to cover the planted cuttings with jars or film. With regular watering, rooting occurs in 25-30 days.
To grow tall trees in a short period of time, choose cuttings with a length of 20 cm.
Temperature and humidity
Boxwood does not tolerate frost well. At a temperature of -20 degrees, the plant may die if the necessary measures are not taken to shelter the trees. To do this, at the end of autumn, before the first snow appears, wrap the bushes with burlap or other material that can protect the bush from the wind and direct sunlight in frosty weather. To protect plants from adverse weather conditions, it is better to plant them in a semi-shaded place and choose frost-resistant varieties.
Under no circumstances should boxwood be covered with cellophane. This creates an excess of moisture, as a result of which the plant dies.
Watering
Unlike potted plants, which need to be watered daily, trees in the garden only need to be watered in the summer. In the rest of the year, the need for moisture is replenished by precipitation. In prolonged dry weather, boxwood is abundantly watered every 4 weeks.
From time to time it is necessary to arrange a short shower for the plant, which will wash off the settled dust from the leaves and will have a beneficial effect on the rooting of seedlings.
 Do not forget to loosen the soil around the planted bushes as often as possible.
 Lighting
When it comes to lighting, boxwood is not too demanding. It perfectly tolerates shade and existence next to other trees. But it is better to protect it from direct sunlight, creating an artificial shadow and, thus, protecting the leaves of the plant from burns.
Top dressing
The land in which the shrub grows must be nutritious and fertile. Top dressing with organic fertilizers begins from the moment when the plant is thoroughly rooted. In the spring, apply complex fertilizers to the dug up soil, which contain nitrogen, phosphorus and potassium. In the fall, feed the shrub with nitrogen-free fertilizers - superphosphate and potassium salt.
Pruning
Like top dressing, boxwood is trimmed in the second year after planting, when the tree has finally taken root. This should be done once a month, during the period of the most active growth of the shrub - from May to August.

- Planting: from mid-September to early October, but if necessary, in spring and even summer.