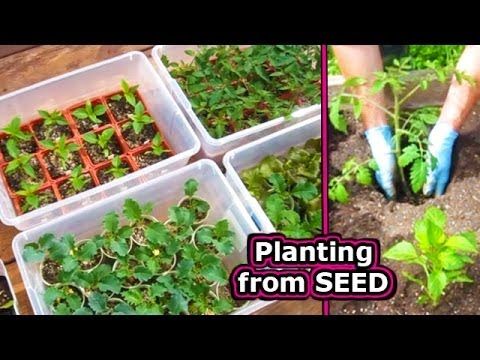
How to harvest tomato seeds for next year
How to Save Tomato Seed
Saving seed from your favourite tomatoes is a simple process and could save you money on buying seeds next year.
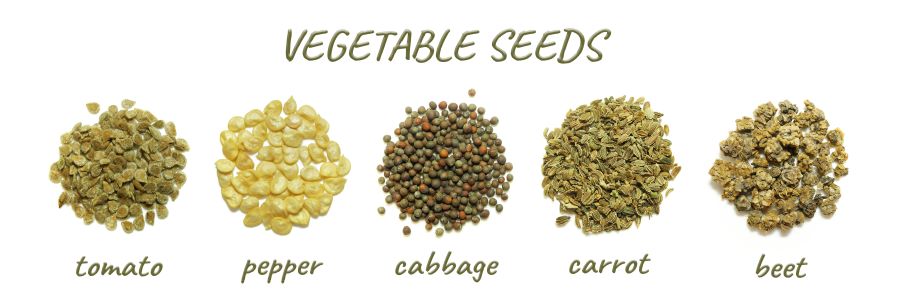
Most tomatoes are self-pollinating, so the offspring will be identical to the parent plant. Choose open-pollinated tomato varieties, not F1 varieties as they may not come ‘true’ to seed. It’s also a good idea to save heritage, or rare varieties of tomato in this way, to preserve the seed for future generations.
If you grow more than one variety you could grow your own brand new variety of tomato by cross-pollinating the flowers.
More tomato content:
- Sowing tomato seeds (video)
- Monty Don’s tomato trial (part one)
- Tomato, basil and calendula container display
You Will Need
- Tomatoes
- Knife
- Glass jar
- Sieve
- Paper envelope
Step 1
Choose a couple of healthy tomatoes and mark them with a tag, so you don’t pick and eat them by accident. When the tomatoes are very ripe, pick them off the plant.
How to save tomato seed – picking the tomatoes
Step 2
Halve the tomatoes and scoop the seeds out into a shallow jar of water.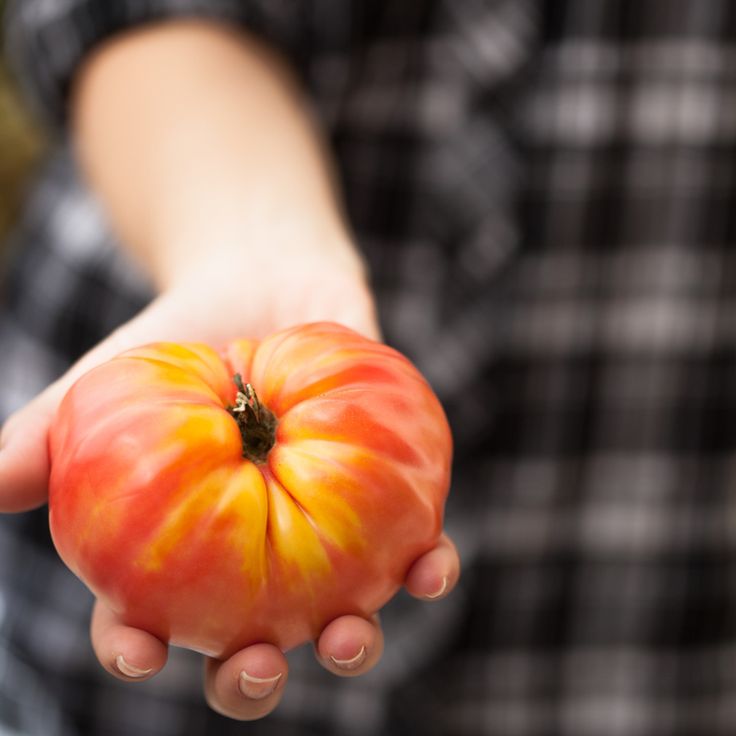 Put the jar aside for four of five days, after which a mould will have developed. This helps to remove the gelatinous coating on the tomato seed, which can prevent germination.
How to save tomato seed – scooping out the tomato seeds
Step 3
After four or five days, pour the seeds into a sieve and wash them thoroughly with water to remove the mould.
How to save tomato seed – washing the seeds in a sieve
Step 4
Arrange the seeds on a piece of kitchen roll to dry out. Once the seeds have dried out thoroughly, store them in a paper envelope in a dark, cool place until spring. Make sure they’re clearly labelled.
How to save tomato seed – drying out the seeds on kitchen paper
Cross-pollinating tomatoes
1. Choose two plants that have qualities you would like to combine in a new plant. First, remove the anthers from a newly opened flower with your fingers or a pair of tweezers, to create a seedbearing parent.
2. Take a flower from the other plant and rub its anthers on the stigma of the seedbearing parent. This plant will produce new fruit, so collect the seed to sow and raise your own, unique tomato variety next year.
Tags
How to Save Tomato Seeds to Grow Next Year
By
Marie Iannotti
Marie Iannotti
Marie Iannotti is a life-long gardener and a veteran Master Gardener with nearly three decades of experience. She's also an author of three gardening books, a plant photographer, public speaker, and a former Cornell Cooperative Extension Horticulture Educator. Marie's garden writing has been featured in newspapers and magazines nationwide and she has been interviewed for Martha Stewart Radio, National Public Radio, and numerous articles.
Learn more about The Spruce's Editorial Process
Updated on 06/21/22
Reviewed by
Barbara Gillette
Reviewed by Barbara Gillette
Barbara Gillette is a master gardener, herbalist, beekeeper, and journalist. She has 30 years of experience propagating and growing fruits, vegetables, herbs, and ornamentals.
Learn more about The Spruce's Review Board
The Spruce / Hilary Allison
In This Article
-
When to Save Tomato Seeds
-
Working With Tomato Seeds
Project Overview
Anyone who has composted leftover tomatoes has probably had the experience of seeds from those tomatoes "volunteering" in the garden if the compost that has overwintered is then used as a soil amendment or mulch the following spring. Or perhaps you've seen tiny tomato volunteers spring up in the garden where tomatoes have fallen off the plant the previous year. Tomato fruits are laden with tiny seeds that will readily sprout if they reach the soil. But rather than waiting for accidental volunteers, it's quite easy to save seeds from tomato fruits so you can plant them exactly when and where you want.
When to Save Tomato Seeds
Tomato seeds can be collected from fruits that are fully ripe, from mid-summer to fall. Tomatoes are a rather slow-growing plant, so most gardeners will want to start these seeds indoors quite early in the spring. It can take tomato seeds six to eight weeks to become viable seedlings, then once planted outdoors, the seedlings may require as much as two months to produce ripe fruit. This varies somewhat depending on the variety and size of the tomatoes—small cherry or pear tomatoes will begin bearing fruit much faster than large beefsteak tomatoes, for example. But overall, tomatoes are one of the slower-growing vegetable plants.
Working With Tomato Seeds
Seeds from many plants can be saved simply by waiting for seed pods or fruit to dry, then opening them up to collect the seeds. Tomatoes take a bit more work because their seeds are enclosed in a gel-like sack that contains growth inhibitors to prevent the seeds from sprouting inside the tomato. The best way to remove this gel covering is to allow the fruits to rot and ferment. In nature, this happens when the fruit falls off the plant. For seed savers, we're going to speed up the process.
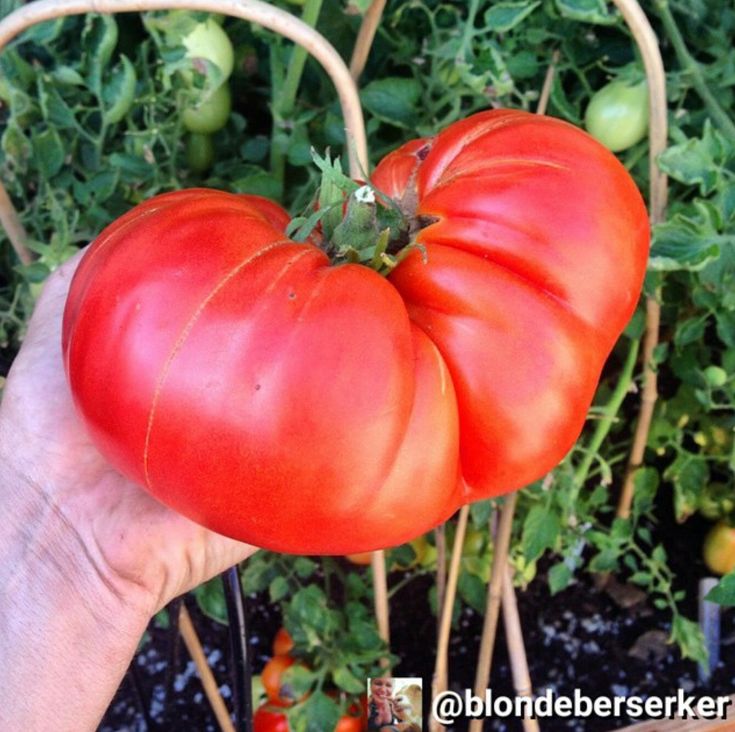
The first step is to choose your best-looking tomatoes. You want to save seed from the finest fruit, so that next year's plant will have good genes. Remember you should only save seeds from open-pollinated (OP) tomatoes. That includes all the heirlooms. Seeds from hybrid tomatoes, while they may sprout and grow, often produce tomato plants that revert to one of the genetic parent plants, which can produce much different fruit than you're expecting.
Equipment / Tools
- Mixing bowl
- Canning jar
- Colander
Materials
- Ripe tomatoes
- Cheesecloth or paper towel
- Paper plate
- Sealable envelope
The Spruce / Meg MacDonald
-
Harvest the Seeds
To start the process, slice the fruit in half so that the stem end is on one side and the blossom end on the other. This will expose the seed cavities better than if you sliced through the stem end.
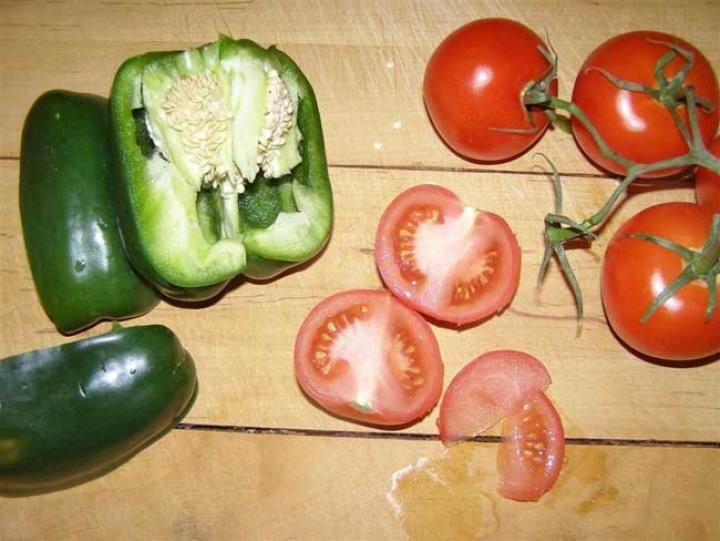
In some pasta and smaller tomatoes, the seeds are so concentrated in the cavity that you can scoop them out and still be able to use the flesh of the tomato for cooking. Many slicing tomatoes will require scooping out all of the flesh with the seeds. Whichever the case, scoop the seeds into a clean bowl or jar.
The Spruce / Meg MacDonald
-
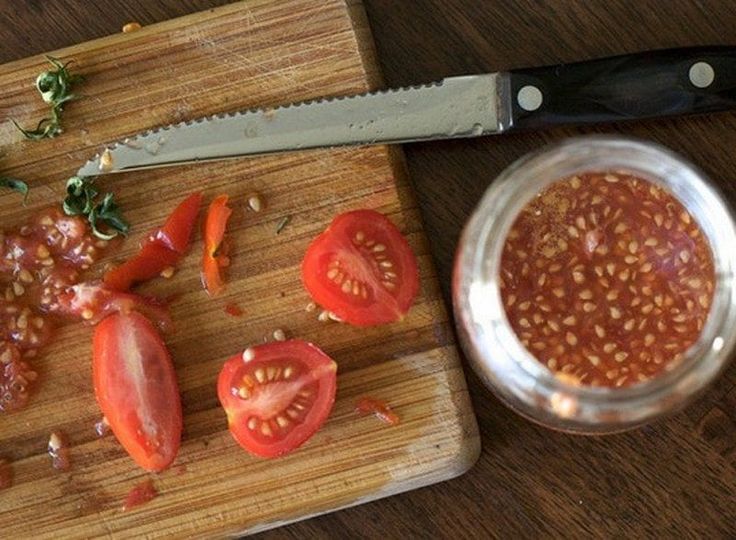
Start Fermentation
If there is not enough liquid from the tomato pulp for the seeds to float in, add up to a cup of water to help separate the seeds from the pulp. Then set the bowl or jar of tomato seeds and pulp in a warm, out-of-the-way spot. You will need to allow 2 to 4 days for the fermentation to take place. As it does so, the mixture is going to begin to smell awful, so store the bowl where you won't pass by it frequently.
If you have sterilized glass canning jars available, they make a good container for fermenting tomato seeds. The extra space at the top of the jar controls some of the odor and the clear sides let you keep tabs on what is happening.
 Covering the top of the jar with cheesecloth or paper towel will keep fruit flies out and also diminish the spread of the unpleasant odor.
 Remember to label each variety.
The Spruce / Meg MacDonald
-
Check on the Fermentation
Every day or so, check on the process of the fermentation. What you eventually want to see is a layer of mold on top of the seeds and pulp. The process is done when bubbles start rising from the mixture or when the entire layer of tomato pulp is covered with mold. Don't leave the seeds fermenting past this stage or they may begin to germinate.
It is harder to see the layer of mold through the glass jar, but you can generally tell the fermentation is complete when the seeds settle to the bottom of the jar in a watery liquid and the thicker pulp and mold sit on top of them.
The Spruce / Meg MacDonald
-
Separate the Seeds
Finally, you can remove and dispose of the mold covering.
 Lifting it before rinsing the seeds will make rinsing easier, but it's not necessary. You can add some water to the jar or bowl and stir or shake vigorously. The good seeds will settle to the bottom, allowing you to drain off the excess first.
 The Spruce / Meg MacDonald
-
Clean the Seeds
Strain the seed mixture into a colander and rinse the seeds well under running water. Try to remove any remaining pulp bits and mold, so that only clean seeds remain.
The Spruce / Meg MacDonald
-
Dry the Seeds
Spread the seeds onto either a paper plate or glass dish to dry. Don't use paper or paper towels or the seeds will stick to them and be difficult to remove. Set them in a warm, dry spot and allow the seeds to dry completely. Shake them on the plate daily to make sure they don't clump and that they dry evenly. Don't try to speed the process by using heat or you might destroy the seed.
The Spruce / Meg MacDonald
-
Store the Seeds
Once the seeds are thoroughly dry, you can store them in an airtight container, in a cool, dry place.
 The envelope shown here will be placed in a canning jar. Remember to label and date your seeds.
 Tip
While many tomatoes lend themselves to seed saving, it is especially beneficial to focus on heirloom tomato varieties for this activity. A great many of these vintage types of tomatoes are at risk of being lost. In addition to being rare, heirloom tomatoes often are especially flavorful and my have unusual colors and shapes.
The Spruce / Meg MacDonald
Seed Saving: Quick Tips on Saving Your Garden Favorites
Watch Now: 6 Mistakes to Avoid When Growing Seeds Indoors
How to collect and store tomato seeds at home
Do you want to keep your favorite home variety of tomatoes on the site and not frantically look for its seeds on sale every season? And you don’t have to - collect and prepare seeds from your own plants, and then propagate the variety you like on your own is not at all difficult!
In the case of collecting seeds by hand, you will, firstly, be sure which variety you will receive; secondly, independently control the quality of the seed; thirdly, you can prepare as many seeds as you need (only for the next season or with a margin of 2-4 years), without focusing on store calculations of their number in bags.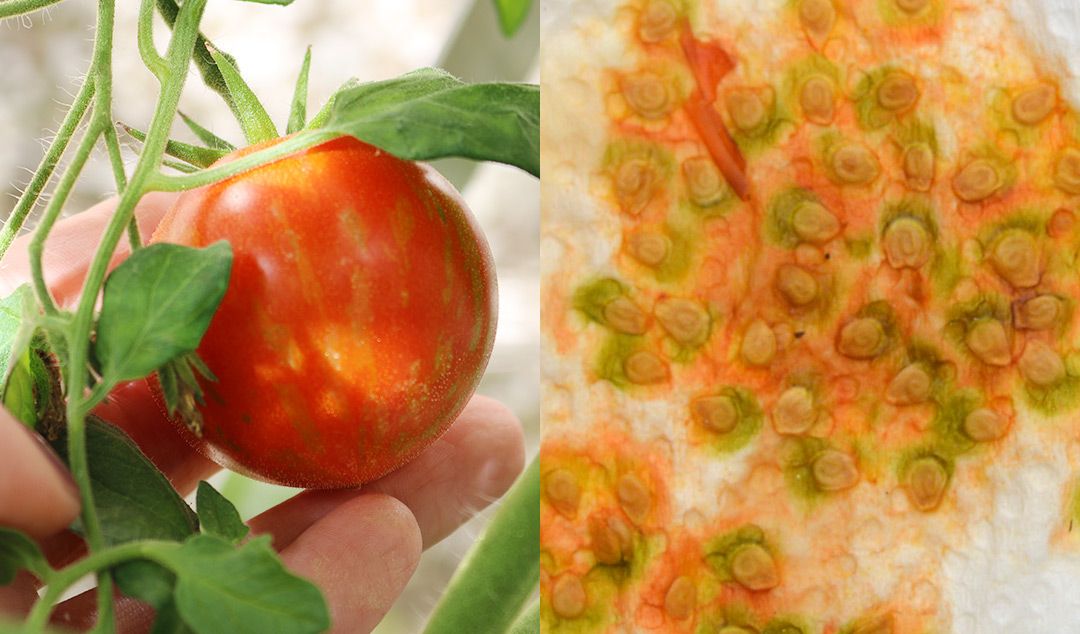 nine0003
So, your attention is a step-by-step master class with a photo and description - how to collect and save tomato seeds at home.
Step 1. Select tomatoes, prepare tools
Any well-ripened (but not over-ripe!) and well-formed tomatoes that are typical for this variety in size, shape and color are suitable for self-collection of seeds. Of course, the fruits must be taken from productive, strong, absolutely healthy plants. Usually they try to pluck tomatoes from the lower brushes, which are formed first of all, when there is little risk of cross-pollination with other plants. nine0003
Only varietal tomato plants can be successfully propagated by seeds! If you grew hybrids, their seeds for the next season will end up with a "mixed suit" - F1 hybrids themselves are obtained by crossing different varieties, and in the second generation, splitting according to traits will go completely unpredictably.
In addition to the actual fruits of tomatoes, for the procedure you will need a couple of clean plates, a knife, a teaspoon, a strainer, a couple of napkins, a small container for soaking the seeds and a container for their further storage. nine0003
Step 2. Remove tomato seeds
Thoroughly wash the selected fruits, cut in half or quarters and, pressing lightly, squeeze the contents of the seed chambers together with the liquid into the prepared container. For some tomatoes, it is more convenient to do this with a teaspoon - see the situation.
Step 3. Soak the tomato seeds for two days
Many people finish collecting seeds right at this stage - the liquid with the seeds is placed on a napkin and waited for it to dry completely, then to separate the seeds and send them to storage. You can do it this way - but we offer you another option. Why? Firstly, the seeds from such a napkin will then be very difficult to tear off without damaging them. And secondly, the protective shells of the seeds will remain intact, containing special substances that prevent them from germinating right inside the fruit. nine0003
We advise you to send the collected liquid with seeds to a container with a small amount of water: soak the seeds so that after a short fermentation (fermentation) the protective shells of the seeds are destroyed and do not interfere with their further rapid and friendly germination.
Keep the seeds in the fermentation container for a short time - enough for 2 days at room temperature. As soon as the liquid brightens a little, and an inconspicuous film and air bubbles appear on its surface, the process can be completed. nine0003
To prevent oxidation, the container for soaking seeds should be plastic, ceramic or glass - never metal.
Step 4 Wash and dry the tomato seeds
The fermented liquid must be carefully drained together with the floating, hollow, low-quality seeds, add a little more fresh water to the tomato seeds remaining at the bottom, shake them up and send them to filter and drain through a strainer.
nine0003
Then place the seeds on a cloth or paper towel to dry.
Step 5. Store tomato seeds
Collect fully dried seeds and store in a cloth bag or paper envelope. Cellophane bags are not suitable for this purpose - they do not allow air to pass through and the seeds can go rotten there, or even rot if they were not completely dried. Do not forget to mark the storage container - be sure to sign the year the seeds were collected and the name of the selected tomato variety. nine0003
Store bags or envelopes until next season in a dry and preferably cool room.
The germination of tomato seeds under proper storage conditions lasts 5-10 years, but it is better to use them for their intended purpose no later than 4 years after harvest.
As you can see, it is not at all difficult to collect and store tomato seeds for seedlings on your own.
How to properly collect tomato seeds for seedlings
Experienced summer residents prefer to select tomato seeds on their own at home. Even novice gardeners can get high-quality seed material with good preservation and high germination, if you follow simple recommendations and rules. I have prepared a detailed master class for Antonov Sad subscribers with a step-by-step photo on which tomatoes, when and how to get seeds correctly. I will be pleased if you share in the comments your secrets and tricks for collecting your own seeds. nine0003
1. Choose from which tomatoes we will collect seeds
Mark in advance the tomato bushes from which you want to collect seeds. Plants must be healthy, strong, and the fruits must correspond to the characteristics of the variety.
From what bushes to take tomatoes for seeds?
Select in advance 1-2 absolutely healthy bushes of the variety you need.
- Make sure that the fruits formed on them fully correspond to all economic and biological characteristics in accordance with the original characteristics of this variety. nine0094
- I advise you to immediately mark these specimens by tying ribbons or strings so that later you do not confuse and collect fruits from them by mistake.
Which fruits to take for seeds?
1. Take tomatoes exclusively from the 2 lower clusters of the central stem.
The higher the cluster is to the top of the plant, the less large seeds it contains. nine0094
2. Select fruits that are characteristic of the size, shape, and color of the variety you like.
- If the variety is medium-sized, don't be tempted by one large specimen.
- Probably, the best conditions for this bush simply developed, and subsequently it is not at all necessary that the future harvest will be the same. nine0094
3. You can select for seed production both fully ripe fruits and brown ones that need to be put on ripening.
- Fruits that are too ripe can cause seeds to germinate inside
IMPORTANT
Seeds must not be harvested from specimens with signs of disease, especially those with signs of disease!
Photo: select the best varieties of tomatoes for seeds
Is it possible to collect seeds from F1 hybrids?
Do not attempt to collect seeds from hybrid plants. They are called F1 heterosis hybrids due to the manifestation of the effect of heterosis - a significant excess of all economically valuable indicators compared to parental forms.
- It should be known that the obtained improved properties appear only in the offspring of the first generation.
- In subsequent generations, the traits you like so much will not appear at all, or they will be much less pronounced than in the previous season. nine0094
- Seeds collected from these plants will grow into specimens that combine both the characteristics of their parents and more ancient ancestors that you most likely will not like.
Photo: a tomato in a section allows you to see the seeding of the fruit
2. Cut the tomato into seeds
Now that all the necessary conditions for obtaining varietal healthy seeds are known, you can start collecting.
- The selected tomato should be cut crosswise in order to immediately see the contamination of the fruit.
 nine0094
 - Seeds are stored in special seed chambers. There may be two, or there may be several.
IMPORTANT
Do not wait until the fruit is completely softened!
- The seeds it contains often germinate even inside.
— Quite often, an infection settles in such fruits, infecting the seeds.
Photo - Cut the tomato crosswise
3. Extract the tomato seeds
- Gently squeeze the fruit with your hand and squeeze the seeds into a glass jar or mug. nine0094
- If the fruit is hard enough, it is better to use a small spoon and take out the contents from each chamber.
IMPORTANT
Some experts advise adding water to the contents immediately. I don't think this is correct.
Water can cause rapid rotting of the pulp or premature germination of seeds in the cup!
Photo - Use a spoon or squeeze the seeds by hand
4. Put the seeds for fermentation
Leave the resulting gruel (pulp) on the windowsill for 2-3 days for fermentation. Do not forget to sign the name on the jar or cup to avoid confusion. nine0003
- The room where the seeds will be stored must not be colder than 22 ° C. Otherwise, fermentation is delayed, and rotting or germination of seeds may occur.
- As a result of fermentation, full-fledged seeds will settle to the bottom, and fermented juice, along with debris, will be on top. This indicates readiness for washing the seeds.
TIP
The most valuable seeds are those that have formed away from the stem, in the upper half of the fruit. nine0003
Plants grown from top seeds are 10-15% more productive than others.
Photo - Empty the contents of the seed chambers into a cup
5. Washing the seeds
Now it's time to get the final result of our efforts - washing the seeds.
- After mixing the contents, gradually pour cold water into the jar, stirring better.
- Wait for the seeds to settle again, and drain the settled upper part of the gruel.
 nine0094
 - Do this several times until the water in the cup is completely clear with no pieces of peel or debris floating on the surface, and settled seeds at the bottom.
Photo - After 2-3 days of fermentation, you can start washing the seeds
6. Dry the collected tomato seeds
- For preliminary disinfection, the seeds can be soaked for 15-20 minutes in a 3-5% solution of potassium permanganate (light pink) .
- Then rinse, wring out and lay out on paper, cardboard or a thin cloth to dry. nine0094
- Pour the dried seeds into the signed paper bag. In addition to the name of the variety, indicate on it the year of harvest.
IMPORTANT
Be sure to lay out the seeds for drying in a thin layer, preferably even one seed at a time.
— Otherwise, the probability of germination of seeds is high, and then they will lose their germination.
Photo - Spread wet seeds in a thin layer on paper
7.