How do i plant flowers
How to Plant Flowers - A Guide to Starting Your Garden
Weeding and watering—though necessary garden chores—are definitely not as enjoyable as choosing flowers and putting them in the ground. Planting flowers is one of the true joys of gardening! (And it couldn't be easier, even for beginners.) There’s also something soothing about walking around the garden every day to observe your plants and all the pretty, little pollinators doing their jobs.
To get the most bang for your buck when planting flowers, make sure you know what you’re buying. Annuals last one season and provide bright pops of color right away all season long until frost. Perennials bloom for just a few weeks early, mid, or late season and typically return year after year. Read the plant tag or description: It tells you what kind of plant it is as well as how much sunlight the flower needs. Full sun is considered 6 or more hours of direct sunlight, while part sun is about half that. If you choose perennials, pay attention to the USDA Hardiness Zones (check yours here) to be sure the plant can survive winters in your climate.
Timing is key fo planting: For most flowers, you'll want to wait until after the last frost of the season to plant, although there are a few types, such as snap dragons and violas, that will handle cooler temperatures.
Here’s how to plant flowers that will brighten your garden now and for years to come:
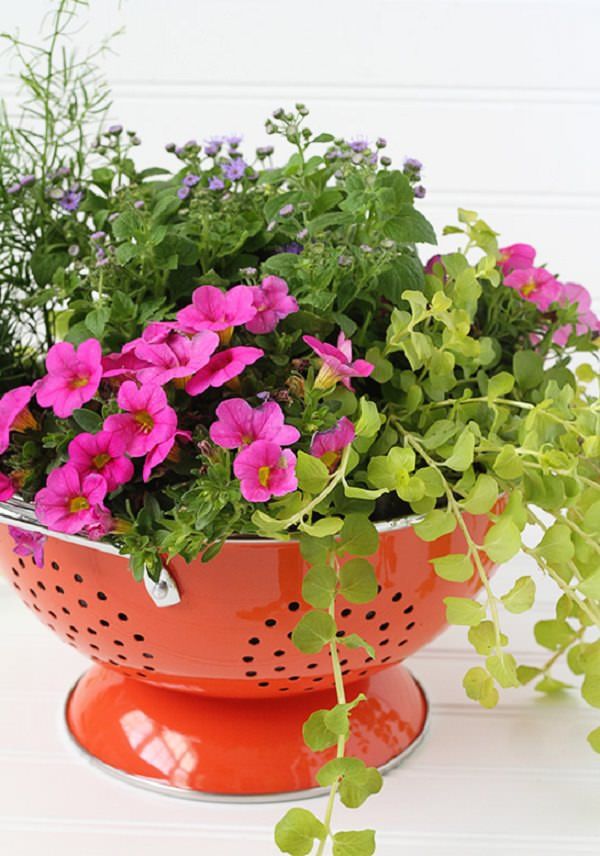
Prep your beds or pots.If you’re adding flowers to a garden bed, dig out the area ahead of time. Mix in some compost to improve the soil structure. Pull weeds now so they won’t compete for water and nutrients with the plants you do want! If you’re planting in containers for your patio, deck or balcony, fill to within an inch or two of the rim with potting mix (not garden soil, which isn’t the same thing). For mixed containers, choose one type of plant that’s tall, such as marigolds or daisies to provide vertical interest, something to fill out the pot such as calibrachoas or petunias, and something to spill over the edges, such as sweet potato vine or fan flowers.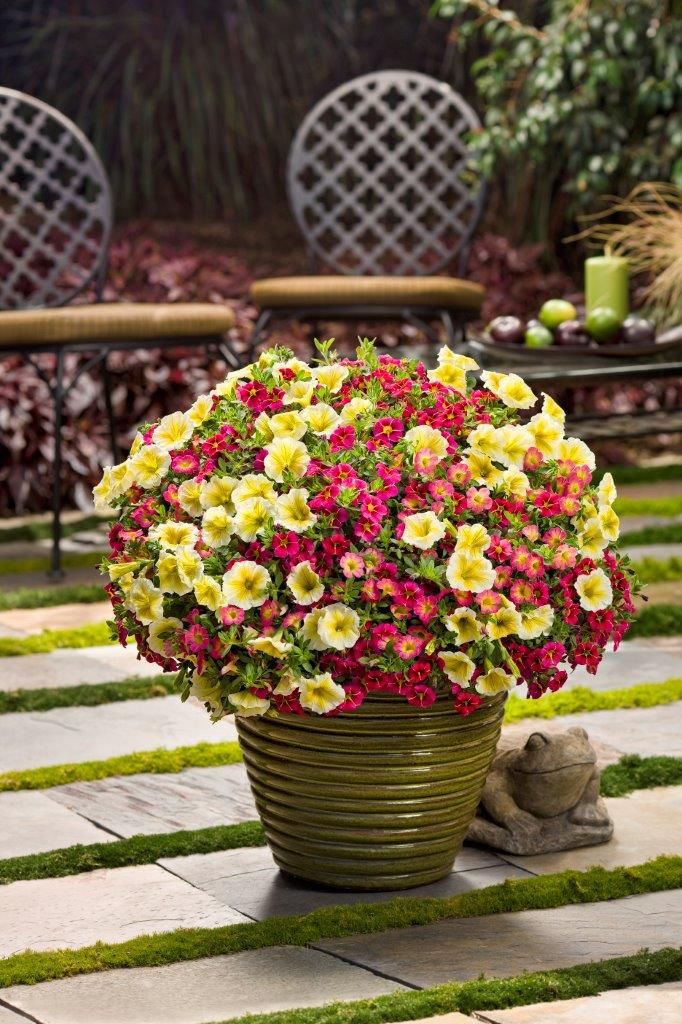
The plant tag or description will tell you how tall and wide a plant is expected to get under ideal conditions. Don’t ignore it! If you’re planting in beds, you want to put the tallest flowers, such as zinnia or salvia, in back, with sprawling flowers or groundcovers, such as sweet alyssum or portulaca, in front.
NurPhoto//Getty Images
Choose healthy plants.If shopping at a nursery, look for plants that appear strong and green, not wilted, brown or already scraggly. If the pots are bone-dry, avoid them because the plants likely are already stressed.
Give your plant a good start.Dig a hole about twice the size of the root ball. If you have a multi-pack of flowers, squeeze each individual cell to loosen it up a bit. Then tilt the pack on its side, allowing each plant to slip out of its section into your hand.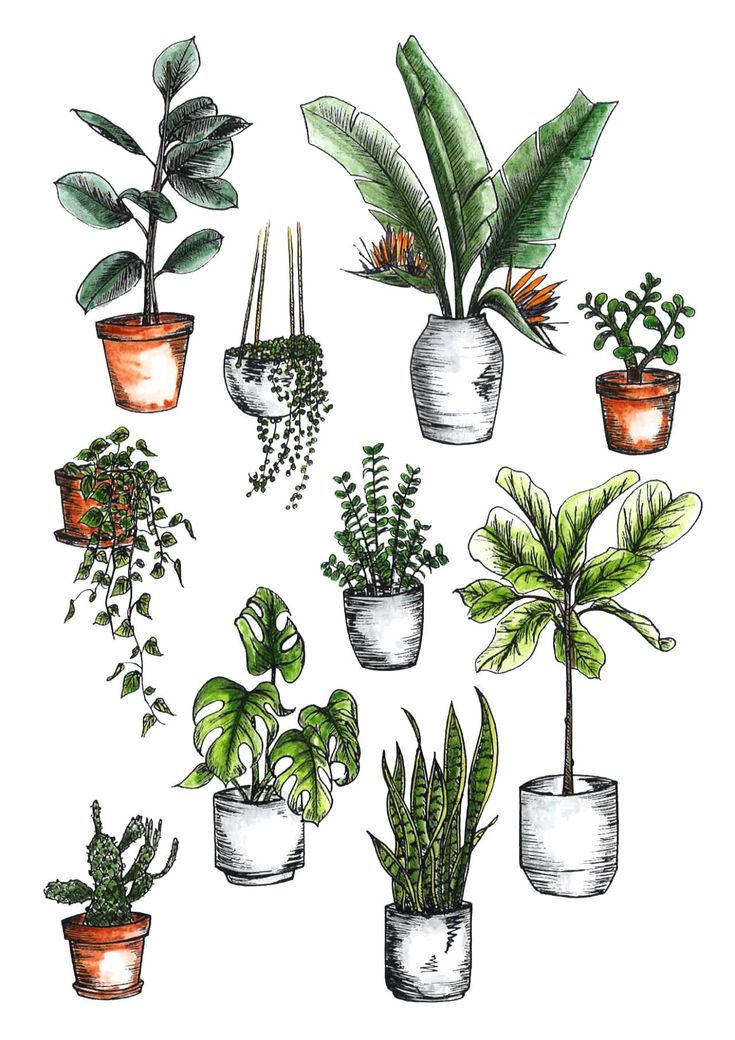 If you need to coax it, that’s fine, too. Lift the plant by the stem, not the top, and set in the hole at the same depth it was in the pot. You also can rough up the roots (gently!) with your fingers a bit to help them start spreading out into the hole because roots often are matted and circled inside the pot when you buy them. Replace the soil around the plant in the hole, tamp it lightly, and water thoroughly.
If you’re planting seeds, read the package to see how deep to plant them. It’s often surprisingly shallow, perhaps as little as a ¼ inch. And pay attention to the “days to maturity” listed on the package as well. For example, if a flower takes 80 days to mature and it’s already the end of June, it may be too late to plant from seed in some climates. You’ll spend all summer watching your plant grow but never bloom, only to get taken out by the first frost!
Mulch your new plantings.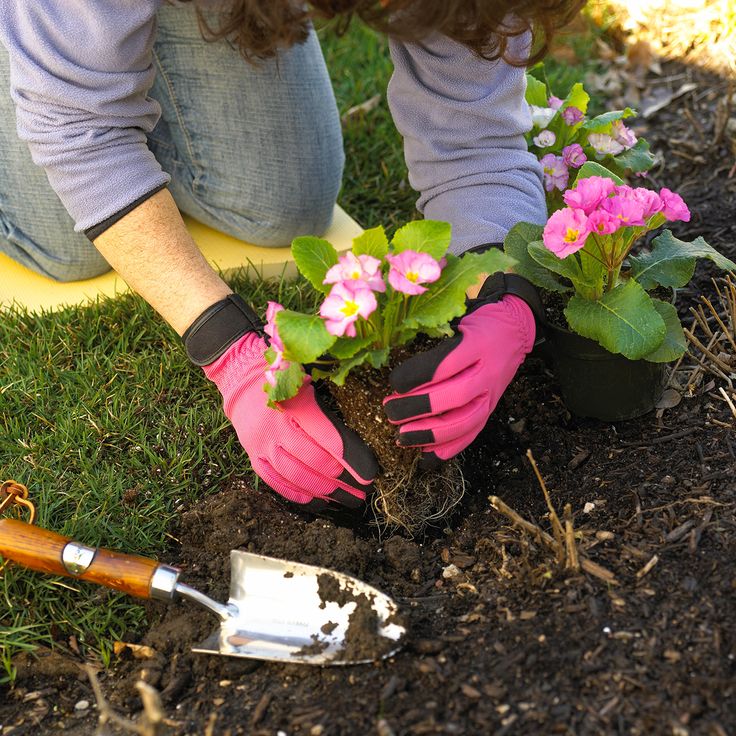
It may seem like an unnecessary step, but mulch (even in a container) will reduce evaporation so you may be able to water less frequently. It will also keep down weeds and decompose over time, improving soil structure.
picture alliance//Getty Images
Don’t forget to water.Most annual and perennial flowers need a couple of inches of moisture per week to thrive. But use common sense: If it’s rained, you probably don’t need to water! If you stick your finger in a pot and it’s dry, it’s time to give it a drink. Most plants prefer long, deep watering until water runs out of the bottom of the pot. In spring, with frequent rains, expect to water pots and beds a few times a week. In the summer, you’ll probably need to water daily. By fall, the growing season is ending so water a couple of times a week during dry spells.
What You Need to Plant Flowers
Gardening Glove
$15 at Home Depot
Hand Transplanter
$11 at Home Depot$8 at Walmart
2-gallon Watering Can
$5 at Home Depot
12" Plastic Flower Pot
$6 at Home Depot
Follow House Beautiful on Instagram.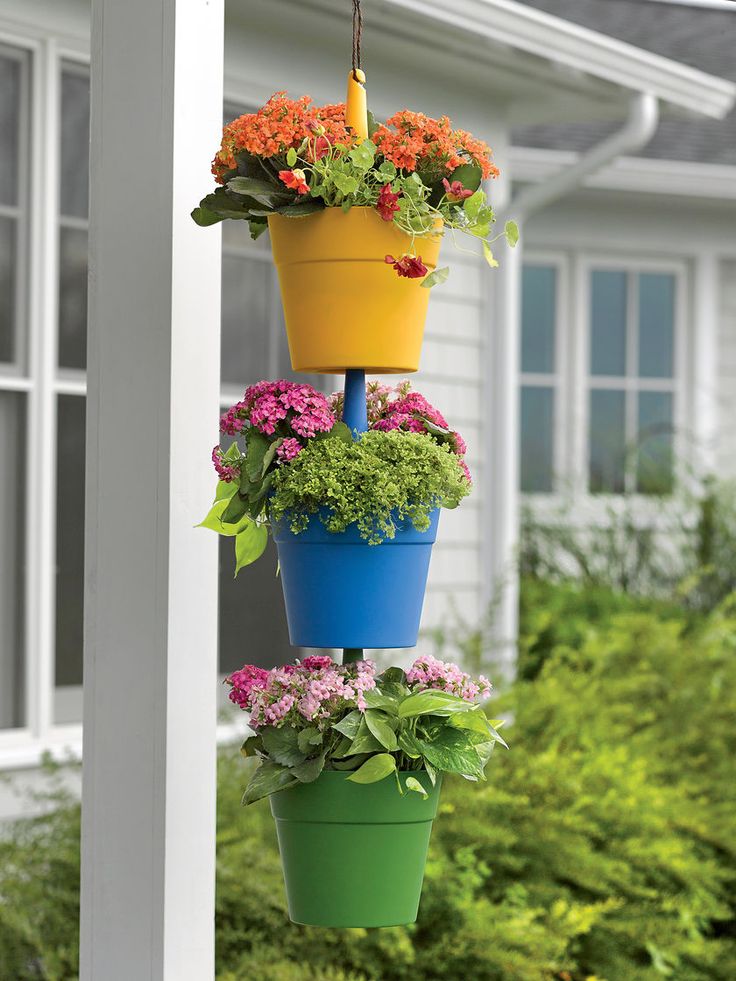
Tutorial: How to Plant Flowers in a Pot
A step-by-step tutorial to teach you how to plant flowers in a pot. See inspiration for the types of flowers and plants that work best for container gardening. Also includes a shopping list for everything you’ll need to create the perfect planter!
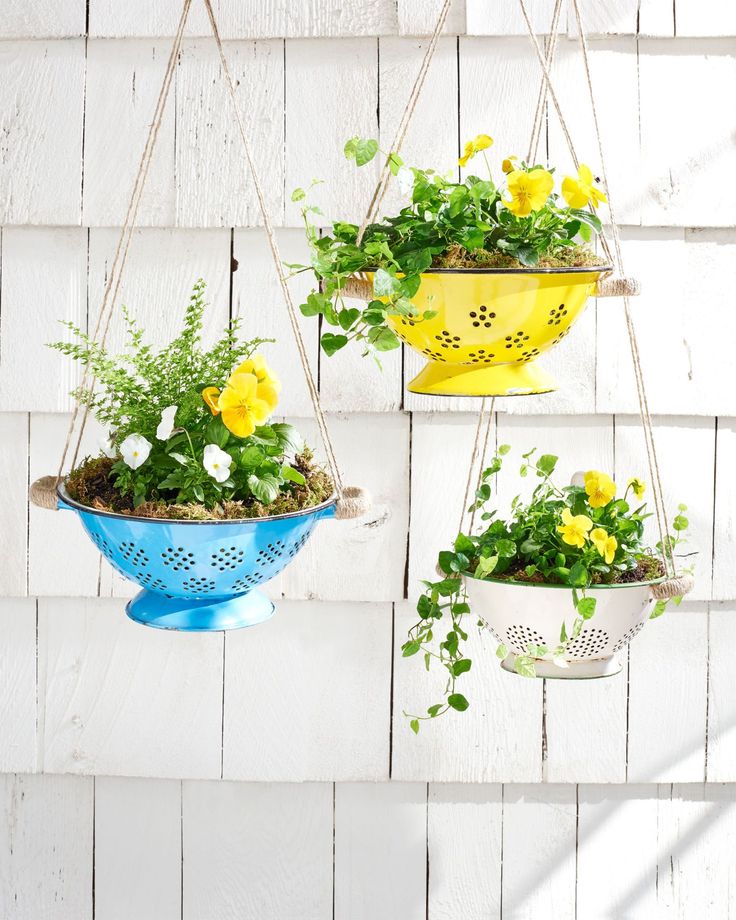
A few weeks back, I shared some summer planter ideas to add color and personality to your yard. Several of you had detailed questions as to how I got about creating my planters. So, today I’m going to share how to plant flowers in a pot. Even better, I’ve teamed up with a group of bloggers to share even more outdoor plants and flower inspiration at the end of the post! And if you’re looking for even more inspiration, be sure to check out my front porch planter ideas!
From an early age, both of my parents showed me how to do gardening, planting, weeding and basic yard maintenance (#freelabor). I always have loved the summer months so much, and colorful flowers in pots throughout the yard make me love the summer months even more! For those that haven’t planted before, I want to assure you it’s worth trying and the effort involved. Planters can add so much personality to your outdoor spaces, and make you enjoy the outdoors even more. Following are my steps to creating the perfect planters!
Prior to purchasing any flowers or plants, you’re going to want to ensure you know exactly where you’ll be placing your planters.
- Ensure you’re following the flower/plant guidelines closely on the enclosed tag or label. If your planter will be in the sun all day, be sure to select flowers that love 6+ hours of sun (you’ll see this on the label). If it’s a shaded area, again, select the flowers accordingly.
- Keep in mind that you’ll likely only find plants at your local nursery or gardening center that are appropriate for your region. Living in Nebraska, we can use a fairly wide variety of plants in our summer months (especially annuals for planters). But, what I use may not work (or be available) where you live. Just something to keep in mind when you’re out shopping for plants and flowers.

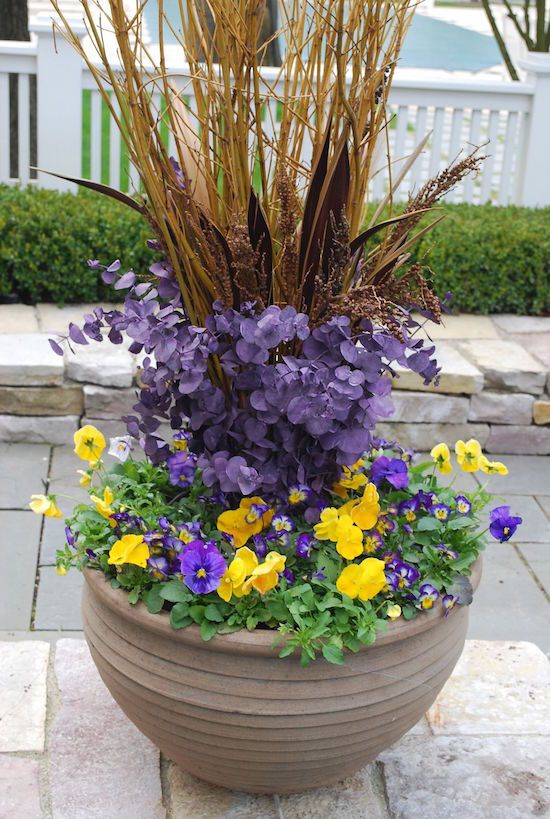
- Next, I love to follow the “Thriller, Filler, Spiller” method of planting.
- Thriller Plants and Flowers: an upright superstar in the middle (I love palm trees or yucca plants for larger planters and small dracaena spikes for smaller planters)
- Filler Plants and Flowers: everything around the thriller and can include flowers or green foliage
- Spiller Plants and Flowers: plants that grow over the edges of the pot and downwards (I love sweet potato vines)
- I love a variety of colors and textures in my planters, so I buy accordingly. Some of my favorite flowers and plants to use in planters in include yucca, petunias (typically I go with the wave variety), sweet potato vines, impatiens, palms, etc. You can see examples of my past planters in this post.
- I actually prefer to buy smaller plants (if it’s fairly early in the season). I find that they do better when they are in large pots as they get bigger, rather than being constricted to nursery pots.
 And, as impatient as I am, I still try to buy flowers that haven’t bloomed yet (look for ones with lots of buds instead). This way, I can enjoy them as long as possible when they do bloom! They may look a little wimpy when you first plant them, but I feel like they take off much more quickly when they start small!
This post contains affiliate links for your shopping convenience. Click here to read my full disclosure policy.
Supplies Needed to Plant Flowers in a PotThe supplies needed to plant flowers in a pot a fairly minimal.
- Potting Soil. You’ll need a bag of potting soil (or several, depending upon pot size). We usually just buy what’s on sale, but usually prefer the Miracle-Gro options. If you’re carrying your soil over from prior years (I leave mine in the pots all winter), I usually do a mix of old and new to ensure there are still nutrients available in the pot.
- Gardening Gloves.
 These aren’t necessary, but I always prefer them so I’m not cleaning soil out of my finger nails for days on end. I like lightweight options with a cloth/latex mix like this pair for working on my flower pots.
 - A small shovel. Again, this isn’t necessary but can speed things along. I typically just use my hands though when working in pots and save the shovels for planting in the ground.
- Planters. I’ve collected mine over the years, as they can be quite the investment if you plan to have a lot in your yard and on your porch. These tall planters I got last year and two of my favorites as I feel they’re not only the perfect size, but they also have inserts that come with them so you don’t have to fill them all the way with dirt! With the wind in Nebraska, I prefer resin planters over ceramic, as it’s not uncommon for ours to occasionally blow over. I’ve included a few other fun planter ideas below, but I also have a post dedicated to outdoor planters.
 Simply click on any of the images below to learn more about each item.
Turn on your JavaScript to view content
If you’re more of a DIYer, be sure to check out this DIY wood planter or this DIY planter pot table combo for the patio! Two great tutorials for DIY planters that will get your creative juices flowing!
- Fertilizer. I’ve used this fertilizer for ages after my mom got me hooked (she’s the queen of flower planters).
- Water. You’ll want to water your plants in as soon as they’re planted (full tutorial below) but you’ll want to ensure you have easy access to a water pitcher or hose.
Planting flowers in a pot is not a long process, if you come prepared and have followed the steps listed above. I’ve tried to include detailed photos below for those of you that haven’t tried this process on your own. Once you get the hang of it, you can have a planter completed in less than ten minutes!
- Prepare your planter and the soil. When using really large pots, I like to flip an old bucket upside down in the planter before filling it with dirt. Dirt can get very heavy when you need a lot of it, so this helps save on soil and makes the planters a bit more mobile.
- Set plants and flowers in their containers in the pot to visualize placement and layout.
- Dig a hole for each of the plants. Ensure that that top of your plants’ soil is just slightly below the surface of the top of the dirt. Start in the center and work outwards. So, if you follow my method above, you’ll start with planting your thriller, then your fillers, then your spillers. So plants may fulfill more than one of these criteria, but the process is still the same.
- Carefully loosen the roots/base of the plant with your hand. They tend to get pretty packed in their pots from the nursery, so you’ll just want to loosen it all up a bit so they can grow better in your new pot.

- Gently place the plant in the hole and cover with dirt, slightly pressing soil around it. You don’t want to leave air around the plant, but you also don’t want to pack it super tight. You may then need to add a bit more potting soil around the plant. Just ensure that the top of all of your dirt doesn’t sit above the pot, or water may run out.
- Once all plants are planted, it’s time to fertilize! I add a few shakes of the fertilizer. If you buy the bag of the fertilizer, like I did this time around, I just take a small handful and sprinkle throughout the planter. If you buy the small version, which also acts as a shaker, you can just shake it a handful of times around the pot.
- Water everything in! At this point, the plants have probably started to dry out, so you’ll want to water them (and the fertilizer in). I like to give them a good soak. Then, they’re ready to grow!
Like I mentioned above, at first they’re going to look a bit wimpy, but you definitely want to leave room for them to grow! Within a week or two you’ll definitely notice a difference – especially if you take pics the day you plant and compare! With proper care, within 3-4 weeks or less, you probably won’t even see any dirt!
How to Maintain Flower Pots in Summer MonthsNow that you have your pots planted, let discuss how to maintain throughout the summer season! The photo below was taken about a month after I planted the petunias and potato vines, so you can see just how much they grow in a short amount of time!
Watering is key during the hot summer months. There are many weeks when I have to water my plants daily (if we don’t have much rainfall). But, again, this will be dependent upon your local climate. Most flowers and plants will start to get droopy pretty quickly if they aren’t watered enough, so if you see this occurring, be sure to water ASAP. I’ve found that in Omaha, the months even vary. We usually get a lot of rain in June so I can sometimes go 3-4 days or more without ever having to water. But in July and August I have to water much more regularly.
I also try to fertilize the planters ever 3-4 weeks, as well. Just a few shakes of the fertilizer, and it’s good to go for another few weeks! I try to buy fairly self-sufficient plants that don’t need much ongoing maintenance. However, I will try to dead-head plants and cut off broken leaves as needed. By August, my planters tend to be overflowing onto the ground in some areas!
And that’s about it! If I left anything out, feel free to leave a comment and I’ll get back to you with any questions! You can use the graphic below to pin to save for future reference!
More Outdoor Plants and Flowers InspirationBe sure to stop by all of the other stops on the tour for even more outdoor plants and flowers inspiration!
Satori Design for Living | On Sutton Place | City Farmhouse | Maison de Pax
The DIY Mommy | A Pretty Life | Vinyet Etc.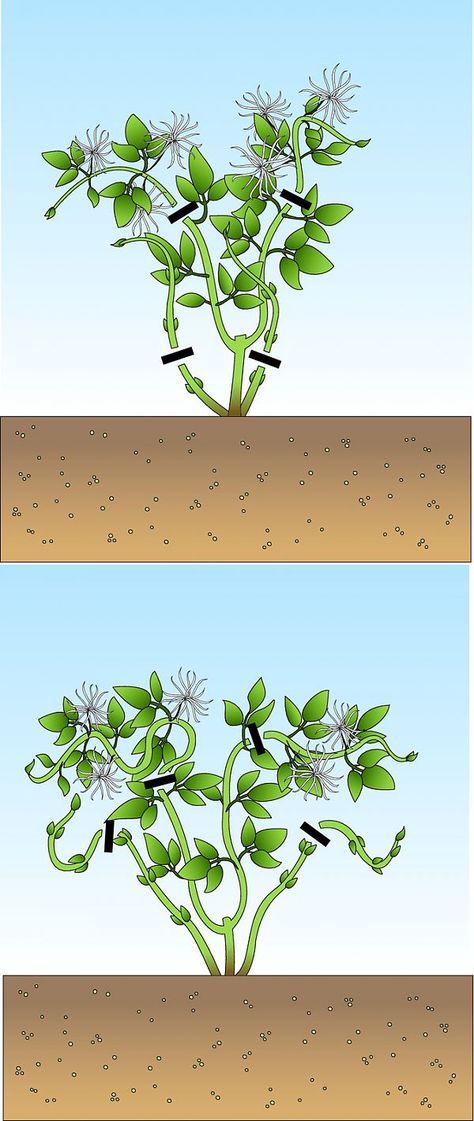 | Life On Virginia Street
The Happy Housie | Clean and Scentsible | Casa Watkins Living | Postcards from the Ridge | Finding Silver Pennies
If you would like to follow along on more of my home decor, DIY, lifestyle, travel and other posts, I’d love to have you follow me on any of the following:
Pinterest | Instagram | Facebook | Twitter
disclosure: some affiliate links used
How to plant indoor plants | Tips for choosing a pot, soil and drainage for the right planting
Tips for choosing a pot, soil and drainage for the right planting
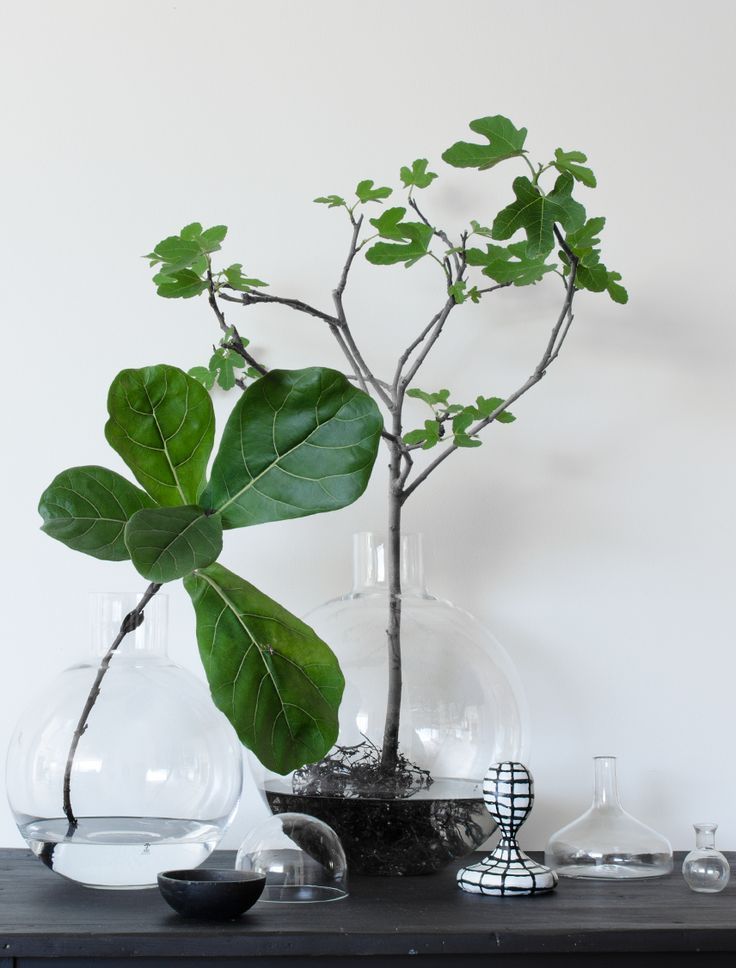
How to plant indoor plants? A question faced by many.
We can often see different types of soils, drainages and additives on store shelves - try to figure out what exactly suits your grandmother's favorite ficus or a large lemon tree.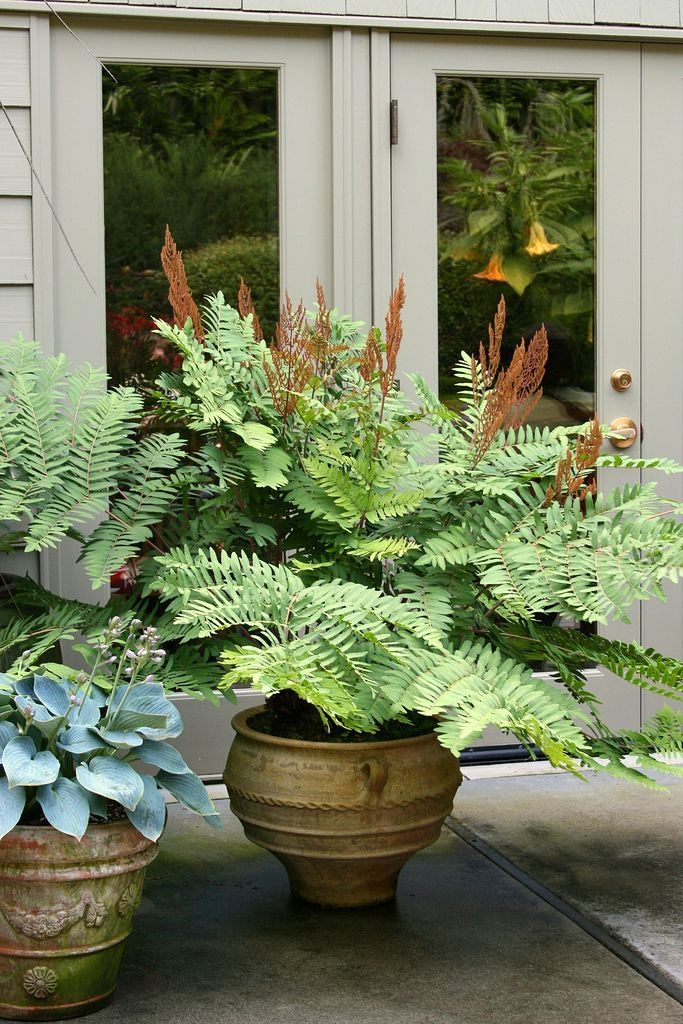 ..
..
Recommendations for choosing a pot, soil, drainage and their proper use.
"Even a stalk of grass is worthy of the great world in which it grows..."
Surely, a good hostess of a cozy home has a special passion - growing indoor flowers and plants. It is not for nothing that it is believed that plants "feel" the aura of a good person, if all kinds of flowers in pots (of any kind) grow magnificently or coexist in the house - this indicates the positive energy of the owners of the house.
How to plant indoor plants? - A question faced by many. We can often see different types of soils, drainages and additives on store shelves - try to figure out what exactly suits your grandmother’s favorite ficus or a large lemon tree ... There are no universal recommendations for choosing soil or soil, but there are generally accepted norms and concepts that will help your green households.
To plant (or transplant) a houseplant you will need
Choosing a planter for a flower
First you need to choose the right container for planting (flower pot). The cache-pot should be about 3-5 cm larger than the previous one in size (diameter). If you plant a flower in a larger pot, then the growth of the plant may be stunted (instead, the root system will enter the active growth phase), and with it the flowering will be delayed.
The best and most affordable option - plastic pots with trays . They do not break or prick, are offered in different designs and sizes, and are produced in series (which will allow you to transplant all flowers into pots of different sizes in the same style). In addition, they are lightweight and durable.
! Important: when choosing a pot, pay attention to the presence of a hole in its bottom.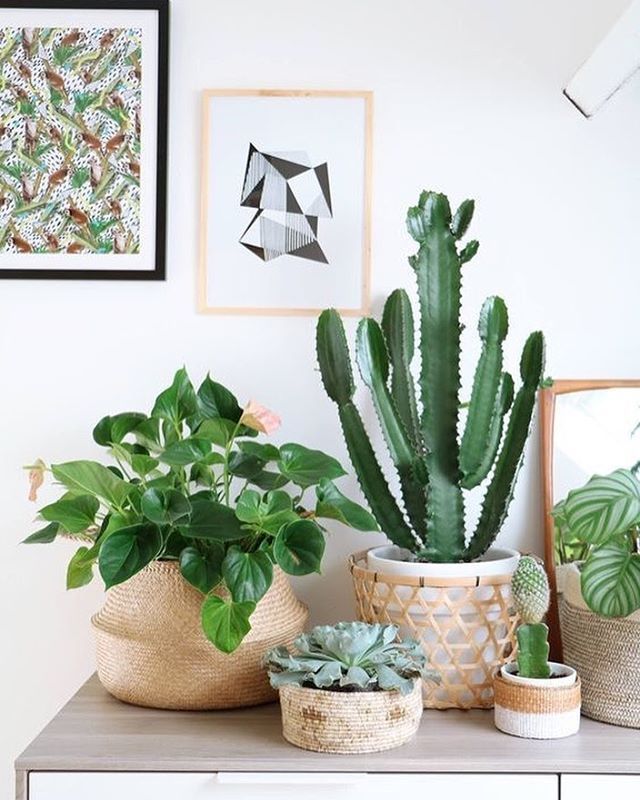 If it is not provided there, buy another one or make a hole yourself.
Drainage - what it is and how to use it
In order for your flower to have a better chance of developing successfully, experienced flower growers recommend when transplanting plants in a pot create drainage system . Drainage will smooth out small misses in watering.
! Advice from SLONcom: it is more expedient to use expanded clay drainage.
What is expanded clay? In essence, expanded clay is fired clay with a porous structure. The only expanded clay parameter that can vary is the fraction (grain size). For drainage, expanded clay of a fraction of 5–10 mm is used (sometimes they write "small expanded clay"). Often you can also find larger expanded clay with a fraction of 10 - 20 mm (then they write "large expanded clay").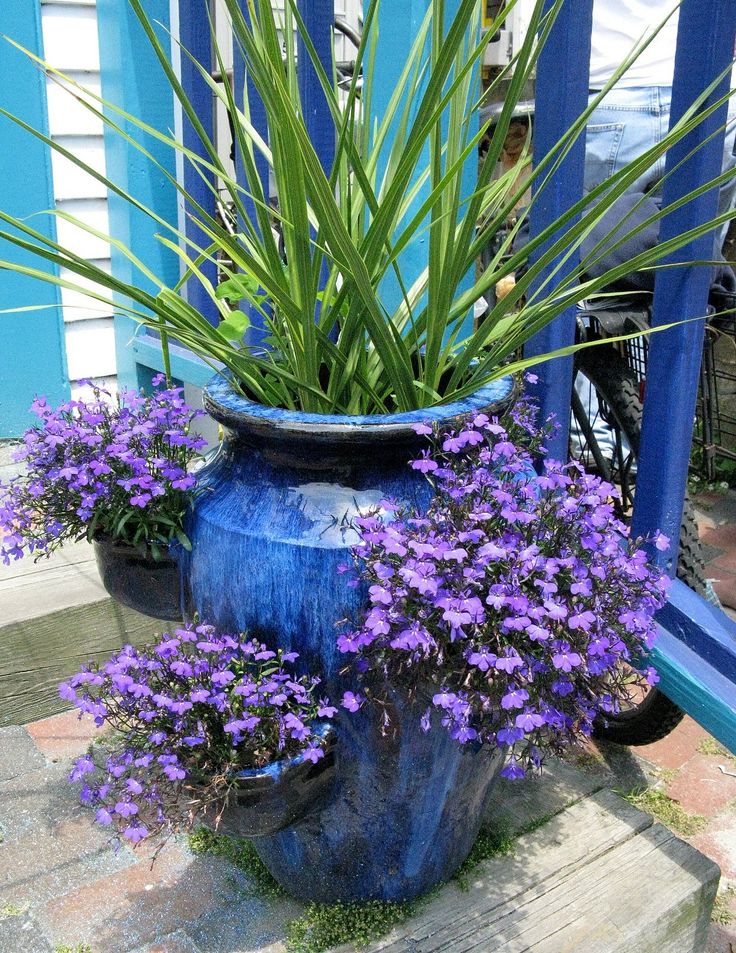
! In the absence of expanded clay, drainage can be done using ceramic shards.
What size drain should I use? For plants, it does not make much difference which fraction of expanded clay you put as drainage. Here, subjective reasons are more important: the diameter of the drain hole in the pot (in large pots, small expanded clay can spill out of the drain hole).
Laying out the drainage and preparing the soil for the flower
The drainage layer of in small pots (up to 3 liters) should be about 1-2 cm, in larger pots from 5 to 10. But no more than 1/5 of the height of the flower pot.
! Important: some manufacturers of "expanded clay drainage" recommend mixing drainage with the ground, ostensibly to prevent soil acidification. This is not true, because if the acidification process has already begun, expanded clay can only delay the beginning of the end. Much better to water properly. Mixing expanded clay with the ground is relevant only for air exchange of the roots.
By the way, after 5 - 6 years of being in the ground, expanded clay is gradually destroyed and transformed into soil, i.e. after 5 - 6 years, it is recommended to renew the drainage.
The next step is soil preparation . Today, flower shops offer a wide range of soils designed for all types of plants and flowers. It already contains the necessary minerals and fertilizers that favorably affect the growth of flowers, moreover, it does not contain harmful impurities and debris. Thanks to this soil, your indoor flowers will not need top dressing for a long time.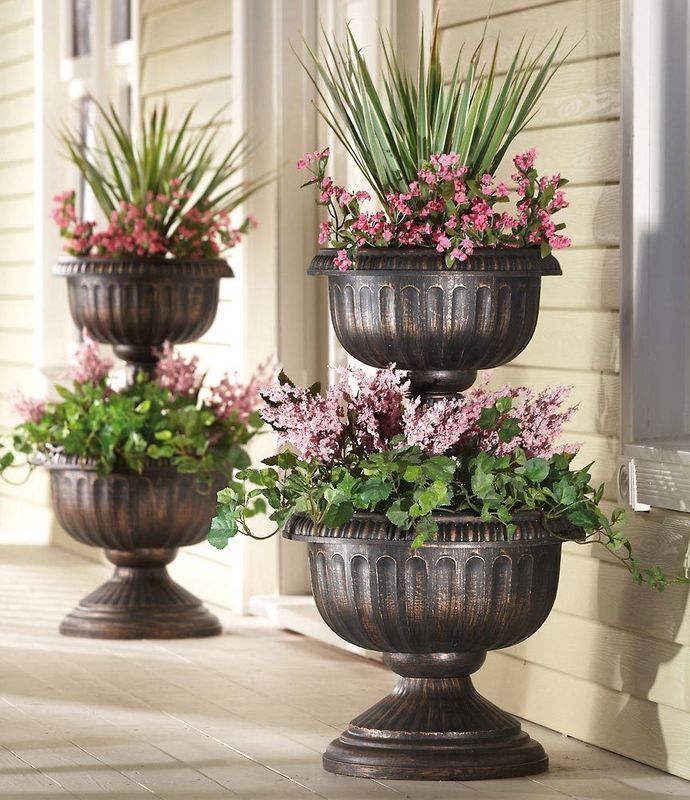
Spread a small amount of prepared soil on the drainage layer, plant a plant in the center, add soil and compact a little.
*Important: leave at least 2cm to the top of the pot.
Use of drainage on the soil surface . We recommend filling the soil with a layer of expanded clay (drainage) from above, because. this prevents the appearance of mold, mosses and fungi on the surface of the soil. Also expanded clay from above eliminates overheating of the topsoil and reduces the evaporation of moisture from the soil. In addition to useful properties, expanded clay can serve as a decoration (for example, colored drainage).
How to cover the soil surface with drainage.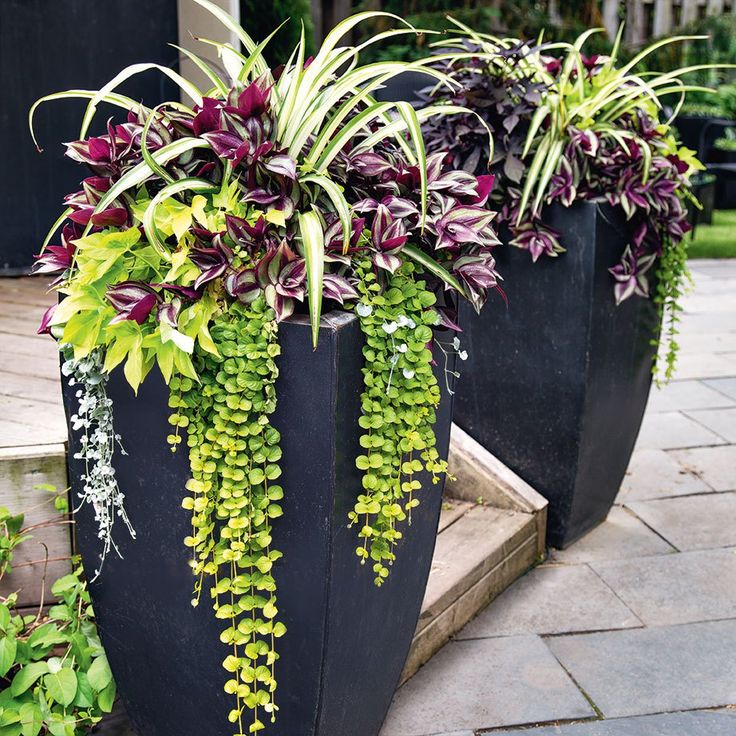 Sprinkle evenly with expanded clay, a layer of about 1 cm, not 2 - 4 cm, as is often written on the package. Too much expanded clay will absorb a lot of water and will not let it into the ground to the roots, which can begin to dry.
Hooray! Your favorite plant in a new pot.
Choose a pan of the right diameter (so that water does not spill out of it onto the windowsill) and place the pot in a lighted place. The choice of location is a separate topic, we will return to this later.
Flower care should not end there. Depending on the type of plant, it requires certain care and watering. Find out about this when buying a plant or using the Internet. If it likes a lot of moisture, spray it periodically with a spray bottle. Wipe large leaves with a slightly damp sponge if this is acceptable for the flower.
Prosperity to you, your business and houseplant!
How to properly plant flowers in pots
Do you know how to plant flowers in pots? At first glance, it may seem that this does not require special knowledge. But in fact, the ability to do it in the right way is very important for proper and good plant growth.
Contents:
- Choosing the right pot
- Planting a plant in a pot
Selecting the right pot
Here are some suggestions:
- The pot is usually chosen 2-5 cm larger than the previous one.
- It is better to choose a pot with straight walls, without rounding at the top edge, otherwise it will be difficult to pull the plant out of it during the subsequent transplant. It is important to have a hole in the bottom of the pot. This will allow the earth to “breathe”, and also excess moisture will easily come out of the pot. All this will help protect against the reproduction of harmful microorganisms.
- Be aware of the presence of the pallet. It is desirable that the bottom of the pot does not come into contact completely with the pallet, and there is a small space between them.
- If you want to pick up a pot of an ideal shape, then remember that the diameter of its circumference (upper ring) should correspond in size to the very height of the pot. The diameter of the lower ring should be less than the diameter of the upper one by a third.
It is also important what material the pot is made of. The best option is ceramics, as it is a natural material that will provide additional ventilation and natural thermoregulation. Ceramic material will also help to protect the roots from overheating in extreme heat, and in case of strong unwanted watering (which sometimes happens) it will regulate humidity.
If you still purchased a plastic pot, then remember that the watering regimen will be different. And the reason is that moisture is retained longer in a plastic container than in a ceramic one.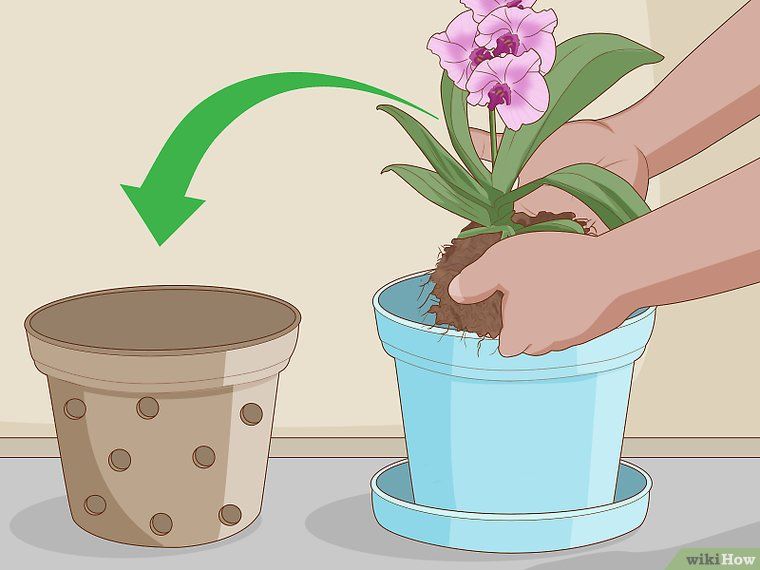
In addition, remember that not all plastic pots are made of high-quality material, which means that they can harm the plant.
Planting a plant in a pot
To plant a plant in a pot, it is also important to remember some rules. Here are some of them:
- Drainage available.
Drainage is very important. In addition to the fact that there should be at least one hole at the bottom, it is also necessary to put charcoal or expanded clay on the bottom of the pot to absorb excess moisture. You can take shards from a clay pot and put them on the bottom with the convex side up. Gravel can be placed on top of the pot.
Consider also where the pot or container will be placed. If it is in a hanging position, for example, on a balcony, then the shards can be replaced with lighter material. Styrofoam is suitable for this.
It would also be a good idea to place some garden covering material on top of the drainage layer.
To do this, cut out a size that will match the size of the roundness of the pot. If necessary, then make several holes in it for the outflow of moisture.
- Pot clean.
If you are using a pot that has been previously grown with another plant, wash it first with hot water and soap.
- Soil mix.
Partially fill the pot with potting soil purchased from a container plant store or your own. The soil is selected depending on which plant you are dealing with. Read the relevant literature and find out what composition and what acidity is suitable for the particular plant you are planting. In the store you can purchase specialized mixtures designed for individual groups of plants.
If you decide to prepare the mixture yourself, then do not forget about such procedures as sifting the soil and calcining it at a high temperature.
River sand is also added to many mixtures to loosen the soil and make it more porous.