Making a walk in wardrobe
9 things you need to know about creating the perfect walk-in closet
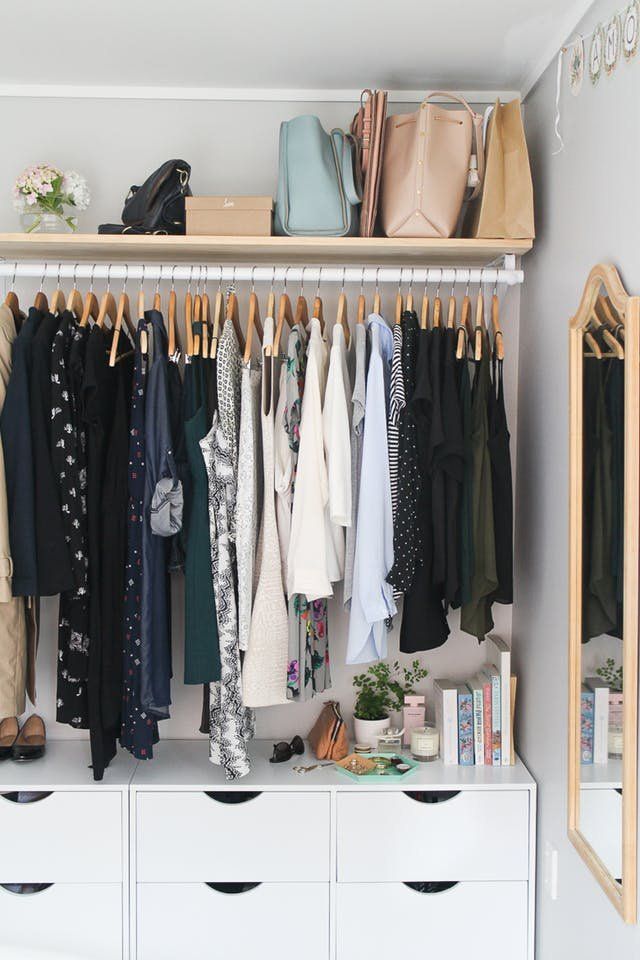
(Image credit: Future)
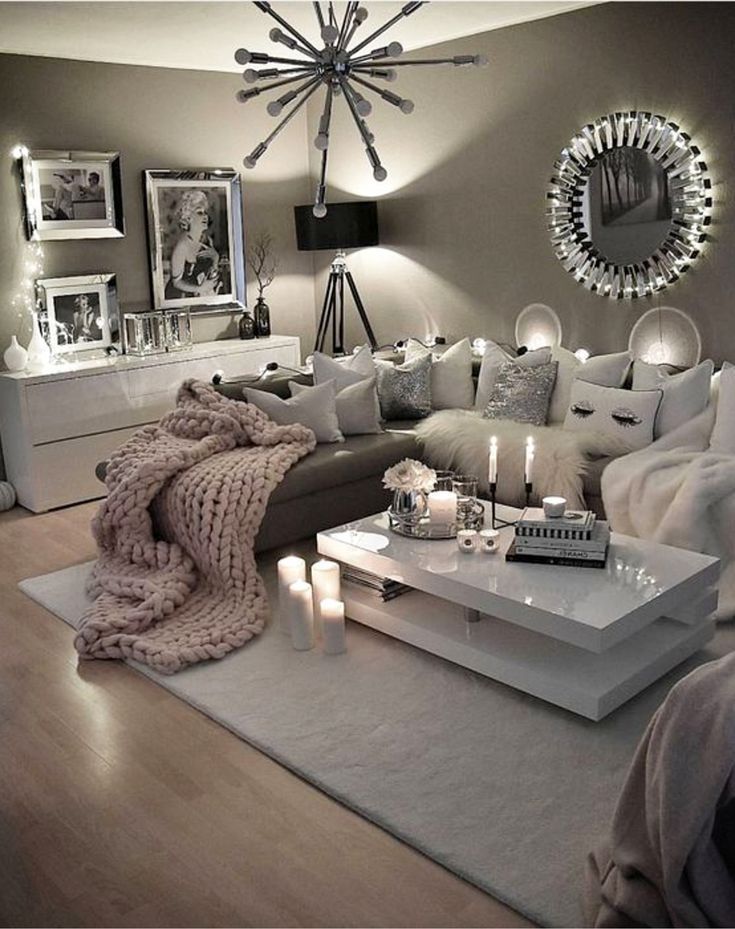
Whether you love labels and have a closet to die for, or even if you just like to keep your clothes stored neatly, a walk in closet is a covetable addition to any home.
With careful space planning and a little forethought, getting one that's the envy of Carrie Bradshaw is easier than you might think. So before you start browsing walk-in closet ideas, here are 9 top tips you need to know.
Whether you are looking for closet organization ideas, dressing room ideas or just some neat bedroom storage ideas, designing a walk-in closet needs careful planning. Below, we take you through the basics, step by step.
1. Space is everywhere
(Image credit: Future)
Consider stealing some inches from the footprint of an existing room – space under eaves can be sectioned off for example, with drawers against the short wall and hanging space against the new full height partition.
Or if you're extending your home to incorporate a new bedroom or bathroom, plan the layout a little more carefully and include some clever storage space too. Thinking ahead can save time, money, and help you make best use of the space.
2. Prioritize hanging
(Image credit: Future)
You can always put an extra set of drawers in the bedroom but you can't hang your clothes there. Separate short and long garments and measure how many feet of hanging space you need for each, then add 20% more.
An average 7ft ceiling height will allow for two rows of short hanging, one above the other, or one row or long hanging with shelves or drawers underneath.
3. Make use of redundant space
(Image credit: Future)
Shelves above hanging rails or doors can be used to accommodate less frequently used items (hat boxes, say) and a set of closed cupboards will protect more expensive garments from dust.
Install a set at the end of a long walk in closet, and use mirrored doors to maximize the feeling of space.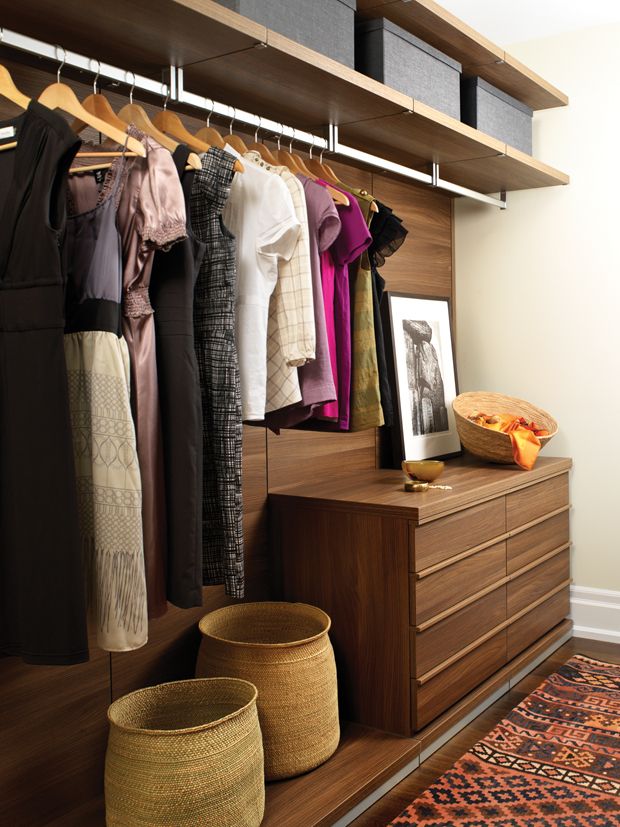
4. News on shoes
(Image credit: Future)
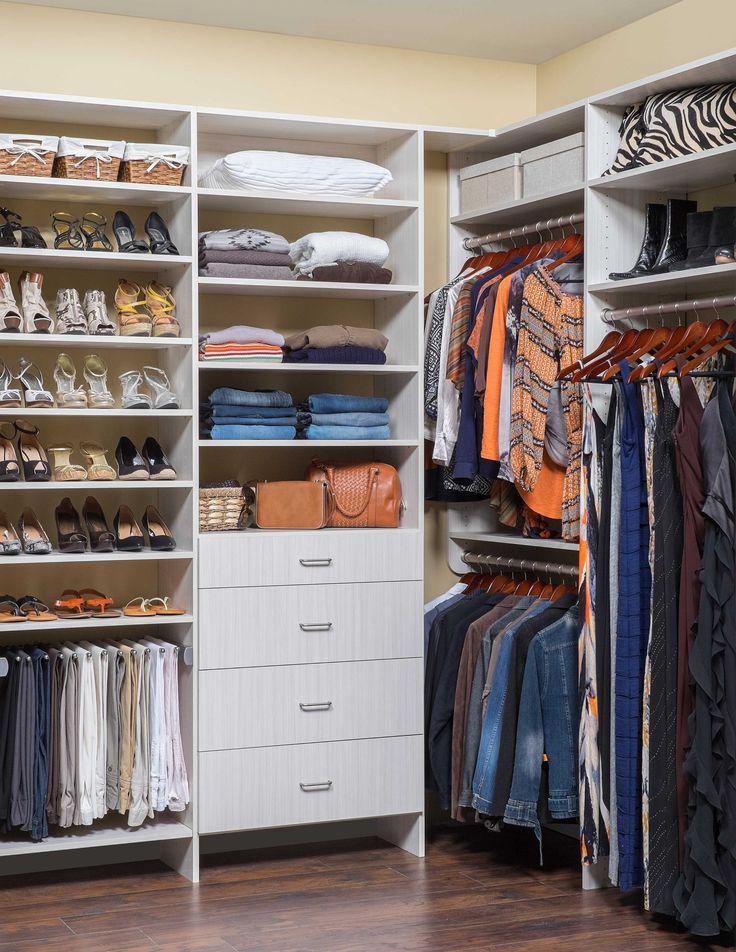
Shoe storage ideas need to be designed to suit the shoes you're storing. Shoe bars only work with heeled footwear, so instead choose flat shelves and see through plastic boxes, which are great for stacking and locating the right shoes at a glance.
Alternatively, attach Polaroids of the shoes inside to the outside of existing shoe boxes, ready for easy identification.
5. Consider clever fittings
(Image credit: Future)
Smart solutions can include a pull out ‘shoe larder' (similar to those found in kitchens). These can stow multiple pairs in a narrow space, and mean shoes are stored separately.
6. Don't forget lighting
(Image credit: Future/Paul Raeside)
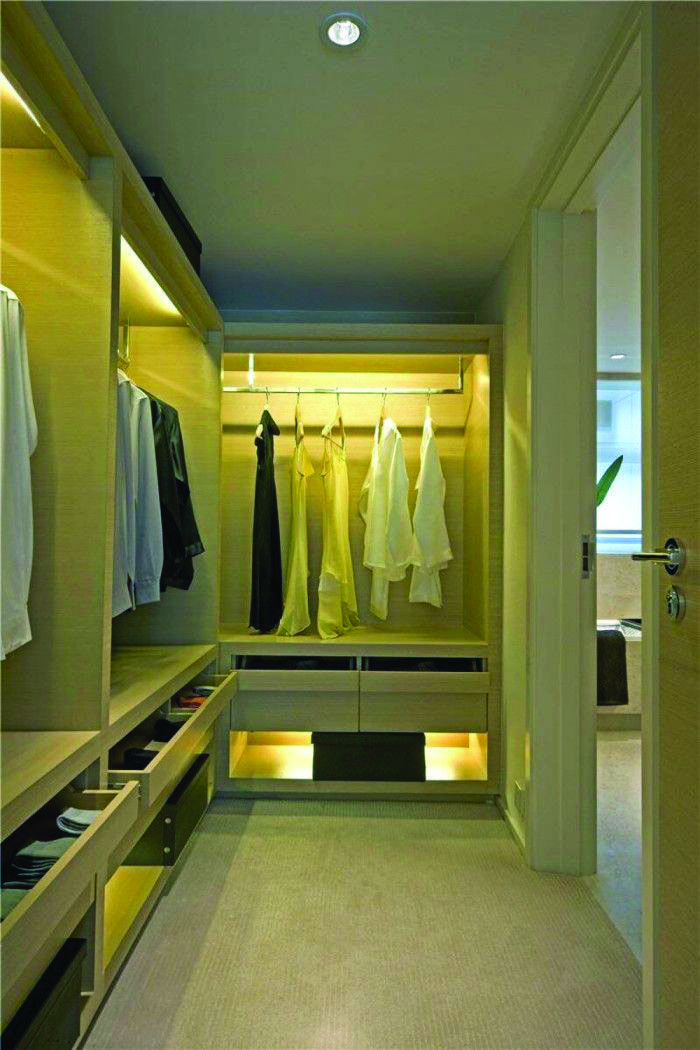
Well-planned closet lighting ideas shouldn't cost more than 20 per cent of the budget. LEDs give the best light for viewing garments, and spot lights can be adjusted.
7. Close things off
(Image credit: Future)
Pocket doors or sliding doors won't encroach on the storage space, and consider underfloor heating that ensures that valuable wall space remains free.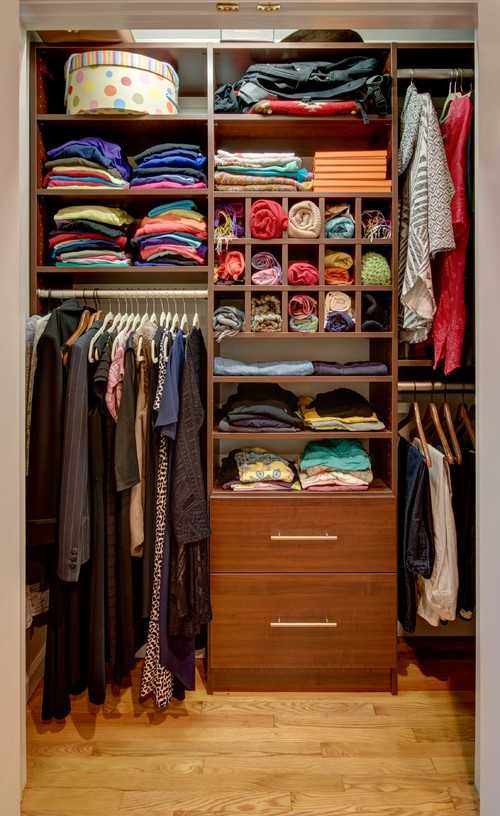
8. Think modular or fitted
(Image credit: Future)
Look at modular systems or get a bespoke interior built. Budget from £500 per linear m for open storage with a melamine finish up to £1200 per linear m for full wardrobes with doors.
9. Top drawers
(Image credit: Future)
Drawers are more expensive than shelves, so folding and stacking garments such as jumpers can help to maximize your budget.
Amy Cutmore is Editor-in-Chief, Audience, across Future's Homes portfolio. A homes and interiors journalist of 20 years standing, she has spent much of that time writing about technology, appliances and kitchens. While other people count how many countries they've visited, Amy tots up how many countries' washing machine factories she's toured (it's eight by the way, from South Korea to Slovenia). She can't leave the house without a decent pair of noise-cancelling headphones, and is always ready to explain an acronym – be it QLED, DAB or HDMI.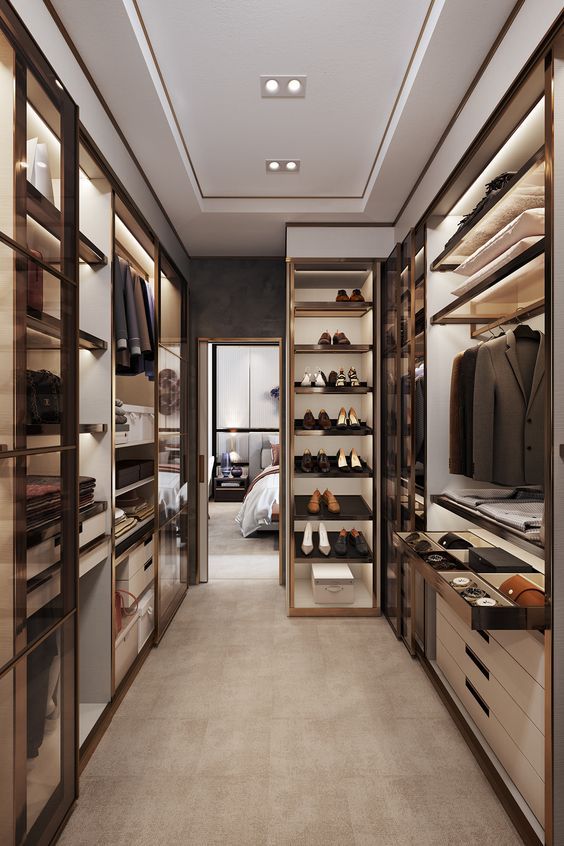
How to Build a Walk-In Closet Everyone Will Envy
A walk-in closet is something almost every homeowner dreams of. If you’re new to the DIY game, constructing entire walls may seem like a high-level project, but the fact is that you don’t need any special knowledge of carpentry to DIY your dream walk-in closet. In fact, a couple of enterprising individuals can build a walk-in closet over the course of a few days. Let’s get started!
What You’ll Need Before Building the Closet
- 2×4 boards.
- 16D nails.
- Stud Finder.
- Level.
- Framing Square.
- Circular Saw*.
- Tape measure.
- Carpenter’s Pencil and/or Permanent Marker.
*If you don’t own one, you can rent a circular saw at most home improvement stores.
What You’ll Need After Building the Closet
- Drywall.
- Door(s).
- Paint.
- Desired storage options.
Image: ClosetMaid.
As you prepare to build a walk-in closet, it all starts with 3 measurements:
1) Your closet’s height from floor to ceiling.
2) The length of its usable wall space. For walk-in closets, this includes the back and side walls.
3) The depth of the closet.These three measurements are critical, as they will impact the depth of the shelving you can use, the amount of shelving and hardware you’ll need, and what options you’ll be able to add to a basic configuration.
ClosetMaid | How to Design a Closet
Preparing to Build a Walk-In Closet
Once you’ve got your materials in hand, it’s time to lay the initial groundwork for building your own closet.
1) Choose a Location for the Closet
You have two options when deciding where to build your own walk-in closet. If possible, you can frame off an alcove in the desired room. If the room instead has an open layout, you can frame a space along one or two existing walls.
Image: Case Design/Remodeling Indy
If you are doing any demolition to make your closet, ensure none of the walls you’ll be cutting through are load bearing.
Damage from cutting through a load-bearing wall is dangerous and expensive to fix! It’s not always easy to tell if a wall is load bearing—if you aren’t 100% sure, get a professional opinion.
Case Design/Remodeling Indy
2) Decide On Your Layout
In order to plan the size and layout of your walk-in closet, you’ll need to ask yourself a few questions:
- Will you use a swinging door or folding doors? This is important for determining how much space you need in front of the closet.
- What are you storing in it? Will it be just your clothes/shoes/accessories, or are you planning on storing other items as well?
- What type of storage options (i.e. rods, shelves, hooks, cubbies) do you plan to incorporate?
- Do you plan to include non-storage elements, like a spot to fold or iron clothes?
- Do you have mobility considerations to take into account when spacing things out?
Draw up a rough sketch of what you want your closet to look like, then begin testing mock layouts in the intended space to determine dimensions.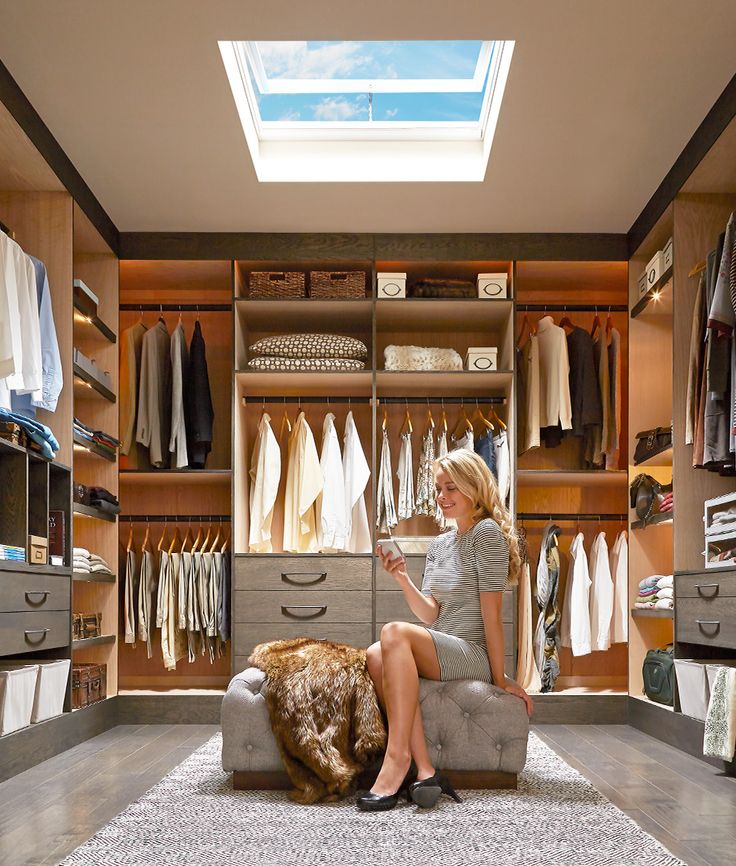 An easy way to do this is to use string and tacks to stake out different layout options. When you find a layout you like and think will work within the space, you can then easily measure the strings to get the dimensions.
Image: ClosetMaid
While deciding on your layout, remember these handy tips from ClosetMaid:
A good rule of thumb for calculating hanging space: allot 1 inch per item. But don’t forget that bulky items like seasonal coats need more room, so give them 1.5-2 inches of space each.
To maximize your closet’s full potential, create a double-hang space within your design. By hanging the tops up top and bottoms below, you can double capacity while making outfit matching fun and easy.
Long-hang space for dresses and coats should be placed at an easily-reachable 70 inches from the ground.
ClosetMaid | Calculating Storage Space
3) Check Whether Permits Are Required
You may or may not need a permit to build a closet in an existing space.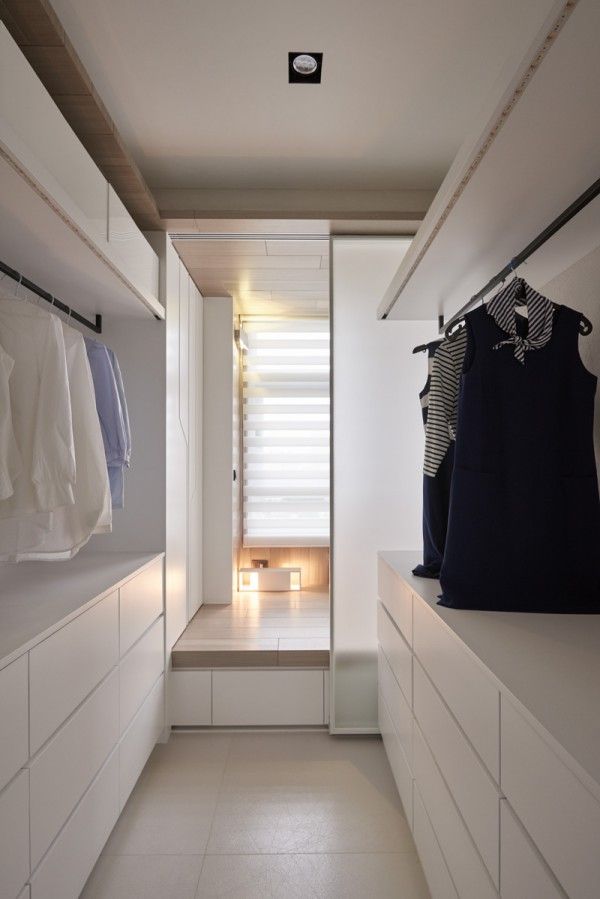 Contact your city’s building department to make sure of the laws in your area. If you will need to add lighting to your closet space, you or your electrician will almost certainly need an electrical permit.
Image: ClosetMaid
If you’ll be eliminating an existing closet in favor of your brand-new walk-in closet, keep in mind that you can reuse storage elements from the old closet if desired. Use these quick tips from ClosetMaid on how to dismantle a closet system:
1) Remove the pole portion of the system, by either lifting it out or unscrewing any brackets.
2) Remove any planks that have served as shelves by unscrewing them.
3) Remove any support boards by unscrewing them.The steps used to remove a wire storage system are similar, but may require additional tools, such as a pair of pliers and a step ladder. You’ll use the pliers to pull out any pins used to anchor the support brackets to the wall.
ClosetMaid | How to Remove an Existing Closet
Building Your Walk-In Closet
Getting Ready
If your room is carpeted, pull up the carpet, underlay, and tack strips in the space where you plan to build the closet.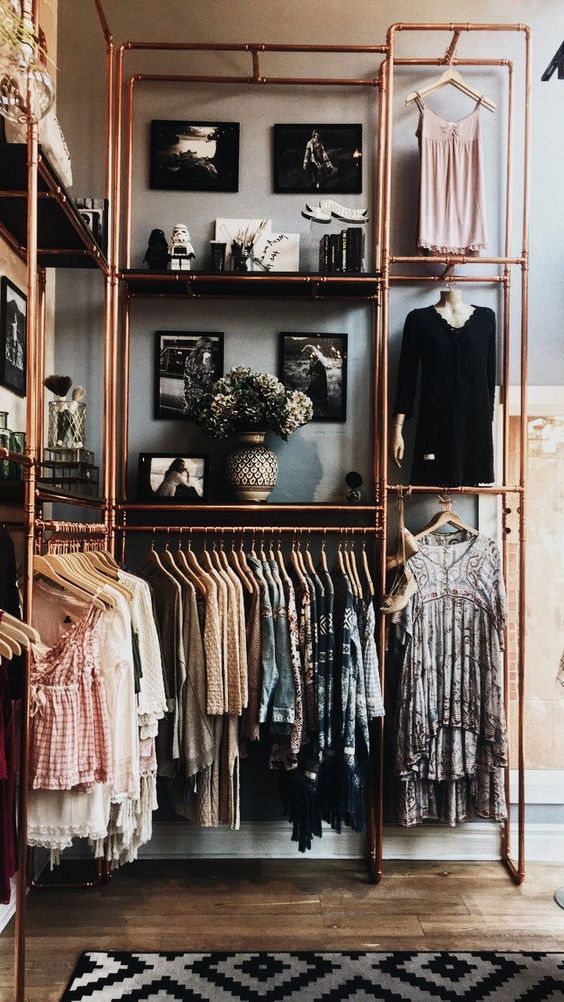 Roll the carpet back and out of the way. When you’re finished with the project, you’ll cut it to fit around the closet and tack it back down.
Pry the baseboards off of any sections of existing wall that will become part of the closet.
Measure along whatever existing wall you’ll be using and find the studs that are nearest to the dimensions where you’ll want to put each of your new walls into place. You need a stud so that you have something to anchor your new walls to.
Use a 2X4 to draw a straight line from floor to ceiling along those studs. Once they’re constructed, you’ll line your walls up with these lines.
Image Source: HGTV
Constructing Your Walk-In Closet
Cut two 2x4s to the length of the first wall you need to construct. These will be your header and footer plates.
Use a tape measure and a permanent marker to mark stud spacing on both 2X4s. Remember that studs must be spaced “sixteen inches on center,” meaning that the center of each stud is 16 inches from the center of the next.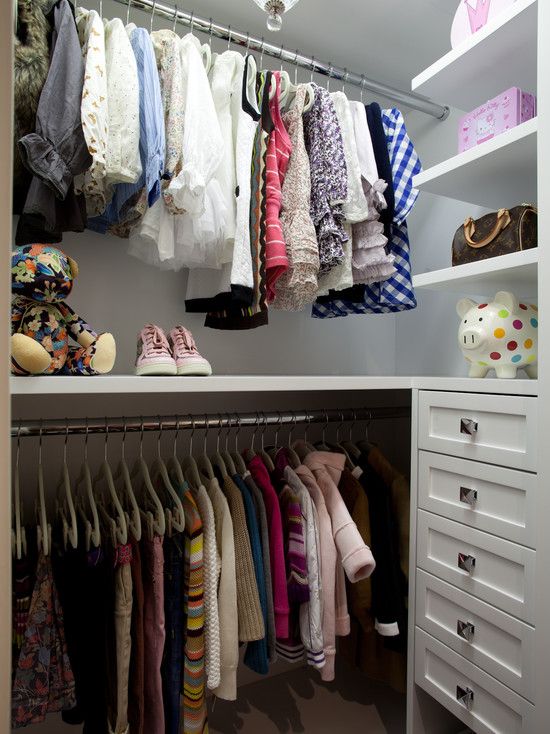
For as many studs as you will need for the wall, cut 2x4s to the height you want the wall to stand. Add an additional 2studs to your count to serve as end caps.
Nail one stud at each end of the footer plate, and nail the remainder into their slots. Nail the header plate on top.
Repeat the Prep and Construction steps for each wall you’ll build.
You will construct the wall containing your door in basically the same manner as above. On your footer plate, mark the space where the door will go, then mark for studs using the above method, simply skipping over the door space.
Nail in your studs and header as normal. Then create a “door header” by cutting a 2×4 to the width of the door and nailing it across the gap at door height.
Image Source: Remodeling for Geeks
Raising the Walls
Lift your first wall into place, lining it up with the marks you made on the existing wall. Use a level to ensure that it sits straight. Use shims where necessary to make it level.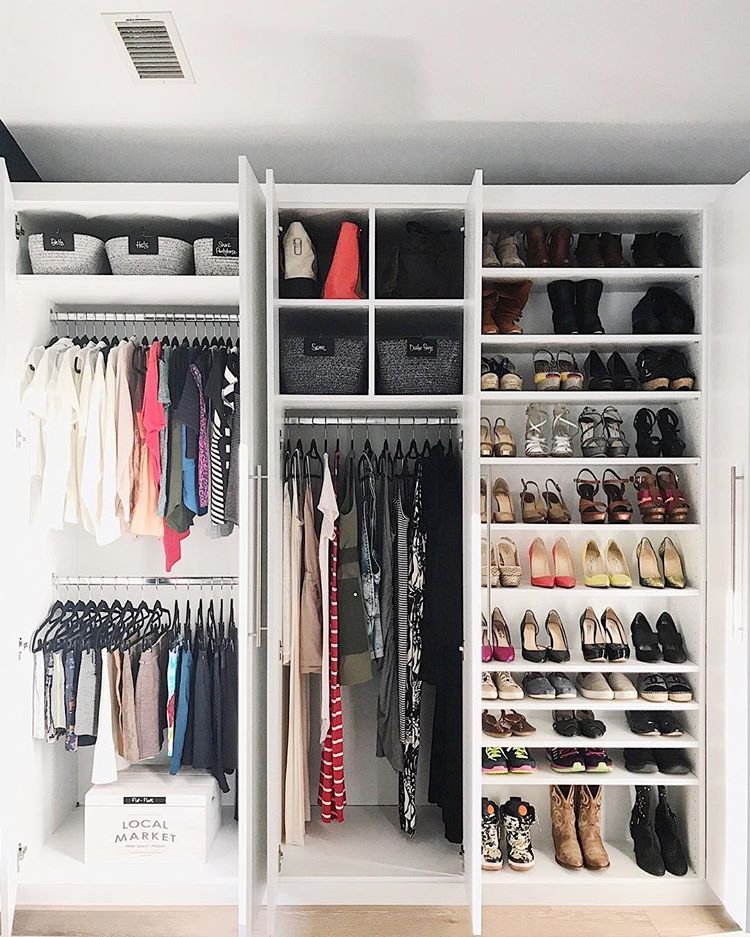
Secure it to the existing wall by nailing through the end stud into the existing wall every 2 feet.
Anchor it to the floor and ceiling by nailing between studs liberally along both the header and the footer plates.
Repeat this process for all walls.
Adding Structural Support
Wherever you feel you may need extra structural support to hang shelving and other items, cut sections of 2X4 to fit between studs, and nail them between the studs at those locations. When in doubt, go crazy. More studs just mean more options for handing things in the future.
Image: Case Design/Remodeling Indy
To complete your closet, think into every detail to make it feel professional. Carpet is warm and soft first thing in the morning, but hardwood feels elegant and polished. Light the room brightly and mimic natural light as closely as possible to help see colors accurately.
Case Design/Remodeling Indy
Celebrate Your DIY Walk-In Closet
You did it! A brand new DIY walk-in closet is almost yours.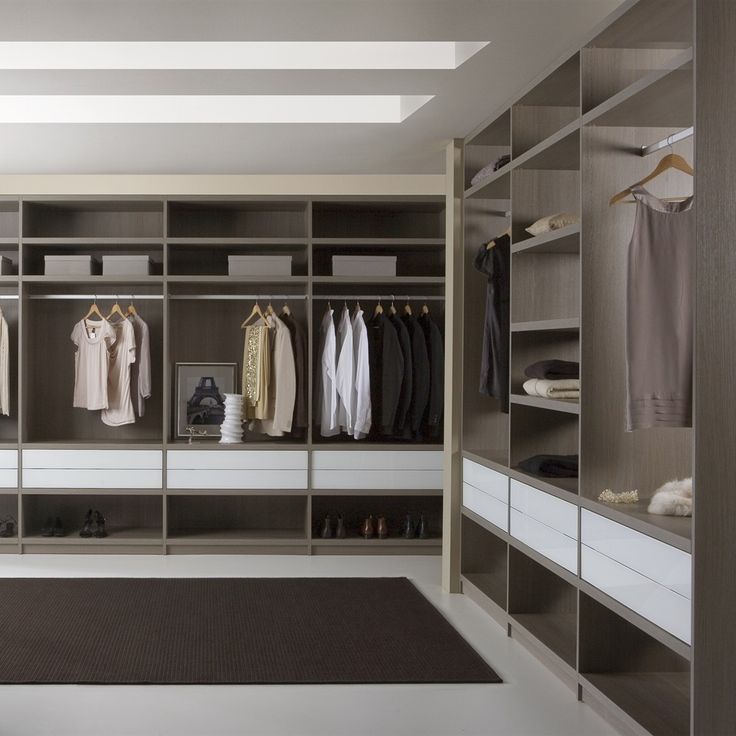 Now you just need to hang drywall, install your door, paint the closet as desired, and install whatever shelving and other storage systems you plan to use in your new space. These will likely be projects for a separate weekend, but the bulk of the work is behind you, and a lifetime of enjoying an awesome closet you built yourself lays ahead. Need some additional tips to help you get the job done? Check out our exceedingly comprehensive Guide to DIY Home Improvement!
And once the job is complete, check out our tips from professional organizers on how to organize a walk-in closet.
Wardrobe for kindergarten. For a walk”
Tips for parents:
“Wardrobe for kindergarten. To walk".
A child spends a lot of time in kindergarten. He eats there, sleeps, communicates with peers, plays, studies and rests. And still walking!
And this is where the problems begin: either the overalls are uncomfortable, or difficult to put on, or they quickly get dirty.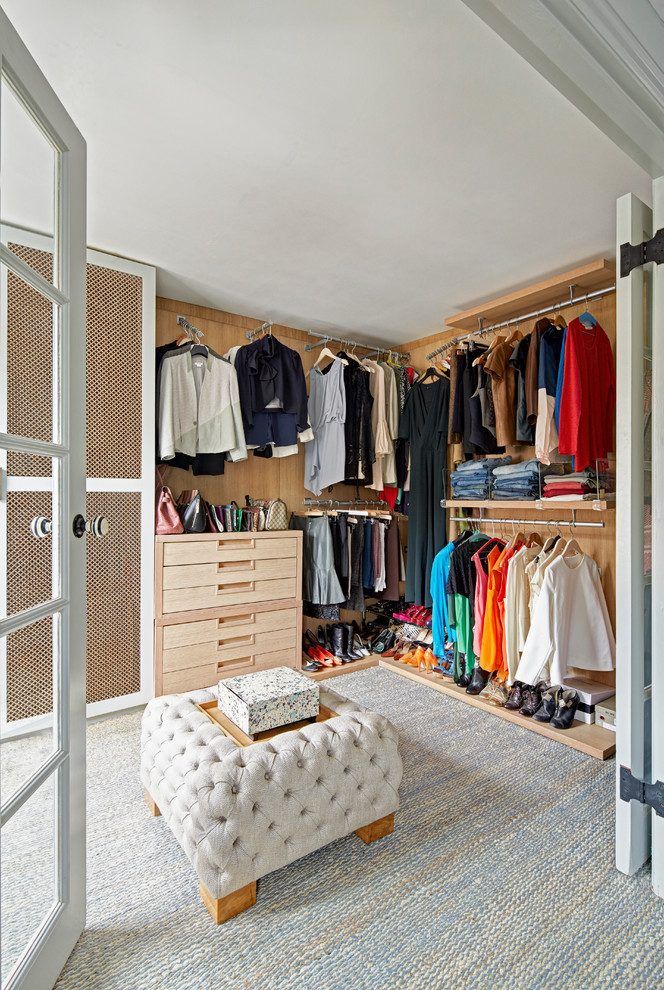 What if you get your feet wet? How not to freeze? What to change into after a walk? Do you need spare shoes? The answers to all questions are in our article.
What clothes does a child need in kindergarten?
You should pick up a whole mini-wardrobe for kindergarten for your son or daughter: comfortable clothes for group games, soft pajamas for sleeping, spare linen, including underwear, a warm jacket, comfortable outerwear, several pairs of shoes ( light for leisure, athletic for exercise, and boots or boots for walking outdoors).
How to dress a child for kindergarten? How many outfits do you need? What are the requirements for the clothes of the baby does the teacher have? These are one of the few questions that parents ask when choosing a wardrobe for kindergarten. Only you decide what your child will wear, everything is purely individual. However, there are general guidelines.
The choice of clothes for kindergarten depends mainly on four factors:
As a rule, kids of younger groups need more change of clothes, because. they get dirty more often, can be described. Therefore, children of this age should have at least one spare set of clothes in their locker. For children of older groups, this is not at all necessary, but a changeable T-shirt, panties (shorts) and socks will not be superfluous (after all, the child may just sweat).
2. Temperature in the room of the kindergarten group. Everything is obvious here: if it is hot in kindergarten, a light set of clothes is selected (for example, a T-shirt, shorts, a skirt, knee-highs), if it is cold, a warmer one (jacket, sweater, tights, trousers).
3. Requirements of the administration of the kindergarten or teacher. Some preschool institutions have their own requirements for the appearance of pupils. For example, the obligatory presence of a T-shirt or, conversely, a ban on wearing jeans and puffy dresses.
4. Activity children in kindergarten. You will need several sets of clothes and shoes - for a simple stay in a group, for sleeping, for physical education, for walking, for holidays and matinees.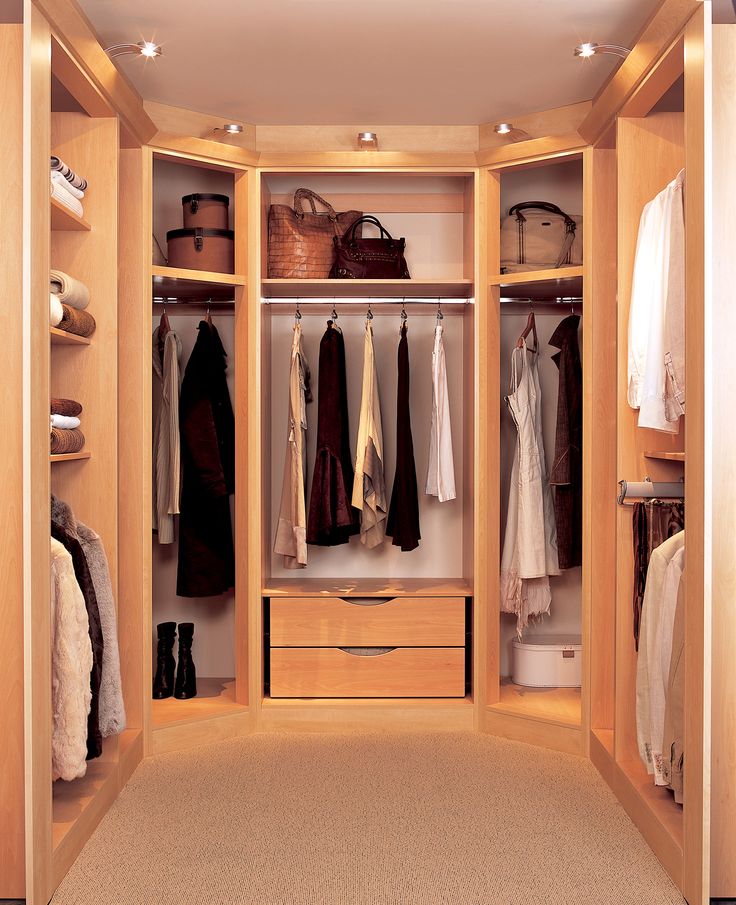
You need to know this!
-
When gathering your child to kindergarten, think about whether it will be convenient for him to dress himself, whether it will be convenient for educators who take a whole group of children for a walk. Zippers and Velcro are preferred over buttons; a knitted shirt-front is more comfortable and reliable than a scarf; the mittens sewn to the elastic band will not be lost, and the cap-helmet will tightly cover the ears.
-
To avoid overheating while getting ready for a walk, children in kindergarten are taught to dress sequentially: first, “bottom” - tights, trousers, socks, boots; then "top" - a sweater, a hat and, last of all, a scarf and a jacket.
-
Group clothes should be as comfortable as possible, not restricting the child's movement. Soft jersey pants are more comfortable than tight jeans and denim overalls. A T-shirt or knitted jumper is preferable to a shirt.
 Elastic suspenders are dangerous - when moving, metal or plastic fasteners can unfasten and injure the child's head. In addition, suspenders and straps of overalls make it difficult for a child to change clothes and create inconvenience when visiting the toilet.
-
If your child is prone to sweating, you need to bring an extra T-shirt with you so that the caregivers can change him.
Child's clothing depending on the type of activity.
Outing
Clothes for a walk should, first of all, be chosen according to the season. Since the main time for visiting kindergarten falls on the autumn-spring-winter period, overalls or jackets with warm pants are used as outerwear. The choice between a jumpsuit and a split set is up to you. It is more convenient for someone to dress the baby in overalls, because the child himself can fasten it in one motion, and also his back always remains closed.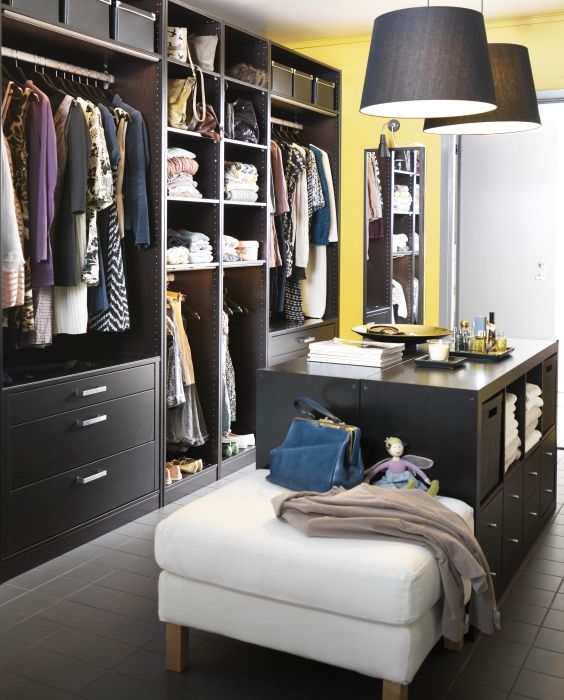 Others, on the contrary, prefer a jacket, considering it more comfortable.
Mittens are good for toddlers, gloves for older kids. To ensure that mittens or gloves are not lost, they are sewn with an elastic band. Today there is a large selection of mittens and gloves made of waterproof fabric, in addition, there are models with high "cuffs" that do not allow snow or water to stain the sleeves.
The hat should be comfortable, made of soft fabric and fit snugly around the child's head.
Scarves are not welcome in kindergartens, especially for graduation. First of all, this is due to safety requirements - the protruding edge of the scarf can be caught if, for example, the child moves down the hill. Therefore, capes or hoods are now the most popular, which completely cover the baby's neck and are comfortable when put on.
Sleep
For "quiet time" the clothes in which the child usually sleeps at home are well suited: T-shirt and panties, pajamas, nightgown. The main thing is that the baby was comfortable to rest.
Physical education classes
Sports activities in the older groups require a change of clothes, while in the younger groups children are engaged in regular clothes. Basically, T-shirts, T-shirts, shorts or leggings are used for physical education. Clothing should not restrict movement. From shoes, sports slippers and Czech shoes are preferred. These shoes are comfortable and easy to change into. For this reason, shoes with laces - sneakers and sneakers - should be avoided.
Holidays
A holiday or matinee in kindergarten is a rather frequent phenomenon. In addition to calendar holidays, birthdays are celebrated, colorful performances are held. In this case, the baby’s wardrobe should have at least a couple of beautiful and elegant things. For girls, these are dresses, for boys - trousers, a light shirt, a bow tie, etc.
General recommendations for choosing clothes and shoes for visiting kindergarten:
1. Your baby's clothes should be comfortable and made from natural fabrics.
2. It is necessary to give preference to such things, most of which the child can put on on his own (this is convenient not only for the child, but also for the teacher, because it greatly facilitates the process of changing clothes).
3. It is better to exclude buttons on clothes, give preference to Velcro and buttons.
4. Clothing should be decorated as little as possible with various beads and small details, primarily for safety reasons
5. Shoes must be chosen exactly in size (they must clearly fix the foot), avoid "complicated" fasteners (it is better to give preference to Velcro fasteners). Sandals are the most popular in kindergarten, and slippers with a closed heel can also be used as interchangeable shoes for a group.
Star Wardrobe Tour: Kendall Jenner
Hi, I'm Kendall! Welcome to my dressing room!
The first thing Jenner shows are Azzedine Alaia high heel boots.
They are four or five years old, my favorite boots. Kanye (West - ed.) gave them to me, - says Jenner.
Then Kenndal finds a Hermès bag in his wardrobe.
This is a great bag, I bought it recently!
Kendall shares the story of the Kardashian tradition:
These are our pajamas. We buy matching pajamas for Christmas Eve and put them on on Christmas morning and wear them all day.
Marc Jacobs jeans. I was obsessed with them - I tried to steal during one of the photo shoots. Just don’t tell anyone about this,” Jenner laughs. - Of course, I didn’t steal them in the end, I felt ashamed, and later the brand gave me these jeans.
So let's move on, this is my fitting room. I love this vintage Louis Vuitton skirt. I just received it and haven't put it on yet. Fendi suit (jacket and shorts - ed.) - I was wearing it in Paris at one of the couture shows. By the way, I made the shorts shorter, they were much longer, - Jenner continues.
Over the knee boots - my friends tried to put them on, but they didn't work, they are too long, says Jenner.
Next, Kendall plans to show the collection of shoes from Vetements + Manolo Blahnik, but suddenly abandons this idea and brings several branded bags from the dressing room.
Everyone knows that I love waist bags. Here is a vintage Louis Vuitton funny pack - this is my baby, I love it, says Jenner.
Next, Kendall shows off the Versace dress the model wore to the Met Gala 2016.
Learn more