Cleaning a bathroom sink
How To Clean Your Bathroom Sink In 6 Easy Steps
Let’s be real, though. Usually, we straight-up ignore it. It will never be as beloved as its big brother, the bath, or oohed and aahed like its fancy cousin, the dishwasher. It’s just your bathroom sink. Omnipresent, never obtrusive, and usually forgotten until you look down and realize that it’s encrusted with speckles of dried toothpaste. Gross.
The thing is, that’s the least of it.
Your bathroom sink is probably teeming with bacteria.
You’d think that the daily running of water mixed with soap would keep it clean, but alas. It’s actually an active hotbed for the worst of the microorganisms. Stagnant pools of water, although tiny, breed some of the nastiest microbes for us humans to consume. This includes Streptococcus, Campylobacter and E. coli.
Okay, so before you run upstairs to scrub your bathroom sink in a disgusted panic, there’s a few things you need to keep in mind.
Know thy bathroom sink.
While the cleaning steps we outline should be sufficient for your average unkempt sink, it’s crucial to remember what your sink is made from, especially when it comes to determining what types of cleaning products you apply to it, in case you want a deeper scrub. Below we’ve listed several kinds of common sink materials. Just identify which is yours, and note its general ongoing maintenance tips (if applicable), and if there’s anything you need to avoid before you dive in and play Cinderella.
Cleaning ceramic, porcelain, fireclay, and cast iron sinks
These hard materials are all extraordinarily durable, and resistant to scratching and chipping—which is why they’re some of the most popular materials out there for sinks. However, they still can be damaged. When cleaning them, it’s crucial that you avoid the following:
- Do not use any scouting pads or brushes—especially if they’re made from metal (like steel wool).
- Do not use abrasive cleaners or scouring powders—they could scratch or damage the surface.
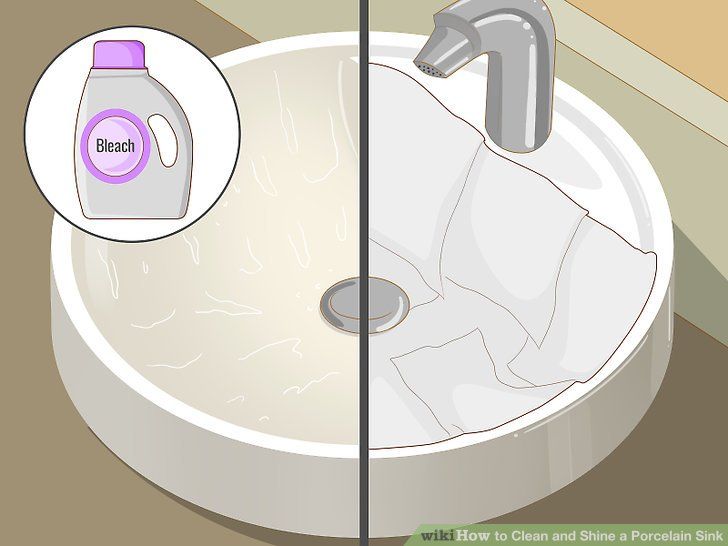
- Generally, avoid bleach (can be used with care and on occasion if your sink is white).
Cleaning stainless steel sinks
While more popular for a kitchen sink, stainless steel still makes an appearance in the modern bathroom. They’re durable, and are able to withstand intense scrubbing, but they're certainly not to the caliber of Thor’s hammer. Stainless steel can scratch when not cared for properly. Here’s what you should avoid:
- Do not use steel wool or brushes. Not only will they scratch the surface, but they will make it more vulnerable to rust and stains.
- Do not use abrasive cleaners or scouring powders. They will scratch the surface and consequently dull the finish.
- Avoid bleach and any kind of cleaner with chlorine, as it will also lead to possible damages.
Cleaning resin and composite sinks
Resin is the budget guy’s marble (or granite). Think: really, really tough plastic. Sometimes it’s polymer mixed with granite dust. Nonporous and resistant to stains, it’s a pretty easy-going, low-maintenance material, like the best roommate ever. However, it can still get scratched sometimes. Here are some tips:
- Do not use steel wool or brushes, as it could scratch the surfaces.
- Do not use abrasive cleaners or scouring powders.
- Do not use bleach.
- Pro tip: if there is scratch, there’s a secret. You actually can rub it out using coarse sandpaper, ever so softly.
Cleaning natural stone sinks
Think: granite sinks, marble sinks, travertine sinks, sandstone sinks, onyx sinks, jade sinks, and soapstone sinks. If one thing’s for certain, these materials are hard and tough for your daily morning wash. However, they’re kind of porous—and need to be resealed at least once a year (Yeah, that’s right! Most people don’t know this, and so don’t do it!). Basically, you want to protect these kinds of stones from mineral deposits like salt, lime, or even just soap buildup. Here’s what you need to know:
- Do not use cleaners that are highly acidic (aka, have a high pH).
 Yes, this even includes natural cleaners, like vinegar or lemon juice.
 - Do not use steel wool or brushes.
- Do not use abrasive cleaners.
- Bleach actually can be used on occasion—but it’s crucial to water it down. Do not use it daily.
Cleaning quartz sinks
Quartz is one of the most durable sink materials out there. It’s as smooth and as hard as polished granite, but unlike typical natural stones, it’s nonporous. Consequently, they’re way less maintenance (you needn’t seal them yearly). Still, you just can't throw anything on them and hope they’ll withstand the pressure. Things to remember:
- Do not use cleaners that are highly acidic—and yes, this includes natural cleaners like vinegar and lemon juice.
- Do not use steel wools or brushes.
- Do not use abrasive cleaners that can dull the color and finish of your sink.
Cleaning tempered glass sinks
Tempered glass (often nicknamed “toughened glass”) is far stronger than your average glass. However, it can still break and scratch if you’re rough with it. One cool thing? It can be lightly cleaned using the same spray you use on your windows! Here’s some things to keep in mind when you’re cleaning:
- Do not use any abrasive pads.
- Do not use cleaners containing any abrasive powders.
- Do not use bleach, ammonia, alcohol or chlorine.
Bathroom sink cleaning supplies
After you’ve established what products you absolutely should avoid on your particular sink, here’s what you need when you’re cleaning. The best part of this? You probably have all of this already at your house.
- 2–3 cotton towels or soft sponges (keep one dry for the end)
- Liquid dish soap (our favorite is Dawn)
- Disinfectant spray, like Microban 24
- Water
Yep, that’s it!
Let’s get to it: How to clean a bathroom sink in 6 easy steps
1. First, wipe the bathroom sink down.
- Using your dry cotton towel or sponge, wipe your entire basin dry.
- Get out all the grime, hair and dust that you can just by using your hands.
- Don’t forget about the faucet.
2. Now rinse the sink with hot water.
- Run the hot water—this will loosen up the soap scum and dirt, and help kill the bacteria.
- Now wet your cotton cloth or sponge, make sure the hot water gets in contact with the sides and rub it around.
- Wipe down the facet with the hot water, too.
3. Add some soap, and let the bubbles do their magic.
- Squirt a couple drops of dish soap into the basin.
- Plug the sink.
- Turn on the water to warm (or as hot as you can touch without it hurting!), fill up half the sink and watch the bubbles appear.
4. Scrub and drain!
- Take your towel or sponge, and scrub the remaining dirt and grime.
- Be sure to give the drain a little TLC, focusing on whatever little crevices there might be, including the facet.
- Drain the water.
5. Rinse and dry the sink.
- Using cold water, rise the sink until all the bubbles are gone and no soap residue is left.
- Then, take a dry cloth—wipe it completely dry.
6. Disinfect!
How to Clean Bathroom Sinks and Drains
Keep dirt and grime out of your bathroom sink by following these easy steps
Get quotes from up to 3 pros!
Enter a zip below and get matched to top-rated pros near you.
It may seem like a no-brainer. Cleaning the bathroom sink is something everyone regularly does when they see hair and gunk build up in the basin. But cleaning your bathroom sink correctly isn’t as straightforward as you may think.
Learning how to clean a bathroom sink properly will not only remove those unsightly globs of toothpaste, but it will also get rid of germs and bacteria and make your sink shine.
What You Need to Clean a Bathroom Sink
You’ll need the following to clean a bathroom sink, no matter the material:
Microfiber cleaning cloth or sponge
Old toothbrush or soft bristle brush for scrubbing tough areas
Non-abrasive cleaner(more on choosing the right one in the next section)
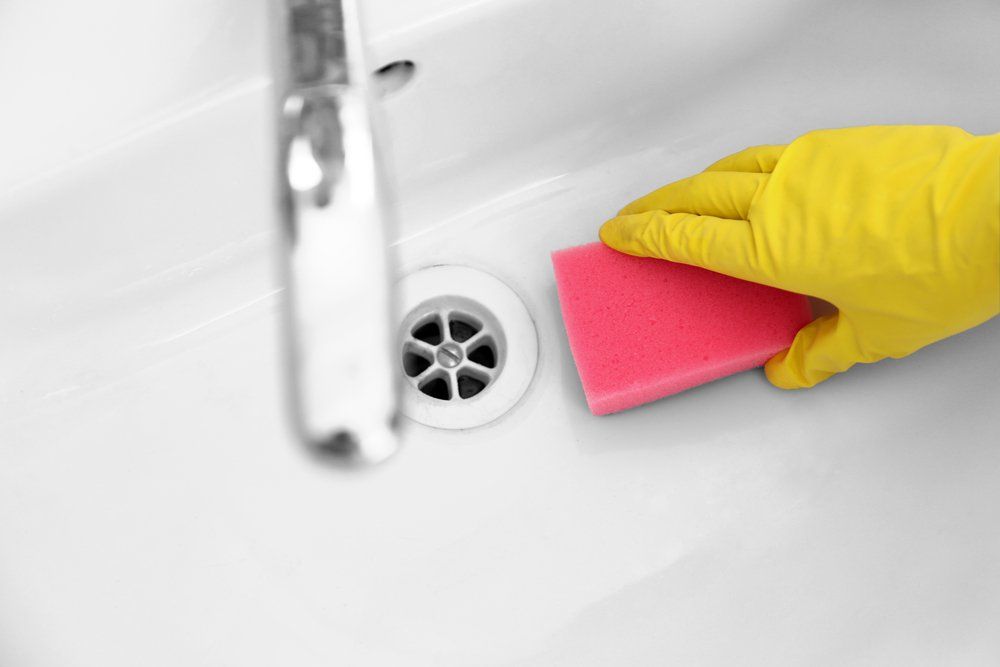
You may also need specialized cleaners and tools, depending on what sink material you have.![]() For instance, you’ll need baking soda if you’re planning to clean the sink drain. You’ll need protective wax for copper and stone sinks. You should pick up paper towels and hydrogen peroxide to wipe porcelain and stainless steel sinks.
For instance, you’ll need baking soda if you’re planning to clean the sink drain. You’ll need protective wax for copper and stone sinks. You should pick up paper towels and hydrogen peroxide to wipe porcelain and stainless steel sinks.
What Are the Best Cleaners for Bathroom Sinks?
The best cleaner for bathroom sinks is a non-abrasive all-purpose cleaner, liquid soap, or a 50:50 mixture of distilled white vinegar and water. These products are mild and won't harm your bathroom sink, but effective enough to cut through grime and soap scum. If you have areas that need tougher cleaning, sprinkle on baking soda and scrub with an old toothbrush.
Here are the best cleaners for each bathroom sink material:
Porcelain, stainless steel, and glass: All-purpose cleaner or 50:50 mixture of distilled white vinegar and water
Copper and stone: Liquid dish soap
How to Clean a Porcelain or Stainless Steel Bathroom Sink
Porcelain sinks are made of durable clay, iron, steel, and other materials with a porcelain coating.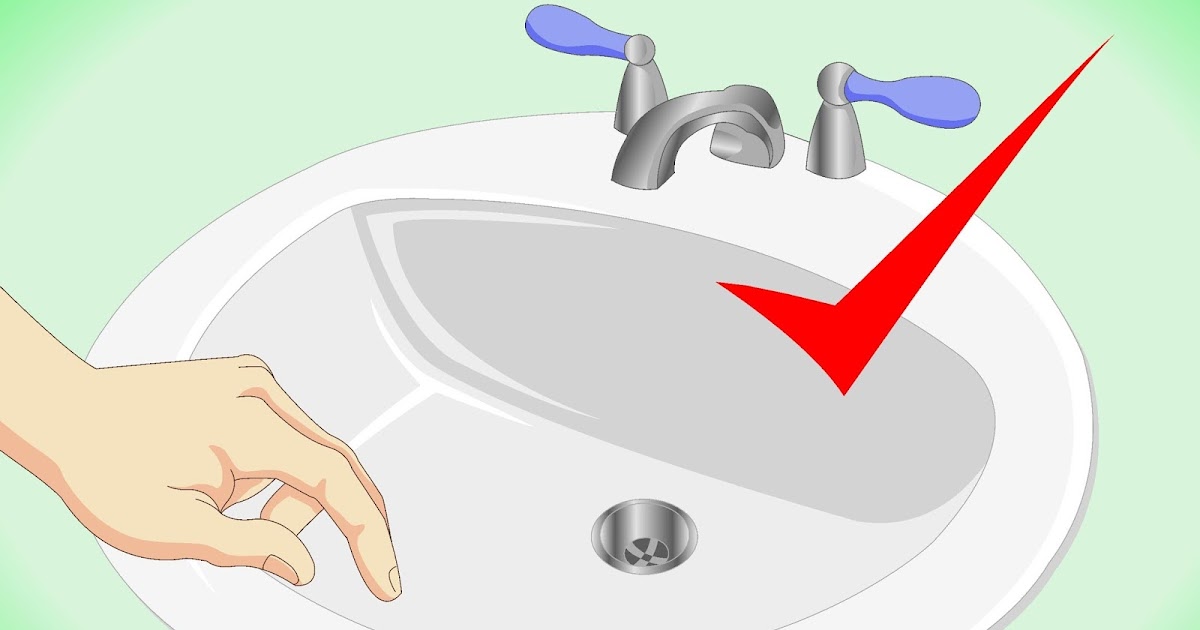 They’re easy to clean, and regular maintenance helps prevent stains. Stainless steel is also easy to clean, and you can follow the same method as you do with porcelain sinks. Cleaning your stainless steel sink prevents corrosion, making it an important maintenance step.
1. Rinse and Apply Cleaner
First, rinse the sink with warm water and add the non-abrasive cleaner. Scrub with your sponge or a washcloth to remove toothpaste and soap buildup.
2. Identify Stubborn Stains
Rinse the sink and identify any stains that may need extra attention. It’s common to find hard water stains and rust stains below the faucet and around the drain, especially if you have well water. Both types of stains require a little extra elbow grease, but they should come clean if you follow the instructions below.
3. Apply Hydrogen Peroxide Mixture
If stains are present, you’ll need to use a hydrogen peroxide mixture to remove them. Layer a few paper towels in the basin and soak them with a solution made of one part water and one part hydrogen peroxide. Let the damp paper towels sit in the basin for two to three minutes, and then remove them and rinse the sink thoroughly. Hydrogen peroxide not only removes stains, but it will also disinfect the sink.
4. Scrub Drains and Fixtures
To clean the caulking and the sealant around your drains and fixtures, spread a small amount of toothpaste into the crevices and scrub them with an old toothbrush. Rinse thoroughly when finished.
How to Clean a Copper Bathroom Sink
Copper sinks are not only beautiful, but they’re also easy to maintain. There are three basic types of copper sinks: raw copper, lacquered copper, and finished copper.
Raw copper is unfinished and will naturally develop a green-colored finish called a patina after being exposed to air and water for a while. Lacquered copper is covered in a protective lacquer to protect its shiny surface from patination, and finished copper is pre-patinated and protected.
The good news is that you should clean the three types of copper the same way.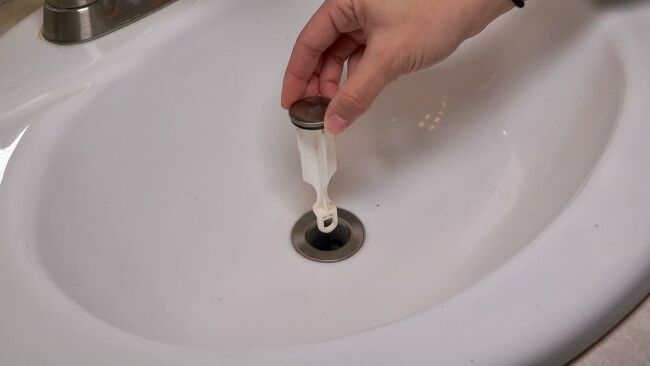
1. Rinse and Apply Cleaner
Spray the sink with water and add a few drops of liquid soap. Never use abrasive cleaners such as bleach on copper sinks, as they will damage the surface.
2. Scrub the Surface Gently
With a soft cloth or a soft-bristled nylon brush, scrub gently from the edges of the sink down toward the drain. Use your brush to get into the crevices and around the fixtures.
3. Rinse the Sink
Rinse the sink with warm water to remove the soapy residue.
4. Wipe Down Faucet and Fixtures
Spray an all-purpose cleaner on your faucet and handles, then wipe them down with a cleaning cloth.
5. Apply Wax
If you want to keep your raw copper sink from developing a patina, or you don’t want your patina to change over time, wax your sink with carnauba wax or special copper wax once the sink is dry.
How to Clean a Stone Bathroom Sink
There are various stone sinks on the market today. Granite, marble, onyx, travertine, and soapstone are the most commonly used stones for sinks.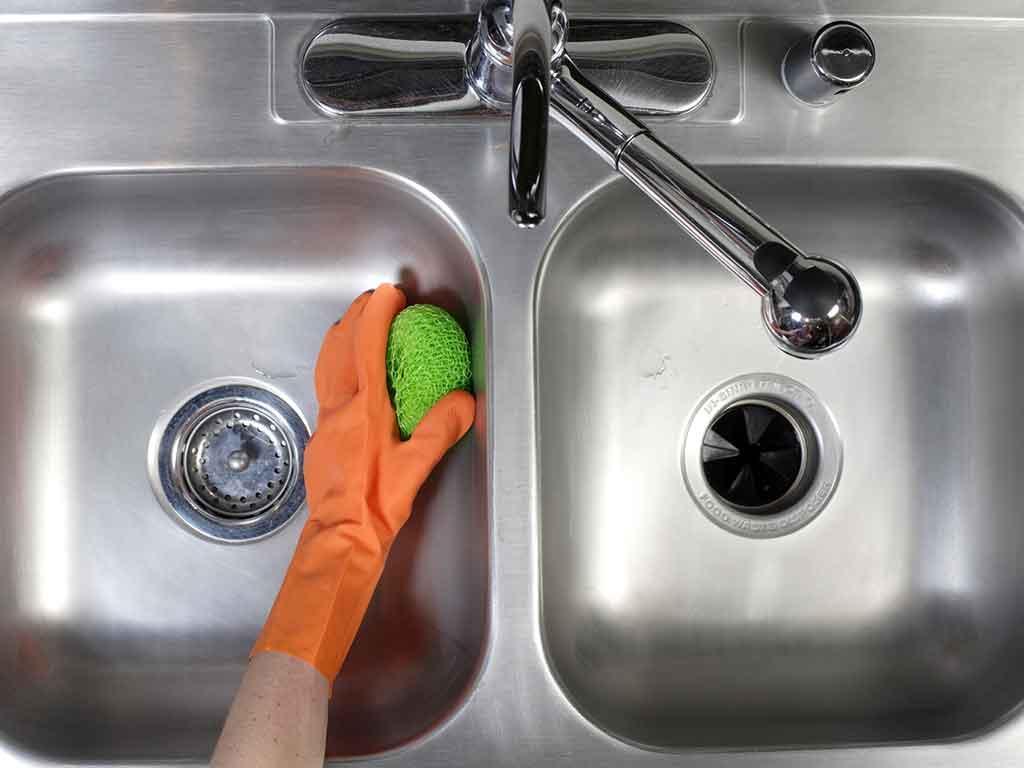 No matter which of these you have, you should never use abrasive cleaners or steel wool to clean them. Abrasive cleaners and steel wool will damage the finish of your sink regardless of the type of stone material.
Here’s a better routine you can follow to clean a stone bathroom sink.
1. Apply Cleaner
To clean your marble, granite, onyx, travertine, or soapstone sink, spray the sink with water, then apply a few drops of mild liquid soap.
2. Scrub From the Edges to the Drain
Scrub your sink with a soft cloth, a non-abrasive sponge, or a soft nylon brush. Work from the edges down toward the drain.
3. Rinse
Rinse your sink with water. Start from the edges and send the soapy water and debris down the drain.
4. Wipe Down Faucet and Fixtures
Spray an all-purpose cleaner on your faucet and handles, then wipe them down with a cleaning cloth.
5. Apply Wax
If the manufacturer did not seal your stone sink, apply a coat of wax at least once a month to protect the stone from stains and discoloration.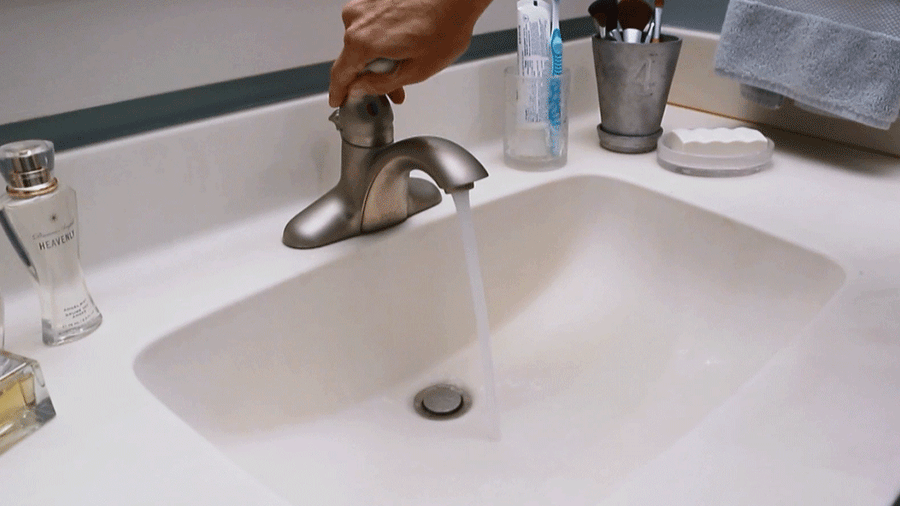 Special stone waxes are available at home improvement stores, or you can use pure carnauba wax.
How to Clean a Glass Bathroom Sink
Cleaning your glass bathroom sink is pretty straightforward. However, if you have hard water stains in your sink, it will get a little more complicated. Hard water is a common problem, especially if your home runs on well water. Mineral deposits from hard water build up and cause unsightly discoloration on glass surfaces, and they’re hard to ignore.
1. Spray Cleaning Solution
Create a mixture of equal parts white vinegar and water or a mixture of equal parts lemon juice and water. Put the solution in a spray bottle and apply it to your sink, especially the areas with hard water stains.
2. Allow the Cleaner to Sit
Let the mixture sit for 10 minutes to help break up stains, debris, and soap residue.
3. Scrub the Sink
Working from the edges toward the drain, gently scrub the sink with a cloth. Use an old toothbrush on harder-to-clean areas.
4. Wipe Down Faucet and Fixtures
Spray an all-purpose cleaner on your faucet and handles, then wipe them down with a cleaning cloth.
5. Rinse the Sink
Rinse the sink with water, starting from the edges down to the drain. Let the sink dry. To prevent future hard water stains from developing in your glass sink, wipe the sink dry after every use.
How to Clean Bathroom Sink Drains
The basin isn’t the only part of your bathroom sink that you should keep clean. Drains can be a hotbed of microbial activity where a buildup of hair and gunk can provide the perfect breeding place for various types of bacteria. This buildup can also cause your sink to drain slowly.
1. Remove the Stopper
The first step to cleaning out your sink drain is to remove the stopper and set it aside. If hair or debris is visible in the drain, you can use a pair of needle-nose pliers to pull it out.
2. Disinfect the Drain
Once you remove the debris, put the stopper back in.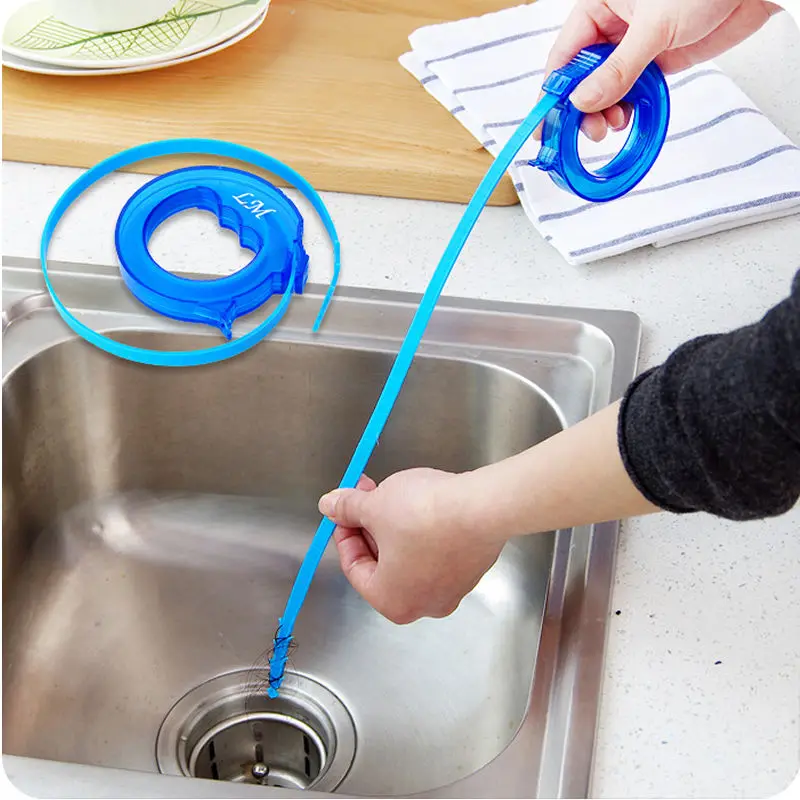 Flush the drain with a half-gallon of boiling water, and then slowly add a cup of baking soda to the drain. Follow the baking soda with 1 cup of white vinegar. The fizzing reaction that occurs will help break down any clogs in the sink.
3. Flush the Drain
Let the solution sit in the drain for an hour, and then flush the drain with another half-gallon of boiling water.
How to Keep Your Sink Clean
Keep your bathroom sink clean and free of hard-to-scrub grime by following a few tips.
Rinse Away Debris Immediately
Clear away debris, gunk, and toothpaste as soon as it lands in your sink. Wipe it away with a cloth or your hands, then rinse the sink with water. By preventing any grime from sitting and drying on your sink, you can keep your sink looking sparkly longer and keep germs at bay.
Flush the Drain Weekly
Pour hot water down your sink drain once a week to prevent residue buildup and mildew.
Clean Your Bathroom Regularly
Once a week, clean your bathroom, including the countertops and sink. This routine will keep your sink clean and disinfected.
DIY vs. Hiring a Professional
Cleaning your bathroom sink is a simple and straightforward home maintenance task. If you hire a cleaning service for your home, a professional cleaner will clean all the sinks in the home. If you typically take care of housekeeping and cleaning tasks personally, there’s no reason to call in a professional cleaner.
A few exceptions might include if you’re moving into a new home or you’re moving out, and you want your home professionally cleaned before showing it to potential buyers. If your sink is made of a material you are unfamiliar with, like copper or brass, you might consider calling a professional cleaner to show you the proper way to maintain it.
Frequently Asked Questions
You can apply baking soda and distilled white vinegar to your sink’s surface, then rinse with water and scrub a microfiber cloth to get your sink white again. For tough spots, let the baking soda and vinegar sit for at least an hour, then gently scrub with an old toothbrush.
These non-abrasive cleaners get your sink white without causing damage. More abrasive cleaners, such as hydrogen peroxide and bleach, can discolor your sink and leave permanent damage.
Yes, a bathroom sink can be cleaned with a mixture of distilled white vinegar and water (50:50 ratio). The acidic nature of the vinegar dissolves everything from dirt and grease to grime and soap scum. It also kills bacteria and germs, leaving the bathroom sink both clean and disinfected.
Yes, vinegar and baking soda can go down a bathroom sink drain. In fact, these two ingredients work together to break up debris, grime, and mildew. Afterward, you can flush the sink drain with hot water to wash away any grime that got loosened. By cleaning and flushing the drain, you can prevent mold growth.
Yes, you can leave white vinegar and baking soda in the sink overnight without damaging your surfaces. Typically, letting the combination sit for 10 minutes breaks up residue and grime, but additional time, such as overnight, can help with tougher areas. Be sure to rinse your sink with water when done.
How to clean the sink and bathtub siphon with your own hands
Contents:
- Solution No. 1. Cleaning the sink drain with folk remedies.
- Solution #2: Clear blockage with household chemicals.
- Solution #3: Cleaning with a plunger.
- Decision No. 4. Radical disposal of blockage - disassembly of the siphon.
- How to prevent clogging?
Even the most modern sink or bathtub can become clogged. The most problematic area in this sense is the kitchen sink. When washing dishes, pieces of food, cleanings, fats washed off plates, coffee grounds, etc. fall into the drain. Fats settle on the inner surface of the pipes, other debris sticks to them, gradually accumulating. Over time, the layer thickens, and eventually If not cleaned regularly, clogging may occur. In the same way, clogs appear in bathrooms: hair, residues of detergents, toothpaste appear in the drain hole, sometimes tiny pieces of sponges, threads, etc. are accidentally dropped there. As a result, all these small contaminants accumulate and form a dense cork that does not allow water to pass through. The fact that the siphon in the sink or bathtub is clogged can be guessed by the appearance of an unpleasant odor, but the most striking sign is slow draining of water up to the complete stagnation of water in the sink. If such a nuisance happened to you, then you should contact the services of a plumber, but first you can try to deal with the problem yourself.
Solution #1: Homemade sink drain cleaning.
Classic bath or sink drain cleaner - a mixture of baking soda and vinegar. These substances react violently, forming carbon dioxide, due to this reaction, the debris plug is broken, and the blockage is removed. You need to act as follows: pour a pack of soda into the drain hole and add a glass of vinegar. Active gas formation will immediately begin, so try to quickly plug the hole with a cork or a damp cloth.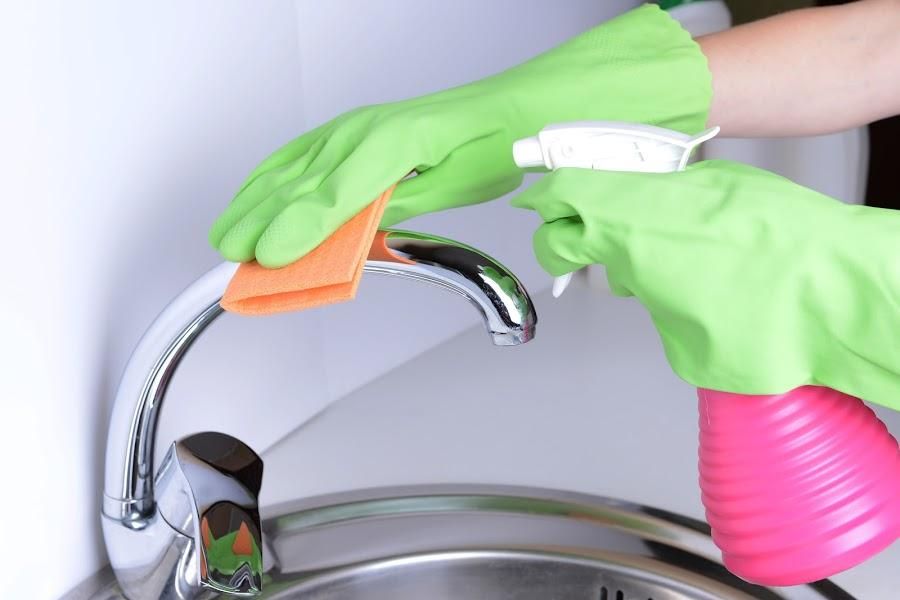 Wait 20-30 minutes and pour a large volume of hot water. You will know that the blockage has been eliminated by the speed of the water leaving - if the sink is quickly freed, then you have done it. It must be said right away that0017 cleaning siphons with soda helps in simple cases, when the blockage is not serious. It will not hurt to carry out such treatment as a preventive measure - cleaning with soda helps to remove fatty deposits from the inner surfaces of the pipes, and this, in turn, reduces the likelihood of contamination.
Solution #2: Clear blockages with household chemicals.
To clean the siphon in the bathroom, manufacturers of household chemicals offer special formulations. Be sure to choose exactly those tools that are designed for cleaning pipes; such products do not contain aggressive components, that can adversely affect the condition of the equipment. The agent should be poured into the drain for the time specified in the instructions, and then rinsed with a strong stream of water. This method is effective even in the case of severe clogs, but be aware that many ready-made formulations have an unpleasant odor and are prone to vaporization, so it is better to leave the bathroom while the product is working.
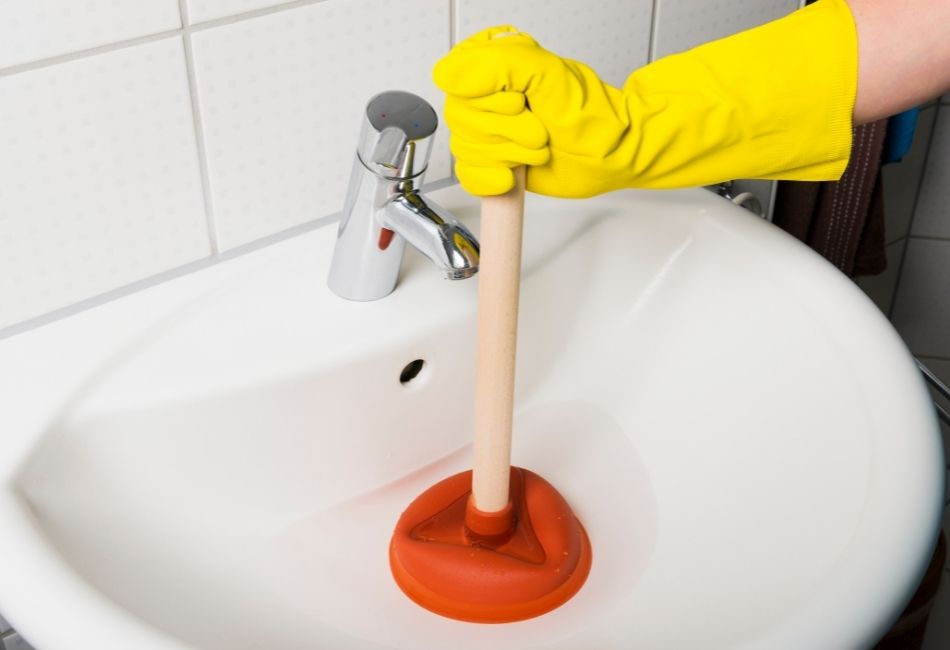
Solution #3: Cleaning with a plunger.
Plunger, as well as home remedies, is also a traditional method of dealing with blockages in the sink and bath. A rubber cap with a handle made of wood or plastic is found in almost every home, and it is not difficult to use it. The principle of operation of the plunger is based on the fact that it creates an area with high pressure. Recall that the siphon connecting the sink or bath drain pipe to the sewer is a kind of water seal, thanks to which odors from the sewer do not spread through the kitchen and bathroom. To remove debris with a plunger, pour hot water into the drain hole, then press the plunger firmly against the drain and press it vigorously several times. Pressurized with air and water the blockage will collapse and the water will flow freely.
Solution No. 4. Radical disposal of blockage - disassembly of the siphon.
If none of the tried and tested method helped you, then you will have to resort to at least - parsing the siphon. Despite the fact that this solution is quite laborious, it has two significant advantages:
- when disassembling the siphon , the debris is guaranteed to be removed, which means that the clogging problem will be solved with one hundred percent probability;
- parts of the siphon can be thoroughly rinsed, getting rid of finer dirt and greasy deposits. Thus the occurrence of a new blockage becomes unlikely.
Before disassembling and cleaning the sink siphon, you need to prepare a container for dirty water, rubber gloves and a rag. If there is still water in the sink or bathtub, then it must be removed. Then proceed with the disassembly, observing the following procedure:
- unscrew the upper and lower rings that hold the parts of the siphon, and then disconnect the siphon itself from the pipe.
 Drain the water;
 - remove all dirt by rinsing with hot water and mild detergent;
- if you have a corrugated siphon installed, then do this: after removing the siphon, close one end of it with a tight plastic bag, pour hot water with dissolved detergent, close the other end with the same bag and shake vigorously several times. These manipulations will degrease all the folds;
- assemble the siphon, remembering to check the reliability of all connections and their tightness, and turn on the water. If you did everything right, then the water will instantly leave the sink or bath.
How to prevent blockages?
Clogs in the siphon of a sink or bathtub are an unpleasant phenomenon. Despite the fact that you can eliminate the garbage plug yourself, it is still better not to bring the equipment to such a state. An ordinary grate installed on the drain hole will become an obstacle to blockages. This small accessory catches most of the waste and is very effective in preventing sewer clogging. Weekly cleaning recommended, flushing the drain with a jet of hot water, and once or twice a month you need to clean the drain with soda and vinegar. All these procedures do not take time and do not require material costs, but they will contribute to the durability of your equipment.
How to clear a blockage in the sink - folk and professional remedies
A blockage in the sink is a common occurrence, even if the hostess maintains perfect cleanliness in the house / apartment and thoroughly flushes the sink from grease and dirt, and prevents food debris from entering the drain system. How to clear blockage without effort? It's simple - call a plumber and believe that he will come on time and do his job efficiently. But instead, you can do it on your own, especially since there are a lot of options.
Contents: 1. How to clear a blockage in the sink with a plunger 2. How to clear a blockage in the sink without a plunger 3.Special tools for cleaning blockages in the sink 4. Mechanical cleaning of blockage in the sink
How to unblock a sink with a plunger
A very popular, well-known plunger for a long time is a real lifesaver in moments of sink clogging. The principle of its operation is simple - under pressure, a water hammer is created in the drain pipes, which contributes to the passage of accumulated dirt.
The plunger must be attached with the rubber side to the hole in the sink so that it is completely closed. Then 3-4 sharp shocks are made, during which you can hear the characteristic gurgling sounds in the pipes. Then the plunger is removed and, as a rule, the water from the sink begins to actively drain. If the drainage of water goes badly, then you need to repeat the procedure with a plunger. If dirt / debris / food particles rise up, they must be removed immediately - if they enter the drain again, they will again create a blockage.
A plunger is the answer to the question of how to clean the sink in the bathroom, because this method is suitable for any drain systems, including toilets.
How to unblock a sink without a plunger
If there is no plunger in the household, then you can use folk remedies, the basis for the preparation of which is ordinary baking soda. It is this product that has the ability to dissolve fats, which causes the cleaning of the drain system in the sink. So, the blockage in the sink can be removed in the following ways:
- Pour three tablespoons of baking soda into the drain hole in the sink, then rinse everything with hot water, preferably boiling water;
- Pour three tablespoons of baking soda with vinegar in an amount of 100 ml, wait 15 minutes - during this time the chemical reaction in the vessel will end. Then the solution is poured into the hole of the sink and after 3 minutes everything is washed with hot water;
- Take equal amounts of ordinary washing powder and baking soda, pour into the sink drain system. Then pour vinegar in the same amount in the amount of 200 ml and after 2-5 minutes rinse everything with hot water.
These cleaners are great for even tough clogs, and baking soda works on both kitchen sinks and bathroom sinks. If the blockage happened in the kitchen, then most likely the cause of this will be fat accumulations - they are easiest to dissolve with vinegar, so in this case it is better to use the second recipe from the above for the cleaning procedure.
Sink blockage cleaner
There are a lot of such products on the market - they are aggressive, guarantee almost instant results. The task is to choose a cleaning agent that would not only quickly and efficiently remove blockages in the sink, but also be safe. We suggest using the products of the manufacturer "Nevskaya Cosmetics" - a means for cleaning pipes from blockages "Mr. Chister". It has excellent quality characteristics:
- removes clogs in 15 minutes;
- dissolves even hair and grease, but is completely safe for pipes;
- disinfects;
- eliminates unpleasant odors, even if the blockage in the sink is already old.
In addition, the Mr. Chister pipe cleaner is equipped with a special cap that prevents children from trying to taste the contents of the bright bottle. Before opening the bottle, you will need to press the cap and, holding it in this position, turn it - this is the only way the remedy will open.
See how quickly "Mr. Cleaner" dissolved the hair, and did not damage the spoon and plastic cup at all:
Removing a blockage in the sink is not difficult, but it is much more expedient to simply not let it happen. According to statistics, blockage occurs due to fat accumulations in the pipe, and they are taken just from the inner surface of the sink. This suggests that when cleaning the kitchen space, attention should be paid not only to tiled surfaces, but also to the sink - with special tools of the Mister Chister line from the manufacturer Nevskaya Cosmetics, even frozen fat can be removed and blockage can be prevented.