Best way to dry flowers
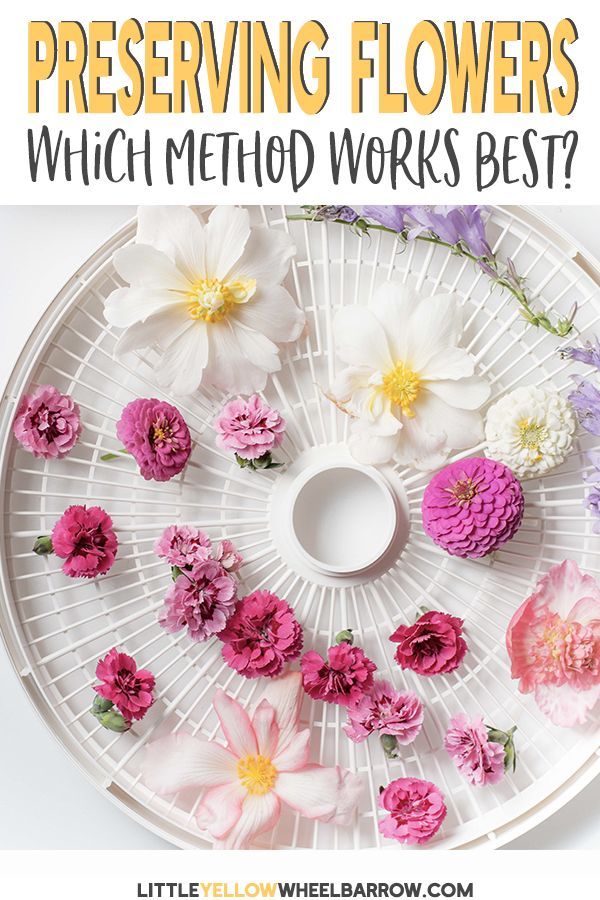
How to Dry Flowers - We Tested 5 Different Methods to Find the Best!
I grow a lot of flowers every year; you might even say I get a bit carried away. I cut fresh flowers daily in the summer and fill every nook and corner with beautiful blooms. To save some of that summer beauty, I dry some along the way, and over the years I’ve learned how to dry flowers in countless ways.
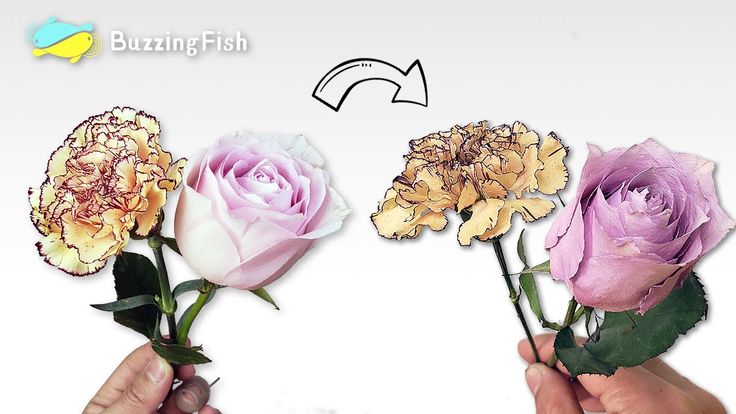
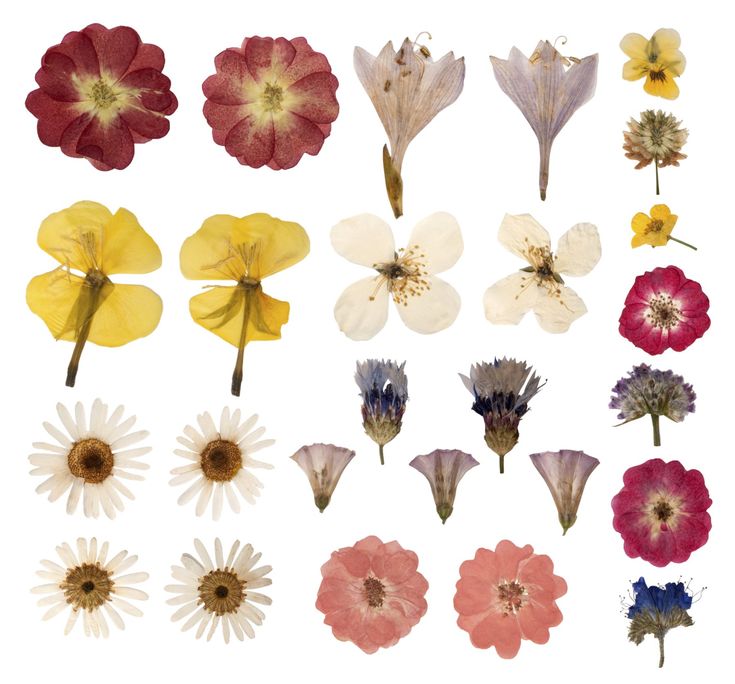
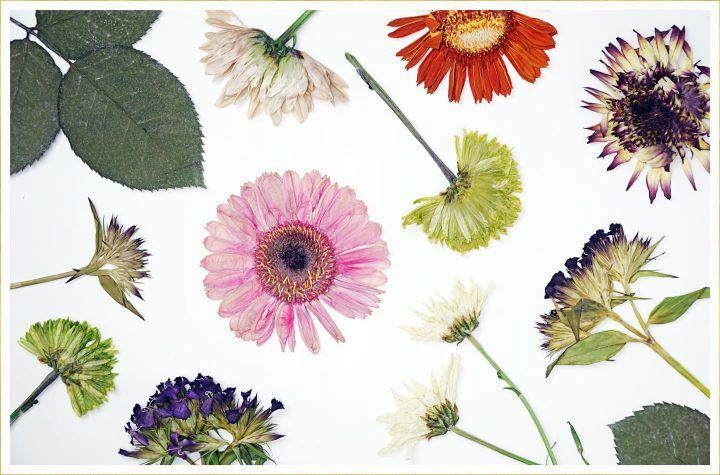
If you want to know what method was used to dry the daisies in the image above, just jump down to the silica sand method. It created paper-like perfect dried flowers that kept the vibrancy of the flowers we tested.
Drying and Preserving Flowers – The Best (and not so best) Methods
I spend a great deal of time in late winter and early spring getting my flowers started. I grow begonias, dahlias, zinnias, mallow, geraniums, and petunias (masses and masses of them) and I get to enjoy them for maybe 12 weeks out of the year.
So it’s nice to save a few of my flowering plants to preserve them, and keep a bit of that summer color living through the fall and winter.
Dried flowers are also great craft items and buying them already dried is a bit too rich for my pocketbook, so I make my own.
Learning how to dry flowers isn’t hard at all, and I bet by the end of this post you’re going to want to start hoarding your blooms from your summer garden so you can make your own.
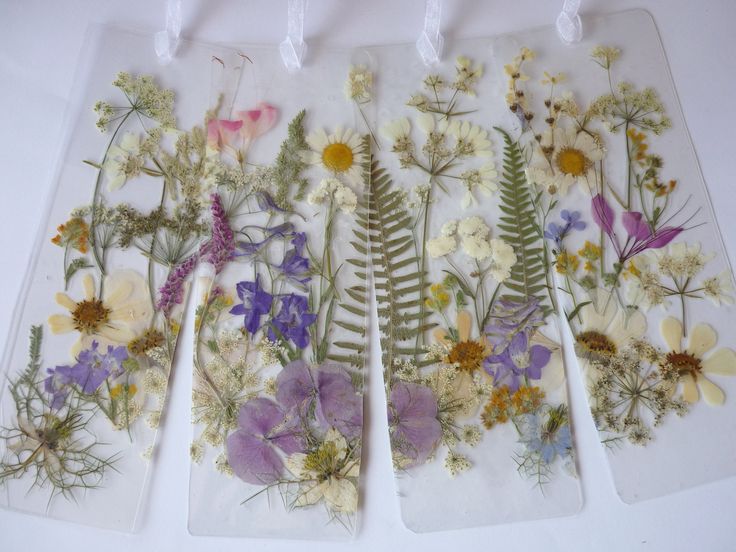
How to Dry Flowers with A Press
Drying flowers with a press is an excellent way to create flat flowers for crafting projects like scrapbooking or embellishing.
Materials Required :
- Heavy book or flower press
- Old belts
- Flat, thin-leafed flowers
- Water Colour Paper – Non-Bleached
- Flower press (optional)
What type of flowers work best for pressing?
Flowers that lay flat hold their color, and have single flowers with delicate petals are the best for pressing:
- Gladiolus
- Borage
- Cosmos
- Larkspur
- Coreopsis
- Queen Anne’s Lace
- Delphiniums
- California poppies
- Hibiscus
- Geraniums (the individual flowers that make up the fluffy head),
- Verbenas
- Nicotiana
- Pansies
- Forget-me-nots
Larger flowers like roses and dahlias can press, but they will become misshapen and may not dry all the way through so be sure to look for smaller flowers without thick fluffy robust heads.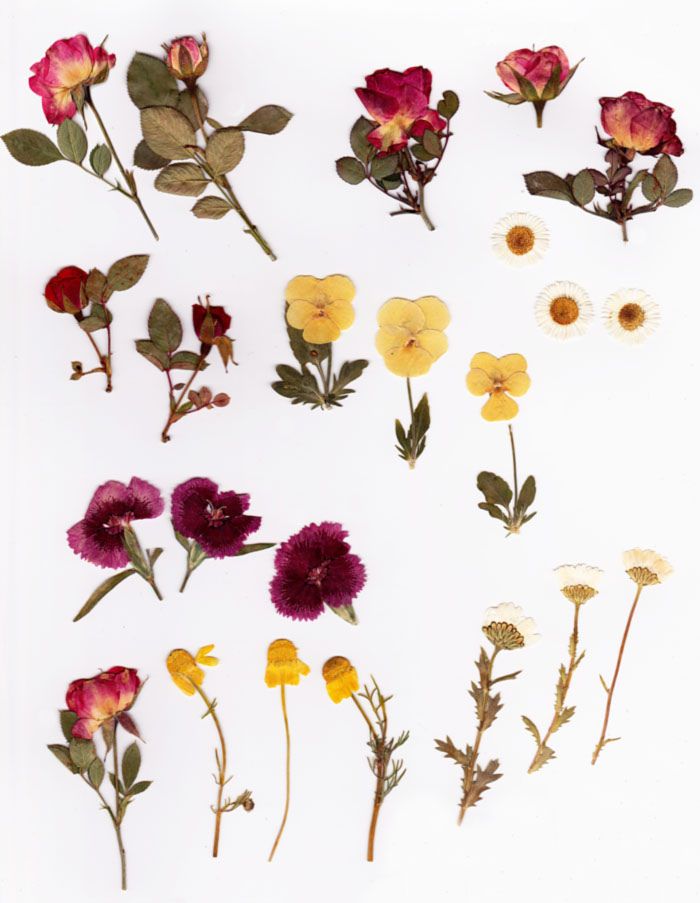 Think single-ply leaves and flattened heads.
Pick your flowers for pressing after the early morning dew has dried from the petals. You want your flowers fresh, but completely dry. Don’t pick your flowers on a humid or rainy day.
Book Method for drying flowers
Pressing flowers in large books is still a useful method for preserving flowers. It seems old-fashioned, but that’s part of the charm. I can remember my grandmother tucking flowers into books that we often found years later.
It is best to use large heavy books, like a phone book (if you can find one), and either tie a strap or belt around it while pressing your flowers or add something substantial to the top to add pressure. You could also use old belts or straps to wrap around your book to tighten down the pages.
Print can sometimes rub off, or transfer, so it is a good idea to place your flowers between sheets of nonbleached paper before putting them inside of the book.
Another useful method uses a bleach-free hardbound watercolor notebook
. You will still need to add pressure to the top, but this is a pretty easy method that does not require adding additional pages.
Drying flowers this way takes about 30 days. If you open your book before the 30 days to peek, you risk cracking or breaking leaves. But after 30 days you will find your flowers beautifully pressed, and ready to use.
Press Method For Drying Flowers
You can buy or DIY a simple flower press using two pieces of wood with bolts in each corner. Stack them inside with pieces of cardboard, and double sheets of nonbleached paper. Press flowers tightly between the books or press and allow them to dry.
I don’t like to use newspaper in my flower presses because it can sometimes leave dye behind. To avoid transfers of print, use plain, unbleached, unprinted paper between your cardboard sheets.
You will want to give a tiny bit of space between each flower, don’t overlap, but they can be placed relatively close together.
Pros and Cons for Drying Flowers with a Flower Press
Pros for drying flowers with a press
- Relatively cheap method.
- Does not require special ingredients.
- Easy to do, without any complicated instructions.
- Creates beautiful flat flowers.
- Pressed flowers make excellent craft project additions.
Cons for drying flowers with a press
- Takes up to 30 days for perfect pressed flowers.
- Flowers do not always retain their full vibrancy.
- Flowers are delicate and can easily break.
- Fragrant flowers do not retain their scent.
How to Dry Flowers – Air Dry Method
The air-dry method is one of the oldest and most common methods to dry flowers. AIr-drying also produces full flower arrangements with stems intact. It’s also one of the easiest methods too!
What type of flowers
When air drying flowers you want to avoid flowers with lots of water content. They tend to not dry thoroughly and rot long before they ever dry out.
Look for good flowers such as:
- African Marigolds
- Cornflowers
- Anise
- Hyssop,
- Globe Thistle
- Lady’s Mantle
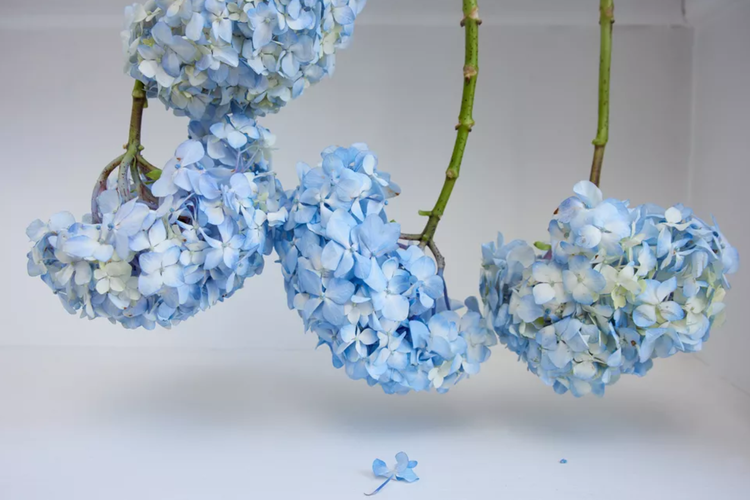
- Hydrangeas
- Larkspur
- Lavender
- Love in a mist
- Dahlias (pompom)
- Poppy (Papaver types)
- Roses
- Starflowers
- Strawflowers
- Yarrow
- Small yellow flowers like buttercups retain their brilliant color very well when pressed
How to air dry flowers
- Start by harvesting the flowers in the morning, after the dew has dried and the flowers are their freshest.
 Pick blooms that are not fully open yet as they will open more as they dry out.
 - Start by gathering your flowers in small bunches by the stem and secure them with a piece of string or rubber band. I find the easiest way is with a elastic band.
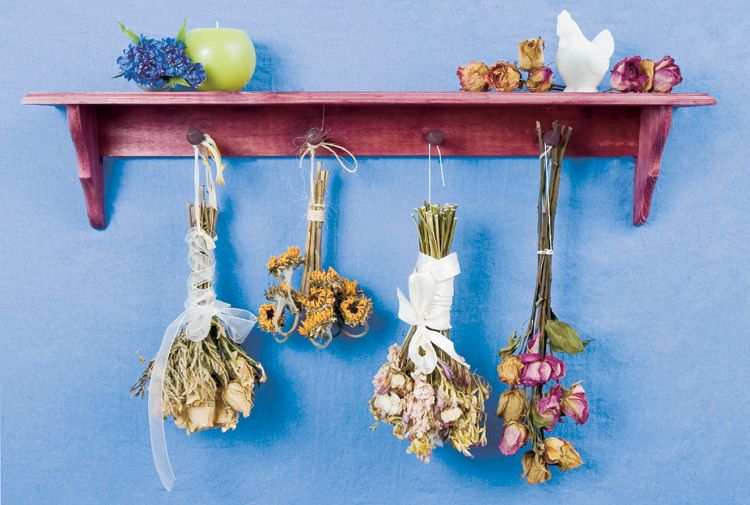
- Hang the flowers upside down in a dark dry place that receives good air circulation. Make sure that your bunches are not too close together.
- Hang the bunch of flowers in a cool dark place to dry out. Try to keep them out of the sunlight to retain some of their vivid colours.
- .Leave flowers for a few weeks to dry. You will notice the flowers will start to change colors. Bright, vibrant flowers change colour to browns, light pinks, dull yellows and transform into vintage bouquets.
- When the stems can snap easily, they are finished drying.
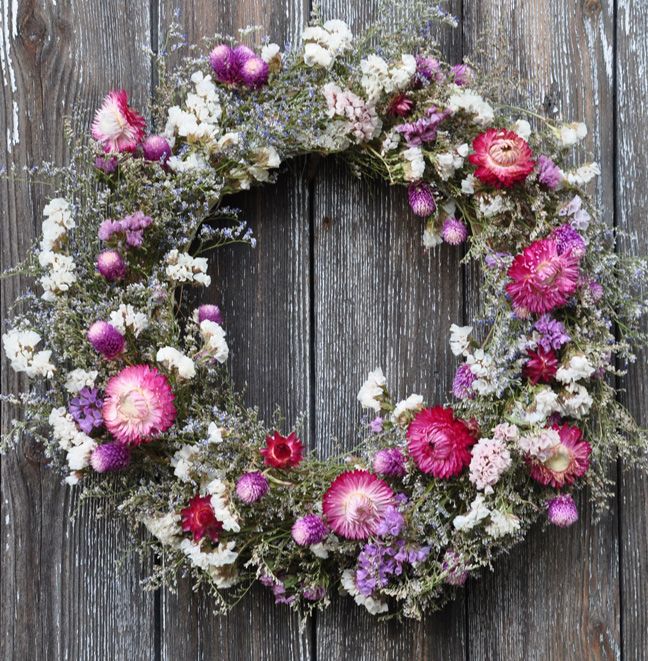
Use dried flowers in vases, crafts like homemade wreaths, or even create centerpieces for the holidays. The air-dry method is a wonderful way to preserve your cut flowers or wedding bouquets.
Pros and Cons of Air Drying Flowers
Pros to air drying flowers
- Minimum supplies required.
- Easy for anyone to do.
- Least expensive method.
Cons to air drying flowers
- Very brittle petals.
- Flowers lose much of their color and vibrancy.
- Flowers shrink and crinkle.
- This method is hit or miss, and you can lose flowers in the process. It is recommended to dry more than you think you will need because you will inevitably lose a few flowers along the way.
How to Dry Flowers With Silica Gel
Silica gel is the best method to dry larger flowers if you want to retain most of the color. You can speed up the process of drying using the microwave as well, so if you are impatient you can get dried blooms in a few minutes instead of a few weeks. It’s the fastest way to dry flowers by far.
- Silica gel
- Dust mask
- Gloves
- Airtight glass or plastic container
- Flowers
- Scissors or garden pruners
- Plastic squeeze bottles
- Mod Podge or hairspray to seal flower from moisture
- Optional: Microwave
**You can pick up silica sand/silica gel at most craft stores.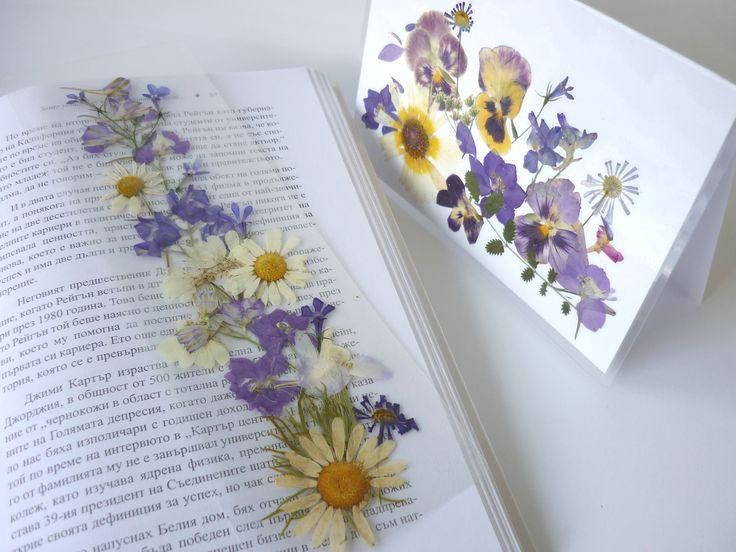
What type of flower is best for drying with silica gel
Any! If they can fit in a container and if you have enough silica gel you should have no problem drying the largest of flowers. Flowers that dry exceptionally well in silica gel are:
- Roses
- Peonies
- Daisies
- Larkspur
- Carnations
- Bachelor buttons
- Zinnias (purple flowers tend to fade to deep pink when dried)
- Sunflowers
- Geraniums ( worked but I did get a few batches of petals!)
- Dahlias
- Small dwarf snapdragons
Silica Gel method for drying flowers
Flowers dried with silica gel look like very realistic paper flowers, they even feel like paper.
Important things to remember: Do not forget to put on your air filter mask and gloves before working with your silica gel. The drying agent can cause irritation to the skin and lung lining if inhaled
- Collect your flowers in the morning after the dew has dried and the flowers are freshest.

- Cut your flower stems about an inch away from your flower head.
- Place your large flower heads face up in a container at least 2 inches taller than the flower. Flat-faced flowers do better if you place them upside down. Flowers that are long, like larkspur, can be laid down on their sides.
- Gently pour silica gel over the flowers until covered by an inch or more of silica gel. Place a lid on top, or saran wrap and set them aside for 3-5 days.
- You need to be very gentle in removing your flowers, or you will end up with dried flower petals.
- You can use a soft bristle paint brush to remove the remaining silica gel; it just dusts off.
Using the Microwave to speed up the flower drying process.
You can also use the microwave to dry your flowers. This method is fast and does a fantastic job of preserving vibrancy. I do find that the microwave sometimes bubbles leaves a bit, but if you are short on time, this is an excellent method for doing flowers quickly.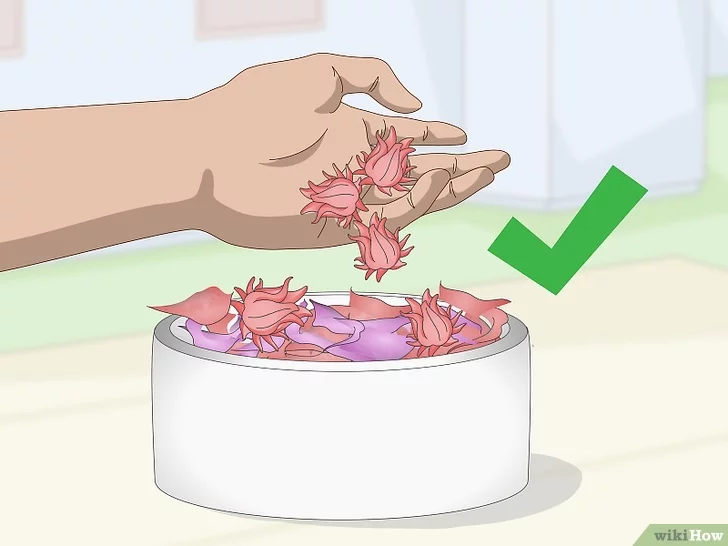
I did find that I had to let my silica gel cool down before doing the second batch and for this reason, my advice is to get two jars of gel if you are planning on drying lots of flowers.
With two containers of silica gel, you can allow one batch to cool down while you work on the second one.
- Use a microwave-safe container and cover your flowers entirely with about an inch of extra on the top. Pop in the microwave for a minute.
- Let the container cool for 30 minutes before removing your dried flowers.
You can seal your flowers with hairspray, mod podge, or with a rattle can spray varnish, be sure it is non-yellowing.
Something to note : You can also use the microwave to dry rose petals in under 2 minutes!
Pros and Cons of Drying Flowers with Silica Gel
Pros of drying flowers with silica gel
- Creates beautifully vibrant dried flowers.
- Retains the same look as a freshly picked flower.
 Our preserved daisies, for example, looked incredibly fresh once dried.
 - The fastest method by far is one minute in the microwave and your flowers are dry.
- You can recharge silica gel by placing it in the oven for 30 minutes.
Cons of drying flowers with silica gel
- Silica gel is one of the most expensive methods to start out with, but since the gel can be recharged the costs diminish over time. If you are drying a lot of flowers and require bulk silica gel it could be cost-prohibitive.
- Don’t spill your silica gel because it is a pain to clean up! (ask me how I know)
- You also need to use a filter mask and gloves while working with Silica gel.
- You can make dried flower petals, but I wouldn’t use them in any beauty products, like bath salts. Silica should be handled with gloves, and you have no sure way of knowing if you pulled all the silica from a dried flower.
Drying Flowers in Food Dehydrator
Food dehydrators work well for drying flowers.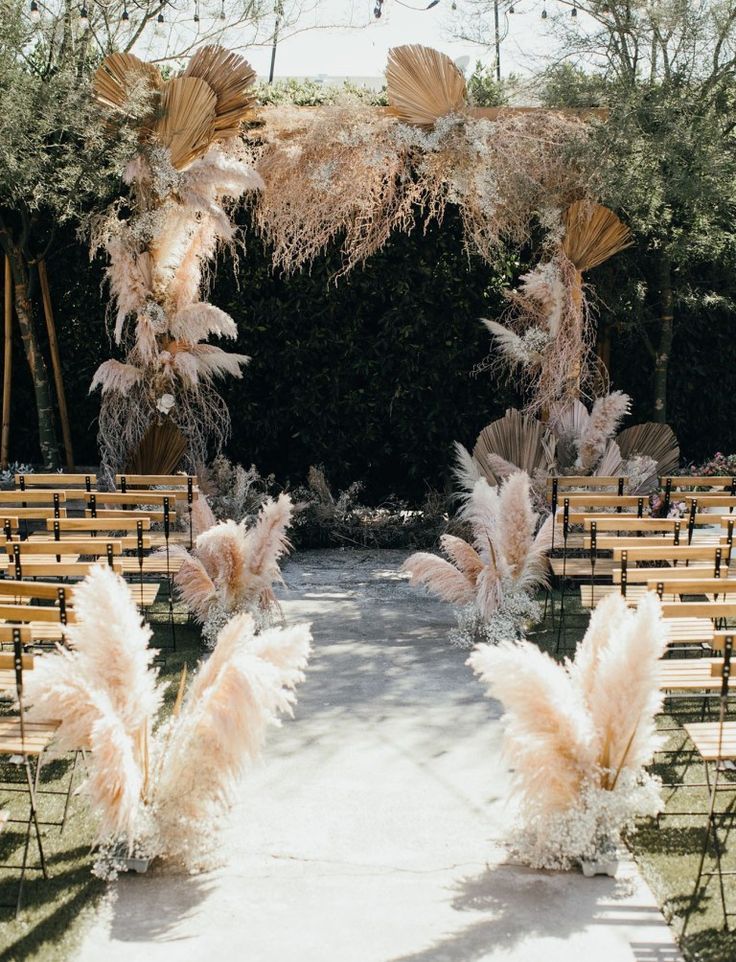 I did not find it as impressive as the silica gel, but it did work. We had excellent results with a dried zinnia bouquet.
I would not dry flowers on trays that I would later use for food. Some of the flowers I dehydrated did leave behind a scent. I am sure that will dissipate, but after a single wash, that scent still lingered on my trays.
Not sure how much the husband is going to enjoy jerky with a hint of marigold.
- Food dehydrator (this is the one I use and it works great)
- Flowers
- Scissors or garden pruners
- Mod Podge or hairspray to seal flower from moisture
What type of flowers are Best Dried in a Dehydrator
You can dehydrate any small or medium-sized flower that will fit in your dehydrator. We’ve had success with:
- Pom Pom Zinnias
- Marigolds
- Carnations
- Daisies
- Rugose Roses
- Coneflowers
- Queens Anne’s Lace
Dehydrator Method
- Harvest your flowers at their full bloom early in the morning after the dew has dried.
- Cut your flower stems close to the flowers. Place your flowers right side up but do not allow them to touch each other because they will stick. Only place a single layer of flowers on each tray
- Dry the flowers at 135F for 4-12 hours depending on the size of the flower heads.
- For medium-sized flowers like pompom zinnias, or any cone-style flowers, leave them for a few hours. The perennial flower that dried the best in the dehydrator were coneflowers (Echinacea).
- For small delicate flowers, like Queen Anne’s lace, add for 1 hour but check on them periodically.
- You can seal your flowers with mod podge, hairspray, or a rattle can of spray sealer.
Pros and Cons of Drying Flower With A Food Dehydrator
Pros for drying flowers with a food dehydrator
- A relatively quick method, flowers can be dried in a few hours.
- Easy process, no real fuss.
- Perfect drying method if you want to make potpourri, or make dried petals.
Cons for drying flowers with a food dehydrator
- You need a food dehydrator.
- Some flowers, like French marigolds, leave a smell behind on your trays.
- Overdrying can cause very brittle and delicate flowers.
- Most flowers change color, especially the pinks purples, and magentas that gained a deeper. ruddier color after drying. Yellow flowers generally held their color well.
- The easiest method for bulk drying lots of flowers at once.
Drying Flowers With Sand Or Kitty Litter
How to dry flowers with sand or kitty litter uses the same process as drying flowers with silica gel.
Drying with sand or kitty litter takes longer, and the results are a mixed bag. I found I never really got any consistency with this method. You can use it in a pinch and still get OK results.
- Sand or kitty litter
- Airtight glass or plastic container
- Flowers
- Scissors or garden pruners
- Mod Podge or hairspray to seal flower from moisture
What type of flowers
If your flowers can fit in a container and if you have enough sand or kitty litter you should have no problem drying most flowers.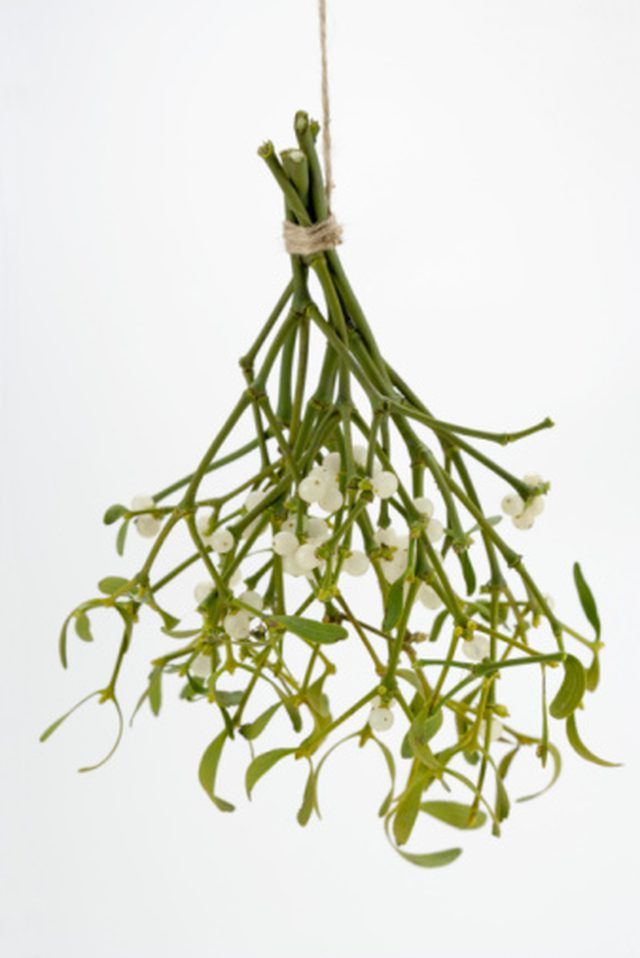
- Roses
- Pansies,
- Peonies,
- Daisies,
- Larkspur,
- Carnations,
- Bachelor buttons, or
- Zinnias.
The larger, more delicate flowers like geraniums or peonies are hit and miss. I found the kitty litter and sand too heavy to keep the shape of the flowers, but zinnias and daisies worked fine.
Sand, or Kitty Litter flower drying method
- Cut your flower stems about an inch away from your flower head.
- Place your large flower heads face up in a container at least 2 inches taller than the flower. Flat faced flowers do better if they are placed upside down. Flowers that are long, like larkspur, can be laid down on their sides.
- Gently pour your kitty litter or sand over the flowers until covered by an inch. Place a lid on top, or saran wrap and set them aside for 10-21 days. (It’s hit or miss here you will have to test and experiment)
- You need to be very gentle in removing your flowers.
 The sand and kitty litter are heavy and can damage the shape of the flowers or weigh down and break off the petals. Go slow, pretend you’re Indiana Jones without the fun and excitement.
 - You can use a soft bristle paint brush to remove the remaining sand or kitty litter.
Pros for drying flowers with sand or kitty litter
- Inexpensive method.
Cons for drying flowers with sand or kitty litter.
- The process is longer than say using silica gel.
- Flowers can be easily damaged during removal.
- Flowers do not keep or hold their vibrancy.
So what Method Was The Best After All That Testing?
After testing all the drying methods above, I’m all for pressing flowers. If you grow your own flowers this is a cheap and easy way to create a collection of dried blooms over the summer.
I love how easy it is, and the investment was a few pieces of wood and some screws to make a DIY press.
The pressed tiny flowers are the best to use for cards, tags, decals, scrapbooking, bath bombs, handmade papers, potpourri, home decor items, and wallpaper. You read that right; you can make your own wallpaper and deck it out with dried flowers.
Silica gel was a close second. The gel created dried flowers that looked amazing and retained color very well.
Kitty litter and sand were the methods I disliked the most, they were very hit-and-miss and I found them messy. But in a pinch, they do work!
Looking For More Flower Gardening Inspiration?
- Flowers that Grow in the Shade: The 14 Best Options
- Impatiens Care – How to Grow An Abundance of Flowers in the Shade!
- The Best Flowers for Bees To Plant In Your Gardens
- 10 Lovely Flowers That Bloom at Night
- How To Keep Your Dried Flowers Looking Great
- How To Make Potpourri Using Dry Flowers And Herbs
How to Dry Flowers and Get the Best Results Possible
Do you want to make your special flowers last a little longer? Maybe you want to preserve a keepsake from your wedding or a loved one’s celebration of life? I’ve been on a flower pressing kick lately, so I thought it was high time I shared techniques on how to dry flowers, especially when only a 3-D effect will do.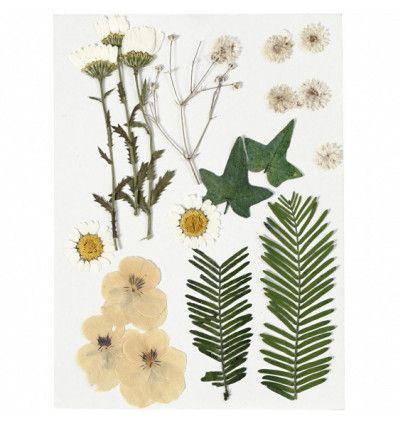
This post contains affiliate links, and I will be compensated if you make a purchase after clicking on my links. For more information, please see my disclosures.
How to Preserve Flowers: What to Know Before You Start
When you see so many different techniques for drying or pressing flowers, it’s hard to know which one is right for you. (If you’re like me, you can’t resist trying them all at some point to satisfy your curiosity.)
Your choice depends on the type of display you want and the types of flowers you’re using.
For projects like pressed flower art, you may need paper-thin petals. See my complete guide on how to press flowers if that fits your bill.
For other resin crafts or shadow boxes, you might prefer one of the more three-dimensional options below.
Tips for preserving flowers
- Always choose fresh flowers for the best results
- Avoid using flowers with bruises or brown spots
- Pick flowers just before they have reached full bloom
- For thick flowers (peonies, ranunculus, roses), you can remove petals before drying
- Flowers with fleshy or water-rich petals may not preserve well
Trust me on the last point.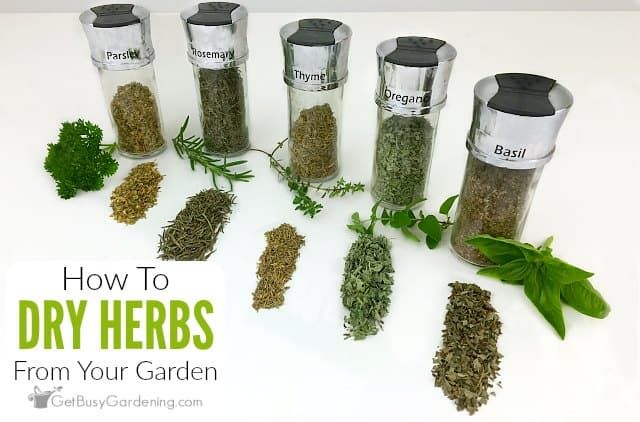 I once scorched a microwave press while trying to dry a portulaca bloom. Gah!
1. Air Drying Flowers
Air-dried bouquet of roses, daisies and cushion pom mumsSupplies
- Fresh flowers or floral bouquet
- Rope to hang
- Hanger or drying rack
- Hairspray (unscented)
Letting flowers dry out naturally is perhaps the easiest (but not quickest) way to preserve your blooms. If you’ve followed the tips above for selecting good flowers, that’s half the battle.
Simply tie a piece of jute rope or string around 5-10 stems, removing any unwanted leaves as you go. You can also use a rubber band for this purpose.
If the stems are the dainty kind, you can insert florist’s wire through the base of the bloom (calyx) and down around the stem to secure them.
Hang the flowers upside down in a well-ventilated, dark space like a closet, attic or utility room. Just make sure the room doesn’t have high humidity. I like to secure them to a hanger or rod in our laundry room…so much more fun than doing laundry in there!
Air dried flowers after 3 weeksAfter 1-3 weeks, your flowers should be completely dry, unless the blossoms are particularly thick. Roses or mums may take longer depending on the size of the flower.
For reference, the bouquet featured in this tutorial was completely dry in about 5 days or so.
Once your flowers have dried, you can spray them with a fixative like unscented hairspray to better retain color.
Best types of flowers to use for air drying
- Roses (my favorite blooms)
- Lavender stems
- Baby’s Breath
- Amaranth
- Hydrangea
- Celosia
- Coneflower
- Herbs (mint, lavender, basil)
According to The Old Farmer’s Almanac, flowers with a small calyx work well. The Almanac also talks about a “flash drying” method of sticking fresh blooms in your car trunk to dry in the sun for better color preservation.
Knowing me, I’d probably forget about it and have potpourri floating around in the back of my car all year.
Best uses for air dried flowers
The air-drying method works well when you’re looking for a more vintage vibe.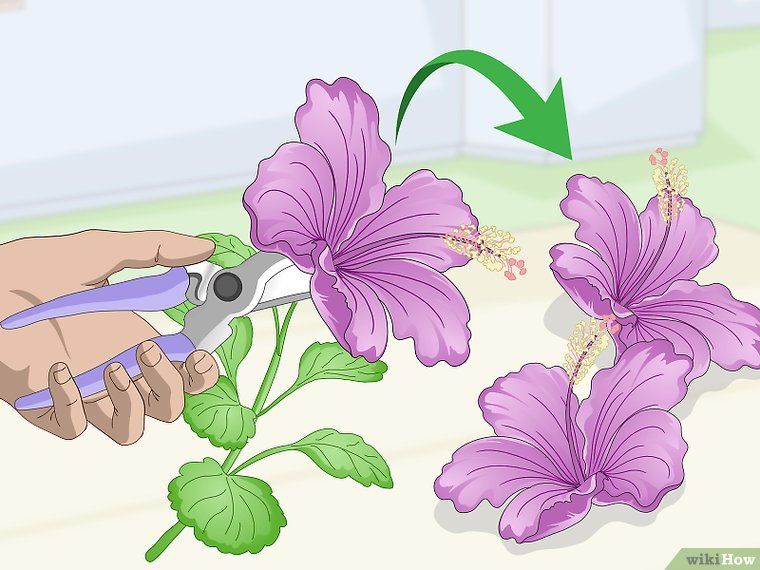 The colors don’t hold up quite as well as other methods, but there’s a romantic touch to the slightly yellowed blooms.
It’s also a great method when you want to keep an entire bouquet intact with stems. Just know the petals will be more brittle than with the silica gel method below.
2. Drying Flowers in a Conventional Oven
Flowers dried in conventional ovenSupplies
- Conventional oven
- Cookie sheet
- Baking rack (a.k.a. cooling rack)
To dry flowers in the oven, first trim the stems off to leave only the blossom and calyx. Leaves won’t tend to dry very well in the oven based on my experience.
For roses, you will likely want to remove the individual petals, since the center of the bud is difficult to dry out completely without a lot of browning. You’ll also find that multi-petaled flowers like mums and daisies may tend to shrivel.
Next, spread your flowers on a baking rack placed on a cookie sheet. Bake at 200°F (about 95°C) for about 2 hours.
Smaller flowers will take far less time, so keep an eye out after about 45 minutes to 1 hour. You can always air dry the flowers for the last stretch.
Best flowers for oven drying
- Roses
- Mums
- Zinnias
- Sunflowers
- Purple or blue-toned flowers (e.g., plumbago, statice, etc.)
As you can see from the photos, flowers with bright blue or purple colors tend to retain their color extremely well, while bright red flowers will darken to a wine color and yellow blooms may tend toward brown.
Best uses for oven dried flowers
I love using the oven drying process when making homemade potpourri.
DIY Homemade Potpourri
Learn how to make your own potpourri in this quick video tutorial.
Watch here
The flowers have a crispness that looks romantic, and you won’t fret as much when petal pieces break off in the bowl. It just adds to the charm!
Potpourri made with oven drying methodOven-drying is also my favorite method for drying citrus fruits.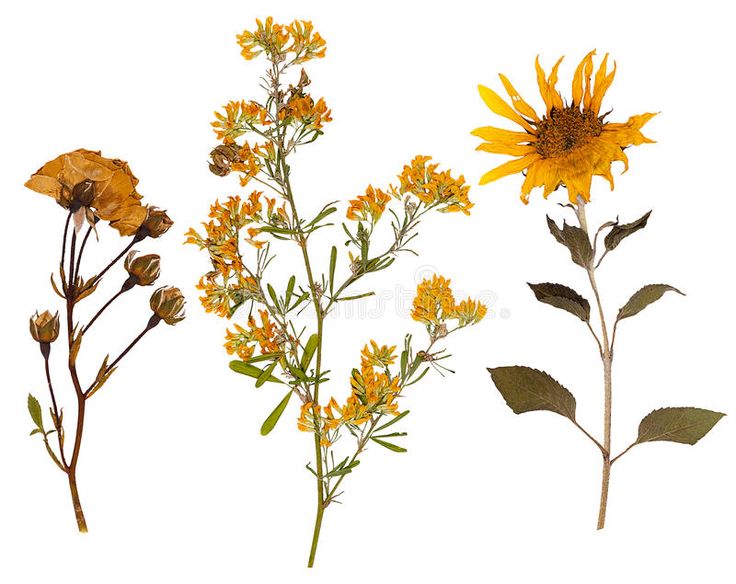 You can see my post on how to make dried orange slices to see the results.
See the last photo in this post for a comparison of oven-drying results to other methods.
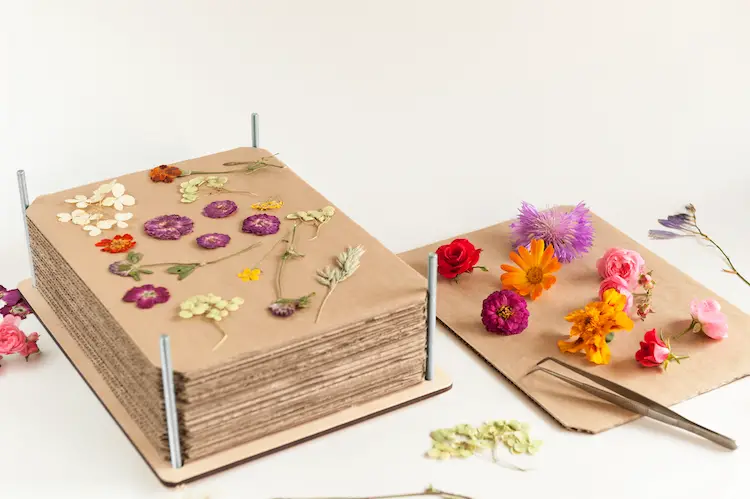
3. Pressing Flowers to Dry
Pressing flowers in a bookIf you want to have completely flattened flowers, then flower pressing is for you! In my complete guide to flower pressing, I cover these 4 different ways to press flowers:
- Pressing flowers in a book
- Wooden flower press
- Microwave flower press
- Pressing flowers with an iron
The supplies needed will vary for each method, so I’ll leave you to check out the related post for all the details.
Best methods of pressing flowers
Generally, the same rules apply in terms of picking the freshest, unblemished flowers to begin. Larger flowers with spherical shapes (e.g., roses, peonies) don’t lend themselves well to pressing, but you can always separate the petals to press.
There are trade-offs in time and quality for each method of flower pressing.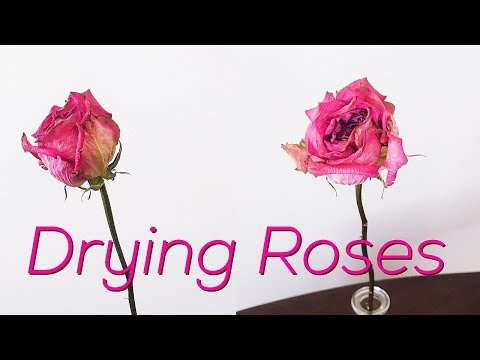 Overall, my favorite method is using the microwave for the speed and ease of creating DIY pressed flower art.
However, the good, old-fashioned book press creates gorgeous paper-thin petals and does a great job of maintaining color. If you have a heavy book and 2-4 weeks to spare, it’s a great summer project for the kids!
When to use pressed flowers
You’ll want nice flattened flowers if you’re planning to make shallow resin crafts like a tray or coaster. Pressed flowers also come in handy to create beautiful wall art using a simple picture frame. I’m planning to decorate candles, mason jars, bookmarks, and mobile phone cases with my pressed beauties.
4. Using Silica Gel to Dry Flowers
Supplies
- Silica gel beads (not silica sand)
- Plastic container with tight-fitting lid
- Gloves/mask (optional but recommended)
Silica gel is a desiccant product that wicks moisture away from flowers.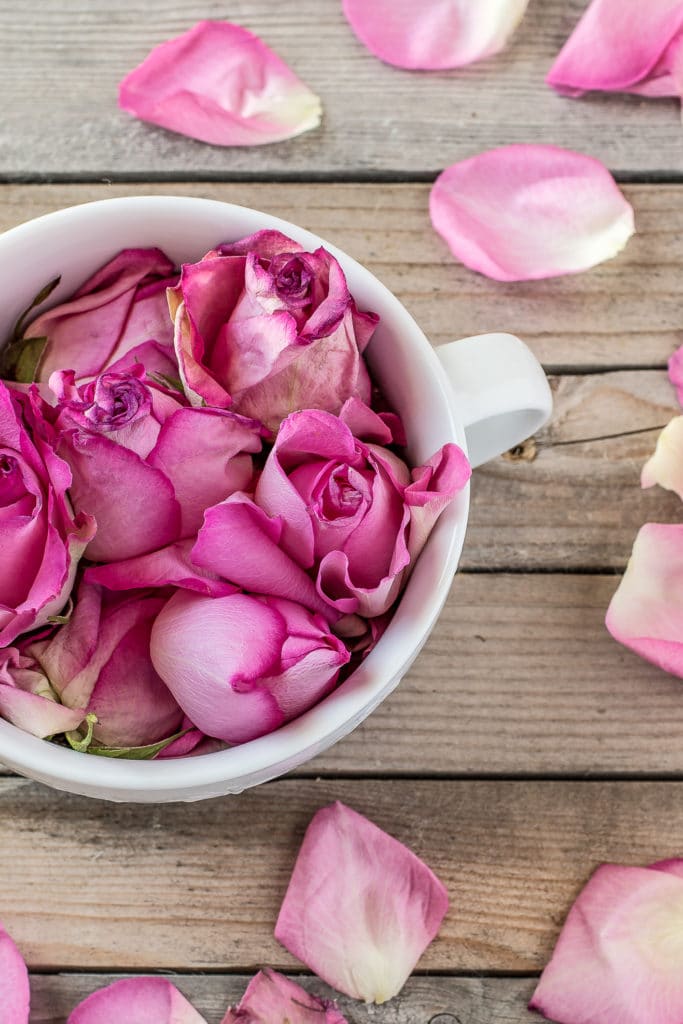 I have a complete guide on drying flowers with silica gel with a step-by-step tutorial on using this product if you go this route.
The basic technique involves pouring a layer of the fine crystals (about 1.5 inches) into your plastic container, placing your flowers on top, and layering more of the crystals around the petals.
Once you seal your container closed, you’ll need to wait 2-7 days for the flowers to dry completely. (The length of time will depend on the thickness of your blooms.) After you remove the flowers, you can use a soft brush to dust the excess crystals off your dried flowers.
This method works well with nearly any type of flower, though very delicate blossoms may give you fits, just like with any other method.
When to use silica gel
This is perhaps the most popular way to preserve wedding bouquets. It’s the perfect method for creating shadow box displays, three-dimensional resin crafts, and jewelry because you’ll get the best color retention and the softest texture.
While you can remove the stem and reattach it to the flower with wire after drying, this technique is more often used just to preserve the blossom.
5. Drying Flowers in the Microwave
If you want to use a microwave to dry flowers, you can buy a microwave flower press (for flat flowers) or use silica gel in a microwave-safe dish. Assuming you want to preserve the shape and body of the flowers, I’ll cover the latter option.
Supplies
- Silica gel
- Microwave-safe dish
- Cup of water
Once again, you’ll create a blanket of silica gel in your container and spread out your flowers before placing more gel on top.
Unlike the conventional method, you will not cover the container but instead, place a glass of water in the microwave with it. Follow the microwaving directions based on the flowers you’ve chosen (typically 1-3 minutes total in 1-minute increments).
Of course, like most time-saving techniques, you’ll face a slight loss in color retention versus the conventional method.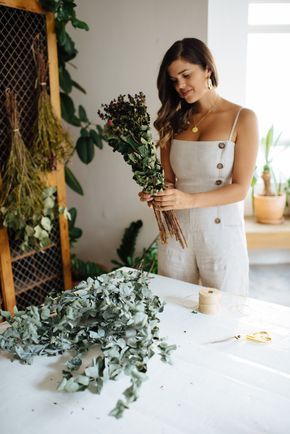
Here’s a look at how the last three methods compare. You can pin it on Pinterest for reference later.
When to use a microwave to dry flowers
Using silica gel in the microwave makes sense when you want nearly the maximum color retention but just can’t spare the time. For something like eco-friendly wedding confetti, it’s the perfect solution!
Project Ideas for Dried Flowers
If you’re here learning about ways to dry flowers, you probably have a project in mind already. Here are a few other dried flower crafts to spark your imagination:
- DIY wreath
- Floral swag
- Flower crown
- Pressed flower table numbers
- Potpourri
- Resin crafts (paperweights, coasters, phone case)
- Jewelry
- Wall art or shadow box
- Gift tags
Let me know in the comments what you plan to do with yours and tag me on Instagram (@firstdayofhome) to share your creations!
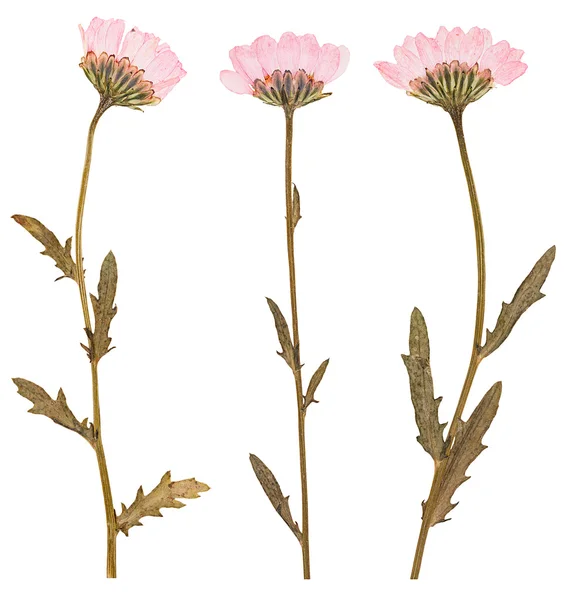
For a long memory: drying flowers
Drying flowers is only at first glance a simple task.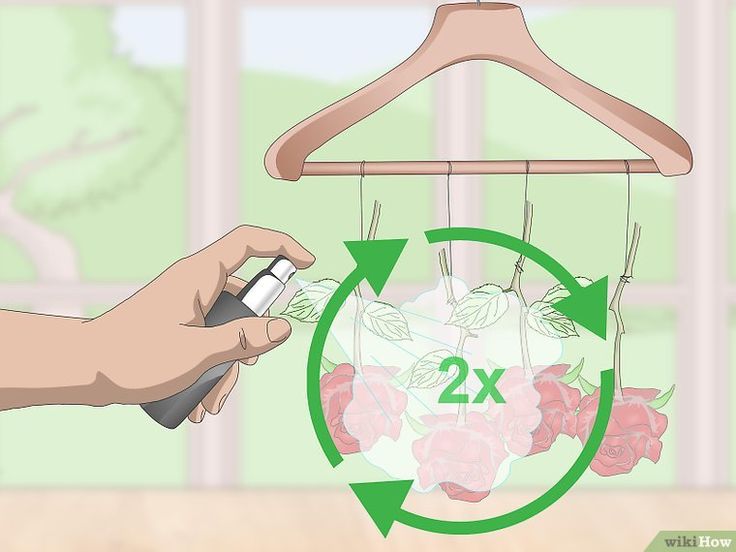 The flower itself will dry up after a while. But will it retain its beauty and not fade? Petals and leaves will not be rumpled? To avoid all these troubles, you need to follow some rules.
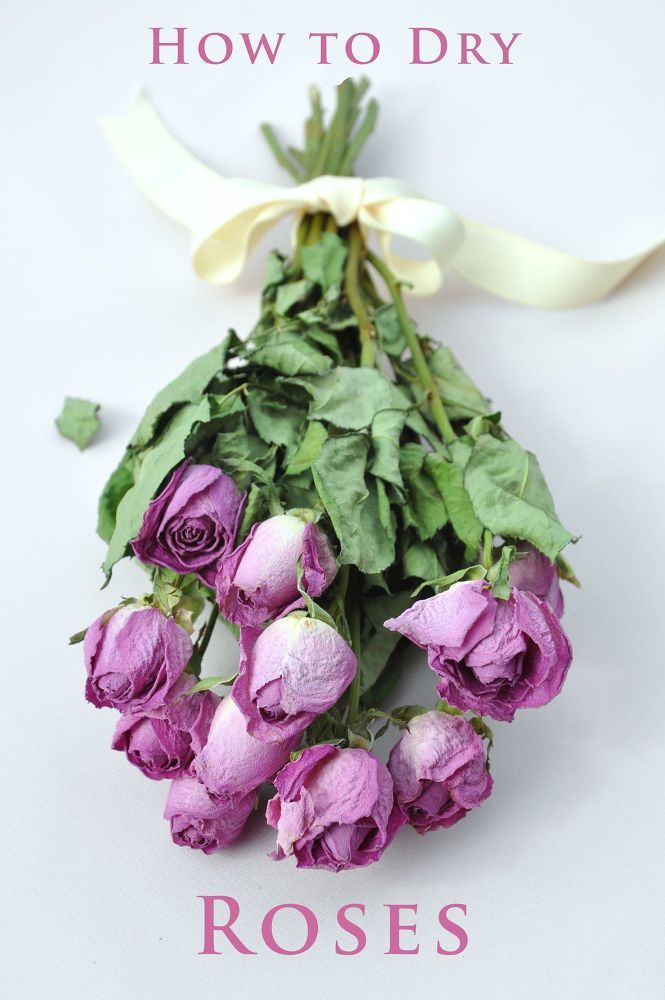
Roses, even when dried, do not lose their attractiveness and elegance
Rules for drying flowers
- Pick only dried flowers when all the drops of dew or rain have dried. Wet plants will mold faster than dry.
- Harvested plants should be dried as soon as they are picked. When they are withered, it will be much more difficult to straighten the petals.
- Collect more material. During drying, many flowers can go to waste. In addition, among the already prepared dried plants, you will have the opportunity to select the best ones.
- In addition to flowers, branches of shrubs and trees, herbs, leaves, berries, moss and even tree roots are suitable for drying. Maple leaves, ears of corn, reeds are often dried.
In a humid room, plants dry slowly and lose their decorative properties
How to dry flowers
There are several different ways to dry flowers.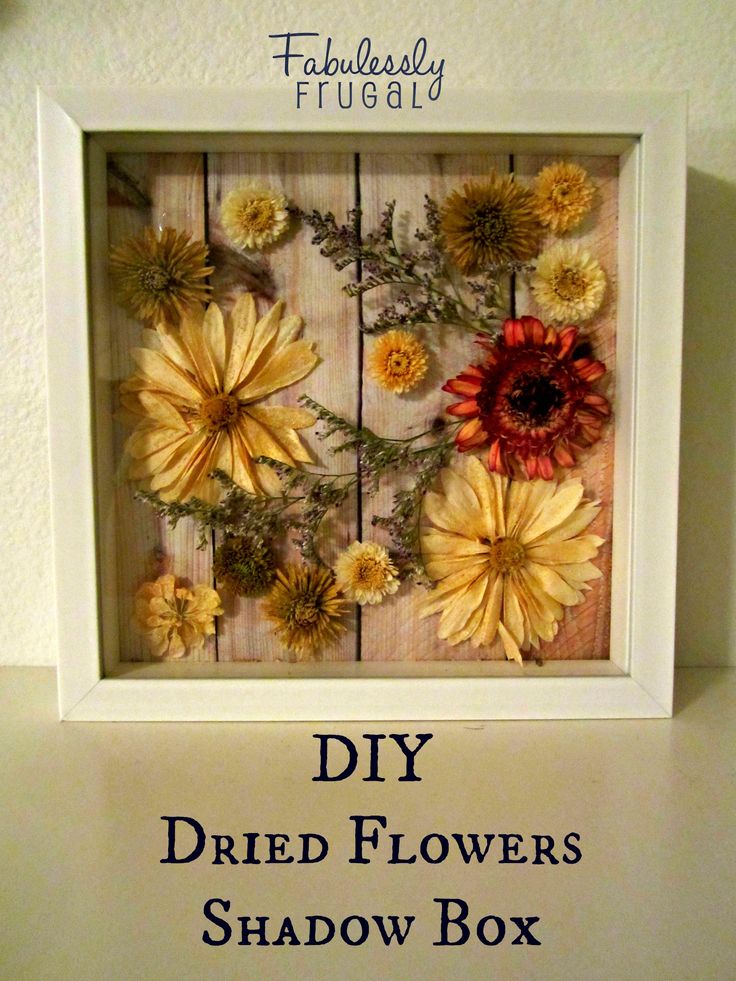
- Book drying. This is the simplest, most popular and affordable method of flat drying flowers. It is suitable for those samples that initially have a flat shape, for example, for many field samples.
It is advisable to take an old book, where the paper is offset: glossy does not absorb moisture well. Make pockets out of ordinary white paper, place plants there and put them in a book, skipping a few pages between them. This is necessary so that the remnants of the paint are not imprinted on the flowers.
After filling the book, it should be put away for a month, pressing down on top of a stack of other books as a press.
Flowers dried in a book can be used to make jewelry or floral collages
- Air drying flowers. Drying plants requires a cool room. It can be a balcony or a well-ventilated room. Those who live in their own home can afford to dry flowers outdoors. Thus, you can dry wild flowers: chamomile, cornflowers, marigolds - and garden flowers: roses, peonies, hydrangea.

Some mistakenly believe that flowers should be dried in a closed and hot room. In fact, heat and lack of air will spoil the appearance of plants.
The room must be warm (at least 10°C warm), clean and free of dust. Also, it must be dry.
Flowers should never be dried in direct sunlight. This makes them lethargic and faded: the sun destroys chlorophyll and the plants lose their color. Therefore, drying in the sun is suitable only for unpainted parts (roots, seeds).
A bouquet of dried flowers for a wedding also looks beautiful and will last for a long time
To dry the flowers in the air, stretch a rope or wire between the walls. Hang metal hooks, the distance between which will depend on the size of the flowers. Flowers are usually hung individually on such hooks, but drying in bunches is also possible. The most important thing is not to tie the bundles too tight. This can break the stems and crush the petals.
Bouquets can be made not only from dried flowers, but also ears of corn, berries, dried flowers
Drying flowers in sand
To dry plants in sand, the first step is to sift and calcinate it.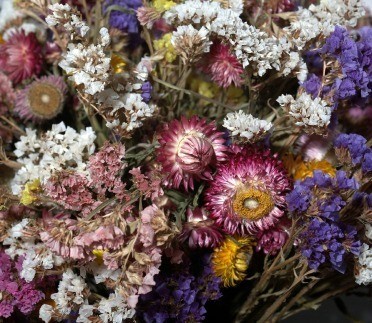 In wet sand, the flowers will deteriorate, acquire ugly spots. Pour the sand into the bottom of the cardboard box, place the prepared flowers (spread the petals, remove the leaves) and carefully pour in the sand until it covers the inflorescences. Store boxes of sand in a cool, dark place for about two weeks.
It is also possible to dry the flowers with salt or semolina. The main problem that you may encounter here is the difficulty in cleaning dried flowers from these loose materials.
Natural drying is good for cereals: put them in a vase without water, they will dry out without losing their shape. Immediately remove it from the bouquet. Dry compositions are very fragile, so be careful when working with them, do not place them in a draft. Dried flowers quickly become covered with dust: it must be removed very carefully, for example, with a weak stream of warm water. You can protect the composition by covering it with glass.
Dried flowers are ideal for creative work: they can be used to make decorations, fill with resin, or make an unusual Japanese Oshibanu composition.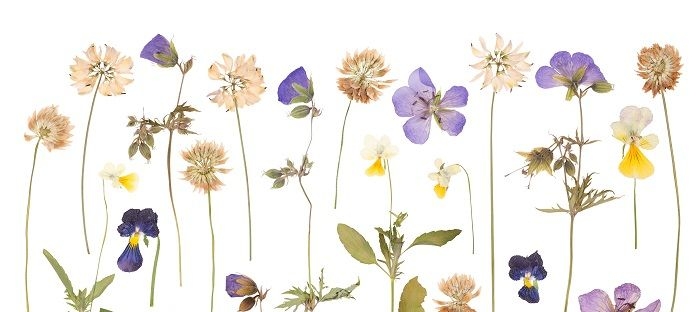
flower arrangements bouquets flower arrangements Exotics Flower etiquette
Author: Flora Express flower delivery service
How to dry flowers properly? 7 best drying methods + PHOTO!
We consider various methods of drying flowers: air, flat and volume drying, as well as quick methods (microwave, iron). We tell you how to dry flowers properly in order to preserve the color and shape of the petals.
See also tips on picking plants and flowers, tips from experienced florists and interesting facts.
Methods for drying plants and their flowers and leaves
Among flower connoisseurs and creators of crafts, ornaments or herbariums, time-tested methods are used.
To dry flowers or leaves effectively use the following methods: air, books and presses, materials with a high moisture absorption capacity, microwave and iron. As well as "preservation" in glycerin and paraffin.
View this post on Instagram
Publication from TOMATO - only true! GARDEN (@_olga_sherl_)
Contents of the article:
- 1 Air drying + no hanging + in a vase with water
- 2 Drying plants and flowers with a book and under pressure
- 3 How to dry flowers in various substances? Bulk drying
- 4 Preservation of plants in glycerin and paraffin
- 5 How to quickly dry flowers and plants?
- 6 10 drying rules for better shape retention and petal coloring
- 7 What can be done with dried flowers?
- 8 Which flowers are long lasting and which are not?
Air dry + no hanging + in a vase with water
A very popular method, indispensable for large flowers and plants. Main advantages: lightness and simplicity.
For drying, you need a dark (without direct sunlight), dry and not too warm room with excellent ventilation (storage room, attic, garage, attic).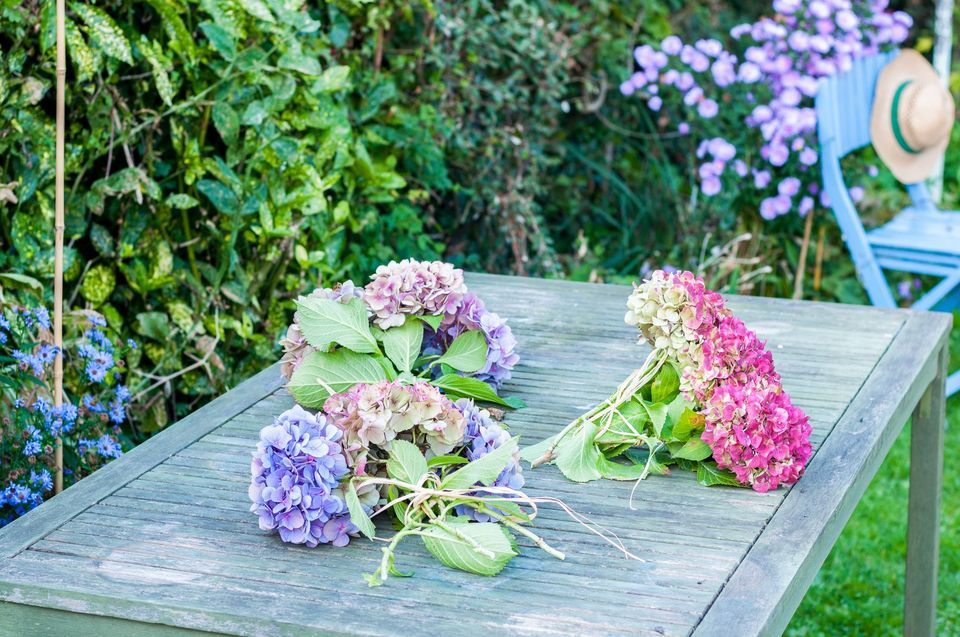 Depending on the type and size of the plant, the drying process takes a different amount of time.
Flowers
- Cut flowering species as soon as the flowers open. Remove the bottom pair of leaves, or all of the leaves if you only want the flower itself.
- Tie the plants at the base of the stem, 5-10 in a bunch. It is better to wrap every 2-3 stems, and at the end of the whole bouquet with a rubber band (tow, twine) so that the flowers do not fall apart after drying. Avoid excessive tension so that moisture does not accumulate in the ligation.
- Hang bunches of flowers, spikelets down, on a stretched rope (twine, wire, fishing line), no closer than 15 cm to the ceiling, with a gap of 10-15 cm between each other on hooks, paper clips or secure with a clothespin. In a bunch, the leaves should be well ventilated, and the flowers should not touch one another.
- Leave flowers hanging for 15-30 days, and if thick and dense petals or not optimal conditions, then 35-40 days.
 When the flowers dry, the petals will be hard and brittle to the touch.
Cereals
Harvest a couple of days before flowering or after the spikelets become light straw in color. After harvesting, cut the tips of the stems so that they are at the same level, and the tops of the spikelets, on the contrary, are at different heights. The next steps are the same.
Rules and tips
- It is better to link different species separately.
- Large flowers should be dried one at a time (hydrangea, peony, rose (thorns to be removed), lilac).
Which flowers can be dried?
It is easy to dry ornamental grasses or spikelets of cereal species (rye, wheat, barley, etc.), as well as medicinal or useful species (St. John's wort, mint, thyme, sage, etc.) using the air method.
Vasilyok, hydrangea , ornamental onions, poppy, rose, lilac (cut as soon as the lower flowers open), physalis.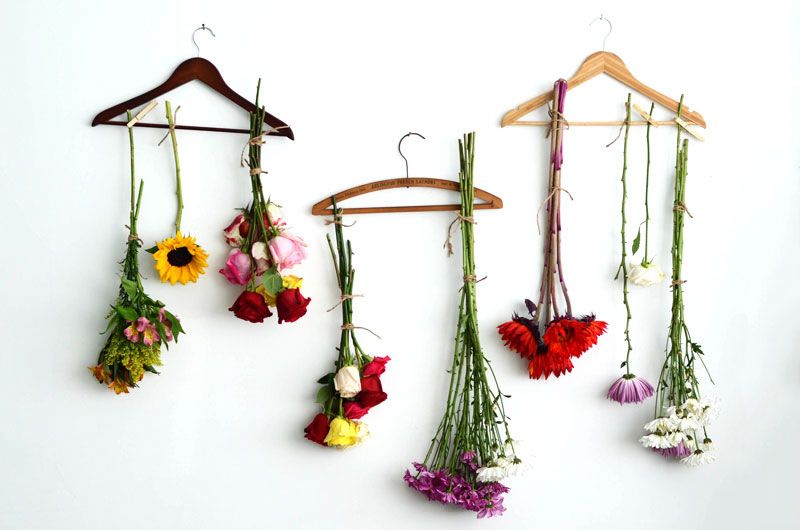
This method is not suitable for flowers with delicate and thin petals (narcissus, peony).
Air drying flowers and plants
Air drying without hanging
If it is not possible to hang the plants, they can be wrapped in blotting paper or rice pads and placed on top of cardboard or in boxes. Flowers usually dry in 14-20 days.
This method is suitable for such plants: ammobium, periwinkle, heather, gypsophila, goldenrod, kermek (statice), lavender, echinopsis and others.
Drying in a vase with water
Some plants wither before they can be dried. Therefore, a combined method is used for them: water + air drying.
- Pour 4-5 cm (no more!) of water into a vase and arrange flowers (lower cut diagonally). As the water evaporates, the plants will dry out.
- After the buds have swelled a little, remove the flowers and cut off the tips of the stems that have been in the water to prevent mold.
 Then dry the plants by laying them horizontally on cardboard or paper.
Plants
A convenient method for such plants: artichoke spherical, heather, carnation (after full bloom), gypsophila, hydrangea, lavender, bulbous, yarrow, chicory, etc.
Drying plants and flowers with the help of a book and under pressure
A very simple, affordable and perhaps the most famous drying method. He is very much loved by many jewelry makers, botanists for creating herbariums and simply connoisseurs of beauty.
In addition to the book, it is better to use standard office printing paper or rice pads. It will protect the flowers from contact with printing ink, and will also facilitate the process of removing dried flowers from the book.
It is convenient to use A5 paper or cut an A4 sheet into two parts, and then fold it in half to make a kind of “envelope”.
- Delicately cut the flower or plant, trim the leaves and stem (if necessary) with scissors.

- Sign the "bookmark": the name and date, as well as, if desired, your designations or the place of the find.
- Place the flower on paper ("envelope"), and spread the petals and leaves. Lightly press them with your finger to pre-fix the position of the plant.
- Carefully close the bookmark and place it in the book. Put a small weight on top (a stack of books, a pack of cereals or salt).
Rules and tips
- Usually flowers and plants are dried for 30-60 days. During this period, they dry well and become flat.
- It is better to use a book made of yellow paper (mostly old editions), but in a white "envelope". Such paper absorbs moisture better than thick and glossy white paper.
- Between "bookmarks" with plants, leave at least 5-10 pages. Then the moisture will be better absorbed and the book will not become damp.
- It is wise to immediately put prepared paper “envelopes” into the book so as not to waste extra time during collection.
 They saw a flower - cut it off - put it. Easy to lay, e.g. every 5 or 10 pages depending on the size of the plant (5, 10, 15… or 10, 20, 30…)
 - Book plants for drying at the same time. Do not report fresh specimens to almost dried flowers, otherwise they will all begin to “bloom”.
Press drying plants
This method is ideal for drying plants used to create panels and paintings. There are special presses for drying, or you can make it yourself or press down with glass. Under one press, you can lay several layers of flowers.
- Arrange the flowers in a single layer and place them on a board (cardboard, plywood) lined with rice napkins, newsprint, office paper or tissue paper.
- Cover the plant with a sheet of paper, then with plywood (thick cardboard) and evenly place a load (a stack of books, cereal in a bag). As a result: cardboard - paper - plant - paper - cardboard.
- To speed up drying, remove damp paper or rice pads every 1-3 days and transfer plants to new ones.
 The average duration of drying under pressure is from 5-7 to 15-20 days.
 - After removing the press, a flower, especially of blue shades, is better to put a layer of fine sand or semolina on a tray or in a box for 2-4 days for 2-4 days and also sprinkle a little sand on top.
Plants
Book and press drying is best for plants that are relatively flat and have small, flat flowers. These include most meadow and wildflowers, as well as medicinal herbs.
Pansies, clematis, bluebells, mallow (stock-rose), fern, primrose, lilac, violet and most medicinal herbs.
Plants with succulent, fleshy stems or flowers with very thin petals should not be dried using these methods.
Laying flowers to dry in a book
Tricks
Place pansies face down, but it is better to place bluebells like this: the narrow side is closer to the fold of the paper. This laying technique will help to maintain the desired position of the flower at the time of closing the "envelope" and laying to dry.
How to dry flowers in different substances? Bulk drying
The advantage of this method is the maximum preservation of the appearance of the plant. In most cases, the shape and color of the flower is perfectly preserved. The petals do not fade, but rather acquire a more saturated color and do not wrinkle.
- Cut the flowers on a dry day so that there is no moisture on the petals. Separate the flower head with a 2-3 cm part of the stem and insert the wire into it. Roll the excess wire under the flower.
- In a deep container (bowl, cup, box, jar, pot) pour a 3-4 cm layer of a loose substance that absorbs moisture well (the larger the flower, the greater the desiccant layer at the bottom). Lay the flowers upside down on top.
- Gently sprinkle the petals to separate them so that the desiccant can penetrate as deep as possible into the center of the flower. After the flower is completely asleep, close the container tightly and place it in a dry and warm place, and if the container is open, then in a well-ventilated area.
- After 3-4 days, check how dry the plants are with a toothpick. Approximate drying times for flowers: 2-4 days - small, 6-7 - large (silica gel), 6-12 days (flour, semolina and borax), 15-20 days (sand).
- When the edges of the petals are hard and dry to the touch, remove the flower with tweezers (it looks like paper - strong, but not brittle). Gently shake off any remaining desiccant with a soft brush or blow it off with a rubber blower. Connect the flower to the stem (it is dried separately) with wire.
Tips
The large container can be used to dry the flowers in several layers.
Drying roses in silica gel
Which flowers are best dried?
This is the main drying method for all bulky, fragile and delicate flowers where the petals are fairly strongly attached to the base. Better flowers are obtained, which have blossomed only halfway and began to dry immediately after the cut.
View this post on Instagram
Publication from TOMATO - only true! GARDEN (@_olga_sherl_)
Aster, marigold, carnation, dahlia, hyacinth, delphinium, sweet pea, marigold, bluebell, kosmeya, lily of the valley, lily, buttercups, daisy, narcissus, orchid, peony, primrose, rose, lilac, violet, cellosia, chrysanthemum, freesia and others.
Gerbera, calendula, daisy, chamomile and zinnia are best placed with their base up.
Larkspur and snapdragons are best placed to dry horizontally.
Which desiccant to choose?
The most popular substances that absorb moisture well are: white flour, borax (sodium tetraborate), corn, semolina and oatmeal, perlite, silica gel (silicate gel), talc.
- White flour or corn grits and borax . Inexpensive substances, but borax is not always easy to buy.
 Drying time 8-18 days. You can dry in these substances separately, or you can make a mixture: corn grits and borax - 1: 1, or flour and borax - 4: 1.
 - Semolina. The result of drying is identical to salt: the shape is excellently preserved, and large flowers also fall into petals, which is considered normal. After the semolina, the flowers are cleaner than after the sand.
- River sand. First sift and dry the sand well in the oven to disinfect. The best drying container is a round cardboard box that opens up at the bottom because the sand is easier to remove from the bottom.
Drying time - 10-25 days. Do not completely cover the flower with sand, as it is only needed for fixing, and the petals will dry the air in a dry and ventilated room. - Silica gel (Wikipedia article). It dries flowers the fastest (2-4 days for small flowers, 6-7 days for large ones), it is reusable, but quite expensive. The price in pet stores (litter for cats), depending on the company, is $ 2-4 for five liters.
It is better to buy fine silica gel or grind it yourself, and pour the granules into a tightly closed container (a jar with a lid).
After absorbing the maximum amount of moisture, the silica gel turns pink. To dry, spread it on a baking sheet and place in the oven for 2-3 hours at 90-100ºC. - Salt. It has high hygroscopicity and low price, therefore, it is actively used for drying flowers and plants. The technology is the same as when using other bulk materials. Waiting time - 30-35 days. TIPS. It is better that the volume of the container (glass, jar) is not much larger than the flower. Because the more salt, the higher the chance of shape breaking due to the greater weight of the desiccant. Fine Salt "Extra" is the best choice, as it penetrates deeper into the middle of the flower and absorbs moisture better.
PLANTS. It is best to dry small bulky flowers in salt. According to the reviews of the masters, the bells, slightly blossoming buds of the wild rose, dry superbly.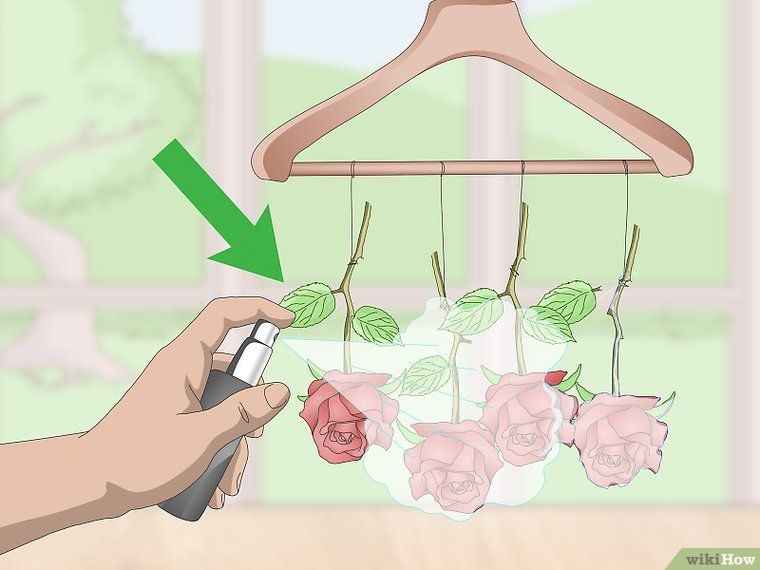
Absorbent wadding
In addition to bulk materials, absorbent wadding can be used. In this case, the petals also retain their shape and color well.
Place all petals (even the most central ones) with pieces of cotton wool. Hang the plant by the stem on a hook or rope. The flower head usually dries up in 5-6 days, but the cotton wool can be removed only after the stem has completely dried.
Toilet paper. Be aware that after drying, the flower is flatter and the papery texture leaves marks on the petals, but it does not fall apart.
Preservation of plants in glycerin and paraffin
In this way it is better to "preserve" branches and dense leaves of shrubs and trees or fresh green specimens due to the fact that fallen leaves or green shoots do not interact well with glycerin.
After “preservation”, the shape, size and elasticity of the plant remains the same, since glycerin does not dry out, but displaces water due to impregnation.
However, after a while the color becomes greenish-brown, brownish or beige, but after drying, the crafts can be painted with paint of any color.
- Remove the lower leaves and cut the stem down the middle with a knife or make an oblique cut and mash the tip. Place the plants in a vase of water for 3-4 hours.
- Pour the solution (hot water, glycerin - 2:1, stir well) into a container to a height of 6-9 cm and place the material in it.
- Move the vessel to a dark and cool place (cellar, closet on the balcony) for 10-20 days, sometimes 5-6 weeks depending on the size of the plant, until the leaves become glossy.
- Wipe drops of moisture from the leaves periodically with a cloth, and add the solution as it evaporates. If they are not wiped, they will curl and dry out.
Plants
Amaranth, bergenia, barberry, cotoneaster, cypress and fern. The leaves of oak, maple, laurel become flexible and shiny.
Paraffin
Fresh flowers can be covered with paraffin, including a bouquet from a loved one. Almost all types of flowers can be treated with paraffin.
Dampen the brush with melted paraffin. Then carefully and delicately process the petal, it is better to start from the extreme ones and move towards the center of the bud. After the petal is completely dry, you can move on to the next one.
How to quickly dry flowers and plants?
Sometimes it may be necessary to quickly dry plants, for example, you need to urgently donate a herbarium to a school or institute. From express methods, drying flowers in the microwave and using an iron is distinguished.
Microwave
- Place a semi-opened flower with a 3-4 cm stem part in the microwave, put a cup of water in it to reduce color fading and prevent excessive drying. Then turn on the appliance for two minutes (medium power).
- If the plants are not dry, turn on the microwave for one minute and check the degree of drying with a toothpick until you get the desired result.
 Or take out the flowers and hang them for 2-3 days in a dry and well-ventilated place without direct sunlight.
Plants
Great for flowers with lots of smooth petals: pansies, carnations, dahlias, gypsophila, goldenrod, calendula (marigolds), lavender, cuff, daisy, peony, rose, chamomile, zinnia and others.
Flowers with thick petals are not recommended for microwave drying.
Tips
- Ideally, microwave the flowers in a container with a desiccant (silica gel, flour, etc.). If the plants were dried in a container with a desiccant, then after the procedure it must be taken out, opened and left to cool for 12-36 hours.
- The denser and more numerous the petals, the longer it takes to dry - 7-8 minutes at medium or high temperature.
- If you dry delicate and fragile flowers (daisy, chamomile), it is better to use the defrost mode for a more delicate effect.
- Disadvantage of the method: a high probability of overdrying of the flower, which will lead to its excessive fragility and decrease in attractiveness.
Microwave drying rose petals
Iron
It is better to dry the leaves with an iron: put them between two sheets of paper and iron them. After each ironing, change the paper to a new one and repeat the procedure until the moisture has completely evaporated.
Iris and crocosmia leaves are good to dry with an iron.
10 drying tips for better petal shape and color retention
- Pick herbs and flowers only in dry weather after 11:00-12:00. They should not be damp from rain or dew. Wet specimens are much more likely to rot than dry, and after drying, the color becomes noticeably paler. For this reason, it is better not to harvest in early spring or late autumn.
- Choose strong, healthy buds with rich color and no blotchy petals. Even slightly wilted flowers, after drying, will acquire an unattractive "dead" appearance.
- Most types of flowers, especially those with small, dense buds (larkspur, lavender, etc.
 ), are best cut when they are in full bloom, as the flowers will look fully open when dry.
 - Cut the flowers carefully, along with 2-3 cm of the stem. The base of the flower is very fragile and a small “leg” will prevent it from scattering. If you plan to create flower arrangements, then insert a wire into the leg so as not to touch the flower with your hands and after drying it does not break.
- Dry plants as soon as possible after cutting. A freshly cut flower is easier to dry in the desired form, as the petals still hold their shape for some time.
During the transportation of plants to the house, they will blow, especially fully bloomed flowers, and it will be difficult to spread their petals.
The general pattern is as follows: the thinner the petals and the “delicate” structure of the flower (the worse it holds its shape), the faster you need to dry it. - If the plant has a fragile thin stem and is likely to break after drying, then it is better to insert a wire inside it.

- Stems are usually straight when dry. If you want to give such a stem a more natural shape with slight bends, then dip it in warm water.
Once the stem is wet, remove it from the water and gently bend it to your liking. Then lay it out to dry horizontally and press something down on it so it doesn't unfold again. - After drying, as a rule, yellow, blue, orange and pink flowers do not lose color, but white specimens may turn brown, and purple and dark red ones may turn black.
- In order to make cereals, flowers and herbs less shed, after drying they can be sprayed with hairspray from a distance of 35-40 cm. This treatment strengthens the flower and prevents early falling of the petals.
- Not all plants can be dried whole if you want to use them to create jewelry (earrings, pendants, rings). For example, it is better to disassemble bells and sleepy into “parts” with tweezers.
Advice from an experienced florist
At first glance, even a first-grader understands this, but, nevertheless, specialists with many years of experience sometimes fall into this trap.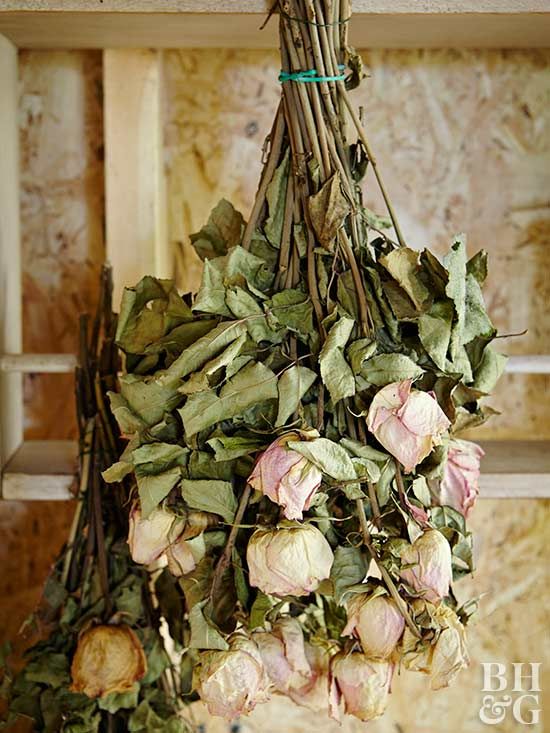 If you need one beautiful dried flower, for example for a pendant, then it is better to dry 5-10 pieces.
No matter how we try to arrange the flower beautifully and straighten all the petals, after drying we often see a sad picture. Flowers are quite fragile and can break in the most innocuous situation. Moreover, even if you successfully dried the same type of flower 100 times before, then a puncture can happen on the 101st.
If you need one, but all 10 flowers dried perfectly, then you can always choose the best one or figure out how to use the rest.
What can be done with dried flowers?
Flowers are dried for various purposes, it all depends on your desire and possibilities.
- Home or room decoration. Often dried bouquets of herbs and flowers are placed in vases to decorate the interior, often in places where live houseplants cannot grow. Increasingly, dried flowers are used to decorate the house for the New Year holidays. They are sprinkled with artificial snow, rain or covered with multi-colored sparkles.
- Floral collages, compositions of dried flowers, applications, herbariums, panels, paintings and garlands. For paintings and panels, plants are needed after flat drying (book, press, glass or iron).
- Creation of various jewelry: earrings, pendant, ring, button. For this handmade master, dried flowers or leaves are poured with epoxy resin (it is better to take a special “Crystal Resin”, the usual one often turns yellow very quickly).
Clover leaf ring
Which flowers keep their colors and which do not?
Able to retain color for longer than a year: apricot (flowers), pansies, marigolds, immortelle, gomphrena, forget-me-not, daisy, muscari, rose of dark shades, lilac, statice, tulip (yellow).
A little brighter: small pink roses, red tulips, rose hips in bud.
Extremely fading: Japanese quince, periwinkle (99%), carnation (all types), nettle, violet (all types, any color and always).
Attention! To keep dried flowers and plants from fading longer, protect them from the sun.