How to fix water damage in ceiling
How to Repair a Water Damaged Ceiling By Yourself
Regardless of the water’s source, water damage cases are considered emergencies that require prompt action. The excess water will become absorbed by any porous building materials in your property, including drywall and furniture. This absorption then makes it easy for the water to spread to new areas of your property, thus worsening the damage.
Furthermore, the more water that materials absorb, the less stable they will be. For example, a water-damaged wall that continues to take in more water will eventually deteriorate and suffer structural damage. The presence of excess water can also lead to mold growth.
Repairing a Water-Damaged Ceiling
If a ceiling in your property has sustained water damage, it is important to repair it right away. Failing to do so will threaten the structure’s integrity and people’s safety. Knowing this, you need to act immediately to prevent further damage.
Use the following information to help make repairs to a water-damaged ceiling.
1. Stop the Water Source
In any water damage situation, the first thing you need to do before you can make repairs is to address the water source. This is important to prevent any further water damage. If you do not stop the water source beforehand, then it will continue to damage the ceiling. Any repairs you make will then become useless.
To locate the source, you might need to remove the damaged drywall. Since water can spread, the source may be far from the damaged ceiling area. So once you find it, make any repairs or replacements needed to stop the water.
2. Dry the Affected Areas
Once the water source has been addressed, the water-damaged ceiling can then be dried.
First, place down a tarp to protect the floor and any furniture in the room from water and debris. Then, gather materials you can use to dry the ceiling, including fans and towels. Take time to dry the areas above and below the ceiling to ensure you thoroughly address the moisture.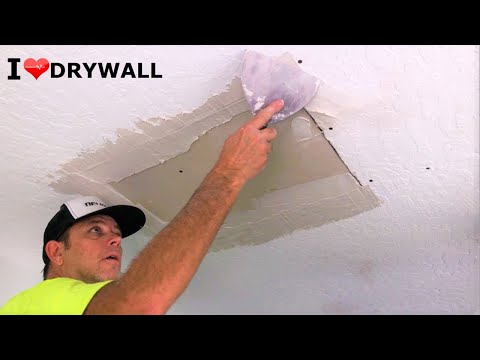
If water is still dripping after you’ve dried the ceiling, you can be sure it is still too saturated and requires further drying. You might need to cut out the sections that are still wet so you can dry it.
If the ceiling’s drywall is bulging, puncture it to release the water. But first place a bucket beneath the swollen area to catch any water.
3. Remove the Damaged Sections
Before you do any more work, make sure to wear protective gear, including safety goggles and a face mask.
If the water-damaged ceiling is peeling or bulging, if you haven’t done so already, scrape those parts off. Other damaged sections, such as those with water stains, should be removed as well.
If the drywall has stains but has not sustained structural damage, you can salvage it by cutting out only the affected areas. Use a keyhole saw to cut out the damaged section into the shape of a rectangle or square. Then you can easily replace the part with a drywall patch later.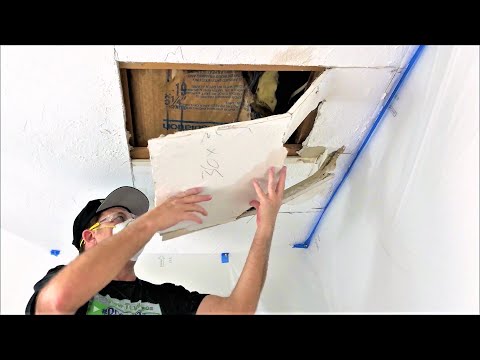
4. Repair the Ceiling
Using sandpaper, smooth down any ridges, bumps, and rough areas. Fill small holes with joint compound, let it dry, and then use more sandpaper to smooth it out.
For sections where you cut out the drywall, measure the hole. Then cut a new piece of drywall out to fill the hole, but make sure it is 2 inches wider and longer than the hole. You want to start with a piece that is bigger than necessary and size it down using a utility knife. Once the adhesive has dried, add a layer of joint compound, and smooth it down with sandpaper.
5. Prime and Paint the Ceiling
When you are done with repairs, open windows to provide proper ventilation for the priming and painting process. Apply primer to the ceiling and allow it to dry. Once dry, you may repaint the ceiling.
Although the entire ceiling may not have been harmed, it is best to prime and repaint the whole ceiling to ensure even coverage.
Call for Water Damage Restoration
Because water damage is considered an emergency, immediate action is important. Sometimes, these situations require more than do-it-yourself repairs. Whether the job is too much for you, or you are unequipped to take care of a water-damaged ceiling yourself, you can hire professional help for water damage repairs and restoration services.
Professional water damage restoration companies are available to help restore homes and businesses that have sustained water damage, including water-damaged ceilings. No matter what caused the damage, professional technicians will fix the water source, remove excess water and moisture, dry affected areas, and make the necessary repairs. If the water has led to mold growth, professionals will handle its removal, too.
With help from a professional water damage restoration service, your water-damaged property will be repaired and safe to return to.
About Luke Armstrong
Expert in emergency fire and water restoration services, fire cleanup and water damage cleanup, mold removal, as well as carpet and upholstery cleaning services.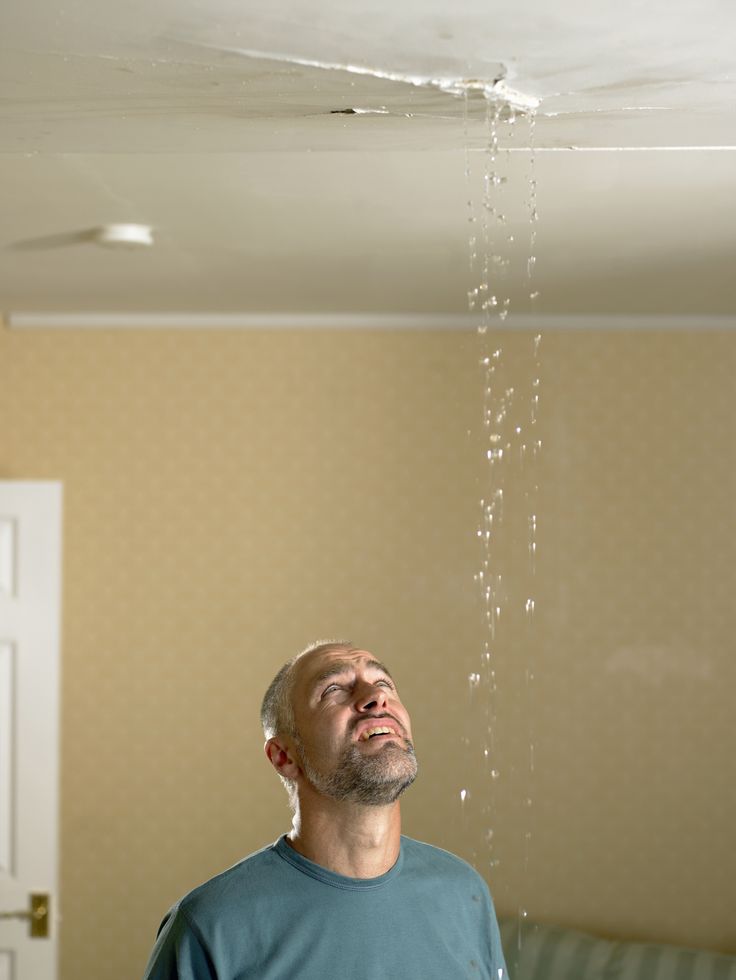 Contributor to several restoration and cleaning blogs.
The Steps to Repair Drywall Ceiling Water Damage
Eddie Shekari
January 17, 2022
Water can cause severe and irreversible damage to your ceiling. If this happens, it’s important to take immediate action as your ceiling could deteriorate, need replacement, and potentially cause health problems. A water-damaged ceiling can lead to mold growth, which can be extremely dangerous to your health, resulting in rashes, headaches, dizziness, nausea, allergic reactions, asthma attacks, and lung infections.
However, water-damaged drywall and water-damaged ceilings can be repaired. All you need are the proper steps and tools to know how to assess the drywall water damage and how to fix it. Failure to do this will result in irreparable destruction to the damaged area, which is why we at Pro Painters have put together the following steps for you to repair drywall ceiling water damage successfully.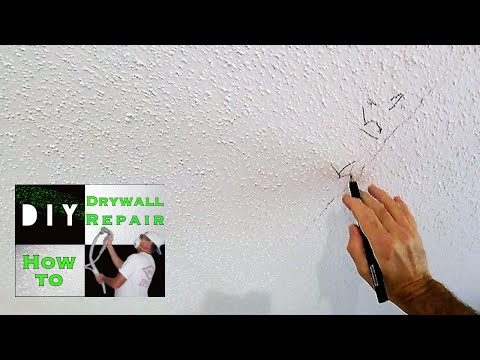
If you have a roof leak or suspect water damage, it’s critical that you first assess the damage. The source of the water leak needs to be found before repairs can be made. This is essential for preventing further drywall ceiling water damage; the water source must be stopped, or the damage will continue.
Sometimes it’s an undeniable observation as the ceiling could be showing signs of peeling, cracking, or bubbling. Other times, the ceiling can have exposed seams or sagging areas on the roof. However, it’s not always an easy investigation to locate the source. It’s possible that the water has already transferred from a roof leak, and is now causing damage to places where you would never expect.
If, after further investigation, the source of the water-damaged ceiling still cannot be found, it’s time to remove the damaged drywall. The removal will help you find the leak’s location and dry out the water-damaged areas.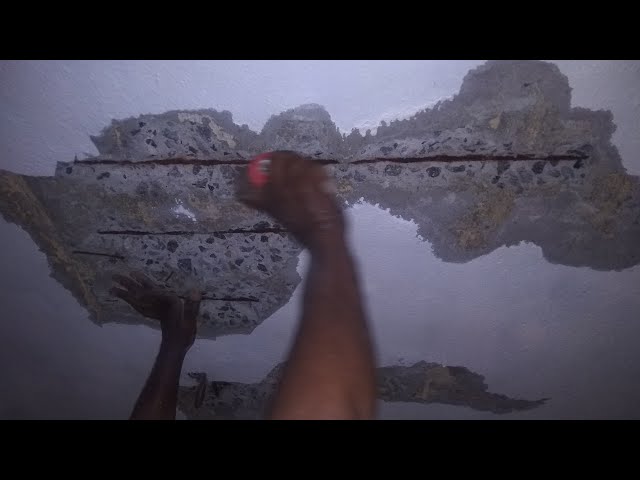
2. Dry Out Damaged Areas
Before removing the damaged drywall, you have to dry out the affected areas. Place down a drop cloth or tarp to protect the floor and catch any dust and debris created when removing the damaged drywall. If the ceiling’s drywall has a bulging area, puncture it to release the water and have a bucket in place to catch all the water.
Take the time to ensure that all areas are completely dry — above and below.
3. Remove Drywall Ceiling Water DamageBefore beginning the removal process of the water-damaged ceiling, make sure you are wearing protective gear such as safety goggles and a face mask. Start by removing the damaged drywall either by hand or by using a hammer or wrecking bar. If the drywall panels only show water stains and aren’t showing structural damage, it can be salvaged by cutting out only the damaged areas.
Furthermore, when cutting out the affected area, use a keyhole saw to cut the hole into a square or rectangular shape.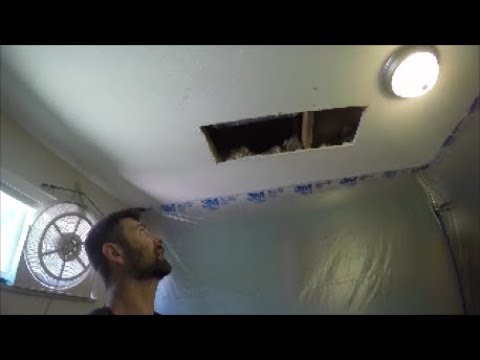 This can then be later used to make a patch with another piece of drywall.
4. The Repair Process
Use sandpaper to smooth any ridges and bumps that have been left. Then continue by filling all the small holes with a joint compound, letting it dry, and then smoothing it down again. For the other times where you cut out the damaged areas of the drywall, measure the size of the hole and then cut out a new piece of drywall 2 inches wider and longer than the previous hole. This new piece will fill the hole.
Remember to always start with a bigger piece that can be cut down with a utility knife. Once the adhesive has dried, make sure to repeat the process of filling the holes with a joint compound and smoothing.
Please hire a restoration company to put in complete slabs of drywall panels or work on ceiling repairs. The task can be daunting by yourself as drywall is heavy, and keeping it steady can be challenging.
5. Prime and PaintAfter finally completing the repairs, open the windows to provide ventilation for the priming and painting process. If the whole ceiling was not damaged, it’s still critical to prime and paint the entire ceiling to ensure an even finish.
Start by priming the ceiling and allowing it to dry. An important note is that you don’t have to wait to paint in between coats, but doing so will ensure better results. Once completed, you can then paint the entirety of the ceiling.
However, if the whole priming and painting process seems like a drag, call the professionals.
Call the ProsAttempting to repair the water-damaged areas of your drywall and ceiling can be challenging, especially by yourself. This is a very involved process, and if you need help, the professionals at Pro Painters can help. We are a Houston painting company that can repair and install drywall.
The Pros understand the urgency of these situations — water-damaged ceilings and wet drywall. Our drywall repair and installation service includes measuring, marking, and cutting the panels. Afterward, we fasten the boards with glue, nails, or screws; match and trim rough spots; seal the joints, layer the drywall with sealant, and sand the joint and holes to make it smooth. We will restore your home all back to normal. Contact Pro Painters for immediate replacement or repair of drywall ceiling water damage.
Eddie founded Pro Painters in 1995 to meet the growing need for high-quality residential and commercial painting needs in Houston. In nearly 20 years, Pro Painters has exponentially grown our client base, serving residents across the greater Houston area. Our core principles have helped us achieve the highest standard of workmanship and customer satisfaction. Our years of experience have allowed us to become an extension to our customers as the all-in-one solution for home makeovers.
How to fix a hole in a stretch ceiling with your own hands: repair steps, necessary tools and nuances
Stretch ceilings have been used for interior decoration relatively recently, but almost immediately after their appearance they gained incredible popularity. This is explained by the versatility of the finishing material and unpretentiousness in use
- one Causes of damage to the stretch ceiling
- 2 General recommendations for repairing damage
- 3 Repair under warranty
- four Troubleshooting PVC sheet
- 5 Fabric ceiling repair
- 6 Stretch ceiling defects that cannot be repaired
- 7 Recommendations for the operation of stretch ceilings
Stretch ceilings have been used for interior decoration relatively recently, but almost immediately after their appearance they gained incredible popularity.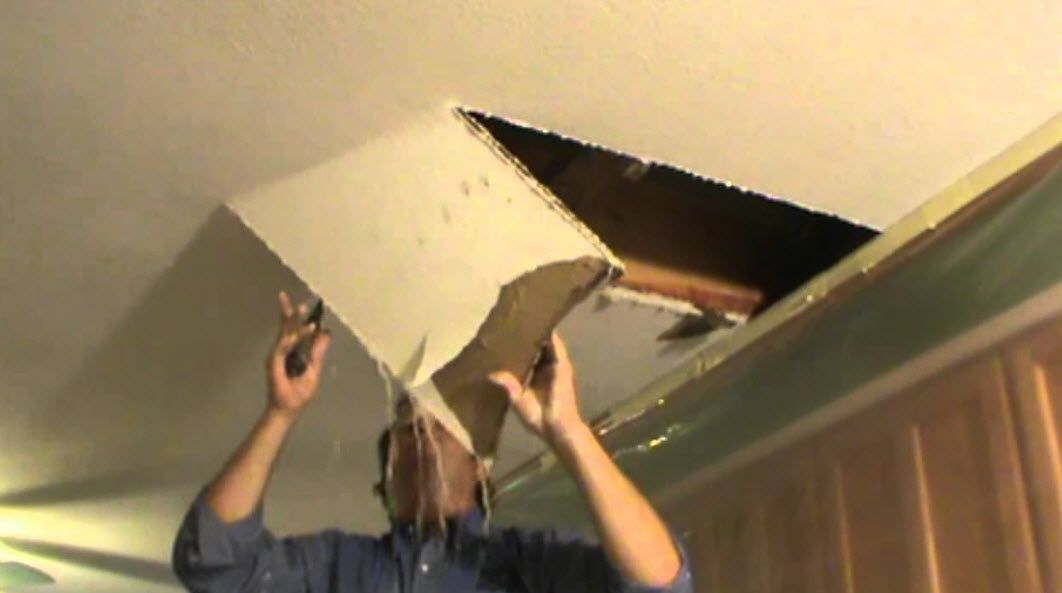 This is explained by the versatility of the finishing material and unpretentiousness in use. Such ceilings can be mounted in old houses and in new housing stock. If suddenly the main ceiling has any defects in the form of bumps, cracks, unsuccessful painting or the consequences of leaks, the stretch fabric will easily hide them. Today, this is perhaps one of the most popular ways to decorate ceilings, which is another confirmation of the unique performance characteristics of ceilings.
Causes of damage to the stretch ceiling
Unfortunately, the stretch ceiling, like any other finishing material, can be damaged during operation. The reason for the appearance of a hole in the canvas can be anything: a champagne cork accidentally shot at the festive table, a toy thrown high by a child, the installation of a curtain or a lamp. It is enough to show the slightest carelessness during the removal of dust, and now an unsightly hole flaunts on a perfectly even surface. In some cases, sagging is formed on the stretch ceiling, due to which a crack subsequently appears.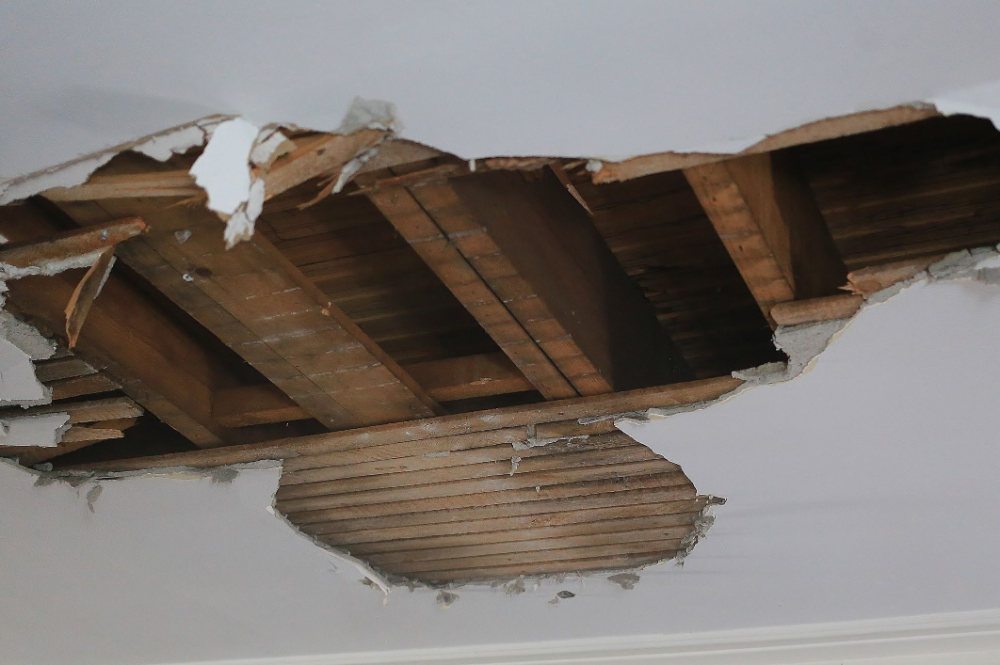 The reason for sagging may be a violation of the fastening technology, poor-quality installation of the canvas, looseness of the wall panels.
General recommendations for repairing damage
Given that ceilings and their installation are quite expensive, do-it-yourself repairs should be carried out with the utmost care. In most cases, damage can be repaired on your own: just seal the hole to restore the aesthetic appeal of the canvas. But before proceeding with cosmetic repairs, it is necessary to deal with the existing restoration options that are acceptable for a certain type of ceiling.
It may seem that a small hole will not do much harm, especially if it is not in the most visible place. Of course, this is not true. Any defect will sooner or later lead to sagging and, as a result, a deterioration in the operational and aesthetic characteristics of the stretch ceiling. Therefore, it is important to assess the scale of the "disaster" and begin to eliminate it.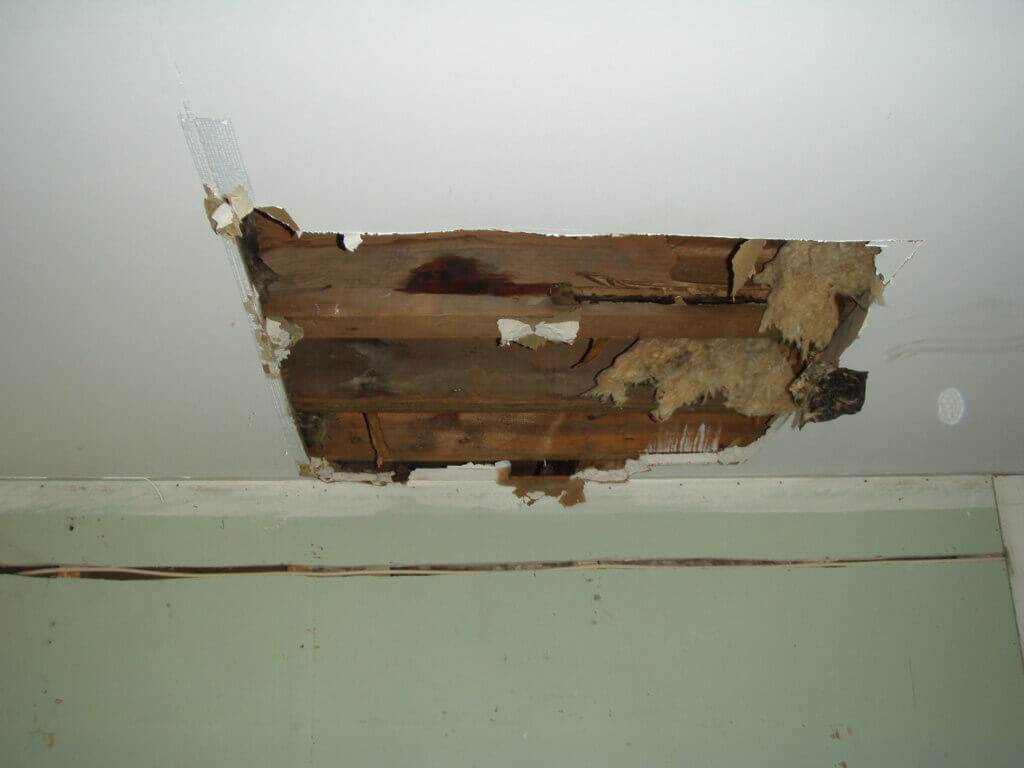
There are a few general "first aid" recommendations for stretch covers:
- The size of the hole will increase unless urgent action is taken, so limit the area of damage with masking tape;
- if the damage was caused by a manufacturing or installation defect, it is better to entrust the repair of the stretch ceiling to the manufacturer who has assumed warranty obligations;
- sometimes there are several holes in the ceiling, and they can form around the entire perimeter of the canvas. In this case, it is more expedient to completely replace the ceiling.
If you accidentally damage the ceiling sheet as a result of inaccurate use of building tools or during children's games, you can repair it yourself. If you find a small hole, just cover it with a small piece of PVC film, similar in quality to the canvas itself. This is easy to do without the help of specialists. On the shelves of stores there is a wide range of adhesives that are suitable for repair work with a PVC ceiling. Please note that working with such glue is not easy: PVC compounds set quickly enough, so try not to hesitate when sealing a hole.
There are also secrets for minor repairs of fabrics. The stretch ceiling will look like new if the resulting damage is masked with silicone sealant. This method is used to seal small holes in the outer layer of the canvas.
Warranty repair
It is worth considering separately warranty cases of damage to the ceiling sheet. These include:
- seam divergence due to poor quality gluing;
- divergence of fasteners due to non-compliance with fastener spacing;
- poor-quality assembly of the harpoon;
- Insufficient threading of the fabric in the baguette.
Unfortunately, even a skilled craftsman cannot fix a broken seam. The only way out is a complete replacement of the ceiling, which is carried out at the expense of the installer company.
In case of damage, please read the contract carefully. And never do any repairs yourself. This problem should be solved by a stretch ceiling installation company. Even if the damage is not covered by the warranty, it is still worth notifying the company about them, since after your intervention in the ceiling structure, the warranty may simply cease to be valid. If the cause of the seam rupture or its discrepancy was water accumulated under the ceiling or crumbling plaster, repairs will have to be done at your own expense.
Troubleshooting PVC sheeting
To effectively repair a PVC stretch ceiling, it is important to assess the location of the damage. A small hole, located at a distance of no more than 1.5 cm from the fasteners, can be removed by simply pulling up the material. In order not to damage the material during the repair process, secure the edges of the hole with masking tape.
If, however, due to the strong tension of the web, this method of repairing the damage seems impossible, you will have to spend a little more time and effort on repairs.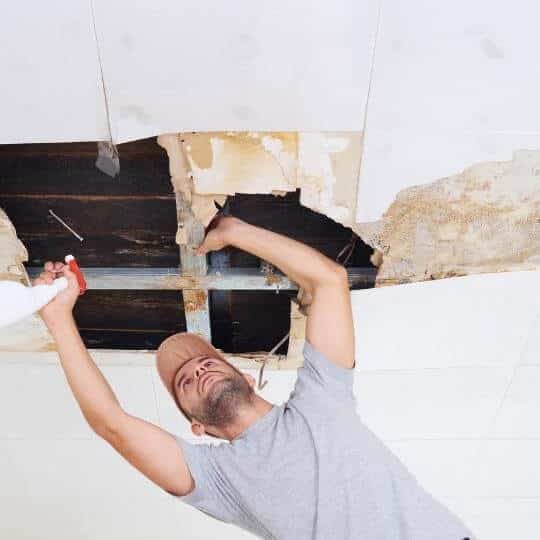 First you need to remove the mounting plate next to the damage. Then, using a conventional hair dryer, the material must be heated and the canvas pulled up so that the hole is not visible. After that, the mounting plate is installed in its place.
A hole located far from the wall will cause much more problems. According to experts, the best option in this case would be to install a spotlight at the site of damage. Fasten a suitable reinforcing ring under the lamp and connect the wiring. For fixing, use glue for PVC materials. It is important to glue all the elements with transparent compounds without dyes. If the luminaire is controlled by a remote control, wiring is not necessary.
Another repair option is to use decorative PVC ceiling patches. They do not even need glue, since one side of the patch is covered with a sticky compound, and the other is protected by a film.
Fabric ceiling repair
Fabric ceiling is easier to repair than PVC sheet.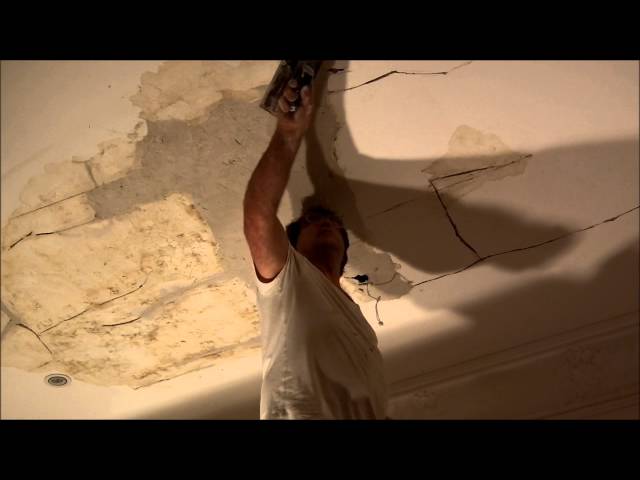 If the size of the hole does not exceed 1-2 cm, then it is enough just to sew it up or paint it over. For larger damage, patches can be used. Having picked up a patch that is suitable in color and texture, you can begin to repair. To do this, a piece of fabric must be smeared with colorless glue and try to carefully insert the holes inside. Cyanoacrylate-based adhesives are ideal for fabric stretch ceilings. Seal the damage carefully, constantly smoothing the canvas. Make sure that the edges of the patch do not peel off. After the repair site dries, it needs to be painted over.
You can fix a hole in the canvas with your own hands in a different way, for example, using a beautiful application from a hardware store. A small hole formed on the ceiling will be hidden by the original decor, and the sticker itself will decorate the interior. The application can be replaced over time or completely abandoned by performing a full painting of the stretch fabric.
Defects in the stretch ceiling that cannot be repaired
Unfortunately, in some cases, simply gluing or patching holes will not be able to cope with the problem. If the tension fabric is too tight or incorrectly cut, a more global repair will be required. The most common problem in these cases is the divergence of the seam, and the easiest way is to completely replace the panel. Such repairs will cost a lot, but you can save on the purchase of fixing strips and fasteners. And do not forget that stretch ceilings and all the problems that arose during their operation should be dealt with by the company that made the initial installation of the canvas.
Most often, a stretch ceiling suffers from water, and leaks from neighbors are not uncommon. PVC stretch fabric is not afraid of large volumes of accumulated liquid: they stretch perfectly, turning into a waterproof bag. Such a ceiling will save your interior even with a strong flood, but after that it will most likely have to be replaced. To extract water from the tension fabric, you have to make two punctures. One is in the very center of the sagging, the other is in a place where there is no water. For these purposes, it is best to use an awl. If the scale of the leak is not so great, the stretch ceiling can be saved. It is enough to repair it in any of the above ways without a complete replacement.
The fabric stretch ceiling has practically no stretch, therefore, under the influence of large volumes of water, it is likely to break at the attachment points. Even if the leakage was insignificant, the aesthetic properties of the ceiling will suffer greatly: ugly stains and stains will remain on the canvas. To hide defects, a fabric stretch ceiling can be completely painted.
Recommendations for the use of stretch ceilings
In order for the ceiling to serve for many years, care must be taken during its operation. Dry cleaning and washing of the ceiling must be carried out in strict accordance with the manufacturer's recommendations. Simple rules will help you avoid trouble:
- Electrical installation and wiring should be carried out by professionals;
- do not use aggressive cleaners to clean the ceiling;
- during repairs do not use sharp objects in the immediate vicinity of the ceiling;
- when installing moldings and cornices, use softening pads that protect the ceilings from sharp elements.
If you accidentally made a hole in the stretch ceiling, in no case should you panic. Calmly assess the complexity of the damage and deal with its elimination.
Stretch ceiling cut repair
Video can’t be loaded because JavaScript is disabled: Stretch Ceiling Cut Repair (https://www.youtube.com/watch?v=-18PHCMAuZU)
Contents
How to fix damage to stretch ceilings with your own hands.
Buzz! The corner of the new metal cornice, which they tried to install before the holiday, caught the film on the ceiling and tore the most expensive thing in the apartment - the French stretch ceiling.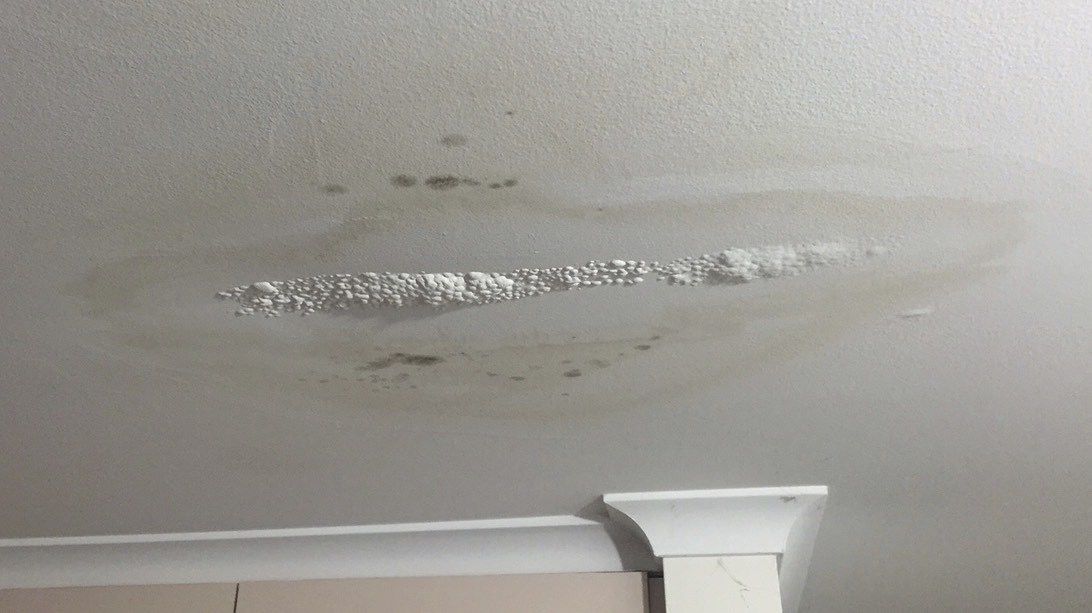 Without looking into the rounded eyes of his wife, who suddenly fell silent, the Boss ran for the adhesive tape. Do you know how to fix damage to stretch ceilings with your own hands?
Contents
- 1 What kind of damage can happen
- 2 Film tear
- 3 Ceiling cut
- 4 Water flood from above
- 5 Temperature violation
The long-awaited chic stretch ceiling is a fragile and capricious thing and requires careful handling. A small mechanical damage is enough for the appearance of the stretch ceiling to be spoiled. After all, the ceiling material is still a film, about 0.3 mm thick, so damage can occur.
How to deal with such unforeseen cases and repair the damage yourself?
What kind of damage can happen
Damage to stretch ceilings can be classified as follows:
• film rupture resulting in further extension of the damaged area
• mechanical cut caused by a sharp object
• sagging due to water saturation
• detachment of the fastening baguette
• thermal warping of the film due to prolonged temperature impact.
The subsequent repair of stretch ceilings will depend on the type of external impact. Therefore, which stretch ceiling is in your apartment, in this way, should be done in case of damage.
Sudden damage must be repaired as a matter of urgency.
Film Breakthrough
The most common cases of damage to the stretch ceiling can be called a break and a cut. Breakthrough of the PVC film can happen at any point on the surface, and no one is immune from this. Therefore, after detecting the damage zone, it is necessary to quickly fix the edges of the cut or incision, because the film tends to quickly spread damage under the action of the tension force.
To eliminate the consequences of a breakthrough, use ordinary tape or adhesive tape from the first-aid kit. It is necessary to stick adhesive tape or adhesive plaster along the edges of the breakthrough. Well, now call the master or repair the damage with your own hands.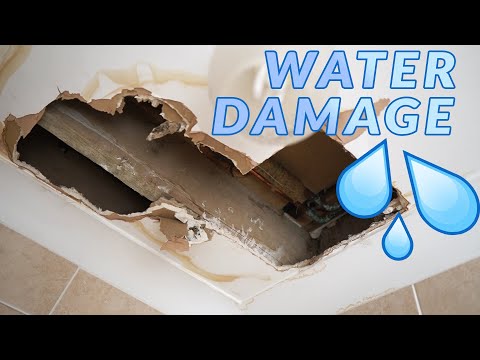
Restoration options abound. The main economy options: you can install a lamp in the resulting hole, insert a false hood or stick a decoration on the topic.
You will be damned lucky if the stretch ceiling has a fabric base. In this case, you can eliminate the breakthrough with your own hands. For this case, it is necessary to take fabric tape or glass tape and seal the torn area.
To prevent the patches from being visible, you can partially tint a part of the canvas and the resulting seam or decorate it.
If the break is located in the area of the wall at a distance of up to 15 cm and the size of the tear or cut does not exceed 20 cm, then it is necessary to glue the patch on the inside.
A patch of stretch ceiling material is brought in from the inside of the ceiling from the breakout area and carefully glued. After work, a small seam will be visible on the front side. On matte or fabric ceilings, such a seam is almost invisible, but on glossy ones it will be visible. Decorate the seam with a special application with Swarovski crystals. No one except you personally will know that there is a seam under this application.
Ceiling cut
A mechanical cut made by the edge of a sharp object may have a long configuration with divergent blade edges. You can eliminate the consequences of a cut by sealing the crack of the cut with adhesive tape or adhesive tape. The cut on the stretch ceiling can also be in any part.
If the cut area is located closer to the wall edge, at a distance of no more than 10 cm, then it is possible to repair the damaged area by stretching the film. In this case, the damaged part of the stretched ceiling surface is dismantled. The damage is pulled up, an additional harpoon is mounted, the film is heated and neatly tucked into the profile. This “cosmetic facelift” leaves no visible signs of damage or repair.
Water flooding from above
A common type of damage, but rather a nuisance, is flooding your stretch ceiling with water from neighbors above. Slowly, drop by drop, a significant amount of water will accumulate in the space behind the stretch ceiling of your apartment.
A leak becomes apparent when the ceiling is pulled into a hanging bubble on the ceiling. We warn you, it is undesirable to pierce such a bubble. There is another way to fix the leak. If there is a chandelier or lamps in the ceiling, they are dismantled and the accumulated water is drained into the hole formed. If the water flow is continuous, then you will have to dismantle the ceiling on one side and drain the water into a prudently prepared container.
"Flood" can be considered a natural disaster for a stretch ceiling. You can’t glue anything here and you can’t darn it with white threads. Moreover, the amount of water is always above the norm, therefore, in the process of leakage, the mounting baguette will begin to move away.