Outdoor garden plans
20 Free Garden Design Ideas and Plans
Starting a garden from scratch may seem daunting for a novice! But we've got you covered with tons of great ideas and free garden plans for every type of yard, whether it's big and sprawling or teeny-tiny. For starters, look at the area you want to plant: Does it get full sun, which is 6 or more hours per day? Or maybe it gets only part sun, which is about half that, or full shade. Watch that space for a few days to get a sense of what's happening at what time of day. Think about seasonal changes, too. For example, an area that's full shade in summer may be full sun in spring. That will dictate what plants will likely thrive in that area. It's essential to read plant tags carefully and make sure a perennial, shrub or tree can survive winters in your USDA Hardiness Zone (find yours here).
It's also important to be patient because gardens aren't built overnight. They evolve through the years as you learn more about the plants you love. And whether you're an experienced gardener or a complete newbie, Mother Nature will continue to throw you some unexpected twists and turns along the way.
The bottom line is you're never done learning about plants and your garden. So, embrace the challenges, enjoy the unexpected surprises, and read on to discover plenty of great garden plants and layout ideas for your own backyard oasis.
1
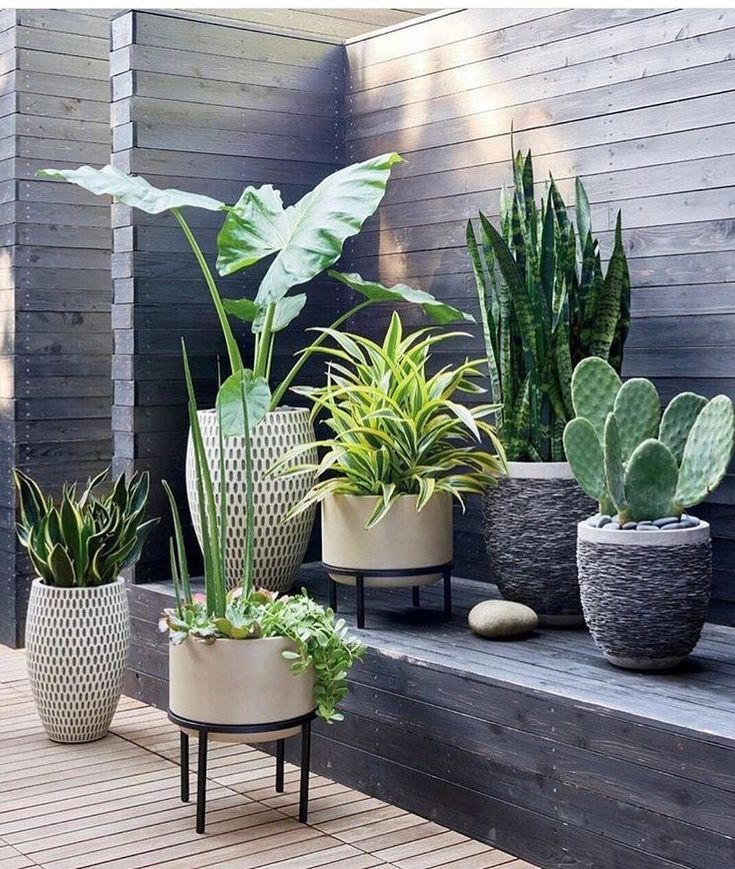
Patio Garden Bed
ChiyacatGetty Images
If you're constructing a new patio, create a planting bed as part of the patio to define the space and make it feel more like an outdoor room.
Find best patio plants.
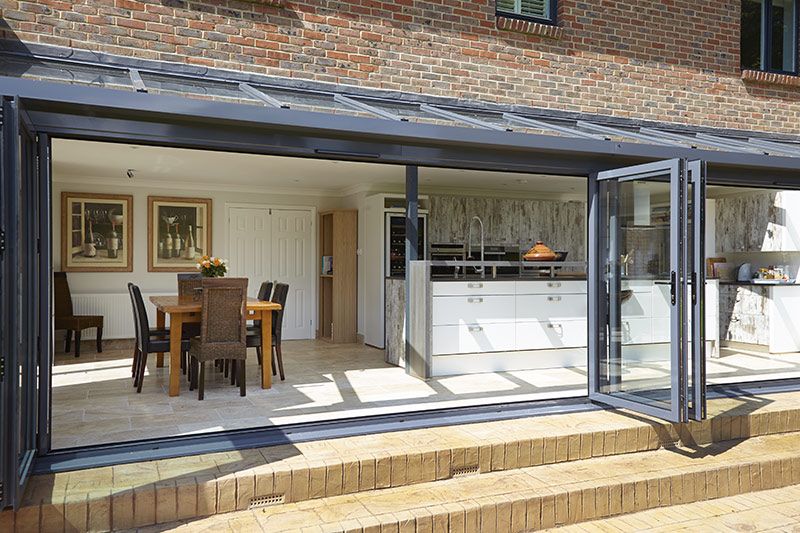
2
Ultimate Kitchen Garden
Illustration by Michael A. Hill
Say hello to the potager of our dreams, designed by renowned gardener Jon Carloftis. Overflowing with amazing edible plants handpicked by some of the nation's best chefs, this brings new meaning to farm-to-table dining because it's your own backyard!
Get the garden plan.
3
Perennial Garden
© Frédéric CollinGetty Images
Why plant new flowers every year? By incorporating perennials, which return for many years, you'll be able to build a garden that will need little care from you to bloom.
Find the best perennial plants.
4
A Glorious Kitchen-Garden Plan
Illustration by Michael A. Hill
When faced with Linda Lipsett's 30-by-90-foot plot, garden designer Chris Fischer got crafty with organization. He denoted three prominent portions—a large middle area surrounded by two smaller sections—and adorned each with raised beds for better soil quality control.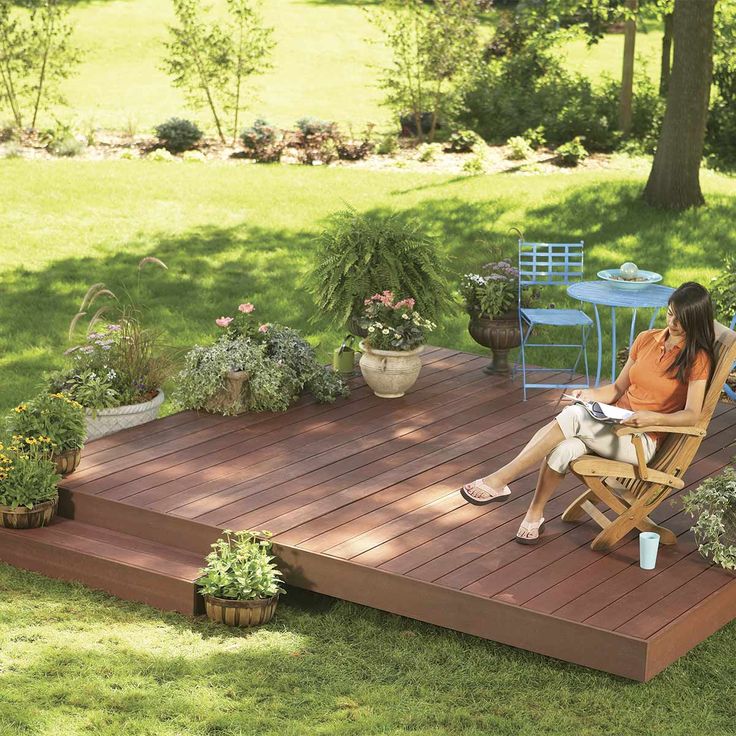
Get the garden plan.
5
Vertical Garden
JillLangGetty Images
Sometimes the only way to grow is up! Vining plants add interest and also can provide screening and privacy on a deck or patio. Vines in pots work just as well as those planted in beds.
Find the best flowering vines.
6
Foliage-Filled Garden
Illustration by Allison Langton
Sean Conway's got nothing against flowers, but it's the garden designer's way with foliage that makes his Rhode Island spread sing.
Get the garden plan.
7
Herb Garden
Westend61Getty Images
Even if your space is limited, you can grow herbs right outside your door.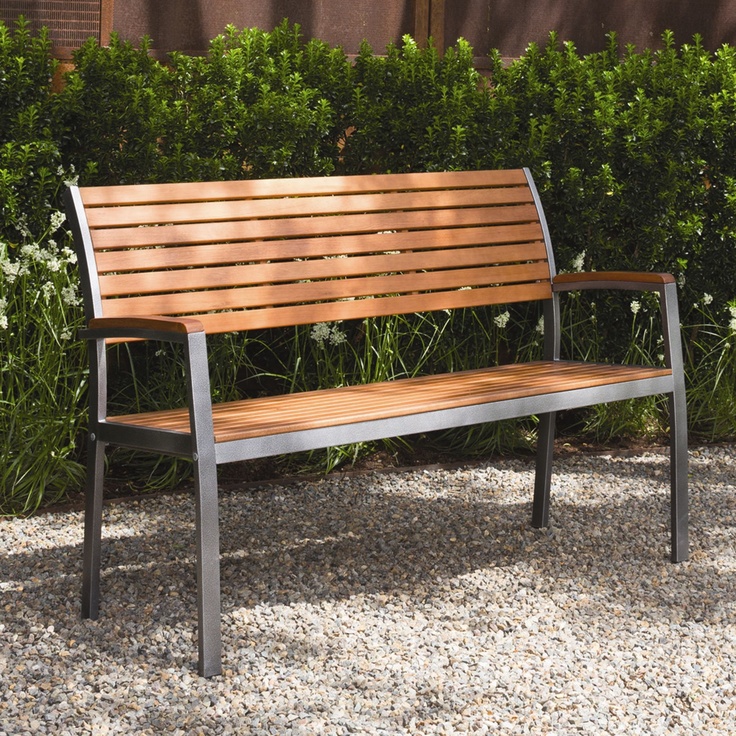 Assemble a collection of pots and plant the herbs that you use most often, as well as some varieties that are less familiar to you (you may discover a new fave!). Plant both annual and perennial herbs for a good mix year after year.
Find the best perennial herbs.
8
Crevice Garden
Illustration by Michelle Buchard
How about perking up that drab Zone 5 to 8 patio or terrace with a sundial and some compact flowering plants? All you have to do is remove a few of the pavers and plant a few sprawling perennials.
Get the garden plan.
9
Rose Garden
Getty
Every garden needs roses! And they're not as fussy as you might suspect. New shrub types are hardy and more disease-resistant so they're perfect even for beginners.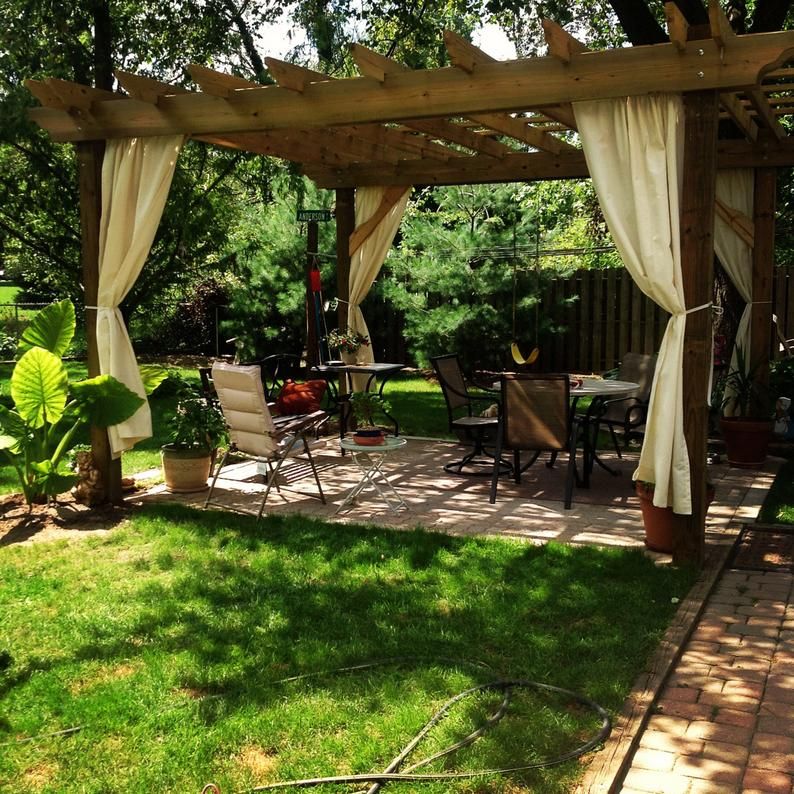
Get the garden plan.
10
Water Garden
Illustration by Michelle Buchard
This small water feature is suitable for a Zone 6 to 9 residential garden in the city or suburbs, where it could be placed on a deck, terrace, or patio.
Get the garden plan.
11
Bark Appeal Garden
Getty
Does your garden lack color during the leafless season? Trees and shrubs with interesting or peeling bark make a great addition to your landscape.
Get the garden plan.
12
Cottage Garden
Illustration by Michelle Buchard
This Zone 5 to 8 garden integrates charming old-time annuals and perennials, herbs, and flowering shrubs to produce a simple, informal display that provides plenty of flowers for cutting.
Get the garden plan.
13
Shade Garden
ChiyacatGetty Images
14
Fall Cutting Garden
Illustration by Michelle Buchard
Nothing dresses up a home like fresh flowers, and growing them yourself is a fun bonus. This small raised-bed cutting garden will provide cut flowers for weeks and weeks.
Get the garden plan.
15
Spring Bulb Garden
Rosemary CalvertGetty Images
Nothing's more refreshing after a long, dark winter than greeting spring with bright and cheery flowering bulbs. Plant them in fall for a show next spring. You also can plant in pots if you have limited space.
Find the best spring bulbs.
16
Fall Decorating Garden
Illustration by Michelle Buchard
Tired of having to buy all the items you need to craft natural seasonal decorations? Why not take some space in your garden and grow your own autumn plantings?
Get the garden plan.
17
Fragrant Garden
wilatlak villetteGetty Images
A garden should enchant you on many different levels. Engage all your senses by planting a variety of fragrant flowers and shrubs.
Find the best fragrant flowers.
18
Porch Border Garden
Getty
Forget about boring foundation plantings. Dress up your front yard with a mixed border of annuals, perennials and shrubs.
Get the garden plan.
19
Raised Planter Garden
Getty
Limited space or poor soil? A raised bed solves the problem, and you can grow ornamentals or edibles in these containers.
Get the garden plan.
20
Round Evergreens
Getty Images
Round evergreens are so much fun! They add character and whimsy to any garden and are an essential spot of year-round color.
See more evergreen shrubs.
Erin Cavoto Erin Cavoto is the Editorial Assistant at ThePioneerWoman.com, covering food, holidays, home decor, and more.
Arricca Elin SanSone Arricca SanSone writes for CountryLiving.com, WomansDay.com, Family Circle, MarthaStewart.com, Cooking Light, Parents.com, and many others.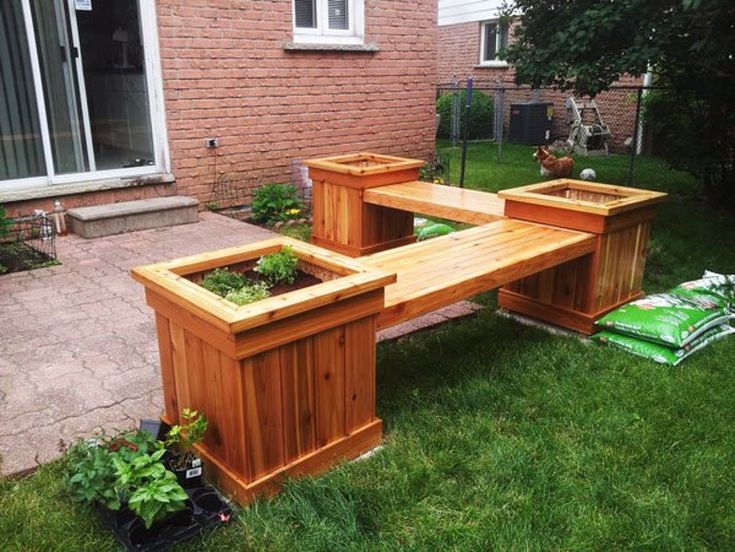
Kitchen Garden Plans - Vegetable Garden Ideas
It's true what they say: The best-tasting tomato is always the one you grow yourself. But which tomato to grow? With some 3,000 heirloom varieties out there—from 'Ananas Noir' to 'Green Zebra'—the possibilities can be downright paralyzing. And that's before you even begin to contemplate other crops. So we turned to the real experts: chefs renowned for their skill with fresh vegetables. Alice Waters, the woman who practically invented the farm-to-table movement, weighed in. As did Peter Hoffman. And Rick Bayless. These slow-food pioneers, as well as 10 of their peers, delivered the momentum—selecting nearly 100 incredible edibles—that set our organic kitchen-garden project in motion.
See the recipes these 13 chefs made from our garden produce »
Corralling that gigantic plant list into a sensible, stunning plan: CL contributing editor Jon Carloftis, who's designed gardens for Julianne Moore and Jerry Bruckheimer but remains a country boy at heart. Carloftis sited our potager at his alma mater, the University of Kentucky in Lexington, and convinced his mentor, horticulturist Sharon Bale, to lend a hand. The duo divided the 32' x 56' plot into a grid of 12 raised beds, defined by paths edged with marigolds (said to repel pests) and covered in pine straw—an affordable alternative to hardscaping that also gives veggies the acidity they crave. "Every time it rains, acid from the straw is released into the soil," the designer explains.
Download our Ultimate Kitchen Garden plan and the entire plant list »
Other moves that sync with Carloftis's pretty-is-as-pretty-does strategy included birch tepees and a handsome poplar arbor, to support climbers, such as beans, peas, and cucumbers. Barn-wood boxes and recycled bourbon barrels supplied the necessary depth for root crops like sweet potatoes and carrots. And a fence of tobacco sticks, draped with sturdy netting, deterred (most) critters, beautifully.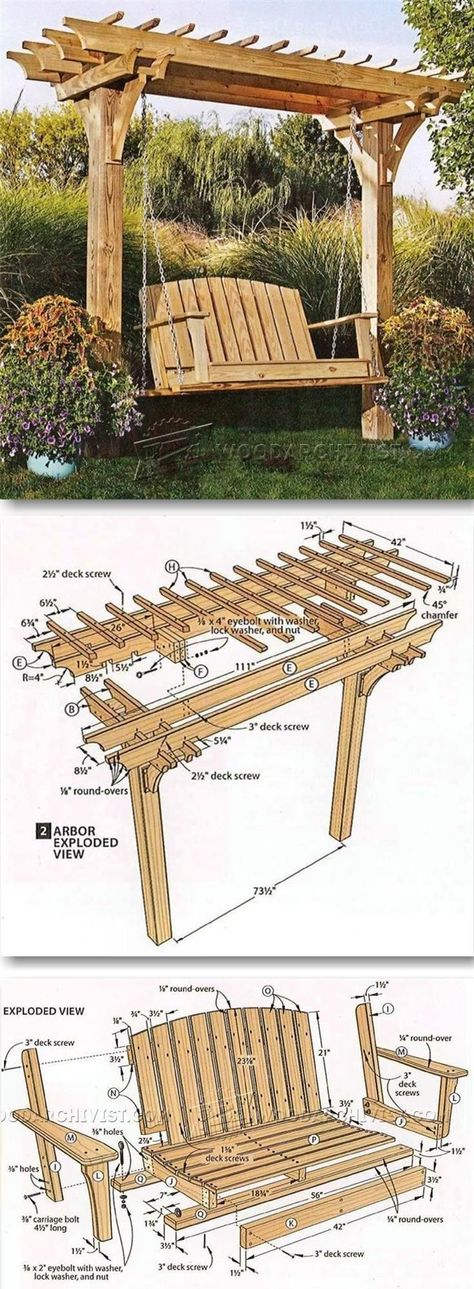 "Structure adds style," Carloftis declares, "and that's what separates us from Neanderthals."
But, woe, the best-laid plans.... Remarkably persistent rabbits, contaminated compost, heavily compacted soil—and what turned out to be Kentucky's second-wettest spring on record—all conspired to wreak havoc. "It was," says Bale in her matter-of-fact way, "the perfect storm for failure." And yet, come July, when we bit into that first 'Early Girl' tomato, infinitely juicy and still warm from the sun, all was forgotten.
Convinced? Check out these 13 tips for creating a kitchen garden, and soon you'll experience the sweetest satisfaction of knowing I grew this.
More from our Ultimate Kitchen Garden:
Check out our favorite seed sources »
See the garden from beginning to end »
Tips for how to downsize our plan to fit your backyard »
Garden plan illustration by Michael A.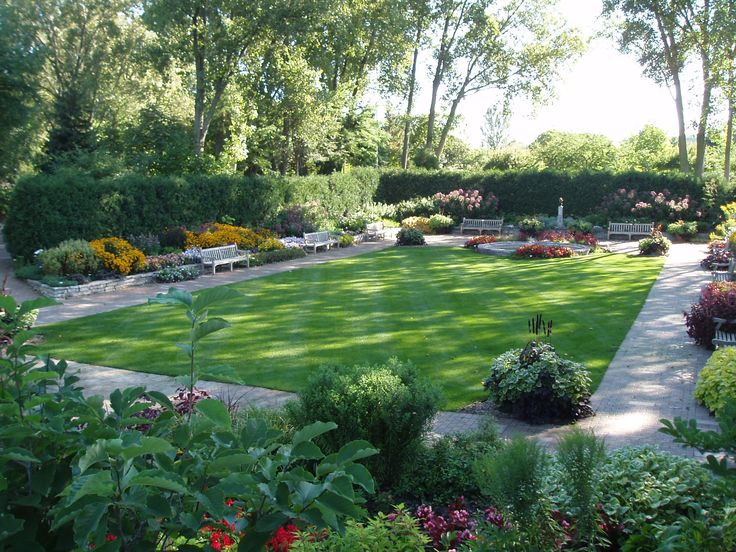 Hill
Hill
"Blossoming garden" Drawing in non-traditional ways.
Municipal Autonomous Institution
Continuing education
Creativity Development of Children and Youth "NART"
Open Conseches
Topic: "Blooming Garden" Drawing with non-traditional methods.
Compiled by: PDO Boranova A.M.
Vladikavkaz, 2020
Topic of the lesson: “Flowering garden. Drawing in non-traditional ways»
Purpose: development of creative abilities through non-traditional drawing techniques.
Tasks:
Educational:
- introduce children to non-traditional drawing techniques - drawing with a hard semi-dry brush, dabbing with a sponge, drawing with cotton swabs, plastic fork, spray.
Developing:
- to develop imagination, creativity by consolidating the skills of working with cotton swabs, hard semi-dry brush, sponge, plastic fork.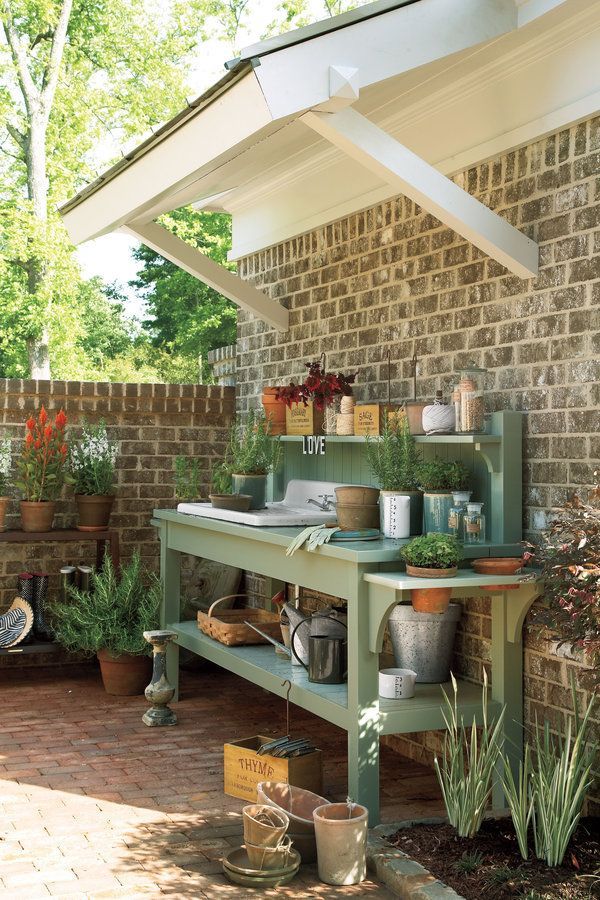
Educational:
- cultivate aesthetic perception, instill accuracy in work, cultivate a creative attitude to the task and interest in joint activities.
Expand and activate vocabulary:
spraying, non-traditional technique, drawing with a hard semi-dry brush, drawing with cotton swabs,
Materials and equipment:
, screen, speakers, presentation of a blooming garden,For children : A3 paper, gouache, hard brush, sponge, cotton buds, jar of water, palette, wet wipes.
Course of the lesson:
Organizational moment:
The teacher greets the children.
Next teacher: Guys, what a wonderful weather today! The sun is shining! Finally, spring pleases us with warm flowering. Have you seen how the trees woke up, how they changed?
Who saw unusual trees on the street? Describe how they have changed?
(bloomed)
What color were they wearing?
(white, pink, purple)
What does the tree look like in bloom?
(on a cloud, on cotton wool, on a bride)
Today we will draw flowering trees, but not as we usually do with a brush, but with the help of these objects (the teacher shows the children a sponge, cotton buds, a plastic fork) Who guessed how will we use them?
Which trees bloom in spring?
(Apple, pear, cherry, cherry, plum, etc. )
)
That's right, fruit guys. From each flower, if it is pollinated by insects, a fruit can appear: an apple, a berry, etc.
Guys, let's take a walk through the flowering gardens?
(There is a video with blooming gardens on the screen, the teacher reads the quatrain and comments on what is shown on the screen)
Blooming gardens, you are fabulously beautiful
Your mysterious outfit captivates.
In your beauty you are so diverse
Unique and gentle aroma.
Look what I brought you! (The teacher takes out hidden branches with flowers)
Let's smell the aroma of these cute flowers! Close your eyes, inhale the aroma and imagine that you are standing in the middle of a blooming garden! (the teacher gives all the children to smell the branches)
What color are the trees in your garden? How do you feel being in the middle of this garden?
Trees in bloom seem so tender and vulnerable. What happens if a strong wind blows on the branch? And let's all together "make the wind", i.e. let's blow on the branches. Some of the petals fell off. It happens, and then the tree in its robe stands as if on a carpet.
Now we will get to work, draw 2-3 spring trees each, and at the end of the work we will have a whole flowering garden!
The teacher sits down at the easel and shows the progress of the work.
Let's start with the background: you already know what shading and stretching are, but today we'll stretch the color with a regular dish sponge. We spread the paint on the palette, dab it with a sponge and apply it to the sheet, starting from the top. We are painting the sky, so the color of the sky lightens downwards and we add a little bit of white. We also apply color with a sponge, make smooth transitions, stretch the color. It is important not to dip the sponge into the water, otherwise you can soak it and the paint will flow. If we need liquid, add it to the palette or apply it with a brush on a sponge.
Now it's time for the grass. Who guessed what object can show the texture of grass? Let's do this with a plastic fork. Apply with a brush or collect from the palette. We work with vertical strokes.
It's time to draw the trunk. What is the surface of the tree bark according to the texture? Rough or smooth? Draw a rough bark with a semi-dry bristle brush. First with one shade of brown, and on top with another shade of brown so that the first layer shows through. Let's draw the main branches at the base of the crown.
Now it's time for the flowers. We, of course, print them with cotton swabs. What color will our trees be? How to get pink on the palette? How to make soft purple? We mix the colors we need on the palette with a brush, apply with cotton swabs.
And now let's imagine that a breeze blows and some of the petals fly off the crown. We spray with a hard brush. The size of the spray depends on the amount of paint, the force applied by us and the distance from the brush to the sheet.
Children begin independent work on the music of Vivaldi and Mozart.
After completion of the stages "sky" and "grass" - physical minute.
Trees have grown in the field. It's good to grow free! (Sipping - arms to the sides) Everyone is trying to reach for the sky, for the sun. (Pulling hands up) Here a cheerful wind blew. Branches swayed right there, (Children wave their hands) Even thick trunks Bent to the ground. (Tilts forward) Left and right, back and forth - So the wind bends the trees.
Then the children continue to work.
After completion, total:
What did we do in class today? (painted flowering fruit trees)
In what ways? (applying and stretching, spraying, semi-dry brush.
What other objects have served us today? (sponge, fork, cotton swabs)
That's right! What a great day you are! You did a great job! Let's collect all the trees in one big beautiful garden
All the easels move and the works are hung close to each other Wonderful garden
The teacher praises the children
Thank you for your work
Outline of the open lesson
Municipal budgetary educational institution “Lyceum named after S.N. Bulgakov, Livny, Oryol Region Outline plan open lesson on technology on the topic: “Making toys for kindergarten. Occupational safety at work. 5 "b" class technology teacher Highest qualification category: Andreeva Elena Ivanovna 2013
Topic: "Making toys for kindergarten." Labor protection at work. Goals: educational: teach how to cut products from plywood with a jigsaw; form an initial idea of the stages of the project; to teach to determine the need for the product and briefly formulate task for the project. educational: fostering a culture of behavior and conflict-free learning; to cultivate accuracy, accuracy in the performance of work; continue the formation of such qualities as collectivism, a responsibility. developing: develop the ability to correlate new information with previously learned; develop creative thinking and imagination; Development of students' self-control.Object of work: making a toy using the saw carving technique. Equipment: Textbook technology grade 5 (version for boys) under edited by Yu.L. Khotuntsev., Workbook of creative tasks, multimedia equipment, workbench, drawing accessories, jigsaw, vypilovochny little table, saws for a fret saw, plywood. Lesson methods: verbal, visual, practical, methods learning, depending on the nature of the cognitive activity of students, design technologies, active approach to learning. Interdisciplinary connections: art, drawing, Russian language, history Lesson type: Combined During the classes I. Organizational part greeting; checking the availability of students; checking the availability of educational and work supplies. 2. Learning new material. Message about the topic and purpose of the lesson. Today we will get acquainted with the structure of the Mini-project - content search and research section of a creative project, we will cut out a toy for a gift.
The structure of the creative project. 1. Search and research section. 1.1. Definition of need 1.2. Task Formulation 1.3. History of sawn threads
1.4. Development of a bank of ideas and proposals. Need definition and summary tasks. When formulating a problem, you must answer 3 question: what? for whom? for what? (as what? will be our product is intended). At this stage, students see the products presented by the teacher A jigsaw will be used to complete the mini-project. 1. Arrangement and preparation of a jigsaw for work. Many beautiful products can be made from plywood using a jigsaw. Jigsaw (see fig. consists of frame 1 with handle 2, top 3 and bottom 4 clamping screws. Between the clamping screws is pulled and fastened narrow and thin steel file with teeth tilted towards the handle (Fig. 1.). To tighten the frame before attaching the file, use eccentric clamp (see fig.). After fixing the saw remove the eccentric clamp with screws. File under the action of the frame is stretched. You can shrink the frame manually. To do this, one end of the frame rests, for example, in table cover, with the left hand press on the other end of the frame, and the right one fixes the file with clamping screws (Fig. 2). Practical show. Demonstration of preparing a jigsaw for work. 2. The sequence of sawing with a jigsaw When sawing with a jigsaw, a special sawing table, called a dovetail. blank they lay it on the table and hold it with the left hand, and cut it out with the right. The workpiece is pressed against the cutting table from above and jigsaw cut out the outline along the marking line. jigsaw move up and down without distortion of the file with a slight pressure so as not to break it. At sharp turns lines, the workpiece is smoothly rotated without stopping jigsaw movements. The cut sections of the workpiece are cleaned with a grinding skin or files.
Files are small files with a fine notch. They have different profiles in cross section (Fig. 3). Safety rules for working with a jigsaw. – Work with a jigsaw and an awl with securely fastened and serviceable handles; - Securely fasten the sawing table to the workbench; - Securely fix the file in the frame of the jigsaw;
– Do not make sudden movements with the jigsaw when sawing, do not bend over low above the workpiece. 3 Fixing. Frontal survey 1. Where should the teeth look when installing the file? 2. Show the sequence of preparing a jigsaw for work? 3. Safety precautions when working with a jigsaw? 4. What is the content of the research section of the project? 4. Introductory briefing. 1. Organization of the workplace in the carpentry workshop. 2. Rules of self-control. 3. Labor protection when working with a jigsaw. 4. Compliance with the technological sequence. 5. Compliance with labor operations.5. Practical work Sawing toys in the technique of saw carving. current instruction. 1st bypass - checking the organization of the workplace; 2nd bypass - checking the rules of self-control; 3rd round - checking labor protection when working with manual carpentry tools. Individual instruction: 4th bypass - checking the markup of the workpiece; 5th detour - verification of labor operations; 6th bypass - verification of the technological sequence. Routing. Making a toy No. p / p Name Sketch Equipment Note. operations 1. Choice of workpiece Ruler, workbench 2. Translation template Copier. paper, workbench, plywood 3. Sawing Jigsaw,
external contour saw cut according to the template table, files for jigsaw, clamp 3. Product finishing paper, 4.Artistic burner decor products. 5. Control Technical information 7. Final part. 1. Summing up the lesson. 2. Evaluation of students' activities (analysis of responses) 3. D / Z: p 15, abstract. Class 7 Subject: Through (openwork) carving. Workplace organization. Safety labor at work. Goals: educational: Familiarize yourself with the types of through threads show the difference between a slotted thread and a saw thread show the difference between an openwork thread and a flat through thread talk about the technology of making overhead thread developing: learn to understand the types of through threads to promote the development of cognitive interests of children, observation; attention; memory create conditions for the manifestation of the activity of students learn to perform openwork carving educational: contribute to the formation of the aesthetic culture of the child's personality education of diligence, patience, accuracy Consolidation of knowledge on safety measures
Equipment: multimedia presentation "Types of through thread", thread cards, safety instructions, plasticine, stacks, plastic, finished sawn products (for further work students), cutters, samples of sawn and openwork carving, bow saw, hand jigsaw, electric jigsaw Type of lesson - communication of new knowledge Lesson plan.1. Organizational beginning. 2. Learning new material (using ICT). 3. Pinning (slide show) 4. Introductory briefing 5. Practical work 6. Final part During the classes I. Organizational part greeting; checking the readiness of the class; mark absent. 2. Learning new material. 1. Setting the goals of the lesson by children. 2. First, pay attention to this table As you can see, the through thread is divided into two large types: slotted and sawn. How do you think they differ from each other? (answer options) First, the tool with which the background was removed: Welt - “cut through” - “cut” - “cutter” Sawing - “saw through” - “cut” - “saw”. Secondly, drawing. As a rule, in the sawmill it is larger. However if the background is removed with a hand jigsaw with thin files, the pattern may be thinnest. Thirdly, the materials that are used in a particular thread. After all through carving can decorate not only wood, but also other types materials: plywood, birch bark, ganch (carving on semi-hardened gypsum), fruit and vegetables, paper…
The game "Who is faster" I name the material, and you say what kind of thread can be applied to him: tree birch bark plywood paper veneer (one layer in plywood) ganch Chipboard cardboard pumpkin Summary of the game.Another division of the through thread, and it is this division that is very often interpreted not properly. We open almost any site and read “Openwork carving (propyl)…”; “Sawed carving is the same as openwork ...”; “Openwork carving is the same as sawing” However, this is not quite true. Let's look at the following table: Any of the previous types (slotted or sawn) can be presented in all these forms. Before I show examples of these types of threads, I will briefly talk about them and I will give the main difference between one species and another. Flat - the pattern is formed only by removing the background (i.e. if we talk about technology, then it is carried out elementarily: they took the material, drew a pattern, chose the background (with a chisel or saw (jigsaw)), slightly sanded (corrected) - and the thread is ready). Openwork - gave a flat through thread with a cutter (chisels, other devices) relief, the so-called openwork Consignment note - they took a flat or openwork thread and put it on any surface I have two through thread samples built based on the same ornament: - sawn flat - sawn openwork Any of them I will turn into an invoice.
(visual showing) For clarity, you can make an associative comparison with you: - schoolboy - flat carving - student - openwork carving - worker (worker) - laid on thread
A student can study in a general education institution (public school) - sawn carving, in a private school or on individual training - slotted thread Students can be both students of public schools and private Workers can be both former schoolchildren and former students. Is the analogy clear? I hope the internet won't confuse you anymore. And now Let's see if you understood my explanation. 3. Fixing. (slide show) I show a slide, your task is to determine what kind of thread is on it depicted. Answer options: sawn flat, sawn openwork, sawn flat invoice, slotted openwork invoice, etc. Talk about the fact that this thread is sawn or slotted is possible when you sure that only one of the thread types is applicable to this material: or slotted or sawn thread. 4.Introductory briefing. 1. Organization of the workplace in the carpentry workshop. 2. Rules of self-control. 3. Labor protection when working with a jigsaw. 4. Compliance with the technological sequence. 5. Compliance with labor operations. 6. Practical work You have seen how diverse openwork carving can be done. Do you know Do you why during the Baroque and Rococo openwork carvings (in woodworking) called only “modified” slotted? To answer this question, you need to know what tools were used for sawing. I'll show you the one the tool with which this thread was made, and you tell me how comfortable it was for them to work. (showing a bow saw) What do you think, after work on such a tool, you would also want to refine the thread chisels and chisels? Now tell me what has changed since then? Sawing out a vase for sweets using the technique of openwork carving. current instruction. 1st bypass - checking the organization of the workplace; 2nd bypass - checking the rules of self-control; 3rd round - checking labor protection when working with manual carpentry tools.