Bathroom sink layout
A Step-by-Step Guide to Designing Your Bathroom Vanity
Here are six decisions to make with your pro to get the best layout, look and features for your needs
An exceptional vanity design requires careful planning and attention to detail. There are plenty of decisions to be made, from the layout and style to the types of sinks and countertops. This six-step process gives you a game plan to follow as you’re working with a designer or other home professional to create your new vanity space.
Swanson Homes
1. Settle on a Layout
Before you decide on colors, finishes and fixtures, you have to know where your vanity is going and how big it’s going to be.
A galley layout includes two vanity spaces separated by a pass-through. Each of these spaces can include sinks, or you can use one space to wash up and the other for seating.
Find a bathroom designer near you
Toulmin Kitchen & Bath
Many bathrooms feature horizontal vanities with one section of cabinetry. These vanities are efficient and take full advantage of available storage and counter space. They also ensure clean lines and a streamlined bathroom design.
Shop for bathroom vanities on Houzz
Haile Kitchen & Bath LLC
Homeowners also may choose L-shaped vanities, particularly in master bathrooms. While they don’t always maximize space (corners are seldom efficient), they offer ample leg and arm room, as well as distinct vanity spaces, in bigger bathrooms. Unless they are used in small bathrooms, L-shaped vanities rarely feel cramped.
McDonald Architects, LLC
2. Determine the Number of Sinks
You’ll need to find a vanity style that can accommodate the number of sinks you want.
If they had their choice, many homeowners would prefer double sinks. Unfortunately, there often are space restrictions.
Vanities smaller than 60 inches wide usually have only one sink.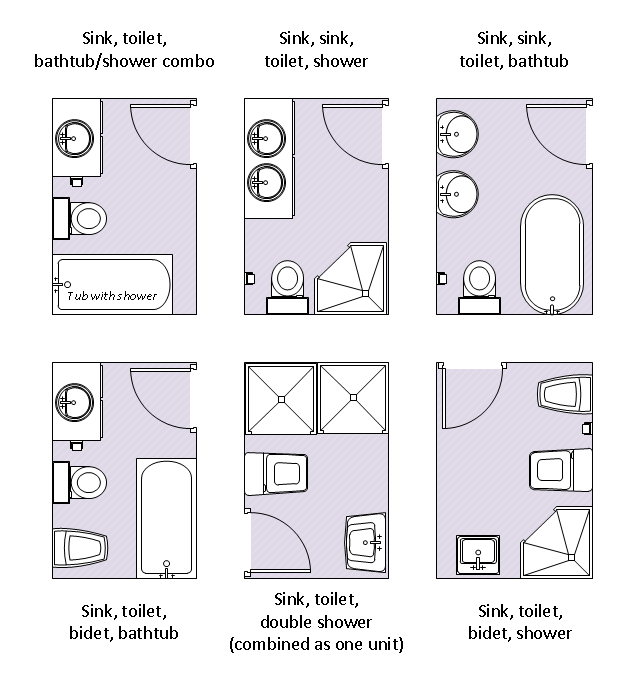 The sink can be in the center, to the right or to the left. Your sink cabinet can have drawers or standard cabinet doors.
Twist Tours Real Estate and Portfolio Marketing
Vanities more than 60 inches wide can comfortably accommodate two sinks. However, if one sink is enough, you can use the extra room for additional counter space.
Teale Architecture
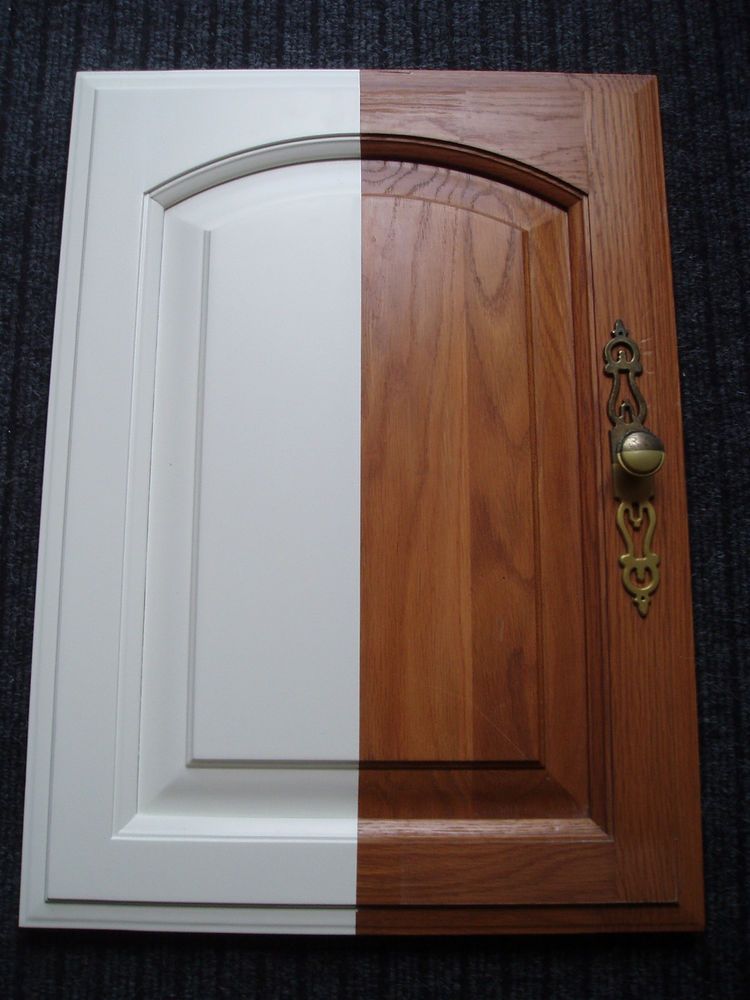
3. Choose the Style
Once you find the layout that best suits your bathroom and determine how many sinks you want, the next step is to decide on the vanity design. Do you prefer traditional cabinets? An antique furniture piece? A pedestal sink?
If you want traditional vanity cabinets, there are several factors to consider:
- Do you want a paint or stain?
- What color do you prefer?
- What type of door style do you want?
- Do you want drawers, doors or pullouts?
Herron Horton Architects, Inc.
Vanity cabinets don’t have to be built-ins. Freestanding vanities aren’t attached to any walls and can have open shelving in lieu of closed cabinets. They also can feature furniture-style details.
Kozo Designs
Another style is a floating vanity, which is mounted to the wall and has open space below.
Hive Home
Ursus Homes, Inc
If you don’t need storage space and are seeking a minimalist design, you can forgo cabinetry and simply install a wall-mounted countertop.
Asha Maía Design
4. Find the Right Countertop
If you’re buying a pedestal sink or restoring an old piece of furniture, you might be able to skip this step. Most other designs, including cabinets and repurposed furniture pieces without a top, will require some type of countertop.
Toulmin Kitchen & Bath
There are a number of materials available, including quartz, granite, marble, laminate, concrete, wood and solid surface.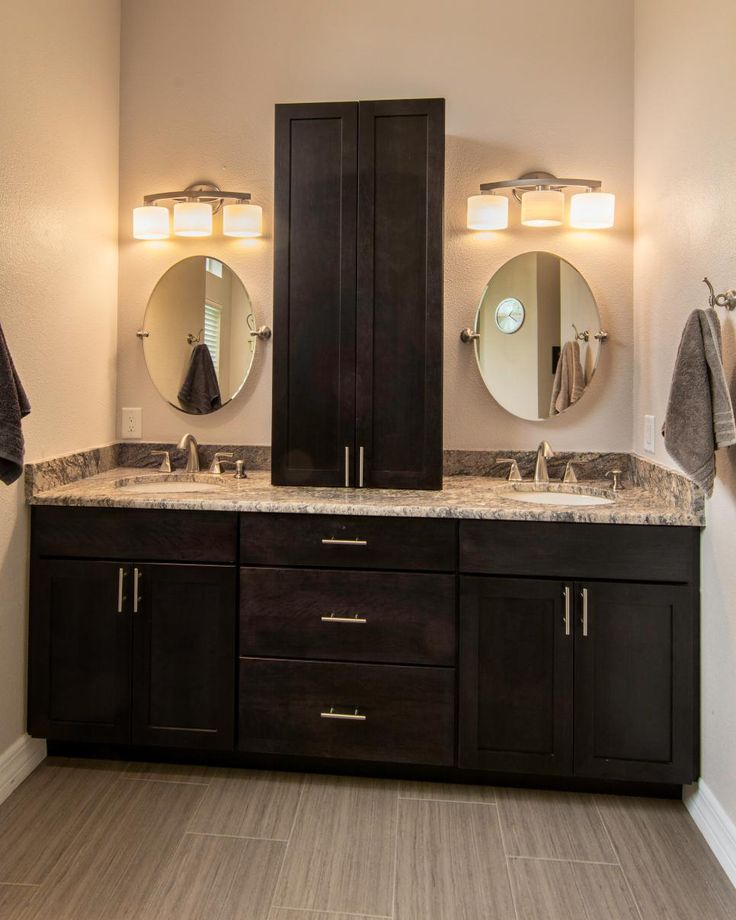
Giammarino and Dworkin
Quartz and granite are popular choices for bathroom countertops. Both are durable, high-quality materials with designer patterns. Granite needs to be sealed every one or two years because it’s a porous stone.
Softer stones like marble scratch more easily than granite and quartz and have less tolerance for moisture. Wood and laminate don’t always mix well with moisture either, but they may be more budget-friendly than stone.
Alison Giese Interiors
Keep in mind that repurposed furniture pieces aren’t always able to bear the weight of stone countertops like quartz and granite. Consult a remodeling expert to get specific recommendations for your furniture piece.
Ayesha Usman Design
5. Pick the Type of Sink
The next step is to determine the type of sink, such as undermount, drop-in, vessel or wall-mount.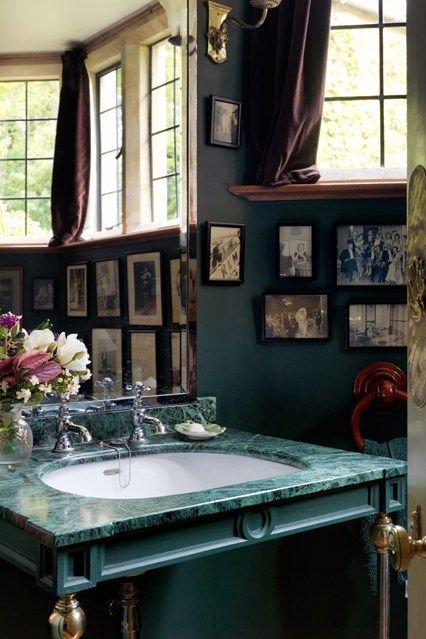 After that, choose the color and material for your sink, whether it’s porcelain, natural stone or something else.
SpaceWise Designs
Undermount sinks are mounted below your countertop with supporting brackets, providing a seamless look. They’re harder to install and usually require a professional.
Josh Wynne Construction
Vessel sinks sit above your counter. A hole for the drain is cut out from your countertop. There’s more to clean, but vessel sinks give you the option to choose a sink with patterns, designs and custom shapes.
Synergy Design & Construction
Drop-in sinks are installed inside a cutout in your countertop. These sinks have lips that rest on top of your counter.
Glynis Wood Interiors
6. Fixtures, Fixtures and More Fixtures
It’s time to wrap up your design with fixtures.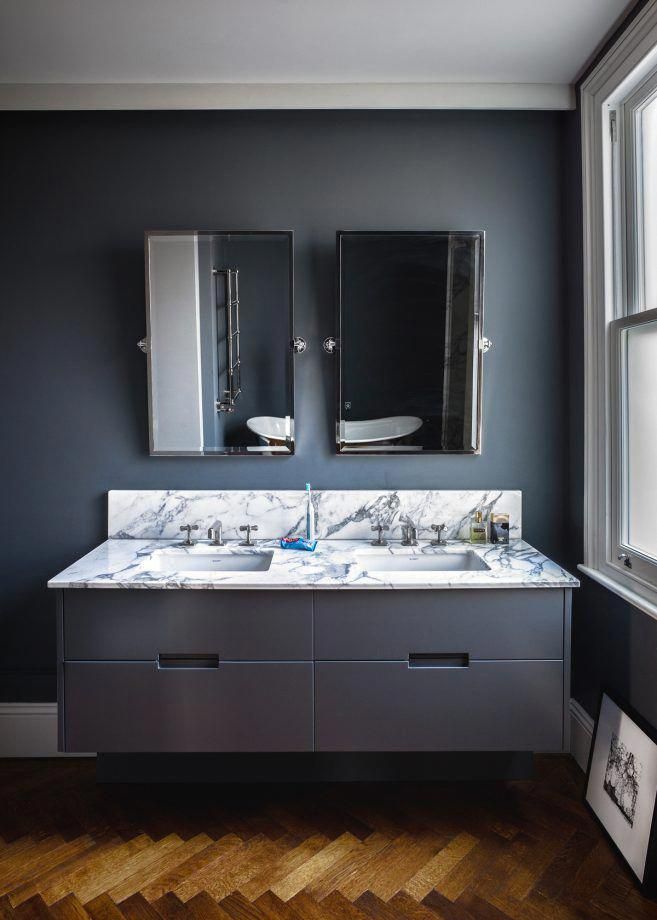 You may focus most of your attention on your layout and cabinet finishes, but you still need to select your cabinet hardware, faucets, lighting and mirror. Most important, these should be coordinated with the rest of your design and color scheme.
Specifically, you need to make the following decisions:
- Do you want sconce lights, wall-mounted lighting or recessed lighting?
- Do you want a built-in mirror or a decorative mirror that you can easily replace?
- What kind of cabinet knobs and pulls do you want?
- Do you want a detailed faucet design or something more simple and modern?
KitchenLab Interiors
There is no shortage of options for cabinet hardware and fixtures. Settle on a finish (oil- rubbed bronze, brushed nickel, chrome, stainless steel) and then choose a style (traditional, contemporary, modern).
More on Houzz
Vanities That Pack a Storage Punch
Bathroom Design: Getting Tile Around the Vanity Right
Find a bathroom remodeler
Browse bathroom products
Sponsored
Design and Styling Artist for Residential, Set & Stills
Sponsored
Düsseldorf | Gemeinsam zu Ihrem Wohntraum
Bathroom Space Planning for Toilets, Sinks, and Counters
Bathroom space planning—toilet space, tub space, room for counters and sinks—is more critical than in other areas of the home.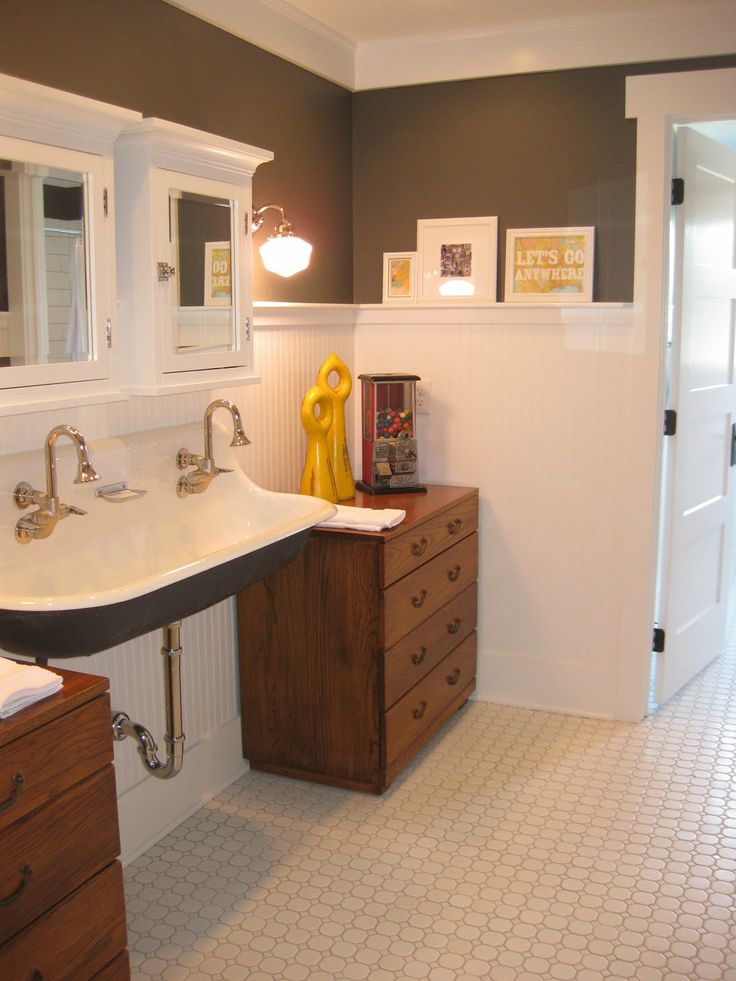 You might have a few extra square feet in the basement to place the washer or dryer anywhere you like; not so in the bathroom.
Most people would like a generously spaced bathroom with tons of room to place the key services such as the toilet and sink without restrictions. This is possible in spec bathrooms or bathrooms found on home shows. But most real-world bathrooms, even those considered large, must account for every square and linear inch in order to make everything properly work together. Moving the toilet a few inches in one direction might mean that you can't put in that double-basin sink and 48-inch vanity you've been dreaming about.
A toilet placed too close to a bathtub or sink will impact users of both the toilet and the bathtub, and may entirely bar some users from entering the bathroom. When subsequent buyers view the arrangement, improper spacing may affect their offering price. Bathroom fixtures are difficult to move around once they have been installed.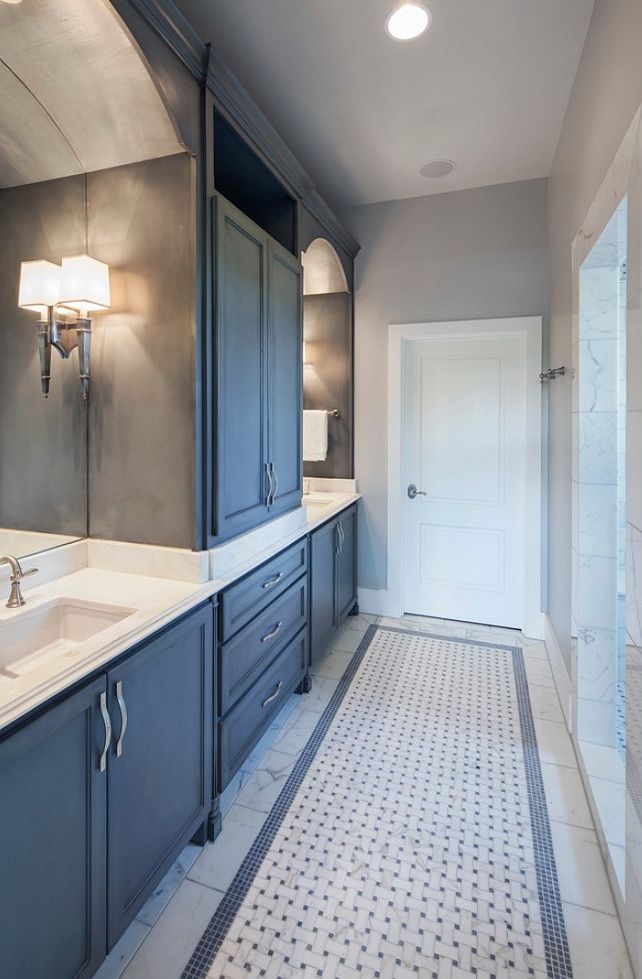 So, it is vitally important to get your bathroom's floor plan right the first time.
Minimum Clearances
Local building codes are often silent on matters of recommended optimal spacing of toilets, sinks, bathtubs, and showers. Minimums may be found in the code, but these minimums can often be meager for real-world use.
Instead, home improvement industry groups such as the non-profit National Kitchen and Bath Association (NKBA) draw up recommendations that many bathroom and kitchen designers use when laying out the rooms. Yet even NKBA guidelines should be regarded as bare minimums. If you do have any extra room, you should consider increasing the NKBA guidelines by several inches.
One clearance issue that often comes up: How much clearance should you leave in front of a toilet? You can look at this from three angles. Minimum recommendations tend to be 21 inches. But as this allows less than two feet in front of the toilet, the NKBA recommends adding even more space: up to 30 inches, minimum.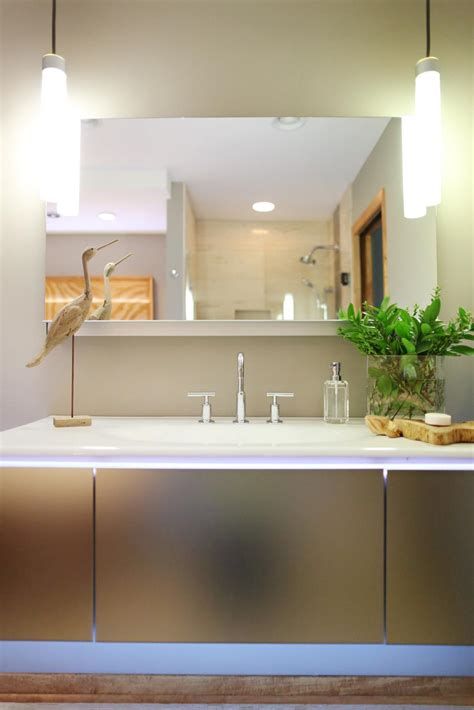 Yet that is not a satisfactory clearance for wheelchairs. Thirty inches is considered the absolute bare minimum for wheelchairs or walkers to clear the passage, with 48 inches being a more comfortable space.
Center Line and Sizing
Spacing designations for bathrooms often use a term called center line. Center line, a way of standardizing measurements, means drawing an imaginary line down the center of the fixture, with the line typically crossing over the drain hole.
Center line is meant to take into account the width of standard-sized fixtures but not all fixtures. If you have items that differ from the standard size, adjust accordingly.
Center line usually refers to the side-to-side placement of toilets and fixtures but not the front-to-back placement of them.
Minimum Toilet Space: Front
Front toilet space clearance not only ensures that the user has enough room to take care of needs, but that other services, namely the shower, sink, tub, and door, remain unobstructed.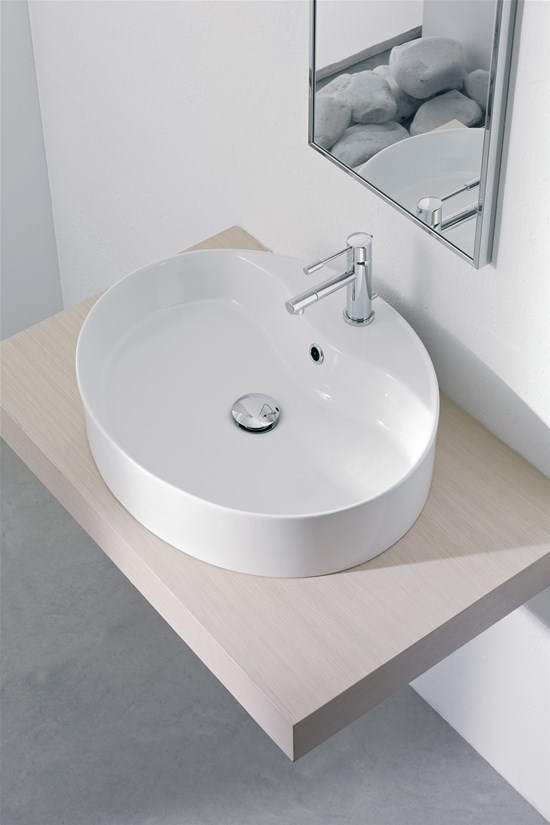
- Minimum: 21 inches from the front of the toilet
- Recommended: 30 inches from the front of the toilet
- Disabled access: 30 inches to 48 inches from the front of the toilet
Example: Minimum Toilet Front Clearance
For most bathroom users, one cannot have too much toilet front space. You need space in front of the toilet when using the toilet, cleaning the toilet, and passing in front of the toilet to get into or out of the bathroom.
Consider the NKBA-recommended 21 inches minimum to be the absolute bare minimum. With the popularity of longer bowl residential toilets, you will want to make sure that the toilet flange has extra space.
Try to place the toilet facing an open wall or door, if possible, rather than a fixture. Generally, this will ensure enough clearance room in front of the toilet. For other bathrooms, aim for a 30-inch front clearance space for the toilet.
Minimum Toilet Space: Side
If you need to save room, pushing the toilet side space to a bare minimum is often helpful.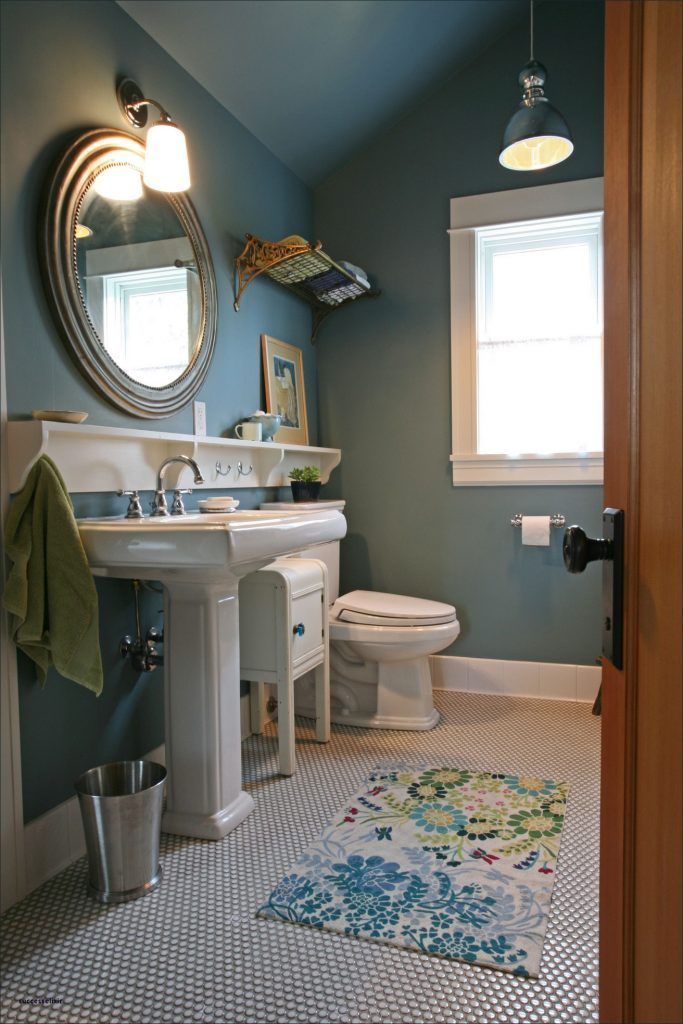
When measuring toilet side clearances, always measure from the toilet's imaginary center line to the nearest side obstruction.
If mounted on the wall, the toilet roll holder will need several inches of extra space, as well. But if you're looking to save room on the side of the toilet, consider toilet roll holder alteratives. You can mount the toilet paper on a separate stand. Or insert the toilet roll holder in the wall to save an extra few inches.
- Minimum: 15 inches to the nearest side wall, partition, or fixture
- Recommended: 18 inches to the nearest side wall, partition, or fixture
Example: Minimum Toilet Side Clearance
In a tiny bathroom such as a half-bathroom or powder room, space is at a premium. So, it may only be possible to provide for the bare minimum clearances. In this case, make sure that the center line of the toilet is at least 15 inches from the nearest wall or sink. Eighteen inches would be preferred.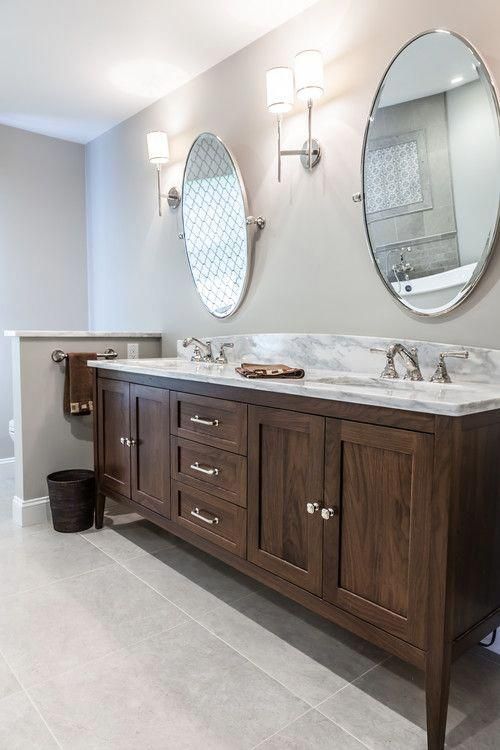 Installing a pedestal sink can help give the feeling of greater room in these small areas.
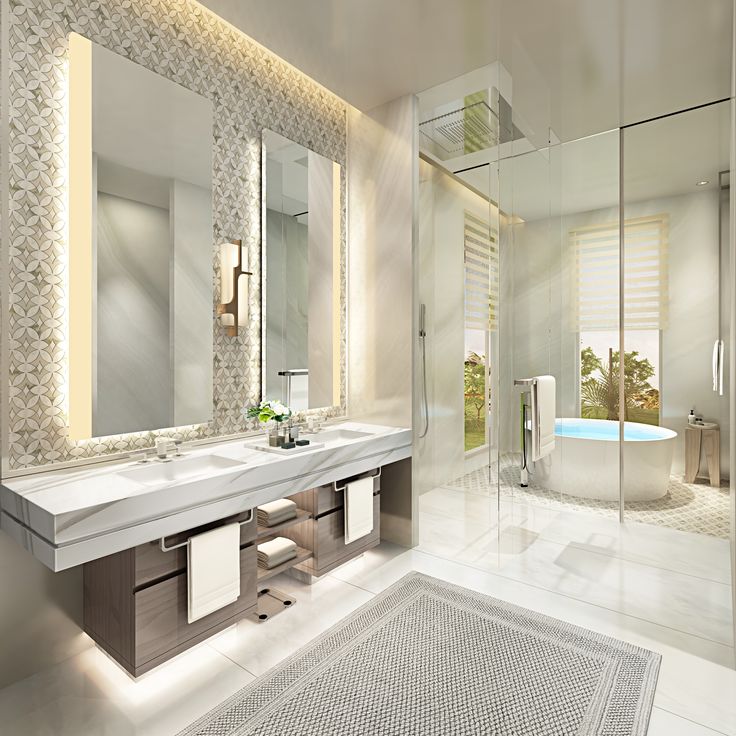
Bathroom Sink and Countertop Clearances
Placement guidelines differ between single and double basin sink configurations. These spacing guidelines mostly apply to countertops where you are making the sink cutouts. If you purchase a bathroom vanity top, you will not have any choice as to sink cutout placement as they come pre-cut.
chandlerphoto/Getty ImagesBathroom Double Basin Placement
When installing two basins, space them at least 36 inches away from each other, measuring from one center line to the next center line. This is the recommended minimum distance to allow users to use both sinks simultaneously if needed. The distance also provides adequate room for the plumbing below the sink.
Bathroom Sink Distance From the Wall
Place bathroom sinks 20 inches from the back wall, recommended. The bare minimum is 15 inches. This is measured from the sink's center point to the wall.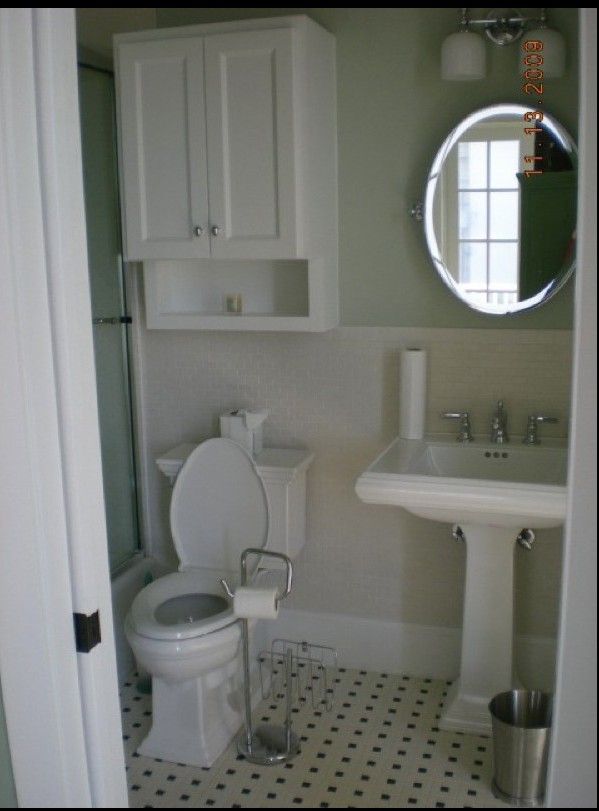 Bathroom vanities with precut sinks should already meet the spacing guidelines.
Bathroom Counter Placement From Front Obstruction
Place the bathroom counter at least 30 inches from any front obstruction, recommended. The bare minimum is 21 inches. This is measured from the edge of the countertop to the leading edge of the obstruction.
How to plan the sink area in the bathroom
In the interior of any bathroom there is one area that we we use most often. This space is next to the sink, and it is the design This area deserves special attention. Most often we see a shell immediately, as soon as we get into the bathroom, it becomes the center of the because unlike a shower or bath, it is used several times a day all family members.
When planning this zone, you need to take into account both its functional component and its ergonomics, and, of course, create a stylish design. Consider the main steps in creating the ideal sink area.
So, the first step is always the development of the most convenient layout.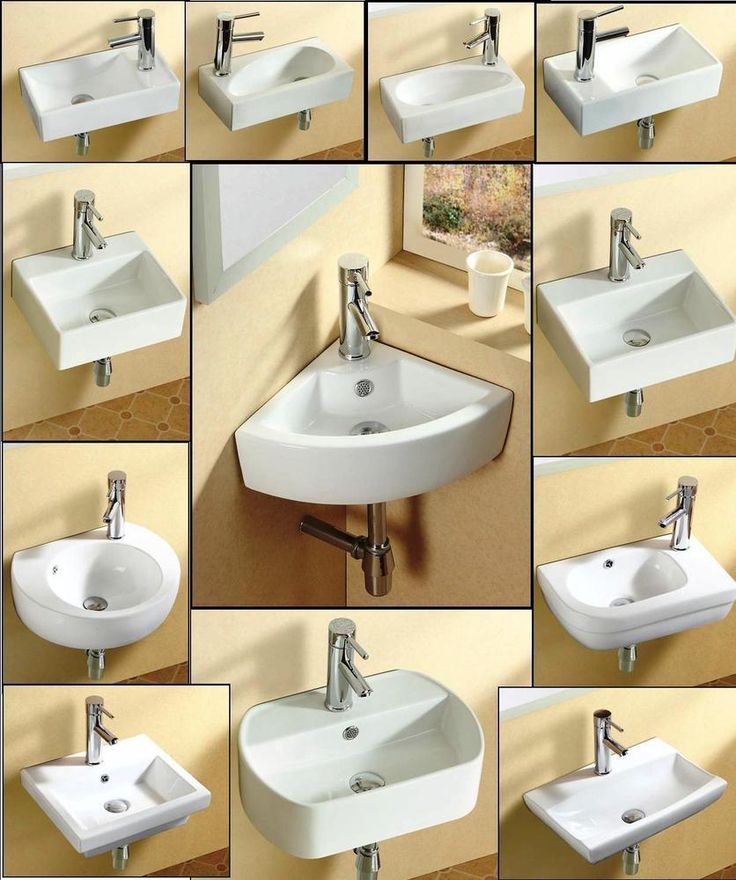 As a rule, the sink is built into the dressing table, so the arrangement determines the layout of the furniture. The first option is two cabinets located opposite each other, each of them contains a sink. This way of arranging furniture is very convenient when several people use the bathroom, for example, children going to school at the same time.
The second way is classic, that is, consisting of one dressing table, as a rule, its size is selected individually, and the furniture completely occupies one of the walls. For a compact bathroom, this is the perfect solution.
Finally, the third and rarest layout option is L-shaped furniture. Of course, such an arrangement is possible only in a spacious bathroom, otherwise the furniture will take up too much space. But in this case, there will definitely not be a shortage of storage areas.
The next step in creating a layout is determining the number of sinks. Most often, we have the opportunity to install only one, but this is a limitation, which is due to the fact that there is not enough space in the bathroom.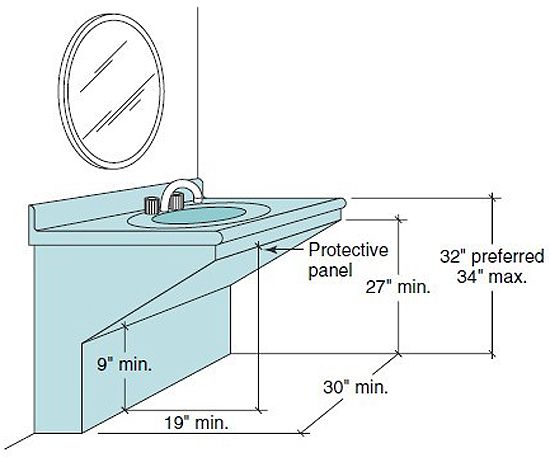 If the space allows, it is always better to choose a longer countertop, where there is room for two sinks.
If the length of the countertop is more than one and a half meters, two sinks will fit perfectly on it. If, under such conditions, you simply do not need two sinks, then you can limit yourself to one, and use the free space for storage.
Next, you need to decide on the style decision that we choose for the sink area. It can be solved in different ways: hanging model or located on a pedestal, built into a pedestal or corner. Today, most often they choose the classic version, that is, a model built into the countertop of the cabinet.
In this case, the sink itself becomes almost invisible, and the design of the furniture group comes to the fore. At this stage, we also determine the material, color, shape, style in which the cabinet under the sink will be made. Determine immediately whether the model you like has enough storage space for small items.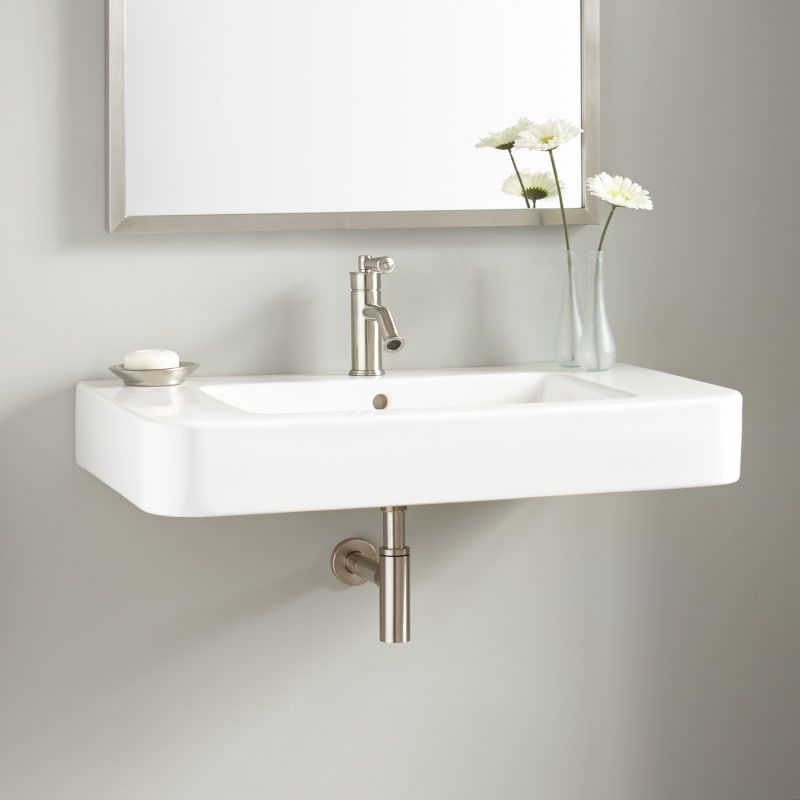
The style solution of the furniture group is selected in accordance with the overall concept of the bathroom interior. It can be either a very concise modern model, or a model made in a decorative, classic spirit.
A wall-mounted washbasin is the best solution if you don't need a lot of storage space and want to maintain a more minimalist style.
So, if you have chosen a sink built into the surface of the cabinet, then the next step is to choose the material of the countertop.
The modern market offers many materials that are great for this purpose. It is worth focusing on your taste and budget. However, it is possible to single out the general requirements put forward to the material of the countertop. This, of course, is wear resistance, good tolerance to constant humidity, strength and ease of cleaning. It is desirable that the surface is not subject to rapid abrasion and scratches.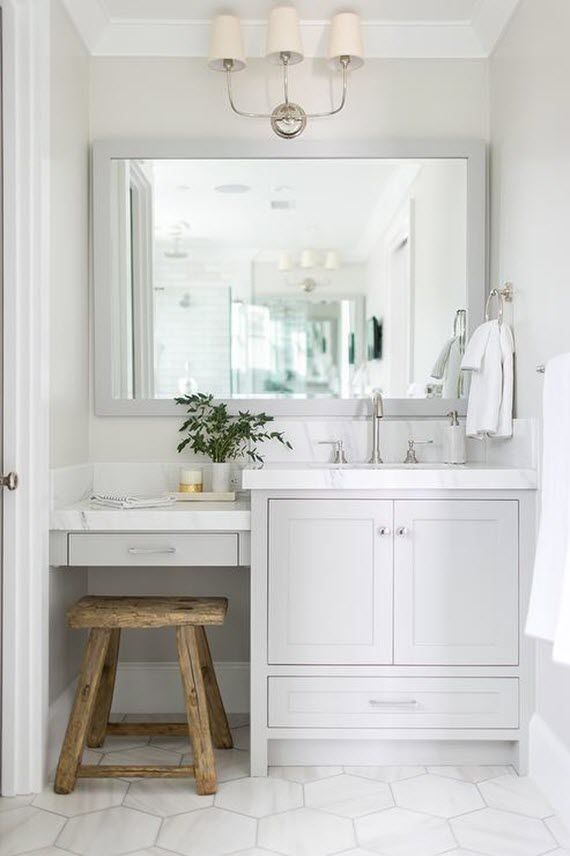
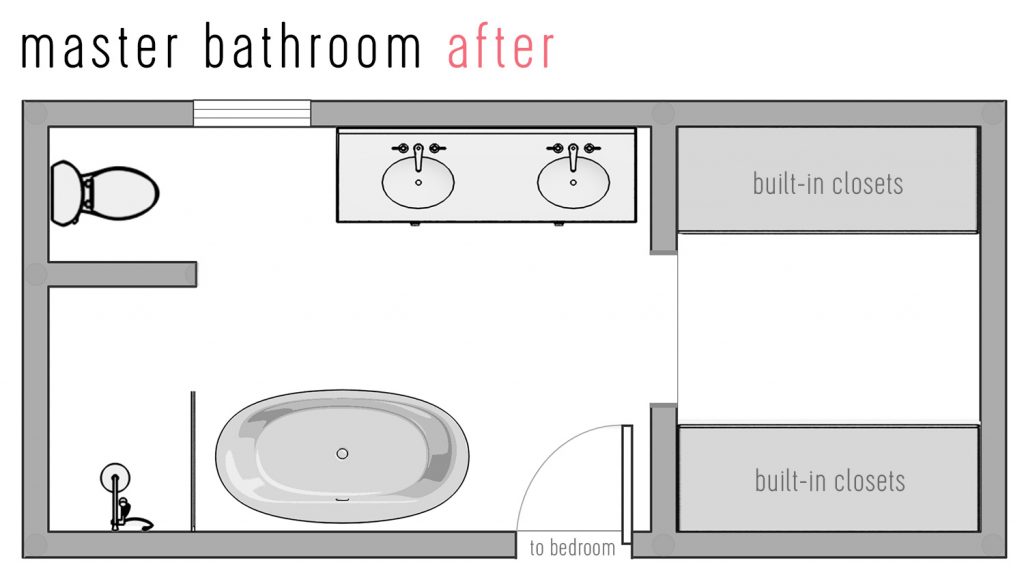
Bathroom and toilet layout with plumbing placement (21 sizes)
Before renovating a small bathroom, the question always arises of how to place plumbing fixtures based on the size of the room. Please note that not all of them have standard sizes (for example, toilets), and showers (corners), furniture and bathtubs are selected from your preferences in size, design and functionality.
View plumbing options for small bathrooms and separate toilets. They will give an initial idea of how to place plumbing, taking into account its size and area of \u200b\u200bthe room. Please note that the door opens inward and most likely an option for narrow corridors was considered. If you have enough space, it is better to make a door that opens outward, which is the most practical and correct for fire and personal safety, for example, when a person becomes ill and needs help. Look, evaluate - maybe this is your option!
Bathroom layout with bathtub, shower cabin (shower corner), toilet and washbasin.
1. The layout of the bathroom with dimensions 2.35 x2.50m includes a bathtub 160 x 80cm and a shower measuring 90x90cm, as well as two washbasins and a toilet with a partition, please note that the toilet and shower are separated by a partition on the same line .
2. Bathroom with dimensions 2.2x2.05m includes a bathtub 160x80cm, a built-in seat 40cm wide, as well as a toilet bowl, sink and shower enclosure 90x90 cm door 80 cm wide, which does not prevent you from going inside the room.
3. Bathroom 1.9x2.25 m layout includes all necessary plumbing fixtures, bathtub 160x80 cm, corner toilet bowl 60 cm sink and square shower enclosure or cubicle 90x90 cm.
Layout of a separate bathroom (toilet) with a minimum area. The figure shows the minimum dimensions (depth) for installing 55cm wall-hung toilets and 65cm floor-standing toilets and a 33cm washbasin. When choosing plumbing, pay attention to these parameters.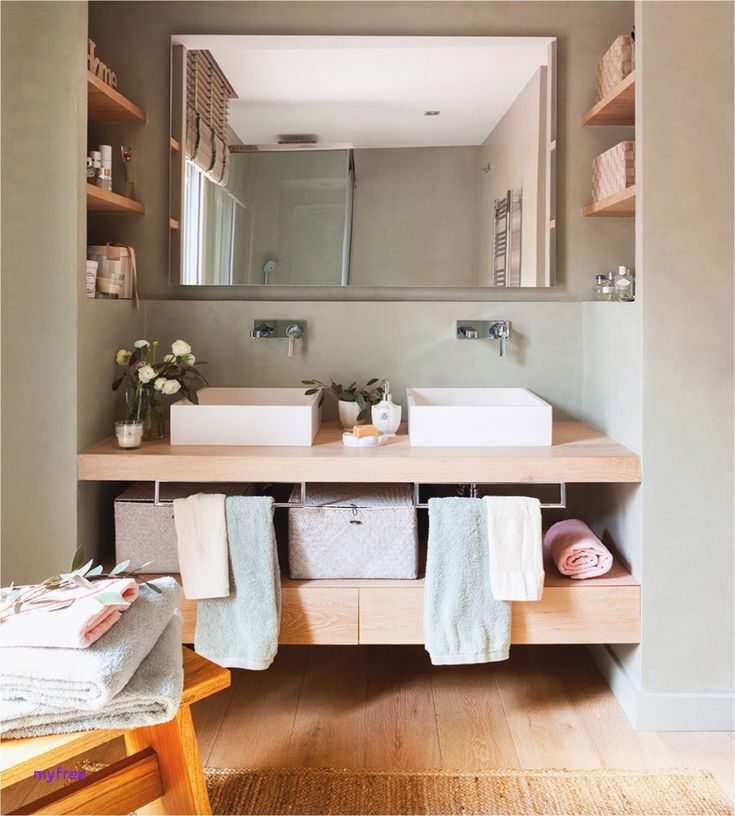
Layout of a bathroom with a 90x90cm square type shower cabin (shower enclosure), floor-standing toilet bowl and washbasin. The dimensions allow the installation of a wall-mounted toilet bowl and sink, a hundred more modern and practical.
Bathroom layout with bathtub 170x75cm, floor-standing toilet and sink.
The layout of the bathroom includes: a bathtub measuring 170x75cm, a floor-standing toilet and a washbasin. The last version includes a shower cabin (shower corner) 80x80cm. The dimensions of the bath and shower can be adjusted according to your preferences. Instead of a full knitazv, you can install a hanging one. The sink can be both floor (tulip) and hanging..
Layout of a bathroom with separate toilets, which is very practical for a large family.
There are a lot of options for planning and placing sanitary ware in the bathroom, and this is only a small part with specific dimensions. In any case, it is possible to rearrange or combine it, including, for example, bathroom furniture.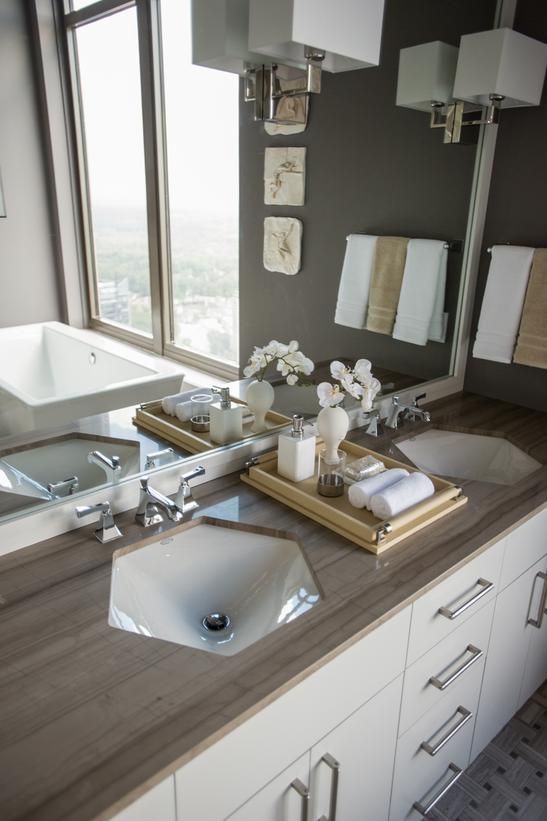 Happy repair!
Number of impressions: 21046
Find out more
3D design of a small bathroom 2.0x2.0m (project 2)
3D design of a bathroom 2.50 x 2.50 m in a cottage (project1)
3D design of a bathroom in blue
Check out the 3D design of a bathroom made in soft blue, which became part of a stylish project
Projects bathrooms - 35 original planning ideas
Back to the list
-
Bathroom and toilet layout (21 options)
See how you can arrange sanitary ware in a bathroom and toilet of various sizes.
...
>>>
-
3D design of a small bathroom 2.0x2.0m (project 2)
>>>
All Interesting articles
-
What can be the ceiling in the bathroom?
The ceiling in the bathroom should be beautiful, practical - after all, this room is characterized by an increased.
Learn more