Refinishing kitchen cabinet
How to Refinish Cabinets and Give Your Kitchen a New Look — Bob Vila
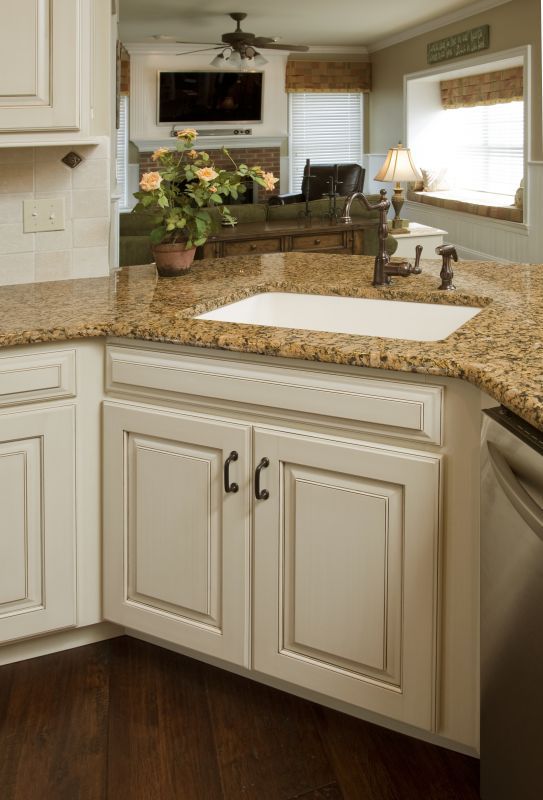
Photo: istockphoto.com
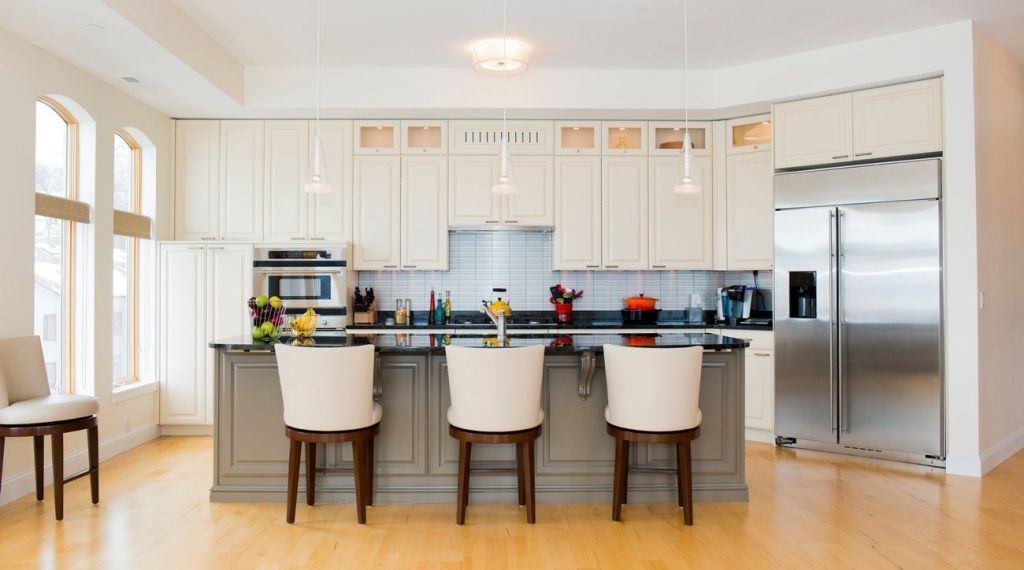
Refinishing cabinets is one of the best ways to give your old, ho-hum kitchen a fresh new look, and it can make a big difference in the way you feel about a space. After all, having expensive cabinets hanging on your kitchen walls doesn’t mean much if you don’t like the color. That’s why many homeowners think about refinishing cabinets with a stain color of their own choosing. It is a big job, but there’s an even bigger payoff.
Before you begin refinishing your cabinets, however, it’s best to do a little detective work. You need to know what materials you’re working with to see if the job is even possible. But, with that research and a lesson on how to refinish cabinets, it’s possible to give a kitchen a serious upgrade.
Safety Considerations for Refinishing Kitchen Cabinets
Before we go too far, it’s important to consider the safety and environmental concerns involved with kitchen cabinet refinishing. You’ll probably need to employ harsh chemicals and create a lot of airborne particulates, so safety does matter.
First, make sure to refinish the cabinets in a well-ventilated area. If the cabinets aren’t mobile, open windows and use a box fan to keep air moving. Next, be sure to wear a respirator when working with chemicals or sanding to avoid inhaling harmful substances. Finally, avoid damaged or stained skin by donning a pair of chemical resistant gloves.
Finally, remember that some chemicals used in kitchen cabinet refinishing (particularly during stripping or staining) are flammable, so be sure to play it safe around any heaters, open flames, or anything of the sort. Oily rags can also combust if left in a pile, so hang them to dry before throwing them out.
Advertisement
RELATED: The Best Under Cabinet Lighting of 2021
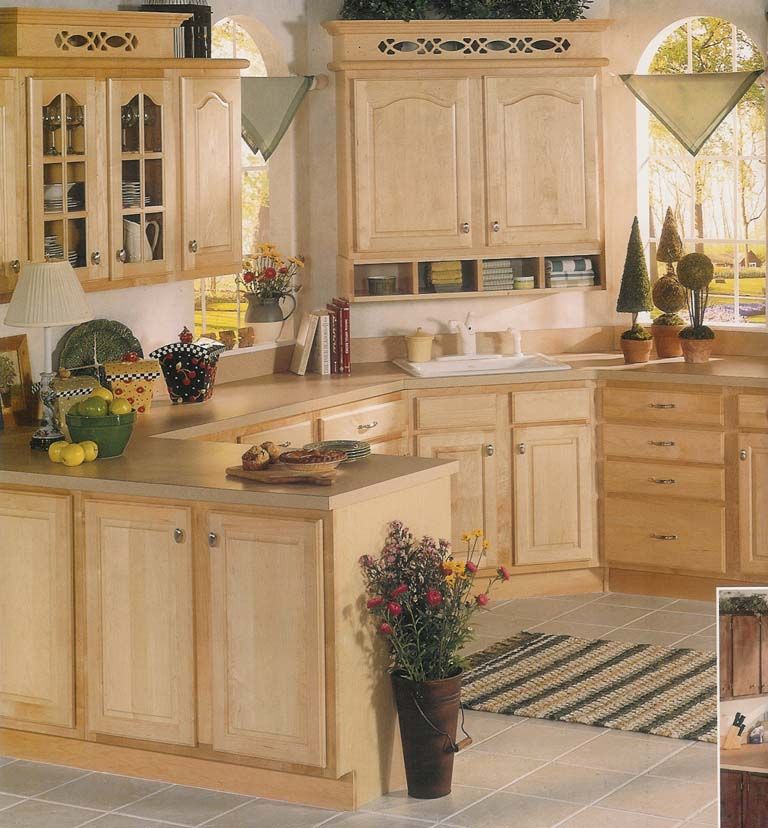
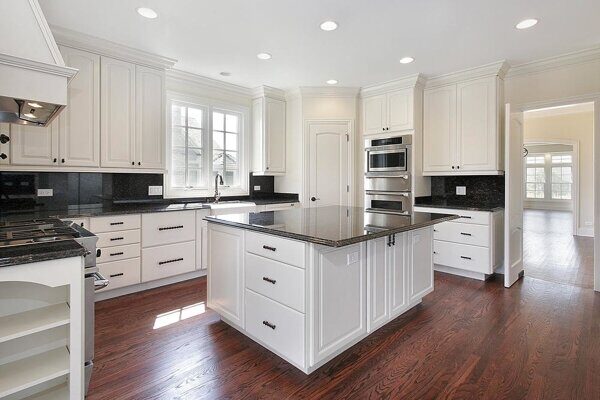
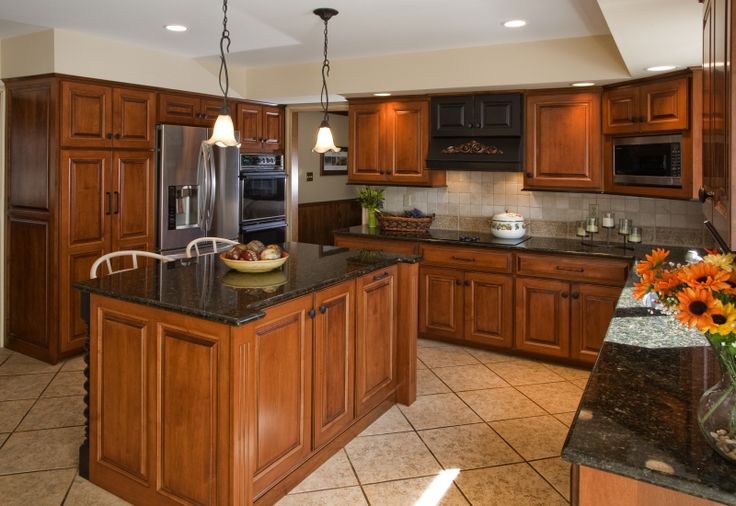
Method 1: Refinishing Cabinets to Make Them Lighter
Photo: istockphoto.com
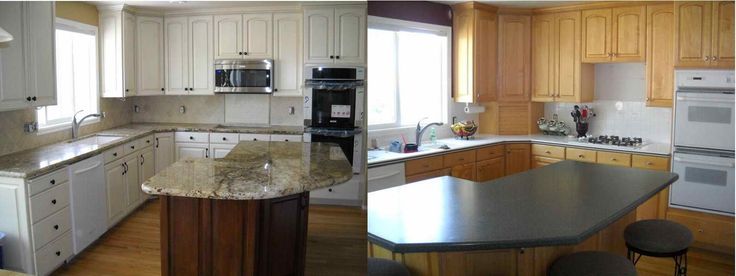
Refinishing darker cabinets to make them lighter is probably the most involved method of refinishing, and it takes some specific knowledge, tools, and materials. With the following list and steps in mind, you should be able to remove the finish, paint, and stain from wood-based cabinets to bring them to a lighter finish.
– Sandpaper
– Paint stripper
– Chlorine bleach (if necessary)
– Wood filler
– Wood sealer
– Denatured alcohol
– Stain
– Varnish
– Respirator
– Rubber gloves
– Sanding block
– Scraper
– Putty knife
– Orbital sander
– Rags
– Paintbrush
– Steel wool
– Tack cloth
STEP 1 : Remove the cabinet doors.
Before embarking, remove one of the doors and sand off a small area of the finish on the back. Do the same to an area at the back of a rail or stile (horizontal or vertical framing member).
If the doors and drawer fronts are made of hardwood, remove them and take off all the hardware.
Note: If the doors and drawer fronts are fiberboard, forget about refinishing them with stain. The only way you’re going to get the cherry, oak, or birch tones you love so much is by applying a veneer or buying all new doors and drawer fronts.
STEP 2 : Strip the old finish from the cabinets.
In a well-ventilated room (or outdoors), use a paint stripper to remove the existing finish. Removing a clear coat finish should be a lot easier than removing paint, but you may have to use an aggressive stripper or chlorine bleach to remove the old stain. The job is messy and potentially unhealthy, but if you’re careful, it’s better than blowing thousands of dollars on new cabinets.
Note: Removing paint from cabinets, or any wood furniture, requires patience. Not all of the paint lifts off after the first application of remover, and maybe not after the second or third, either. It’s imperative to work in a ventilated space, to wear a respirator, to wear protective gloves and a long-sleeve work shirt.
Advertisement
Use a sharp scraper to remove as much finish as possible and use whatever you have on hand (old spoons, dental tools, etc.) to scrape contours and crevices.
STEP 3 : Fill damaged wood with wood filler, then proceed with sanding the cabinets.
Fill dents and deep scratches with wood filler, then sand thoroughly until all finish is removed and the wood is super smooth with no scratches.
Make your first pass with an orbital sander using 100-grit paper, your second with 180-grit paper, and your last pass with 220-grit.
STEP 4 : Apply a sealer.
Before applying it, thin out the sealer to a 50-50 concentration with denatured alcohol.
Apply the sealer (this is sometimes called a wood conditioner). A sealer does just what it says: It seals the surface with a light, thin coating so that when you apply stain, the color goes on evenly. Zinsser’s Bull’s Eye Seal Coat, an alcohol-based sealer that’s easy to apply and dries fast, is a good option.
When the sealer dries, lightly rub with 000 steel wool, then clean the surface thoroughly with a tack cloth.
STEP 5 : Apply the stain.
Apply stain using a soft cotton rag, a brush, or a brush in combination with a rag. Experiment until you find a combination that allows you to apply a consistent tone.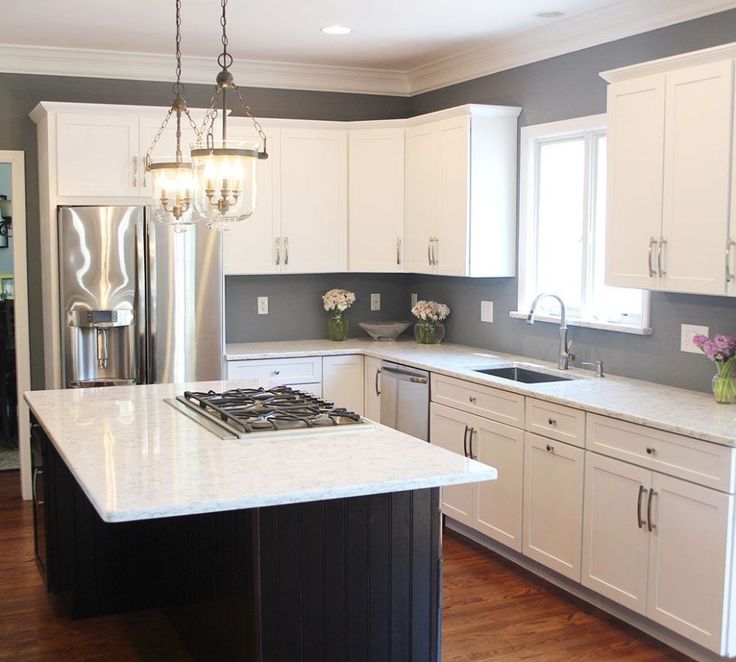
If the stain is going on too dark, rub some it off. Too light? Don’t worry. You can apply another coat after the first one dries.
Once the stain dries, follow up with another very light rubbing with 000 or 0000 steel wool before cleaning with tack cloth.
Note: It’s always wise to experiment on the backside of a single door before committing to the project, just to be sure you’re going to be pleased with the results.
Advertisement
STEP 6 : Add a protective varnish to the cabinets.
Now you can apply a protective coat of clear polyurethane varnish. Applying any clear coat must be done in a dust-free environment.
Read the directions on the can and follow them, but when it comes to thinning, you may need to deviate from the product literature. Most makers say you won’t have to, and maybe that is the case under perfect conditions, but I find that it’s usually necessary to pour in a little mineral spirits to keep the polyurethane flowing smoothly and drying without brush marks.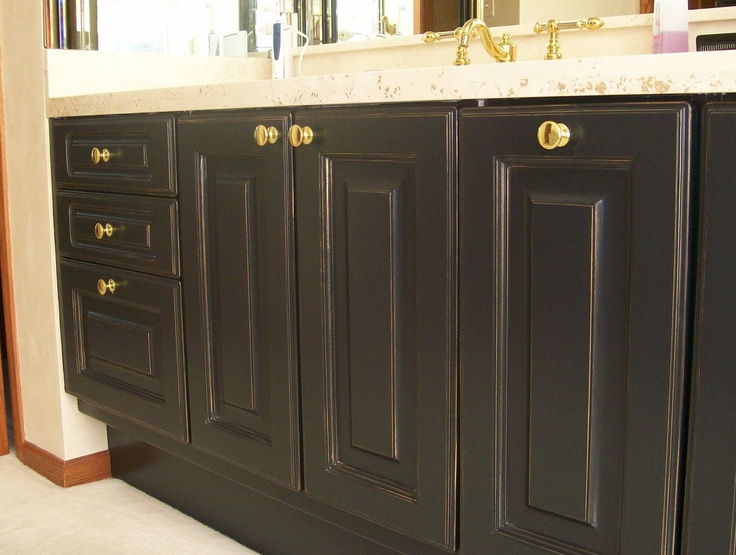
RELATED: These Cabinet Customizations Are Totally Worth It, According to Pro Organizers
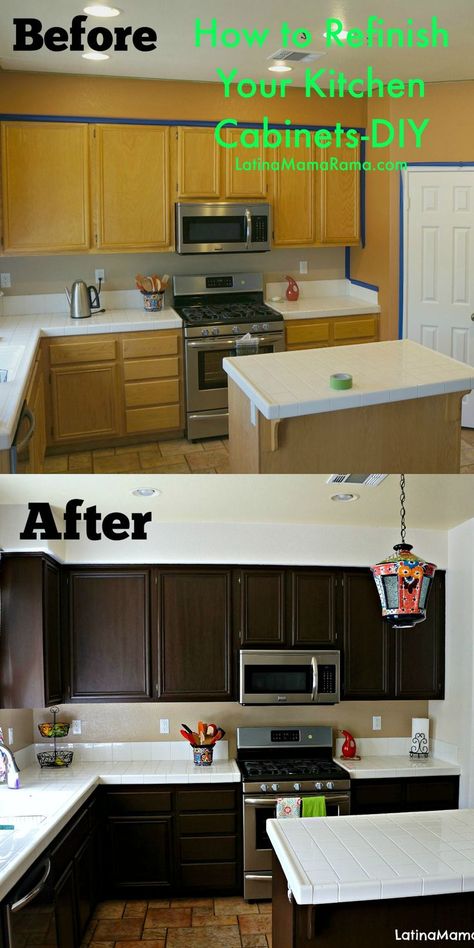
Method 2: Refinishing Kitchen Cabinets to Make Them Darker
Photo: istockphoto.com
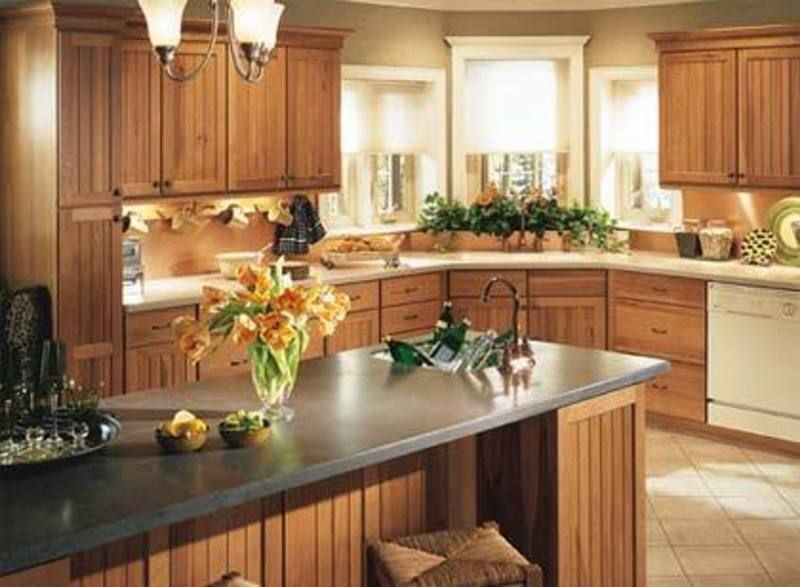
If you want darker-toned cabinets than what you currently have, you may be able to simply tint the existing finish. This method of refinishing kitchen cabinets, or cabinetry in any space, is much easier to accomplish than others that require stripping and sanding, but there are still a few ins and outs that you need to know.
SUPPLIES– Respirator
– Rubber gloves
– Trisodium Phosphate (TSP)
– Water
– Sandpaper
– Tack cloth
– Tinted polyurethane varnish
– Paintbrush
– Polyurethane finish
STEP 1 : Remove and wash doors and drawer fronts.
After removing the doors, drawers and hardware; begin by thoroughly washing grease and wax off the cabinets with TSP and water.
STEP 2 : Sand and dust the cabinets.

Lightly sand and wipe off the dust with a tack cloth.
STEP 3 : Apply a tinted polyurethane.
Experiment with a tinted polyurethane varnish (such as Polyshades by Minwax) to see if you can achieve the tone desired. Tinted polyurethanes combine stain and varnish in a single product.
Note: It’s always wise to experiment on the back side of a single door before committing to the project, just to be sure you’re going to be pleased with the results.
Advertisement
RELATED: How to Stain Cabinets
Method 3: Repainting Kitchen Cabinets
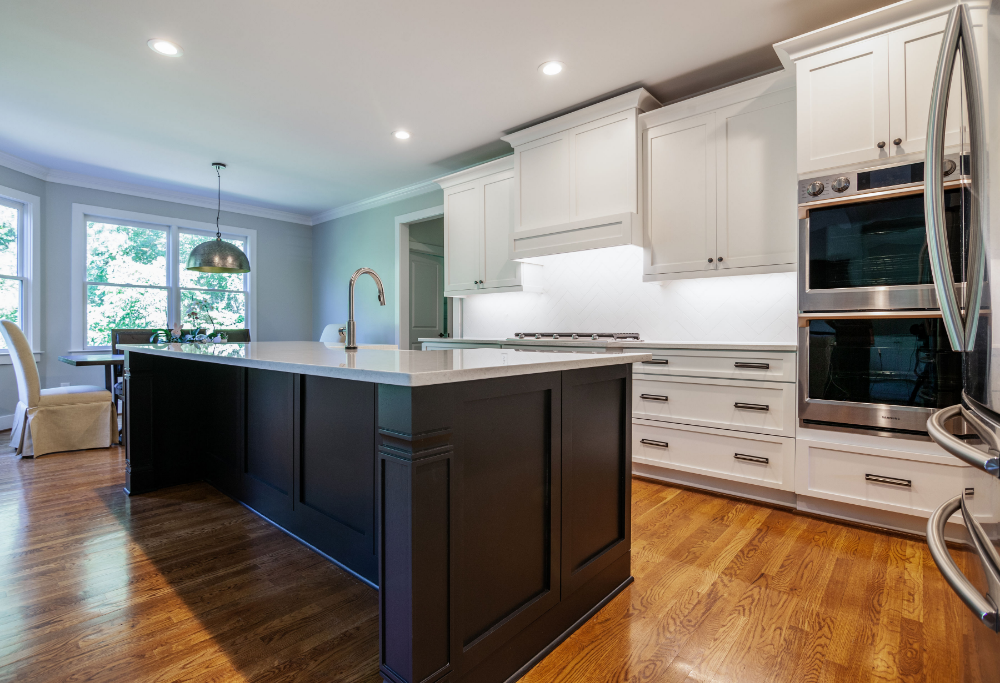
Photo: istockphoto.com
While it might make the biggest impact, repainting kitchen cabinets is actually quite a bit easier than restaining them. And, since you’re applying a whole new coat, the color possibilities are endless.
SUPPLIES– Respirator
– 220-Grit sandpaper
– Foam sanding block
– Tack cloth
– Degreaser
– Primer
– Paintbrush
– Paint roller and tray
– Enamel cabinet and trim paint
STEP 1: Remove the cabinet doors and hardware.
Start by removing the doors, door knobs, drawer fronts, drawer pulls, and other hardware from the cabinets. For very large kitchens, it’s a good idea to number the cabinet doors and drawer fronts to ensure you know where to put them back.
STEP 2: Lightly scuff the cabinets’ surfaces.
Cabinets are typically smooth and covered with a bit of polyurethane. While primer can adhere to this surface, it’s better to scuff it up a bit first. Put on a respirator and use the 220-grit sandpaper and foam sanding block to lightly scuff the surface of the boxes, face frames, drawer fronts, and doors. The foam sanding block should be able to get into intricate door profiles.
Keep in mind that your goal isn’t to sand down to bare wood. Instead, you simply want to roughen the surface of the existing finish to give the primer something to hold on to.
RELATED: The Best Primers for Kitchen Cabinet Transformations
STEP 3: Clean the cabinet surfaces.
After scuffing, remove the dust from the cabinets with a tack cloth. Take your time with this step as any dust that stays behind is going to create a rough texture on the cabinet.
While you’re sanding, you’re inadvertently transferring oils from your fingers to the cabinets. Also, cabinets see a lot of cooking oil, as well, and neither substance is conducive to a great paint job. The answer to this conundrum is to use the degreaser to clean the entire surface of the boxes and doors. Once clean, the surface is ready for primer.
Advertisement
RELATED: The Best Paint for Kitchen Cabinets
STEP 4: Prime the cabinets.
After pouring primer into the paint tray, use the paintbrush and roller to coat the boxes, face frames, doors, and drawer fronts with primer. Be sure to brush the primer into any cracks or corners, especially along the door profiles. This finish might look a bit streaky, but you should only need one coat of primer before moving to paint. Pour the excess primer back into the can and clean the brush and paint tray while allowing the primer to dry.
STEP 5: Paint the cabinets.
Once the primer dries, it’s time to paint the cabinets. Put a new roller cover on your paint roller and pour some paint into the paint tray. Use the brush and roller to coat the doors, face frames, drawer fronts, and boxes with an enamel paint made specifically for cabinets and trim for the best results. After allowing the first coat to dry, apply a second coat of paint. Once dry, put all the doors, drawer fronts, and hardware back on and enjoy the fresh, new, updated look in your kitchen.
RELATED: The 14 Freshest Kitchen Cabinet Colors
Final ThoughtsPhoto: istockphoto.com
With this primer on how to refurbish kitchen cabinets, you have the knowledge necessary to give those boring or ugly wood boxes and doors a facelift. Whether sanding down to bare wood and restaining kitchen cabinets, using a tinted varnish to darken the color, or painting your cabinets, be sure to wear the proper safety gear while you tackle this big-impact project.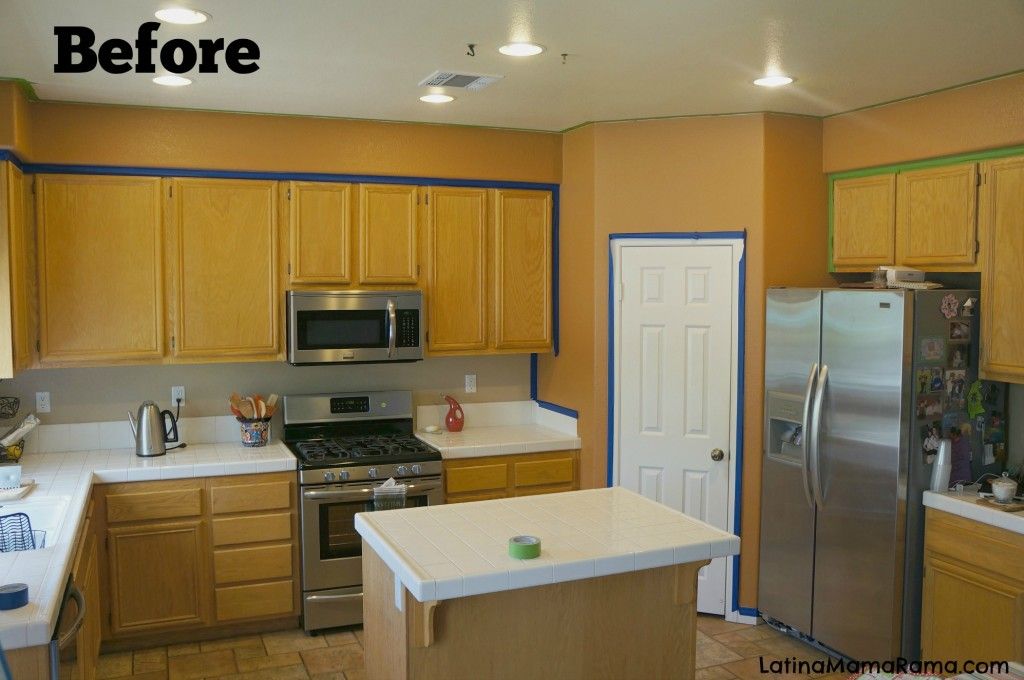
That might feel like a lot of information about the refinishing kitchen cabinets, and it’s hard to cover everything in one coat. If you still have questions about restaining cabinets or simply refurbishing old kitchen cabinets, this section is for you.
Advertisement
Q: What is the average cost to refinish cabinets?Generally speaking, the cost of refinishing kitchen cabinets (with labor) will run between about $1,800 and $4,000, depending on the size of the kitchen. You can save up to 75 percent of that cost if you tackle the project yourself.
Q: Is it worth it to refinish kitchen cabinets?It is absolutely worth refinishing kitchen cabinets. If your boxes and doors are still in good shape, a fresh coat of stain or paint can breathe new life into an old space and save you up to $20,000.
Q: Is it cheaper to reface or refinish cabinets?Generally speaking, refinishing cabinets is less expensive than refacing kitchen cabinets.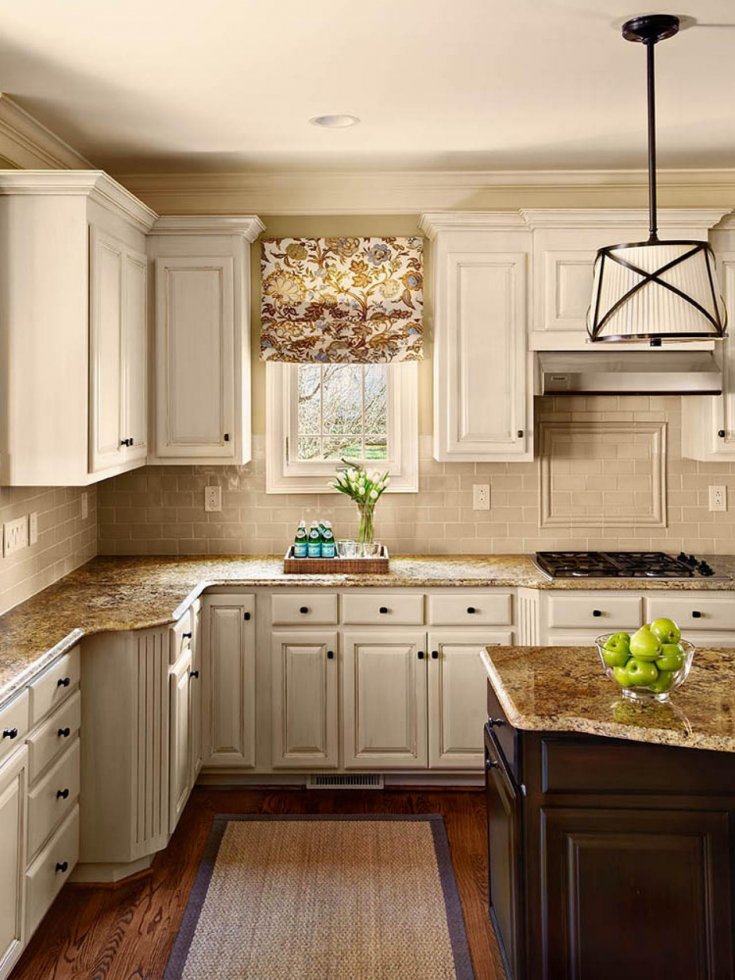 Cabinet refacing costs, on average, $7,132.
Usually, discoloration is caused by old stain that’s deeply embedded in the wood. Liquid strippers and sanding might not even be an option, so it’s best to go with a darker stain or paint that will hide the blotchiness.
Refinishing your cabinets?
Get free, no-commitment project estimates from pros near you.
Find Pros Now
+Tips for Refinishing Kitchen Cabinets
While it may be tempting to rush through—or even skip—the preparation process, if you truly want your finish to look good and last a long time, prep is the most important step. And the techniques you employ, and the products you use, can make or break your outcome. Follow these steps and you’ll be on your way to a foolproof finish.
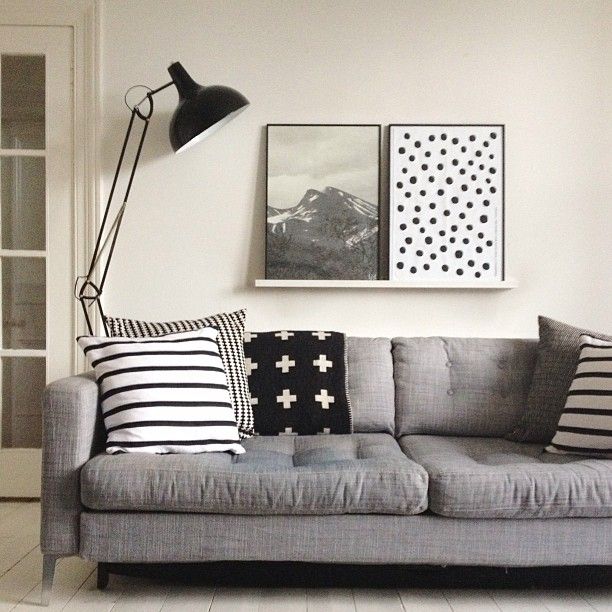
The “Before”
Courtesy Nick SlavikThe wood cabinets were in great shape, but the dark finish was outdated, and made the space feel small and dreary.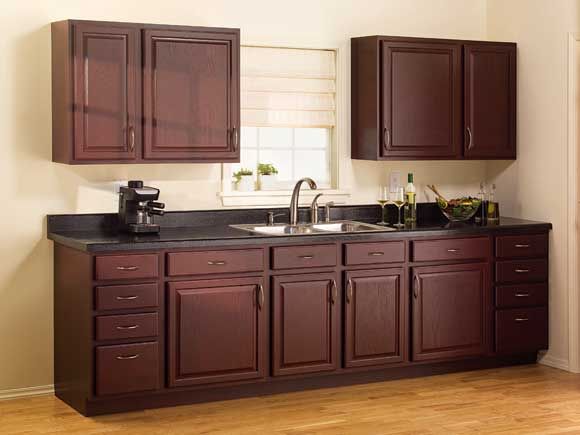
Protective Measures
Courtesy Nick SlavikStart by laying down floor protection, and then cover countertops so they can double as a work surface. You can use canvas drop cloths, but personally I prefer builder’s paper, as it protects well, it’s affordable, and it’s easily discarded/recycled.
Preparation Pays Off
Courtesy Nick SlavikYes, some people would say I go a little crazy with prep, but from experience I know that it’s not wasted time. Remove all of the doors and drawers, label/number them carefully (you’ll thank me later), and stage them for cleaning. Plastic and tape off all of the insides of the cabinet boxes to keep dust from getting in, cover all backsplashes with plastic, and seal all appliances to keep them clean.
Degrease
Courtesy Nick SlavikOn to the cleaning process. Scrape off any food residue from the cabinets and then wash/scrub with synthetic steel wool and soap and water. For tough grease, use TSP (trisodium phosphate) and water; the TSP actually emulsifies the grease and removes it much more efficiently than soap alone. Let dry completely before moving on.
Prep, Part One: SVT
Courtesy Nick SlavikThis is the key step to prep: SVT (Sand, Vac, and Tack). Sand the cabinets with medium-grit sanding sponges and/or 180-grit sandpaper on a random orbital sander. It’s not essential to remove all of the finish, but you must scuff it to give it “tooth” and promote adhesion. Once 100% of the surfaces are sanded, use a shop vac with a brush attachment to remove the majority of the dust. The last step is to tack-rag off the residual dust. The best method is to use a microfiber rag with water–but remember to wring out almost all of the water, as residual water will leave spots.
Prime Time!
Courtesy Nick SlavikChoosing the correct primer is so important. The wrong primer will leave you with chipping cabinets, an uneven finish, and even stain bleeding from the wood. KILZ 3® Premium Primer, in my experience, is easy to apply, adheres wonderfully and blocks stains. A major benefit is that it has low odor, so families can continue to live in the house while work is done. (This is unlike most traditional oil primers which have a very noticeable odor.) And KILZ 3 Premium Primer dries to the touch in 30 minutes and can be top-coated in one hour; this will help with achieving a dust-free finish.
Application
Courtesy Nick SlavikPriming is fairly straightforward: apply as uniformly as possible, and be super thorough. Application can be done with brush, roller, or sprayer. For this project I’ll be demonstrating brush and roller application. The best brush for painting cabinets will have super-fine nylon bristles. This will leave a finish nearly devoid of brush marks.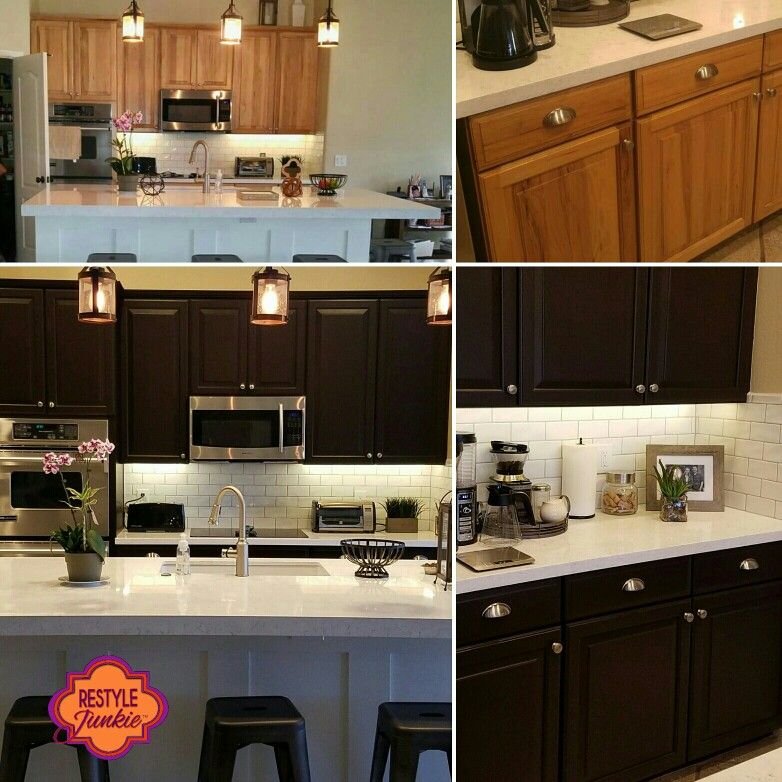 Don’t skimp on this. Expect to pay between $15 and $25 for a good brush. Properly cleaned, it will give you decades of service. When choosing a roller for painting cabinets, I prefer a very high-quality woven cover. This will prevent shedding of fibers and a flawed finish. For the nap, I like ¼” or ⅜”. Anything thicker will leave excessive stipple.
Prep, Part Two: Repeat SVT
Courtesy Nick SlavikOnce the primer is dry I like to repeat the SVT process: lightly scuff-sand to promote adhesion and remove any minor flaws left on the cabinets, and vacuum and tack-rag again before caulking any cracks. I prefer to caulk cracks (where the cabinets meet walls, crown molding, etc.) after priming. Caulk will always stick better to a primed surface than to bare wood. However, never caulk the panels on cabinet doors—they’re actually called “floating panels” and need to move with seasonal temperature and humidity fluctuations. I’ve seen some really bad effects from caulking these panels, such as peeling caulk and even cracked door panels.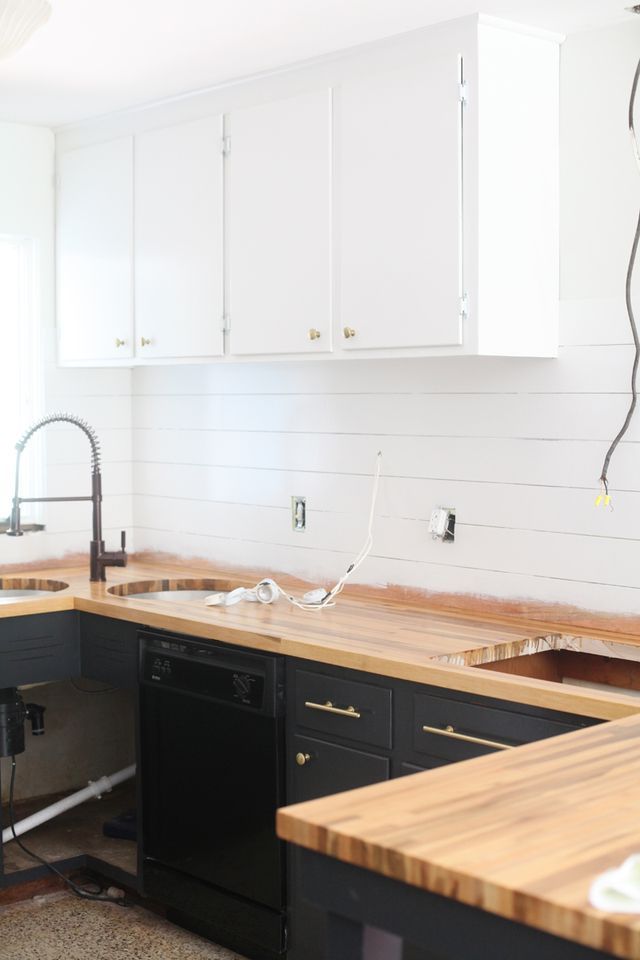 It’s tempting to caulk these, but you’ll have to abstain—trust me on this one. Let any caulk dry completely before moving on.
Top It Off
Courtesy Nick SlavikNow that you have a perfectly primed surface, it’s time for the top coat. The application techniques are the same as priming—use a high-quality nylon-bristle brush and/or roller, and take your time to ensure smooth, even coverage. Start by coating the back sides of the doors and lay them flat. Laying doors flat will help with the leveling of the enamel and give you a smooth finish. Once dry, you can flip the doors over and coat the fronts. For the cabinet boxes, try to keep a wet edge (don’t start and stop, allowing the paint to dry). I recommend applying a second top coat for added protection and an even shine.
De-Prep (Almost There!)
Courtesy Nick SlavikOnce everything has dried to the point where you can handle it, start by removing the tape and plastic from the cabinets.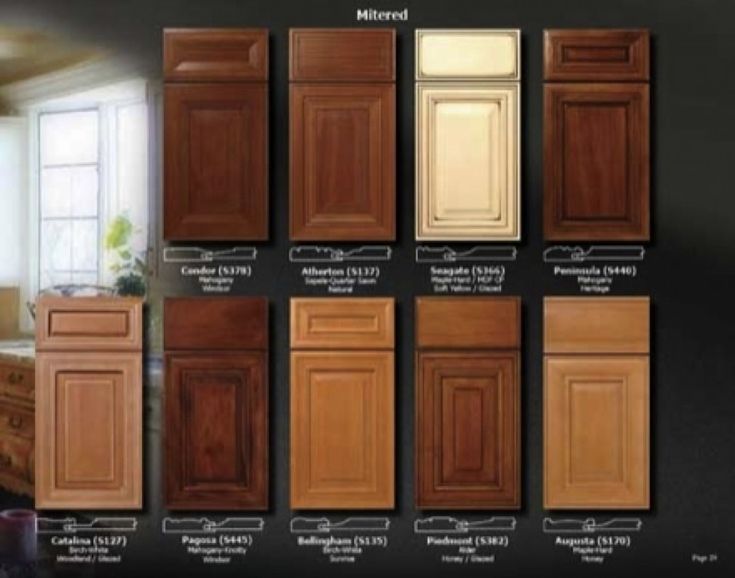 Install the doors one by one. (Now, you get to see if your door labeling system was effective!) Save any adjustments of the doors until the end. I use only hand tools when installing doors and drawers; drills tend to strip out delicate screws. Install any knobs or pulls, and make any necessary adjustments to get them all straight. Pro’s Note: Clients love when you install new clear rubber bumpers on the doors and drawers (they were removed during the prep process). It’s a small detail, but well worth the effort.
Photo Finish
Courtesy Nick SlavikTake one final walk-through to look for touch-ups; if you’re satisfied, then you can go ahead and remove the plastic, paper, and tape from countertops, appliances, and floor, and consider your job well done!
KILZ 3
® Premium Primer is designed for use on interior and exterior surfaces including woodwork, drywall, plaster, paneling, masonry, brick, painted metal, and properly prepared glossy surfaces. To learn more, visit KILZ.com
 How to Decorate Kitchen Cabinets - 9 Creative Decorating Ideas
If you think that choosing kitchen cabinets is an easy task and does not require special design skills, then you are undoubtedly mistaken. But a few professional tips that we will share with you today will help you choose comfortable, stylish and original furniture for your kitchen.
So, let's watch, learn and get ready to implement the most daring creative ideas.
Stained glass is exactly the option that turns an ordinary closet into a real gem of the interior and gives the atmosphere a touch of mystery that evokes memories of the distant past. Giving the interior warmth and originality, such cabinet design compares favorably with simpler options.
It is stained glass that plays a key role in this process, and its ability to turn the most modern products into vintage style pieces makes your creative possibilities almost limitless.
Despite the simplicity of the design solution, kitchen cabinets made in the form of open shelving can sometimes be the most relevant, especially for rooms decorated in a modern style. They allow not only convenient placement of kitchen appliances, but also make it a stylish part of the interior.
But don't forget the old proverb: "Measure seven times, cut once." Otherwise, if you calculate the dimensions of the furniture incorrectly, it may turn out that the selected rack is not suitable for your kitchen, and you will have to redo it all over again. But if you follow everything exactly, the result will be beyond praise! And the opportunities for arranging and decorating the kitchen, which will be provided by open shelving, will be more than enough for you.
If you are satisfied with the functionality of this design, but are somewhat confused by its openness, try to settle for an “in-between option”, such as sliding doors. They will retain the practicality of light shelving, but at the same time protect the shelves from the curious glances of guests or playful children's hands.
But if you want to achieve a truly impressive result, then consider not only the convenience and functionality of a variety of furniture, but, of course, its design and combination with other furnishings.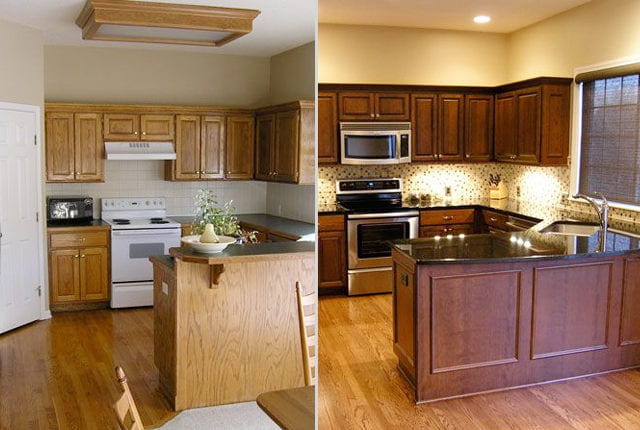 The white color in the interior, which prevails in most kitchens, can be wonderfully refreshed with splashes of brighter tones.
The soft contrast of this color scheme is the key to a complete interior transformation, and without undue effort and financial costs.
Glossy pink fronts of the cabinets undoubtedly make the interior of this kitchen exceptionally unusual, stylish and interesting. Sometimes such a color scheme can bring notes of retro style to the atmosphere, and the play of shades - from soft pink to raspberry - will make the interior deeper and richer.
You don't have to limit yourself to just one bold and bright color. Try experimenting with two saturated shades that blend harmoniously with each other. For example, you should not focus solely on the use of one bold and bright color. Choose two shades that have the necessary set of visual characteristics. Making the upper tier, where the hanging kitchen cabinets are located, in one color, and the lower one in another is a way that is as win-win as it is simple.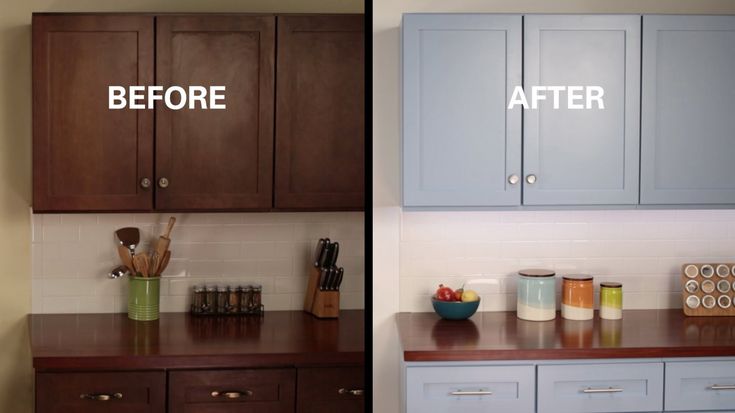 The combination of turquoise with a hint of lime green is one of those, no doubt, successful options.
Another interesting solution is wall cabinets with open upper shelves. Such furniture gives the interior a certain zest due to the ability to arrange beautiful dishes, vases or other decorative items on the shelves. In addition, open shelves are always convenient in terms of functionality.
Slate - the most interesting way to design a kitchen cabinet! It not only looks stylish, but is also very comfortable to wear. This original interior decoration is perfect for notes, grocery lists, recipes and the like.
Not only extremely stylish, but also extremely attractive from an environmental point of view - the use of previously used wood as a material for furniture. The shelves and drawers of this set are made from old walnut flooring. Agree, despite the simplicity of the form, they look just amazing! Taste, style and chic are the essential properties of the interior, in which there are genuine elements of antiquity.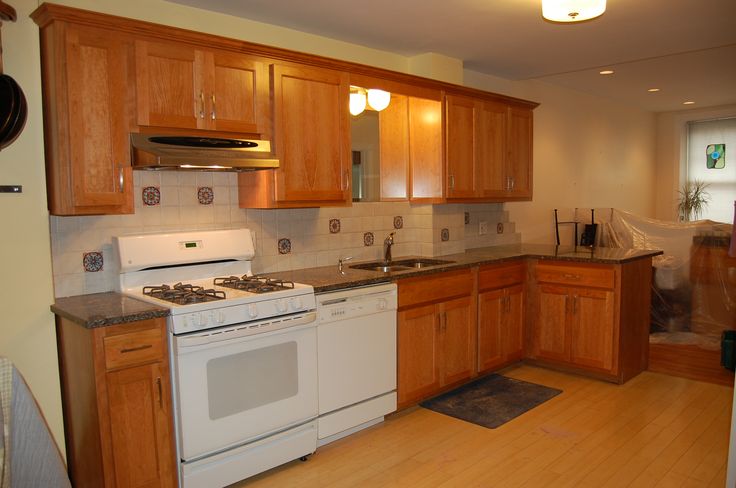 Leave the material in its original form without updating it, and you will get amazing examples of kitchen furniture.
Finished furniture can also be supplemented with such elements - this will give it an original look, add depth and significance. For example, you can decorate the back walls of open cabinets with an old board. It is not difficult at all, and the result will exceed all expectations!
12 ways to update your kitchen set
Natalia | 02/26/2019 | Updated | Kitchen furniture | 74 244 views | 2 comments
Contents of the article
For a domestic person, the kitchen is not only a place where food is prepared. This is a place for family lunches and dinners, a place to meet friends and family. All this means only one thing - the kitchen should not only be comfortable for the hostess, but also attractive in appearance. Every piece of furniture and decor matters, and even more so the kitchen set.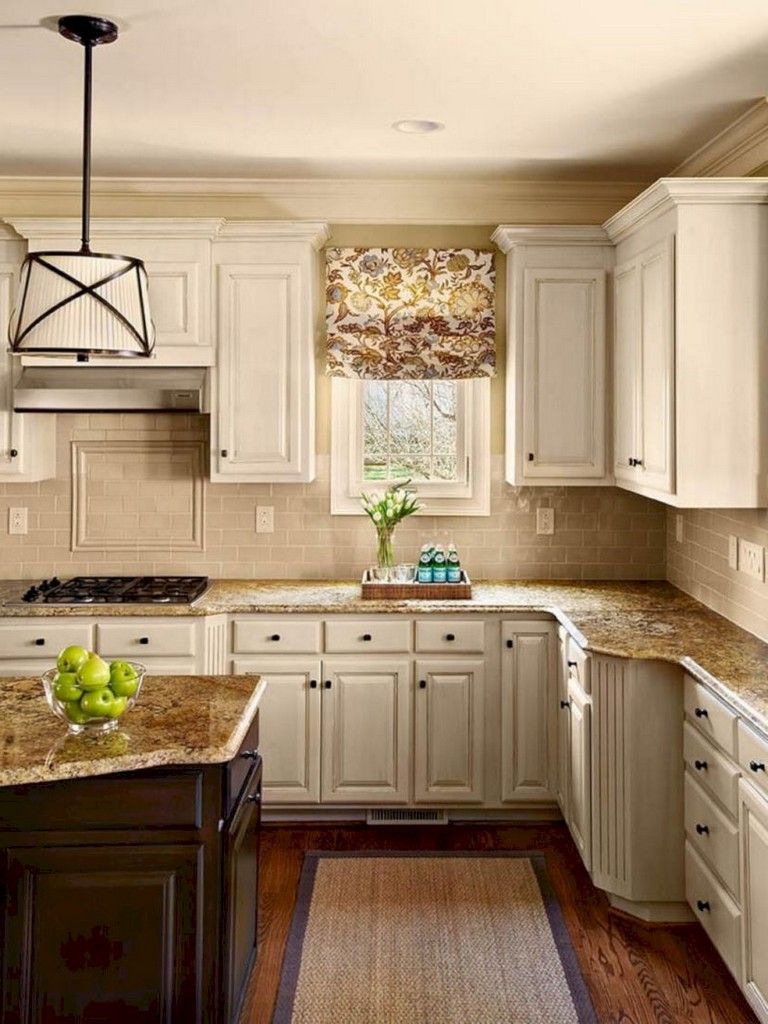 When cracks and stains appear on it, or when it no longer matches the style of the kitchen and the tastes of the owners, many people think about buying a new headset. But is it always advisable to spend money on new furniture if you can ennoble the existing one? If the headset is still strong, outdated in size and layout, then you can transform it with your own hands. Consider the most popular and effective ways to update the kitchen set.
Self-adhesive film
This method of restoring a kitchen set has become truly popular, and all thanks to its many advantages :
- vinyl film is inexpensive, so that renovation of facades will not hit your pocket;
- The range of self-adhesive film is huge, you can find options with imitation of wood of any species, stone or leather. There are films depicting landscapes, with interesting drawings, etc., with a smooth and embossed surface;
- almost everyone can handle the installation of the film - it is enough to be careful during the measurement process and directly during the actual gluing;
- vinyl film is not afraid of temperature changes and moisture, which is very important for the kitchen.
 It will be easy to care for such a surface;
 - If a part gets damaged or you want to change the environment again, the film can be easily removed.
Minus - low durability of the film, only 3-4 years, but the cheapness and ease of replacement smooth out this drawback.
Pasting kitchen facades is quite simple. Most importantly, follow the following recommendations:
- choose a film of a suitable color, taking into account the preferences for a new kitchen interior. It is not necessary to take material with imitation of wood - you can take a plain film of light color, and then you will be able to make a small kitchen larger and make dreams come true for the implementation of a minimalist interior;
- It is best to remove kitchen fronts - this will make work easier. The fittings must be dismantled in any case;
- measure the parameters of each removed facade;
- the film must be applied to a clean, dry surface, i.
 facades must be thoroughly cleaned of stains of grease and dirt. This can be done with a soapy solution, or using dishwashing detergent. After that, it is necessary to remove the remnants of detergents and wipe the facades dry;
 - if the facades are seriously damaged, some time will have to be spent on repairs. Peeled edges on the ends must be glued. The pits must be sanded, then filled with acrylic putty, sanded again and primed. If there are large potholes, then in their place it is better to glue a patch of plywood or veneer;
- cut the foil according to the measurements. Experienced craftsmen recommend adding 4-5 cm of allowance in places where the film will bend. If there is a large drawing on the film, then when cutting it out, it is necessary to control that it is located correctly. It is better to cut with a clerical knife - so the edge will be as even and neat as possible;
- Take the first piece of film, start peeling off the backing paper and apply the film with the adhesive side to the front.
 Controlling evenness, gradually peel off the protective layer and stick the film;
 - The film can be rolled with a rubber roller or a plastic scraper. This removes the remaining air. It is necessary to smooth from the center to the edges. If air bubbles remain, they can be pierced with a needle and rolled again with a roller;
- if you suddenly notice that somewhere the film is glued crookedly, then within 5-6 hours the situation can be corrected. The film can be re-glued, but not more than 1-2 times, since then the glue will simply lose its properties;
- when all fronts are pasted over, you can screw them back;
- You can use the old fittings, or you can replace them with new ones that fit better with the updated style.
If the shelves are soiled to such an extent that no detergent can take them, they can also be pasted over with foil. The principle of operation is the same. The film can be chosen close to the original color of the shelves.
Replacing the fronts
Many people think that the fronts covered with foil look somehow too modest. This is all, of course, a matter of taste and personal preferences, but it is difficult to radically change the kitchen with a vinyl film, because glass inserts or panels will not be added to the doors. To make serious changes to the interior of the kitchen, it is better to act radically and completely replace the facades. Yes, it will turn out more expensive than with a film, but still much cheaper than when buying a new headset. The method is great if the frame of the furniture is still strong enough and durable.
The easiest way will be for owners of modular furniture , which was bought relatively recently. Then it will be possible to buy facades of the required size and replace them with your own hands. But this is not often so lucky, because usually you have to make facades to order. It is not at all necessary to change wooden doors to wooden ones, and chipboard to chipboard. The uniqueness of this method of restoration lies precisely in the fact that the appearance of the headset can be dramatically changed using completely different materials.
The cheapest option is chipboard or plastic facades. MDF and wood will cost more. You can choose accessories and decorations, for example, use glass inserts, but all this will affect the price. Masters with hands, of course, can make all the facades on their own. If you have woodworking skills, then why not? But it is much easier and faster to turn to a specialized company , which will make facades for your headset.
Repair of kitchen facades in Moscow
For residents of Moscow and the region, we recommend the company "Kitchen Repair", which has been operating for over 20 years and specializes in the repair of kitchen facades. Experienced specialists can replace facades or repair existing ones by painting, enameling or sticking a film. Among the services of the company are also repair of accessories and replacement of countertops.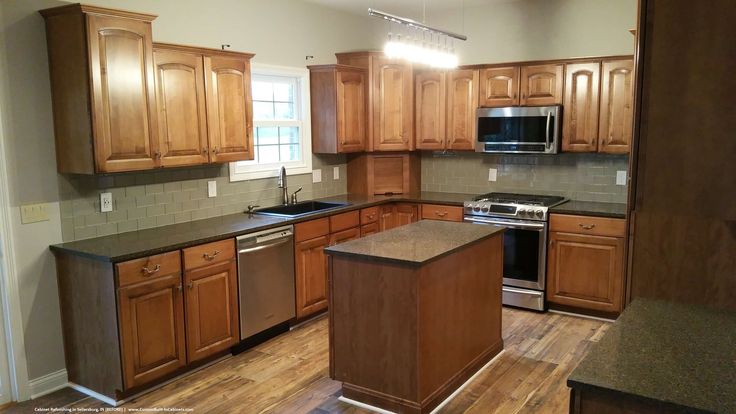 All work is carried out at the facility, measurements are preliminarily carried out, the design and estimate are agreed, the required elements of the headset are made from the desired material. All work is guaranteed. You can see detailed information and examples of work on the page https://remont-kuhni.com/service/remont-kuhonnyh-fasadov/.
An example of the work of specialists from the company "Kitchen Repair"
Painting
The method is quite simple, but requires careful surface preparation. The main advantage of the method is the ability to paint the facade in any color. If you want to make your kitchen more daring, you can choose a bright shade, such as blue, green or orange. A win-win color is white, as well as many light shades, incl. beige, grey, cream, etc. Imagine in advance what the kitchen will look like, and get creative.
Simultaneously with painting the facades, they can be slightly transformed using moldings , special strips that are glued to the surface and give it an interesting relief.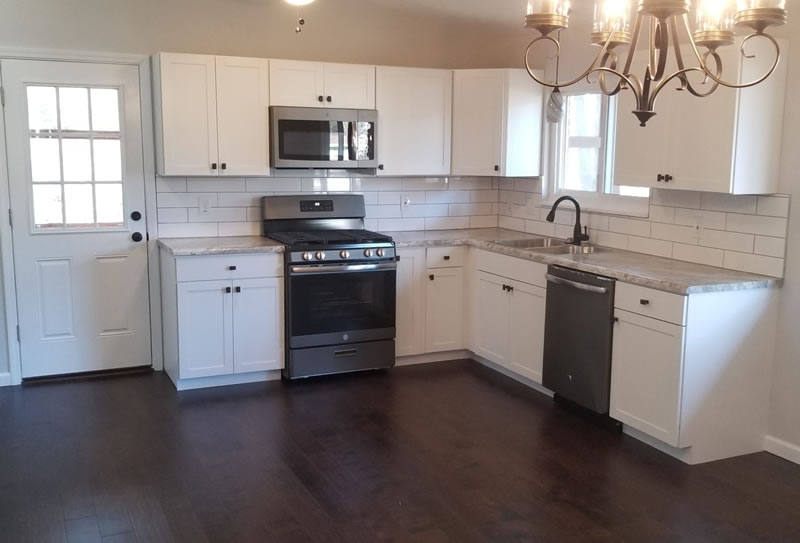
The sequence of actions is as follows:
- remove the facades from the headset, dismantle the fittings and glass. Those elements that are difficult to remove can be sealed with masking tape;
- Old varnish or paint can be removed most conveniently with a sander. If PVC film was used as a decor, then it is better to use a building hair dryer. From the temperature, the film will melt, and it will be easier to remove it. It is better to work in a respirator so that small particles of the facade and the pungent smell of PVC do not enter the respiratory tract;
- if there are serious damages, they must be filled with filler and then sanded;
- the surface is rubbed with sandpaper, then dust is removed, degreasing is carried out;
- If you plan to use moldings , then they are attached at this stage. You can choose flat or textured planks, there are products that imitate stucco molding. It is better to grind the planks in advance, then they are cut into segments of the required sizes.
 Often, moldings are attached along the contour of the doors, or a pattern is formed from them closer to the center. Usually a 45 degree joint is used. After you have made sure that the figure is laid out evenly, the elements are glued, you can use glue for wood products. It is allowed to use nails without hats;
 - MDF, chipboard and wood absorb moisture well, so it is better to pre-coat them with a primer. The one that is designed for woodworking will go. It is better to apply two layers;
- you are now ready to paint. It is better to use acrylic paint or car enamel. The first is cheaper, the second is better in terms of moisture resistance and resistance to mechanical damage. You can use a brush, roller or spray gun. The paint is applied in 2-3 layers depending on the required color saturation. To guarantee, some craftsmen cover the facades with a layer of transparent varnish;
- when the paint is dry, the masking tape is removed, the fittings are returned to their place, and the facades themselves are hung on hinges.
If coloring seems too banal to you, then use glisal , a translucent glossy paint, in your work. It is applied in exactly the same way as acrylic paint, but while the coating dries, an interesting texture can be created on the surface. With a sponge, a bag or other improvised items, you can make a geometric pattern or an ornate pattern. If anything, part of the pattern can be removed with a roller. The result is an unusual result that will appeal to fans of ethnic style.
Lacquered
The variant is only suitable for fronts made of solid wood . The varnish allows you to reliably protect the wood and at the same time does not hide its chic natural look. When it comes to furniture, nitrocellulose, alkyd-carbamide, polyurethane, epoxy and polyester varnishes are used. It is important that the varnish protects the wood from moisture and high temperatures. Varnishes have a not very pleasant smell, therefore it is better to carry out all work on the street.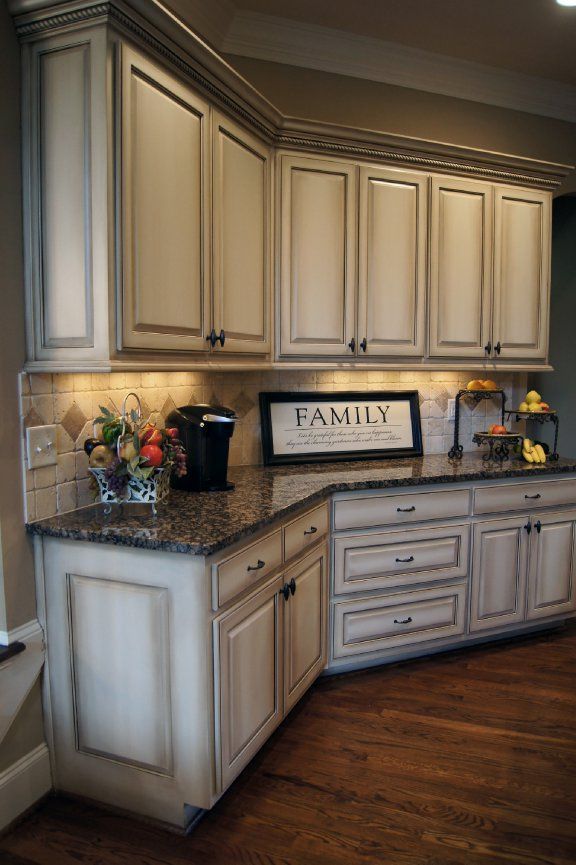 If this is not possible, then it is better to take a water-based material, it has almost no smell.
It is very important to decide in advance on the gloss level of . The varnish can be glossy, which will add visual volume to the headset, or it can be matte, which will emphasize the wood pattern. The degree of gloss is indicated on the packaging as a percentage of reflected light: a glossy varnish will reflect up to 90% of the light, matte - only 10%, there are many intermediate options. Which is better depends on your preferences.
The procedure is as follows:
- remove the facades, dismantle the fittings, if necessary, seal some parts with masking tape;
- remove the old lacquer layer, you can use sandpaper. Dust is best removed with a vacuum cleaner. After finishing work, the surface is wiped with a damp cloth, then it is allowed to dry thoroughly;
- apply primer;
- the varnish is applied with a brush or roller, it is better that each new layer is slightly thinner than the previous one;
- some types of lacquer should only be used outdoors;
- drying speed - different for different varnishes, the average is indicated on the package;
- After drying, the tape is removed and the fittings are returned to their place.
To create the effect of aging , several layers of stain can be applied.
Hardware update
We all have heard about the great impact of small things, but many, however, refuse to believe in the truth of this statement. Designers, without hesitation, convince us that sometimes changing handles on a kitchen set can transform a kitchen space. Most often, however, the replacement of fittings is carried out along with the renewal or replacement of facades.
It happens that the kitchen set itself is perfectly preserved, and the handles from constant interaction with them have become flaky, dull, or completely deformed in places. Take off your old hardware and head to a specialty store, where you can choose from a wide variety of handles. The main thing is that the size matches and you do not have to drill new holes.
If the old handles fit perfectly into the style of the kitchen, then you can find new ones that are as similar as possible to them.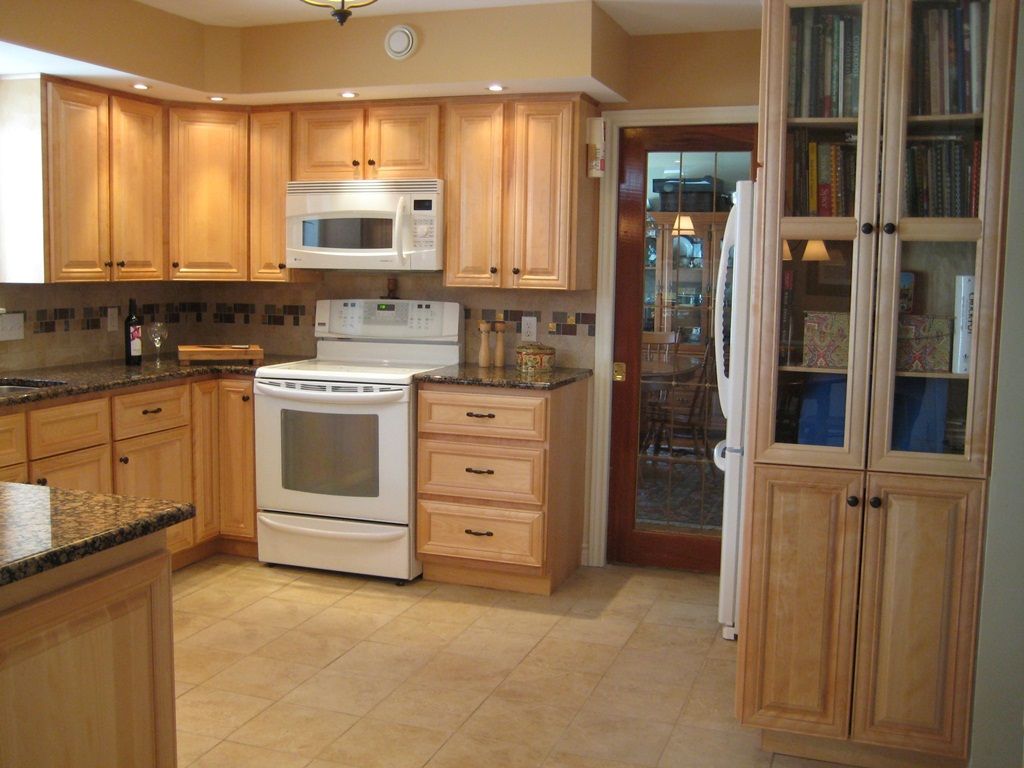 If you want something fresh, or if the kitchen facade has become completely unrecognizable after simple manipulations, then pick up handles in a new style. The range of manufacturers includes handles in modern and classic style, smooth chrome-plated and carved antique. There are handles with imitation of leaves and animals, there are inlaid glass and stones. There are wooden, plastic and metal, transparent and colored - everyone can choose the right one.
Possibly hinges and sliding shelf mechanisms need to be replaced. Before going to the store, these elements should be dismantled and taken with you as a sample. New loops are selected according to the size of the previous ones. It happens that the existing holes are very loose, and it is impossible to attach new loops to them. Then they will have to be puttied with an acrylic-based composition in the color of the facade, sanded, varnished or painted, and only then drill new holes and install purchased hinges.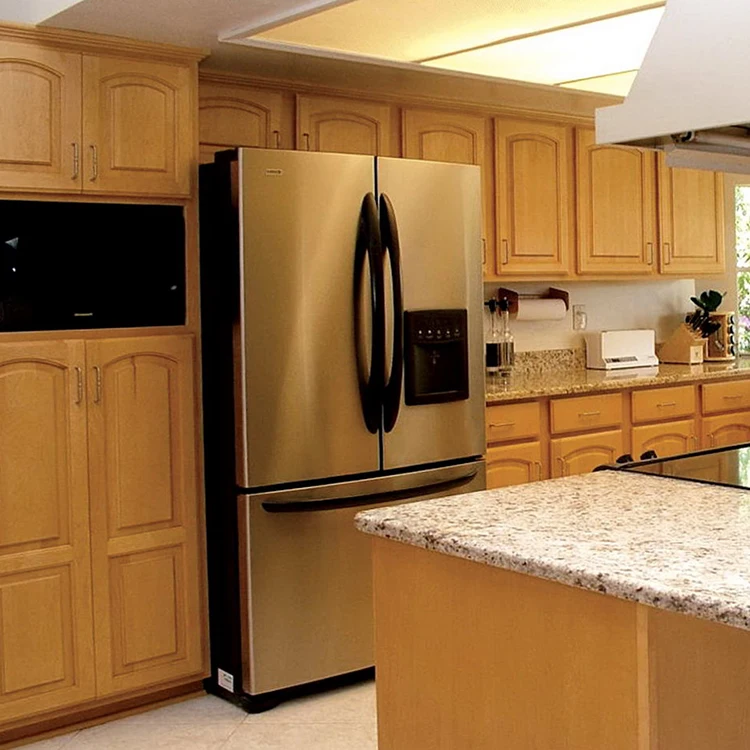 Old roller mechanisms can be replaced with ball ones. All these actions give a huge result - using the headset becomes more pleasant and comfortable.
Replacing glass
As a rule, glass inserts in facades are simply washed well to return them to their original perfect appearance. But what if you want something new? You can replace the existing transparent glass with frosted or colored glass, then the kitchen will noticeably change. True, glass will have to be made to order, and not everyone can handle the replacement itself.
A more budget option is to buy a self-adhesive film. With its help, you can give the glass the desired shade without depriving them of transparency. It will help create a matte effect or imitate a real stained glass window. Anyone who knows how to use a tape measure or centimeter tape, scissors and is able to accurately glue the film can definitely cope with gluing the film.
There is also the old-fashioned method, which involves applying a mixture of chalk powder and silicate glue to the glass.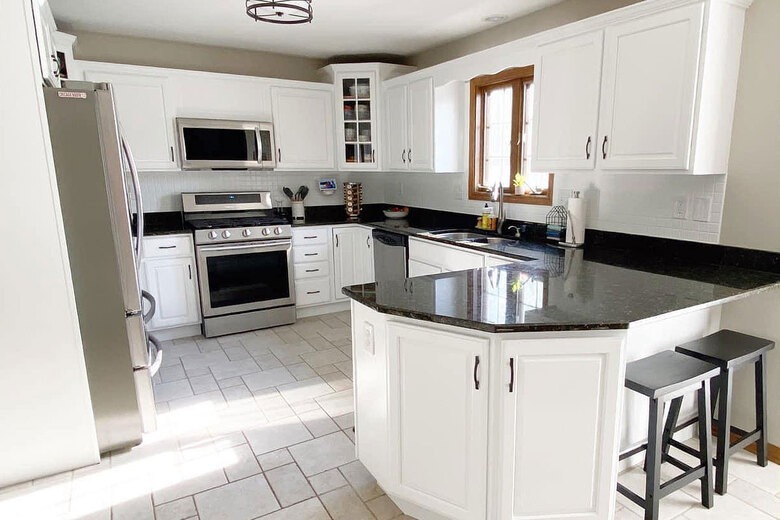 In two layers, this material is applied to the glass, after which they become dull.
Decoupage of kitchen fronts
Decoupage is a great way to update your kitchen set and give it a touch of Provence style. After the transformation, the facades will look as if talented artists painted them for you, but you will know that you made all this beauty with your own hands. Absolutely any pattern can be applied to cabinets and shelves, but usually they choose something related to plant and kitchen themes: images of fruits and vegetables, coffee, jars of spices and cereals, flowers, etc. Decoupage will help decorate the facades with ornaments in the style of Gzhel or Petrikovskaya painting. The main thing is to find a suitable drawing - no one limits your imagination.
Everyone can cope with the restoration of facades on their own:
- remove all doors, remove fittings;
- If the surface of the headset is perfectly even and smooth, then it is enough to wash it well to get rid of grease and dirt stains.
 If there are defects, it is better to sand the surface. First use fine-grained, and then coarse-grained sandpaper. If you have a grinder at your disposal, it will greatly simplify the process. In the presence of cracks, depressions, pits, it is better to fill them with putty. When it dries, the treated areas are sanded again. After that, the facades can be primed, but many skip this stage;
 - decoupage technique is suitable not only for wood, chipboard and MDF - it can also be used to decorate plastic and glass facades. Preparing them for decoration is very simple - just get rid of all the dirt and grease;
- The easiest way to use three-layer decoupage napkins. Think in advance in which part of the facade the drawing will be located. Don't use images that are too small. Different lockers can be decorated with pictures in the same style. The image can be glued to ordinary PVA glue;
- now it remains to open the facade with acrylic varnish, it is better to use 3-4 layers, each is applied after the previous one has completely dried.
 It is easiest to work with a narrow brush with long bristles;
 - it remains to return the fittings to their place and mount the facades.
If this is not your first work in the decoupage technique, then you can use not only special napkins. Experienced craftsmen know that fragments of wallpaper with a suitable pattern, and even maple for the kitchen table, will do, not to mention the fact that the image you like can be printed on a printer.
Decorating with ceramic tiles
Almost everyone has leftover tiles after repairs. A lot of material for this method will not be needed, because even buying a new tile will not hit the budget. Naturally, not all facades are laid out with tiles. A fragment with a beautiful pattern can be glued in the center. It can be one tile or four smaller tiles laid out in a square or diamond shape. Small tiles can lay out the contours of the cabinets. Often such decoration is used to decorate the lower or upper edge of the headset.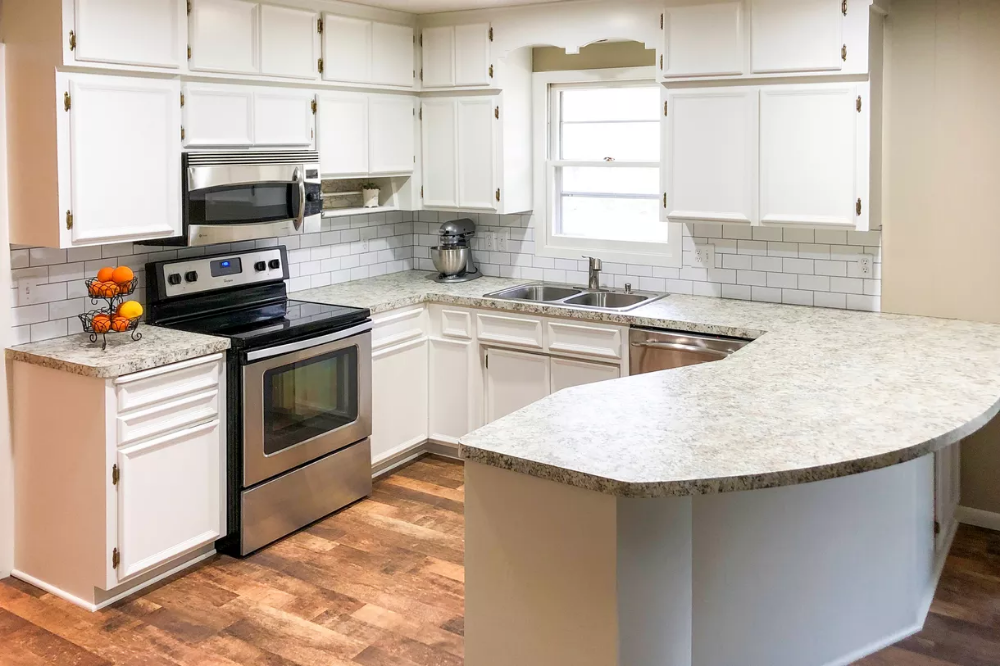 The image on the tile should match the overall style of the kitchen.
The principle of operation is as follows:
- it is better to remove the facades, dismantle the fittings;
- as a minimum, the surface must be washed and degreased with an alcohol-based compound. If desired, the facade can be painted, guided by the tips described above;
- lay the tiles on the surface in advance, determine the ideal place for them, it is better to trace them carefully with a pencil;
- prepare the tile adhesive, apply it on the facade and start gluing the tiles. The principle is almost no different from the usual installation of tiles, only glue is needed so that it can hold the tiles on a wooden (or other) facade;
- when everything is dry, you can frame the tiles with molding to make the decor look finished.
Decoration with rattan inserts
The principle is the same as with ceramic tiles. Rattan inserts will look appropriate with ethnic and eco-style.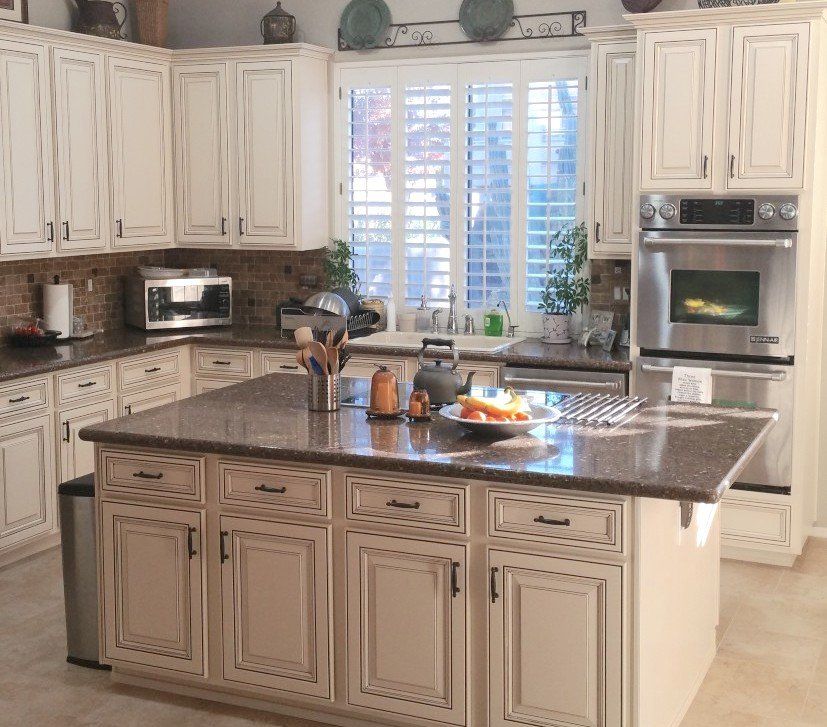 Rattan perfectly copes with the effects of moisture, therefore it is well suited for the kitchen. It can be used to replace glass inserts along with large-scale restoration of facades. Rattan inserts can be glued over blind cabinets. A variety of weaves and the presence of several shades will allow you to choose the appropriate insert option.
It is easy to work with rattan:
- a fragment of the desired shape and size is cut out, you can use secateurs or metal scissors;
- the section can be stapled to the facade;
- Wooden planks pre-treated with an antiseptic are mounted around the perimeter of the insert. You can use glue;
- with rattan, the main thing is not to overdo it - small inserts on the largest cabinets will be enough to bring the necessary notes into the interior.
Use of chintz
Fabric decor is rarely used, because this is your chance to make the kitchen unique. You will need a piece of fabric with a suitable pattern, and then everything is simple:
- the beginning, as always, is to dismantle the facades and fittings;
- cupboards are measured, the fabric is cut out and glued on pre-washed and degreased facades;
- facades are covered with a colorless varnish in 5-7 layers, it will protect the fabric from moisture, grease and odors;
- it remains to return the fittings to their place, and you can purchase new, more suitable handles;
- An interesting effect can be achieved by making a lampshade from the same fabric, or by sewing chair covers.
What else is used to update kitchen facades?
The fantasy of home craftsmen knows no bounds, and folk ingenuity has generated a lot of interesting non-trivial ideas on how else to ennoble an old kitchen facade. The following materials are used for this:
- Vinyl stickers, the range of which impresses even experienced designers. Monochrome boring facades can be decorated with animal figurines, world landmarks or inspirational phrases. Gluing and removing such decor is very simple;
- sea pebbles and mosaics are glued like ceramic tiles, creating interesting decorative effects;
- wooden decor. There are ready-made kits for children's creativity, but with skill, you can cut wooden figures yourself. It remains only to open them with varnish and glue them to the facades. This decor looks best on wooden facades.
How do I update my kitchen worktop?
Renewing facades and leaving the countertop unattended means not finishing what you started.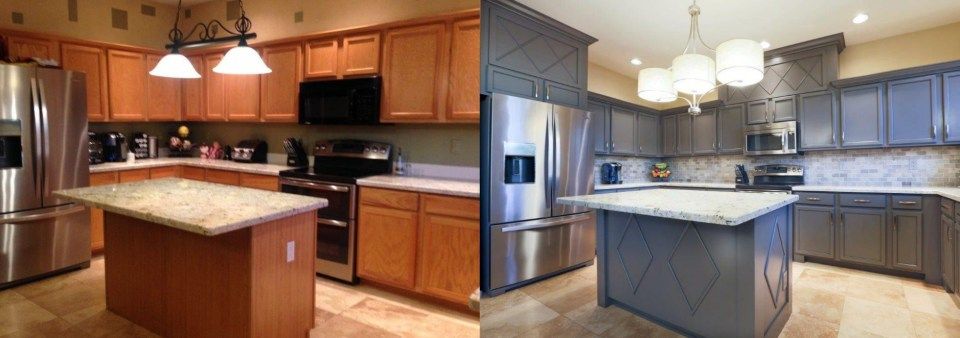 The countertop is the most vulnerable point of the kitchen set, because its surface constantly encounters drops of water and fat, mechanical stress, and high temperature. Chipboard countertops are usually the first to suffer, and when the facade looks even more or less normal, the work surface leaves much to be desired.
What can you do to update your kitchen worktop? Several options:
- glue the vinyl film . The option is not very durable, but simple;
- carry out varnishing – method for wooden worktops;
- painting is carried out according to the principles described above;
- tiling , and usually tiles are used in the color of the one with which the kitchen backsplash is lined. The tile is easy to clean, not afraid of moisture and high temperature, relatively easy to install. The weight of the headset, however, will greatly increase. If the frame is weak, then it may not withstand.
 They begin work by attaching a metal corner around the perimeter of the tabletop. The tiles are laid on ordinary tile adhesive, the gaps are made minimal. The glue dries quickly, so it’s best not to cover the entire countertop with it at once. It remains only to wipe the seams and open the tile with a protective layer of varnish. Work in a similar way with mosaic ;
 - tempered glass finish , under which you can use anything: sand and small pebbles, coins, cork pieces, drink bottle caps, a printed image of a beach, forest or some kind of pattern. Glass is planted on glue and firmly protects the entire decor from negative influences.
If the worktop is still in good condition, but has only one or two noticeable flaws (for example, burnt spots or stab spots), you can carry out local repair. The defective area is carefully machined with a cutter to end up with a quarry-type depression. It is filled with putty on wood in the color of the countertop, the material is added in portions, well tamped, the excess is removed with a knife.