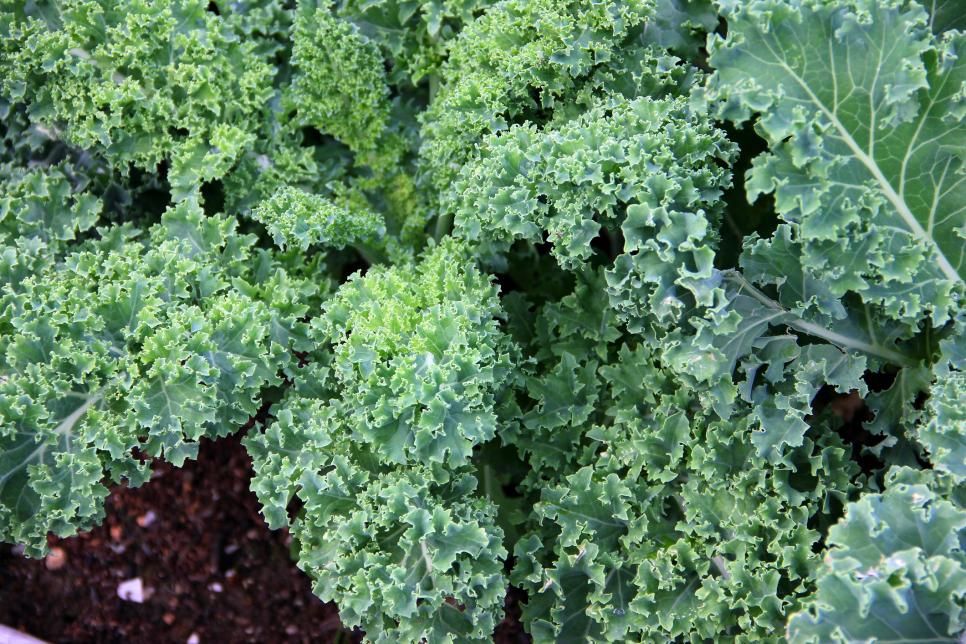
Where to plant kale
Guide to Plant, Harvest & Use Kale ~ Homestead and Chill
Kale is one of the most popular dark leafy greens around, prized for its high nutrient-density and numerous health benefits. WebMD even refers to kale as a superfood! Of all the “grow guides” we’ve published here, I’m not sure why it’s taken me so long to write about how to grow kale… After all, it is one of our favorite versatile veggies – and also quite straightforward to grow!
In this article, you’ll learn everything you need to know to grow kale at home – from seed (or seedling) to table. We’ll explore the optimal conditions and time of year to grow kale, ways to extend the growing season, and different varieties of kale to grow. Tips for ongoing care, potential pests, and how to harvest, use, and preserve kale are included too!
Ready to grow kale? (The correct answer is kale yes.)
Disclosure: This post may contain affiliate links to products for your convenience, such as to items on Amazon. Homestead and Chill gains a small commission from purchases made through those links, at no additional cost to you.
When to Grow Kale
Kale grows well in a temperature range from 35 to 75 degrees, but is happiest between 60 to 70°F. It is generally considered a ‘cool season crop’, like its fellow members of the brassica plant family, such as cabbage, cauliflower, and broccoli.
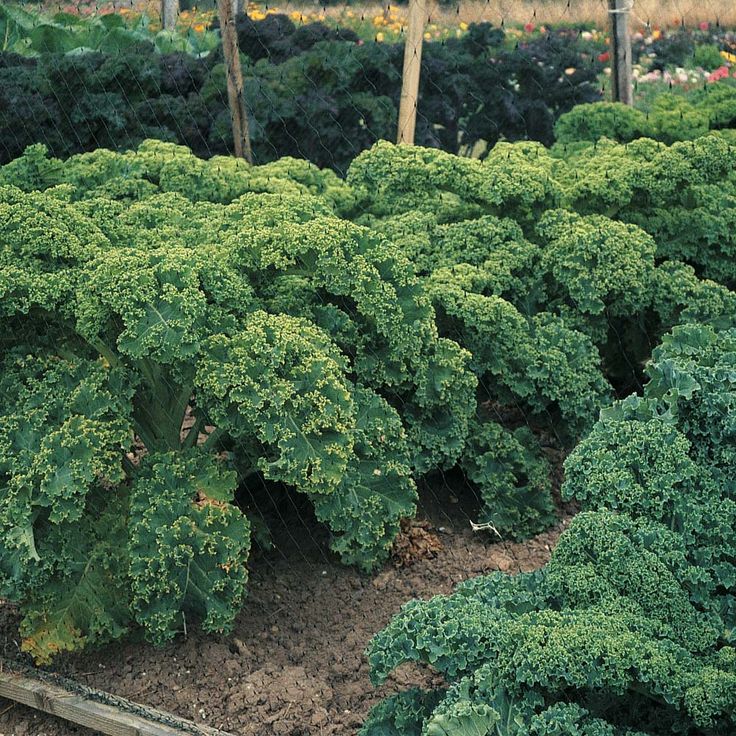
In most locations, kale has two distinct growing seasons: spring and fall. Yet in moderate climates with only mildly warm summers or little-to-no winter frost, kale can continue to grow for up to a year, or longer! Kale grows exceedingly well as a fall crop in many regions – where there is a longer period of cooling weather ahead. That is because kale is less tolerant of extreme heat than it is of cold.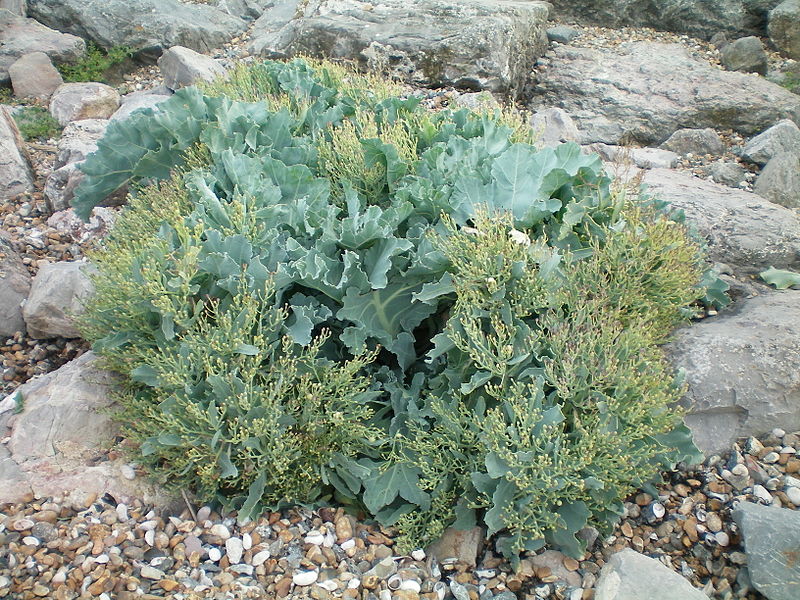 In fact, kale leaves taste better in colder weather, and develop a sweeter flavor after a kiss of frost!
Hardy kale grows longer into the freezing winter months than most leafy greens, said to withstand temperatures down to 10°F. In most locations, kale can be left in the garden all winter! On the flip side, brutal heat can quickly cause kale to “bolt” – or begin to flower and go to seed. Once that happens, the leaves decline in quality, size, and also become more bitter. Note that fall-planted kale that have grown through winter may be triggered to bolt by the lengthening daylight hours of spring, even if temperatures are still cool.
Planting Kale: Seeds or Starts
You can grow kale by sowing seeds directly outdoors, or by planting seedlings – either nursery seedlings, or ones you start indoors yourself. The exact time to plant kale depends on your climate, and if you’re starting with seeds or seedlings. If you don’t have one yet, grab a planting calendar here to help guide your timing – they are available for every USDA hardiness zone!
As a general rule of thumb, plant kale seedlings outside in late winter to early spring, as early as 3 or 4 weeks before your last average frost date.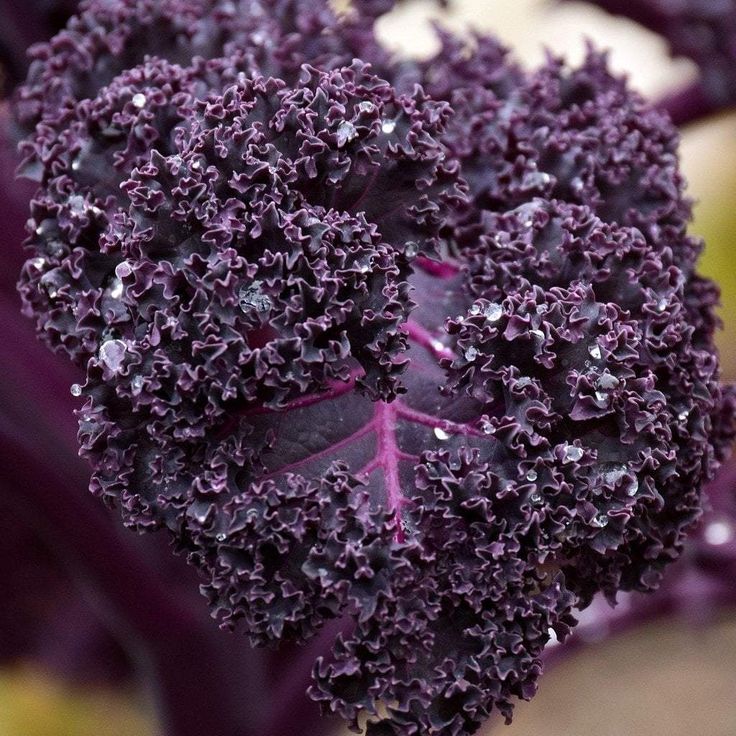 Seeds can be started indoors even a few weeks earlier. Protect tender young seedlings from hard frost after planting with frost cover or cloches.
For a fall harvest, plant kale 6 to 8 weeks before your zone’s first average fall frost date. In most places, that means late summer. Yet places with moderate winters (zones 8, 9, and 10) can plant kale later in the fall and even into winter.
Sow kale seeds in light, well-draining soil about ¼ to ½ inch deep. Maintain consistent moisture during germination. If you’re starting them inside, be sure to provide ample light to avoid tall, leggy seedlings. Directly sowing seeds outdoors can lead to less rapid and consistent germination. Tiny sprouts are also more susceptible to pests outdoors. See this guide for more tips on starting and raising seedlings indoors.
When planting kale seedlings outdoors, space them approximately 12 to 18 inches apart. As long as they’ve been properly hardened off, the stem of tall seedlings can be buried up to their first set of leaves. Water well after planting.
Optimal Kale Growing Location
Soil Conditions
Kale thrives in moderately rich, cool, consistently damp soil. The soil should also be well-draining. It is not an incredibly ‘heavy feeder’, though it is best to amend the soil with well-aged compost and/or a well-balanced natural fertilizer before planting kale. Ample nitrogen, phosphorus, potassium, minerals, organic matter, and beneficial microbial activity within the soil will lead to the most robust kale plants possible. If you’re growing kale in a container, be sure to use one that can drain freely.
Sun
Kale grows best in full sun to partial shade. Plan to provide your kale plants at least 6 to 7 hours of direct sun per day.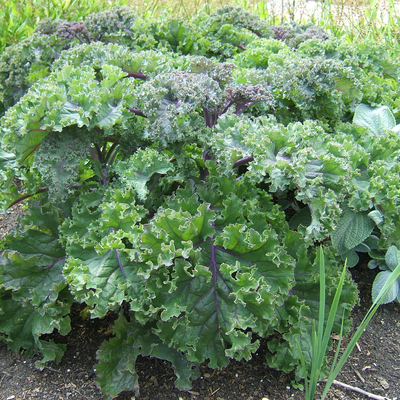 If you’re growing kale in the spring with hot summer weather on the horizon (regularly over 90°F), consider a planting location that receives some afternoon shade. That added protection (along with choosing the right variety) will help your kale survive longer before it ‘bolts’ and goes to seed. During the increasingly dark days of fall, the more sunlight, the better! I also try to keep kale along the back (north side) of garden beds since it can quickly become tall and shade out smaller, shorter plants.
Kale Varieties
There are a handful of general kale types, and within those groups, dozens of unique cultivars to choose from. Our trusty go-to is lacinato kale, though we grow other types too. Experiment and grow a few different varieties to see what you like and what does best in your climate!
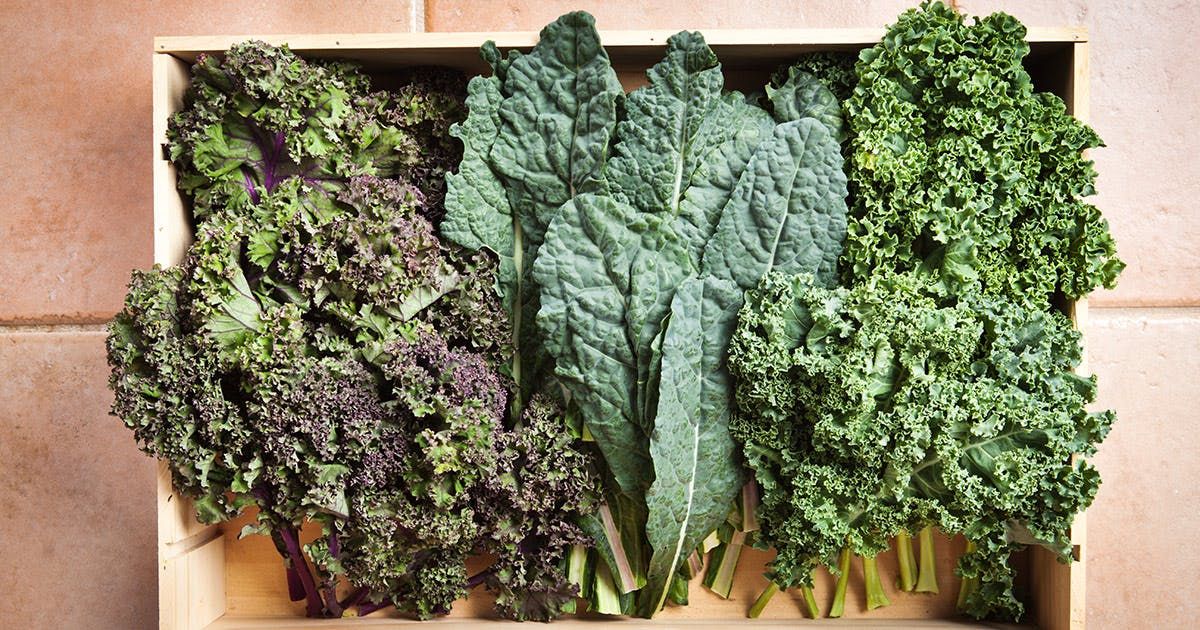
- Curly Kale – Light to medium green leaves with deep frills. Curly kale is common in grocery stores. These compact, prolific kale plants have superior cold-tolerance. A few curly kale varieties include Blue Curled Scotch, Dwarf Blue, Vates, Winterbor, and Redbor – a beautiful deep burgundy-purple curly kale.
- Lacinato or Tuscan Kale – An Italian variety of kale with long, large, narrow leaves that are dark green to bluish in color. Because of the bumpy, scale-like appearance of the leaves, lacinato kale has also been dubbed “dinosaur” kale – or simply dino kale. You may also hear it referred to as cavolo nero or black kale. Of all the kale varieties, Tuscan kale is most likely to grow several feet tall – eventually looking like a mini palm tree. The flattened leaves are ideal for making kale chips.
 Varieties include classic Tuscano, extra-dark Black Magic, or purple-veined Dazzling Blue – our personal favorite.
- Russian Kale – Generally have wide, mostly flat leaves with fringes around the edge – resembling the shape of large arugula or oak leaf lettuce. Some say Russian kale is the sweetest and the best-tasting type of kale. It can also remain more tender than some other types, even as leaves become quite large. There are a few cultivars of Russian kale: Green Russian, White Russian, and the most popular, Red Russian.
- Portuguese Kale – Hailing from the Mediterranean, this lesser-known type of kale has large, wide, flat paddle-like leaves with thick white veins. It is more reminiscent of collard greens than the quintessential kale we all imagine. Also akin to collards, Portuguese kale is more heat tolerant than other kale varieties. A few Portuguese kale varieties include Tronchuda and Beira, and is sometimes also referred to as Portuguese cabbage or sea-kale.
 A staple for traditional Portuguese kale soup.
 - Other: There are many more varieties of kale, including unique hybrids and heirlooms. For instance, ‘Madeley’ kale is another one of our other favorites, but doesn’t fall into the categories above. Ornamental kale is widely used in fall and winter landscaping, but is also technically edible.
Ongoing Care
Water
Kale grows best when it is provided consistent and moderate water. Aim to maintain the soil damp at all times – never soggy, but never dried out. Soil within pots tends to dry out more quickly than raised beds or in-ground gardens. Therefore, container-grown kale may require more frequent watering. Add mulch to the soil surface to aid in moisture retention, and also to buffer the soil and roots against temperature swings.
Fertilizing throughout the season
Before planting, amend the soil with compost and mild, slow-release fertilizer. Soon after transplanting, we typically water our seedlings with a dilute seaweed extract to give them a gentle nutritional boost as well as overcome any potential transplant shock. As the growing season continues, we transition to watering the garden beds with homemade compost tea (made from worm castings) once every few months. For especially long-lived kale, apply a fresh top-dressing of compost mulch once the plants reach 6 months old (if you intend to keep them around a bit longer).
Extending the Season
There are a number of ways you can extend your kale growing season, be it into the warmer summer months or through the depths of winter. The first step is to choose varieties that are best-suited for your climate and the season you’re intending to grow kale.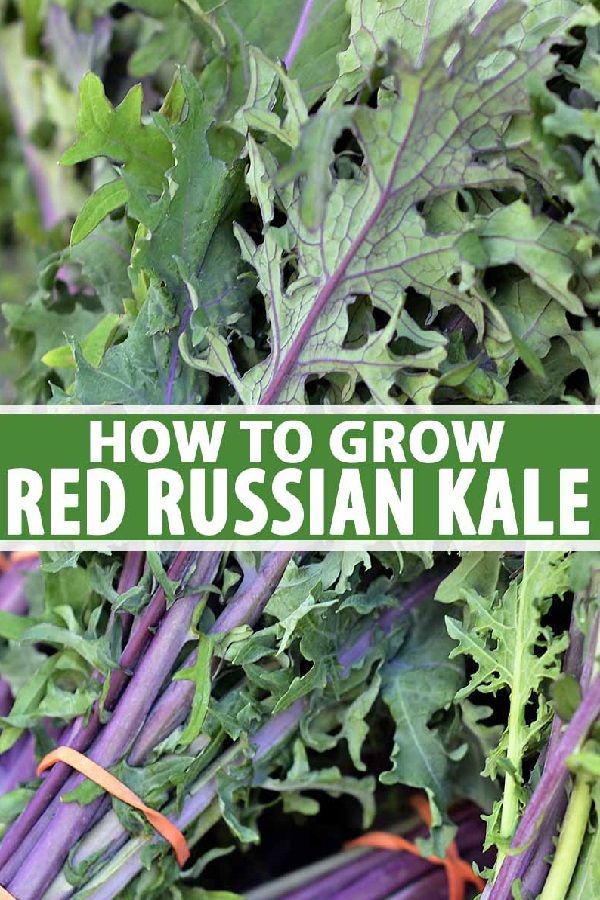 For example, Premier and Portugese kale are known to be some of the most heat-tolerant types. Therefore, they’re slower to bolt in the warming weather after spring planting. We have also found Dazzling Blue to be fairly heat tolerant.
While established kale plants can withstand some frost and snow, young seedlings are more sensitive and need protection. For instance, by covering them with dome cloches, frost row cover, bedsheets, plastic row cover supported on hoops, or other similar methods. Even mature kale plants will also appreciate a little added frost protection for extended cold periods, which can increase their winter lifespan in the coldest climates.
Related: Using Hoops and Row Covers for Pest Control, Frost Protection and Shade
You can find our metal garden bed hoops here, which can be used to support either insect netting, frost cover, or shade cloth to protect the crops below.Harvesting Kale
Days to harvest: 30 days (baby greens) 50-65 days plus (mature leaves)
I could be mistaken, but I think this is where some people may ‘go wrong’ with their kale. The thing is, kale LOVES to be harvested! Often, and in small amounts. The more you harvest, the more it produces new leafy growth, and the taller and larger it becomes – so don’t hold back! Also, kale leaves left to sit on the plant become increasingly tough over time.
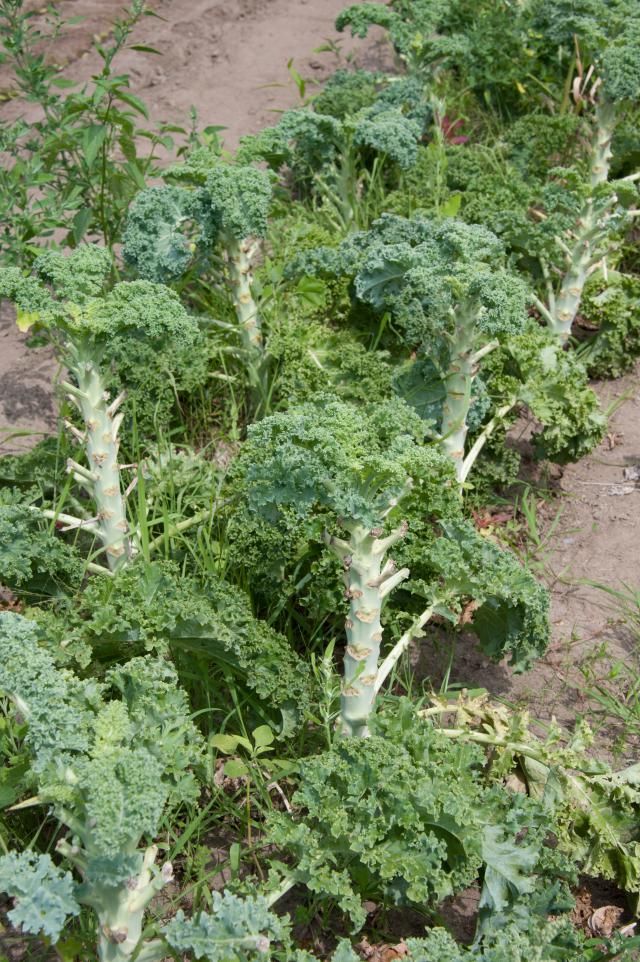
The best way to harvest kale is with the ‘cut and come again’ method – by removing a few of the oldest leaves on the plant each week (or as needed). The oldest leaves are those on the bottom, outermost portion of the stem – closest to the soil rather than the center of the plant. Either cut or carefully tear off individual leaves from the main stalk. You can start this process early, harvesting baby greens while the kale seedlings are young. Always leave behind at least a handful of leaves. The plant needs those to photosynthesize and continue to grow!
Unless you’re done with the plant for the season, never cut the whole thing down like a head of lettuce! It won’t grow back.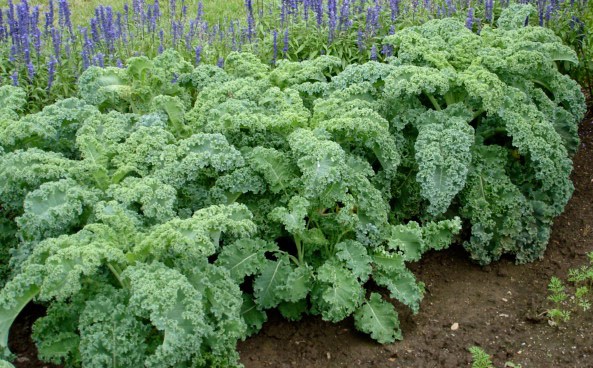 Also, avoid harvesting leaves from the center of the plant. That is where new leaves grow from, called the terminal bud. If you cut the terminal bud, the kale will stop producing new leaves – or create branching offshoots and only small new leaves instead.
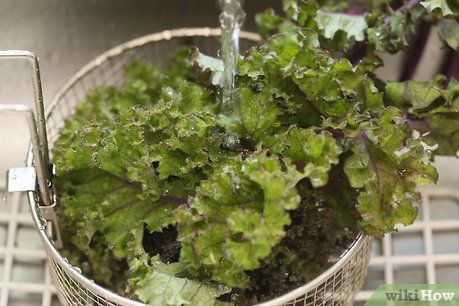
It is best to harvest kale in the morning, or any time the weather is cool and the plants are most perky. Then, store the leaves in an air-tight container or bag with a tiny splash of water to prevent them from wilting. We don’t wash our kale until we use it.
Related: How to Harvest Kale and Leafy Greens (with demo video)
Going around to all these young kale plants to remove the bottom several leaves from each stalk. A handful of large mature kale leaves. Always harvest leaves kale from the underside of the “head” and they’ll keep getting taller! If you look closely, ever notch along the stalk represents a leaf that was previously harvested.Common Kale Pests
The most common pest insects that fancy kale include cabbage worms, flea beetles, harlequin bugs, and aphids.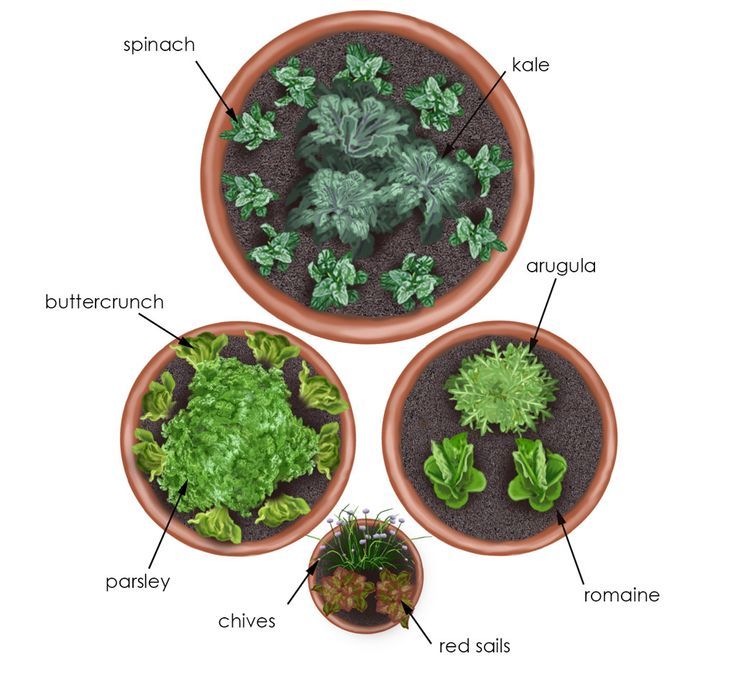 The first three will cause holes or lacing in the leaves, while sap-sucking aphids cause curling leaves. Kale pests often hide on the underside of leaves, or in the center cluster of new growth. Slugs, snails, or soil-dwelling pests like cutworms may go after small seedlings, which are also prone to damping off (or sudden seedling death).
The most common fungal diseases to inflict kale are powdery mildew and downy mildew, presenting itself as white or yellow fuzzy blotches. Finally, root-knot nematodes may also attack kale roots in the soil. Inflicted plants may be stunted, deformed, and have tell-tale knobby roots.
This list may sound a tad daunting, but we generally find our kale to be fairly resilient. Our greatest struggles here are aphids and cabbage worms, but both are easy to control in an organic manner – especially if you practice proactive prevention, or catch the problem early!
Organic pest control methods we use include covering crops with insect netting, companion planting, routine inspections and hand-picking pests, blasting aphids off with water, and hand picking cabbage worms.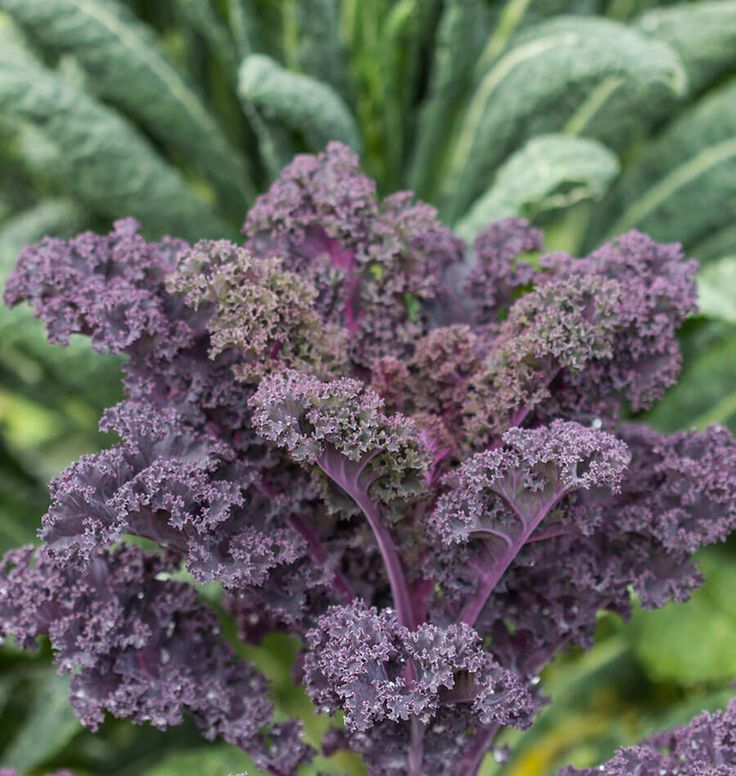 Occasionally, treat with DIY soap spray (for aphids) or bacillus thuringiensis (for caterpillars) if the infestation is more advanced. While neem oil can be handy for the foliage of tomatoes and squash plants, I personally do not like to use neem oil on our leafy greens since it does leave a bit of an oily residue behind.
Related:
- Organic Aphid Control: 9 Ways to Get Rid of Aphids
- How to Prevent and Treat Powdery Mildew Organically
- Companion Planting 101 (with Garden Companion Planting Chart)
- 8 Organic Ways to Get Rid of Cabbage Worms or Cabbage Moths
- Homemade Insect Soap Spray Recipe (for aphids, mealybugs, mites and more)
- How to Properly Emulsify, Mix and Use Neem Oil Spray
Eating & Preserving Kale
Enjoy kale fresh and cooked
Kale is one of the most versatile veggies you can grow.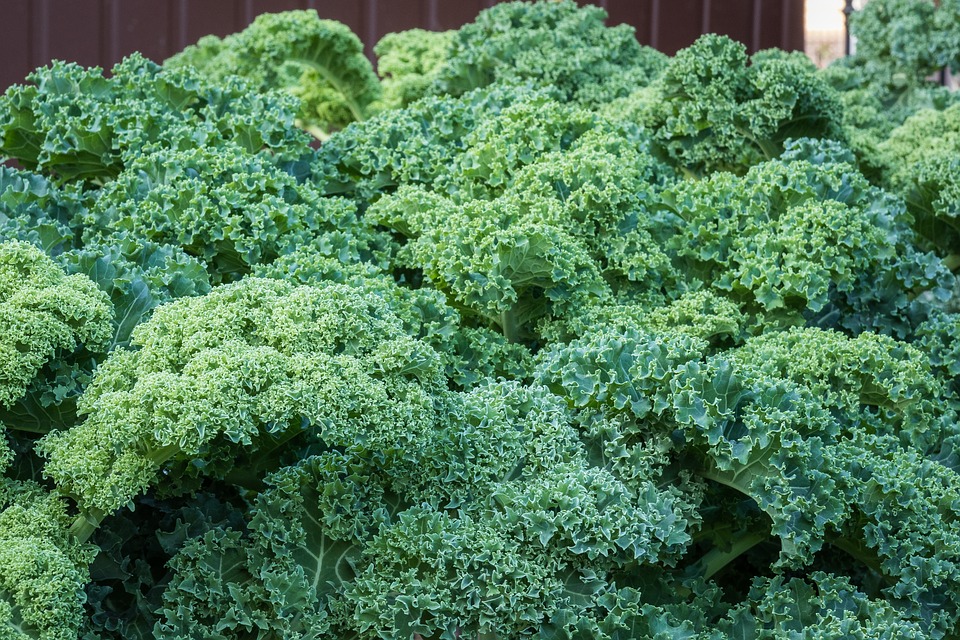 We eat kale dang near every day! In salad, soup, smoothies, sauerkraut, roasts, stew, chili, frittata, quiche, with eggs… you name it. Basically, you can chop up some kale and toss it in just about anything!
Baby kale leaves are perfectly tender to use raw in salads. To soften more mature kale leaves, give them a good massage first. Then they’re ready for salads or other raw use too! To enjoy cooked kale, we love to simply sauté it – with a little splash of olive oil, a sprinkle of salt and pepper, and sometimes a bit of garlic and onion. It is wonderful on its own, or with other seasonal vegetables.
Making homemade kale chips is a fun and particularly delicious way to eat kale! You can make them in a food dehydrator or the oven, and doll them up with seasonings of choice. Even the kids love them! See our recipe for crispy kale chips here. When done right, they will stay crunchy for a week!
De-stemming kale
The most tough part of a kale leaf is the fibrous stem, so we typically remove it. ( (That is, unless it’s going into soup or something that will cook for a long time to soften it.) The quick and easiest way to de-stem kale is to hold the end of the stem in one hand, pinch the base of the leafy portion with the other, and then simply pull them in opposite directions – stripping the leaf away.
Ways to preserve kale
I’ll admit that we consume most of our kale fresh or cooked, and don’t preserve a great deal of it. But there are still a few ways to do so if you desire! If you’re into fermenting, check out our Super Greens Sauerkraut recipe. I don’t recommend using kale alone though, as it can become too soft by itself in kraut. It is awesome in combination with cabbage, bok choy, or other more crisp, crunchy greens.
You can also freeze kale for later use. The texture won’t be great for eating raw once it defrosts, but is the perfect addition to soup, smoothies, or stew.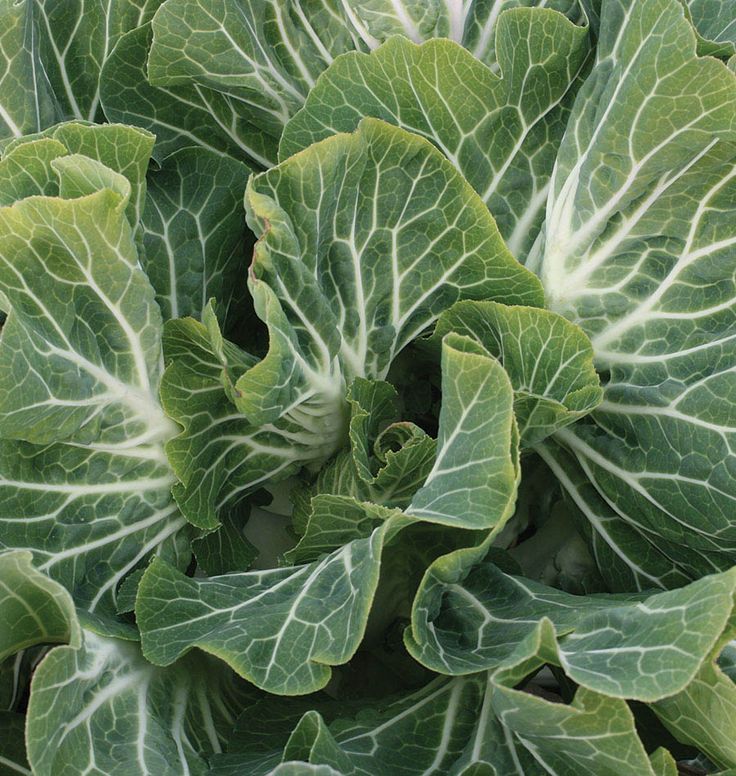 Wash, de-stem, and cut or tear the kale leaves into chip-size pieces or smaller. Then get them as dry as possible either using a salad spinner, patting them dry, or a good old-fashioned extended air dry. Package the kale in desired portions in freezer-friendly containers such as ziplock bags or reusable silicone bags like these. Keep in mind that it will likely clump together, so portion it in a way that fits your intended use.
My personal kale tree model. This dazzling blue lacinato kale plant grew and fed us for 10 months, reached 9 feet tall and almost 4 feet in diameter.
Got it? Now, peas don’t kale my vibe.
All in all, kale is a fun, easy, and rewarding crop to grow. You can grow kale in any climate, especially once you figure out the best variety and time of year. I hope you picked up some valuable tips on growing kale today, and have a kale-r harvest in your future! Please feel free to ask any questions, and spread the kale love by sharing this article.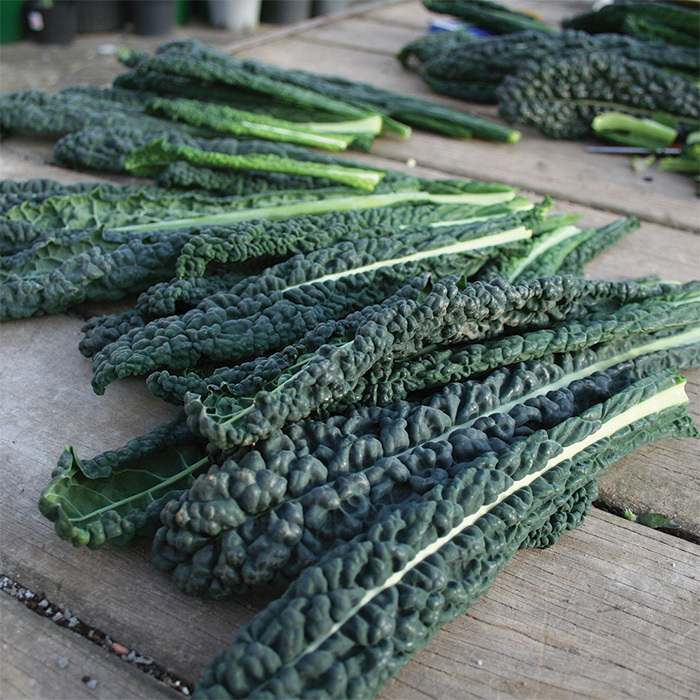 As always, thank you for reading!
How to Plant and Grow Kale
Cold-hardy and resilient, kale is an easy member of the cabbage family to grow. You can set out plants quite early in spring as long as you protect the young plants from severe cold winds with a cover. They will grow steadily for months until the weather gets too warm. You'll get a second chance to plant kale in the fall, when cool weather brings out a wonderfully sweet, nutty flavor that is unique to these cold-natured plants.
Fall is the best time for growing kale in areas where winter doesn't dip below the teens, or in a cold frame farther north, because the leaves are sweeter when they mature in cooler weather. In the kitchen, kale can be steamed, stir-fried, or substituted for spinach in omelets, casseroles, or even quesadillas. It's a wonderful addition to smoothies, too, and tender young leaves make delicious salads.
Quick Guide to Growing Kale
- Plant kale 3 to 5 weeks before the last frost.
 In-ground gardens, raised beds, and containers are all excellent growing options.
 - Space kale 18 to 24 inches apart in an area with full sun and well-drained, fertile soil with a pH of 6.5 to 6.8.
- Improve native soil by mixing in several inches of aged compost or other rich organic matter.
- Kale is a fast grower, so keep the soil moist by giving it 1 to 1.5 inches of water each week.
- Get the most out of your harvest by regularly feeding plants with a continuous-release plant food.
- For nutritious kale year-round, consider an indoor, water-based growing system.
- Harvest kale starting with the lowermost leaves once they reach the ideal color and are large enough to eat. Leaves reach their peak flavor once they've been kissed by a light frost.
Soil, Planting, and Care
Set out plants in spring 3 to 5 weeks before the last frost; in late summer, you can begin planting kale 6 to 8 weeks before the first frost for fall and winter harvests, and continue planting throughout the fall in zones 8, 9, and 10. Be sure to choose kale starter plants from Bonnie Plants®, so you know they'll be strong and vigorous.
Kale grows best in full sun, but will tolerate partial shade as well. Plants that receive fewer than 6 hours of sun daily will not be as stocky or leafy as those that get ample sun, but they will still be plenty edible! Like collards, kale likes fertile soil to grow fast and produce tender leaves. Enrich the soil with compost and fertilizer before setting out the seedlings. Apply fertilizer and lime according to test recommendations. If you forgo the soil test, work nitrogen-rich amendments such as blood meal, cottonseed meal, or composted manure into the ground before planting.
The soil pH should be 6.5 to 6.8 to discourage clubroot disease, although the plants will grow fine in a pH of 6.2 to 6.8 if clubroot is not a problem in your garden. To be sure about your soil pH, test the soil with a do-it-yourself kit, or by using your regional Cooperative Extension office. If that seems too complicated, you can simply improve your existing soil by mixing in a few inches of Miracle-Gro® Performance Organics®All Purpose In-Ground Soil with the top layer.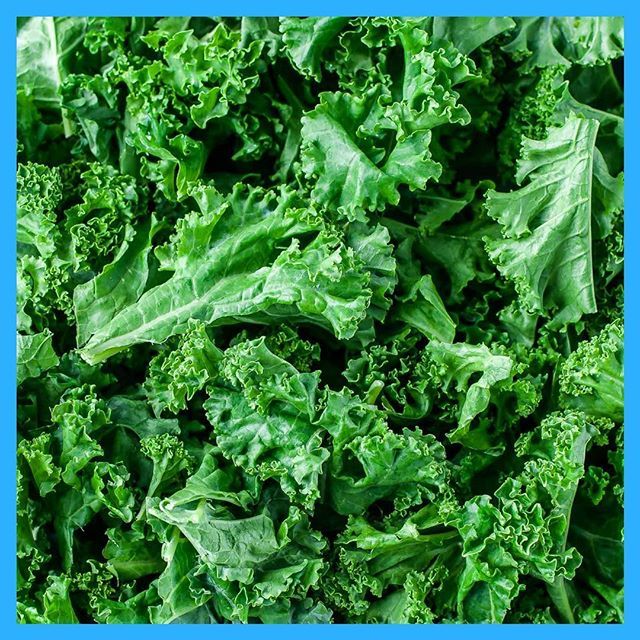 Enriched with aged compost, it will improve both the texture and nutrition of the native soil.
Kale is easy to plant, and grows beautifully in both raised beds and containers. To create the ideal growing environment for the plant roots, fill raised beds with 100 percent organic Miracle-Gro® Raised Bed Soil and containers with Miracle-Gro® Performance Organics® All Purpose Container Mix. Set plants at the depth at which they are growing in the container. Space them 18 to 24 inches apart. The leaves will grow bigger if given a lot of space, but smaller leaves tend to be the most tender. After planting, water plants well. Plants grow best when they have access to both great soil and a continuous source of nutrition, so apply a water-soluble fertilizer such as Miracle-Gro® Performance Organics® Edibles Plant Nutrition regularly for excellent results.
At this point you may need to be patient, because spring-planted kale may stay small until slightly warmer soil temperatures trigger vigorous growth.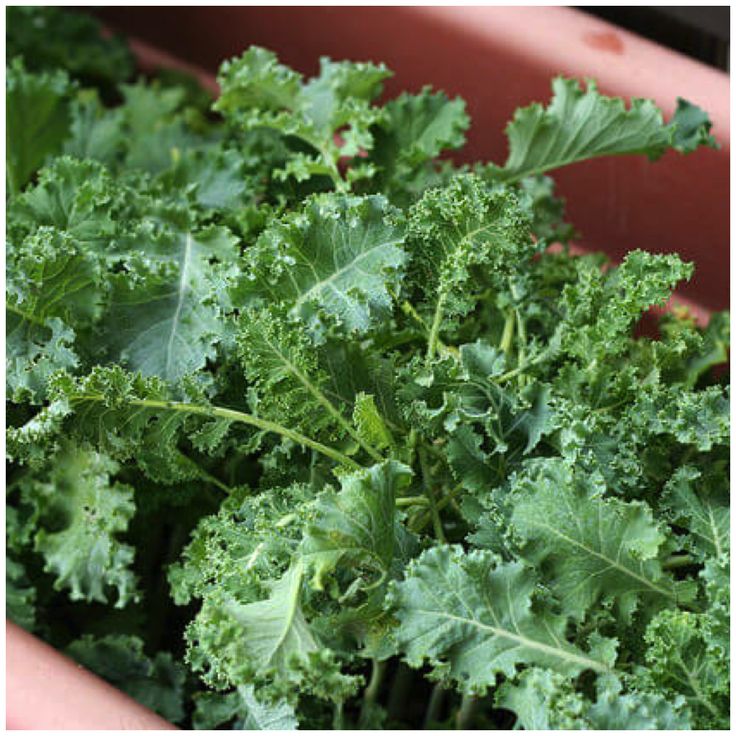 Kale planted in late summer or early fall may sulk through spells of hot weather. Then, when conditions improve, the plants will take off, quickly multiplying in size.
Kale likes a nice, even supply of water, about 1 to 1.5 inches per week. You can measure how much water rain has provided by using a rain gauge in the garden. Mulch with compost, finely ground leaves, weed-free hay, straw, pine needles, or finely ground bark to keep the soil cool and moist and to keep down weeds. Mulching will also help keep the leaves free of splashing soil for a clean harvest.
You also have the option of growing kale indoors. An easy way to do that is in a hydroponic growing system like the Miracle-Gro® Twelve® Indoor Growing System. There's no soil—plants grow directly in water that circulates around the roots, delivering moisture, nutrition, and air. With plenty of light courtesy of a grow light, the system provides top-notch growing conditions for kale. Best of all, you won't even have to go outside to harvest.
Troubleshooting
Kale often grows as a carefree crop, but there are several insects that like kale as much as people do. Velvety green cabbageworms often can be found chewing holes in kale leaves. The larvae of cabbage white butterflies, cabbageworms are more likely to feed on cabbage, broccoli, and cauliflower than to bother your kale.
Colourful black-and-orange harlequin bugs often show up on kale plants that are feeling the stresses of old age. Rather than fight the harlequins, most gardeners pull up and compost old plants if it is mid- to late summer. In late summer, the best way to protect young seedlings from these and other pests (like grasshoppers) is to cover them with a row cover or some other lightweight fabric, such as wedding net (tulle). The covers can be removed in mid-fall, when pest populations usually drop dramatically.
Watch for outbreaks of gray-green cabbage aphids, which often gather in clusters within the folds of frilly kale leaves. Treat small problems with insecticidal soap. Pick off and discard badly infested leaves.
Harvest and Storage
Like collards, kale leaves are sweetest in the fall, after they've been touched by a light frost. Pick the oldest leaves from the lowest section of the plants, discarding those that appear yellowed or ragged. Pick your way up the stalk, taking as many leaves as you like, as long as you leave at least 4 leaves intact at each plant's top (or growing crown). Kale will produce new leaves all winter in zones 7 to 10. In climates where hard freezes are frequent, kale often survives winter with additional cold protection from thick mulch, row covers, or plastic tunnels. Overwintered plants will eventually bolt (producing yellow flowers) in spring, signaling that it's time to remove them and make room for other crops. Wash the leaves thoroughly and store them in a plastic bag. You can eat the stems or discard them—it's up to you. If you cook the kale, the stems will become more tender. Kale leaves will keep for several days in the fridge in a loose plastic produce bag.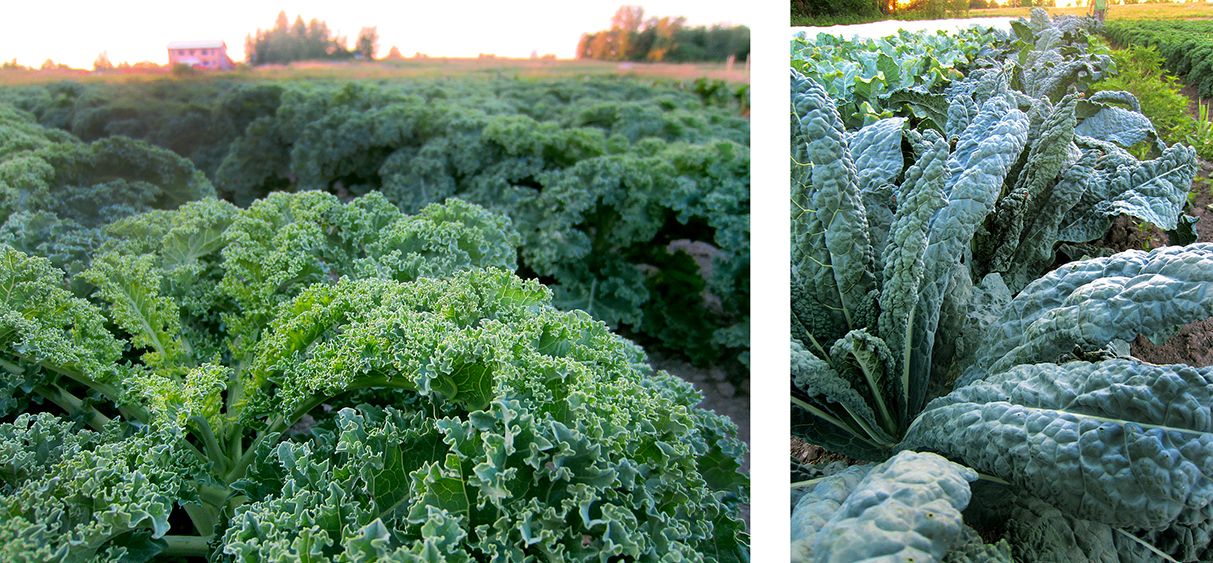
FAQs
Should I harvest leaves when they are young or wait until they grow larger?
It depends. Young leaves work great for salads, but if you're planning to cook the greens, let leaves reach full size. Pick the largest leaves from the bottom and outside of the plant. Avoid picking or damaging the center of the plant where new leaves arise.
How long can I expect to harvest kale?
For many months. You can pick spring-planted kale all summer, but leaves may get tough and bitter when heat arrives.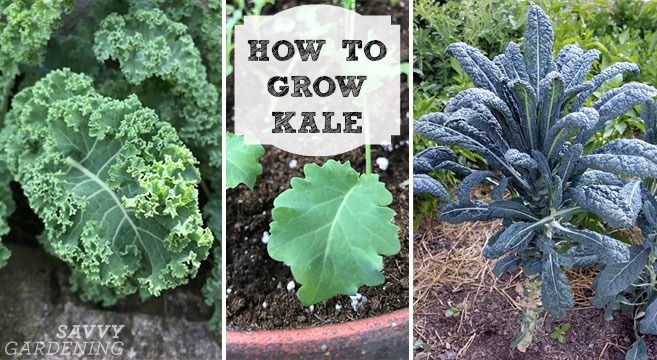 Quality improves again in fall and plants continue growing even winter in mild climates. Frost makes them taste sweeter, and plants are cold-hardy at least to the low 20s. The following spring, though, they will bolt. The same is true for fall-planted kale. Winterbor is an especially cold-hardy one that works well in cold weather. Gardeners in cold climates can enjoy it through winter in a cold frame.
Is there anything I can do to help kale leaves stay sweet?
Warm weather can make kale bitter and tough. While cool temperatures are the key to sweet leaves, you can help keep roots cool by mulching around plants. Making sure plants remain well watered also improves leaf flavor.
I picked kale last week and the patch still looks sparse. Is there anything I can do to jump-start growth?
Fertilize during the growing season for a steady supply of leaves. You can side dress plants with compost or blood meal, spray foliage with diluted fish emulsion, or water with a liquid fertilizer like Bonnie Herb & Vegetable Plant Food.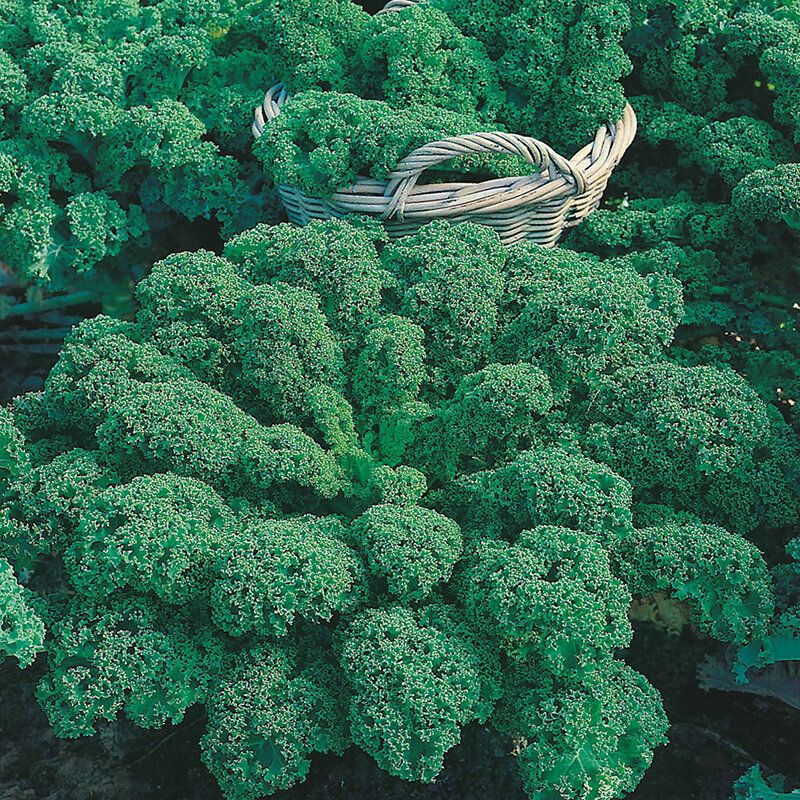
How long can I store harvested kale?
Kale stays crisp in the refrigerator for up to two weeks. Store it in an unsealed plastic bag with a damp paper towel.
Frost is predicted. Should I pick all the kale and store it?
Frost actually sweetens kale. This is the most cold-hardy of all vegetables and will take quite a few of the early frosts before a hard freeze, or "black frost" as it sometimes called, kills it in colder regions. In zones 7 and warmer it often continues to produce leaves all winter long.
Green worms are eating my kale. Can I spray anything that will kill the worms without hurting my family or pets?
Cabbage worm likes to eat kale. If you've noticed a white moth fluttering among the plants, that's the source of your worms. Spray kale with Bacillus thuringiensis (Bt) to control the worms. Bt doesn't affect humans or other wildlife. Bt targets worms, which die after ingesting it. After you spray Bt, worms may take a few bites from the leaves, but they'll stop feeding and die in a few days.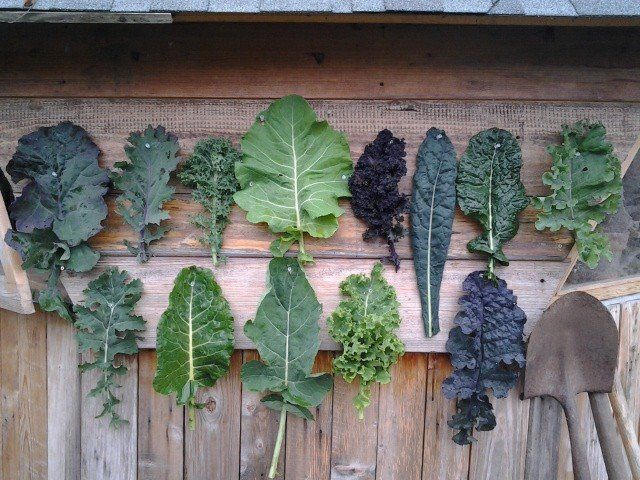 Spray any time you spot the moths among plants.
Content:
- All about cabbage
- Popular Cabbage varieties
- aggressor
- Amger
- Valentina 9000
- can be possible whether to plant cabbage in the shade
Every housewife dreams of a high yield of cabbage. Early, mid-season and late seedlings are planted in the garden. Thus, for a whole year in the diet of every person there is this storehouse of vitamins and nutrients. In summer, fresh cabbage salads will be on the table, and sauerkraut in winter.
All about cabbage
To grow this crop, seeds are first sown for seedlings. It can be grown both in a greenhouse and in the open field, but you should know if it is possible to plant cabbage in the shade. The terms of sowing seeds for seedlings depend on the terms of crop maturation:
- Seeds of cabbage of early varieties are sown for seedlings from the fifteenth to the twenty-fifth day of April.
 After forty-five days, it can be planted in a permanent place;
 - Mid-ripening cabbage is sown from the twenty-fifth of March to the twelfth of April. The plant grows in the nursery for thirty-five days;
- Late-ripening varieties should be sown for seedlings already on the twelfth of April. Grow them for a month.
Late and mid-season varieties can also be sown on the bed, but so that the seedlings do not die from the last frost, the bed is covered with plastic wrap.
The soil in the nursery must be purchased from a store or prepared by yourself. To do this, you need to take:
- a little sod land, its amount should not exceed twenty percent of the total soil;
- peat must be at least seventy-five percent;
- and only six percent of river sand.
When testing the soil for acidity, the result should be neutral. Only under these conditions will cabbage grow and give a high yield.
Sowing cabbage seeds
Popular varieties of cabbage
Where to plant marrows in the shade or in the sun
A few decades ago, cabbage seeds were harvested independently.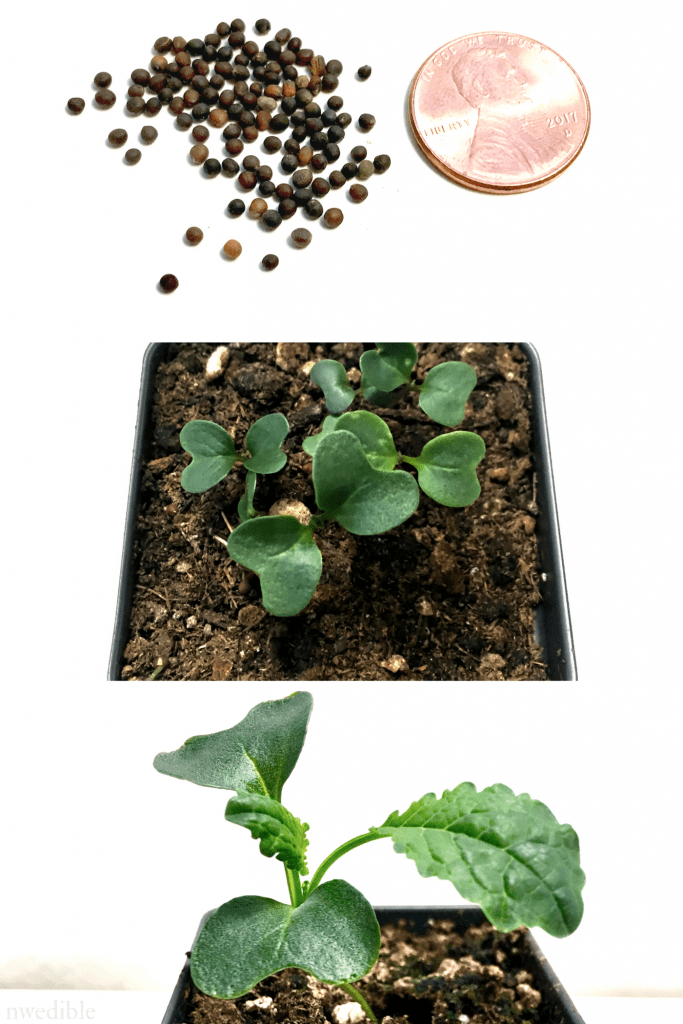 Recently, seed material has been imported from abroad. This material has good qualities, one of them is the resistance of the plant against pests and diseases.
Important! Cabbage loves moist soil, so it attracts pests and pathogens. Bred hybrids with resistance against fungi and insects are a godsend for the gardener.
As already mentioned, cabbage varieties are divided into three types:
- early;
- mid-season;
- late.
The most popular late varieties that tend to keep fresh for a long time are the following.
Aggressor
This hybrid was bred by Dutch breeders. The variety has the peculiarity of resisting Fusarium, is not afraid of fungi and does not need special care. Culture develops over a hundred and twenty days. At the same time, it can be sown directly in open ground. One head of cabbage grows up to three or even five kilograms. You can keep it fresh for up to five months. Suitable for pickling.
Cabbage Aggressor
Amager
This cabbage takes four months to reach maturity. Its one head can weigh four kilograms. Differs in good keeping quality. At the same time, it perfectly retains its presentation.
Valentine
Valentine grows no more than one hundred and eighty days. One head can weigh about four kilograms. The leaves have a slight coating, which gives them a characteristic color. It can be stored until the new season. It is not afraid of diseases and does not crack during growth.
Valentina cabbage
Moscow
This variety was bred by domestic breeders. Therefore, when creating a variety, all the features of the local climate, as well as possible invasions of pests, were taken into account. Harvest can be harvested one hundred and forty days after planting. One head of cabbage can grow up to seven kilograms and not crack during the growth period. This variety of cabbage can lie for at least eight months and at the same time retain all the vitamins and minerals.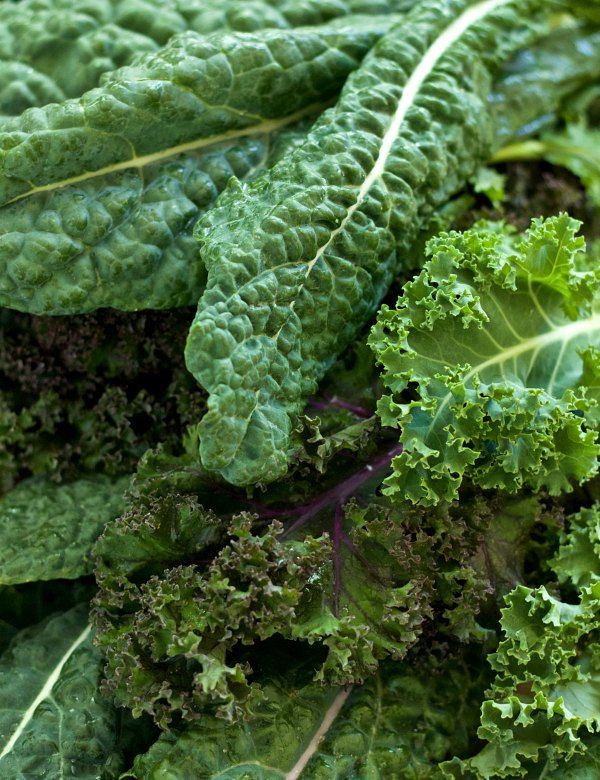
Is it possible to plant cabbage in the shade
Is it possible to plant cucumbers in the shade
Most gardeners who are just starting to work in the garden are wondering where it is better to plant cabbage in the sun or in the shade? As you know, this plant is cold-resistant, she will like the presence of light. When growing it, it is better to find out in more detail whether cabbage loves sun or shade. If it is grown incorrectly, then you can be left without a crop. Shade affects the quality of cabbage heads.
In order for cabbage to grow and develop well, it needs a lot of light. If the culture will not grow in open ground, but in greenhouse conditions, then the greenhouse must be placed in such a way that it is located from east to west. Thus, it will be illuminated as much as possible throughout the daylight hours. The room must have heating and additional lighting.
The greenhouse must not be allowed to be too hot, otherwise a greenhouse effect will be created, this will greatly harm the plant. During such a period, the humidity of the air rises significantly, which is detrimental to cabbage. In such an environment, bacteria that infect the culture like to develop.
Planting cabbage
In order to avoid such troubles, you need to create a partial shade for the cabbage and arrange ventilation. In this case, there should be no drafts. Cabbage likes to grow in a quiet, comfortable place, in a little shading. Then its growth is more active.
Important! Cabbage is very sensitive to lack of sunlight. If anyone noticed, then at a time when the weather is cloudy and rainy, the heads grow much more slowly.
Does cabbage like shade? This is a question that interests everyone. Many shade seedlings by planting them under a tree. But such an event can cause a decline in the expected yield. It is also worth noting the fact that with a lack of sunlight, the leaves of the head do not fit snugly together. Thus, heads of cabbage cannot be stored in the basement for a long time. Already in late autumn and early winter, they begin to rot and deteriorate.
In addition, proper planting planning must be done. It is necessary to take into account the fact that the plant with active growth begins to occupy a large area. Do not plant cabbage densely, very close to each other. Seedlings are planted no less than forty-five centimeters apart. Between rows should be no more than seventy centimeters.
Before choosing a place where to plant cauliflower in the sun or in the shade, you need to know the following:
- If you do not provide seedlings of cabbage with enough light, then they will not pour, but, on the contrary, will stretch out and become unsuitable for planting;
- When true leaves begin to appear, the plant stops developing;
- Every young and fresh leaf begins to wither and dry;
- The so-called growing point disappears in the cabbage, so the cabbage itself does not give a good harvest.
In order for the plant to grow and develop heads, it is necessary to give it the necessary amount of light during the seedling phase.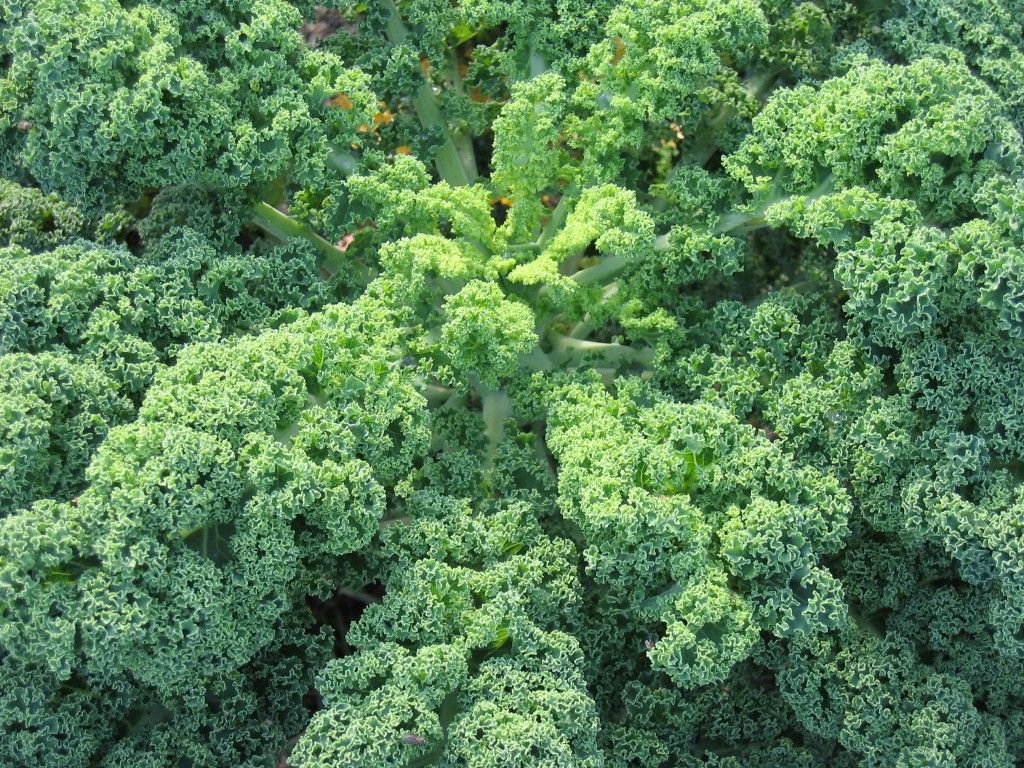 In shaded nurseries, seedlings will stretch out and, even if planted in open ground, there will be no harvest.
If the plant is shaded, then a dried earthen ball will appear on the root system. If there is too much moisture, then the plant can rot, which has a negative effect on yield. The plant can get diseases such as:
- blackleg;
- Phytophthora;
- clasterosporiasis.
It is necessary to do the right planning of planting seedlings
If there is enough light, then the pathogens of these diseases will die.
Illumination of the site by the sun affects the appearance of pests. It happens like this:
- Cabbage that constantly grows in shady areas is attacked by slugs and snails. Sunlight does not allow pests to attack the cabbage. If, however, the invasion is repeated, then it can be disposed of with the help of ash and soapy water;
- Aphids are also one of the harmful insects. Due to the aphids drunk from the juice leaves, the plant withers and disappears;
- Cabbage is still afraid of fleas.
 This insect harms the sheets.
Consider the fact that a small shadow on the plant is a good environment for the development of harmful insects.
If the question is whether cabbage can grow in the shade, it is best to plant the plant in an area with good sunlight. In addition, cabbage does not like drafts. Therefore, you need to plant it in a place where there is no wind. Otherwise, the gardener will not only not get a good harvest, but the plant will die on its own. So is it possible to plant cabbage in the shade? It is best to refrain from shady hiding.
0 0 votes
Article rating
Author:
Natalya G. VlasenkoWhere is the best place to plant cabbage
Home » Cabbage » Where better to plant cabbage
When to plant cabbage seedlings?
When cultivating vegetables, it is important to observe planting dates to ensure a good harvest.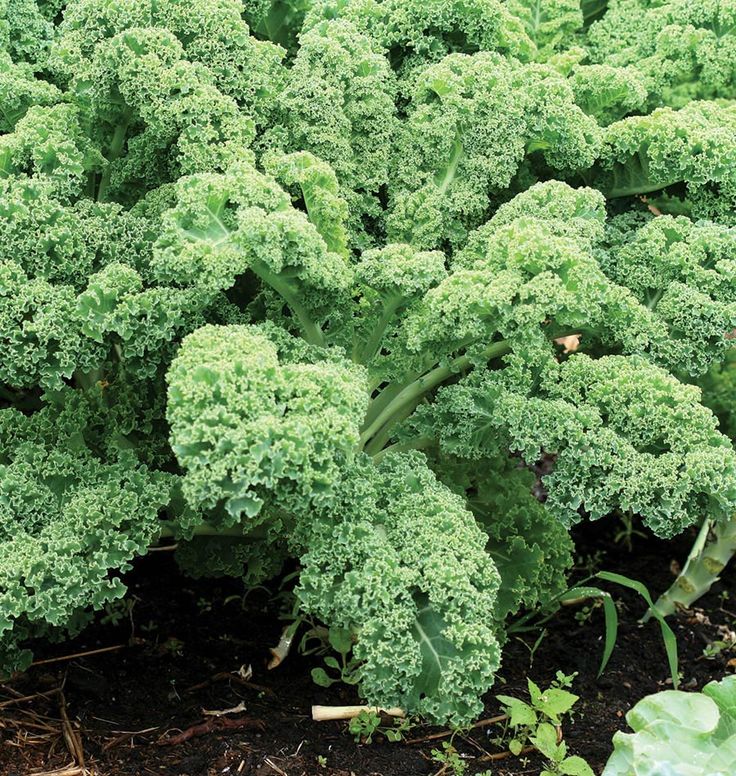 Beginning gardeners need to know when to plant cabbage for seedlings.
Terms of sowing cabbage for seedlings
When choosing the time for planting cabbage for seedlings, one should proceed from the vegetable variety. Early ripe varieties of cabbage, which are able to ripen in early July, are sown in late February or the first decade of March. Medium and late-ripening varieties should be sown at the end of March. But these are only approximate dates. When sowing cabbage seeds for seedlings, the climate in the area is also taken into account. Agrotechnicians recommend sowing cabbage 50-60 days before the intended planting of seedlings in the ground.
How to grow cabbage seedlings?
Cabbage is sown for seedlings in boxes or cups. The key to a good harvest in the future will be the quality of the seed, so large seeds should be selected. It is recommended to dip the seeds in hot water (+45 ... +50 degrees) for 20 minutes, and then hold them in cold water for a couple of minutes. Seeds are covered with a layer of soil no more than 1 centimeter. Immediately after planting, the seedlings are watered, further watering is carried out as the earth dries up. The optimal temperature in the first week is + 6 ... + 12 degrees.
Seedlings appear quite quickly - on the 3rd - 5th day. A few days later, the boxes are identified in a warm place. The appearance of the first true leaf is a signal for diving, while maintaining a distance between seedling bushes of at least 6 cm. To preserve the root system, it is better to use nutrient cubes or peat pots. The soil mixture is prepared from peat (7 parts), humus (2 parts), soddy soil and mullein (1 part of each component). A well-compacted mixture is cut into small layers, each approximately 6x6x6 cm in size. Traditional cardboard or plastic cups filled with the above earthen mixture can also be used, but when growing seedlings of early cabbage, nutrient cubes allow you to get mature heads almost 2 weeks earlier, due to the integrity of the roots plants.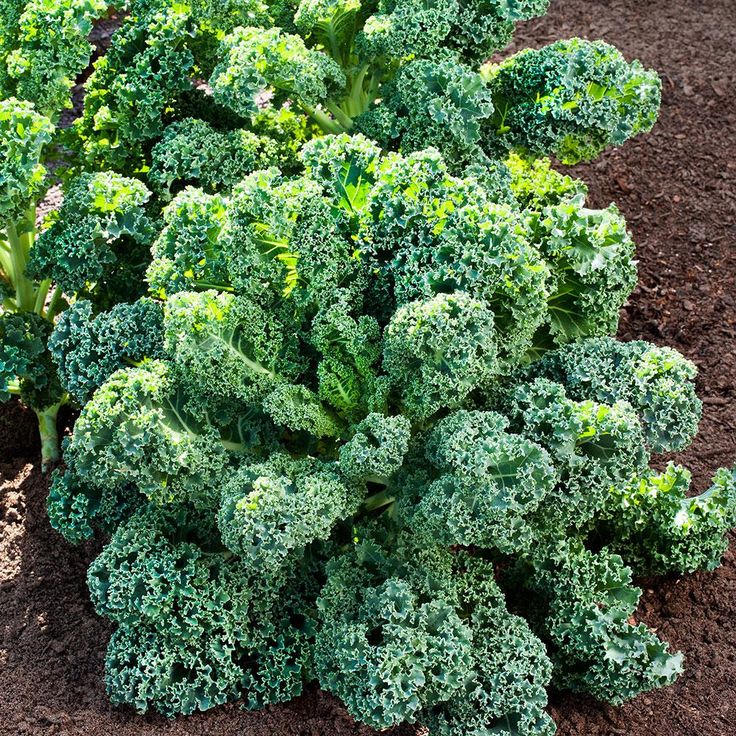
A week after picking, containers with seedlings are placed in a greenhouse and fertilized. It is preferable to feed with manure or bird droppings. It is possible to use urea or ammonium nitrate. It is recommended to maintain a temperature of +14…+18 degrees in the greenhouse during the daytime, +7…+10 degrees at night. If the temperature in the greenhouse is too high, it is required to ventilate the room, but at the same time exclude drafts. In warm weather during the day, greenhouse frames can be opened for a while.
In May, seedlings are planted in the beds. The holes are located at a distance of 40 cm. First, about a liter of water is poured into the hole and a bush is planted directly in the mud. To the bottom leaf, the plant is covered with soil.
Rules for growing and planting cabbage seedlings
- standard seedlings have no more than 5 true leaves;
- when picking, it is necessary to discard weak, fungus-affected or without apical bud seedlings;
- water temperature when watering seedlings should be 2 - 3 degrees higher than the ground temperature;
- before planting seedlings, for several days, the temperature in the greenhouse during the day should be maintained close to the air temperature outside;
- for planting, it is preferable to choose cloudy weather or evening time so that the culture takes root faster;
- the landing site should be sprinkled on top with dry soil.
 This will prevent excessive evaporation of moisture and protect against the formation of an earthen crust;
 - in the first days of planting cabbage should be shaded.
womanadvice.ru
What to plant next year after cabbage
White cabbage is popular among gardeners. It is difficult to imagine a garden in Russia where at least a few forks of cabbage do not grow. Having collected a good harvest, the question may immediately arise: what to plant after cabbage next year? Of course, you can plant cabbage again, but it is still better to choose crops for which cabbage is a good predecessor.
Is it possible to plant cabbage after cabbage
It is possible to plant cabbage in the same place, but still undesirable. Cabbage grows well in the garden, where the following crops grew before: potatoes, garlic, onions, radishes, cucumbers, carrots, peas, annual herbs. But you can plant everything cabbage, only before that it is desirable to add compost to the soil to enrich the soil.
Is it possible to plant garlic, onions, carrots, beets and potatoes after cabbage
Any non-cruciferous root vegetable can be planted. But still, after cabbage, garlic and onions grow better. It is permissible to plant carrots, beets and potatoes. Turnip, rutabaga, radish are cruciferous, so they have common pests and diseases with cabbage. Planting them is not recommended.
Is it possible to plant cucumbers and tomatoes after cabbage
Cabbage is a good precursor for cucumbers. They can be safely planted next year. Tomatoes can also be planted after cabbage. With proper care, you can get a good harvest.
What to plant with cabbage
From pests and diseases, mixed plantings are used. Cabbage grows well on the same bed with celery, cucumbers, beets, potatoes, onions and various aromatic herbs (thyme, sage, mint, rosemary, chamomile). It is undesirable to plant tomatoes, strawberries, beans and parsley next to cabbage.
vopros-sadovodu.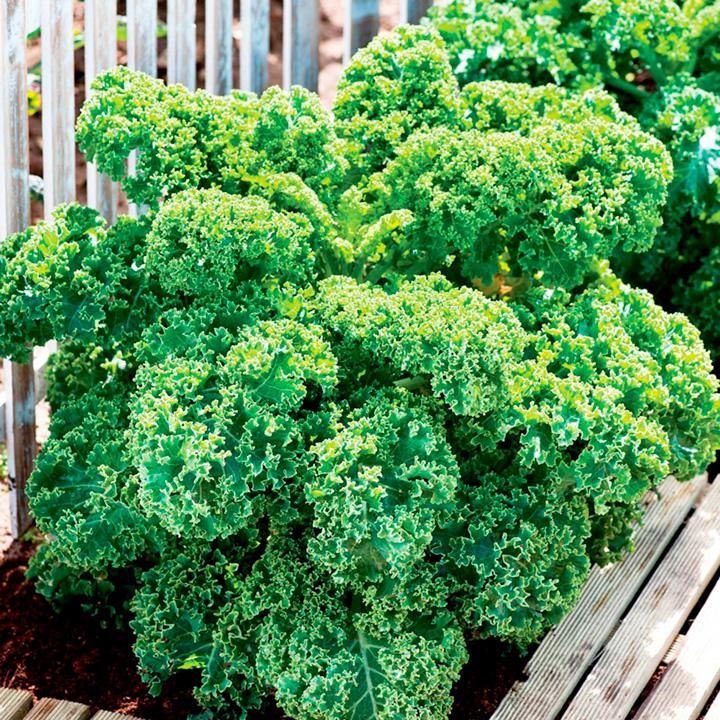 ru
ru
Where is it better to plant cabbage: in the sun or in the shade?
MsergeyIf there are trees on the plot, it is better to plant the cabbage in such a way that they shade the cabbage during the hottest hours at noon, and the rest of the time it is well lit. In our garden, cabbage has always grown in one place, although this is contrary to the rules of crop rotation. From the south of it, on the boundary, a large bird cherry tree grew at some distance, about eight meters, and the shadow from it just turned out to be on a ridge with cabbage in the very heat. I have never seen such cabbage as grew in this place. True, the whole area was very fertile, every year a lot of humus was introduced.
tokvladimir
From my own experience, I can already judge that the sun and a little shade are desirable for cabbage. Only late varieties of cabbage and later cauliflower varieties can be planted in an open area. I would not advise planting cabbage in the shade, aphids will overcome it there, and even the cabbage itself will be small. For five years I have been planting late cabbage along with the second cucumbers (I plant cucumbers around July 10). And the cabbage is good, moisture is preserved, and the cucumbers under the cabbage grow until late frosts.
Mira1320
Cabbage loves the sun, but it also needs water, especially during the heading period. If you plant cabbage in a shady side, it will stretch. It also cannot be planted thickly, if it is not ventilated, it will begin to rot, the disease is called "keel". So cabbage, like any plant, should be all right.
bolshoyvopros.ru
How and when to plant cabbage?
How and when should cabbages be planted? How far apart are
dolphinica
Proper cultivation of cabbage consists in choosing the right place, in well-prepared soil, in the sowing scheme recommended by agronomists, observing the water regime and ventilation, in timely protection from weeds.
Cabbage, and besides it, also radishes and radishes) are planted in one place every three years, at least two, but not every year.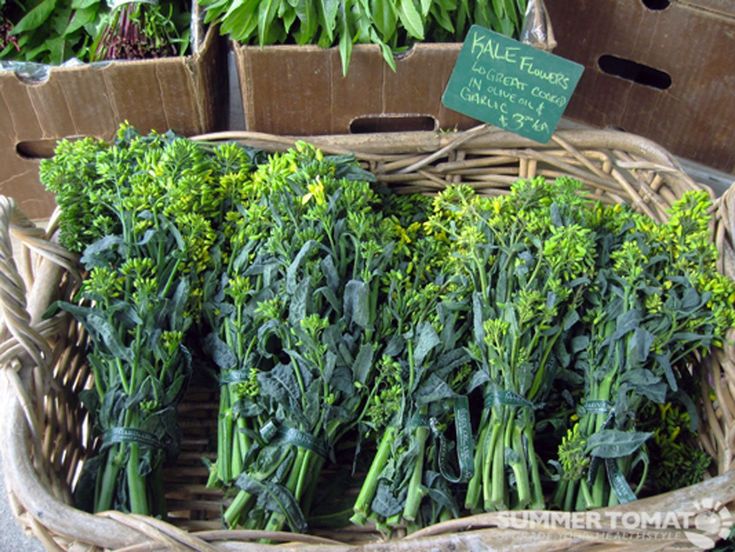 White cabbage should be planted correctly after potatoes, tomatoes, onions, can be planted after beans, peas, carrots and beets.
Cauliflower should be grown through seedlings, so the sowing time depends on the variety of cabbage. Early cabbage is planted in late April, can be planted in early May, late varieties are planted in the first decade of July.
Broccoli is planted when the seedlings have five leaves, not before.
Heads of white cabbage varieties ripen in July - Polyarnaya, Gribovskaya, Iyunskaya. In August, the Golden Hectare, Belorusskaya ripen. In September, cabbages ripen for pickling - this is a Gift, Ladoga. And the Moscow late variety is grown for fresh storage.
If you plant cabbage immediately with seeds, then at the end of April you need to prepare the holes and put two or three seeds each, and you must definitely cover the holes with film or glass.
YanaMarina
Cabbage is best planted in the evening, or before rain, in holes filled with hoes for early cabbage at a distance of 20-25 cm, and arrange rows 40-45 centimeters apart.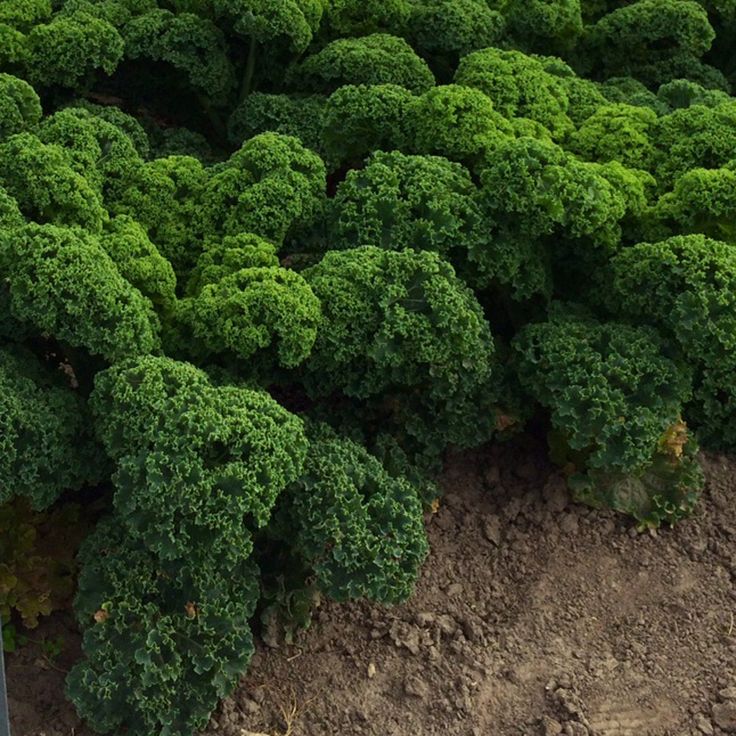 For late, between holes 30-35 cm, and between rows 55-60 cm. Water is poured into the holes, 1 liter per 5 holes, if the earth is dry. Seedlings are planted with 3-5 true leaves. deepen only the root, pressing it tightly into the ground. If the cabbage is overgrown, then the stem can be half buried in the ground. Cabbage stems grow additional roots. Before digging or just before planting, humus is applied throughout the field where cabbage will grow and mineral fertilizer for cabbage is scattered. On a pack of fertilizer there are norms for applying fertilizer to the soil. Stick to them. And only then they fill the holes. Someone recommends putting humus in the holes, this is correct, if the earth is very depleted. I just scatter it around the site, and the cabbage does not suffer from this. If under a bush, then a couple of handfuls is enough, if for a plot, 2-3 kg per square meter. It is better to plant seedlings when the sun is not scorching, so that the most difficult time for them to stand cool.
angren
Several times I tried to grow cabbage seedlings at home, but it did not work out, the seedlings turned out to be frail, pale, and strongly stretched. An experienced dacha neighbor taught me how to properly grow cabbage seedlings, and now I have both seedlings and cabbage just a feast for the eyes. In mid-April, I sow cabbage seeds in a garden bed, which I have been preparing since autumn and cover with a film or covering material, it is good to make arcs over the garden bed. Arriving at the landing cottage, I open it, and close it at night. After May 10, I don’t close the garden anymore, I harden the plants in the sun and at night. And at the end of May I plant plants in a permanent place. Plant transplants are well tolerated, I take them with a clod of earth, they immediately grow, unlike those that were bought on the market.
dolphinica
Early cabbage, heads of cabbage will appear in July - this is the white cabbage Polar, June. In August, the Golden Hectare, Belorusskaya, will ripen. In September, pickling varieties Gift, Ladozhskaya will be ready.
Cabbage is planted after cereals and legumes, after root crops and cucumbers.
Early cabbage at the latitude of Moscow, Chelyabinsk, Ufa is grown through seedlings, with seeds only after May 1. Seedlings are transplanted into open ground at the age of 60 days from sowing seeds.
In Rostov and Krasnodar, sowing of early cabbage in open ground immediately with seeds can be done after March 1.
The distance is kept at least 60X60
Cabbage loves abundant watering, so water after planting, but always with warm water. A sharp temperature difference will cause plant diseases
Connoisseur
The most favorable temperature for the growth of white cabbage is 15-17 degrees Celsius. But strong seedlings can withstand much lower temperatures - up to 5-8 degrees.
Seedlings (early varieties) are planted in April-early May, depending on the weather. But in the southern regions, you can plant earlier.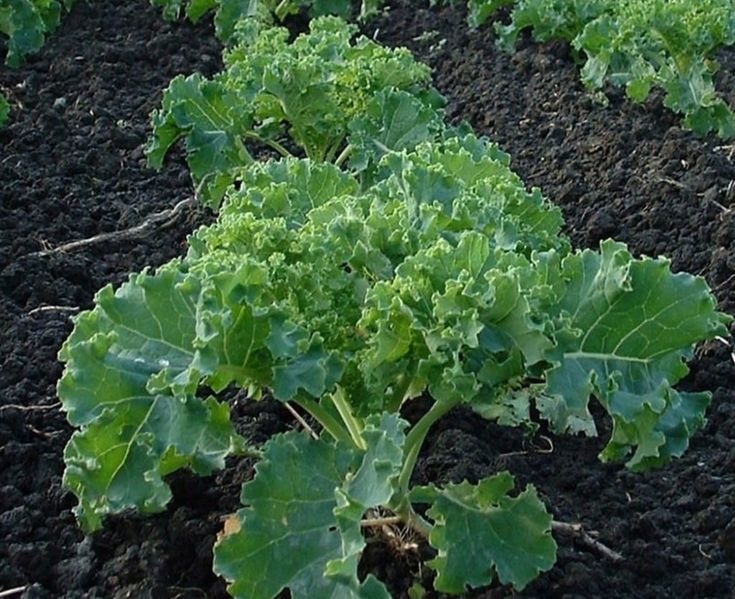
Mid-season cabbage is planted even in June, late varieties - at the end of May.
The land must be fertile, prepared in autumn, with fertilizers applied.
Seated bushes 3-4 per square meter:
early - 60/40 cm or 50/50, and late and mid-season - 60/60, 70/60 or 70 by 50 cm.
Plants are planted in holes, the root is tightly covered with earth. Watered - 1-2 liters under each bush.
Yfnfkmz rjcn
Before planting cabbage, you need to follow a few simple rules:
Select a variety (suitable for the region where the cabbage will be grown)
Buy seeds (in a trusted and good store)
Prepare the ground for planting.
Select pickup time.
Early cabbage - March 20-25.
Mid-ripening cabbage from the end of March to 15 April.
Late-ripening cabbage from the beginning of April to the end of the month.
Now let's move on to landing.
We prepare a container for seedlings and pour a mixture of planting soil. We spill the ground well and you can sow, as soon as the seedlings grow by 15 centimeters, it must be threaded. After a week, you need to feed. And after a while you can plant in the ground.
SiO2
If you mean when to plant cabbage seeds for seedlings, then it is recommended to do this about 2 months before planting in the ground. That is around the end of March.
And already grown seedlings in the ground should be planted at the end of May. First you need to dive seedlings, from weak and affected leaves. They also recommend planting cabbage seedlings either in the evening or in cloudy weather - this will take root better.
Read more about planting cabbage (seeds and seedlings) on this site.
Julia Muromskaya
Cabbage comes in many varieties. All of them can be divided into early, middle and late.
We plant seedlings of cabbage in April, but only under a film, as there may still be night frosts. The distance between seedlings is 50-60 centimeters for head development.
We make a shallow recess for watering.
We plant medium cabbage already at the beginning of May.
Late in July, the harvest will be in September - October, just the cabbage for pickling.
Hasmter
I plant cabbage seedlings around the end of March. I plant seedlings in the ground at the end of May. In our region, at the end of May, there may still be frosts at night, so when I hear about them in the weather forecast, I cover the cabbage with a film at night. This is how I grow white cabbage and cauliflower.
I don't plant a lot of cabbage, in one row. The distance between the cabbage is about 40-45 centimeters.
incolor
Cabbage is usually planted in seedlings, and after 55 days they are planted already in the ground. Then, when there are no more frosts, the earth is warm enough. This depends on where you live. Cabbage does not tolerate cold. But cabbage loves water, so do not forget to water it during the time.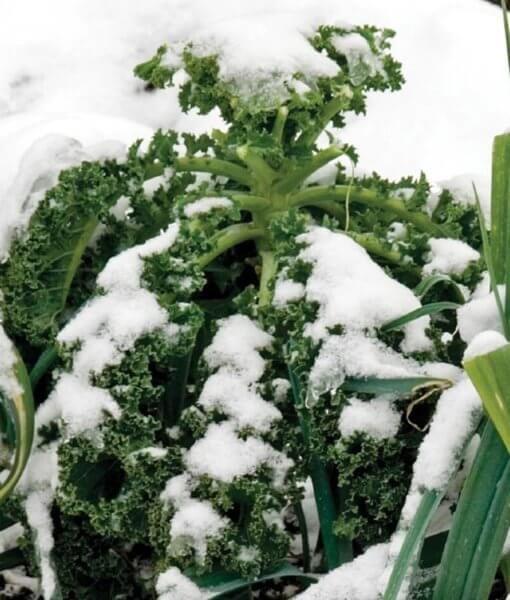 And planted at a distance of approximately 55-60 centimeters.
IngaMus
bolshoyvopros.ru
What can be planted after cabbage in the garden?
Z V Y N K A
1. It is not necessary to plant cabbage after cabbage. The logic of such a "ban" is that all the components necessary for cabbage have already been sufficiently drawn out of the soil. And by continuing to develop the soil in the same agricultural spirit, we will get a much smaller harvest. Such planning can be allowed only after 3 years. As a last resort - through 2.
2 Cucumbers are highly recommended after cabbage. In second place is the potato. And only then, secondarily, they recommend beets (especially table beets), garlic, and carrots.
When landing, it is important to know not only the best predecessors, but also admissible neighbors, but this is another topic.
Aleso
nikkinq
After cabbage, you can plant onions, garlic, carrots, beets, legumes.
angren
Cruciferous vegetables should not be planted next year in the place where the cabbage grew. These are radish, radish, cabbage of all kinds. A dangerous keel disease can appear in the soil. To improve the soil, you can plant beans, peas, beans, sow green manure between them. Crushed marigold plants heal the soil well, which must be buried in the soil in autumn. On this place you can plant onions, garlic, carrots, beets.
dolphinica
Late-ripening white cabbage ripens late, sometimes not everyone has time to dig up the ground in autumn, and in spring the ground for planting should first be prepared. Therefore, after late-ripening varieties of cabbage, late-planted and sown crops are planted - tomatoes, peppers, pumpkins, eggplants, zucchini, beans, cucumbers, corn.
crist
Experts recommend planting cabbage after legumes, potatoes, onions and tomatoes. Even if it is not always possible to do this, we must try to plant so that the plants are of a different family.