Wet areas in bathrooms
16 stunning wet room bathroom designs |
(Image credit: Richstone Properties / Mandarin Stone / l Drummonds / Darren Chung)
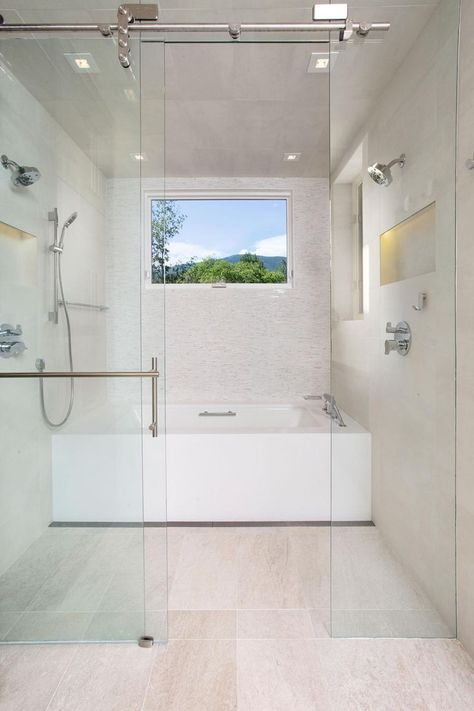
Wet room ideas open up the opportunity for contemporary creative design, without the need to squeeze in a shower enclosure or raised shower tray.
A wet room can be a real luxury at home, even when the space you have to work with is limited. Try thinking along the lines of colorful floor-to-ceiling tiles, built-in seating and sleek, concealed pipework.
A true wet room without any panels provides you with more room to move, and an open-layout is easier to keep clean than a regular shower.
However, wet rooms are a big project to take on when it comes to bathroom ideas. The tanking process to ensure your room is completely watertight can be a significant upheaval, not to mention costly, too.
You may want to weigh this up against the longevity of the space, as a wet room’s seamless design makes it a great option for accessibility and future-proofing your home for years to come.
Wet room ideas
Wet rooms have become an increasingly popular choice for shower-lovers because they are the perfect solution for small bathrooms when you don’t have the space for both a bath tub and a separate shower.
The key difference between a shower and a wet room is the fact that while both may have shower screens, wet rooms are completely open spaces without the stand-in tray you will normally get in a shower. The floor is at one level and water is allowed to flow freely to a drain.
A wet room can provide a spacious showering area and the high-end look of a luxurious spa hotel because the look tends to be very streamlined. Wet rooms are also level entry, so easily accessible to all, not to mention hygienic and easy to clean. Done well, a wet room is incredibly desirable and can boost your home’s value, too.
There are a number of things to consider when planning a wet room or walk-in shower – from suitable flooring to drainage points – so that you can achieve the best results.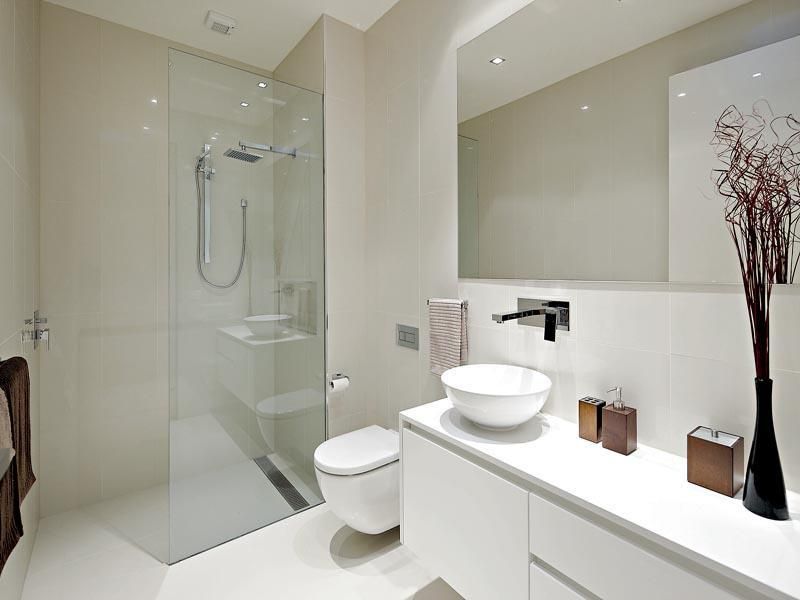
1. Ensure the space you intend to use is fully tanked
(Image credit: Sarah Hogan)
It goes without saying that a wet room needs to be waterproof. Luckily builders are a lot savvier about how to achieve fully tanked spaces nowadays and wet room tanking systems and products are readily available.
'In particular, hidden tray systems, which fit under the floor tiles and take care of drainage gradients and watertightness have proved a real game-changer,' says Nicholas Cunild, MD of luxury shower brand Matki . 'Low-level shower trays that fit flush with the tiles are also popular and can help define the shower room in a bigger room. Wet room installation is not for novices, it’s important to find a tanking specialist or builder with verifiable experience.'
2. Consider underfloor heating to keep the space dry
(Image credit: Mandarin Stone)
'It’s important to take extra steps with regards to heat, ventilation and drying than you would in a regular bathroom,' continues Nicholas Cunild. 'You may be lucky enough to live in a hot climate which naturally gives a warmer bathroom. But if you live in a colder climate and you exit a wet room onto carpeted rooms – add kids, dogs and all the rest – it is a recipe for waterlogged, messy floors everywhere.
'A screen will help contain major puddles, but underfloor heating and heated towel rails will also speed up the drying process and help prevent slip hazards. Mechanical ventilation is a must and will help clear steam quickly – look for models with intelligent humidity sensors that automatically boost when required.' You can also pair this with a beautiful, easy-to-wash bathroom rug idea.
3. Consider different surfaces ideas, not just tiles
(Image credit: Base Interior)
Tiling from floor-to-ceiling is practical but can feel cold and uninviting in large volumes. Nicholas points out the importance of exploiting other options.
'We’ve noted a rise in polished plaster – both traditional Tadelakt and more modern Microcement – in wet room designs and the results are stunning,' he says.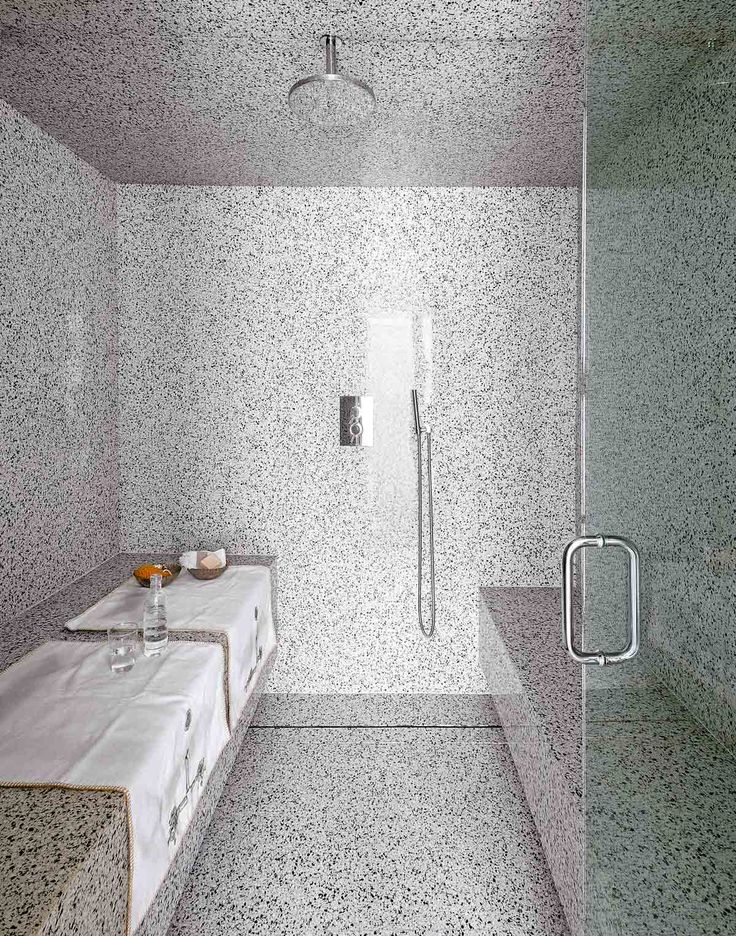
Built up in layers, the finish is waterproof and seamless, so there’s no grubby grout to tackle.
4. Pick the right sanitaryware
(Image credit: Future / Mark Bolton )
'If you are embracing the full wet room in a large bathroom look and omitting any sort of enclosure or screen, it is fundamental to think about your choice of sanitaryware, as it is likely that it will get wet from the spray of the shower or the condensation in the room,' advises Rebecca Milnes, designer at CP Hart .
'Opt for ceramics that are flush to the wall and are ideally wall-mounted. A wall-hung toilet is a brilliant choice in a wet room, as there are no areas for water to pool and it makes cleaning easier.'
Though a bathroom that has been tanked doesn’t necessarily need a shower panel, you may want to add one to prevent towels or toilet rolls getting wet. Opt for a fluted or frosted finish to maintain a level of privacy if your wet room forms part of the main bathroom.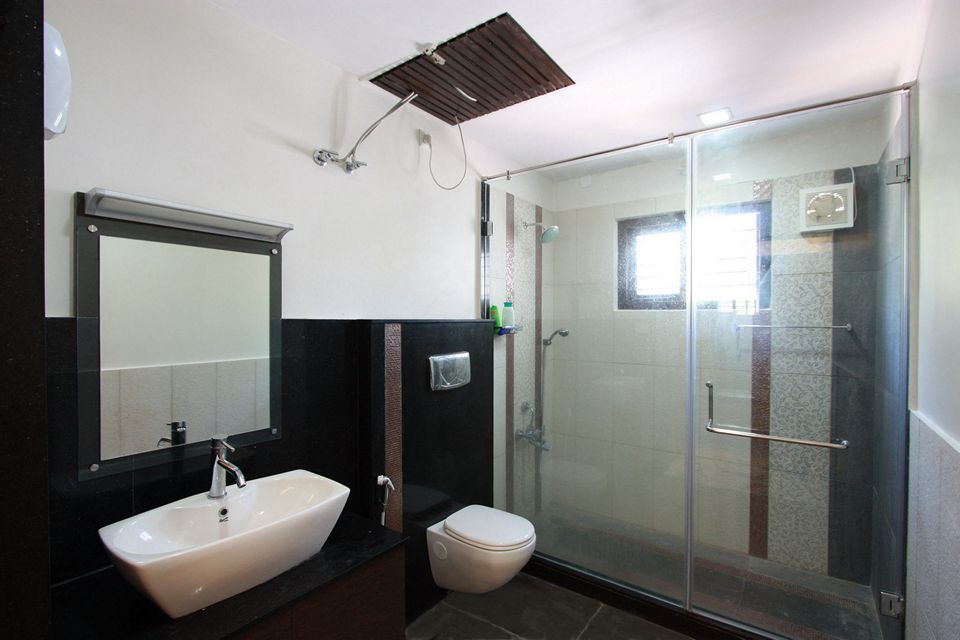
'In order to create a true wet room, a watertight environment must be created by tanking both the floor and walls of the room to thoroughly protect it from leaks. First a watertight membrane is laid, then the room will need to be tiled throughout with a gentle gradient in the main a shower area so the water flows away easily into the waste.'
5. Choose the right size sanitaryware to enhance the sense of space
(Image credit: Matki)
It’s important to choose sanitaryware that is slightly smaller than the average in size so that it can make the room look bigger. A wall-hung toilet with a concealed cistern, is not just easier to keep clean, but being able to see the floor gives the illusion of a bigger room. Wall-hung bathroom vanity ideas will also help reduce visual clutter and use the bathroom space more effectively.
6. Play with the illusion of space
(Image credit: Future / Jonathan Gooch)
Using matching tiles or composite panels on both floors and walls is a good idea for wet rooms and small bathrooms as it will accentuate the sense of space.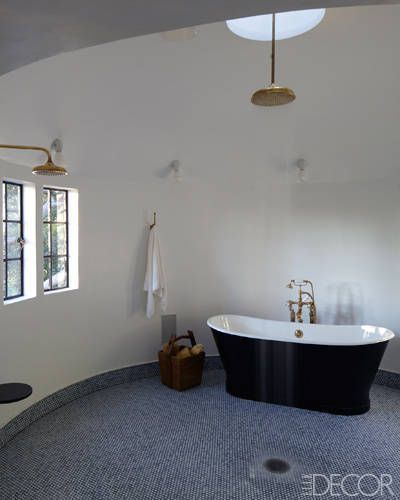
Create areas of bathroom color, and even patterns using mosaics or tiles in a variety of formats, to give definition to your shower space, or mix shapes, sizes and shades for a unique look.
'Add glossy finishes and sleek chrome fittings and use matching shower tile ideas or composite panels on both floors and walls to accentuate the sense of space. Create areas of color and even patterns using mosaics or tiles in a variety of formats to give definition to your shower space, or mix shapes, sizes and shades for a unique look.'
Make sure the floor tiles you want have an appropriate non-slip bathroom flooring rating for wet areas – look out for raised, textured finishes or anti-slip properties in your search.
'Good-quality porcelain tiles are perfect for use in wet rooms and walk-in showers,' says Jo Oliver, Director at Stone & Ceramic Warehouse . 'Firstly, they are impervious to water, making them an ideal solution for everyday use. They also won’t be damaged by detergents or any of the other chemicals we frequently expose our shower surfaces to.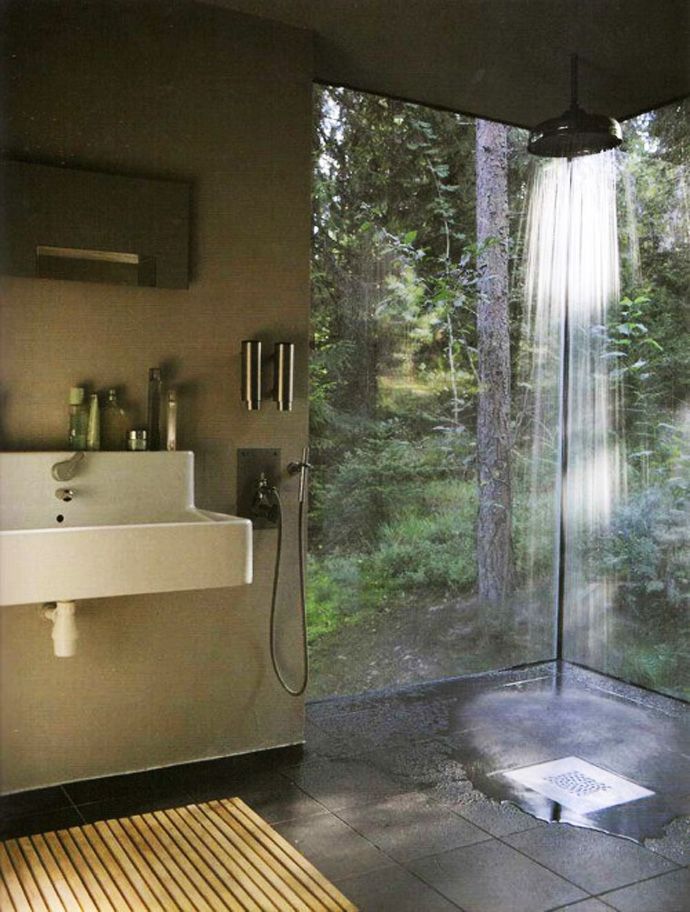 '
'
(Image credit: Max Kim Bee)
While it’s easiest to install a small wet room in a new-build or extension, any bathroom, upstairs or down, can be fully tanked for wet room use.
There are certain situations where a wet room comes into its own. 'Wet rooms are particularly effective in small or awkward scenarios, like rooms with sloped ceilings or strange layouts, as you can maximize the showering area without the restrictions of standard shower tray sizes,' says Nicholas Cunild.
Issues like the direction of floor joists can be problematic but not insurmountable. 'In some cases, you may need to accept a step up into the room, in order to achieve the necessary gradients for efficient water drainage. If it’s done by a good professional, it will be unnoticeable.'
8. Fake a wet room
(Image credit: Future / Darren Chung)
If you are not able to create a true wet room, the latest ultra-low profile shower trays are a clever alternative.
A frameless shower enclosure will give any bathroom a modern, seamless feel and create a contained area for showering without the need for a separate cubicle.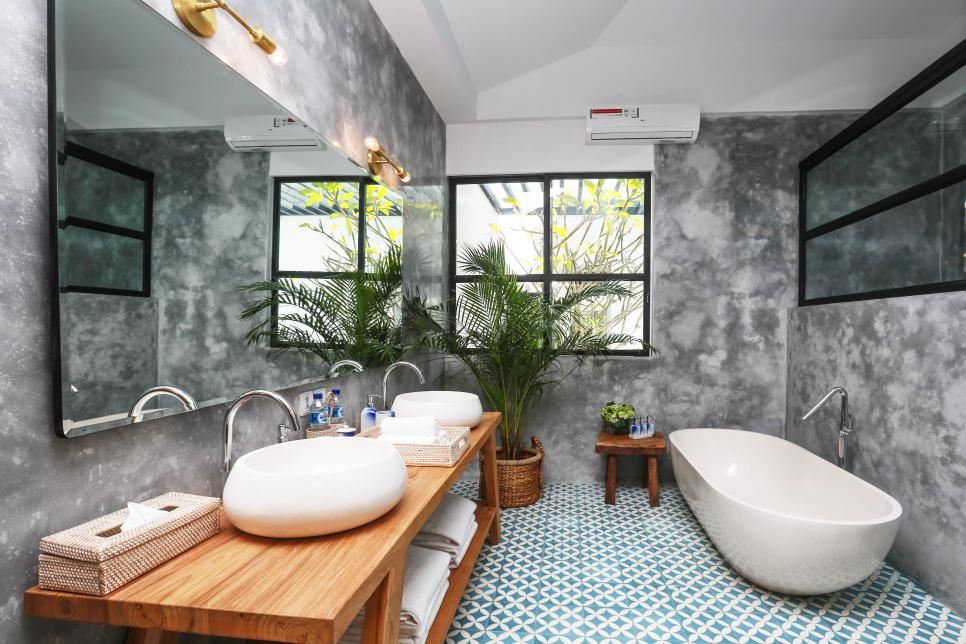
Paired with a low-profile shower tray, these walk-in shower ideas with frameless, clear glass panels help to make even the smallest of spaces feel less claustrophobic and therefore a more calming showering experience.
Don’t forget to allow for adequate drainage at the planning stage. Your shower floor ideas may need to be fitted at a sloped angle away from any doors so water can drain away easily. A sunken shower tray that can be installed flush to the rest of the floor.
9. Bring in pattern to help zone the shower area
(Image credit: Bert & May/ Fired Earth)
Many wet room designs lean towards a minimalist look but it can also be a great opportunity to introduce color and pattern into the space.
Even in an open plan space you can use a showstopping tile on the shower walls and floor to zone the shower area. If you are feeling even braver you can contrast the tiles you use on the floor and walls for even more impact.
10. Find the right tile
(Image credit: Future / Artisan of Devizes)
Bright and colorful wet rooms make for an invigorating shower experience.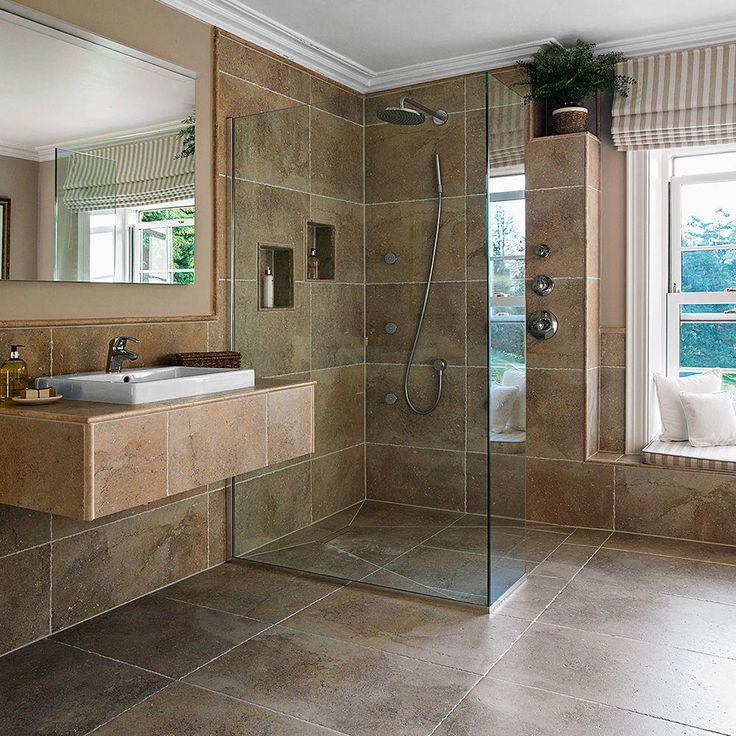 Ideal if you're not naturally a morning person. Smaller bathroom tile ideas like mosaics are a great choice for wet rooms, as they’re easy to lay in a slope towards the drainage hole.
Alternatively, a mix of metro and patterned tiles create a cool and contemporary appearance.
Maintain a seamless look by incorporating a recessed shelf within the shower – a great shower storage idea to keep essential bottles without encroaching on the rest of the space.
11. Enhance the floor factor
(Image credit: Future / Jonathan Gooch)
Shower floor ideas are one of the most important factors when planning and developing a wet room.
Most bathroom flooring types can accommodate the pipes needed for drainage in a wet room – even concrete. But in some instances, the flooring will need to be taken up before tiling takes place to ensure the drainage pipes can be positioned with the necessary slope for the water to drain away.
Tiles are the best type of flooring for a wet room. Damla Turgut, founder of Otto Tiles & Design , advises: 'The most suitable types of tiles for a wet room floor are porcelain or natural stone such as marble, terrazzo, encaustic cement or mosaic tiles. Because of their construction and high-shine finish, we would not recommend the use of ceramic tiles on a wet room floor, they are however suitable for wet room walls as are the very on-trend zellige tiles.'
12. Turn a loft space into a wet room
(Image credit: Future / Davide Lovatti)
There are so many advantage to having a wet room.
You can create a more impressive shower room design in an average-sized bathroom simply by removing the bath and freeing up the space needed for a walk-in shower. For instance, if you have a loft space, consider installing a wet room here.
You probably will need a special extractor fan in your wet room. The build-up of moisture and condensation is greater in a wet room than in a traditional bathroom. Fans operated by light switches alone often aren’t effective enough. A good fan needs to be wired into the room (still coming on with the light switch) but with a separate cut-off switch, which is outside the room. Humidity-tracking extractor fans are best for wet rooms as they work continuously and incrementally with automatic extraction for however much steam is in the room.
13. Create a spa-like sanctuary
(Image credit: Future / Mark Luscombe-Whyte)
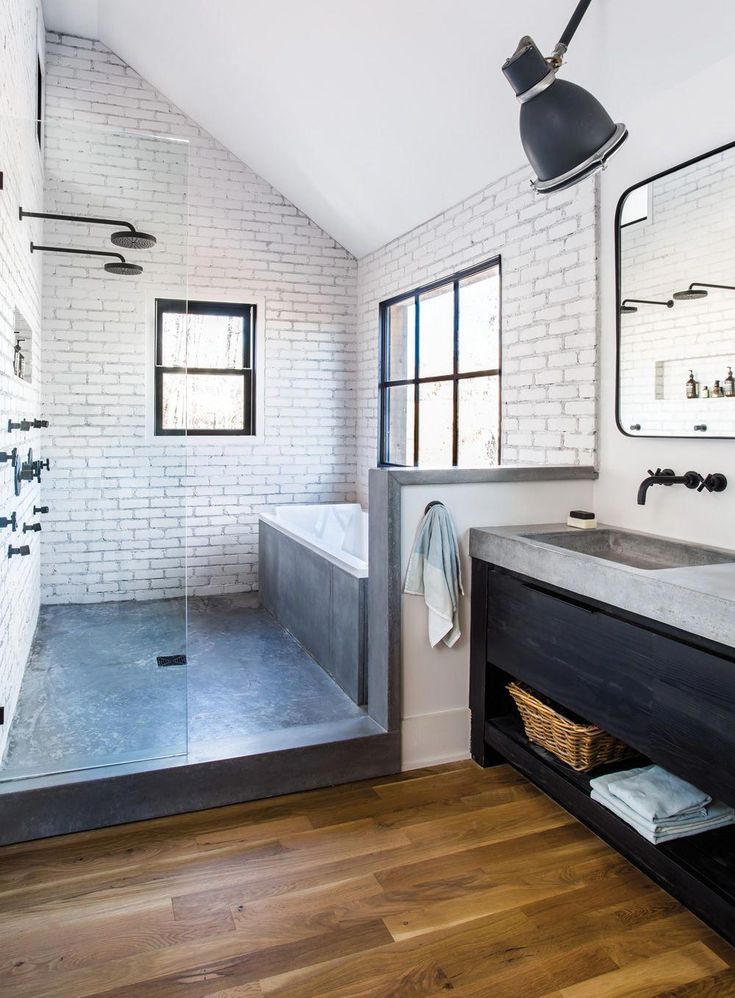
Real estate agents are quick to point out that a family home without a bath will be less saleable, but there are creative wet room ideas with baths you can explore.
If space allows, the bathroom can be turned into a spa-like sanctuary with a bath, vanity unit and smaller wet room-style cubicle.
'Wet rooms give an added level of luxury, allowing a continuous floor finish making a space feel seamless and bigger,' says Gemma Holsgrove, Associate Director at interior design agency Sims Hilditch . 'With cleverly positioned fittings it can certainly feel well thought through.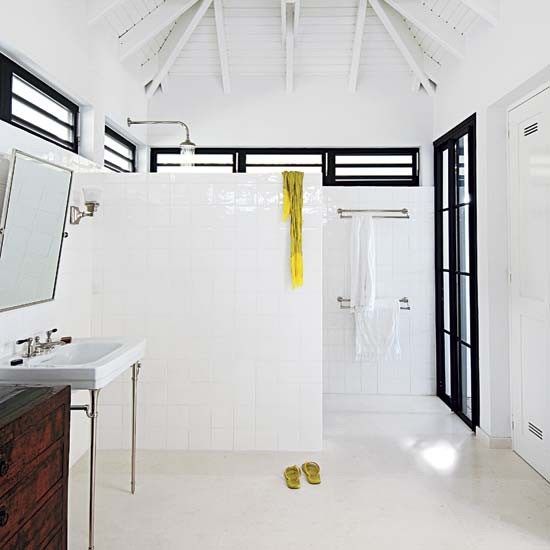 '
'
A wet room design can also work alongside a bath, as Sally Cutchie of BC Designs explains. 'Choosing to have a wet room can actually be hugely beneficial when wanting a bath to sit in the same space,' she says.
'As a wet room is fully waterproof it doesn’t need a shower enclosure fitting,' she adds. 'This can free up a lot of extra space for the all-important bath.'
If your bathroom is on the small side, then use the same material to clad your whole space. A strong stone, like marble, is a stylish option.
14. Take a seat
(Image credit: Fameed Khalique)
Add built-in seating to your wet room for a sauna-like experience. Complete the look with a large rainfall showerhead, then simply sit back and relax.
A wood look can offer a holistic spa bathroom experience, but you'll need to ensure any timber is treated so that it's suitable for a wet area. Or you can mimic the look with tiles. Just make sure they have a non-slip treatment and are comfortable to sit on.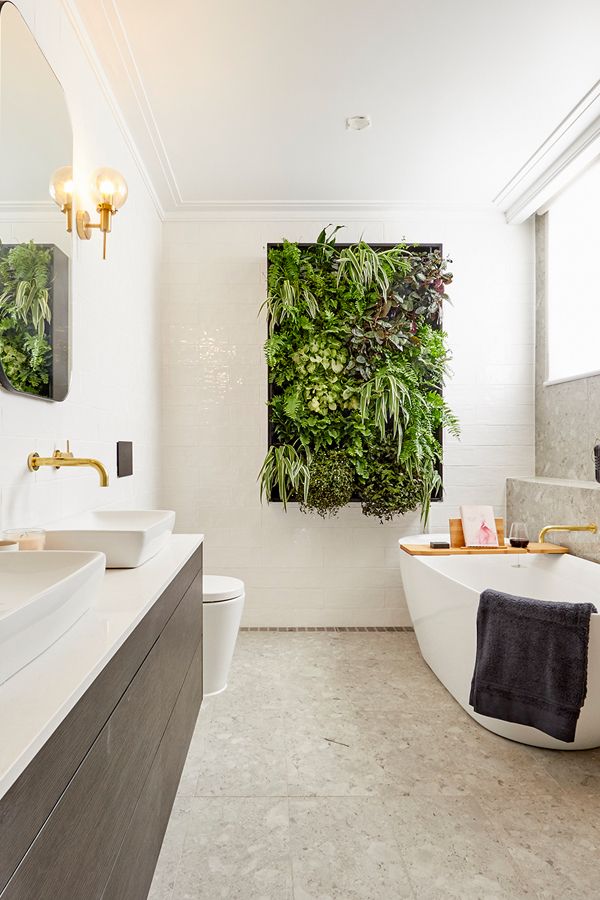
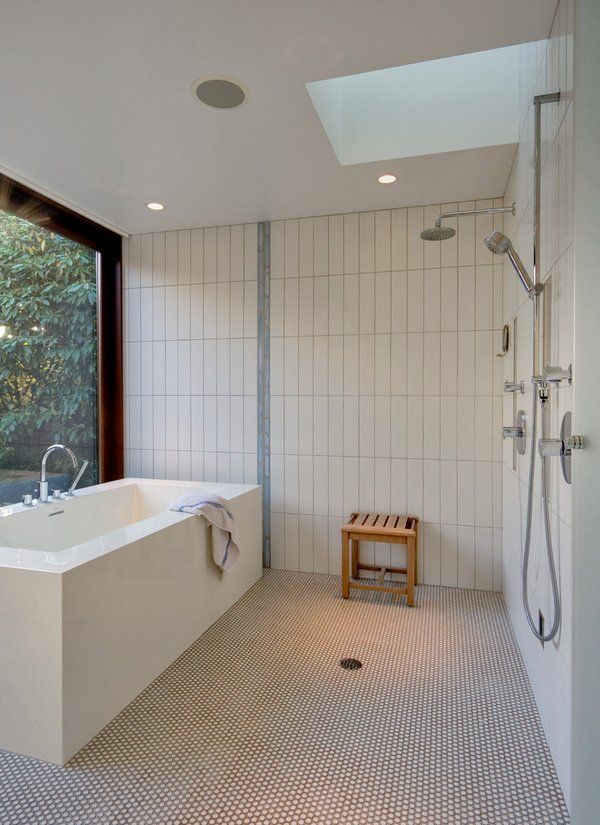
15. Let the light in
(Image credit: Future / Jonathan Gooch)
If you are creating a new space for your wet room, you will need to think about light sources during planning. A huge skylight like this creates the illusion of showering outdoors. So if you've been inspired by trips to tropical climes such as Bali or Thailand, this could be a practical way to recreate that magic.
The best bathroom lighting ideas feature at least two lighting circuits – one for overhead lighting and another for adjustable mood and task lighting. Where you place these will depend on any natural light sources, too.
16. Install a space to rest and recharge
(Image credit: Future / Mark Bolton)
When considering how to choose a shower for your wet room, Paul Bailey, Senior Category Manager at GROHE , says: 'Features such as steam, sound and chromotherapy through built-in lighting modules are increasing in popularity, due to growing demand for spa and wellness inspired bathroom spaces. '
'
Wet rooms are considered a practical and luxurious addition to a home. However, they can be costly. Nick Cryer of Berkeley Place says: 'Wet room installations are more specialist, more time consuming and more expensive. All the materials and kit is very readily available, however, we recommend only experts are employed to complete the installation.'
Are wet rooms a good idea?
There are lots of benefits to having a wet room – from being able to utilise a small or awkward space where a bath or standard shower enclosure cannot fit, to future-proofing your home.
Estate agents are quick to point out that a family home without a bath will be less saleable. But there are creative options you can explore. For instance, if you have a large master bedroom, consider installing a freestanding, statement tub here for a dash of hotel chic.
'Investing time and money into creating a wet room and properly tanking it can also be incredibly useful when it comes to busy family bath times,' says Paul Bailey, Senior Category Manager at GROHE UK.
The main drawback is the investment and upheaval a wet room project brings, mainly due to the fact that all wet room ideas require proper tanking.
'One other point worth noting is that wet rooms can get quite cold, because there’s no enclosure to keep the steam in,' adds Yousef Mansuri, head of design at C.P. Hart.
How small can a wet room be?
While wet rooms are not limited to incremental sizing, most bathroom designers would recommend that the showering section of a wet room measures a minimum 800 x 800mm.
When planning a shower design for a small bathroom, there are a few aspects which may determine the space required. Will pipework be exposed or concealed? Do you need to install a glass panel to prevent other areas of the room from getting wet?
Don’t forget that adequate ventilation must also be installed in line with building regulations to prevent mould and damp spots.
Get the right layout for a wet room
There's no denying that plumbing can limit the layout of a wet room. Basins, baths and showers only have to take away water but, if placed 12ft from an outside wall, the drainage will have to slope gently downwards for quite a long way, avoiding joists, which may not be running in a helpful direction. The sooner an architect or plumber raises a few floorboards, the sooner you’ll know your options.
'In a wet room, the shower area is flush with the floor level and the drain is fitted into the fully tiled floor. Originally wet rooms were completely open without any glass partition. However, a simple fixed glass panel creating a walk-in shower area is a much more practical choice and has become the most popular trend,' advises Rebecca Milnes, designer at CP Hart .
'Wet room systems are not limited to incremental sizing, like shower trays often are, so they are a great solution for awkward or tight spaces.
'In small rooms it is possible to turn the whole area into a walk-in shower. However, it is best to be mindful of the items in the bathroom that need to be kept dry, such as towels and toilet rolls.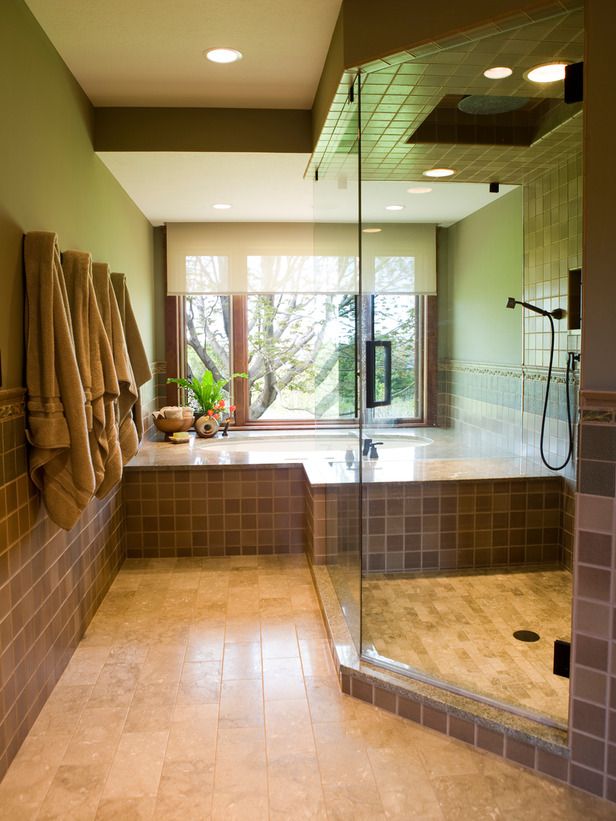
'One of the first things to consider when planning a wet room is where to position the drain. Ideally the drain should be as far away from the bathroom door as possible, to minimise any risk of water escaping the room.
'If you have a wooden sub-floor, the way your joists run is crucial to where your drain can be positioned. You’ll also need to think about which way the gradient fall towards the waste will run, to avoid any tricky wedging effects.'
What's the difference between a wet room and a walk-in shower?
‘A true wet room is a fully waterproofed space without a fixed shower door or tray, and usually has an open tiled shower area,’ explains Nicholas Cunild, managing director of Matki.
A walk-in shower, on the other hand, is an area in a bathroom or shower room with a low-level shower tray and glass surrounds. While completely watertight, you may still wish to include a glass panel in a wet room to contain the water spray.
Is a wet room expensive?
There’s no doubt that a wet room is an investment. The tanking process to ensure the room is completely waterproof can be costly and takes time. All wet room ideas involve tiling the space from floor to ceiling carefully while ensuring proper drainage.
Concealing pipework can also be an investment, though this can often allow recessed shelving and storage to be created as an additional benefit.
You can find out how much it costs to install a wet room in our guide.
What kind of costs are involved in a wet room?
It is never cheap to re-do a bathroom. In a family bathroom with two basins, a WC, a bath and a shower, quality items will easily add up to £5,000.
Installation adds a further £3,000 or so and, with cabinets and storage, good quality mirrors, tiles and lighting, it generally adds up to between £10,000 and £15,000.
(Image credit: Future / Davide Lovatti)
The build-up of moisture and condensation is greater in a wet room than in a traditional bathroom. Fans operated by light switches alone often aren’t effective enough.
A good fan needs to be wired into the room (still coming on with the light switch) but with a separate cut-off switch, which is outside the room. Humidity-tracking extractor fans are best for wet rooms as they work continuously and incrementally, with automatic extraction for how much steam is in the room.
Pick the right wet room flooring
'When deciding which wet room system to go for, think about what your sub-floor is made of. There are systems for both solid and wooden floors. If you have a concrete floor, it can be quite invasive to channel in a waste and create the gradient fall required for drainage,' advises Rebecca Milnes of CP Hart.
'Forgoing a shower tray in favour of a wet room allows the floor tiles to run through to the shower area, which adds visual space to a room. However, not all surfaces are safe to use in a wet room setting and it is crucial to know what the slip rating of the material is. I’d recommend using a material with a structured, textured finish to give extra grip in wet areas.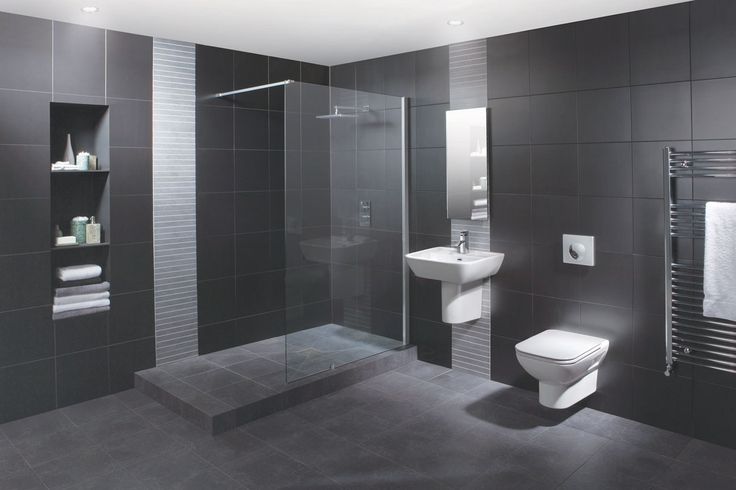 Mosaics are also a great choice for wet areas, as the grout lines between the tiles give appropriate grip.
'In cases where a step-up to the wet area is needed, the step should be at least 10cm high, as anything lower can be easily overlooked by those not familiar with the room and can become a trip hazard. Adding under-plinth lighting can highlight the step and add ambiance to the room.'
Tanking a wet room
'Tanking is essential in a wet room,' says Rebecca Milnes. 'This is a multi-step process which entails several layers of waterproofing to ensure an excellent seal – much like a swimming pool.
'The two main approaches for tanking a wet room are using a self-adhesive bitumen-based waterproof membrane, or applying a paint-on liquid wall membrane. It is always best to speak to your supplier about the best system for your project.'
Jennifer is the Digital Editor at Homes & Gardens. Having worked in the interiors industry for a number of years, spanning many publications, she now hones her digital prowess on the 'best interiors website' in the world.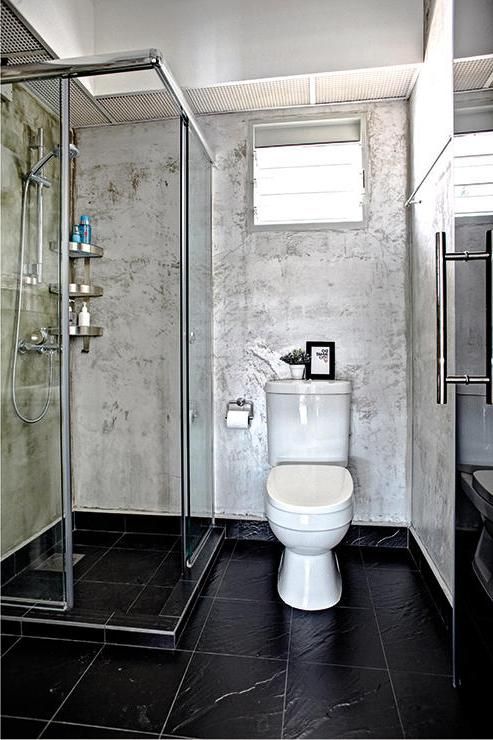 Multi-skilled, Jennifer has worked in PR and marketing, and the occasional dabble in the social media, commercial and e-commerce space. Over the years, she has written about every area of the home, from compiling design houses from some of the best interior designers in the world to sourcing celebrity homes, reviewing appliances and even the odd news story or two.
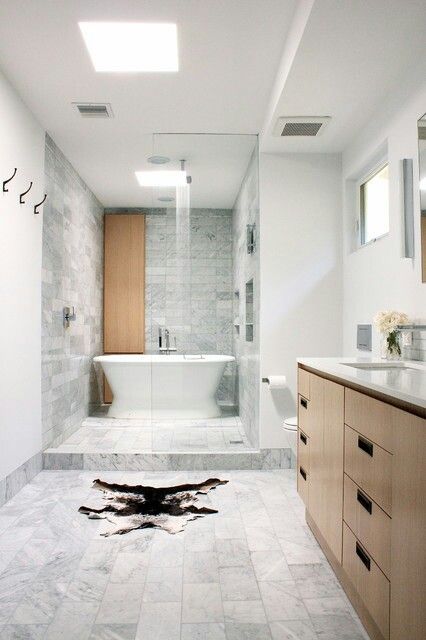
What is a Wet Room Bathroom? Plus Pros, Cons & costs
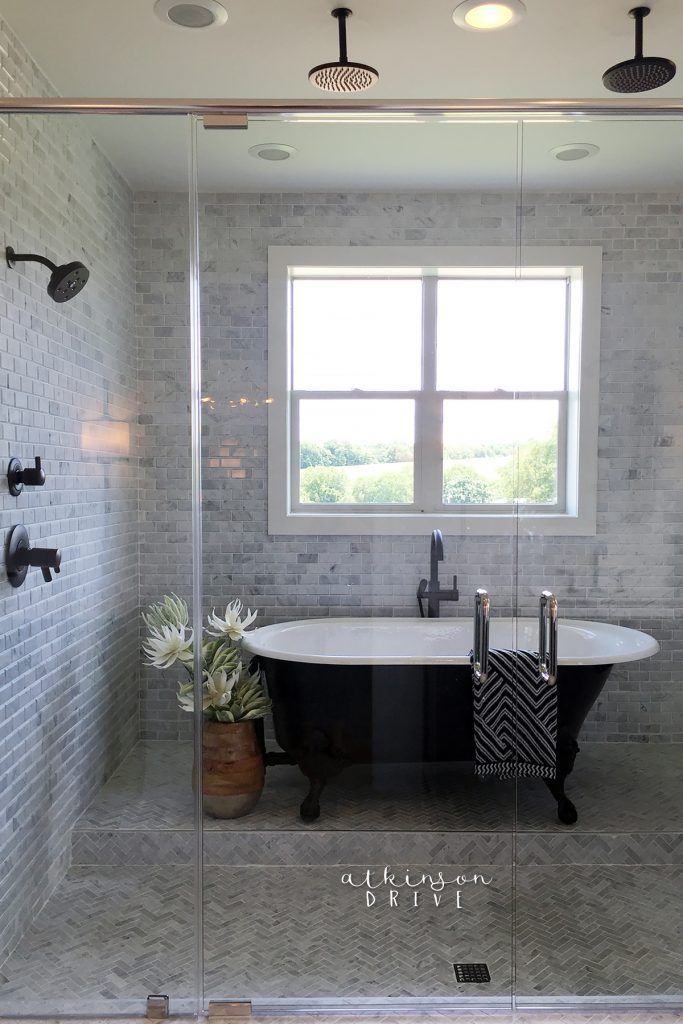
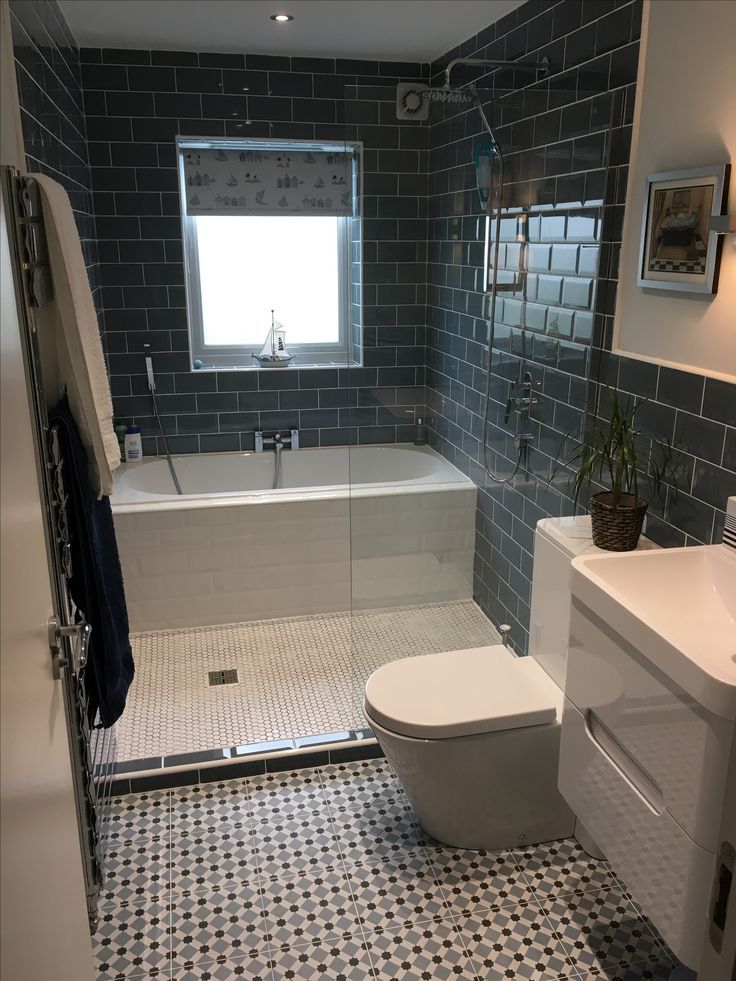
(Above) Sweeten homeowners Liz and Kevin’s wet-room-style bathroom renovation
Designing a more efficient bathroom often means taking down barriers and smoothing traffic flow. Can opening the shower to the rest of the room create a more efficient, luxurious-feeling space? Sweeten explores the possibilities of this intriguing approach.
Sweeten matches home renovation projects with vetted general contractors, offering advice, support, and secure deposits—at no cost to the homeowner.
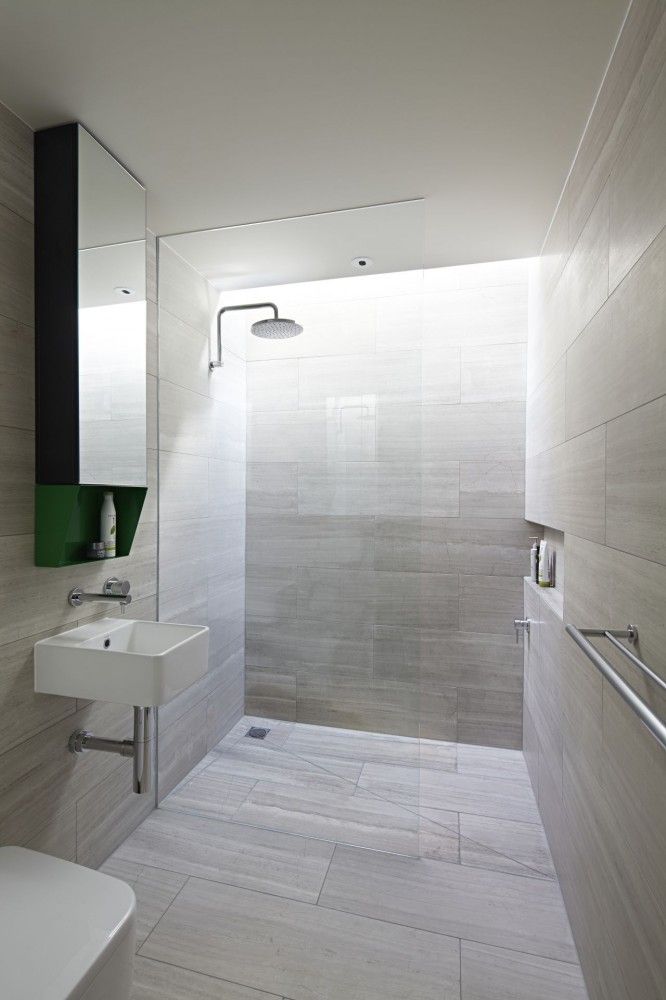
What is a wet room bathroom?
A wet room is a bathroom that typically has no enclosure separating the shower or tub from the rest of the bathroom. All of the walls and the flooring are sealed against water, just like the surfaces in a typical shower stall.
The main flooring of the wet room is on the same level as the shower floor. The section of the wet room where the shower is located has a floor with a sharp slope to aid with water drainage. The rest of the bathroom floor is sloped toward the same drain. But the floor slope is more gradual.
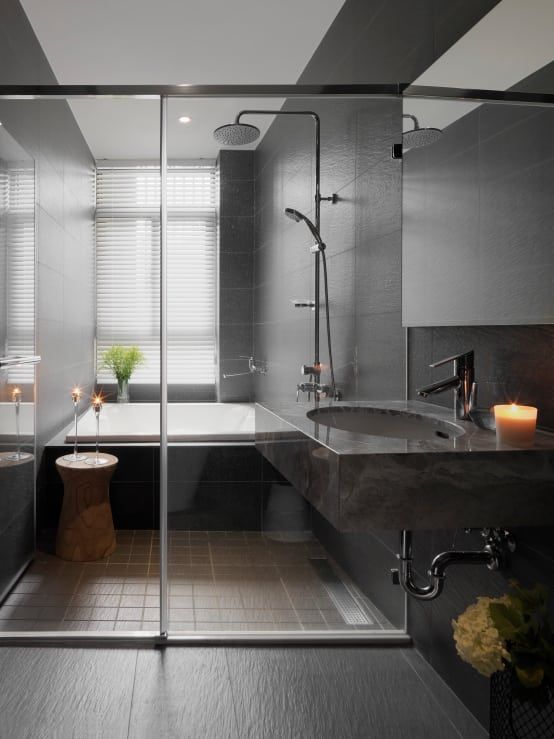
Because there is so much water, bathroom facilities such as the toilet and sink are either raised or are water-sealed.
Due to how wet rooms work, the function of the room is prioritized over the style. Subsequently, most wet room design is clean and spare.
Why are wet rooms so popular?
- Frameless showers let in more light. These use sheets of thick, unframed glass to surround the shower in a wet room. They make the whole room lighter and airier.
- Since wet rooms are designed with excellent ventilation, they typically see less mold and mildew growth.
- Wet rooms are much easier to clean. There are no cramped enclosures to deal with, and the whole floor can be hosed down.
- Wet room bathrooms are ready for all phases of a person’s life. There are no steps or curbs keeping walkers and wheelchairs out of the shower area. The toilet area merges seamlessly with the shower, too.
Pros and cons of wet rooms
Pros
- The bathroom feels brighter and more spacious because it has fewer walls and barriers.
- The floor is easy to clean—all water can be directed to a single drain.
- Accessibility: there is no shower curb or bathtub wall to step over. Wet room designs comply with many aging-in-place design rules.
- There’s less chance of mold, mildew, and water decay.
- The bathing area does not steam up because it is not enclosed.
Cons
- Splashes from the shower can go everywhere.
- It’s best to have plenty of space, to keep the shower separate from dry areas.
- In smaller bathrooms, dry areas need to be made water-resistant.
- It can feel colder in the shower, since there’s no enclosure to hold in heat.
- The need for more tile work may increase costs.
- They can be acoustically loud and bright because of the open design and hard materials.
- Most things stored in the bathroom need to be enclosed in water-resistant cabinets.
Features and special considerations
- Shower enclosures: Many wet room bathrooms are built without any shower enclosures. However, you can opt for an open enclosure with no door. Or you can add a half-wall to minimize splashing.
- Bathroom storage: Locating storage and linen cabinets outside of the bathroom is one way to deal with moisture. Another is to install water-resistant cabinets in the room.
- Large wet rooms: If you have a big enough space, you may be able to store moisture-sensitive items in the bathroom without special cabinets.
- Radiant heating: You can install radiant floor heating even though the floor will see plenty of water. Special underfloor radiant heating kits are available.
- Raised sink cabinet: Pedestal sinks or cantilevered countertops are ideal choices for keeping cabinetry off the floor.
- Relocated heating register: Heating vents cannot be built into the floor. Either build the vents into walls or use another type of heating.
When you’re ready to begin your bathroom or home remodel, discuss with your Sweeten contractor if a wet room is possible in your space.
Wet room bathroom maintenance and cleaning
Homeowners may worry about installing wet room bathrooms on upper floors. Yet a professionally installed wet room is no different than locating a freestanding shower on an upper floor. The waterproofing methods are the same—just on a larger scale. Be aware that just like with any bathroom, a wet room could eventually spring a leak and require maintenance.
Wet room floors are easy to clean. You can clean the flooring with a mild floor cleaner and a rubber-bladed mop. Start on the far end of the room and push water toward the shower drain. You can also use a hand-held shower head as a hose.
Walls in regular bathrooms can be difficult to clean, especially when they’re made of drywall or plaster. Wet room walls are hardscaped and water-sealed. So, you can clean them with soap and water without fear of damage.
A note on fixture and appliance deliveries: If you’re on a tight timeline, Appliances Connection has over 50,000 items in stock and ready to ship nationally. If you’re in the NY/NJ metro area, in-stock items typically deliver within 2-3 days.
Materials for rough finishing of wet rooms
Bathrooms, showers and saunas are the most difficult areas in a house or apartment to carry out repairs. The main problem is excessive humidity and frequent temperature changes, not every material can withstand such conditions. At the same time, I want the bathroom and shower room to look bright and presentable. In this article we will talk about the rough finish of wet rooms.
Invisible but important - bathroom rough finish
The rough finish is hidden from view, but the quality of the material directly affects the appearance of the room. The material for the rough finish of wet rooms should allow solving the following tasks.
- Wall Leveling - Often brickwork or wood walls leave a lot to be desired. Making a smooth wall on such a basis is quite problematic. Draft finishing for damp rooms allows you to correct irregularities.
- Disguise of communications - a bathroom or shower room usually has a large number of communication lines: sewer and water pipes, electrical wiring, ventilation elements and others. Without downplaying the importance of these elements, one cannot help but say that they do not look very aesthetically pleasing.
 Some types of rough finish allow you to hide all these knots.
 - Sound insulation and insulation - it is the rough finish layer that improves the thermal insulation properties of the room. The sound of water is not always pleasant for other residents, so the ability to increase sound insulation is especially relevant for bathrooms and showers.
- Adhesion Improvement with Fine Coat - Primer coat helps to hold the fine finish well.
-
Water resistance and waterproofing - The rough finish material must not only have good water resistance, it must also form a waterproofing layer that will not allow moisture to seep into the lower floors or into neighboring rooms.
Not only the finish, but also the rough coating in the bathroom should have hydrophobic properties.
- Mold resistant - Moist environment favors fungal growth.
 For damp rooms, it is desirable to choose mold-resistant materials.
Dry and wet finish
Depending on the material, the finish is dry or wet.
- "Wet" is produced using various cement mortars, ready mixes etc. Hardening of the surface for fine finishing usually takes time. In some places in a wet room, only a wet finish is possible, for example, this applies to the floor screed in the bathroom or shower.
- Dry finishing - technically easier - dry finishing is easier for non-professionals to handle and works without a lot of dirt and dust.
Wet Finish Wall Materials in a Wet Room
Wet finish is usually used when the wall does not have many irregularities.
-
Plaster - we recommend using a mortar of cement and sand for this. Also, the composition may include various plasticizers, which increase the physical and technical properties of the material and reduce shrinkage.
 In wet rooms, it is a cement-sand mortar that is used; compositions based on a gypsum binder are not recommended for wet rooms. The solution can be prepared independently, but it is easier to use a ready-made mixture for plaster.
It is practically impossible for a beginner to perform high-quality work on his own
Plaster is divided into thick-layer and thin-layer. The first allows you to lay a mortar layer of more than 50 mm, a thin layer is suitable for working with relatively even walls, where the difference is no more than 10 mm. With a plaster thickness of less than 50 mm, reinforcement is usually not done, it is used only in cases where the wall has a complex shape and there is a danger of collapse of the rough coating.
-
Putty is a thick substance that is used to level the rough coating. After plastering, the surface remains rough, so it is puttied for subsequent painting or wallpapering.
 After that, the walls become even and smooth. If it is planned to lay tiles as a finishing coating, then puttying is not performed.
Putty is leveled with spatulas and various grouts
Putty, depending on the base, can be mineral, organic or polymeric. Mineral compositions include cement-based compositions, polymeric - mixtures based on latex and acrylic. Putty, which is available in the form of ready-made mixtures, is immediately suitable for application; dry formulations must first be diluted with water. Also, the compositions differ depending on the fraction of the filler.
Dilution of dry putty with water
Gypsum-based putty is not recommended for use in wet rooms, since even compounds marked as moisture resistant cannot withstand direct water.
Sanding the puttied surface with sandpaper
“Dry” finish without dust and debris
“Dry” rough coating involves the use of sheet material, which is mounted on the crate with self-tapping screws. Also, in some cases, mounting on the adhesive composition is allowed. In wet areas, materials such as GKLV , Aquapanels 9 can be used0006 and GVLV.
-
GKLV - moisture resistant gypsum plasterboard consists of a gypsum core, which is located between two sheets of thick construction paper. Even moisture-resistant material does not have complete protection against water, so the use of drywall in wet areas is only allowed under certain conditions. For example, in ventilated bathrooms of a large area in places where water does not fall. It is not recommended to use GKLV in small showers, baths, hammams, it is better to use denser moisture-resistant materials.
GKLV may be present in bathrooms where there is no direct contact with water
-
GVLV – moisture-resistant gypsum-fiber sheet consists of loosened cellulose and gypsum binder, moisture-resistant sheets contain hydrophobic additives that increase the resistance of the material to water.
 The sheet has a high density and resistance to mechanical stress. Gypsum and cellulose products have good fire retardant properties, although they are not non-combustible. In terms of combustibility, GVL belongs to the class of low combustible (G1), in terms of flammability, it belongs to the class of hardly flammable (B1). Gypsum fiber sheet has good soundproofing properties and is not a favorable environment for the reproduction of fungal organisms. At the same time, in terms of flexibility, GVLV is inferior to GKLV, therefore, it is used less frequently for finishing curved surfaces.
Gypsum-fiber sheets are fixed on the profile boarding
-
Aquapanel is a modern material, the main components of which are cement and mineral filler. The aquapanel has the form of a plate, in which a fiberglass mesh is fixed on both sides, the edges are reinforced with fiberglass, this avoids chipping and coloring of the material.
 Cement-based products are moisture resistant, do not contribute to the reproduction of fungal microorganisms. Aquapanel is fire resistant, therefore it is recommended for rooms with increased fire protection requirements. Also, the material is flexible, so it is used to create curved planes. The panels retain their physical and technical properties at high temperatures. Aquapanel coatings are used not only in showers and bathrooms, but also in baths or saunas.
Aquapanel base in shower room for tiling
Primer - base preparation
Surface priming is used for "dry" and "wet" finishes. Primer is applied before the subsequent laying of the final layer, when grouting and before laying the waterproofing. In wet areas, special requirements are imposed on primers. They should have moisture-repellent and moisture-proof properties, have an antifungal effect and reinforce the base. The main property of the primer is to increase adhesion - adhesion of materials to each other.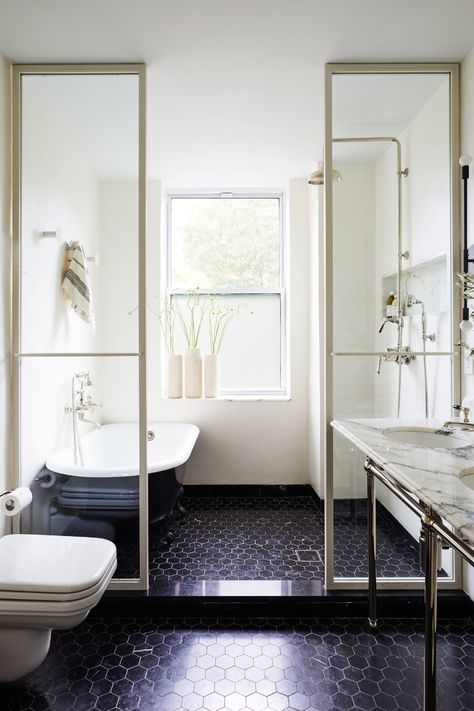
In damp areas such as bathrooms, showers or saunas, primers must be non-toxic. The latter include mineral, alkyd and acrylic compounds. Phenolic primers are not recommended.
It is also important to consider the substrate material on which the primer is to be applied. Alkyd compounds interact better with wood, acrylic compounds with concrete and brick.
Waterproofing materials - water will not pass
In wet rooms, the waterproofing layer is of particular importance, it does not allow water to accumulate between the subfloor and the bases. High-quality waterproofing protects the room from the spread of mold and prevents moisture from penetrating to the lower floors. In bathrooms and showers, not only the floor and ceiling need waterproofing, but also the walls. The layer should form an integral coating without cracks and cracks, for this special attention is paid to joints, overlapping on adjacent surfaces.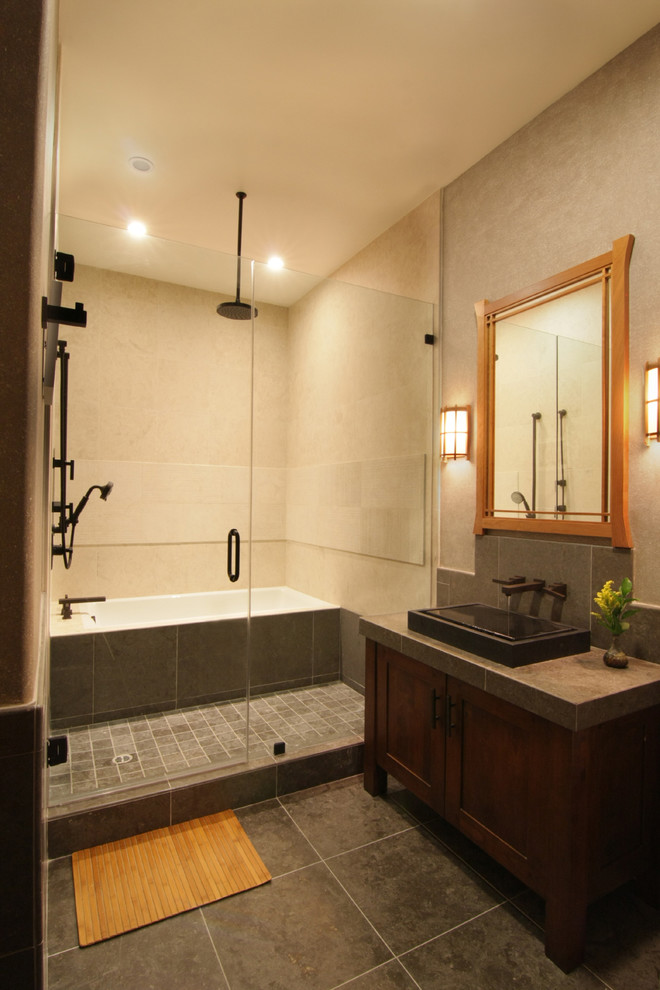
Wall areas in the bathroom critical to the waterproofing layer
Waterproofing materials are divided into types depending on the composition and method of application.
-
Rolls are simply rolled out on the surface of the room or glued to the walls. At the same time, special attention is paid to the design of overlaps, it is important that the material in all places fits snugly against the surface and does not bubble. When laying, it is important to be careful not to damage the coating. For wet rooms, fiberglass and fiberglass are often used, polyethylene and bitumen-based products are not recommended because of the specific temperature conditions of the rooms.
Waterproofing tape with self-adhesive strips for overlapping
Waterproofing materials containing bitumen are inexpensive, but their composition is not very healthy, so for places such as a bathroom, shower or bath they not recommended to use.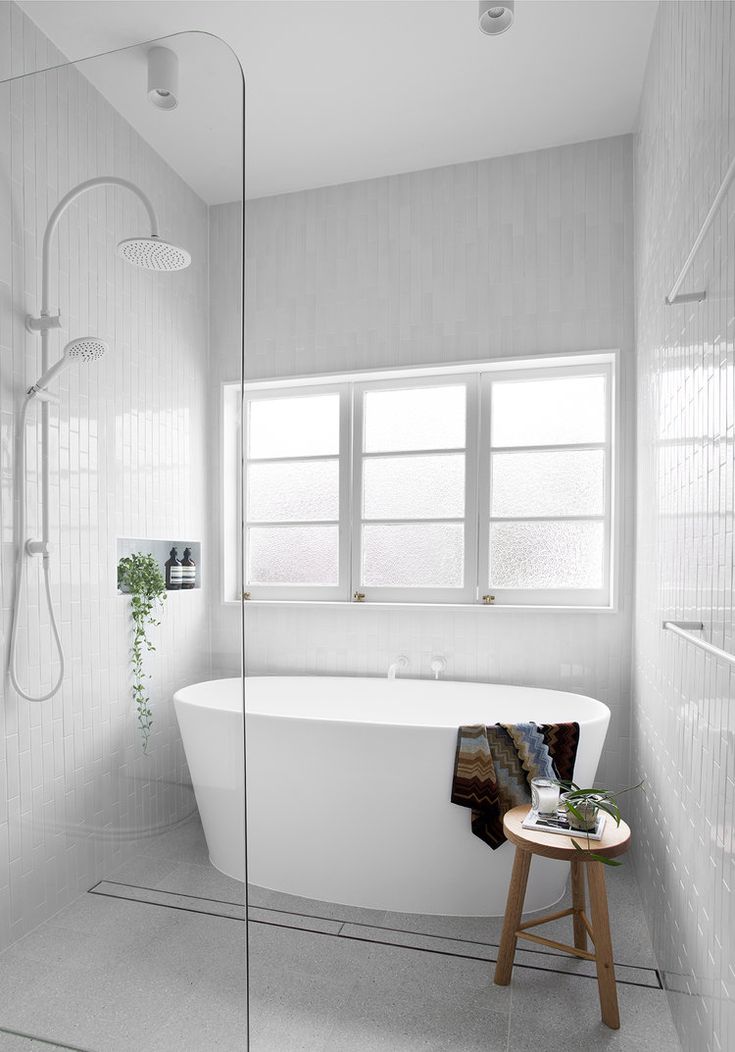
-
Coating compounds - for wet rooms it is recommended to use polymer and cement-polymer substances. Coating waterproofing is well suited for uneven surfaces with a large number of cracks and seams. The consistency allows the coating agents to easily fill voids. Another advantage of this waterproofing is the ease of application.
Applying a waterproofing coating to the joints
It is important that the service life of the waterproofing material matches the service life of the finishing coating.
- Impregnations is another type of waterproofing material. Unlike previous products, impregnations directly affect the properties of the base, increasing its hydrophobic properties. This group of compounds interacts well with concrete or brick. Impregnations also include penetrating agents that are used to restore the old waterproofing layer.
Different formulations can be combined. For example, coating materials are often combined with penetrating materials. The latter is already applied to the finished screed, and the coating composition is placed on the base under the screed.
- Waterproofing plaster is a mixture, which additionally includes various hydrophobic additives that increase the water-repellent properties of the coating. Such compositions are universal and can be used for various types of coatings.
Therefore, in damp rooms it is recommended to use materials with high hydrophobic properties. During installation, it is necessary to take care of the primer and waterproofing of surfaces.
Wet rooms
Wet rooms- home
- Instructions
- Interior painting
0 items
$0
Tikkurila color cards
Color catalogs and dyes are presented in specialized stores that have Tikkurila lacquer materials in their assortment. The sales consultant will help you in choosing paint and colors.
A wet room is a room where the surfaces of structures are regularly exposed to splashes of water or steam. The room is classified as wet according to its purpose. Wet rooms are, for example, bathrooms, showers and baths. A toilet or an ordinary technical room is not necessarily classified as a wet room.
Before painting
- Optimum temperature in the room to be painted is + 15-20 °C and relative air humidity 50%. More detailed recommendations for each type of paint can be found in the annotation to the product and on the label.
- Read label instructions before use.
- New panel surfaces are recommended to be primed prior to installation. Make sure the primer is completely dry before starting the installation work..
- Panel tongues are painted thinly to allow the paint to dry well.
- Choose primer and paint of the same color.
- When varnishing wooden surfaces with translucent colored varnishes, the final color of the surface depends on the type, hardness and original color of the wood, as well as on the number of coats. A trial painting is recommended!
- When using translucent colored lacquers, the surface is varnished continuously from edge to edge in the direction of the wood fibers to achieve an even final result.
- Supi Laudesuoja wood preservative darkens the natural wood color. The end result depends on the type and quality of the wood. A trial painting is recommended!
During painting
- It is recommended to mix paint materials thoroughly before use and during painting.
- In the case of painting the whole room, it is recommended to start from the ceiling. After that, proceed to painting the walls.
- For temporary storage, the paint roller or brush can be placed in a plastic bag and tied tightly.
- Dry indoor air may speed up drying of water-based paints.
After painting
- Keep the room well ventilated.
- Allow sufficient time for the painted surface to dry. Drying of the surface layer of varnish or paint does not mean final drying. Materials usually take from several days to two weeks to completely dry, depending on the type of material and the thickness of the layer.
- If the paint is not completely used up, wipe the edges of the can and close it carefully so that the lid fits all the way into the can. Turn the jar upside down for a short time, this will ensure that the lid closes tightly. Long-term storage of paint in incomplete or loosely closed containers should be avoided.
Learn more