Upholstering walls with fabric
Wall upholstery 101 - How to install traditional fabric walls
When it comes to wall upholstery, there is only two options. You either ask a professional to perform the installation or decide to do it yourself. Both options could be overwhelming if a person does not have some basics. Finding a skilled wall upholsterer could be a challenge and getting a good method for a DIY fabric wall project is another.
I have read a few blog posts’ on DIY fabric wall project and watch some online videos on this subject. The good news is a person needs basic upholstery skills, patience, discipline and like working with fabric.
In some case, I saw people using glue to apply a textile directly on a wall. Well, this method is not called wall upholstery. Nor stapling a pattern fabric on a separate panel or board and then hang it on the wall. I would name this wall Art.
A third type of installation is fitting a fabric over a layer a Dacron and stapling around the perimeter of the room. Of course, additional braid is required for hiding the thousands of staples. Actually this option is wall upholstery as long as no glue is involved in the process.
Nevertheless something is missing with that idea. For instance, the lack of preparation is an important step like adding a small frame. A frame that is created by a slat, a strip fixed to the wall before the fabric is install on the surface. I will explain further later.
What type of fabric installation?
I have nothing against any of these approaches below. All 3 have a completely different look. So if you decide to go with one of them, you will need precision, patience and strength. And time of course! It may take several attempts and several days to complete your DIY fabric wall project but you can do it.
A basic installation would be to wrap the fabric on a frame. Because your fabric has some type of design, pattern and colors, it hangs like a canvas or a painting. With no upholstery skills a person can build a frame then stretch a fabric over it. The idea of placing them in a series is interesting.
Here is a thought. Instead of getting an upholstery fabric with a motif, get a plain canvas and paint on it. I am sure someone at home will be happy to help!
Now the second option is a little delicate because of the paste that goes on the wall. The same idea as wallpaper but the bonus is the fabric won’t tear. The trick is keeping air bubbles away. If you have manage wallpaper with motives then there are no reason for failure. Remember no to over stretch the textile.
Conclusion this is work is a job for a wallpaper installer or for yourself if you are up to it.
Before we take a closer look at the last method that requires basic skills, what if you wish to hire someone?
Hiring a skilled wall upholsterer
Given these points, some of you will decide to go to a professional. So, try getting as much information as possible. In order to guide through THE process, I have written an article on this topic. Laying out questions you should ask before hiring an installer.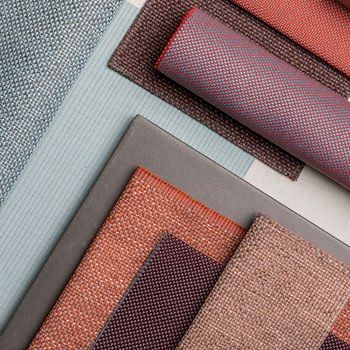 You can find it at How to choose a wall upholsterer?
An upholster should offer options like with or without decorative trimmings. Also, Does your upholster know that there is another fitting method than stapling the fabric? We have research thoroughly for various products or good fitting system on the web for homes. Most tracks are for commercial use and do have their limitations for residential application. In fact, there is only one which stands out. It is called Clean Edge System. A revolutionary track for residential use as it works with all challenges found in homes.
Ask a professional if he can use that type of fabric system.
We have a portfolio full of pictures of wall upholstery. They will help you in many ways. Look at the installations and the type of rooms.
Now the last option for someone who wish the job himself.
Stretching upholstery fabric
The question is Can you stretch fabric on walls? Yes, you can. Do you need upholstery skills? It helps because streching fabric is not like working with wallpaper. However as I mention earlier, wall upholstery requires patience, precision and an amount of strength depending on the scale of the project. I am including a few links (words in blue) to help you.
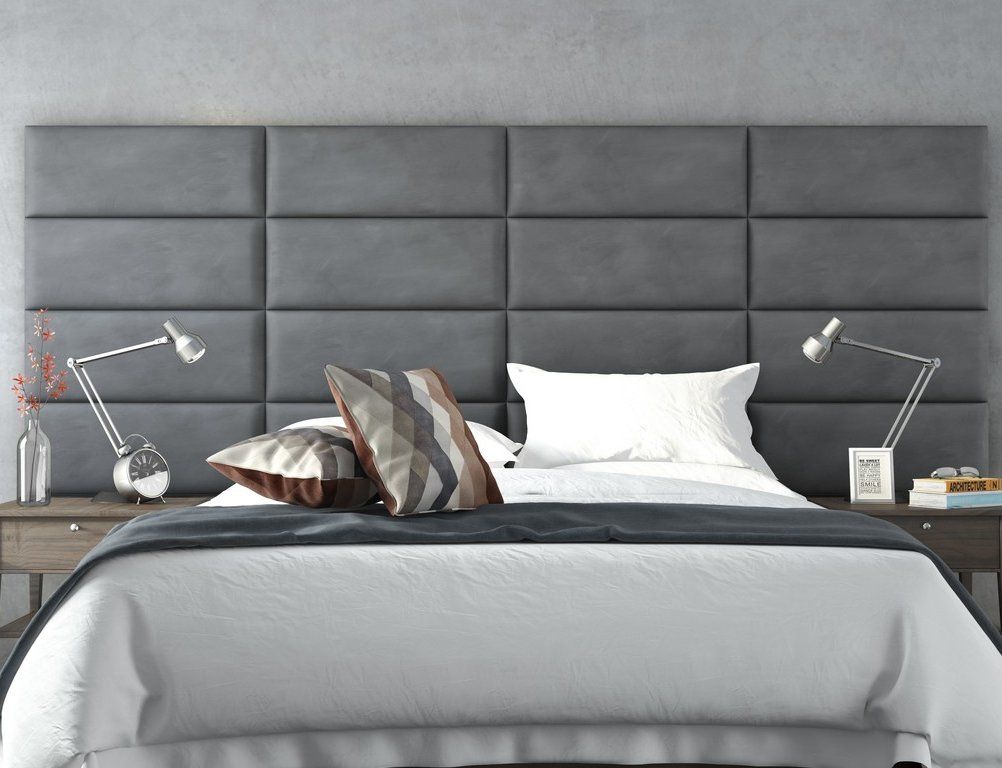
Remember wall upholstery 101 includes for the materials a fabric, some types of padding, and a support to attach the fabric. Plus small fittings, brad nail and staples.
Most important a wall is said upholstered only because it has a layer of padding behind the fabric. Don’t forget!
First and foremost, a fabric should not be stapled directly to the wall but be fixed on some sort of support like a slat. For one thing, if the fabric needs removing away from the wall, you will be very upset with yourself for not having installed any slats.
Wait a minute. Do you really want to pull out all the staples one by one? Think about the time spent doing this. And you will damage so much the sheetrock, plaster everywhere…What a mess!
So what is the solution?
You need to fix a frame where the fabric is stapled to it.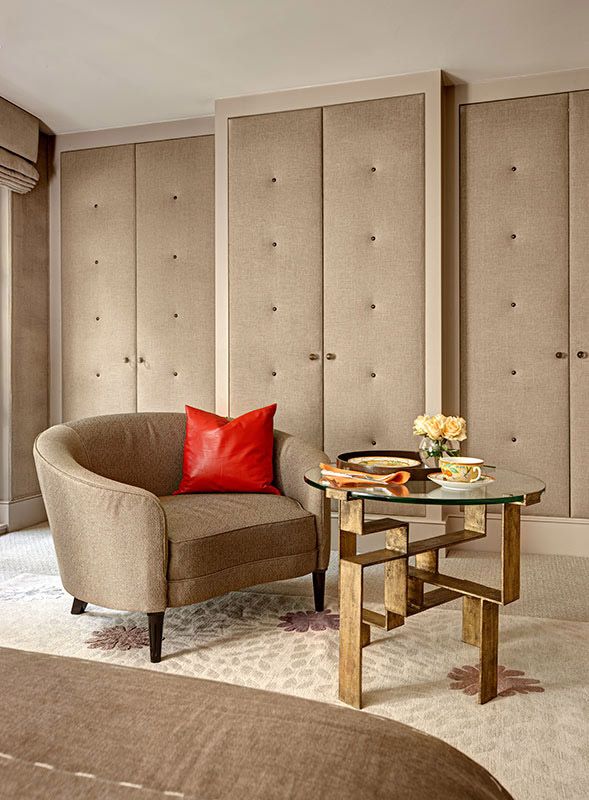 It is a little more work but well invested as the walls will also look so much better. Most people take wooden strips which have a few inconveniences. What are they?
DIY fabric wall project with fabric trims
If you wish to go with wood slats then you will need to buy a sheet of wood; ¼ inch plywood. And make strips of 1 to 1 ½ inch wide.
This stage is another project that could be discouraging. Besides, this method requires a table saw. So, let say you decide to go through it which is fine. Then when time comes to install, you will find that your hands could be damaged or even bloody from splitters during the process. Remember the fabric needs to stay clean. Hello!
Finally during the fabric installation, you will have a high chance of pulling fabric threads from the wood. And more observation, wood brakes too.
In all honesty try to keep this experience simple. Instead of working with wood, my advise would be to rule out plywood.
Simply replace wooded strips with another product called CWS or Contour Wall System.
It is a handy method making a faster job. The fabric is fixed on it, trimmed then a flat braid or welt is added for hiding staples.
A clean and quick DIY upholstery
The product comes in strips ready to use. Each length is 94 inch long by ¼” thick. Contour wall system or CWS is a white strip designed especially for wall upholstery. You will not get all problems mentioned above. Each box has 40 lengths, which makes 100 yards. Smaller quantity is available.
In a nutshell:
What you need to do is place and staple this product around the room using ¾ inch staples or brad nails. It is easy to cut CWS (Contour Wall System) with sharp track cutter. You will be able to make small pieces without problem, even cut at 45 degree angle. After installing the strip around the perimeter of the room, by doors and windows, add a layer of padding.
Cut the padding just before the strip so they are both at the same level. Proceed with the fabric installation by stapling the fabric on the slat. Trim the excess fabric, then add the desire decorative fabric trimmings.
In case you choose to add brass or nickel nails instead, it will just fine. Any size works.
Remove all furniture from the walls. If the room is empty it is even better. Measure each wall; width and height. Disregard the windows.
Remember that most fabrics are 54″ or 48″.
Let’s say that a wall is 130″ wide, you will need 3 widths of fabric for 54″ wide (3 x 54″ = 162″). For a 48″ fabric, count also 3 widths (3 x 48″ = 144″) And so one with the other 3 walls.
If your wall is 98″ tall, add 5 inch extra to each drop of fabric (103″). This means, you have 3 widths x 103″ = 339″ convert in yard after you have added the other walls. Go shopping for fabric and have fun. You may want to add an extra width as a security. You never know what could happen.
Written instruction of full installationYour supplies.
- Get a ladder, scissor, a pencil, a tape measure.
- Get a compressor, a staple gun or brad nailer. Staples or brad nails ¾” long
- Buy some tracks Contour wall system, a track cutter
- Purchase some padding ¼ to ½” thick
- Find the right fabric
- Sewing machine to seam up the width of fabric.
Step one is the strip.
Take a length of Contour wall system (CWS) and a brad nailer, start by the ceiling at the top right or left corner.
Place a strip against the ceiling or crown molding and fix. Take another length until you reach the other corner.
Use the track cutter for cutting the strip to the correct length.
Step two.
Do the same at the base of your walls or chair rail.
Step three.
Do the vertical strips. At each step: measure, mark your slat, cut and attach the CWS with brad nails. Repeat all around the room. Don’t forget to put strips by the window and door. Fit them against the moldings.
Take a break from your job!
If you are doing a large project, you may need a break at this point.
Then, clean your space and get ready for the next step.
Step four.
Get your padding. Place it just below the track at the top and use your stapler. Trim if too long.
Step five is the fabric.
TOP. Place fabric over the wall with a little extra all around. (Leave more extra cloth at the bottom) Start at the top center with one staple. Hold and stretch very slightly from center to the right, staples on the CWS until you reach the corner. Repeat from the center left to the other corner.
BOTTOM. Go to the bottom. Let the fabric hang naturally and stretch it vertically, staple in the center. Work to the right and to the left. Make sure keep straight.
SIDES. For the sides, pull slightly the cloth and put one staple at the center right and one the left side.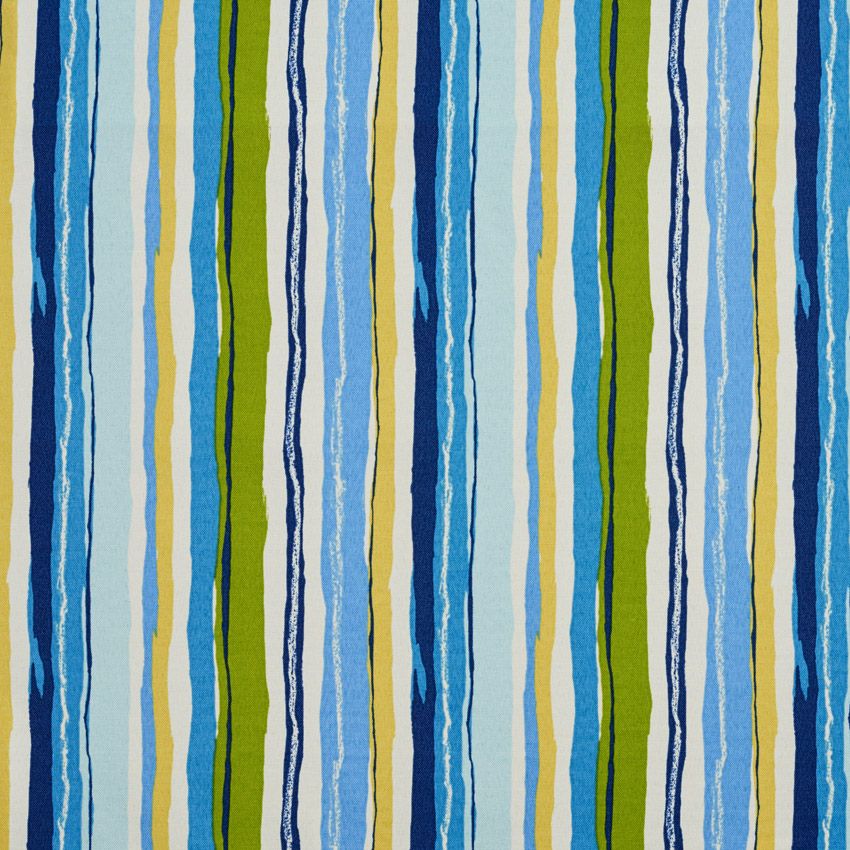 Look back to see it is all leveled. Start stapling the sides. Trim the excess fabric all around.
Step six.
Finally, apply the decorative trimmings of your choice with glue. This operation will hide all staples Any size works. If a nail is not at the correct place, pull it out and reposition. Contour wall system does not split open, which is a great bonus.
I believe you have now all elements for installing fabric wall upholstery 101.
Conclusion on a DIY upholstery project
I have review 3 ways for having a fabric on a wall.
The most basic upholstery skill wrap a fabric on a panel. Stretch a fabric on a frame or a board. It is up to you to add padding or not.
Next is a glue job. A fabric stays permanently glued to a wall and it is a flat solution like wallpaper. Try this on an accent wall with a pattern, it looks good when a fabric has a design.
Then, there is the wall upholstery option where you will use a ready made strip fitted around the room, a padding and a fabric.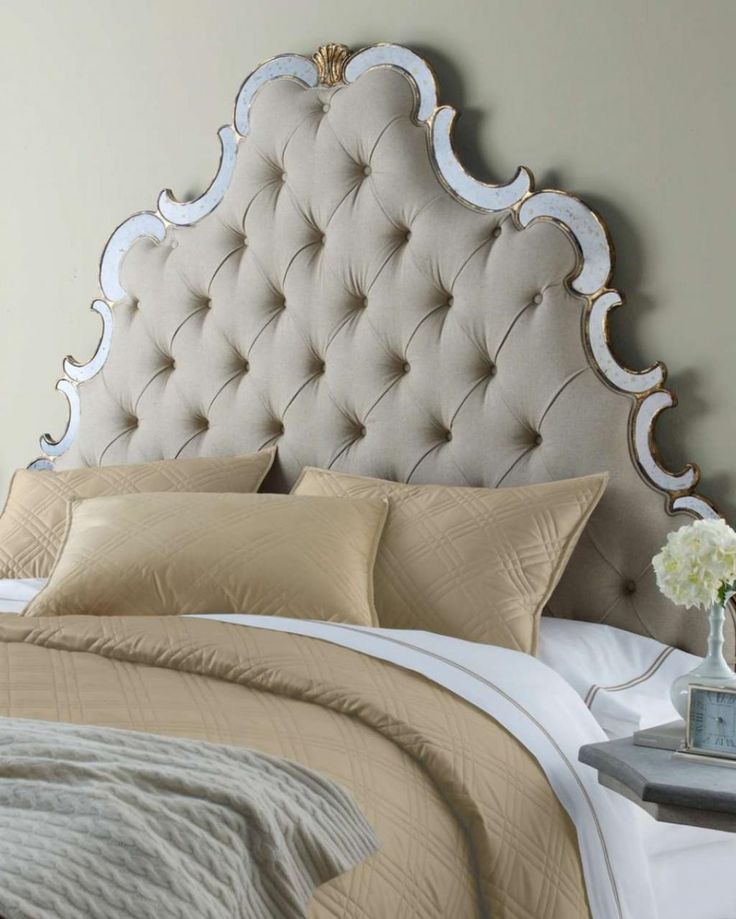
But there is still another way, hiring a skilled wall upholsterer.
Upholstered walls are trending – here's how to get on board
The most dramatic way to elevate your home is by changing your walls – but interior experts are urging us to delve into a world beyond conventional paints and wallpaper and experiment with the most luscious trend to date. Yes, we can create the ultimate statement of opulence and luxury through upholstered walls – the craze that drenches the room in nothing but pure, unrivalled style.
See: Interior design trends – top looks for the year ahead
Creating a look that's reminiscent of a boutique hotel and giving a nod towards modern maximalism, upholstered walls have never looked – or felt – quite so current. But this decorating technique has already kissed the walls of the most fashionable homes throughout the centuries. So, what does the process involve? And how can we bring this enduring trend into our homes?
Here, the experts reveal everything we need to know before going all-out indulgent across our walls.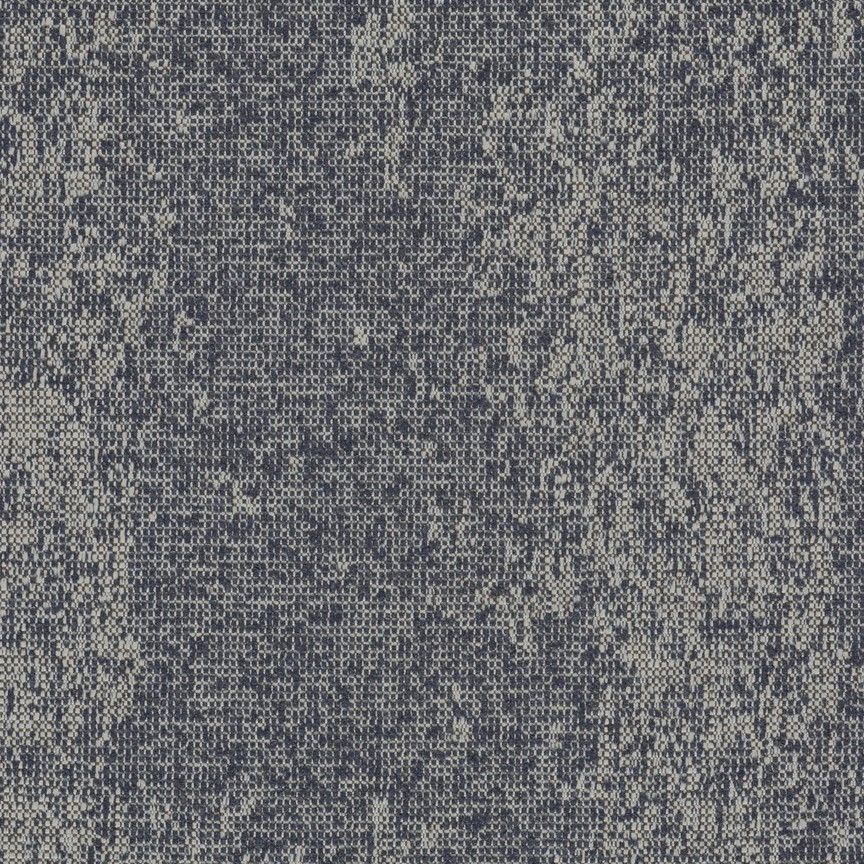
(Image credit: Arte)
What are upholstered walls – and why are they trending?
(Image credit: Arte)
‘Upholstering walls is a highly complex and specialist process, dating back hundreds of years, where fabrics are stretched over battens attached to the wall, which as well as adding pattern and color, creates a wonderfully cozy, cocooning, textured feel,’ begins Arte’s Managing Director, Philippe Desart.
But why are upholstered walls trending now? According to Philippe, new technologies that have created alluring ‘textile wallcoverings’ are bringing the indulgence of upholstered walls into an increasing number of homes, as they are ‘far easier to install and create the same warm and welcoming feel.’
He continues: ‘From light silks and satin to heavier fabrics like boucle, corduroy, cashmere or velvety chenille and suede, there are a number of real textiles, as well as innovative and clever imitations to suit all styles and budgets in both traditional and contemporary spaces. ’
’
How to bring upholstered walls into your home
(Image credit: Arte)
With so many textures, patterns, and emerging techniques, designing an upholstered wall that is suitable for our homes can be tricky. However, we’ve spoken to the people at the top of the interiors industry who shared how to make the process more seamless – and how to make these luxurious walls work for you.
1. Experiment with flat wall upholstery
(Image credit: Arte)
It is possible to indulge in the aesthetic of a wall upholstery without the overindulgent pin cushion effect – according to designer Miles Redd of Redd Kaihoi .
‘There is nothing like fabric and batting on a wall for an extra layer of luxury and comfort. I favor very tailored flat wall upholstery – with just the thinnest layer of batting, to avoid the pincushion effect. I love a rich-colored satin on walls as it gives more depth than paint, but also a fan of patterns,’ Miles shares ‘Walls can be expensive, so if that is not in the budget, I always love to upholster a banal door with leather and nailheads,’ he adds.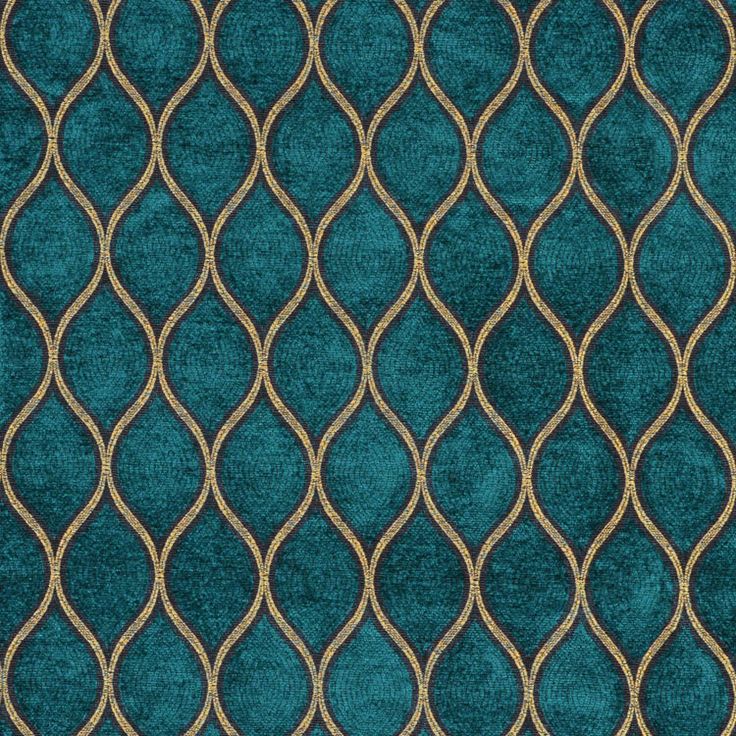
See: Wallpaper trends – the most stylish ways to dress your walls
2. Play with paper-backed fabric
(Image credit: Fermoie)
Perhaps one of the biggest obstacles in upholstered walls is the timely installation process. However, the Director of Fermoie , Jamie Shawcross, offers an alternative in the shape of paper-backed fabric.
‘Paper-backed fabric can be hung on a wall in the same way as standard wallpaper, but the effect is far from average. It adds a layer of luxury to a room, it’s tactile, and it’s warm and cozy. It is not a DIY job to attempt over a wet weekend, however.’
3. Indulge in wallcoverings with depth
(Image credit: Arte)
In all their glorious colors and patterns, upholstered walls exude maximalism – especially when selecting real textiles wall coverings with depth. Philippe recommends choosing luscious deep coverings that boast ‘striking contemporary patterns,’ such as the Monstera, Palma, or Panthera (above) from Arte’s Yala collection.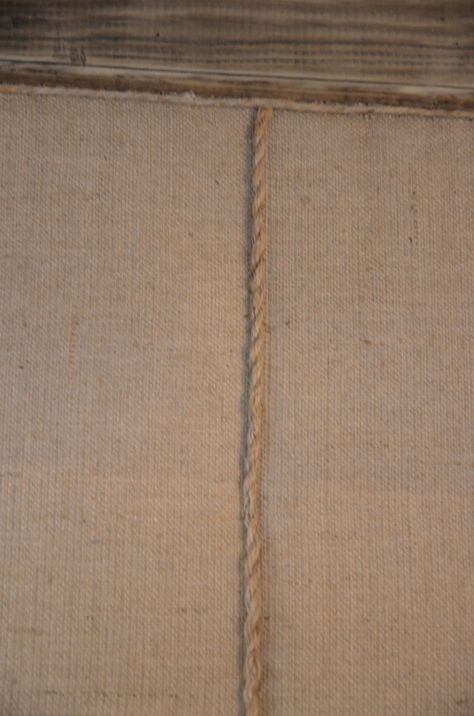
See: Wallpaper ideas – gorgeous decor for every room
4. Upgrade your walls to works of art
(Image credit: Arte)
The unparalleled aesthetic and the craftsmanship behind upholstered walls rivals any artwork while adding ‘warmth and texture, as well as an imposing presence that establishes and grounds a room, a corridor or a stairwell,’ shares Camilla Clarke, Creative Director at Albion Nord .
Camilla also suggests that patterned textiles bring ‘an old-world charm to the most contemporary of rooms, and the contrast between more contemporary pieces in close proximity can be really arresting.’
5. Create upholstered walls – with a twist
(Image credit: Fermoie)
See: Accent wall ideas – inspiring feature wall ideas and creative focal points
For the ultimate contemporary twist on this century-old trend – get creative – and design a scheme reminiscent of a boutique hotel by creating upholstered walls using curtains. Choose curtains that run the course of the walls, and match your soft furnishings to bring the luxurious scheme together in style.
While we may be able to return to a hotel, we've never felt so inspired to bring its allure into homes. Maybe we'll just have to do both.
Specificity of wall decoration with fabric | Blog Angstrem
10/13/2021
1326 Views , 0 Comments
Wall decoration with fabric was used in Europe in the 12th century, and this method of decoration was most widespread in the 18th century. The very word "wallpaper", so familiar to modern man, originally referred specifically to the canvases of fabric with which the walls were upholstered.
Now wall decoration with matter is not so common, but it can be used in modern interiors.
Pros and cons of fabric wallpaper
When choosing this option, it is worth considering that
● wall decoration with fabric will cost significantly more than when using other materials;
● work presents a certain complexity;
● The fabric cover will require special care.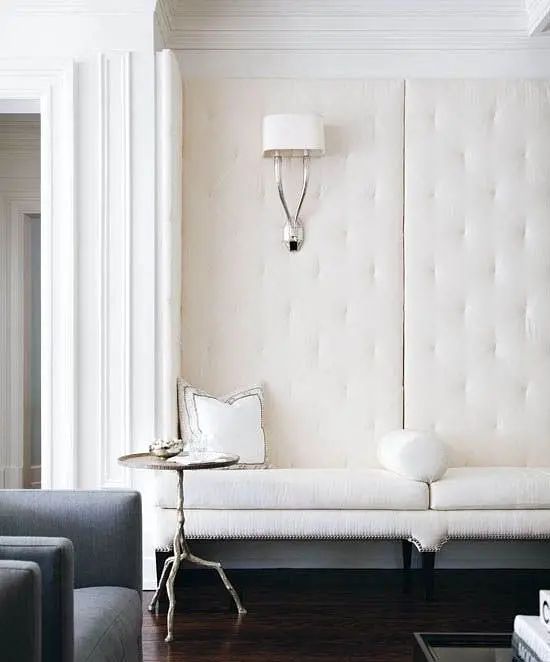
However, the advantages of this design method are much greater. Fabric trim
● makes it possible to give the room a non-trivial look, to create a particularly cozy and warm atmosphere;
● does not require preliminary alignment of the walls;
● Prevents the appearance of mold and fungal formations;
● Provides good breathability;
● creates an additional heat and sound insulating layer on the walls.
● With the right choice of fabric, the finish does not fade, is easy to clean and can be repaired.
Textile selection
Almost any fairly dense fabric is suitable for finishing. A win-win option is natural and artificial materials used for furniture upholstery.
● Natural fabrics are more environmentally friendly - this option will appeal to adherents of a natural interior and a healthy atmosphere in the house. Jacquard, jute or sisal fabric is suitable for decoration.
● Synthetic materials are more practical: they are less subject to wear, are not hygroscopic and hold their shape better.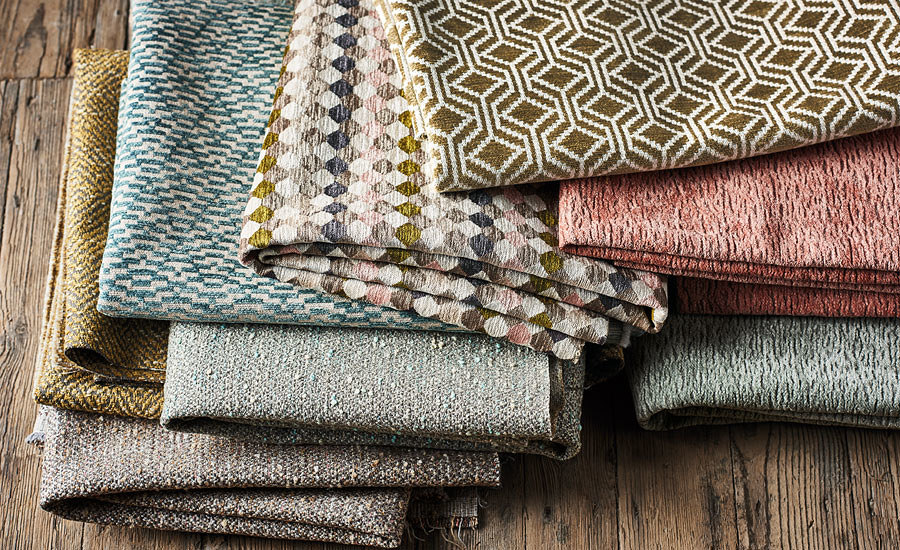 You can use upholstery made of polyamide, polyester or viscose.
The choice of colors largely depends on the style of the room.
● For a classic setting, fabrics with stripes, repeating patterns, three-dimensional patterns are suitable.
● Most modern interiors will be successfully complemented by monochrome fabrics in neutral shades.
● For an Art Deco room, you can use materials with a bright, expressive pattern, as well as plain fabrics of complex colors.
● Patterns in the form of zigzags and waves go well with the ethnic setting.
● For an oriental-style room, fabrics with metallic threads are perfect.
Work Technicians
There are several ways to decorate walls with fabric.
● Pasting involves gluing the fabric directly to the surface of the walls. This method is suitable for fleecy materials: velor, suede, velvet. The process involves the mandatory leveling of the surface.
● Upholstery can be made on or under the rail.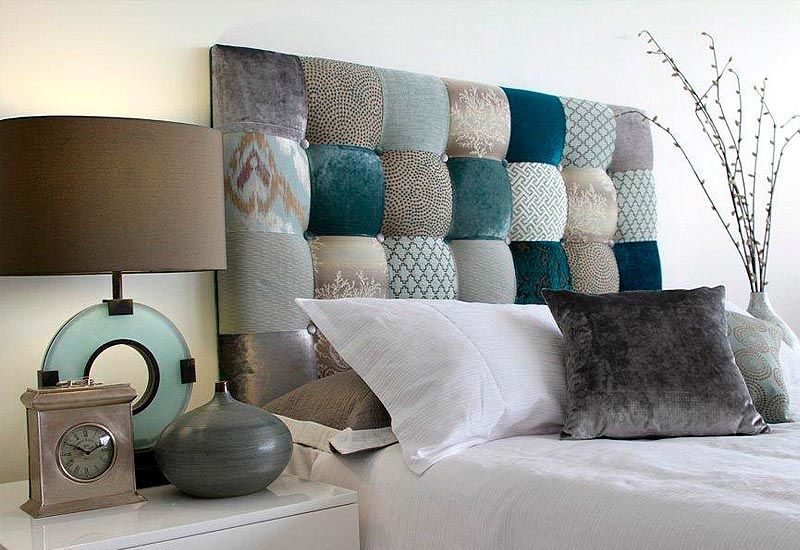 The second option is considered easier to implement. A rack frame is installed on the wall along the perimeter, which can be filled with foam rubber for additional sound insulation, and then a fabric sheet is fixed to it.
● Drapery involves the use of wide sheets of fabric: usually it should be 1.5 - 2 times the width of the wall. The more fabric is used, the richer and richer the drapery is.
Fabric wall decoration in the interior of individual rooms
You can use this wall decoration option in almost any room of the house. In this case, it is not necessary to sheathe all the walls in the room with a cloth. Matter is great for creating accents, inserts in combination with other finishing materials: plaster, paint, traditional wallpaper.
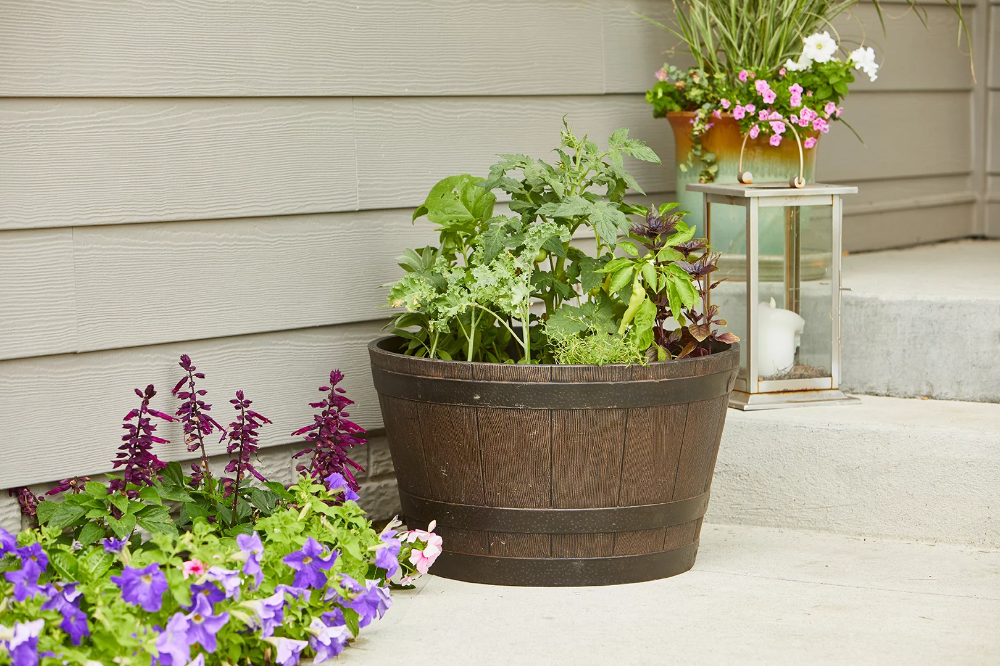
● In the bedroom, you can decorate the wall or its fragment at the head of the bed with fabric drapery.
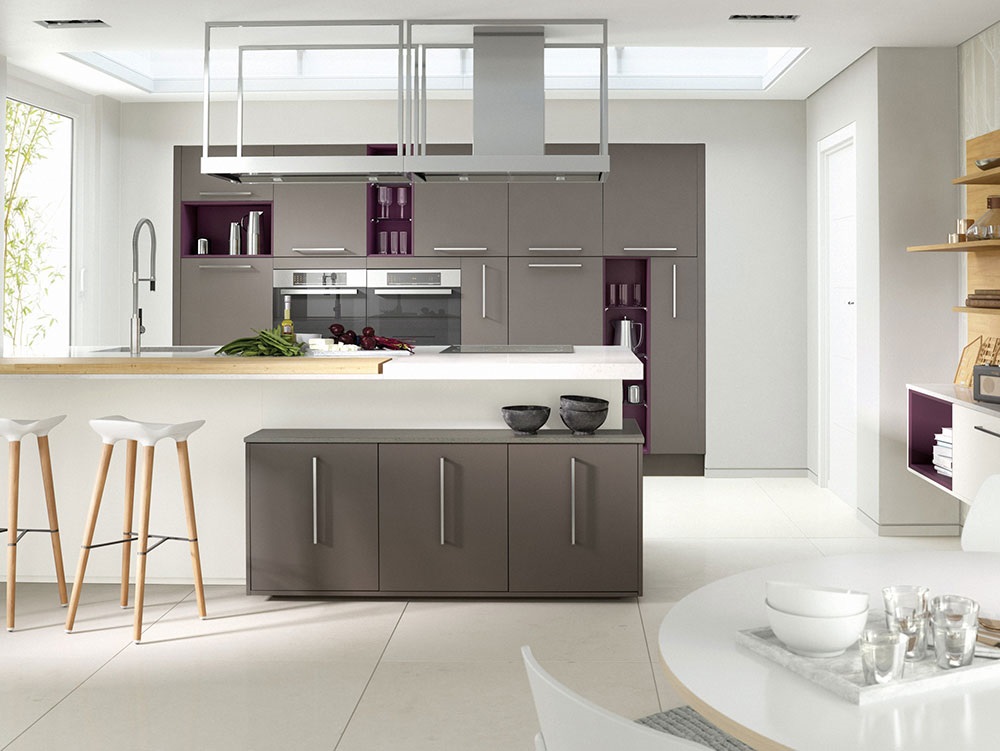
● In the living room, this finish is suitable to highlight the seating area.
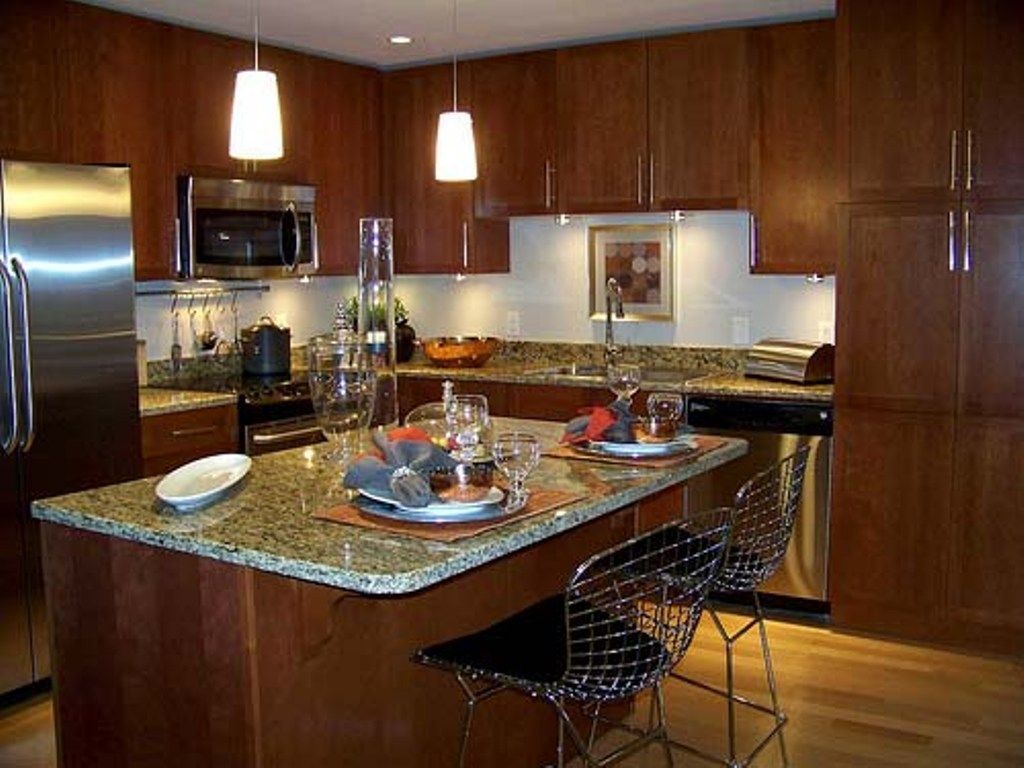
● Fabric wallpaper in the kitchen will give a special coziness to the dining area.
Care instructions
To remove dust from the fabric, it is regularly vacuumed. More serious contamination is removed with soapy water or dishwashing detergent.
It is not recommended to use aggressive stain removers and other products for cleaning - due to such exposure, the fabric may stretch or change color.
If the material is torn, the gap is carefully repaired with a patch of the same material, gluing a piece of fabric to the surface.
Do-it-yourself wall upholstery with fabric: nuances and important points of the process
Contents:
Wall drapery: the first method - stretching the fabric under the rail
Wall sheathing with fabric: the second method - stretching the fabric onto the rail
Wall upholstery with fabric: the third method - gluing
More and more often, modern designers are returning to the old days for inspiration - you must admit, they used to know how to build and repair for centuries. Moreover, all ancient technologies are distinguished by exquisite taste and simplicity. This is how you can characterize the decoration of the walls with fabric. This technology, or rather three ways of decorating walls, we will analyze in this article. Together with the site stroisovety.org, we will study in detail the question of how do-it-yourself wall upholstery is done with fabric and learn all the subtleties of this process.
In principle, draping walls with fabric can be done in three ways - all of them are quite simple and accessible to everyone. Believe me, this process, despite the apparent complexity, is much easier than wallpapering the walls.
Do-it-yourself upholstery of walls with fabric photo
Wall drapery: the first method - stretching the fabric under the rail
This method of decorating walls with fabric can be called the most difficult. The fact is that it is difficult to implement it alone on large areas, although it is possible if desired.
Woven fabric, the dimensions of which are 10-15 cm larger than the dimensions of the wall, is fixed with studs or small dowels, first in one upper corner, and then in the other - at this stage of work, it is necessary to stretch the upper section of the fabric to the maximum. After that, a decorative rail is stuffed over the fabric. Here you will have to show all your diligence and patience - you must simultaneously fasten the rail and stretch the canvas.
Wall drapery with cloth photo
You need to start from one of the corners and gradually move to the side - it is better to install fasteners every 15-20 cm. As fasteners, you will have to pick up either self-tapping screws with decorative caps, or use ordinary ones, but install them in a sweat, which can later be masked with decorative caps. If a crease crawls out at the end of the wall, then the carnation that pre-fixes the fabric will have to be removed - you can take care of this in advance, even before installing the last piece of decorative rail (it is unlikely that you will be able to purchase a wall-sized rail).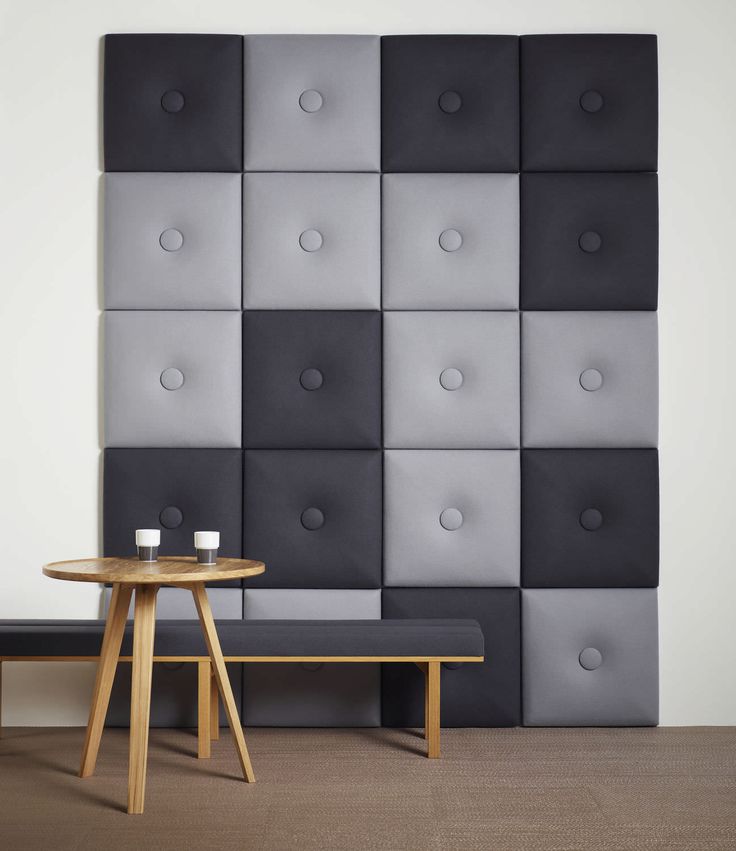
So, with the top sorted out, now it's time to switch to the bottom of the wall. Almost everything is the same here. First, we stretch one of the lower edges, then the second, and, like last time, we install a decorative bar and at the same time stretch the fabric. The sides of the woven fabric are attached in exactly the same way.
In all this, there is one very important point regarding the installation of a decorative strip - if you want the wall covering to be 100% successful, you will have to take care of the correct trimming of the corners. They need to be cut in advance, even before work begins. In principle, you can even prepare all the fasteners ahead of time and drill holes for them not only in the rail, but also in the wall - then you just have to stretch the canvas and fasten the rail.
Do-it-yourself wall decoration with fabric
Wall sheathing with fabric: the second method - stretching fabric on a rail
This method of decorating walls with fabric is much simpler - it consists in the fact that a rail is first stuffed around the perimeter of the wall, and only then fabric is attached to the rail .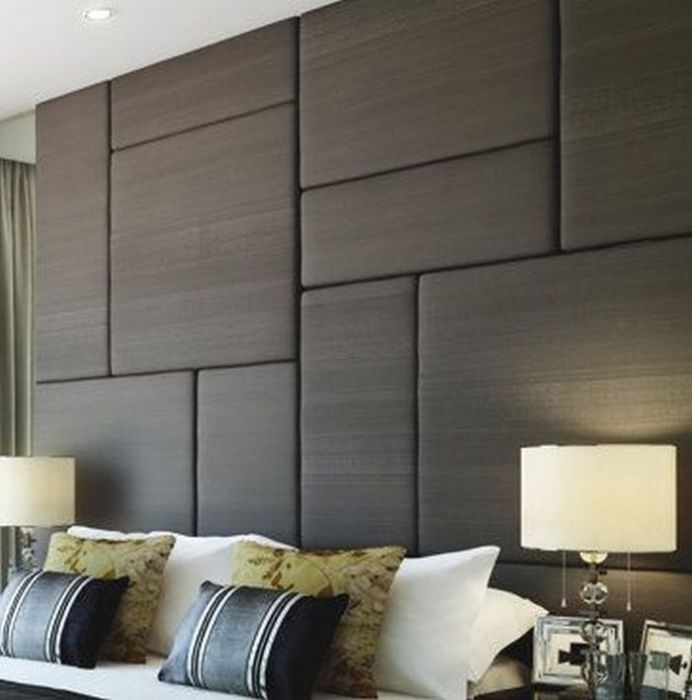 This method has one advantage - thanks to the stuffed rail, it becomes possible to insulate and muffle the wall. Of course, you can’t lay a full-fledged insulation for such a wall, but you can use thin foam or felt.
Do-it-yourself wall covering with fabric
In principle, the whole process of stretching the fabric looks exactly the same as in the first method, only nails with decorative caps are used as fasteners (in this case, the edges of the fabric will have to be folded in) or furniture staples . The second way to fasten the fabric is easier and faster. Subsequently, the attachment points are covered with decorative strips.
Finishing the walls with fabric in the second way is carried out in the following sequence. Starting from any upper corner, the fabric is simultaneously stretched and nailed to the rail, first under the ceiling, then above the floor, and only then from the edges of the walls. You should carefully monitor the tension of the canvas so that wrinkles do not form.
DIY wall decoration with fabric photo
Wall upholstery with fabric: third method - gluing
In principle, almost any fabric can be glued using this method. To decorate the walls in this way, you will need a partner who will hold the naughty canvas. Of the tools, a sharp knife and a powerful old-style iron are useful. Of the additional materials - exclusively furniture glue, which hardens when exposed to high temperatures.
As in the previous cases, the decoration of the walls with fabric by gluing it starts from the top. Furniture glue without temperature exposure hardens for a long time, so you can safely spread the entire wall at once and not worry about anything. For ease of use, one corner of the woven fabric, from which all work begins, can be fixed with a small carnation. While your partner is holding the canvas under the ceiling, you calmly smooth it with an iron - the glue is absorbed into the top layer of the wrong side of the fabric, gluing it to the wall in this way.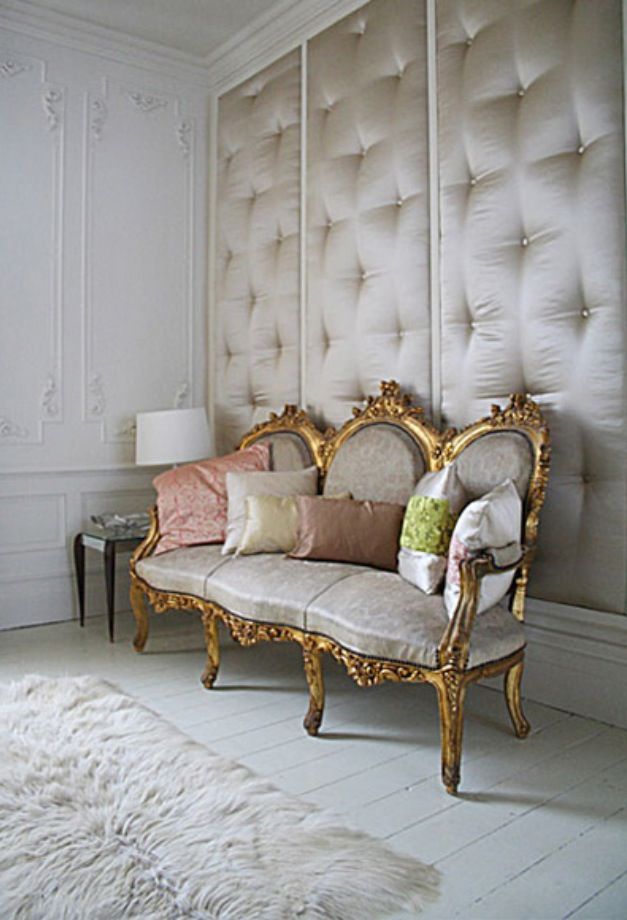 So that the upper edge of the fabric does not fall off, it is better to immediately warm up a strip half a meter wide.
Wall decor with fabric photo
Having reached the opposite edge of the wall, you can free your partner and entrust him with trimming the fabric. Hand him an even metal ruler and a sharp construction knife - by placing the ruler in the corner between the ceiling and the wall, he will quickly and easily, and most importantly, evenly, remove excess fabric. In the same way, the fabric is cut off near the ceiling baguettes.
While the partner is busy cutting the fabric, we continue the interrupted process of gluing the fabric. We move in the same way as under the top - we take a strip half a meter wide and, gradually warming it up, we reach the opposite edge of the wall.
How to glue the fabric on the walls with your own hands
So, strip by strip, the entire woven fabric is pasted. In the process of work, special attention should be paid to the following points.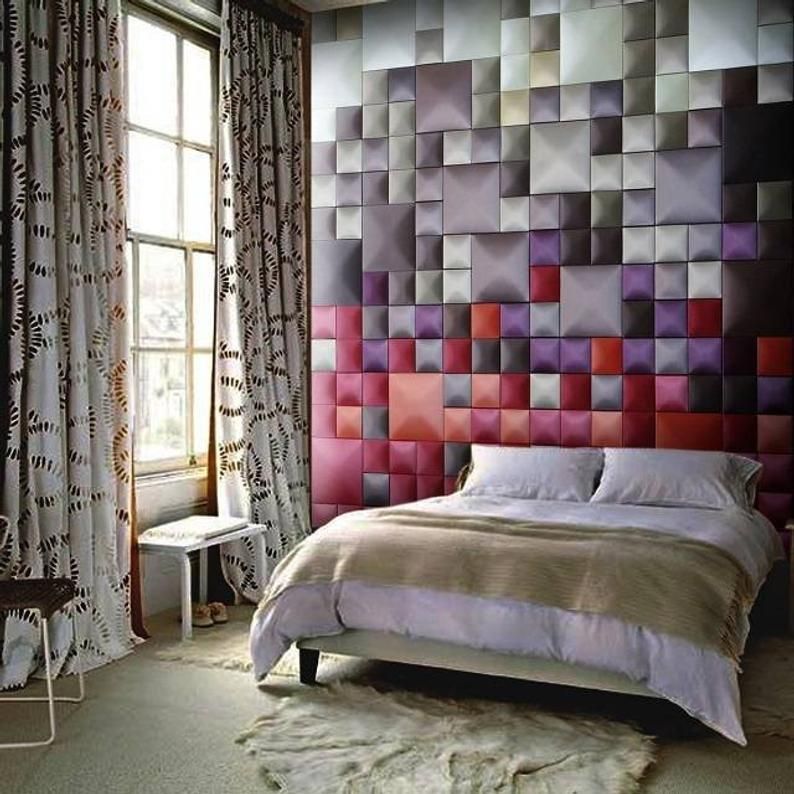
- Firstly, in the process of covering the walls with fabric, it should not be pulled - it should lie naturally on the walls. The fact is that even after warming up, the glue used remains plastic and the fabric can move to the side, resulting in folds.
- Second, the edges. Like it or not, the edge cut with a knife during operation can be frayed. This is prevented in only one way - around the perimeter of the wall, it is necessary to apply a little more glue than everywhere else. It will be absorbed deeper into the fabric and, after curing, will prevent fraying of the edges.
- Thirdly, carefully monitor the uniformity of gluing. Sometimes air can remain under the fabric, which prevents the fabric from sticking in this place. At the end of the work, the wall must be carefully examined for bubbles that have arisen and, if necessary, removed - a couple of punctures with a thin needle and repeated ironing solve this problem in the best way. By the way, such bubbles can also appear the next day - there is nothing terrible in this.
Learn more