Under stairs lights
How to Install Under Stair Lighting — 1000Bulbs.com Blog
Under stair lighting is a cool and versatile way to light a high-traffic area in your home. This guide will take you step-by-step through two under stair lighting installations using LED strip lighting. Before you begin, if you cringe in the face of electrical current or wince at the thought of wiring, your best option is to leave the actual installation in the hands of a professional electrician. Under stair lighting using LED strip lights is a matter of finding the right length and type of tape light you want, wiring it all together, while simultaneously hiding the cables and power sources.
Jump To: Materials Method 1: Single Run Method 2: Each Stair
Materials NeededSingle color LED strip lights with or without tape backing (aka tape light in 12 or 24-volt)
A 12-volt or 24-volt LED driver (optional driver with built-in plug for Method #1)
End caps
Wire cutter/stripper
Wire nuts
Power drill
| Method #1 Optional Materials:
| Method #2 Additional Materials
|
It should be noted that you can also use rope light and its corresponding accessories for under stair lighting. We provide a comparison of the advantages and disadvantages of both strip and rope light in our article entitled, Rope Light vs. Tape Light: Which is Better?
Method #1 - Lighting Your Staircase Using a Single Run of LightsThe easiest method to light your stairs utilizes a continuous length (i.e. “run”) of 12-volt strip lighting as long as the total length of the LED strips plus the cables to the driver is 16 feet or less; you can even use 24-volt strip light for a longer run. However, if your staircase is longer than 18 feet, you will need to split the strip light run between two LED drivers to ensure the proper amount of power.
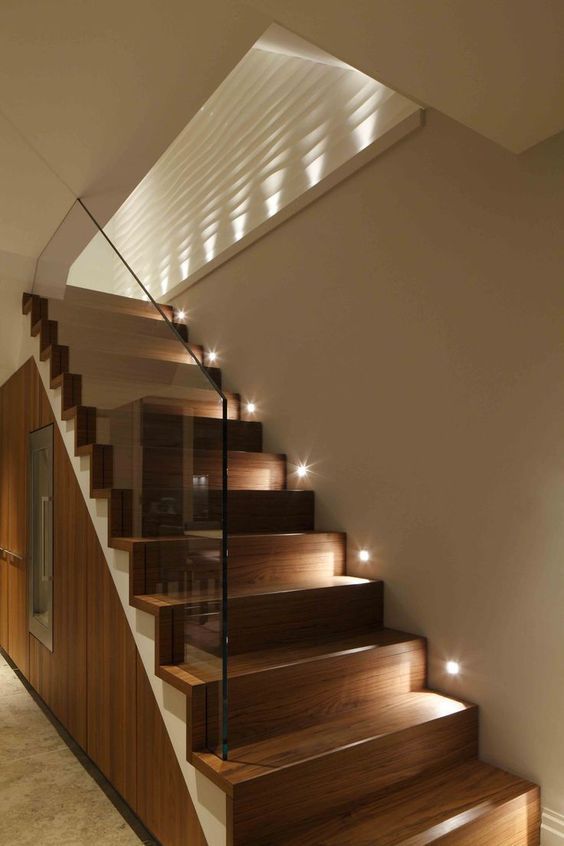
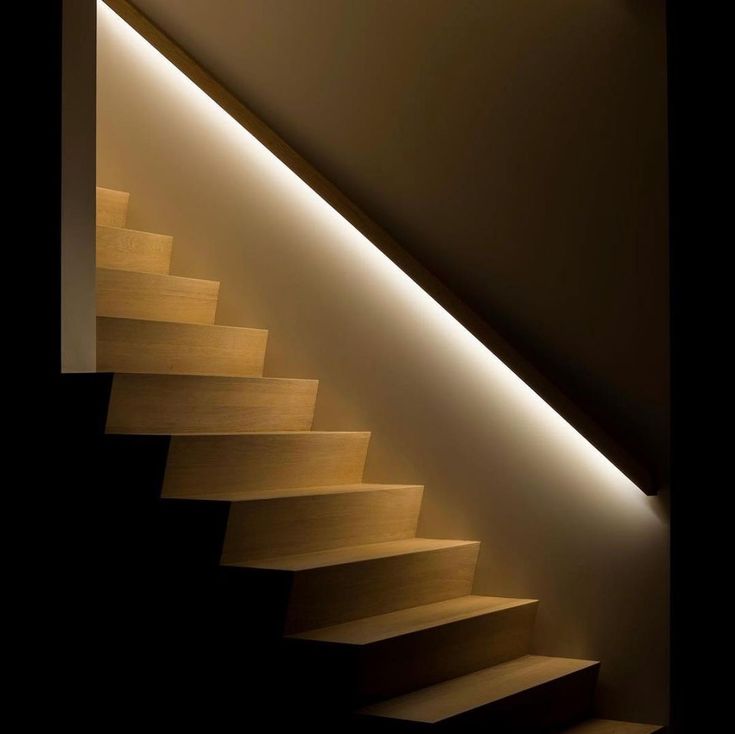
Step 1 – Assessing Your Staircase. You will need to decide where you want to mount your strip lights. This way, you would run one single line of strip light at the base of your railing, underneath the small lip of molding, or for stairs with open-air or floating steps, run the lights just under the entire staircase. You may need to drill holes or lift the carpet to cover up the wiring. The idea is to mount the lights in way that only the illumination is seen but not the lights themselves.
Simple strip light installation
Step 2 – Installing Your Strip Lights. If you can do a single run, peeling off the backing tape or screwing in silicone brackets every foot or so, is the most you will have to do for assembly. Interconnection cables or pin connectors can be used if you need a gap or if you have an odd length of strip light. For runs that need to be split, a driver would reside at both ends of the full run but the two runs would not be connected. Each LED driver for your strip lights will need to be hidden and wired to the most convenient light switch. If you don’t have a light switch already near your stairs, you will need to install one or you can install an outlet near the base of the wall (for an LED driver with a built-in plug) and wire the outlet to your preferred light switch.
The more complex version of under stair lighting has the underbelly or lip of each individual step lit by LEDs. This is an advanced technique which requires the skills and knowledge of electrical soldering work. This is not a beginner’s project and if you feel unsure of your ability to complete this project, please call a licensed electrician instead. The following instructions assume you already have a suitable location for your LED driver and are wiring your lights to or from the driver’s location.
Step 1 – Measuring and Preparing Your Lights and Wires. First, measure then cut your LED strip lights to fit each step. Remember to only cut the strip on the designated cut lines to preserve functionality. If you are using pre-cut lengths of LED strip lights with at least one male connector end attached to each strip and buy 2-wire adapters with female ends, you can connect the lights in parallel without soldering. If not, you will want to prepare the wiring as you attach the strip lights to each stair.
12-inch LED strip light adapter, normally used for dimmer controllers
For every length of 18 AWG wiring that will be attached to the lights, you will need to strip off about a half-inch of the insulation from the wire ends and lightly pre-tin the exposed copper wire. Tinning the wire means coating the twisted wires with a light coat of solder. After you straighten and carefully twist together any of the bent exposed wires, tinning will help you attach the wires more easily to your strip light.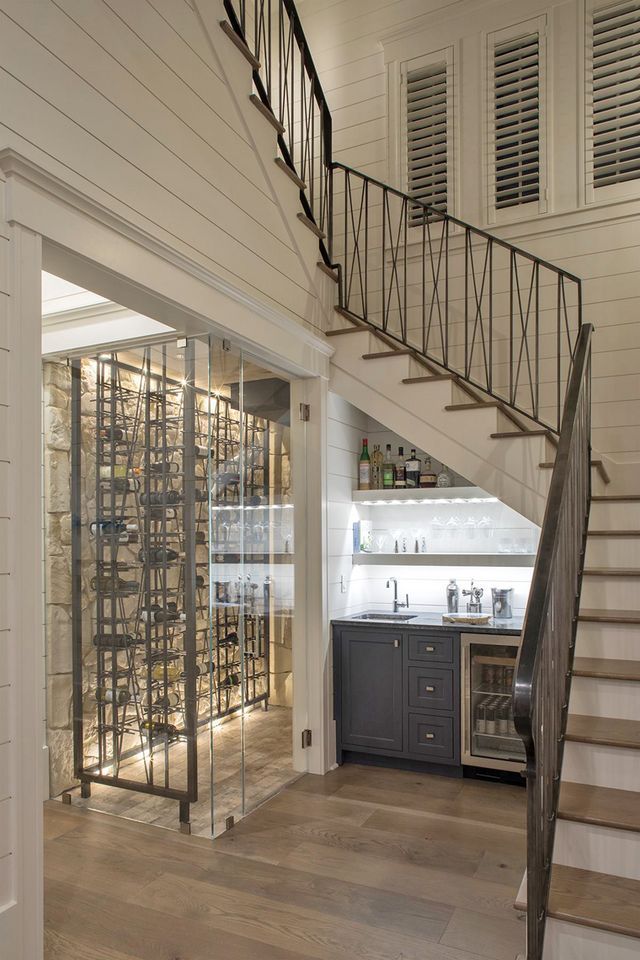 You must also put a drop of solder on whichever positive and negative copper pads of the strip light you plan to use for the connections. The pads are recognizable by the plus or minus signs and are often on the cut lines for the LED strip lights. Please note that this only works if your strip lights are non-insulated or not covered with a silicone coating. We don’t recommend removing or cutting open the insulation of that kind of LED strip light, since it will void any weather or water-resistant features.
Step 2 – Placement of Wiring on the Stairs. This step is optional depending on the type of staircase you have. If you have floating steps, the wiring can be connected underneath each step. If your staircase has paneling between each step, you may need to drill into the steps or add extra molding to conceal your wires. You will need access to the area beneath your staircase as drilling into steps would result in the wiring coming out underneath the staircase. You would make your connections there, wiring to the driver.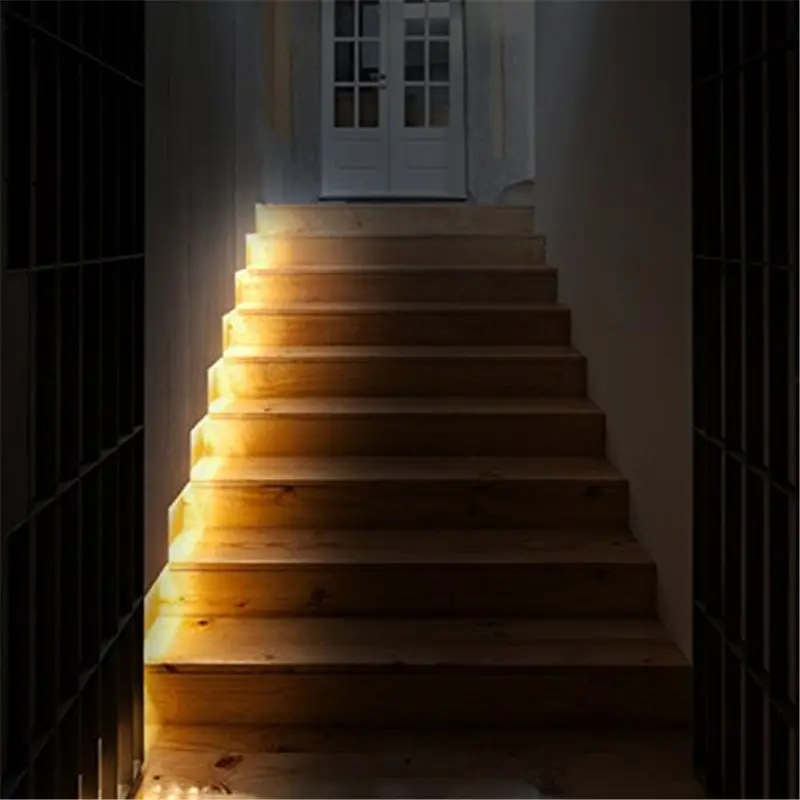
Step 3 – Connecting Your LED Strip Lights to the Driver. Trim your tinned wires until only about ¼-inch of the original exposed length remains. Use the soldering iron to press one positive and one negative wire to the prepared soldered pads for each strip light. Those wires should be connected in parallel to the LED driver location. For example, each positive wire from the LED strip must connect via wire nut to the positive wire of the LED strip preceding it. In addition, a third positive wire would also be included in the wire nut connection. The third wire would continue the wiring forward to the next LED strip until you reach the positive wire from the power source. All the positive wires should only connect to other positive wires, vice versa for negative wires.
Many brands of LED strip lights have a sticky tape backing for easy placement. If your strip light doesn’t have a tape backing, you can use strip light channel guides or small silicone brackets with screws to mount your strip lights.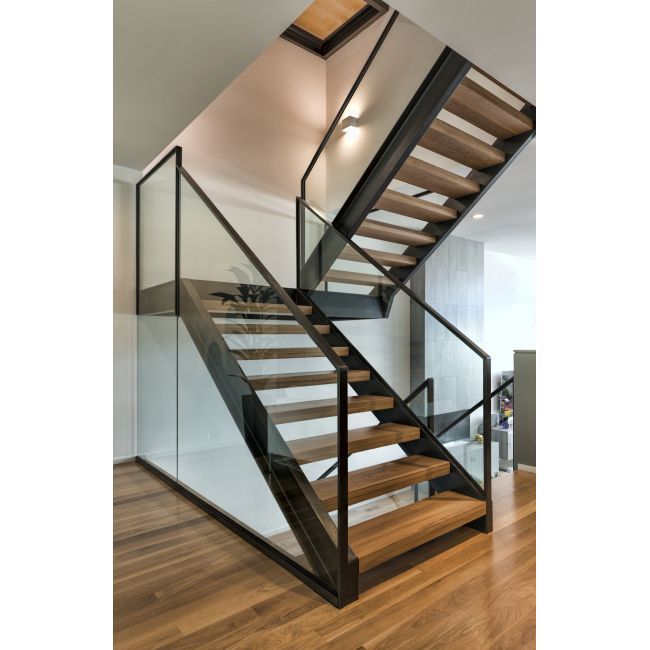
Step 4 – Connecting Your Driver to Your Light Switch. Assuming you want a controller for you lights, your LED driver will need to be placed near and wired to a light switch. You may consider building a compartment to conceal it or recessing it into the wall below the switch. You do not want to use a driver with a built-in or molded plug for this step, since the plug would have to be removed. Turn off the power to the switch and then connect two of the wires, one positive and one negative, to your LED strip lights and the other two wires plus the ground wire (usually green) to your light switch. Read the manufacturer’s installation instructions for more detailed information about wiring your LED driver.
We welcome any pictures of your awe-inspiring lighting projects, code for Arduino-controlled motion sensors lights, or even questions about the right kind of strip lighting for your set-up in the comment area below. Learn more about strip lighting projects like How to Install Cove Lighting on our blog or check out our Facebook, Twitter, LinkedIn, or Pinterest for more ideas.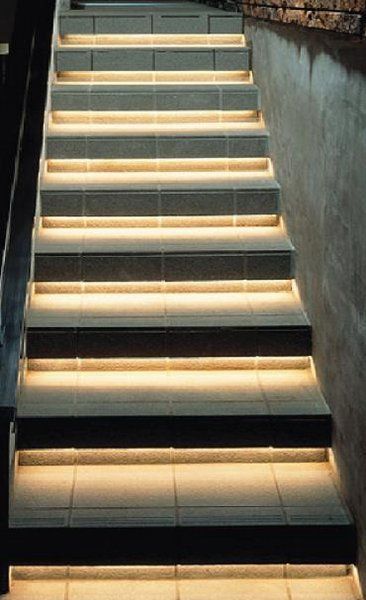 Our 1000Bulbs.com staff would like to help you to take lighting where no lighting has gone before, please call us at 1-800-624-4488, Monday through Friday, 7am to 7pm CST, for expert advice on the latest lighting products.
How to Install Stairway Lighting
Installing stairway lighting has never been more simple. In this easy-to-follow guide, you'll learn how to install beautiful stairway lighting with LED strip lights.
We'll guide you every step of the way.
What is Stairway Lighting?
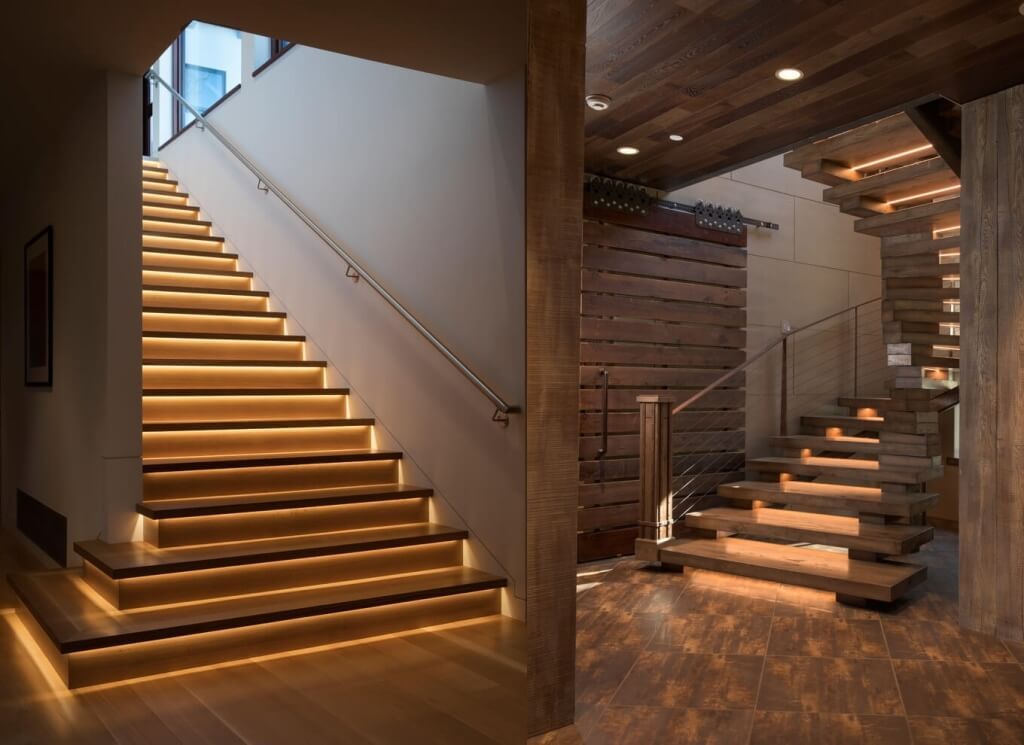
Stairway lighting is a tasteful lighting technique that looks beautiful and serves a functional purpose. The installed lights illuminate the stairs, making an attractive glow while also increasing the visibility of your walkway in a charming manner.
Stairway Lighting with LED Strip LightsIf you’re thinking about installing stairway lighting in your home or business, you’ve come to the right place. Whether this is your first time or you need a refresher, we’ll carefully take you through every step of the process to make it as effortless as possible.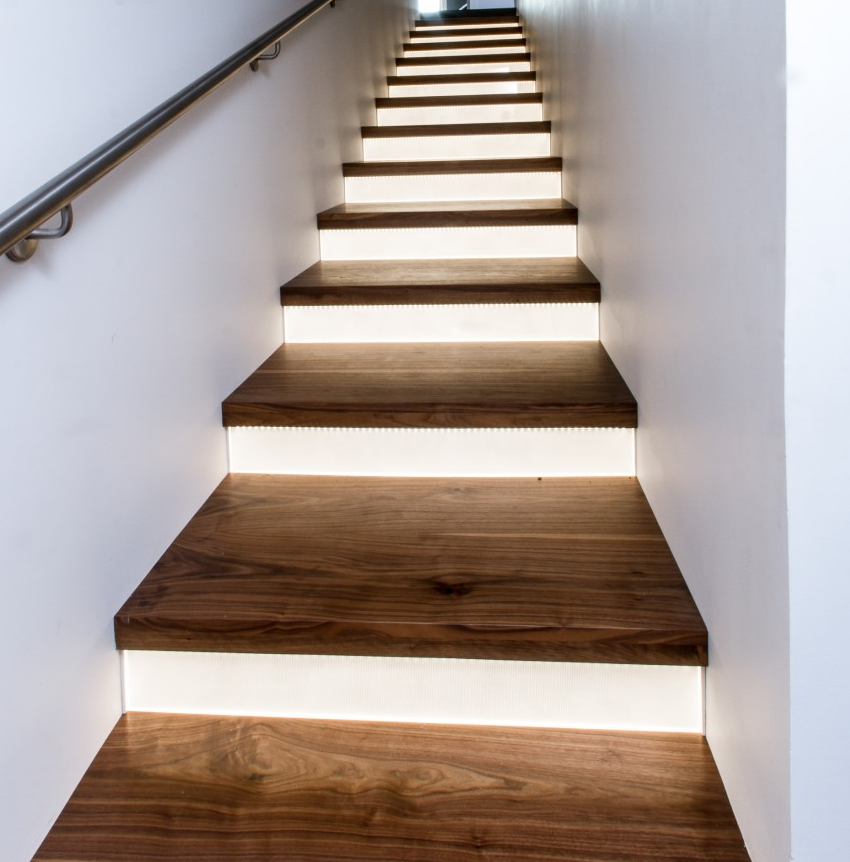
From learning how to choose the best LED strip light for staircase lighting to picking out power supplies, we’ve created an easy-to-follow guide on how to install LED stair lighting.
If you already know which strip type, color temperature, and voltage option you want, you can skip down to step two. If you still need help deciding, continue down below to step one.
5 Simple Steps on Installing LED Stairway Lighting1. Choosing the Best LED Strip Light for Stairway Lighting
A. Where to Install (Placement)
B. Choosing Brightness for Stairway Lighting
C. Choosing Color Temperature for Stairway Lighting
D. Best Voltage Option for Stairway Lighting
E. Best LED Strip Lights for Stairway Lighting
2. Choosing Your Control System
3. Choosing Your Power Supply
4. Solderless Connectors and Wires
5. Mounting and Extrusions
Design Support (Free project design included)
1.
 Choosing the Best LED Strip Light
First, you need to choose the best LED strip light for your particular project. We’ve narrowed your options to the top three choices for staircase lighting projects that you’ll see down below. But before you can make that decision, here are some questions to consider when choosing the best LED strip light for stairway lighting:
- What is the purpose of the lights - will it be the main source of lighting or do you want to create a particular atmosphere?
- What color temperature do you prefer?
- Where will you install? Do you want to light individual treads or light up the railing?
- Are you lighting hardwood stairs or carpeted stairs?
- Do you want a static white output or a color changing or Dynamic Tunable White output?
- How do you want to control your lights?
- Are you looking for something temporary or prefer a long-lasting permanent fixture?
To help you narrow down the best options, we’ve created a short checklist to help you on the first steps on figuring out LED stairway lighting.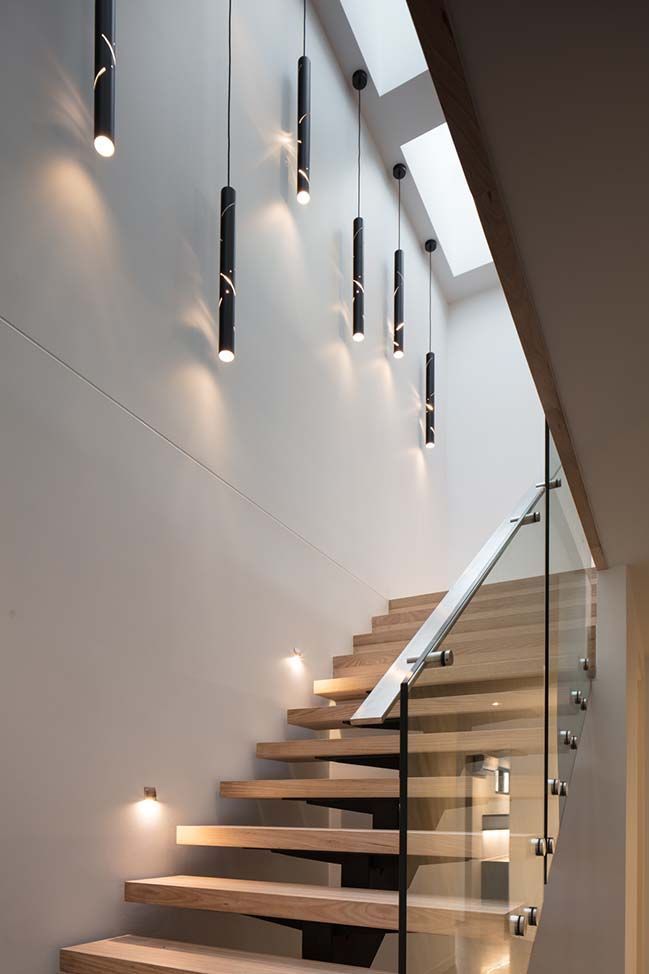 If you already know which strip you need for your project, skip ahead to step two to choose your control system.
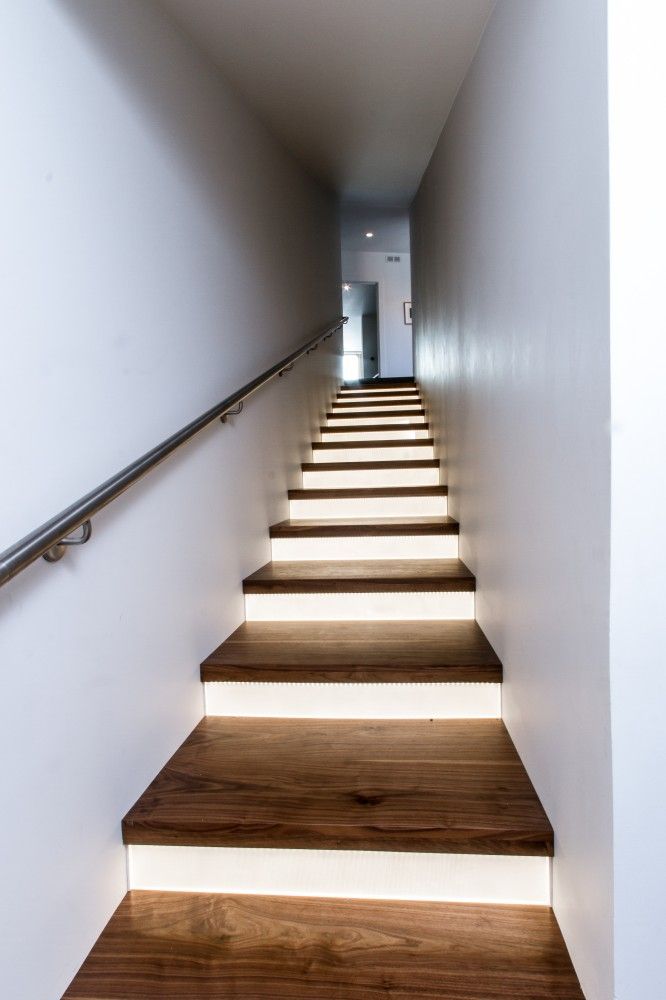
There are various ways to install stair lighting with LED strips, depending on what type of stairs you have and where you want to place the lights. First, you need to measure the length of the installation area. If you want very specific placement, you may want a strip light that has frequent cut marks to match your desired length.
Now, you have the option of placing the lights directly under the tread with the LEDs downlighting, which will provide more light. Or you can mount the lights on the frame of the tread with the LEDs facing toward the riser of the stair. This will depend on the type of stairway you have and your preference.
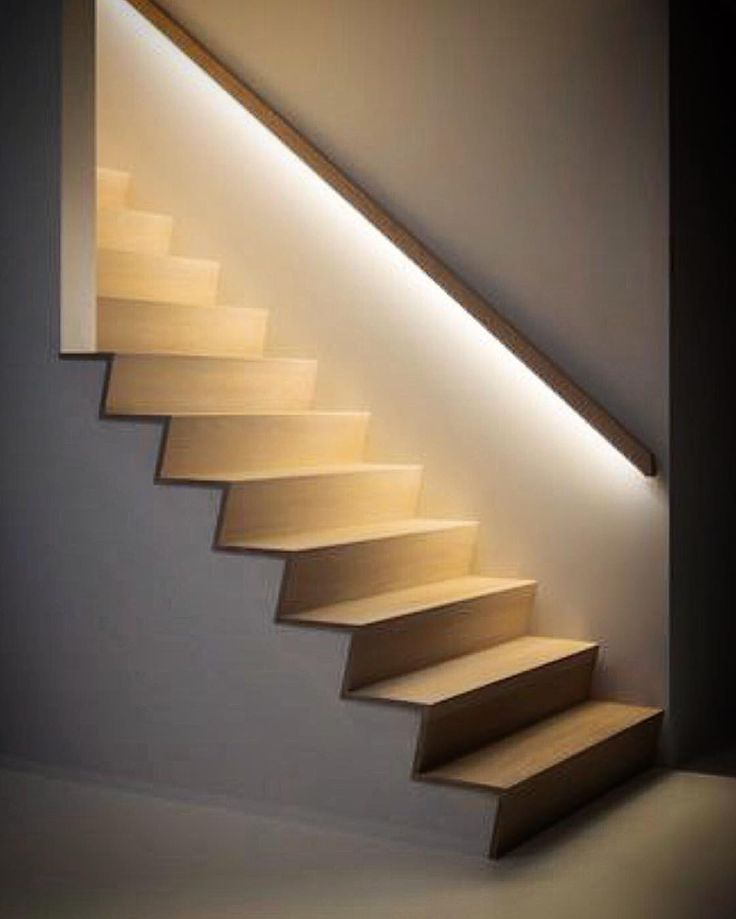
If you have a handrail, you can install below the rail so the light can give an overall illumination onto the whole stairway. This will also give the handrail a pleasant glow. If your staircase has a groove or lip alongside the wall, you can place the lights in there. Look below to see which type suits your project.
A. How to Choose the Appropriate Brightness Levels
What level of brightness are you seeking? Brightness is measured in lumens, so the higher the lumen output, the brighter the light. LED cove lighting can be broken up into three main types of lighting based on the goal you want to achieve. Lumen needs may vary from project to project depending on the size of the coves and the height from the floor to the cove. However, below is a general guide.
-
- Principle lighting will be the primary source of light and will call for brighter, higher-output strips.
The lumen output you are looking for should be between 400 - 1,000 lumen/ft. - Accent lighting is for aesthetic purposes that draws attention to a particular area, such as highlighting ceiling decor.
The lumen output you are looking for should be between 200 - 500 lumen/ft. - Mood lighting or mood lighting provides a soft, overall illumination that blankets the space.
The lumen output you are looking for should be between 100 - 300 lumen/ft.
- Principle lighting will be the primary source of light and will call for brighter, higher-output strips.
Brightness is measured in lumens, so the higher the lumen output, the brighter the light. For stairway lighting, a low or medium-output strip will suffice since the area you’re illuminating is fairly close to the lights and this will not be your principal lighting. On the same note, you may want to lean into lower brightness levels if you plan on lighting up individual treads.
However, if your staircase will be the only source of lighting in the space, you have more leeway on choosing a higher output strip that is suitable for primary or principle lighting.
C. Choosing Color Temperature (CCT)Next is to decide which color temperature, or shade of white light, you prefer. Color temperature is measured in kelvins - the lower the temperature, the warmer the light.
To help narrow down your options to find the best CCT for LED stairway lighting, you can choose between 2700K and 4000K.
D. Best Voltage Option for Stairway LightingMany LED strips come in a variety of DC voltage inputs. Most of our LED strip lights are offered in 12V, 24V and 48V DC input versions.
Choosing the best voltage option for your project can actually be very simple. One of the main deciding factors in choosing the voltage of your LED strip light has to do with voltage drop. Voltage drop is the gradual loss of voltage of energy in DC circuits as it flows through the strips of light, meaning you cannot install an infinite run of lights, and that you may get a loss of brightness at the end of a long run of DC input LED strips.
To avoid voltage drop, all of our LED strip lights have been rigorously tested to create the longest run length before a decrease in voltage.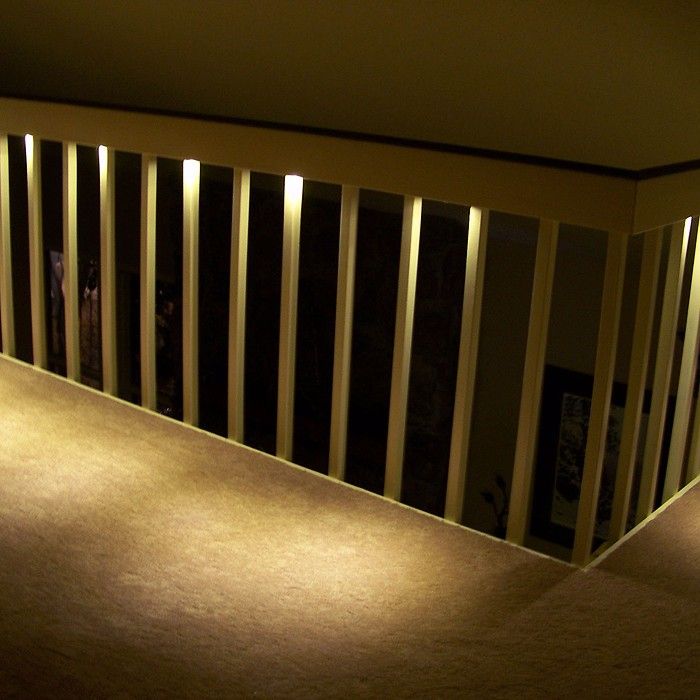 This means your strips will maintain their brightness up to the maximum run length.
Choosing voltage options depending on the size and type of your project. But let’s make it even easier for you to decide.
We recommend the 24V option in most LED stairway lighting applications. The 24V version allows you to run more wiring if necessary, such as having a power supply tucked away under the sink or in the basement. Additionally, all of our dimmers and remote controls are compatible with 24V versions.
E. Best LED Strip Lights for Stairway LightingNow that you know what level of brightness you need, which color temperature you want, and the best voltage option, you’re ready to pick from our recommended strips for staircase lighting. We have manufactured all of our strips with stairway lighting in mind. The following UltraBright™ strip lights offer similar color temperatures and all offer 24V options.
Additionally, these strips have excellent color rendering and come with a 15-year warranty, which is the longest in the lighting industry.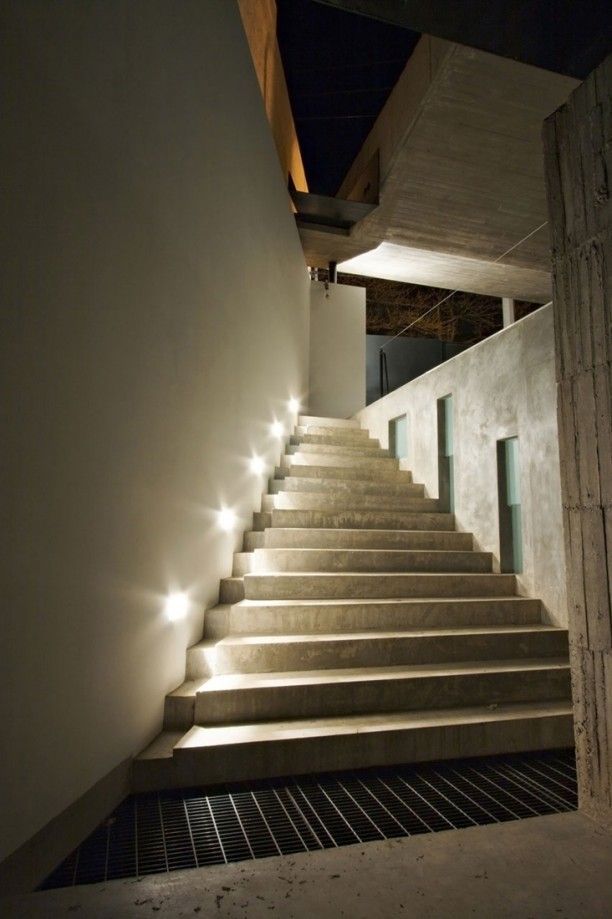
Best Static White Strip Light Options for LED Stairway Lighting
Outline™ Series
Subtle output for accent and ambient lighting. Great for projects longer than 65 ft.
125 Lumen/ft with a CRI of over 95 for perfect color rendering.
Accent™ Series
Striking, seamless lines of light. Perfect for accent and ambient lighting - anywhere!
250 Lumen/ft with a CRI of over 95 for perfect color rendering.
Architectural™ Series
Very bright and intense lighting. Perfect for principle lighting and commercial applications. 500 Lumen/ft with a CRI of over 90 for incredible color rendering.
Best RGB and Dynamic Tunable White Strip Light Options for Stairway Lighting
RGB Color Changing LED Strip Lights
Control your cove lighting with millions of color possibilities from a remote control or voice activated system.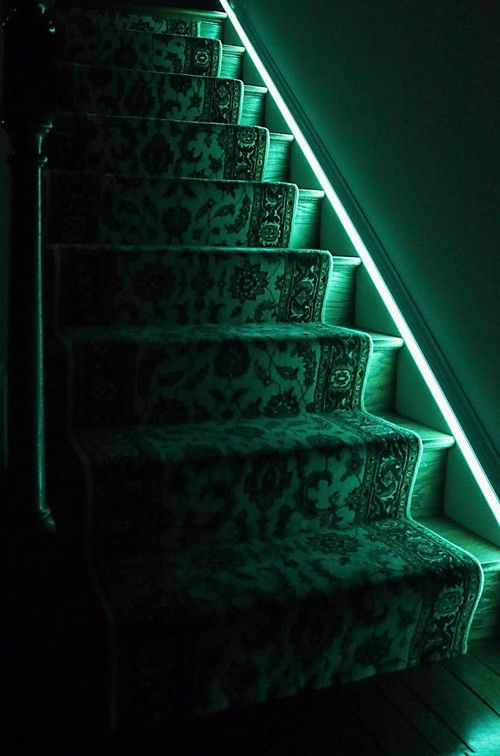
Architectural Dynamic Tunable White
Choose from warm glows to crisp daylight in one room from the same lighting source with a remote control.
2. Choosing Your Control System
All of our strip lights are fully dimmable. This means you can easily adjust brightness levels to perfect LED cove lighting details, allowing you to switch between bright principle lighting to warm ambient lighting.
To experience the full potential of our LED strip lights, dimmers are highly recommended in cove lighting. Dimmers will also help you save energy by preventing the lights from being on 100% brightness at all times.
If you use the Outline, Accent or Architectural Series, you can choose from these control systems:
Lutron® Wall Dimmers - Convenient wall dimmers to control brightness levels with wireless features
LED Smartphone Controller - Control brightness levels via Bluetooth from your smartphone
Multi-Zone Remote & Receiver Combo - Advanced RF technology lets you program favorite settings on your controller
Touch Series Dimmer - Using radio frequency, you can adjust your lights using a simple dimming wheel
Wireless Wall/Desktop Dimmer and Receiver - Wireless wall-mounted dimmer that’s as easy to use as it is beautiful
If you want the Architectural Dynamic Tunable White Series, you can choose from these control systems
LED Smartphone Controller - Control brightness and color temperatures via Bluetooth from your smartphone
Wireless Wall/Desktop Dimmer and Receiver - Wireless wall-mounted dimmer that’s as easy to use as it is beautiful
Touch RF Remote Controller - Choose your favorite color temperature with this remote using radio frequency
3.
 Choosing Your Power Supply
A. Choosing the appropriate style of power supply.
The type of LED power supply you need for your project depends on if and how you want to control your lights with a dimming system in your setup. The next step is to choose from our list of compatible power supplies and drivers to turn on your lights.
Quick guideline: If you’re using a Lutron® dimmer or any other AC wall dimmers, you need a Zurik® dimmable driver. You cannot use the Zurik driver with RGB or Dynamic Tunable White systems.
Plug and Play Power Supplies
- Benefits:
- Good for small low-wattage projects
- Great option for those on a budget
- Very easy use to install and use - plug and play
Zurik® Dimmable Driver
- Benefits
- Dimmable with a variety of control systems and triac dimmers
- Great for all size projects
- Long-lasting durability
- Long warranty
*Not for use with RGB or Tunable White systems
Mean Well Hardwired Power Supply
- Benefits
- Great for all size projects
- Long-lasting durability
- Long warranty
- IP65-rated protection
 Calculating the size of the power supply you need
To calculate the size of the power supply for your LED strip light, you need to calculate the total watts used in your strip. Each strip consumed a different amount of watts per ft (W/ft). Take the w/ft and multiply it by the number of total feet you are hooking up to the power supply. Then, take that number and add an additional 20% to prevent overloading the power supply. It is better to under-load the power supply because it will help increase the lifespan by keeping it cooler.
Check out this in-depth guide to choosing the correct power supply or refer to our power supply calculator chart for a detailed look on which power supply you need.
4. Solderless Connectors and Wires
Installing LED stairway lighting involves some simple handywork. Although soldering is the best way to make long-lasting connections, using solderless connectors to connect LED strips and power supplies is an easier and quicker method.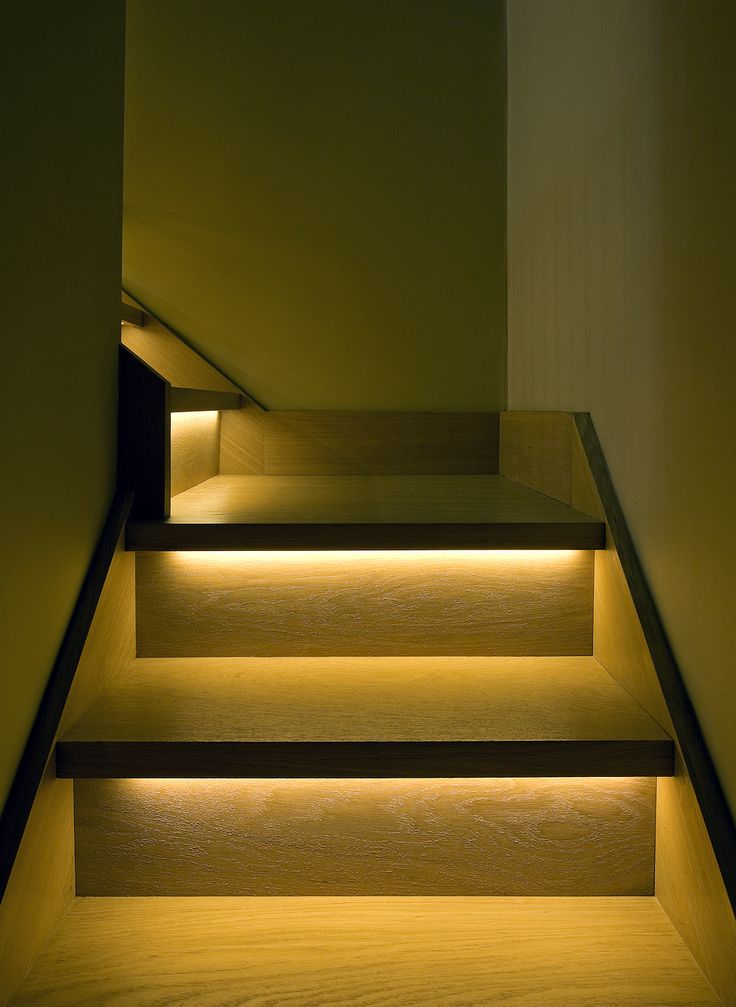
First, you need to cut your strip light to the desired length. All of our LED strip lights for cove lighting are manufactured with cut marks that are as frequent as every half inch to 4 inches for optimal customization. Using sharp scissors, you can easily cut your LED strip light to the desired length.
Click here to view the solderless connector installation guide.
5. Mounting and Extrusions
How to Mount LED Strip Lights
All of our LED strip lights have 3M adhesive backing so mounting will be very easy. The 3M will stick to most non-porous and flat surfaces.
Make sure to thoroughly wipe down the installation area, then carefully peel back the protective cover over the strip’s adhesive backing. Run the strip in a straight line inside the cove.
Using Mounting Extrusions
In LED strip lighting, aluminum channels or extrusions are used for aesthetic and functional benefits. Main benefits of using channels in stairway lighting include preventing spotting and providing the strip lights a professional touch with a more finished look. Extrusions also act as heat sinks and protect the LEDs from dust and debris, lengthening the life of your strip lights.
To make your installation even smoother, we offer channel kits so you get everything you need in one purchase. Try these recommended surface-mounting channels for a “dotless” appearance.
- Best for individual treads
- A surface-mounted channel for recessed installation
- Available in 3 different diffusion levels: Clear, Frosted, and Matte
- 60 degree beam angle
- Best for stair railings
- A shallow, surface-mounted channel with a wrap-around cover
- Available in 2 different diffusion levels: Clear and Frosted
- 110 degree beam angle
You're Ready to Install!
Read the installation instructions below:
Step 1: Create a Mock Installation
When installing LED strip lighting, it is very important that you test the LED lights before any installation.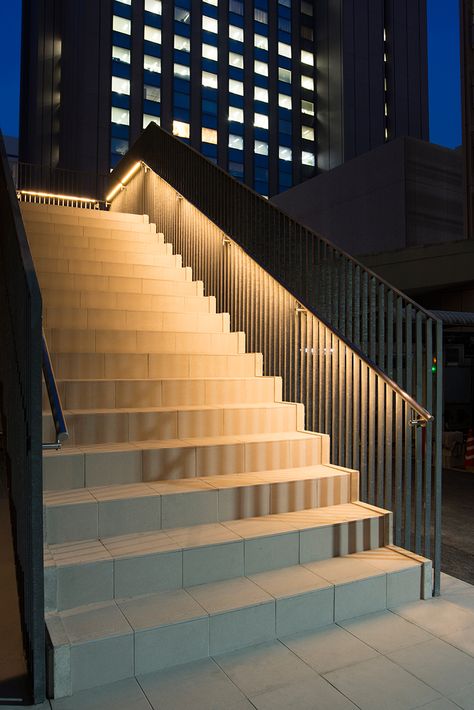 Follow the steps below before you cut the strip lights or attach them to any surface. Make sure to always disconnect the power in your work area, especially if you hardwiring electrical components. Consult an electrician if you have any doubts.
- Lay out all the products to make sure you have all the necessary supplies and components.
- Unroll the LED strip lights from the plastic reel.
- Attach the uncut lights to the power supply. Then, turn on the power supply.
- The strips should light up. If they do not, please check your connections.
- Take a few minutes to ask yourself the following questions to ensure your project comes out perfect: Are all the LEDs lighting up and functioning properly? Are the lights bright enough? Will I need a dimmer? Is this color perfect for my application? Do I have enough tape light?
Step 2: Take Measurements and Make Cuts
Before starting the installation the process, take careful measurements to determine how many feet of strip lights will be necessary. LED strips can only be cut along the clearly marked lines that are evenly spaced. Cut the strips to the desired length with sharp scissors in order to prepare them for the quick installation process ahead. Hold up the strip under the steps or railing where you want to install the lights, and make sure that you have the correct measurement.
Step 3: Prepare the Strips for Installation
After you cut the necessary length of your lights, lay out all all your connectors, aluminum channels, wires, and components. Before attaching the connectors, make sure that the polarity (positive and negative markings on the LED strip) is consistent all throughout the run of lights, connectors, and power supply. If you reverse the polarity, the lights will not function properly.
Once polarity is established, you can make your connections (manual soldering or solderless connectors). Hook up your wires to your dimmer (optional) and power supply. Click here to view the solderless connector visual installation guide.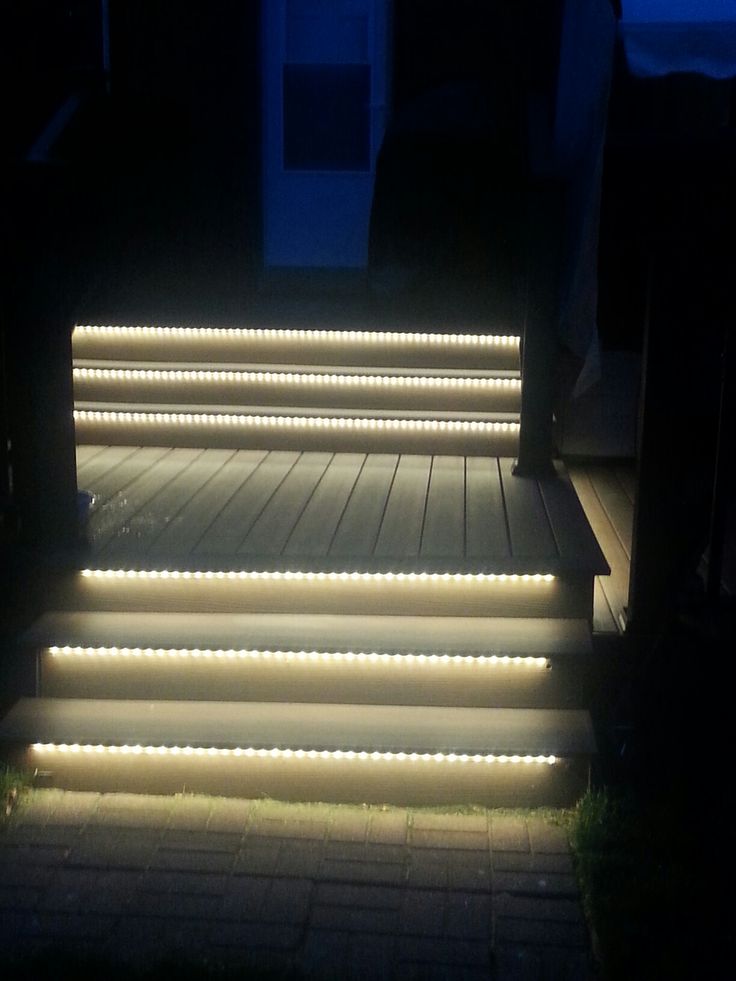
Step 4: Test the Strip Lights (IMPORTANT)
Once everything is hooked up, you need to power the driver to turn the lights on. If everything is wired correctly, the lights should switch on when the power supply is plugged in. If they don't turn on at full brightness right away, check to see that the connectors are solidly attached and that the negative and positive wires are aligned correctly onto the strip, and that the dimmer is set to the maximum setting.
Unplug your power supply and turn off the electricity in the installation area to ensure safety. Always seek the advice of an experienced electrician before doing any electrical work.
Note: For more advice, chat with us or give us a call for free on-the-phone technical consultation at any time during business hours.
Step 5: Mount Your Lights
Wipe down the installation area to make sure it is clean before you install the strip lights.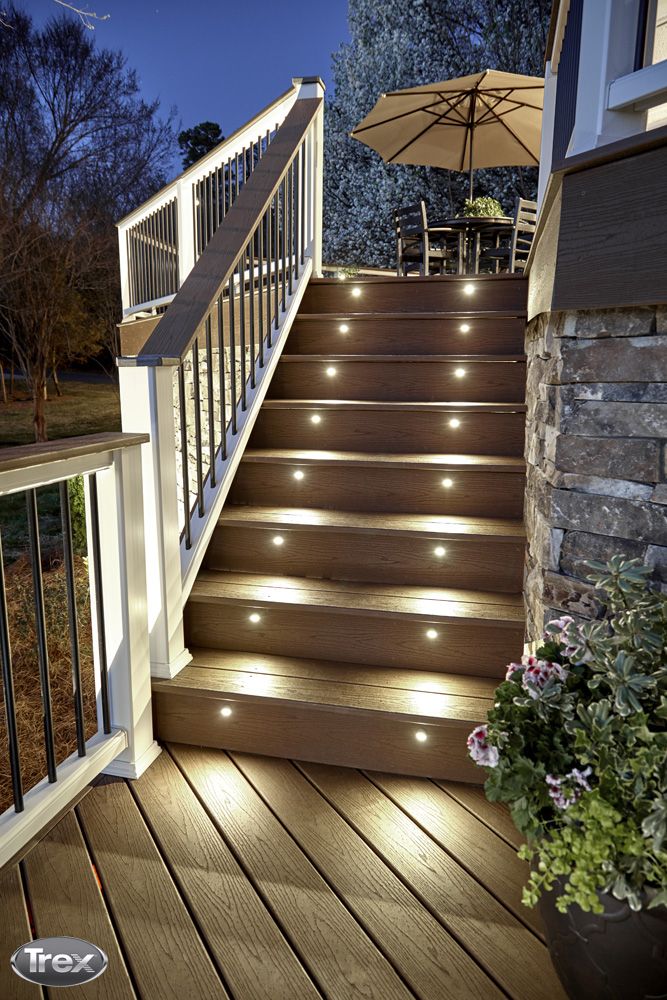
The 3M tape will stick to most non-porous and flat surfaces, so after wiping down the surface area, peel back the protective cover over the strip's adhesive backing. Run the strip in a straight line under the treads or railing.
If you are using aluminum channels, prepare the channels to be mounted under the stairs. Peel the beginning of the wax paper covering the adhesive off of the LED strip, and lightly press the the tape down onto the channel - starting at one end and pressing down every 1/2" as you continue. Rather than taking the whole cover off of the strip at once, peel it back slowly as it is being placed onto the surface.
Secure all cables, wires, and make sure that everything is complete before powering the lights on.
Step 6: Turn On the Lights!
The last step is the easiest and most satisfying part of the whole installation process. All you have to do now is plug in the power supply, turn up the dimmer to the brightness you prefer, and enjoy your beauitful stairway lighting!
Free Design SupportWhether you have a question or need general assistance, we’re here to help! Check out this section on installing LED strip lights at home for cove lighting DIY or contact us and get an answer within 24 hours.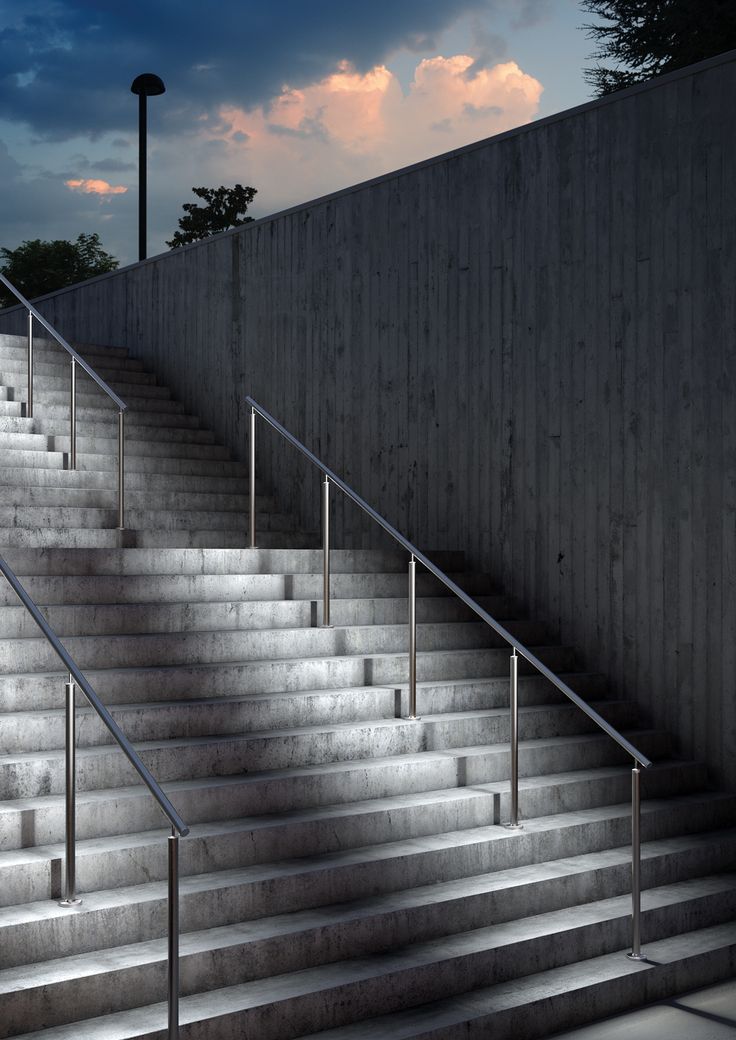
Free Project Design
We offer free design support! That’s right, our team of lighting specialists and design experts will work with you one-on-one to create your dream project, no strings attached.
Chat
Chat with one of our lighting designers on the bottom right hand of the screen to get an expert consultation in minutes!
Call
Call us at (844) 353-9347 Monday through Friday 6AM - 4PM (PT).
How to place a sconce on a staircase, illuminate a staircase in a private house, make staircase lighting
Lamps in the area of the flight of stairs in the house and on the street illuminate the descent and ascent, making movement safe. If done staircase lighting is correct, you can emphasize its design, designate zoning or link it into a single composition interior details.
Placement of lighting, types of lighting
In order to place the lamps on the stairs correctly, consider its installation location, type of construction.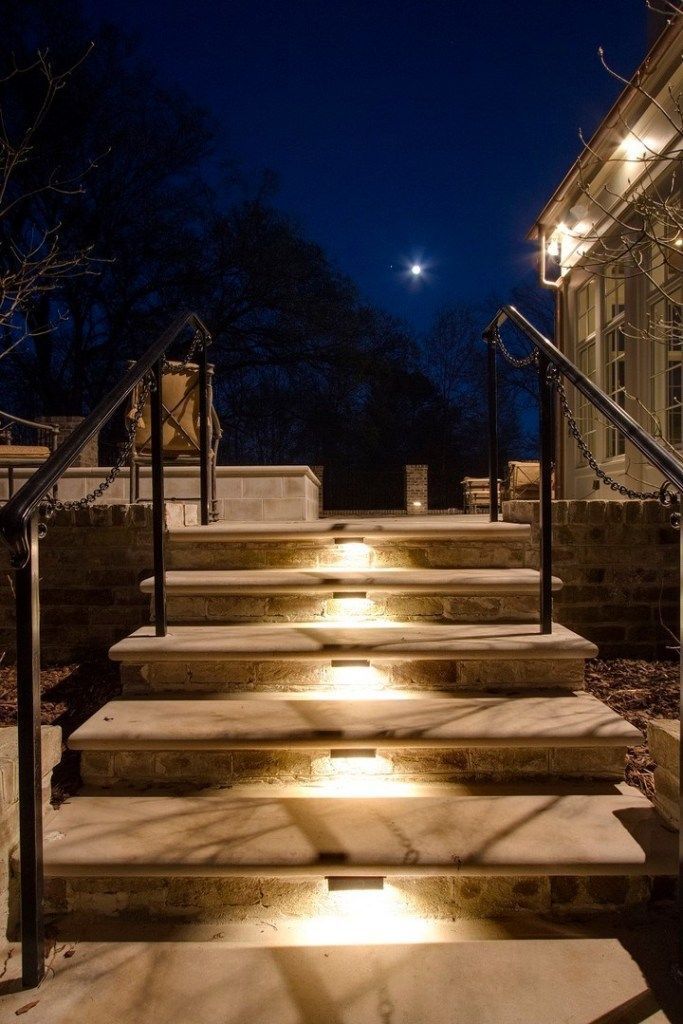 For example, in in a bright room, backlighting is needed only in the evening or in cloudy weather, which means that a spot is enough lighting. It is easier to illuminate a direct march than a screw or c 9 design0 degree turn - put the lamp at the bottom, at the top or on the site between the first and second floors.
To organize artificial lighting in a private house, we recommend following the rules:
- The longer the rise, the softer the light should be - bright lamps tire the eyes, sharp shadows impair space.
- To outline the steps, the luminous flux is directed from above, but the lamp must not dazzle people, walking up the stairs.
- In addition to the stairs themselves, the walls should be well lit - this enhances the feeling of safety and comfort.
You can illuminate the march with direct, diffused, reflected or combined light. You can do single lamps or place them in groups on the ceiling, on the walls along the march, on its individual elements.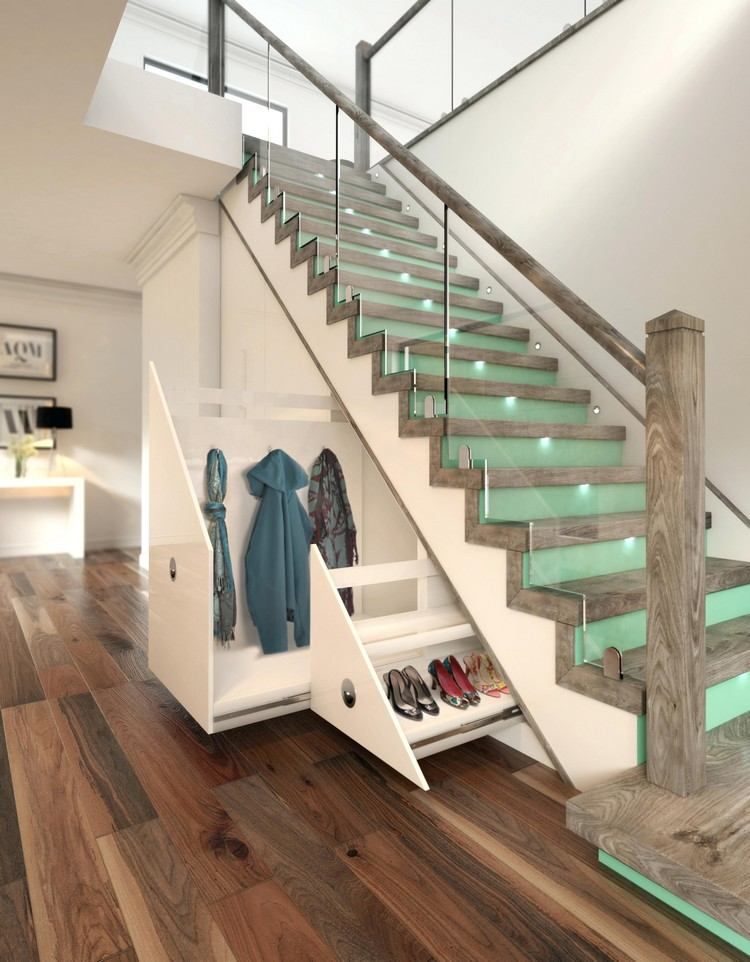 Wherein take into account the backlight power, the general level of illumination of the room and choose the types of lamps:
- Fluorescent - energy consumption is 80% lower than that of incandescent lamps, and the service life is 8-15 times longer. Give light warm, daylight, white. If you place a sconce on the stairs, you will get lighting of the entire room and at the same time your eyes will not get tired.
- Neon - in the form of a glass tube or flexible tape. Create soft light (power 10 W / m), reliable, work 80 thousand hours or more. Can glow in different colors, do not heat up. Fragile glass tube additional protection against mechanical influences. Flexible waterproofing tape can be installed in the house and on the street. It is used as a decorative decoration on the wall, hidden illumination of steps, balusters, perimeter march. It highlights individual zones well, creates interesting compositions, but is not suitable as the main lighting.
- Halogen - lamps with a stable bright light, different shades of glow. Consume 2.5 times less energy than conventional incandescent lamps. Convenient for installation inside the house and on the street, as single lamps, in the form of spot lighting. Very bright light is out of place in a small space. Cannot be placed in rooms with high humidity (baths, saunas, damp basements). The lamps get very hot, so place them so that to avoid direct contact with flammable objects. In networks subject to power surges, halogen lamps will burn out quickly. The service life with proper operation is 2.5 thousand hours.
- LED - work up to 100 thousand hours with high efficiency. Glow spectrum - warm, neutral, cold white. Color can be controlled by connecting the luminaire to an electronic system. Used like additional lighting on the walls, on interfloor areas. Flexible LED strip placed on the steps, along the entire length of the stairs.
How to light a staircase in a private house
Floor lamps or spotlights in the wall are often used in the lower zone of the march.
Stair lighting is often used for decorative purposes - lamps emit a subdued light, visually separate the treads from each other.
Wall sconces and spotlights built into the wall are placed for additional illumination of the march and rooms.
Consider the material of the ladder when positioning the lamps. For example, wood looks even better in warm light. For metal structures made in high-tech style lighting in cold colors is appropriate.
Spotlights are best used for illumination:
- marches, small in length, uncomplicated in form;
- individual elements of the stairs - steps, railings, handrails;
- dangerous areas.
Position the light at different heights. Place in the form of sconces on the walls, floor lamps on the grounds, LEDs on steps.
Choose your light sources so that they emphasize the design of the stairs and look organic in the overall interior private house.
On the porch, in the entrance groups, use lamps protected from precipitation and temperature changes. The power of such there should be more lamps than the lighting in the house. When installing electrical wiring, make reinforced insulation.
To save electricity, make automatic lighting that will turn off as soon as you walk across stairs.
Illumination options
Treads and handrail.
Wall sconce, dotted at the bottom.
Design lamp at the bottom of the march.
Fence lighting.
58 photos, ideas for lighting stairs
Recommendations for organizing lighting
When choosing the type of lighting, several features are taken into account:
- First of all, you should pay attention to the length of the descent. The longer the flight of stairs, the more light is required.
- Appliances must emit a calm light that will not dazzle a person and irritate the eyes.
- Energy consumption should be economical, as the backlight requires frequent use.
- It is necessary to take care of safety and install an autonomous type of lighting that will work with a battery or accumulator in the event of a power outage.
- The luminous flux must not create shadows and distort the configuration of the steps.
What lighting can be used?
Highlight the main lighting options.
Automatic lighting
Thanks to this option, the operation of light sources is greatly simplified. Smart backlight with motion sensors, load or turn on by voice command and clap, can have one mode with the same intensity or smoothly work on a timer with a certain time delay.
In the dark, the sensors react automatically and each step is illuminated in sequence. By setting the control controller, you can set any parameters, for example, set the glow to the desired brightness level, and also select the speed at which the backlight will turn on and off. Night lighting stairs should not be very dynamic.
The photo shows automatic staircase lighting in the interior of a private house in a modern style.
Wireless lighting system
An advantageous option that operates on self-contained power. Such a system includes motion sensors and lamps tuned to the desired frequency. The operation of the composite modules is carried out at the expense of conventional batteries.
The photo shows a flight of stairs with railings equipped with wireless lighting.
Standard wired system
Conventional wired system requires some skill to install, so it is best to seek professional help.
First of all, a competent wiring diagram is required, then all the elements of the circuit are purchased and the surfaces are prepared in order to lay the cable. An ordinary concrete surface can be ditched, and in log or log houses, wires are laid in cable channels and special corrugated tubes.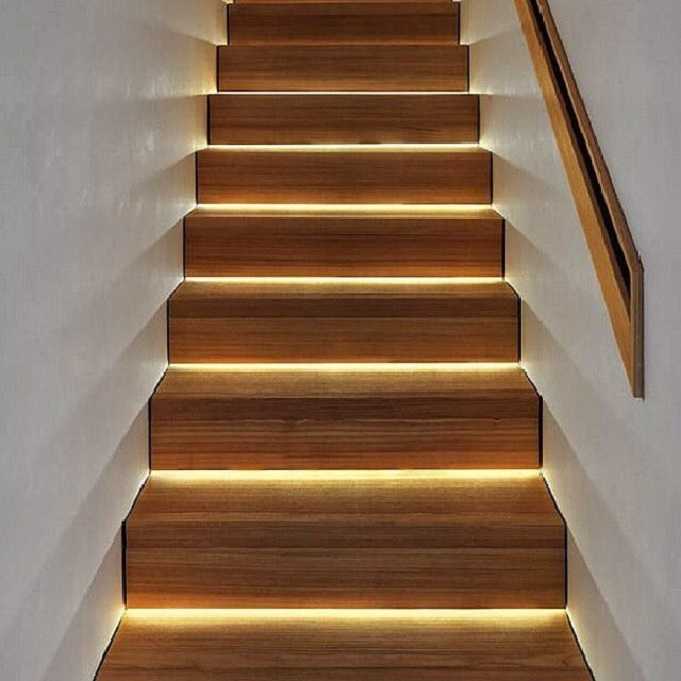
Stair lighting options
Popular lighting fixtures.
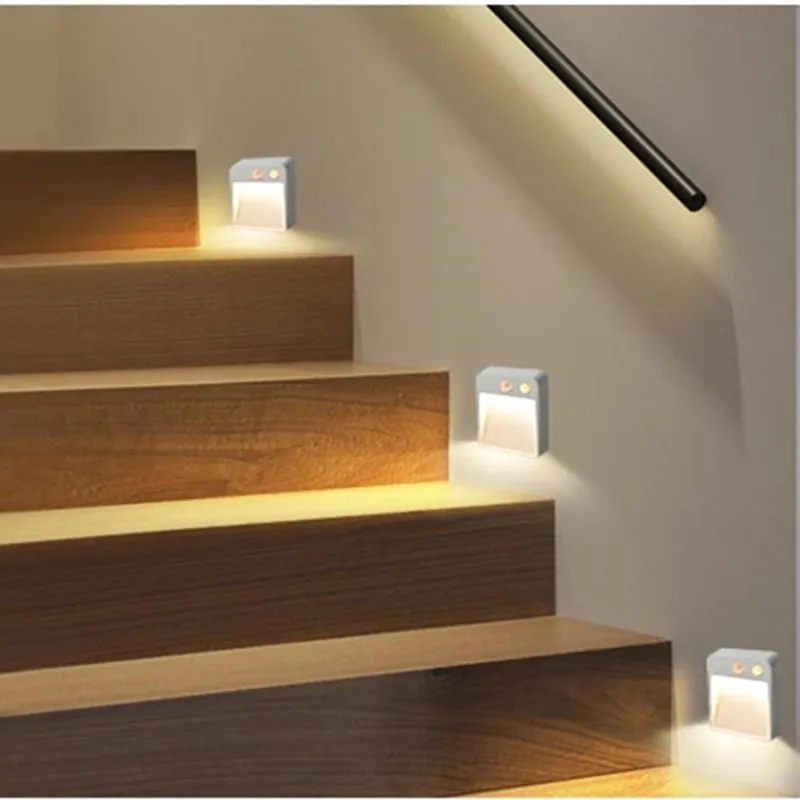
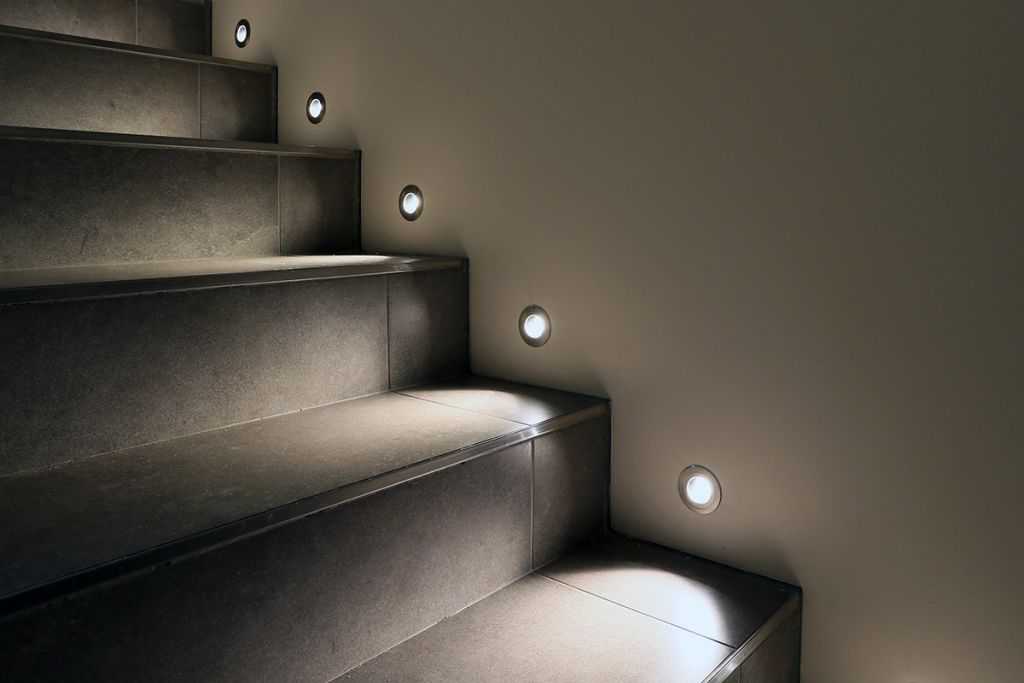
Stair spot lighting
The fixtures are mainly built into the wall, near which the passage to the second floor is located. The installation of such bulbs is provided even before the start of finishing the wall plane.
Point lighting of steps or risers is considered convenient. To install outdoor lighting, spotlights are purchased and attached to the surface of the steps using self-tapping screws or a self-adhesive base. The main advantage of this type of fixtures is the ability to change the direction of the light flux.
The photo shows a staircase in a private house decorated with wall spotlights.
LED strip
Features an adhesive backing that makes installation much faster and easier. LED strip can have a variety of colors. The most common is considered to be white light of a warm or cold shade.
Due to the flexibility and free variation of the length of the LED strip, there is a wide scope for the implementation of original ideas.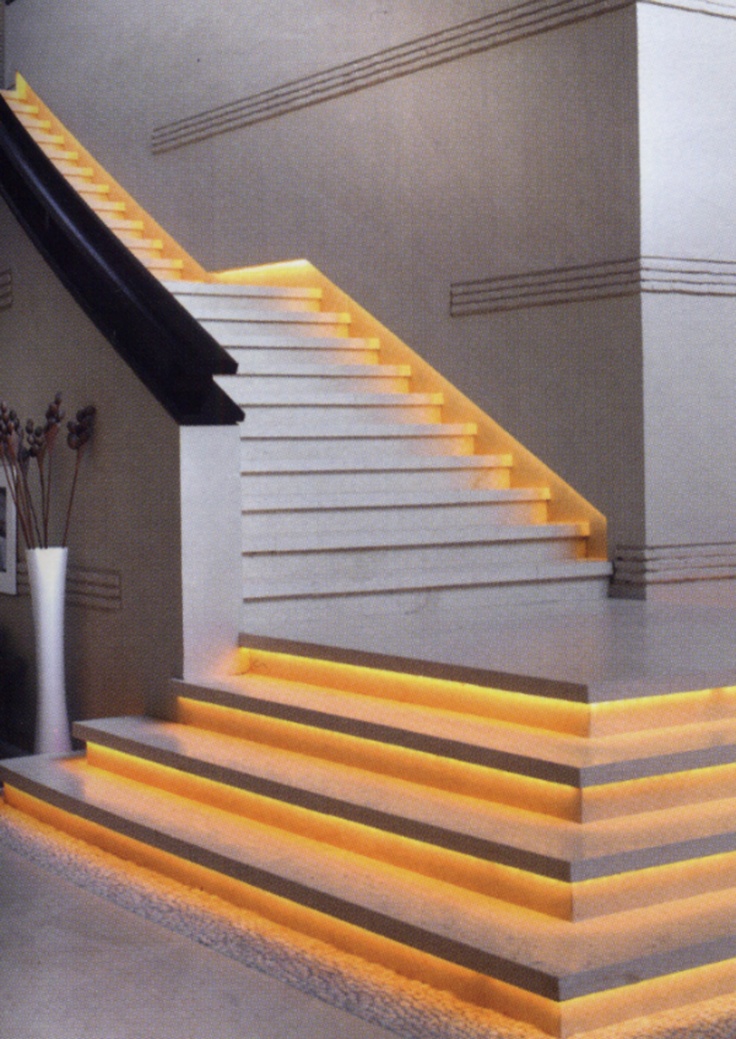 This type of lighting is installed under the steps, under the railing of the stairs or built into a box on the wall.
The photo shows a blue LED staircase lighting in the interior of a country house.
Chandelier above the stairs
The chandelier harmoniously combined with all interior details and wall cladding will favorably emphasize the surrounding design.
When using this type of lighting, the cable for connecting the lamp is hidden in the ceiling. A suspended chandelier is able to create high-quality lighting even for a two-flight flight of stairs. Very often in spacious houses, a cascading chandelier is installed. Light bulbs suspended at different levels provide even light for the entire lifting structure.
The photo shows a country house with a chic chandelier above the stairs.
Wall sconces
Stair lighting in the form of wall sconces, illuminates a fairly large amount of space.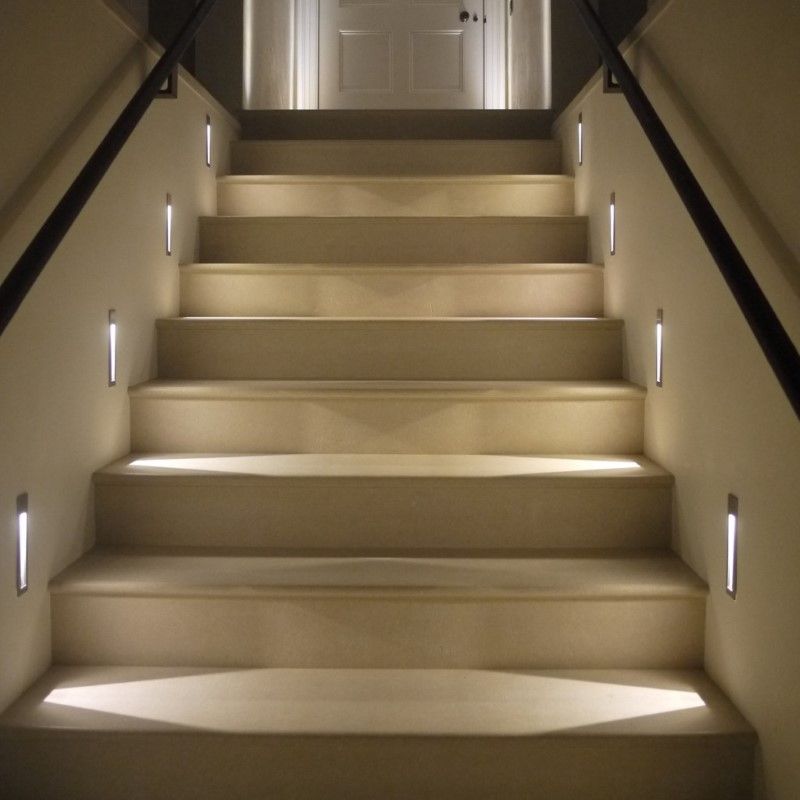 If it is not possible to make wall chasing for wires, the plane is equipped with a cable channel.
The sconce can be combined into one electrical circuit and a common switch can be installed. If a motion sensor is connected, it will turn on the wall lamps automatically.
The photo shows the interior of the hall with a staircase, complete with wall sconces.
Combined lighting
The use of several light sources is an excellent option for stairs to the second floor. For example, in order to organize only the illumination of steps, they can be equipped with spotlights or linear fixtures. Sconces are used to illuminate the entire space. Lighting devices can be switched on together or separately.
The photo shows a staircase lighting with a ceiling chandelier and wall spotlights.
Which lighting arrangement is best?
Examples of placement of light sources.
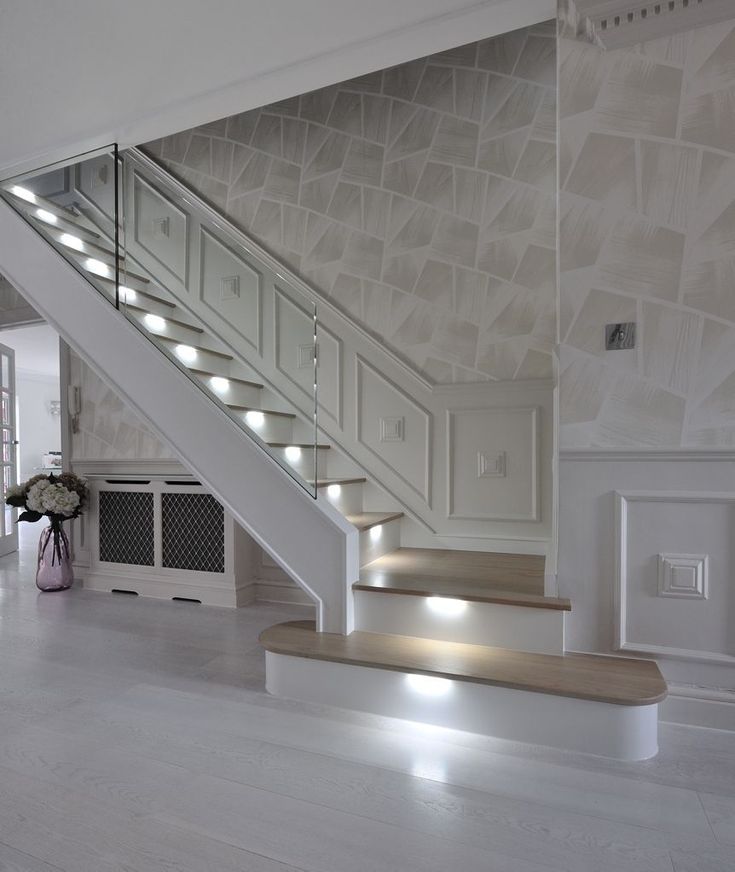
Stair lighting on steps
Step lighting is selected according to the style of the stairs and the interior design of the cottage.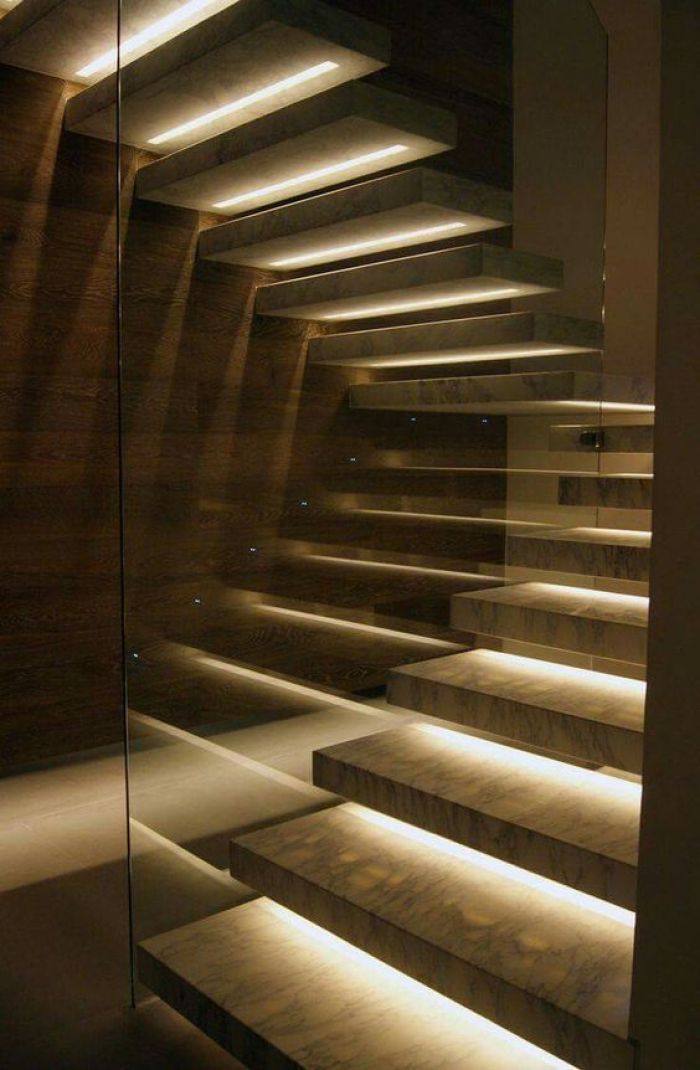 For such lighting, it is better to prefer devices that have a soft glow that will not strain your eyes and form bright shadows.
For lighting installation, holes are made in the steps and the wiring is led out. Light bulbs are arranged in different ways in each step or through one.
The photo shows a marching staircase with LED step lighting.
Lighting with wall lamps
It is advisable to place sources at the level of a standard human height not too far apart. Thus, it will be possible to achieve even lighting of the stairs and avoid dimming the steps.
In terms of color and design, lighting fixtures should be in harmony with the style of the flight of stairs and the overall interior of the house.
The photo shows a wall with spotlights in the design of the stairs.
Ceiling lighting
Top lighting is considered if the ceiling plane has a height of at least 3 meters, since such an arrangement of lamps visually conceals the area.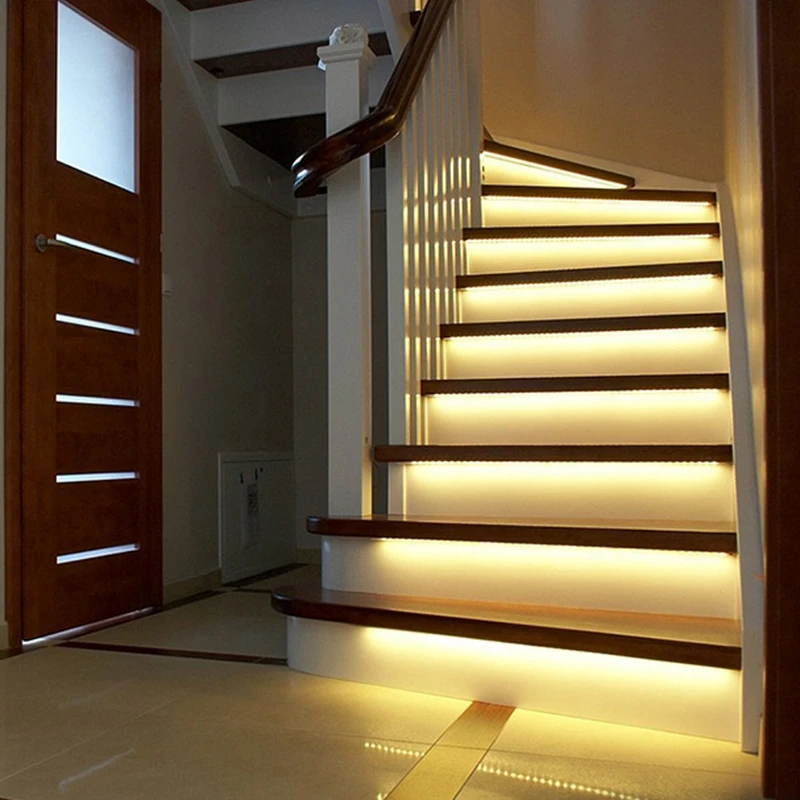
For the ceiling, it is better to choose lamps that have several spotlights with a diffused versatile luminous flux. Devices that create reflected or directed downward light will fit well into the stairwell.
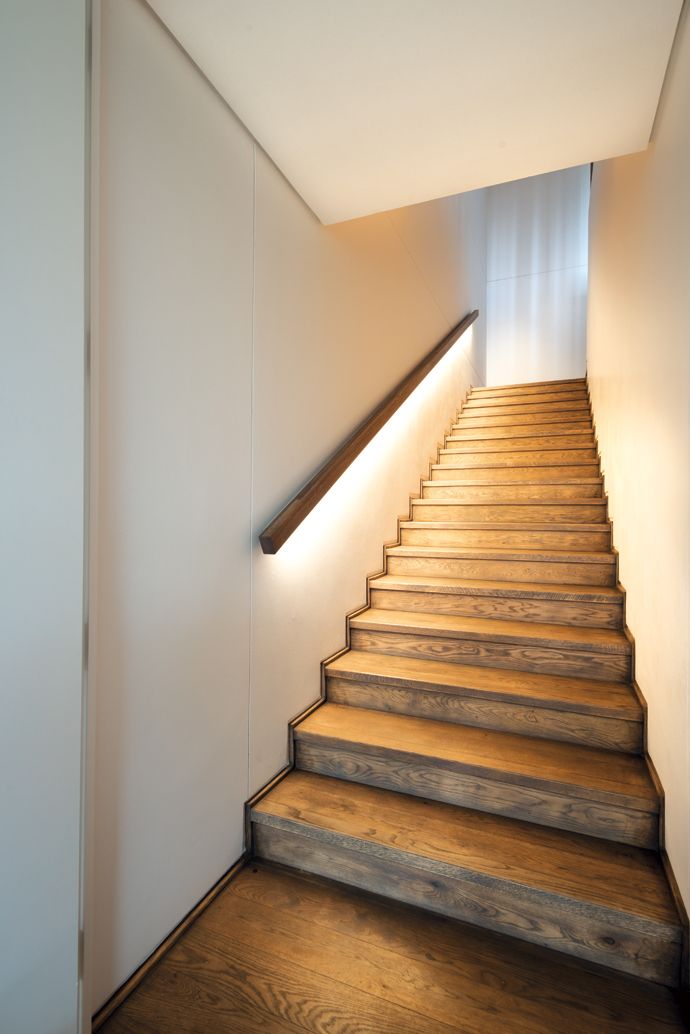
Handrail decorative lighting
Handrail lighting makes the railing lighter and brighter. For decoration, they prefer LED strip, which adds exquisite charm and even some mystery to the stairs.
Choosing the lighting for the type of stairs
Depending on the material and design features, spans are divided into several types.
| Type | Best lighting | Photo |
|---|---|---|
| Spiral staircase | For spiral staircases, ceiling lights or B-pillar fixtures are suitable. |
|
| Flight ladder | Such ladder structures are considered the most comfortable and convenient for installing any kind of lighting. |
|
| Step and ladder material | ||
| Wooden ladder | Wood construction is highly flammable, so it is important that the wiring is insulated. The span should be supplemented with low-current systems and lamps with light bulbs that do not heat up. |
|
| Metal ladder | Since this material conducts electricity well, all cabling is equipped with flexible insulation. Such a staircase looks original in the design of outdoor lamps in the form of a chandelier or sconce. When choosing lighting for a combined design with plastic elements, their combustibility must also be taken into account. |
|
| Staircase with transparent steps | Acrylic or glass is used for transparent steps. As a backlight, the end side of the steps is equipped with a screen that allows you to achieve a glow effect. |
|
| Concrete stairs | The best option for a concrete flight of stairs - side lighting, installed fifty centimeters above the plane of the steps. |
|
 With a sufficient height of the structure, a ceiling chandelier is installed.
 Features of the choice of lamps for lighting
Lamps have their own features and characteristics. The use of neon, halogen and LED bulbs is a traditional solution.
Neon products have a soft, diffused glow that fits perfectly into the limited space of stairs. This type of lamp is durable, but at the same time sensitive to mechanical stress. Therefore, a reliable protective case should be provided for them.
Halogen is characterized by a brighter light output, which leads to strong heating. Therefore, these models are not recommended for wooden marches.
LED lamps are characterized by different shapes, colors and power levels. LEDs provide economical power consumption, have a long service life and do not heat up.
How to make step lighting with your own hands?
Stair lighting device, requires two power supplies. The first is used to maintain the correct voltage balance, and the second in order to integrate the circuit into the household network.
Step-by-step instructions
In the attached instructions, all stages of connecting the stairs lighting are sequentially described. Therefore, any beginner can cope with the installation.
Self-mounting requires the use of tools in the form of a tape profile, self-tapping screws and a screwdriver. If there are protrusions at the steps, the LED tube is attached with an adhesive base. Otherwise, you will need to use an installation profile.
- Cut the tape to the desired width.
- Mount the profile on the steps using 4 self-tapping screws.
- Fasten the exposed LED strip to the profile.
- Close the tape with a special insert that acts as a protection and anti-slip element.
- Cover wires under skirting boards or steps.
- Connect the power supply, stabilizing and control device.
Learn more