Kitchen cabinet updates
10 Simple Ideas to Update your Kitchen Cabinets
Want to give your outdated or factory-grade cabinets a designer look without the high price tag? Before you spend a fortune ripping them out and replacing them, try some of these tricks for a custom, high-end look on a DIYers budget. Most of these can be tackled yourself over a long weekend!
PinWe’re currently in the middle of our Hacienda Hideaway kitchen build, and I’ve spent the last year gathering up all the dreamy inspiration to take my design to the next level. I thought it would be fun to share with you the best ideas I found—almost all of which I’m incorporating into my upcoming plans.
Jump to:
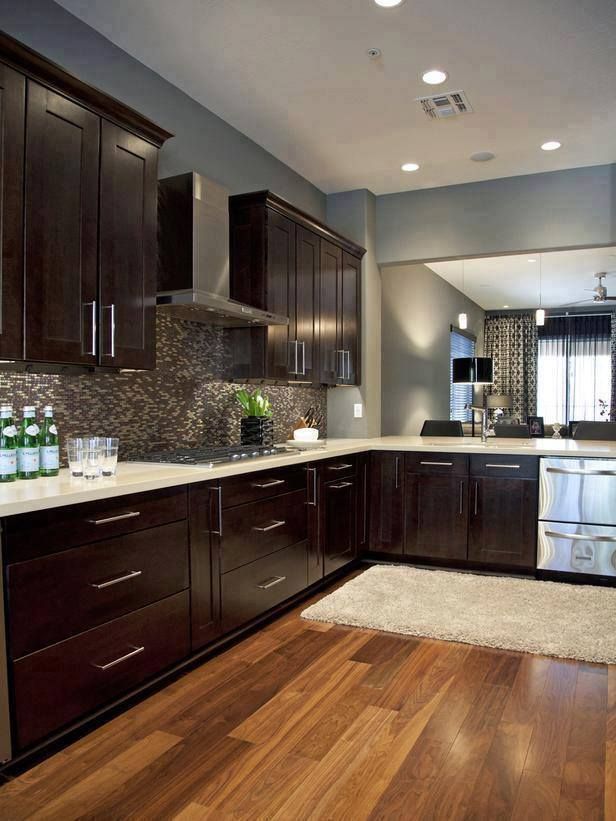
1. Paint
No revelation here—a fresh coat of paint is always the biggest bang for your buck. Most cabinet surfaces can be repainted with a high quality primer and specialty paint. I’ve had great results with Benjamin Moore Advance and Sherwin Williams Urethane Enamel, both designed for cabinetry and highly recommended by pros/DIYers.
If you don’t want to commit to a full color makeover, try painting just the upper, lower or island cabinets. Introducing a second color will add visual interest, and help keep the space from feeling too one-dimensional. Even using a few shades lighter or darker than your existing cabinets will give your kitchen a more custom feel.
Pinvia Oakstone HomesCheck out my detailed guide to Painting Cabinets like a Pro, and my Paint Roller Test results. The power of paint can’t be emphasized enough!
Pin2. New cabinet hardware
A quick fix that can go a long way to update the look of your cabinets. Hardware is the ‘jewelry’ of your kitchen, so you can add some personality here!
Today, there are endless options at every price point, suited for any design style. This is one area where you don’t have to splurge to find something that looks and feels high-end. Sites like Amazon, Lowe’s and Home Depot and even Etsy have a large selection of affordable cabinet hardware (those are my top go-tos on a budget).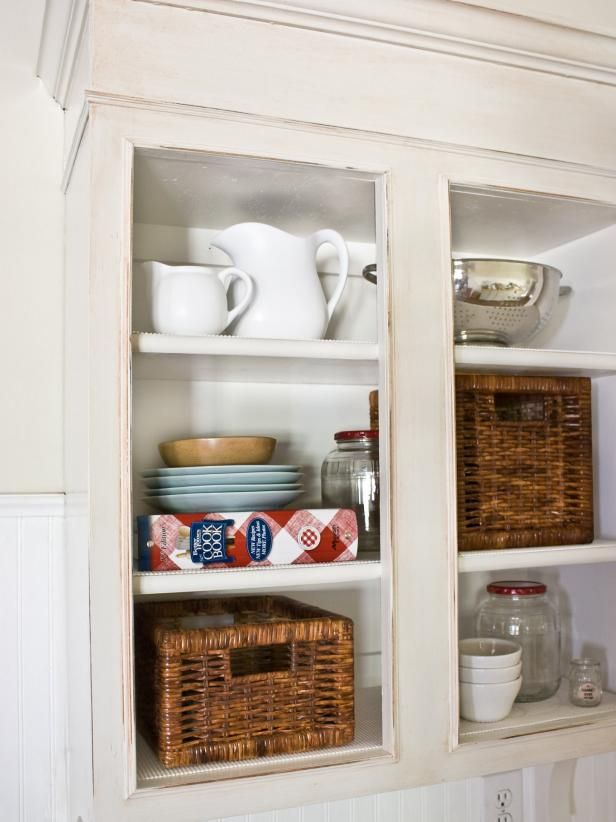
When replacing drawer pulls, you have three options:
- Find replacements that match your existing hole center measurements
- Patch over the old holes and repaint
- Order pulls with backplates to cover the old holes
Option 1 and 3 are the easiest, but they limit your replacement choices. Option 2 requires some extra work. You could also opt for a solid bar handle style like this that will cover over the old holes.
PinPro tip: use a cabinet hardware jig to drill perfect holes and save time! We’re using this one for our upcoming hardware install:
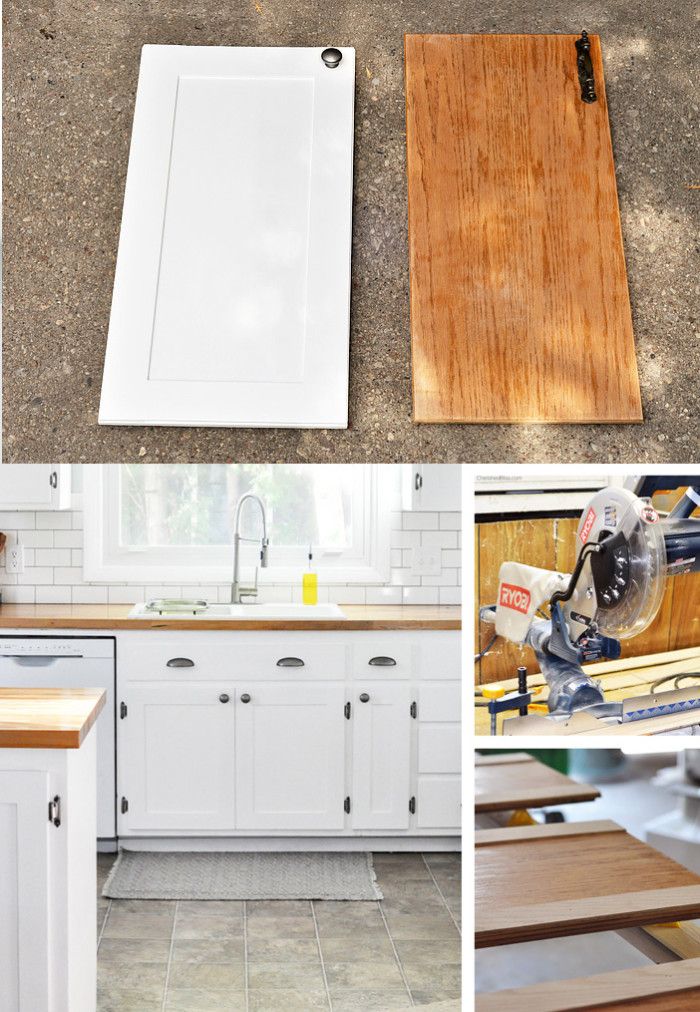
Pin3. Replace your cabinet doors
This is the biggest investment (both in time and $) on this list, but you may find it necessary to make the biggest impact. If you’re happy with the overall layout of your kitchen but have outdated or damaged doors, it’s worth looking into refacing your cabinets.
Pinvia RemodelistaThere are several companies (both local and online) who can create custom door and drawer fronts that fit your existing cabinets.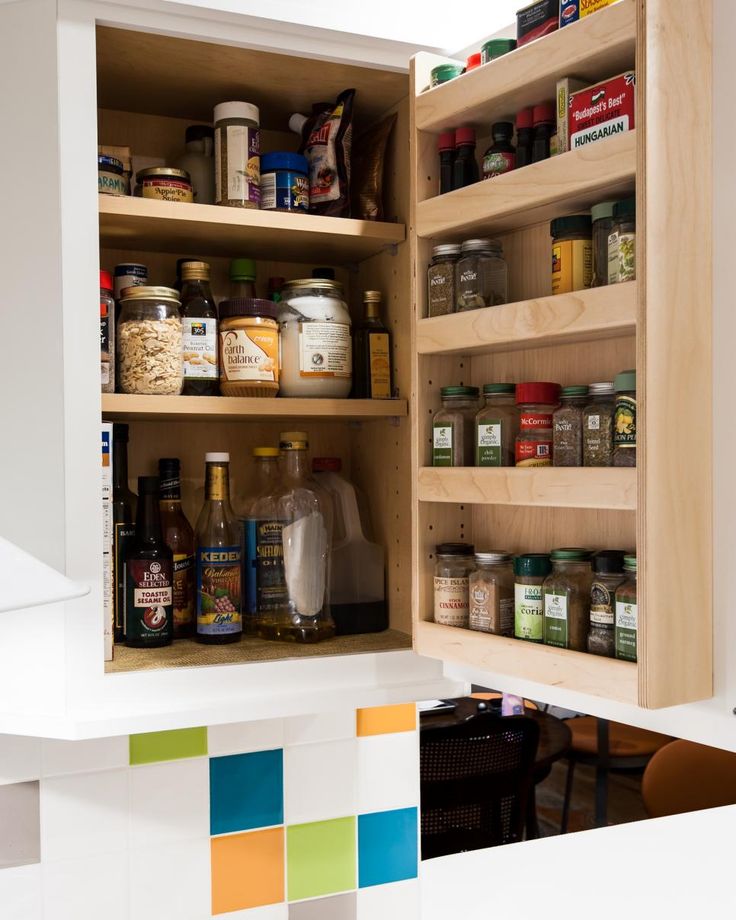 With a little extra modification, you can even upgrade your doors to drawers, which are often a more efficient use of space.
We’re working with Nieu Cabinet Doors for our Hacienda kitchen remodel, and so far the process has been very straightforward. Door installation starts this week—you can follow along in my Instagram stories!
4. Elevate your doors with molding
If replacing your doors/drawer fronts completely is not an option, consider updating them with molding. This is one of my favorite simple DIY tricks for doors of any size (check out my easy DIY door upgrade tutorial).
This process is ideal for plain slab or shaker style doors, when you want to take them to the next level. We upgraded our shaker closet doors with skinny molding to give it an elevated, custom look. The magic is in the details!
PinYou could also experiment with other types of molding such as fluting, like we did below with these DIY fluted Ikea cabinet doors:
Another idea to consider: add molding along the bottom edge of your cabinet boxes for a more polished look.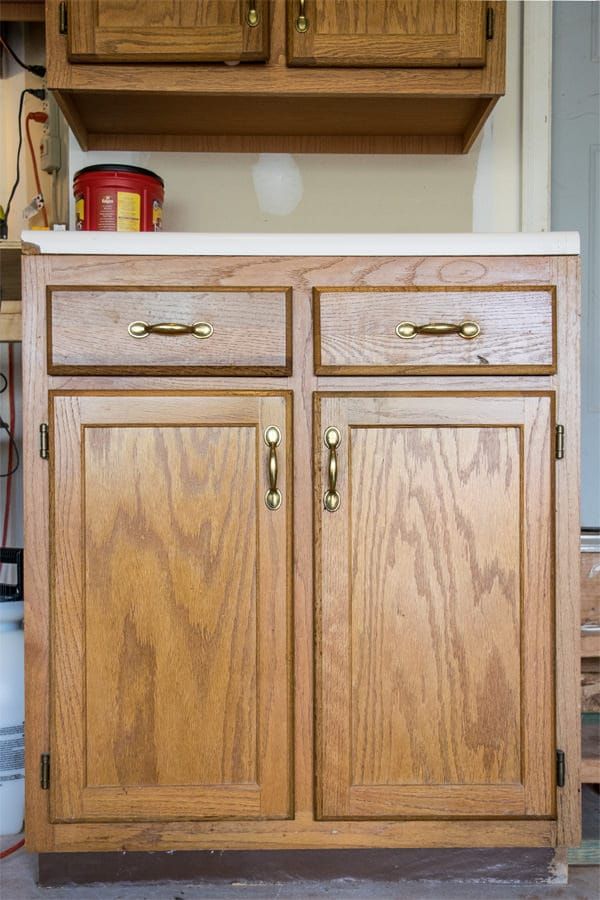
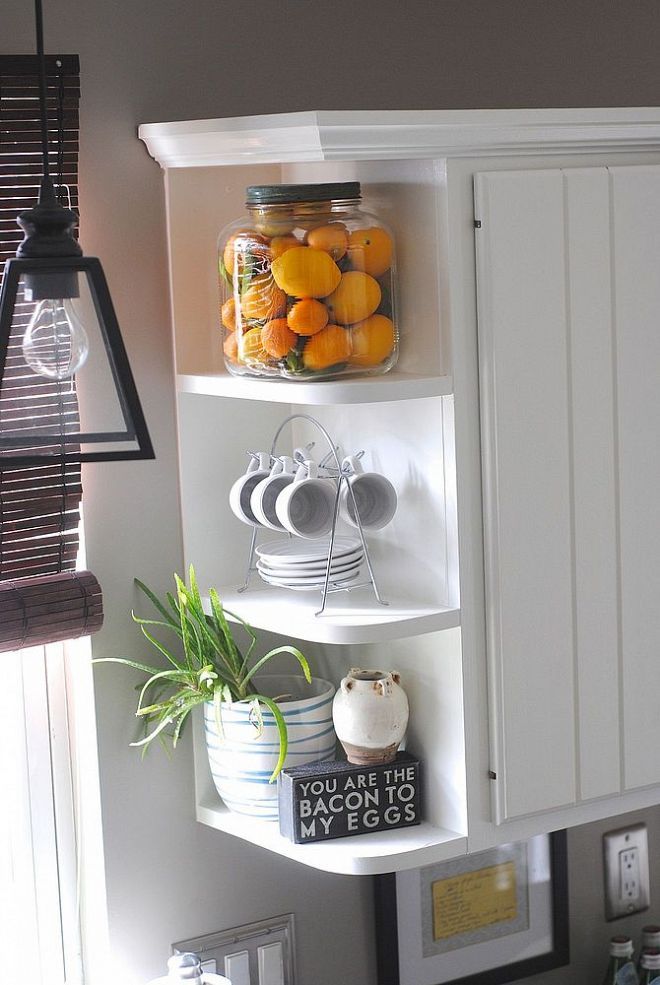
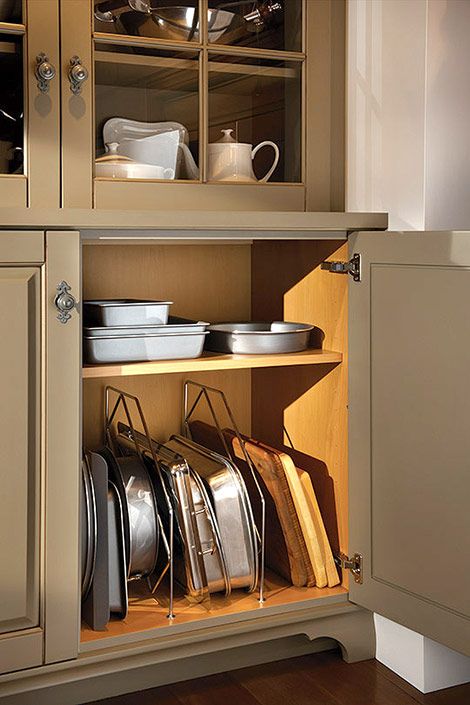
5. Don’t ignore the ends of cabinets
Cabinet ends are another (often ignored) opportunity to customize your kitchen. This can be a simple DIY using molding, or thin cover panels such as beadboard.
Pinvia Thrifty Decor ChickSimple shaker trim will work with nearly any style of cabinetry:
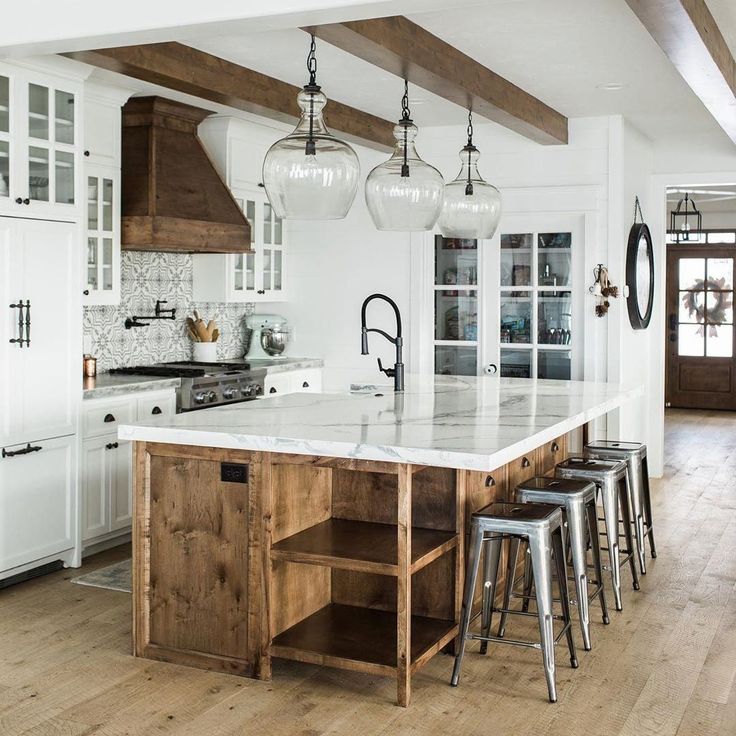
Pinvia Pink Toes and Power ToolsIslands are the perfect spot to add more details and help define the style of the room. In our Hacienda kitchen, we opted to clad both the sides of the cabinets and the island in vertical shiplap:
PinAn ‘X’ shape is another popular look and easy to create with trim:
Pinvia The Harper HouseYou could also make a statement with a pattern on the back of an island using wallpaper or tile:
Pinvia Tamara Rene Designs6. Add decorative toe kicks
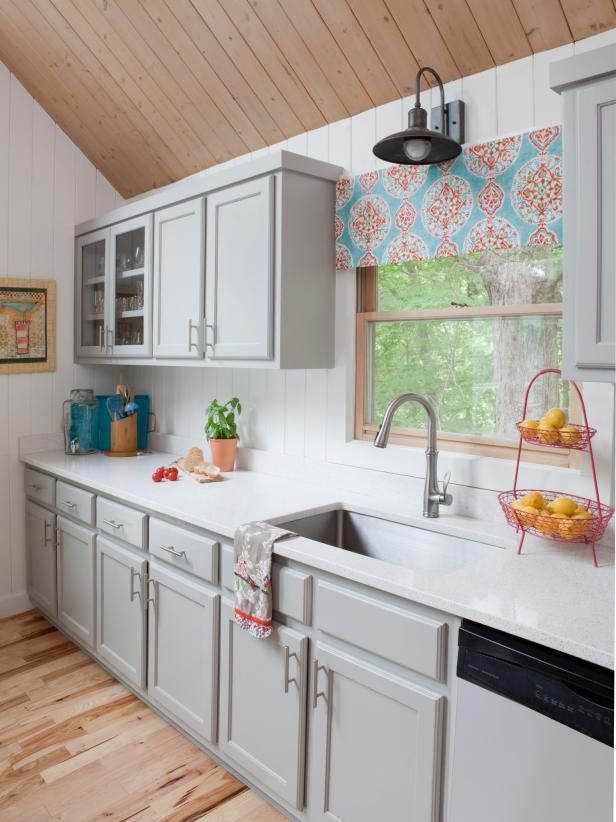
This custom detail was at the top of my wishlist for our Hacienda Hideaway kitchen. After gathering up inspiration on Pinterest, we came up with an arched valance toe kick design and fabricated them for our cabinetry (full tutorial coming soon!)
PinProgress shot from yesterday!Most people don’t even realize there are more options beyond the standard toe kick recess, and that’s one reason they make such a statement—they’re very rare! You will spot them if you study projects from top interior designers. This kitchen by Warmington & North was a huge inspiration for our toe kick design:
In our own kitchen, we added individual feet to the bottom of the cabinets, which is the simplest way to dress them up.
PinIn our Riverside Retreat kitchen, we installed a flush toe kick, which only required some additional 2×4” blocking to extend the face of the toe kick, finished off with quarter round.
PinAny of these non-standard options will make your cabinets look more like built-in furniture and create a sense of a thoughtful, intentional design.
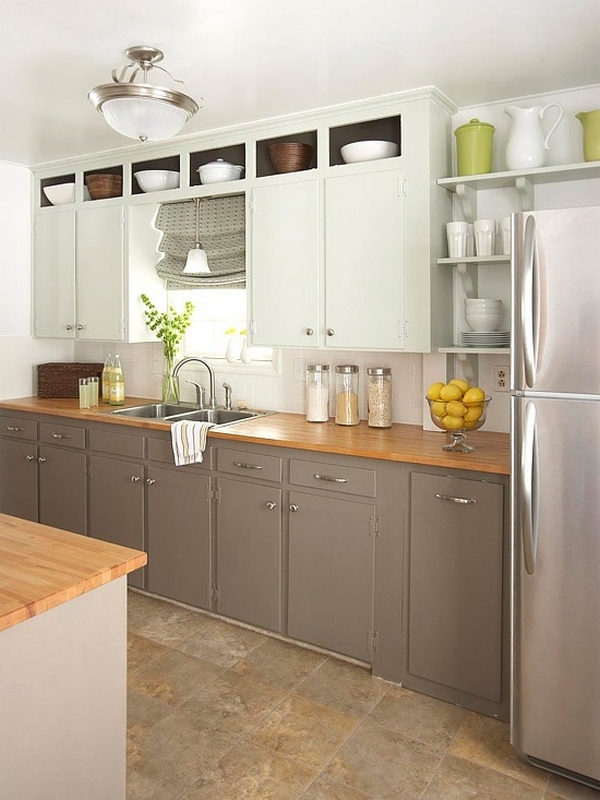
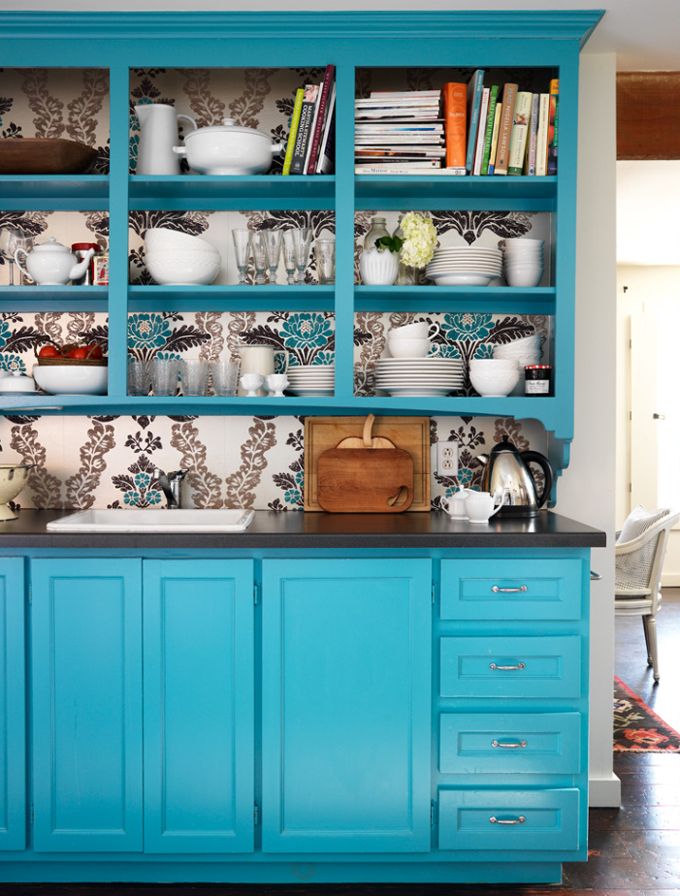
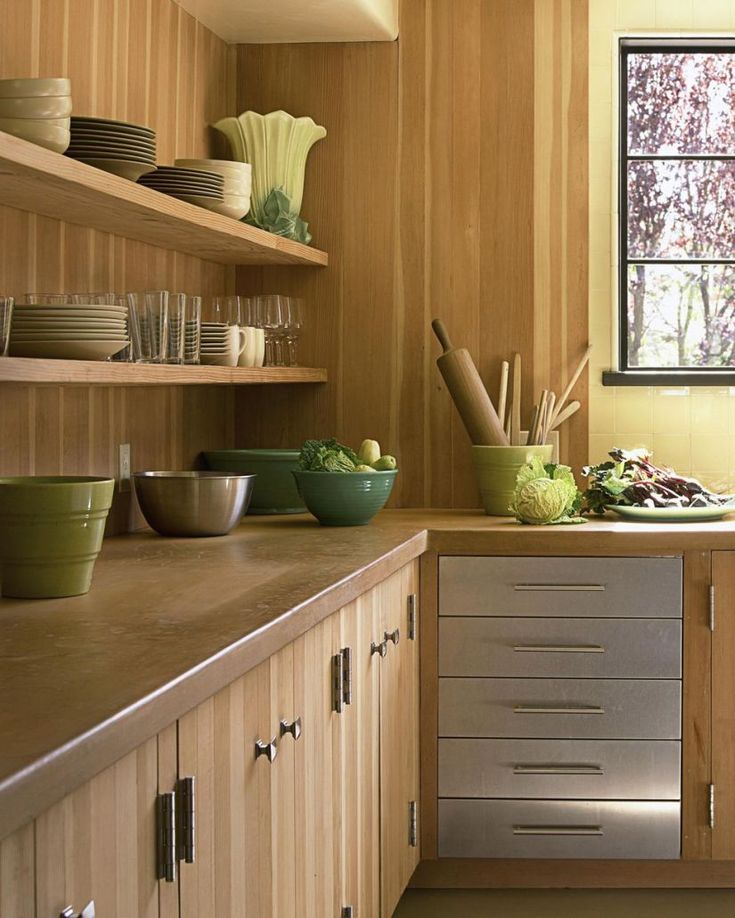
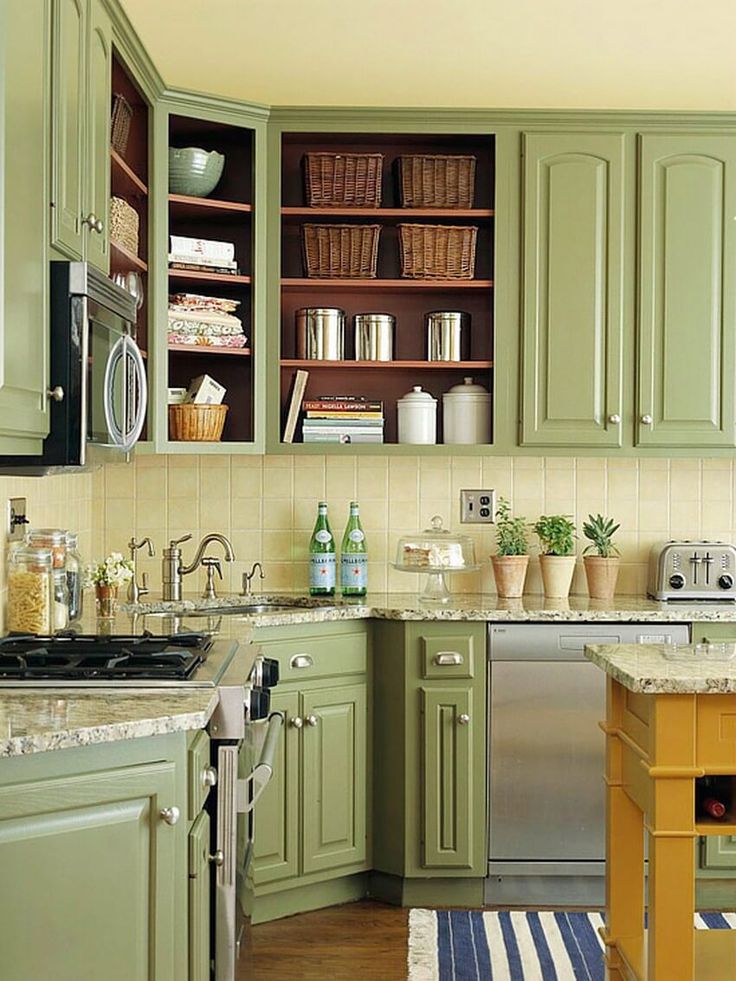
7. Go open on the uppers
If you have enough closed storage space and like the idea of displaying your favorite dishes or drinkware, consider replacing one or more of your upper cabinets with open shelving.
Pinvia House Seven DesignWe opted for an entire wall of open shelving in our own kitchen, and love how easy it is to access our everyday dishes. While our kitchen isn’t huge and we could have used the extra hidden storage, the open shelving makes the space feel larger, and provides more character than a wall of cabinets.
I also chose this route for the Riverside Retreat kitchen, replacing the old upper cabinets with two sets of shelves.
PinA simpler (and less permanent) alternative to open shelving would be to remove the doors from your upper cabinets for an ‘open’ feel. I love the idea of painting the boxes the same color as the wall, so they blend in and feel less like cabinets. You could have fun with it by adding wallpaper, or even peel and stick tile to the back wall.
Pinvia Sunset Mag8. Add glass inserts to your doors
Here’s an alternative to removing your upper cabinet doors: add glass inserts instead! This will still allow you to display your favorite dishes while keeping them dust-free. A local glass company should be able to modify your existing doors and replace the inner panel with glass (slab doors may require additional customization).
Pinvia RemodelistaFeel free to get creative and consider using reeded, leaded or tinted glass, or applying a mullion insert.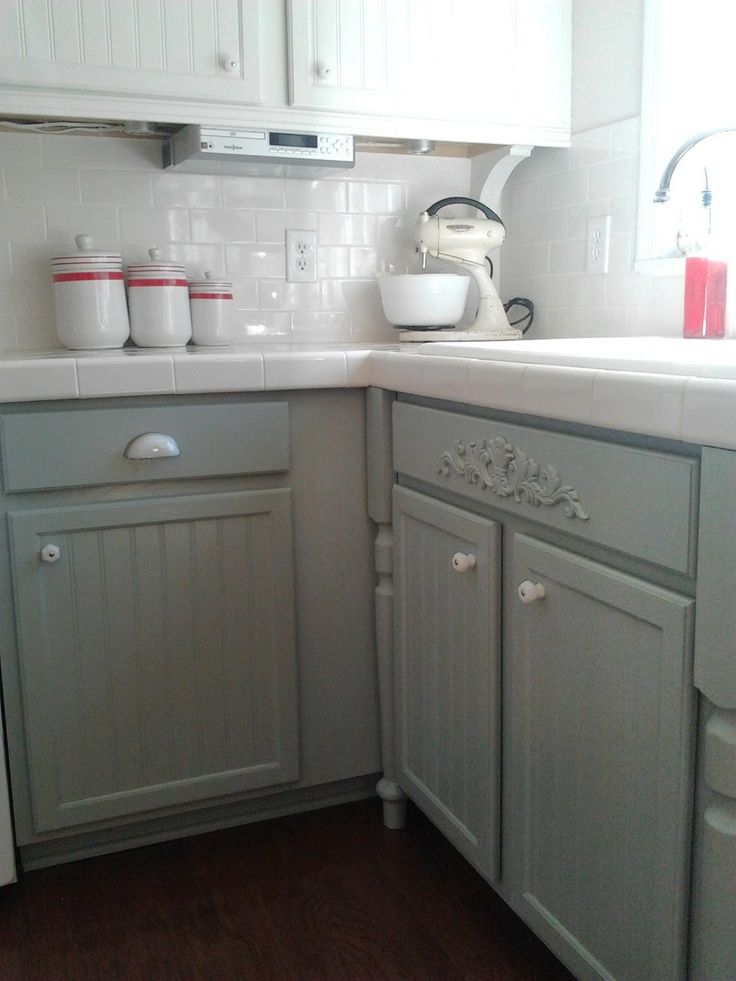 Take it a step further with unique options like cane webbing, wire mesh or antique mirror glass.
This is a great area to add your own personal style to your kitchen and experiment with something new.
Pinvia Design Storms9. Extend your upper cabinets to the ceiling
Empty space above upper cabinets is one of my biggest design pet peeves, but fortunately, it’s a relatively simple fix! Filling in that gap will instantly make the room feel taller and more finished.
Pinvia Chris Loves JuliaThere are multiple ways to go about this, and plenty of great before/after tutorials online. The quickest solution requires framing out the empty space, attaching filler pieces, crown molding and painting to match your existing cabinets.
Pinvia Inspiration for MomsYou can simply cover the gap with panels, or build functional cabinet boxes for usable storage.
Pinvia Thrifty Decor ChickAnother option is to raise the cabinet boxes higher, and add an open shelf below.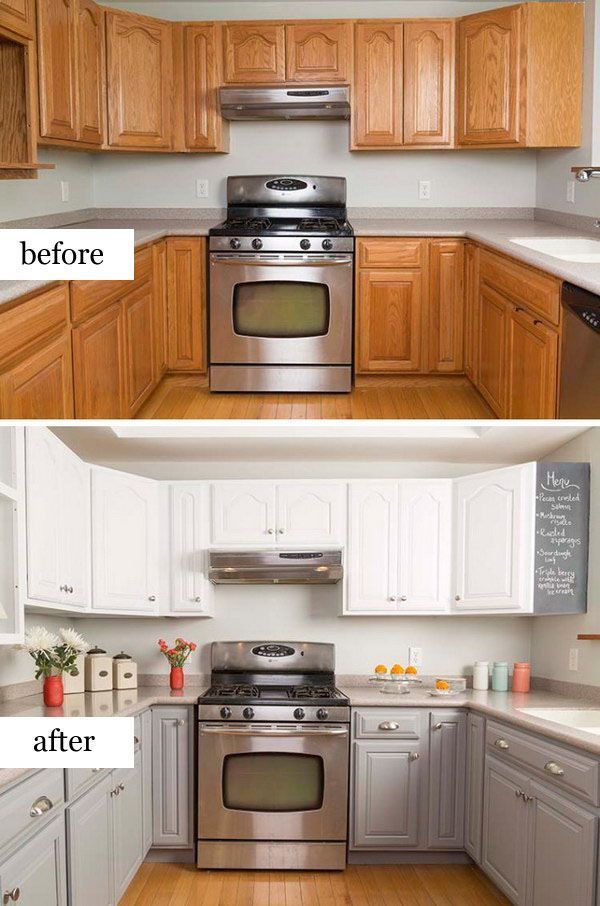
While you’re at it, consider building in a surround for your fridge, as well. Covering up the sides of an exposed fridge will instantly make your kitchen feel more polished.
Pinvia Dana Plus DavidWe built a custom surround in the Riverside Retreat kitchen with Ikea cabinets and plywood panels:
Pin10. Incorporate an antique piece
This is my personal favorite kitchen design trick. I used two vintage pieces in our kitchen—this wood hutch that holds our drink ware, microwave and toaster:
PinAnd this barrister bookcase that serves as our pantry:
PinInspired by Lauren Leiss:
PinVintage pieces can easily be refinished to your taste (both of mine were) and are often much more affordable than cabinetry. They add a ton of character and will separate your kitchen from builder-grade basic.
I try to incorporate at least one vintage piece into every room, and the kitchen is no exception. In the Riverside Retreat, I found a secondhand $50 kitchen table, painted and raised it with casters, and turned it into a movable island:
PinConsider replacing one of your cabinets (upper or lower) with an antique piece, or simply adding an old hutch if there is space.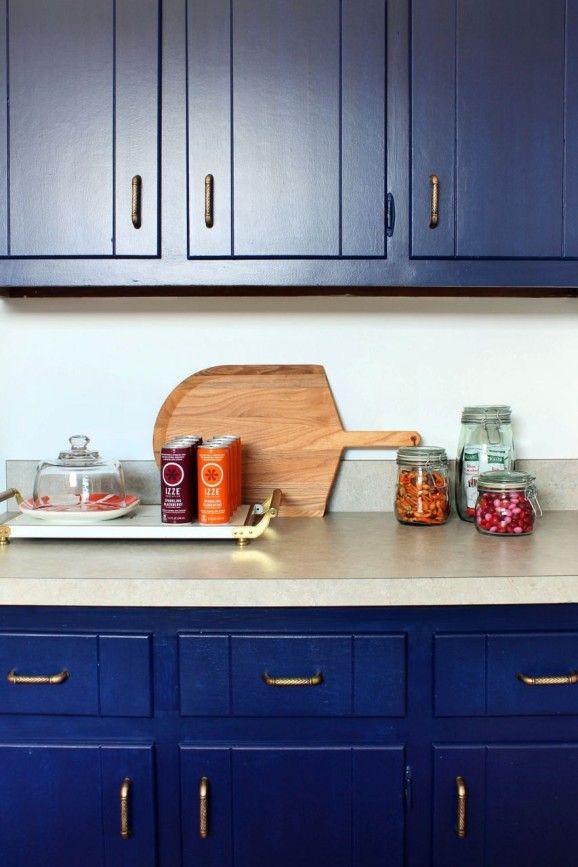
And there you have it—ten designer-approved ways to transform your kitchen cabinets. Do you have a favorite? Hopefully this inspired you to get creative with your existing cabinets if you don’t have the desire or budget to replace them. You might be surprised at the difference one small detail can make!
Looking for more DIY kitchen ideas? Check out these favorite past projects:
- DIY Range Hood Tutorial
- Subway Tile Install Tips
- Rustic Floating Shelves
- Custom Ikea Pax Pantry
- Customized Ikea Kitchen Reveal
While we continue to work on our Hacienda kitchen cabinets, I’ll be checking in on Instagram stories with our progress. Next week: new landscaping at the Heights House!
Related posts:
15 DIY Kitchen Cabinet Makeovers
Snazzy Little Things
One of the most daunting tasks of any kitchen remodel is taking a stab at trying to redo your kitchen cabinets.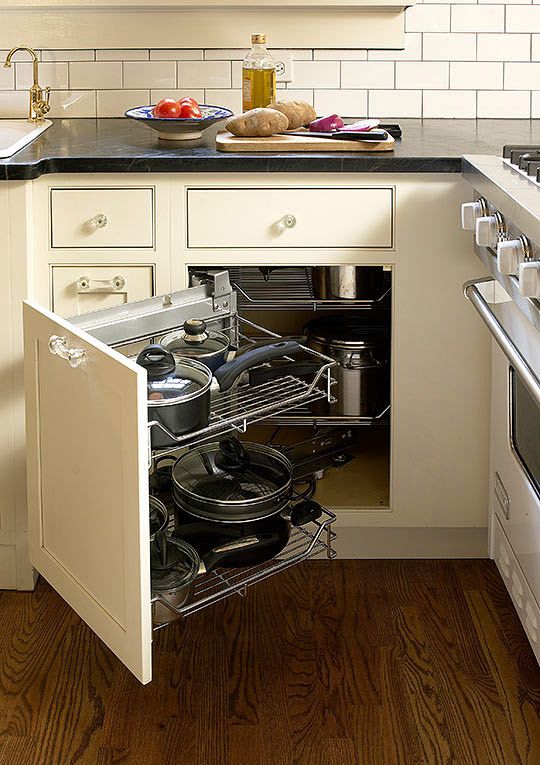 Not only is there a lot to paint, but there's also the matter of picking out the best hardware. For any renovation woes, this list has exactly what you need to feel inspired about tackling your kitchen storage. While plenty of kitchen trends for 2020 are included, such as bold colors and open shelving, there are still nods to more classic design styles. Whether you're on the hunt for cabinetry that will give your kitchen the modern look you're aiming for, or that will evoke all the farmhouse decor and style that can be found in the rest of your home, anything you're in search of can be found in this list (and you should check out our guide on how to paint kitchen cabinets too).
Find simple fixes, like choosing some beautiful cabinet pulls, as well as more involved changes like completely gutting your cabinets. So instead of worrying about how you're going to achieve the look you're after, check out these gorgeous ways to redo your kitchen cabinets for some much-needed design inspiration.
Inspired by Charm
1 of 31
Before: All-White Kitchen Cabinet Makeover
This kitchen received a total overhaul, including completely new custom cabinets.
Inspired by Charm
2 of 31
After: All-White Kitchen Cabinet Makeover
The final result is a chic all-white kitchen, complemented by dark wood floors and an antique table standing in for a kitchen island.
Get the tutorial at Inspired by Charm.
SHOP KITCHEN FAUCETS
Snazzy Little Things
3 of 31
Before: Budget-Friendly Kitchen Cabinet Refresh
The cherry cabinets and island in this kitchen receive a fresh coat of paint in this renovation that cost under $100.
Snazzy Little Things
4 of 31
After: Budget-Friendly Kitchen Cabinet Refresh
The use of two tones of gray pop beautifully in this kitchen, proving that paint can make a huge difference in any space.
Get the tutorial at Snazzy Little Things.
SHOP PAINT BRUSHES
Jenna Kate at Home
5 of 31
Before: Simple Fix Kitchen Cabinet Renovation
Instead of a full-on overhaul, this kitchen is a great example of a few simple touches making a huge difference.
Jenna Kate at Home
6 of 31
After: Simple Fix Kitchen Cabinet Renovation
Thanks to a fresh coat of white paint and new hardware that blends in better with the cabinets, this kitchen has a whole new look.
Get the tutorial at Jenna Kate at Home.
SHOP SATIN NICKEL HARDWARE
Holland Avenue
7 of 31
Before: Chalk Paint Kitchen Cabinet Renovation
The dark cabinets and low lighting made this kitchen feel out of date and in need of some lightening up.
Holland Avenue
8 of 31
After: Chalk-Paint Kitchen Cabinet Renovation
The mint green cabinets add a touch of whimsy to the kitchen, while the white overhead cabinets keep it looking fresh.
Get the tutorial at Holland Avenue.
SHOP CHALK PAINT
Modern Glam
9 of 31
Before: Modern Farmhouse Kitchen Cabinet Renovation
Outdated cabinets, countertops, and appliances made this kitchen an obvious candidate for a big overhaul.
Modern Glam
10 of 31
After: Modern Farmhouse Kitchen Cabinet Renovation
Fresh, white cabinets, new brass hardware, and some open shelving turned this kitchen into a gorgeous space.
Get the tutorial at Modern Glam.
SHOP BRASS HARDWARE
Little Dekonings
11 of 31
Before: Modern Farmhouse Kitchen Cabinet Update
This blogger wanted to paint her wooden cabinets gray for a more upscale-farmhouse feel.
Little Dekonings
12 of 31
After: Modern Farmhouse Kitchen Cabinet Update
The color (Chelsea Gray by Benjamin Moore) instantly elevated the kitchen—as did swapping out the dated drawer pulls for cup pulls.
Get the tutorial at LittleDekonings. com.
com.
SHOP CHELSEA GRAY
Brandi Sawyer
13 of 31
Before: Beadboard Wallpaper Cabinet Refresh
No budget for new cabinets? No problem! Brandi Sawyer made the most of what she had by thickening the door frames with plywood and applying beadboard wallpaper to complete change her cupboards.
Brandi Sawyer
14 of 31
After: Beadboard Wallpaper Cabinet Refresh
See how a touch of texture from the wallpaper makes them look more luxe?
Get the tutorial at BrandiSawyer.com.
SHOP FREESTANDING PANTRIES
My 3 Monsters
15 of 31
Before: Chicken Wire Cabinet Facelift
Want the benefits of open shelving while still keeping your doors? Try this clever DIY cabinet idea.
My 3 Monsters
16 of 31
After: Chicken Wire Cabinet Facelift
The blogger removed the recessed panels and added chicken wire for a rustic touch.
Get the tutorial at My3Monsters.com.
SHOP CHICKEN WIRE
Confessions of a Serial DIYer
17 of 31
Before: Adding Glass to Cabinet Doors
Or, you could always add a glass panel to cabinet doors to open up your cabinets, as this blogger did.
Confessions of a Serial DIYer
18 of 31
After: Adding Glass to Cabinet Doors
Simply remove the center panel and add a plexiglass window. Tip: Only open up the cabinets that hold items you'll want to display.
Get the tutorial at ConfessionsOfASerialDIYer.com.
SHOP GLASS CABINETS
Small Town Rambler
19 of 31
Before: Paint and Hardware Cabinet Refresh
These old wooden cabinets and hardware made the room appear dark and dated.
Small Town Rambler
20 of 31
After: Paint and Hardware Cabinet Refresh
A bit of new paint and new hardware, and this kitchen is totally transformed!
Get the tutorial at SmallTownRambler.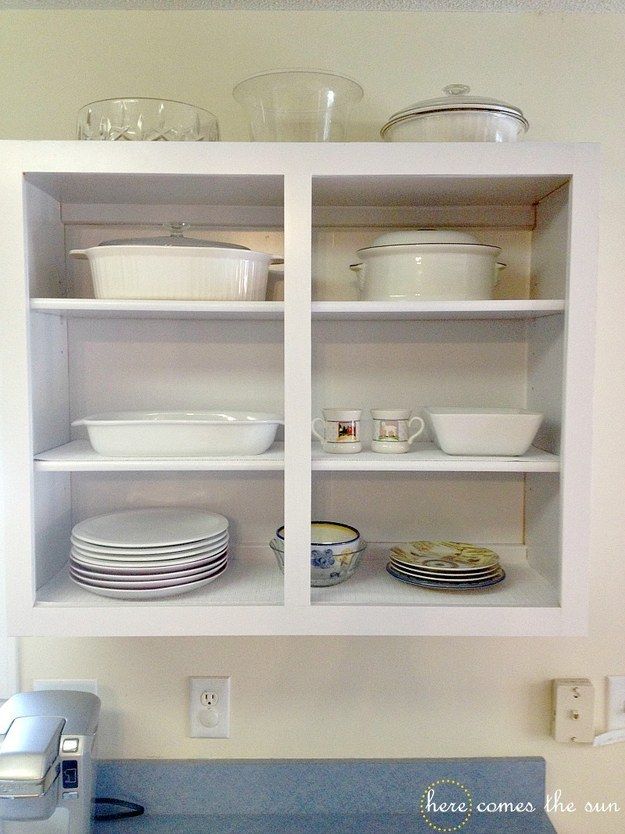 com.
com.
SHOP WHITE PAINT
Beautiful Matters
21 of 31
Before: Adding Trim to Kitchen Cabinets
Sometimes, the smallest and least expensive changes make the biggest impact. This blogger wanted to open up one cabinet for shelving and add trim and fresh paint to the rest of the cabinet doors.
Beautiful Matters
22 of 31
After: Adding Trim to Kitchen Cabinets
Voila! $108 later, it's practically unrecognizable.
Get the tutorial at BeautifulMatters.com.
SHOP CABINET TRIM
All Things With Purpose
23 of 31
Before: Kitchen Cabinet Makeover With Only Paint
We'll never get over the miraculous power of a paint job. Take these dark wood kitchen cabinets for example, which got a much-needed makeover inspired by Fixer Upper.
All Things With Purpose
24 of 31
After: Kitchen Cabinet Makeover With Only Paint
Believe it or not, that is the same space.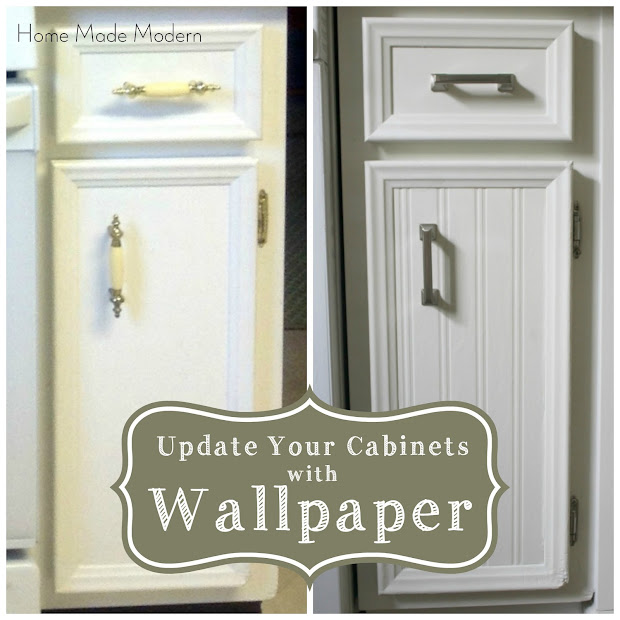 We think Chip and Joanna would approve!
Get the tutorial at AllThingsWithPurpose.com.
SHOP WHITE PAINT
William Waldron
25 of 31
Before: Bright and Cheery Cabinet Refresh
The cabinets needed a facelift, but the vintage stove had to stay.
William Waldron
26 of 31
After: Bright and Cheery Cabinet Refresh
The homeowners swapped out the fronts of the cabinets and painted them a Patriotic White by Benjamin Moore.
See more incredible kitchen makeovers.
SHOP WHITE PAINT
Imgur
27 of 31
Before: $100 Kitchen Makeover
A kitchen makeover doesn't need to break the bank. For proof, just look at this $100 renovation. Here's the before ...
Imgur
28 of 31
After: $100 Kitchen Makeover
.. . and here's the after. Now white with new hardware, the kitchen cabinets brighten up the room.
Get the tutorial.
SHOP DRAWER HARDWARE
Our Storied Home
29 of 31
Before: Chalk Paint Kitchen Cabinet Update
These wooden cupboards were just begging for a refresh.
Our Storied Home
30 of 31
After: Chalk Paint Kitchen Cabinet Refresh
Opening one cupboard, then adding chalk paint and new hardware left these cabinets looking lovely.
Get the tutorial at OurStoriedHome.com.
SHOP OPEN SHELVING
12 ways to update the kitchen set
Natalia | 02/26/2019 | Updated | Kitchen furniture | 77 152 views | 2 comments
Contents of the article
For a domestic person, the kitchen is not only a place where food is prepared. This is a place for family lunches and dinners, a place to meet friends and family. All this means only one thing - the kitchen should not only be comfortable for the hostess, but also attractive in appearance. Every piece of furniture and decor matters, and even more so the kitchen set. When cracks and stains appear on it, or when it no longer matches the style of the kitchen and the tastes of the owners, many people think about buying a new headset. But is it always advisable to spend money on new furniture if you can ennoble the existing one? If the headset is still strong, outdated in size and layout, then you can transform it with your own hands. Consider the most popular and effective ways to update the kitchen set.
Self-adhesive film
This method of restoring a kitchen set has become truly popular, and all thanks to its many advantages :
- vinyl film is inexpensive, so renovation of facades will not hit your pocket;
- The range of self-adhesive film is huge, you can find options with imitation of wood of any species, stone or leather.
 There are films depicting landscapes, with interesting drawings, etc., with a smooth and embossed surface;
 - almost everyone can handle the installation of the film - it is enough to be careful during the measurement process and directly during the gluing itself;
- vinyl film is not afraid of temperature changes and moisture, which is very important for the kitchen. It will be easy to care for such a surface;
- If a part gets damaged or you want to change the environment again, the film can be easily removed.
The minus is the low durability of the film, only 3-4 years, but the cheapness and ease of replacement smooth out this drawback.
Pasting kitchen facades is quite simple. Most importantly, follow the following recommendations:
- choose a film of a suitable color, taking into account the preferences for a new kitchen interior. It is not necessary to take material with imitation of wood - you can take a plain film of light color, and then you will be able to make a small kitchen larger and make dreams come true for the implementation of a minimalist interior;
- It is best to remove kitchen fronts - this will make work easier.
 The fittings must be dismantled in any case;
 - measure the parameters of each removed facade;
- the film must be applied to a clean, dry surface, i. facades must be thoroughly cleaned of stains of grease and dirt. This can be done with a soapy solution, or using dishwashing detergent. After that, it is necessary to remove the remnants of detergents and wipe the facades dry;
- if the facades are seriously damaged, some time will have to be spent on repairs. Peeled edges on the ends must be glued. The pits must be sanded, then filled with acrylic putty, sanded again and primed. If there are large potholes, then in their place it is better to glue a patch of plywood or veneer;
- cut the film according to the measurements. Experienced craftsmen recommend adding 4-5 cm of allowance in places where the film will bend. If there is a large drawing on the film, then when cutting it out, it is necessary to control that it is located correctly. It is better to cut with a clerical knife - so the edge will be as even and neat as possible;
- Take the first piece of film, start peeling off the backing paper and apply the film with the adhesive side to the front.
 Controlling evenness, gradually peel off the protective layer and stick the film;
 - The film can be rolled with a rubber roller or a plastic scraper. This removes the remaining air. It is necessary to smooth from the center to the edges. If air bubbles remain, they can be pierced with a needle and rolled again with a roller;
- if you suddenly notice that somewhere the film is glued crookedly, then within 5-6 hours the situation can be corrected. The film can be re-glued, but not more than 1-2 times, since then the glue will simply lose its properties;
- when all fronts are pasted over, you can screw them back;
- you can use the old fittings, or you can replace it with a new one that fits more into the updated style.
If the shelves are soiled to such an extent that no detergent can take them, they can also be pasted over with foil. The principle of operation is the same. The film can be chosen close to the original color of the shelves.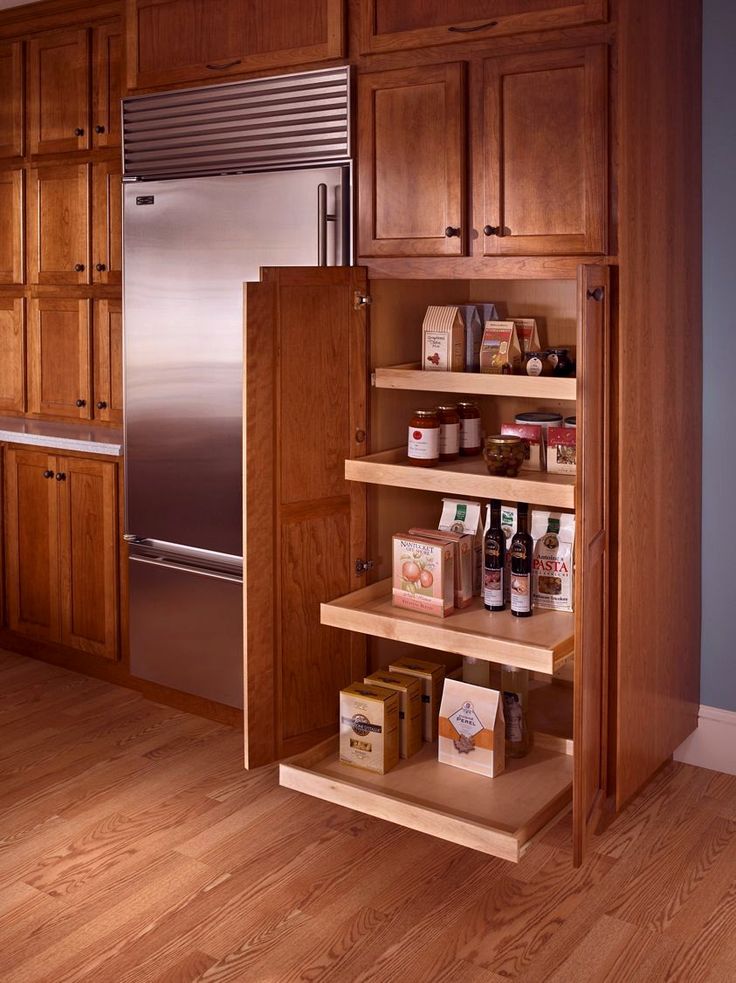
Replacing the fronts
Many people think that the fronts covered with film look somehow too modest. This is all, of course, a matter of taste and personal preferences, but it is difficult to radically change the kitchen with a vinyl film, because glass inserts or panels will not be added to the doors. To make serious changes to the interior of the kitchen, it is better to act radically and completely replace the facades. Yes, it will turn out more expensive than with a film, but still much cheaper than when buying a new headset. The method is great if the frame of the furniture is still strong enough and durable.
The easiest way will be for owners of modular furniture , which was bought relatively recently. Then it will be possible to buy facades of the required size and replace them with your own hands. But this is not often so lucky, because usually you have to make facades to order. It is not at all necessary to change wooden doors to wooden ones, and chipboard to chipboard.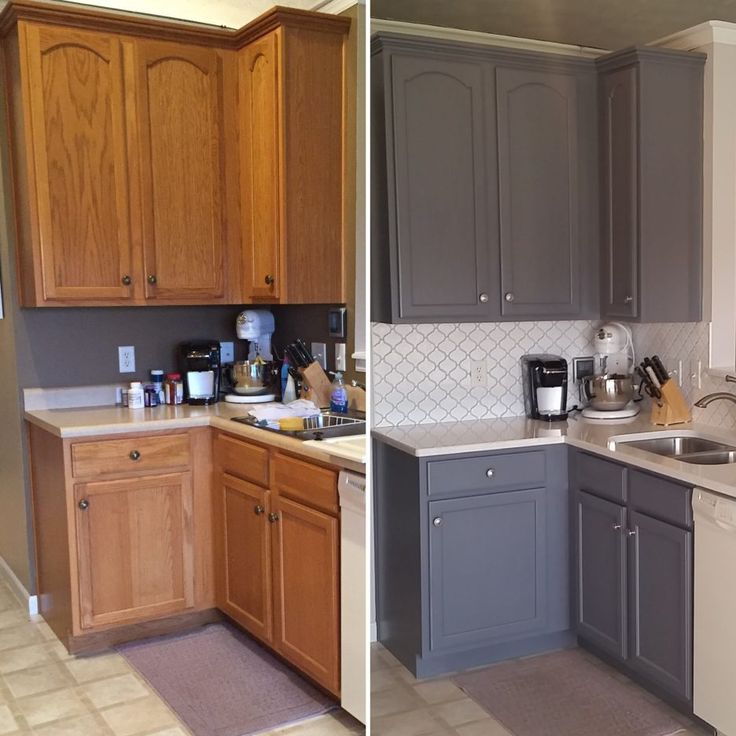 The uniqueness of this method of restoration lies precisely in the fact that the appearance of the headset can be dramatically changed using completely different materials.
The cheapest option is chipboard or plastic facades. MDF and wood will cost more. You can choose accessories and decorations, for example, use glass inserts, but all this will affect the price. Masters with hands, of course, can make all the facades on their own. If you have woodworking skills, then why not? But it is much easier and faster to turn to a specialized company , which will make facades for your headset.
Repair of kitchen facades in Moscow
For residents of Moscow and the region, we recommend the company "Kitchen Repair", which has been operating for over 20 years and specializes in the repair of kitchen facades. Experienced specialists can replace facades or repair existing ones by painting, enameling or sticking a film. Among the services of the company are also repair of accessories and replacement of countertops.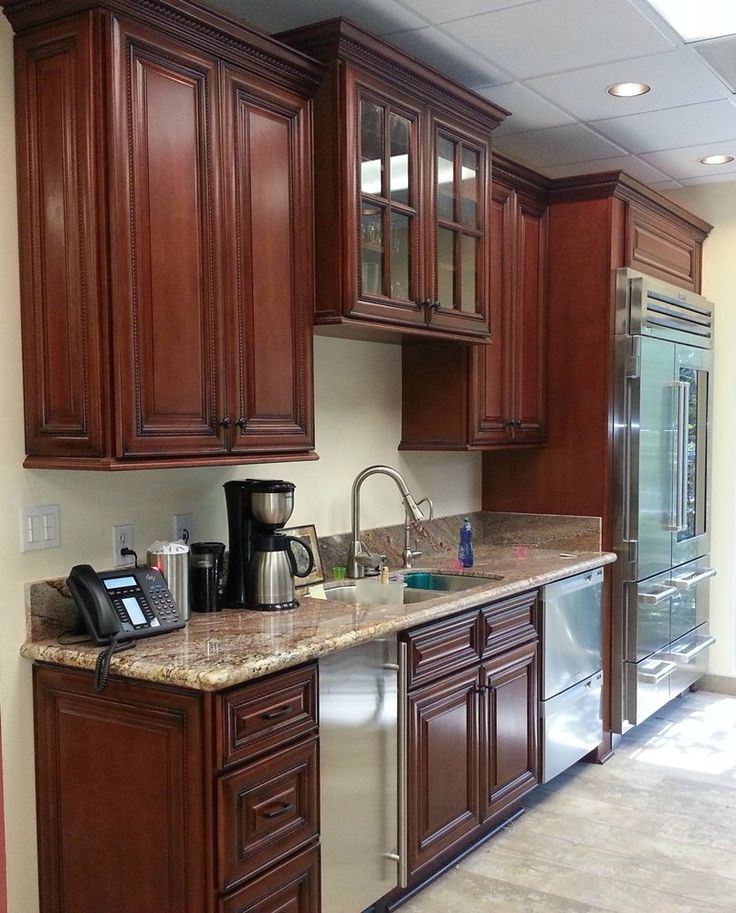 All work is carried out at the facility, measurements are preliminarily carried out, the design and estimate are agreed, the required elements of the headset are made from the desired material. All work is guaranteed. You can see detailed information and examples of work on the page https://remont-kuhni.com/service/remont-kuhonnyh-fasadov/.
An example of the work of specialists from the company "Kitchen Repair"
Painting
The method is quite simple, but requires careful surface preparation. The main advantage of the method is the ability to paint the facade in any color. If you want to make your kitchen more daring, you can choose a bright shade, such as blue, green or orange. A win-win color is white, as well as many light shades, incl. beige, grey, cream, etc. Imagine in advance what the kitchen will look like, and get creative.
Simultaneously with painting the facades, they can be slightly transformed using moldings , special strips that are glued to the surface and give it an interesting relief.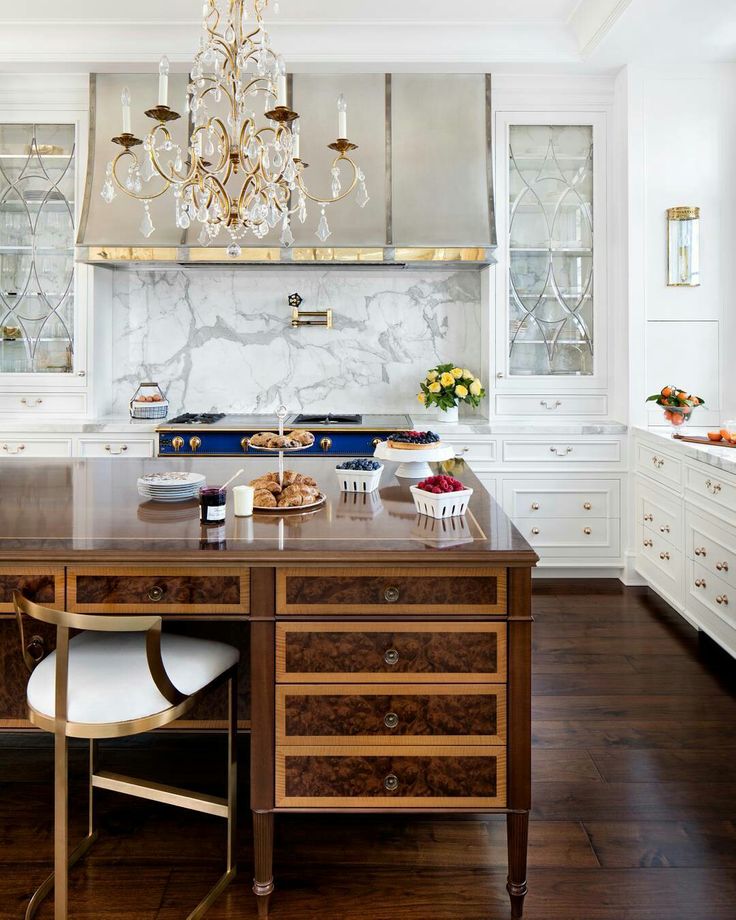
The sequence of actions is as follows:
- remove the facades from the headset, dismantle the fittings and glass. Those elements that are difficult to remove can be sealed with masking tape;
- old varnish or paint can be removed most conveniently with a grinder. If PVC film was used as a decor, then it is better to use a building hair dryer. From the temperature, the film will melt, and it will be easier to remove it. It is better to work in a respirator so that small particles of the facade and the pungent smell of PVC do not enter the respiratory tract;
- if there are serious damages, they must be filled with filler and then sanded;
- the surface is rubbed with sandpaper, then dust is removed, degreasing is carried out;
- If you plan to use moldings , then they are attached at this stage. You can choose flat or textured planks, there are products that imitate stucco molding. It is better to grind the planks in advance, then they are cut into segments of the required sizes.
 Often, moldings are attached along the contour of the doors, or a pattern is formed from them closer to the center. Usually a 45 degree joint is used. After you have made sure that the figure is laid out evenly, the elements are glued, you can use glue for wood products. It is allowed to use nails without hats;
 - MDF, chipboard and wood absorb moisture well, therefore it is better to pre-coat them with a primer. The one that is designed for woodworking will go. It is better to apply two layers;
- you can now start painting. It is better to use acrylic paint or car enamel. The first is cheaper, the second is better in terms of moisture resistance and resistance to mechanical damage. You can use a brush, roller or spray gun. The paint is applied in 2-3 layers depending on the required color saturation. To guarantee, some craftsmen cover the facades with a layer of transparent varnish;
- when the paint dries, the masking tape is removed, the fittings are returned to their place, and the facades themselves are hung on hinges.

If coloring seems too banal to you, then use glisal , a translucent glossy paint, in your work. It is applied in exactly the same way as acrylic paint, but while the coating dries, an interesting texture can be created on the surface. With a sponge, a bag or other improvised items, you can make a geometric pattern or an ornate pattern. If anything, part of the pattern can be removed with a roller. The result is an unusual result that will appeal to fans of ethnic style.
Lacquered
The variant is only suitable for fronts made of solid wood . The varnish allows you to reliably protect the wood and at the same time does not hide its chic natural look. When it comes to furniture, nitrocellulose, alkyd-carbamide, polyurethane, epoxy and polyester varnishes are used. It is important that the varnish protects the wood from moisture and high temperatures. Varnishes have a not very pleasant smell, therefore it is better to carry out all work on the street.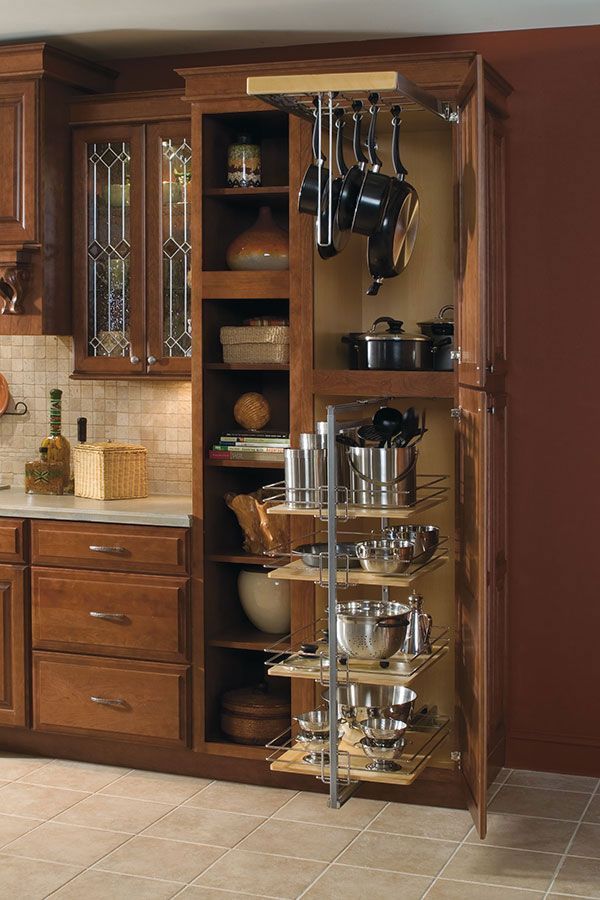 If this is not possible, then it is better to take a water-based material, it has almost no smell.
It is very important to decide in advance on the gloss level of . The varnish can be glossy, which will add visual volume to the headset, or it can be matte, which will emphasize the wood pattern. The degree of gloss is indicated on the packaging as a percentage of reflected light: a glossy varnish will reflect up to 90% of the light, matte - only 10%, there are many intermediate options. Which is better depends on your preferences.
The procedure is as follows:
- remove the facades, dismantle the fittings, if necessary, seal some parts with masking tape;
- remove the old lacquer layer, you can use sandpaper. Dust is best removed with a vacuum cleaner. After finishing work, the surface is wiped with a damp cloth, then it is allowed to dry thoroughly;
- apply primer;
- varnish is applied with a brush or roller, it is better that each new layer is slightly thinner than the previous one;
- some types of lacquer should only be used outdoors;
- drying speed - different for different varnishes, the average is indicated on the package;
- After drying, the tape is removed and the fittings are returned to their place.
To create the effect of aging , several layers of stain can be applied.
Hardware update
We all have heard about the great impact of small things, but many, however, refuse to believe in the truth of this statement. Designers, without hesitation, convince us that sometimes changing handles on a kitchen set can transform a kitchen space. Most often, however, the replacement of fittings is carried out along with the renewal or replacement of facades.
It happens that the kitchen set itself is perfectly preserved, and the handles from constant interaction with them have become flaky, dull, or completely deformed in places. Take off your old hardware and head to a specialty store, where you can choose from a wide variety of handles. The main thing is that the size matches and you do not have to drill new holes.
If the old handles fit perfectly into the style of the kitchen, then you can find new ones that are as similar as possible to them.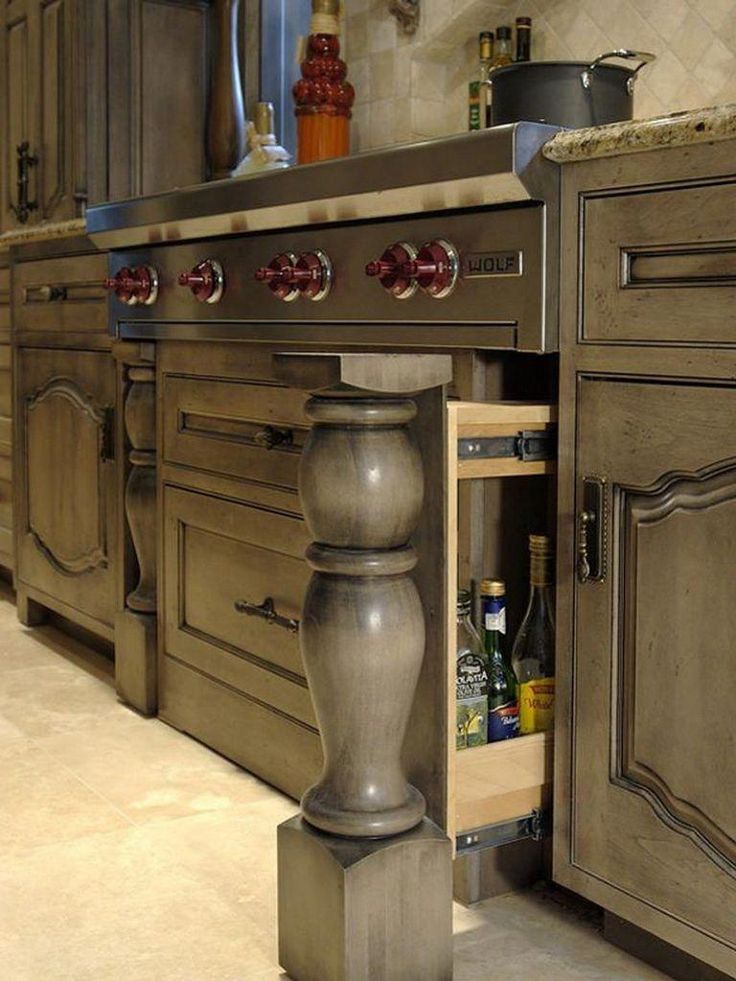 If you want something fresh, or if the kitchen facade has become completely unrecognizable after simple manipulations, then pick up handles in a new style. The range of manufacturers includes handles in modern and classic style, smooth chrome-plated and carved antique. There are handles with imitation of leaves and animals, there are inlaid glass and stones. There are wooden, plastic and metal, transparent and colored - everyone can choose the right one.
Possibly hinges and pull-out shelf mechanisms need to be replaced. Before going to the store, these elements should be dismantled and taken with you as a sample. New loops are selected according to the size of the previous ones. It happens that the existing holes are very loose, and it is impossible to attach new loops to them. Then they will have to be puttied with an acrylic-based composition in the color of the facade, sanded, varnished or painted, and only then drill new holes and install purchased hinges. Old roller mechanisms can be replaced with ball ones. All these actions give a huge result - using the headset becomes more pleasant and comfortable.
Replacing glass
As a rule, glass inserts in facades are simply washed well to restore their original perfect appearance. But what if you want something new? You can replace the existing transparent glass with frosted or colored glass, then the kitchen will noticeably change. True, glass will have to be made to order, and not everyone can handle the replacement itself.
A more budget option is to buy a self-adhesive film. With its help, you can give the glass the desired shade without depriving them of transparency. It will help create a matte effect or imitate a real stained glass window. Anyone who knows how to use a tape measure or centimeter tape, scissors and is able to accurately glue the film can definitely cope with gluing the film.
There is also the old-fashioned method, which involves applying a mixture of chalk powder and silicate glue to the glass.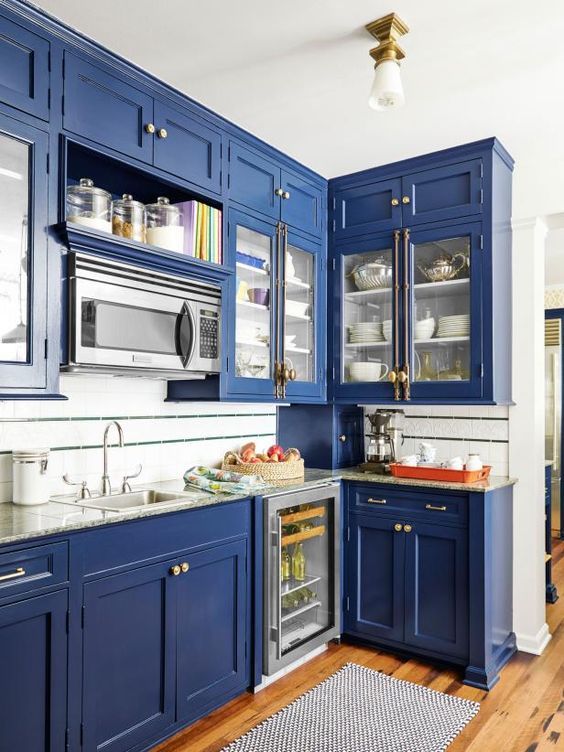 In two layers, this material is applied to the glass, after which they become dull.
Decoupage of kitchen fronts
Decoupage is a great way to update your kitchen set and give it a touch of Provence style. After the transformation, the facades will look as if talented artists painted them for you, but you will know that you made all this beauty with your own hands. Absolutely any pattern can be applied to cabinets and shelves, but usually they choose something related to plant and kitchen themes: images of fruits and vegetables, coffee, jars of spices and cereals, flowers, etc. Decoupage will help decorate the facades with ornaments in the style of Gzhel or Petrikovskaya painting. The main thing is to find a suitable drawing - no one limits your imagination.
Everyone will be able to cope with the restoration of facades on their own:
- remove all doors, remove fittings;
- If the surface of the headset is perfectly even and smooth, then it is enough to wash it well to get rid of grease and dirt stains.
 If there are defects, it is better to sand the surface. First use fine-grained, and then coarse-grained sandpaper. If you have a grinder at your disposal, it will greatly simplify the process. In the presence of cracks, depressions, pits, it is better to fill them with putty. When it dries, the treated areas are sanded again. After that, the facades can be primed, but many skip this stage;
 - decoupage technique is suitable not only for wood, chipboard and MDF - it can also be used to decorate plastic and glass facades. Preparing them for decoration is very simple - just get rid of all the dirt and grease;
- The easiest way to use three-layer decoupage napkins. Think in advance in which part of the facade the drawing will be located. Don't use images that are too small. Different lockers can be decorated with pictures in the same style. The image can be glued to ordinary PVA glue;
- now it remains to open the facade with acrylic varnish, it is better to use 3-4 layers, each is applied after the previous one has completely dried.
 It is easiest to work with a narrow brush with long bristles;
 - it remains to return the fittings to their place and mount the facades.
If this is not your first work in the decoupage technique, then you can use not only special napkins. Experienced craftsmen know that fragments of wallpaper with a suitable pattern, and even maple for the kitchen table, will do, not to mention the fact that the image you like can be printed on a printer.
Decoration with ceramic tiles
Almost everyone has leftover tiles after repairs. A lot of material for this method will not be needed, because even buying a new tile will not hit the budget. Naturally, not all facades are laid out with tiles. A fragment with a beautiful pattern can be glued in the center. It can be one tile or four smaller tiles laid out in a square or diamond shape. Small tiles can lay out the contours of the cabinets. Often such decoration is used to decorate the lower or upper edge of the headset. The image on the tile should match the overall style of the kitchen.
The principle of operation is as follows:
- it is better to remove the facades, dismantle the fittings;
- as a minimum, the surface must be washed and degreased with an alcohol-based compound. If desired, the facade can be painted, guided by the tips described above;
- lay the tiles on the surface in advance, determine the ideal place for them, it is better to trace them carefully with a pencil;
- prepare the tile adhesive, apply it on the facade and start gluing the tiles. The principle is almost no different from the usual installation of tiles, only glue is needed so that it can hold the tiles on a wooden (or other) facade;
- When everything is dry, you can frame the tile with a molding to make the decor look finished.
Decoration with rattan inserts
The principle is the same as with ceramic tiles. Rattan inserts will look appropriate with ethnic and eco-style.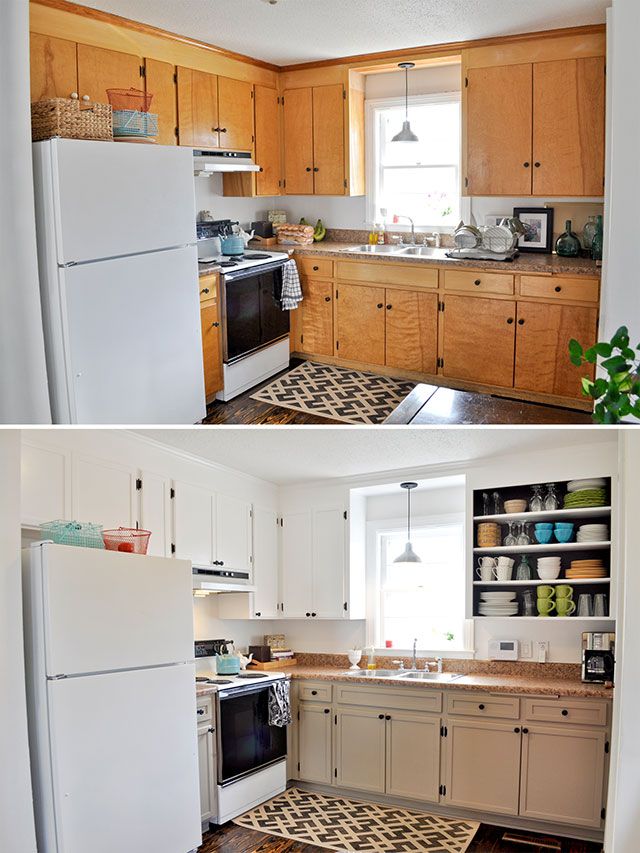 Rattan perfectly copes with the effects of moisture, therefore it is well suited for the kitchen. It can be used to replace glass inserts along with large-scale restoration of facades. Rattan inserts can be glued over blind cabinets. A variety of weaves and the presence of several shades will allow you to choose the appropriate insert option.
It is easy to work with rattan:
- a fragment of the desired shape and size is cut out, you can use secateurs or metal scissors;
- the section can be attached to the facade with a stapler;
- around the perimeter of the insert, wooden planks are mounted, pre-treated with an antiseptic. You can use glue;
- with rattan, the main thing is not to overdo it - small inserts on the largest cabinets will be enough to bring the necessary notes into the interior.
Use of chintz
Fabric decoration is rarely used, because this is your chance to make the kitchen unique. You will need a piece of fabric with a suitable pattern, and then everything is simple:
- the beginning, as always, is to dismantle the facades and fittings;
- cupboards are measured, the fabric is cut out and glued on pre-washed and degreased facades;
- facades are covered with a colorless varnish in 5-7 layers, it will protect the fabric from moisture, grease and odors;
- it remains to return the fittings to their place, and you can purchase new, more suitable handles;
- An interesting effect can be achieved if a lampshade for a lamp is made from the same fabric, or chair covers can be sewn together.
What else is used to update kitchen facades?
The fantasy of home craftsmen knows no bounds, and folk ingenuity has generated a lot of interesting non-trivial ideas on how else to ennoble an old kitchen facade. The following materials are used for this:
- Vinyl stickers, the range of which impresses even experienced designers. Monochrome boring facades can be decorated with animal figurines, world landmarks or inspirational phrases. Gluing and removing such decor is very simple;
- sea pebbles and mosaics are glued on the principle of ceramic tiles, allowing you to create interesting decorative effects;
- wooden decor. There are ready-made kits for children's creativity, but with skill, you can cut wooden figures yourself. It remains only to open them with varnish and glue them to the facades. This decor looks best on wooden facades.
How do I update my kitchen worktop?
Renewing facades and leaving the countertop unattended means not finishing what you started.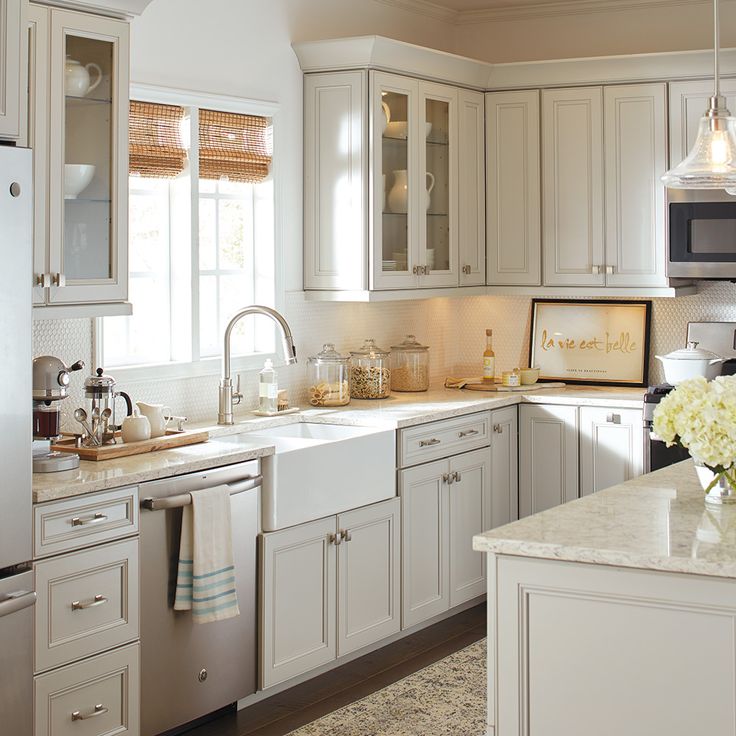 The countertop is the most vulnerable point of the kitchen set, because its surface constantly encounters drops of water and fat, mechanical stress, and high temperature. Chipboard countertops are usually the first to suffer, and when the facade looks even more or less normal, the work surface leaves much to be desired.
What can you do to update your kitchen worktop? Several options:
- glue the vinyl film . The option is not very durable, but simple;
- carry out varnishing – method for wooden worktops;
- painting is carried out according to the principles described above;
- tiling , and usually tiles are used in the color of the one with which the kitchen backsplash is lined. The tile is easy to clean, not afraid of moisture and high temperature, relatively easy to install. The weight of the headset, however, will greatly increase. If the frame is weak, then it may not withstand.
 They begin work by attaching a metal corner around the perimeter of the table top. The tiles are laid on ordinary tile adhesive, the gaps are made minimal. The glue dries quickly, so it’s best not to cover the entire countertop with it at once. It remains only to wipe the seams and open the tile with a protective layer of varnish. Work in a similar way with mosaic ;
 - tempered glass finish , under which you can use anything: sand and small pebbles, coins, cork pieces, drink bottle caps, a printed image of a beach, forest or some kind of pattern. Glass is planted on glue and firmly protects the entire decor from negative influences.
If the worktop is still in good condition, but has only one or two noticeable flaws (for example, burns or stab spots), you can carry out local repair. The defective place is carefully processed with a cutter to end up with a quarry-type depression. It is filled with putty on wood in the color of the countertop, the material is added in portions, well tamped, the excess is removed with a knife.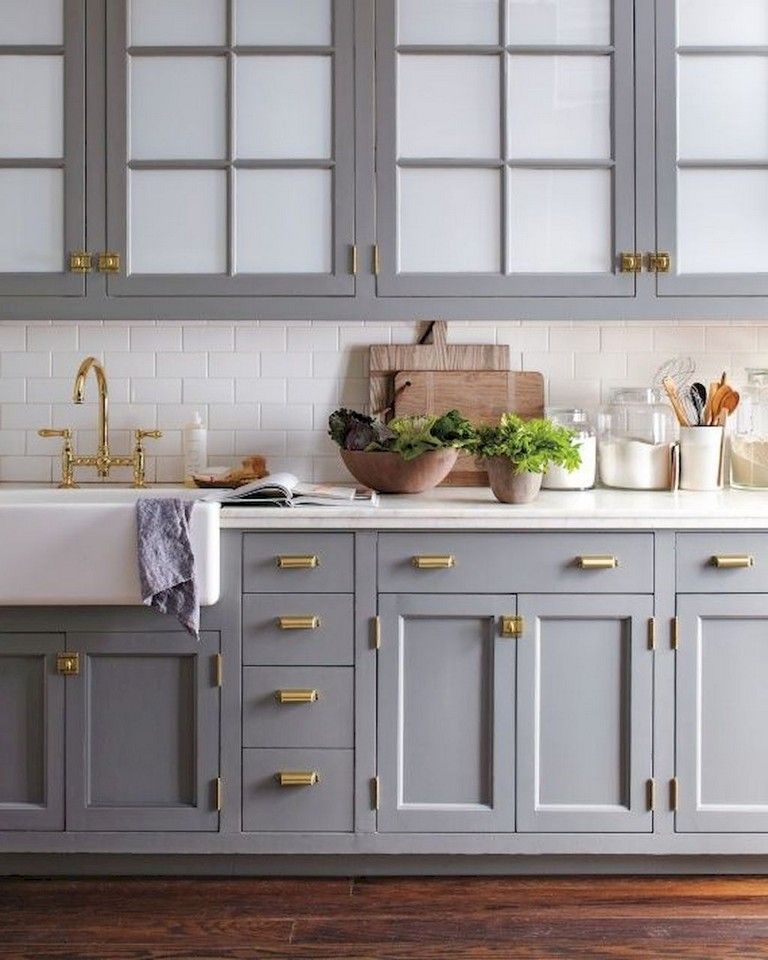 The treated area is sanded, polished and painted. If you can accurately repeat the color or pattern of the countertop, then the place of repair will be invisible. When everything is really bad with the countertop, it is better to make its complete replacement by contacting professionals.
By combining the methods described above, you can transform your kitchen set in such a way that all guests will think that you have bought new furniture. If you combine this transformation with a redecoration in the kitchen, then the result will be impressive at all.
The article was written for remstroiblog.ru.
Tags:Kitchen
How to update the facades of a kitchen set quickly and on a budget: 3 easy ways
Top
12/20/2019
1 star 2 stars 3 stars 4 stars 5 stars
We show you how to give kitchen fronts a new look with moldings, self-adhesive foil and stain.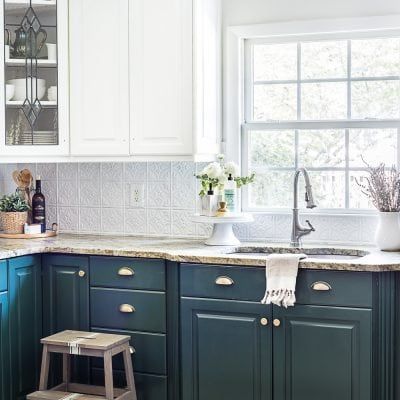
Unsplash
Furniture in the kitchen due to constant cooking, humidity, temperature changes quickly ages and deteriorates. Making repairs several times a year is difficult not only financially, but also morally. We have chosen 3 most relevant ways to update your furniture with your own hands for different tastes and budgets.
1 Glue moldings
Surely you have seen small strips glued on furniture doors in interiors. This is the moldings. They come in different widths, shapes, but the essence is about the same - to decorate the surface. It can be a ceiling, walls. But today we are interested in furniture facades. To update the kitchen in this way, follow the following rules.
-
Walls
How to glue moldings on the wall: clear instructions that everyone can handle
Step-by-step instructions
- Prepare old facades.
 To do this, they must be freed from contamination and be sure to make marks on the inside with a marker. Sign with numbers the door and the place of its fastening. This will help you properly assemble the headset after rework. After that, the facades and fasteners can be safely removed.
 - Moldings are cut to size. At the edges you need to make an angle of 45 degrees - this is how the junctions will look most attractive.
- The moldings are white in the original, so they need to be painted. This can be done with a regular brush or using an airbrush, but you need to be able to handle it. It can be difficult for a beginner.
- Lubricate each plank with wood glue and attach to the facade.
- We return the doors and cabinets to their place, focusing on the numbers that you put down in advance.
Instagram @designer_iskhakova
Instagram @designer_iskhakova
-
Kitchen
9 Ideas for a Budget Kitchen Update (Do It Yourself)
2 Use self-adhesive tape
Self-adhesive tape is perhaps the most cost-effective and easy way to upgrade your headset.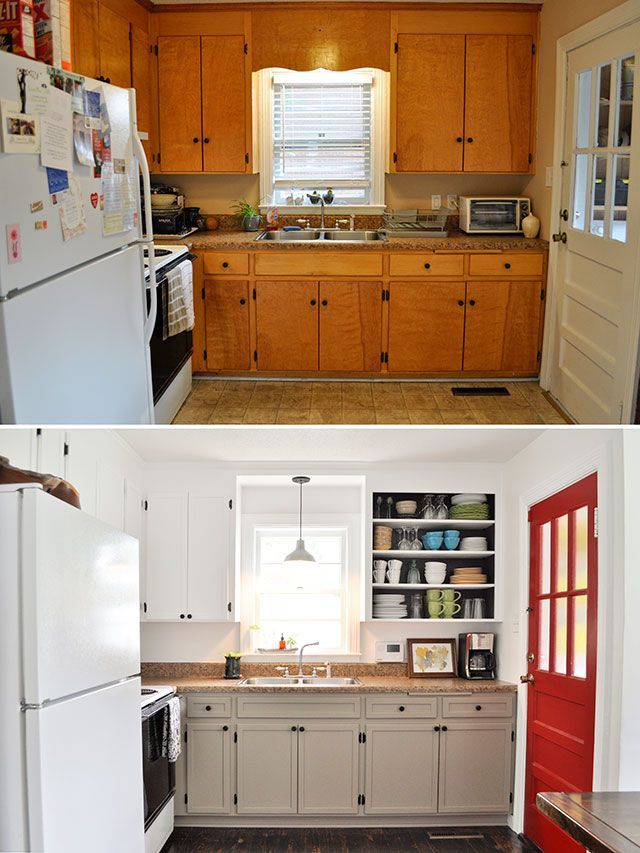 The film is matte, glossy, different colors and textures. This material works well if your kitchen furniture is made of chipboard or MDF. Redesigning is easy.
Film renewal process
- Measure surfaces. Measurements need to be made not only on the front side, but also on the thickness - this is necessary in order to correctly calculate the amount of film glued to the ends. Just in case, leave 2 centimeters of stock.
- There is a protective layer on the inside of the film. It needs to be peeled off on one side.
- Stick the foil to the facade. Using a rubber spatula, expel any air bubbles from the inside so that the surface is even. If some bubbles could not be expelled, they can be pierced with a needle.
- In this way, gradually peel off the entire protective layer and connect the film to the facade.
- If it is not possible to connect neatly, peel off the film and reconnect it. This can be done no more than 2 times, otherwise it will not stick tightly to the furniture.
Aliexpress
-
Furniture
Quick kitchen update: how to repaint facades with your own hands
3 Stain and varnish
Stain is a quick and inexpensive way to not only update the color of facades, but also make them more presentable. It is easy to apply stain and later a layer of varnish yourself. It is important to follow the instructions.
Stain and varnish step by step instructions
- Surface must be cleaned and dried. No primer needs to be applied.
- Apply the compound to the facades with a brush or roller. Wait for it to dry and apply a few more layers. Their number depends on the shade you want to get.
Learn more