Tips for painting a ceiling
How to Paint a Ceiling
A professional home painter shares his tips for painting both smooth and textured ceilings, with equipment recommendations and tricks of the trade.
Every editorial product is independently selected, though we may be compensated or receive an affiliate commission if you buy something through our links. Ratings and prices are accurate and items are in stock as of time of publication.
1 / 13
Family Handyman
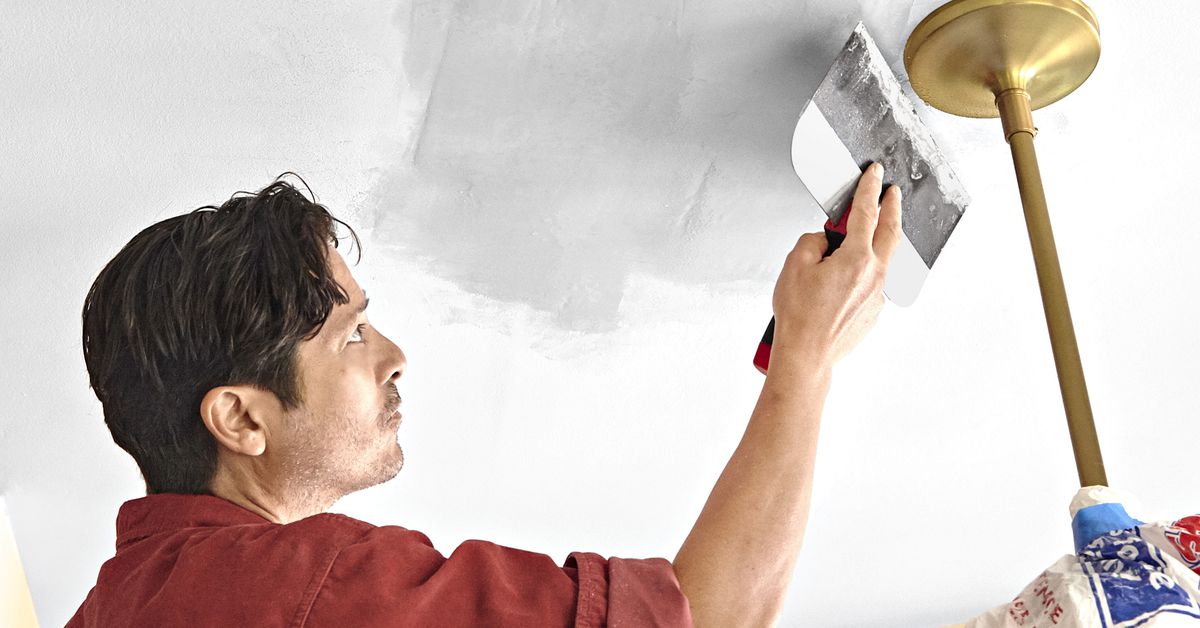
Use a Stain-Blocking Primer to Cover Flaws
Roof leaks, overflowing sinks, tobacco smoke and big spills can all leave ugly ceiling stains or dinginess that is impossible to conceal with plain old paint. But cover the stain with a coat of stain-blocking primer and your troubles are over.
The traditional favorite is white pigmented shellac. You can buy spray cans of pigmented shellac, but usually it's easier to brush it on. Just don't forget to pick up some ammonia or denatured alcohol to clean your brush. If you're painting over a ceiling that's yellow from smoke, roll a coat of shellac over the entire ceiling before painting with latex.
2 / 13
Family Handyman
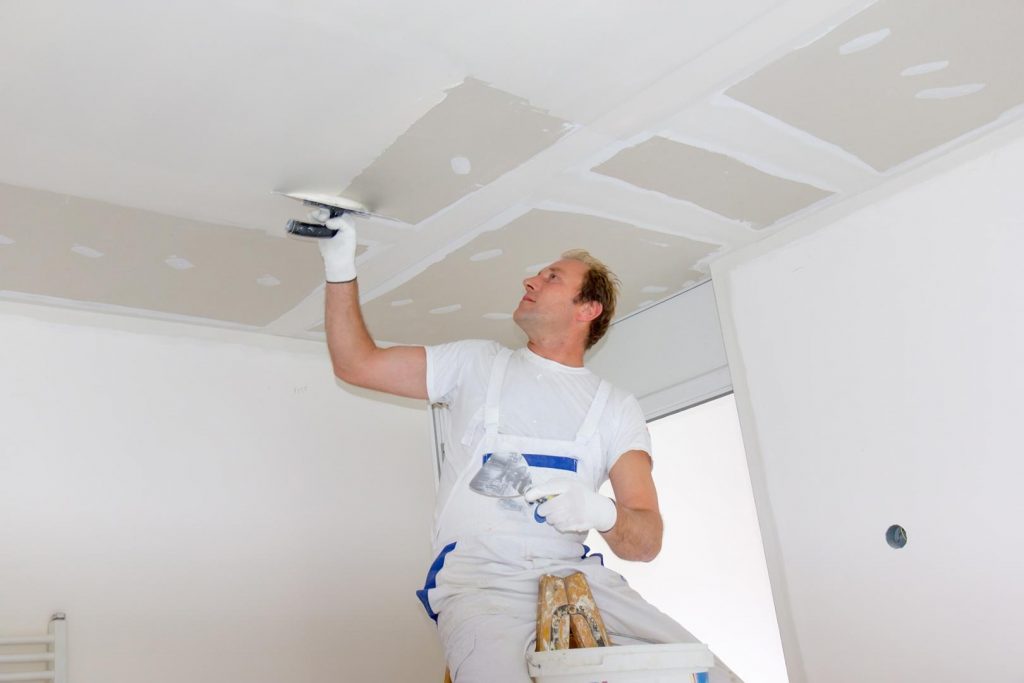
Sand Before You Paint
Over time, and as the layers of paint build up, bumps and crud can get stuck to the ceiling. On untextured ceilings, it's a good idea to start with a quick once-over sanding with 100-grit drywall sanding paper. This helps ensure a perfectly smooth paint job and increases paint bonding. The easiest way to do this is with a sanding pole. When you're done sanding, wipe the ceiling with a damp sponge to remove the dust.
3 / 13
Family Handyman
Rules for Painting Ceilings: Cut in Before You Roll
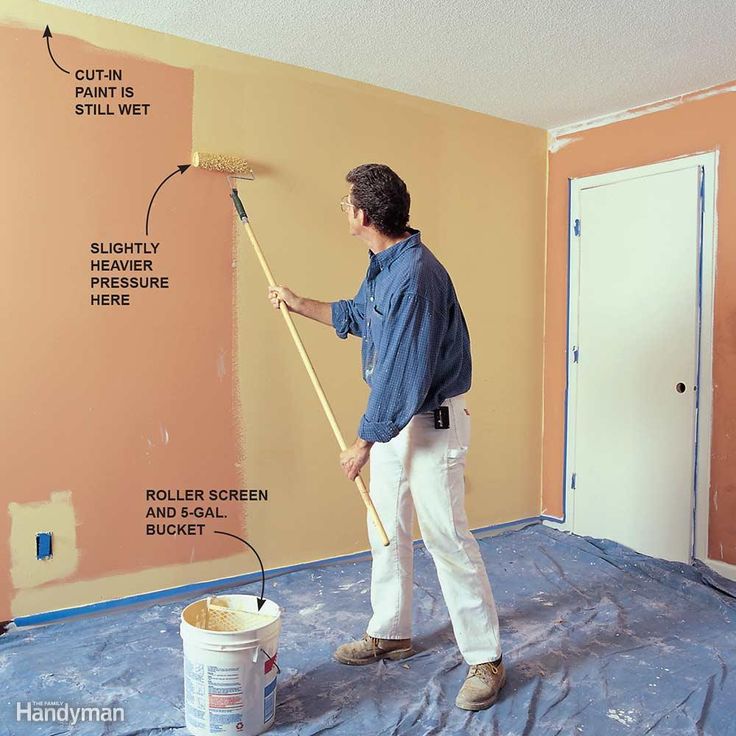
Cutting in before you roll allows you to cover most of the brush marks with the roller. Carefully brush paint along the edge of the ceiling a section at a time.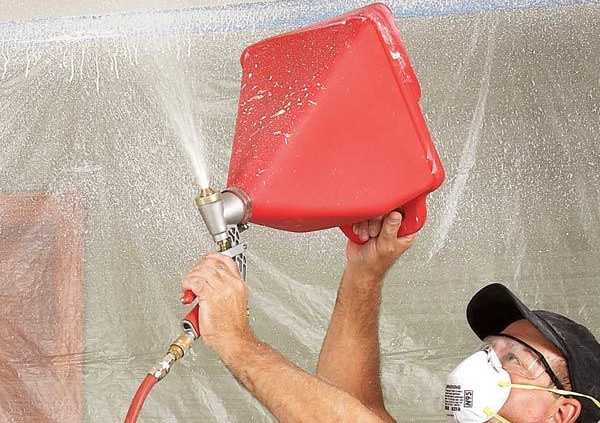 Cut in about 10 linear ft. and then roll that section. This method has a couple of advantages over cutting in the entire room at once. First, the cut-in section will remain wet until you roll, so it blends in better. Also, it's simply less boring to alternate between cutting in and rolling.
4 / 13
Family Handyman
Rules for Painting Ceilings: Roll Both Directions
There are a few tricks to getting a smooth, consistent coat of paint on the ceiling. First, work in sections about 5 or 6 ft. square. Move quickly from one section to the next to make sure the paint along the edge doesn't dry before you roll the adjoining section. This is called “keeping a wet edge” and is the key to avoiding lap marks. You'll get the best coverage by immediately rerolling each section at a right angle to your first roller direction as you go.
Shop Our Favorite Products
5 / 13
Family Handyman
Buy Special Ceiling Paint
While there are exceptions, in general you'll get the best results with paint that's formulated for a ceiling application. For a ceiling, you want paint that doesn't spatter, has a long open time (dries slowly), and is flat instead of glossy. Most ceiling paints are formulated with these qualities. And of course you can have ceiling paint tinted if you want a color other than “ceiling white.”
6 / 13
Family Handyman
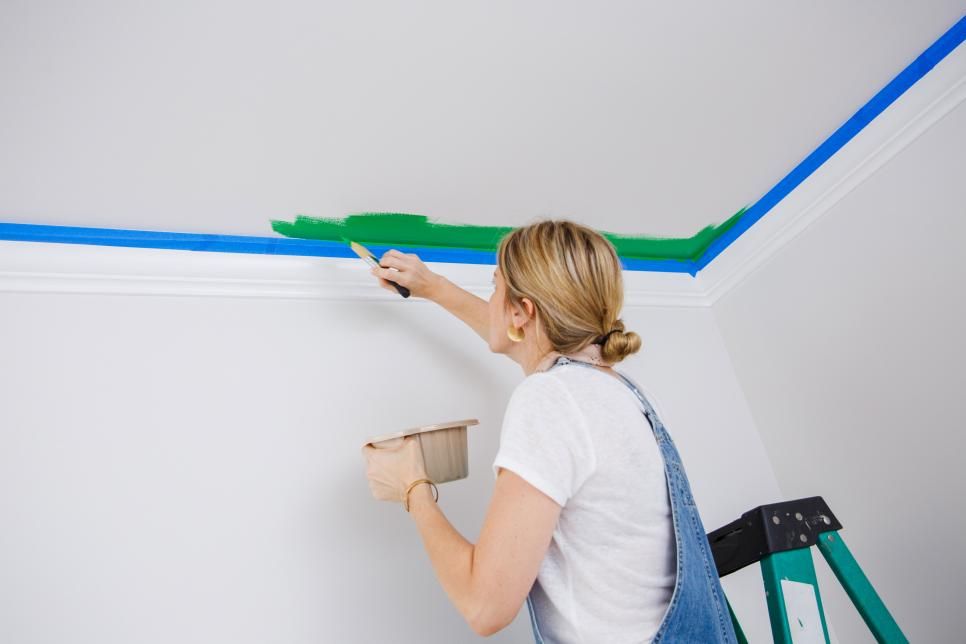
Lap Your Cut-In Onto the Walls
If you're planning to paint the walls too, lap the paint onto the walls a little bit. Then when you paint the walls, you can err on the side of leaving a little ceiling color showing when you cut in and it won't be noticeable. Some painters like to skip this cutting-in step and save time by mashing the roller into the corner instead, but this method is sloppy, builds up excess paint in the corner and can leave runs or a thick paint line on the wall.
7 / 13
Family Handyman
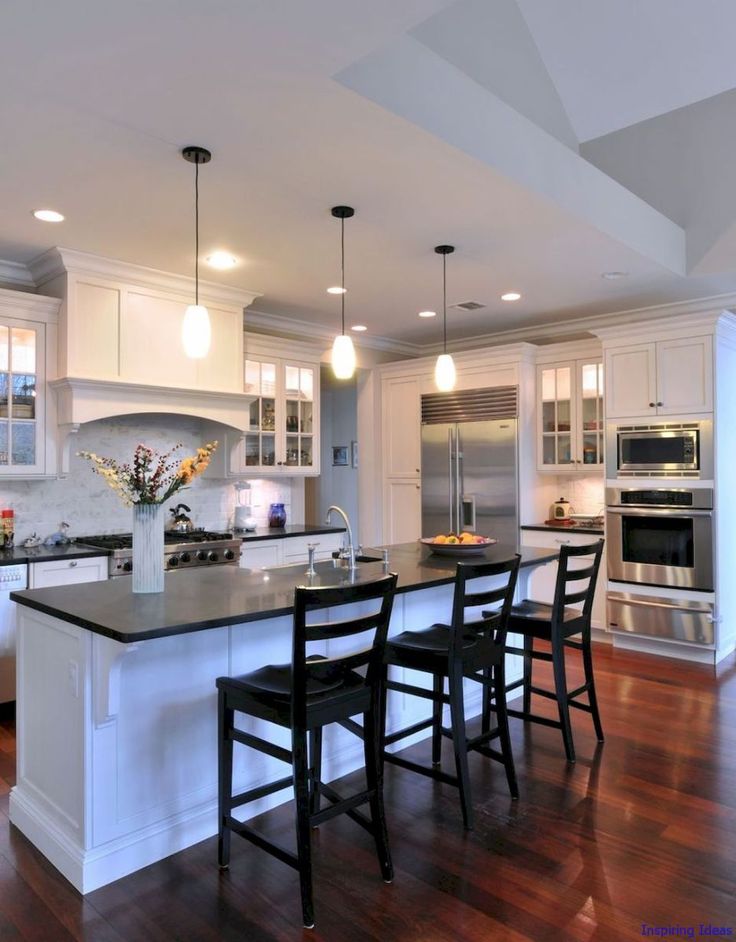
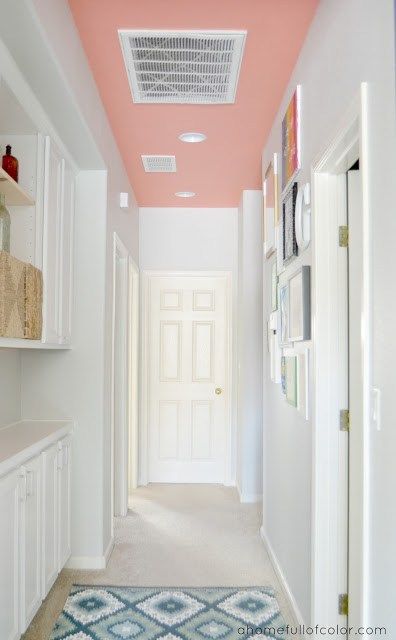
Don't Be Afraid of Color
You may not want to paint your ceiling yellow, but don't be afraid to deviate from plain old white.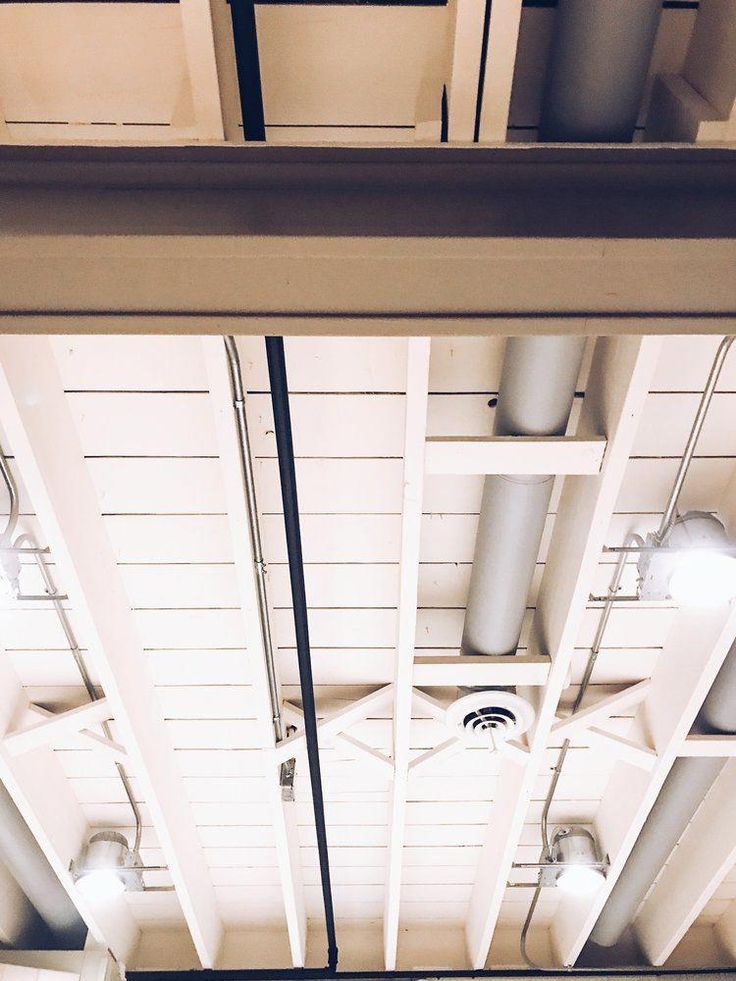 Painting the ceiling a color can make a small room seem bigger, or a room with a high ceiling seem more intimate. Plus, it's just more interesting. Ask at any full-service paint store for help in choosing complementary wall and ceiling colors, or search online for examples of rooms you like.
8 / 13
Family Handyman
You Don't Need an Expensive Pole
You can buy all kinds of fancy—and expensive—extendable paint poles, but a simple wooden broom handle usually works just as well. The reasons are simple. They're cheap and light and do the job.
9 / 13
Family Handyman
Use a Thick, Premium Cover
Here's a tip that applies to most paint jobs but is even more important for ceilings. You want to get as much paint on the ceiling as you can in the shortest amount of time possible while minimizing spatters. To do this, you need the best roller cover you can buy.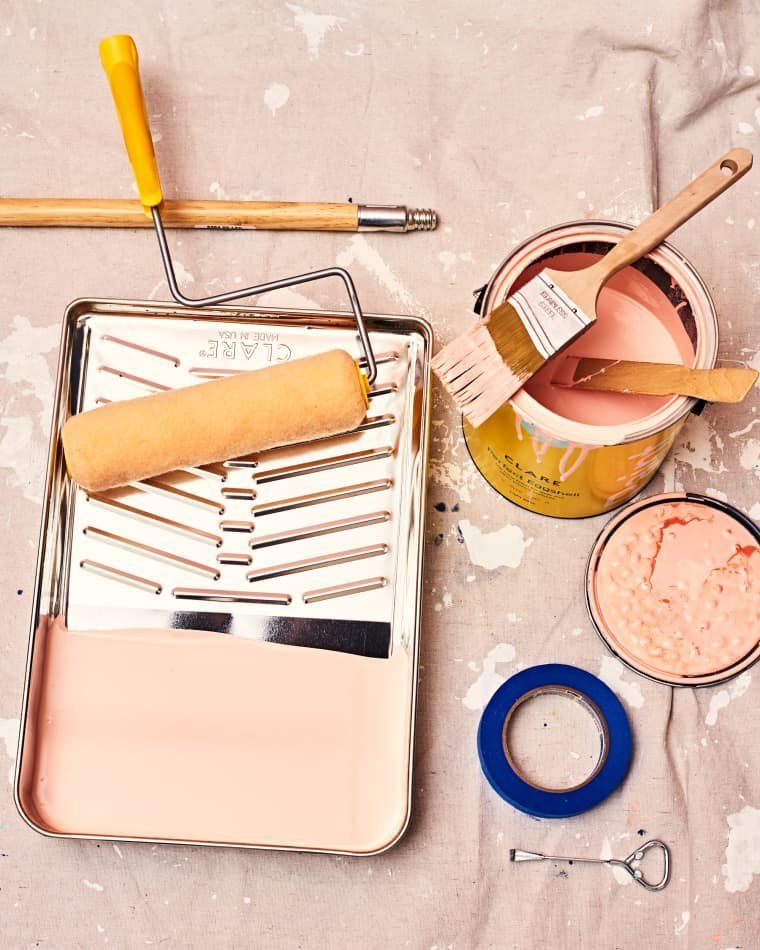 The best choice is a 1/2-in.-nap lambswool cover. If you've never tried a lambswool roller cover, you owe it to yourself to experience the difference. And if you're worried about the cost, keep in mind that lambswool covers are easy to clean and can last a long time if you take good care of them.
10 / 13
Family Handyman
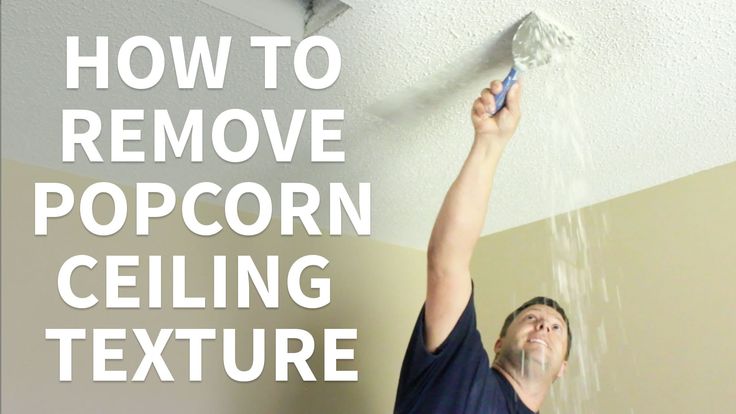
Roll Gently on Textured Ceilings
Painting textured ceilings is a bit of a crapshoot. If the texture has been painted over already, it's probably safe to paint again. If the texture has never been painted, there's a risk the water in the paint could loosen the texture, causing it to fall off in sheets. A lot depends on the quality of the texturing job. If you have a closet or other inconspicuous area, do a test by rolling on some paint to see what happens. If the texture loosens, painting over the larger ceiling is risky.
If possible, spray on the paint—it's less likely to loosen the texture than rolling.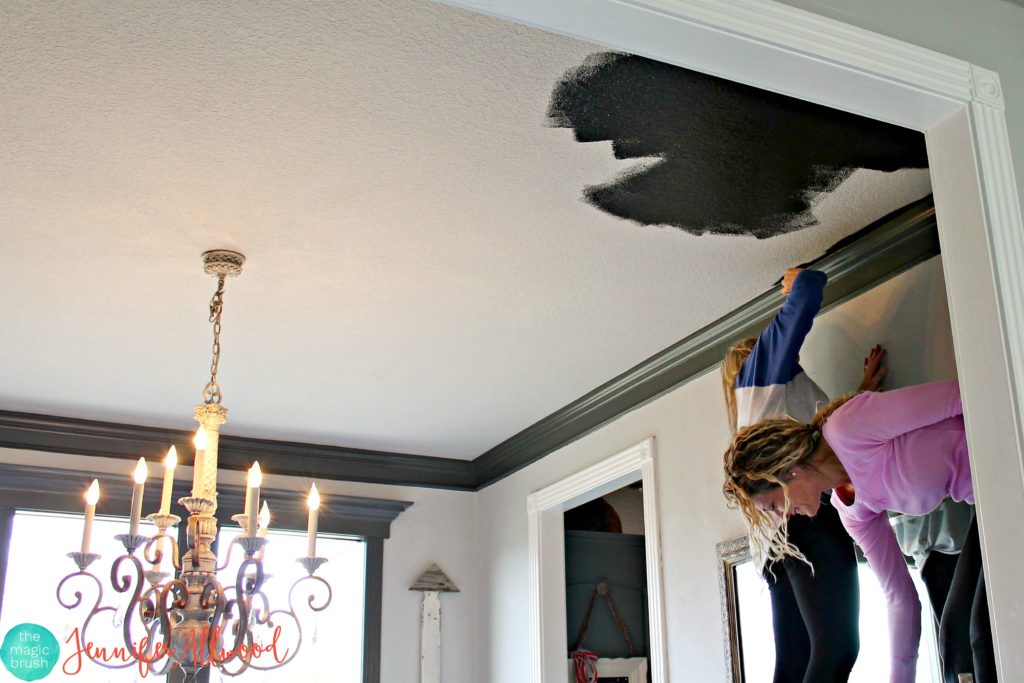 But spraying in an occupied house is usually impractical. The best tip for rolling on paint is to avoid overworking the paint. Just roll the paint on and leave it. Don't go back and forth with the roller, as this is likely to pull the texture from the ceiling. If the ceiling needs another coat of paint, wait for the first coat to dry completely. Then roll another coat perpendicular to the first one using the same careful technique.
11 / 13
Feather Out the Paint Where You Can't Keep a Wet Edge
When interior painting, you can't cover large areas like ceilings, extra-tall walls or stairwells in single, continuous strokes, so the best way to minimize lap marks on these areas is to feather out the paint along the edges that you can't keep wet. The thinner, feathered coat of paint will avoid the buildup that causes the lap mark. To paint a large section without leaving lap marks, roll the nearly dry roller in different directions along the dry edge, feathering out the paint as you go.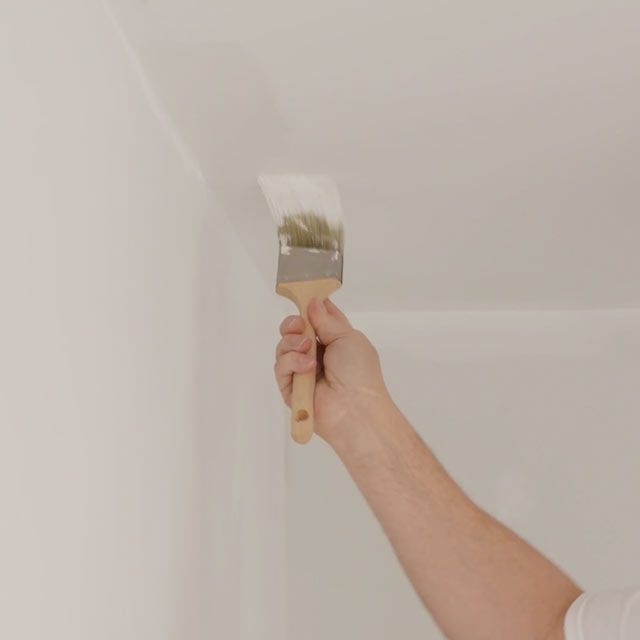 After completing the entire length of the wall or ceiling, move to the next section and paint over the feathered edges. For the second coat, apply the paint in the opposite direction. This crisscrossing paint application sharply reduces (if not eliminates) lap marks.
Check out other awesome paint rolling tools in the video below.
12 / 13
Family Handyman
Groove Textured Ceilings
It's almost impossible to paint right next to rough-textured ceilings (a process called “cutting in”) without getting paint on the ceiling. Taping off the ceiling doesn't work either. The solution? Knock off the texture at the edge with a putty knife. Hold the knife at a 45-degree angle to the wall and run the blade along the edge of the ceiling. The blade scrapes away the texture and leaves a small groove in the ceiling. Clean out the groove with a duster or a dry paintbrush. Now when you cut in along the top of the wall, the paintbrush bristles will slide into the groove, giving you a crisp paint line without getting paint on the ceiling.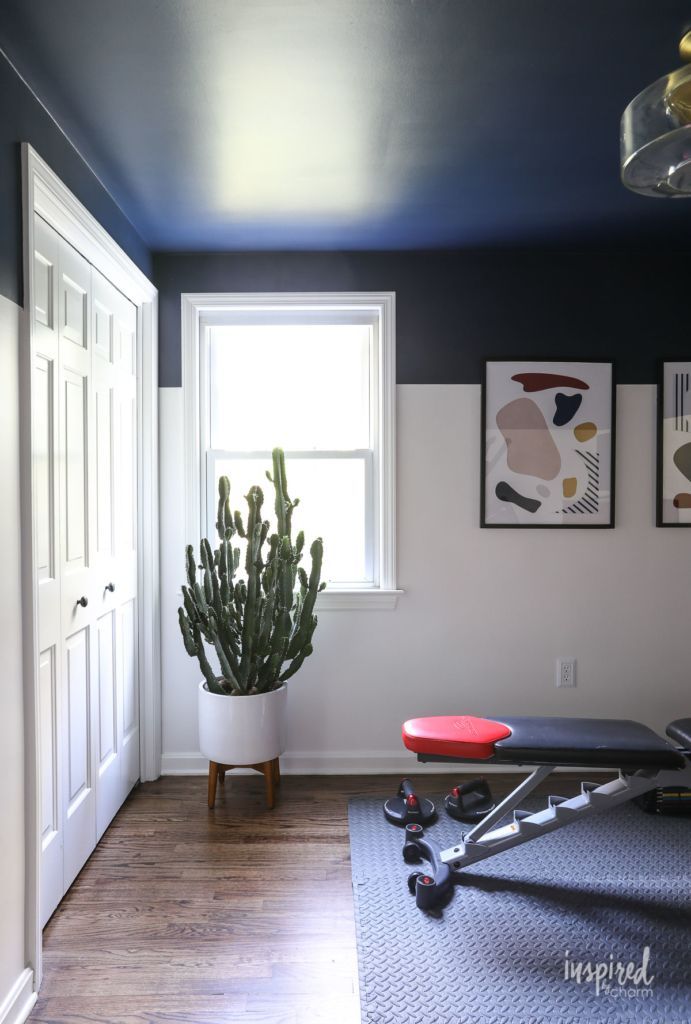 And you'll never notice the thin line of missing texture.
13 / 13
Family Handyman
Avoid Paint Freckles
Rolling paint on the ceiling showers you with a fine mist. A baseball cap is essential, and safety glasses let you watch your work without squinting. To make skin cleanup easier, rub lotion on your face, arms and hands. At the end of the day, your paint freckles will wash right off.
Originally Published: November 15, 2019
How to Paint a Ceiling
By
Lee Wallender
Lee Wallender
Lee has over two decades of hands-on experience remodeling, fixing, and improving homes, and has been providing home improvement advice for over 13 years.
Learn more about The Spruce's Editorial Process
Updated on 09/02/22
The Spruce / Margot Cavin
In This Article
-
Tips
-
Color to Use
-
Ceiling or Walls First
Project Overview
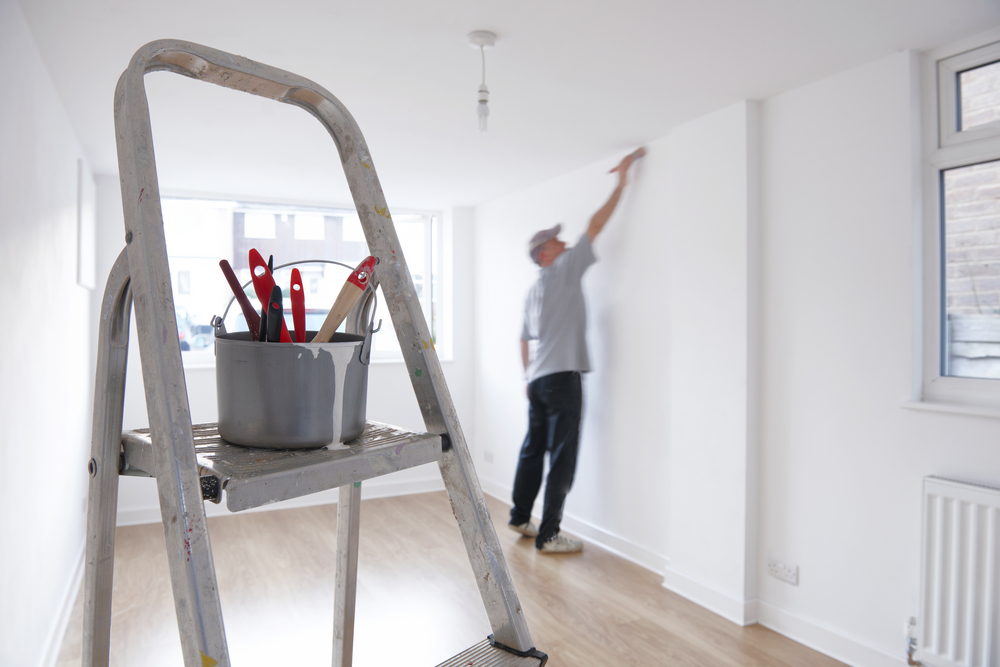
If you are reluctant to paint your ceiling, you are not alone.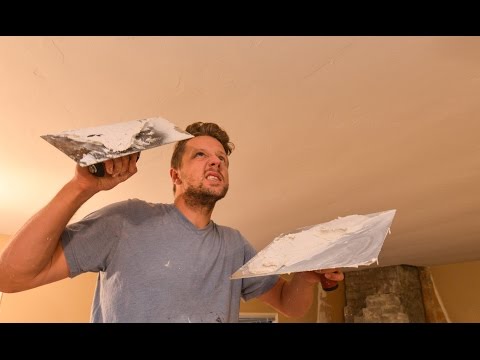 This strenuous project comes with its share of drips and drops, plus it's often hard to know if you're properly covering the ceiling. But there are ways to paint a ceiling that help you eliminate most drips and let you judge whether you are covering the entire ceiling.
Tips for Painting a Ceiling
Use Ceiling Paint
Ceiling paint is formulated differently than wall paint. Ceiling paint's thicker and stickier formulation is meant to eliminate most drips.
Correctly Size the Paint Roller
Ceiling paint is best applied using a roller cover with a 3/8-inch nap if painting a smooth ceiling and a thicker nap for textured ceilings. Painting over your head is made easier when you use the right size nap roller cover. Thick-nap roller covers pick up more paint than is necessary, creating more weight on the end of the pole. Not only that but thicker nap rollers are more difficult to roll across the ceiling.
Keep Track of the Paint
To keep track of what section of the ceiling you've painted, cast a laser level's light upward to the ceiling.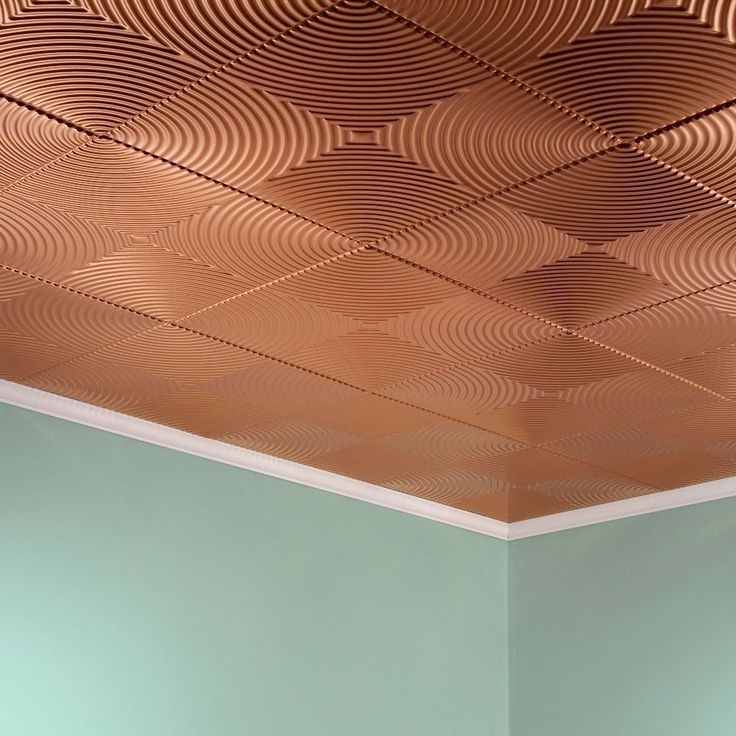 Switch the laser level to its grid pattern. Paint within one of the grids, then move the laser line as you finish painting a section.
If you don't want to use a grid, then position your light source to help you better see the paint on the ceiling. Usually, if the light source is facing in your direction and pointing up to the ceiling, you'll better see the contrast between the old paint and the new paint.
Which Color to Use for Painting a Ceiling
Flat or matte white ceiling paint is the most popular type of paint for a few significant reasons:
- Flat and matte paint hides imperfections on the ceiling more than satin or glossy finishes that highlight every flaw on the surface.
- The white bounces and reflects more light in the room resulting in a brighter space.
- White ceiling paint provides a limitless vista for your eyes that gives the illusion that the room is larger than it is, whereas a colored ceiling offers the illusion of a smaller space.
Paint Ceiling First or Walls First?
If you are painting the entire room, it often doesn't matter if you paint your ceiling before or after your walls. Regardless of which order you paint a room, you will inevitably drip or splatter a little bit of ceiling paint on the walls or wall paint on the ceiling that will need touching up.
Generally, it's best to paint the ceiling first. Since the ceiling color is white, any extra paint that ends up on the walls will be covered over with wall paint, which usually is some type of color darker than white.
Equipment / Tools
- Paint roller frame
- Paint roller cover(s)
- Paint tray and liner(s)
- Angled paint brush or paint edging tool
- Drop cloth
- Plastic sheeting
- Painter's tape
- Putty knife
- Extension pole
- Wood paint stirring stick
- Paint can pour spout
- Latex or nitrile gloves
- Ladder/step ladder
- Vacuum
Materials
- Interior stain-blocking primer
- Flat, white ceiling paint
- Spackle compound
- Fine-grit sandpaper
- Medium-grit sandpaper
-
Prepare the Room
Remove as much furniture from the room as possible.
The Spruce / Margot Cavin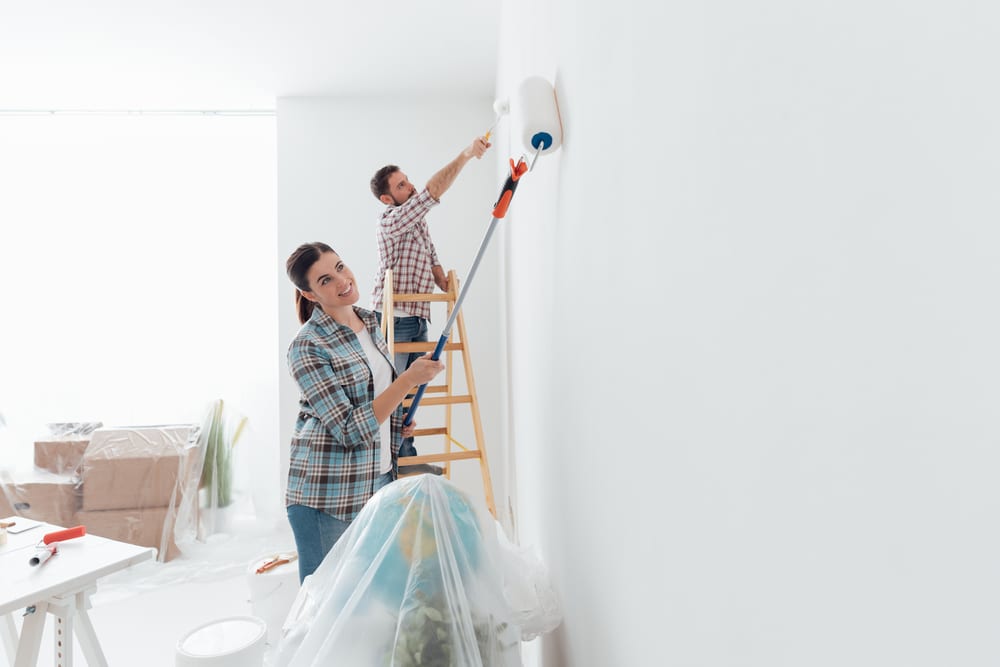 Lay down paper or canvas drop cloths on the floor. Lay drop cloths or plastic sheeting on top of furnishings left in the room. The best way to know how much covering to lay down is to assume that every flat surface below the ceiling potentially could be dripped on.
 Protection from Roller Splatter
Though paint rollers will give you the best ceiling coverage with much less splatter than paint sprayers, they will still produce a fine, invisible mist of white droplets that will land on surfaces. Just because you can't see drips doesn't mean that the surfaces aren't being covered with paint.
-
Remove Obstructions
Turn off power to the room before removing light fixtures. Remove light fixtures and any smoke detectors. You can leave solid electrical box faceplates because they can be painted over.
The Spruce / Margot CavinWarning
Smoke detectors, fire sprinklers, and carbon monoxide detectors should never be painted over.
 Remove smoke detectors and carbon monoxide detectors. Either paint around fire sprinklers or gently cover them with plastic.
 -
Protect Surfaces
If you are painting the ceiling after you've painted the walls, now is the time to hang plastic sheeting around the room to protect the vertical surfaces from ceiling paint. Hang plastic sheeting over windows and doors. Then put protective painter's tape over ceiling trim and molding.
The Spruce / Margot Cavin -
Prep the Ceiling
Vacuum the ceilings to remove dust so the primer and paint can better adhere to the surface. Spackle any small holes or tiny cracks in the ceiling (this is an optional step that requires about two more hours to your work time to let the spackle dry so you can sand smooth). Sand any other rough spots on the ceiling with 100-grit sandpaper (optional). Then vacuum the ceiling again after sanding.
The Spruce / Margot Cavin -
Prepare Your Supplies and Tools
Set up the paint liner in the paint tray just outside or to the side of the room so you don't trip on the items while painting.
The Spruce / Margot Cavin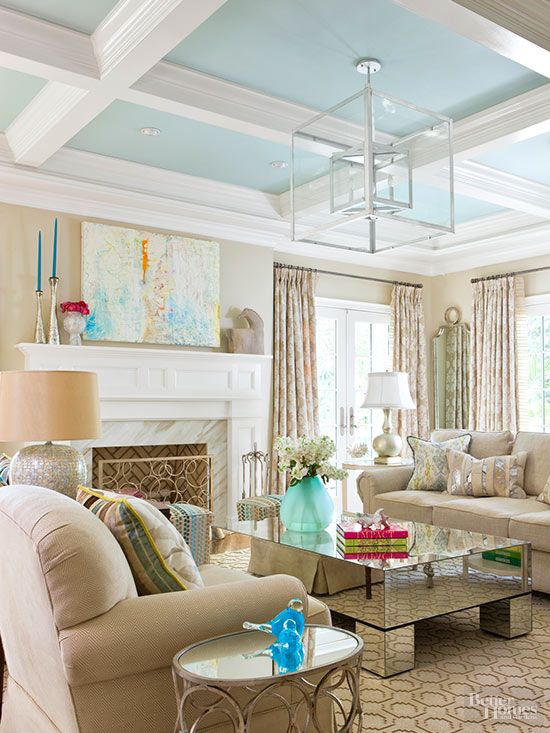 Use the can spout to pour primer into the tray liner. Put a new roller cover on the roller frame. Prepare to put your roller on the extension pole after dipping it into the primer or paint.
 Avoid Back Strain
Use the shortest possible extension to minimize the weight of the pole. For example, using a 17-foot roller extension to paint an 8-foot ceiling creates too much strain because nearly 10 feet of the pole is collapsed into the handle. This excess weight creates strain on your shoulders, arms, and lower back.
-
Prime the Ceiling
Cut in edges of the ceiling using an angled brush or paint edging tool and primer. Roll on the rest of the primer. Then let the primer dry completely.
The Spruce / Margot CavinUse Stain-Blocking Primer
Use a stain-blocking primer to prepare the ceiling's surface for paint. Primer also helps hide more flaws, covers over worn colors, and prevents any stain bleed-through.
-
Paint the Ceiling's Edges
After the primer has dried, use an angled brush or paint edging tool to paint the edges of the ceiling with the ceiling paint. This band of paint should be around 2 inches to 3 inches wide. You do not need to let the paint around the edges dry before the next step.
If you are painting the ceiling white for a second time, it's important to know that not all white paints are the same shade. Old white paint will be darker than new white paint. Even two different brands or batches of new white paint can differ. That's why it helps to box the paint. Boxing means to pour several cans of paint into one, large bucket and then mix it for color consistency.
The Spruce / Margot Cavin -
Paint the Ceiling in Grids
Change the roller pad on the roller frame. Add a fresh liner to the paint tray and then pour paint into the tray. Fill the roller with paint that is in the paint tray.
Paint the ceiling in 3-foot by 3-foot sections (a small enough area to keep track of what you've covered with paint).
The Spruce / Margot Cavin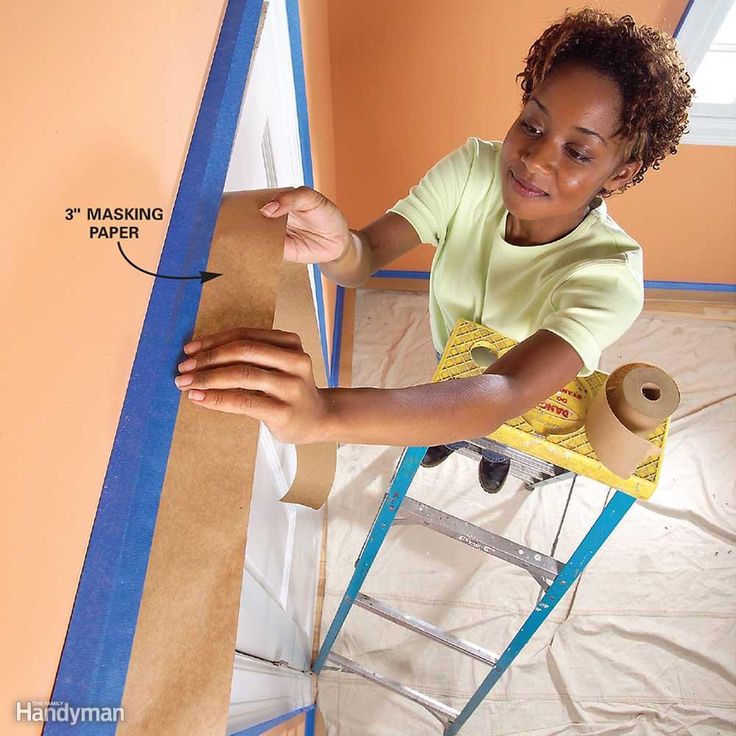 To prevent permanent roller marks, start each new section by overlapping onto the wet edges of the preceding section. Painting over wet edges helps to seamlessly blend sections. Apply a second coat of ceiling paint if necessary.
even, neat and without stripes, what color to choose for the room, details on the photo and video
The content of the article:
1. Preparation for painting the ceiling
2. Painting the ceiling
It is customary to start repairs from the ceiling. If you deal with it last, it may be necessary to re-paste the wallpaper and arrange the floor. The most economical way to give it an attractive appearance, as in the photo, is to simply paint it. But there are a lot of nuances in this matter, so you definitely need to know how to properly paint the ceiling.
Today its painting is more popular than traditional whitewashing. Such repairs can hide minor surface defects. In addition, applying paint is much easier than chalk whitewash.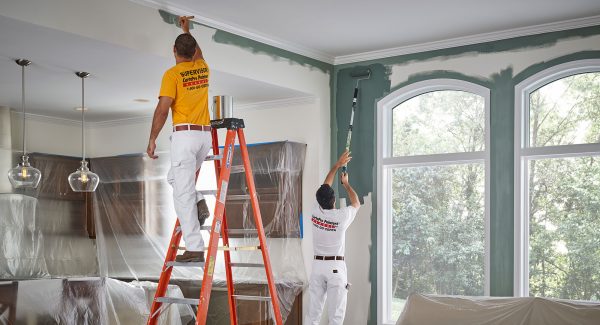 Despite the fact that it seems that painting the ceiling does not require special knowledge and skills, it will not be superfluous to know the basic rules - illiterate use of paint can ruin its appearance. The following tips will help you paint your ceiling evenly.
Preparing to paint the ceiling
Begin painting with the release of the room from the furniture. You can just cover it with a film, but it is better to free up the room so that the stepladder can be placed anywhere - it will be much more convenient to work.
All the necessary tools must be prepared in advance so that when you start painting, you do not have to worry about anything. How to quickly paint the ceiling depends on whether everything has been prepared for work.
You will need:
- ladder;
- large and small roller;
- wide paint brush;
- paint container;
- paint;
- adhesive tape protecting surfaces that do not need to be painted.

First, the ceiling is cleaned (removed old whitewash, wallpaper), plastered, primed the surface (read: "How to clean the ceiling from paint: useful recommendations"). The primer needs a deep penetrating one. It is applied with a roller and brush. Cracks, joints of plates, porous corners between the ceiling and walls are especially carefully processed. This is important to do so that you do not have to think about how to paint the ceiling without stripes.
Putty and primer are selected specifically for the selected paint. These materials must be combined with each other and intended for the type of room in which the ceiling will be painted. The surface is carefully puttied so that there are no irregularities and cracks at the joints of the plates. Before applying the next layer of putty, the previous one must dry well. Prime it until the ceiling is smooth and even.
Before painting, the surface is sanded with sandpaper (fine). As a result, it will become slightly rough.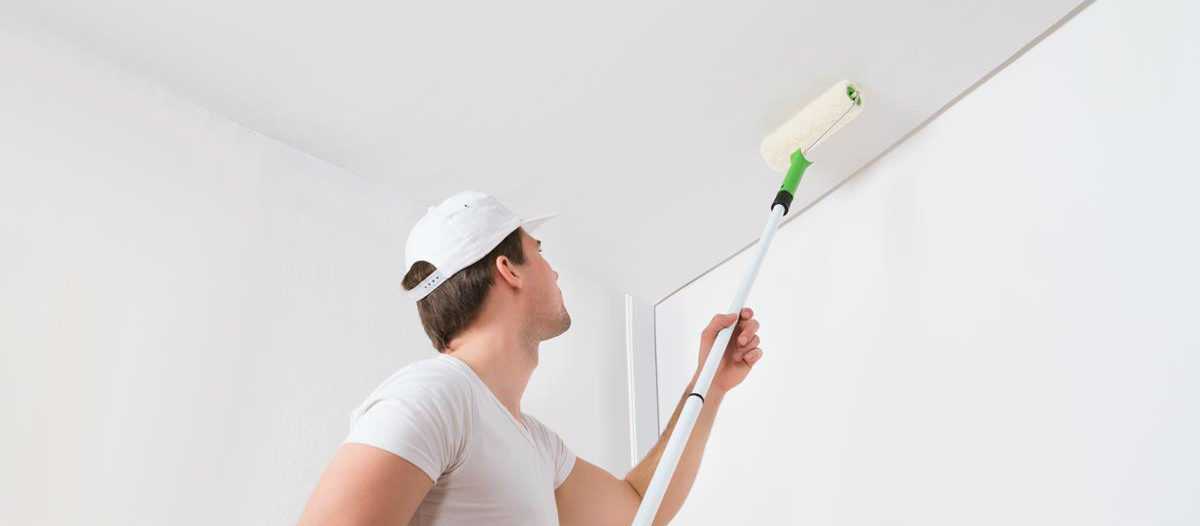 After that, you can move on to how to paint the ceiling in the room.
Before you start painting, you need to install the elements that will serve as elements of interior decor. They can be ready-made baguettes, rosettes, borders, etc.
Ceiling painting
What color to paint the ceiling, everyone decides on their own - it depends on personal taste and the interior of the room. As for the type of paint, there are several options.
For this, water-soluble acrylic enamels are often used. If you are interested in how to accurately paint the ceiling, then you should choose this particular type of paint. Acrylic enamel is easy to apply, resistant to water and light, dries quickly, does not have a strong odor, and is economically consumed.
Alkyd enamels are durable, economical and moisture resistant. But after painting, the room will be saturated with the smell of paint for a long time. The surface painted with such a composition almost does not “breathe”.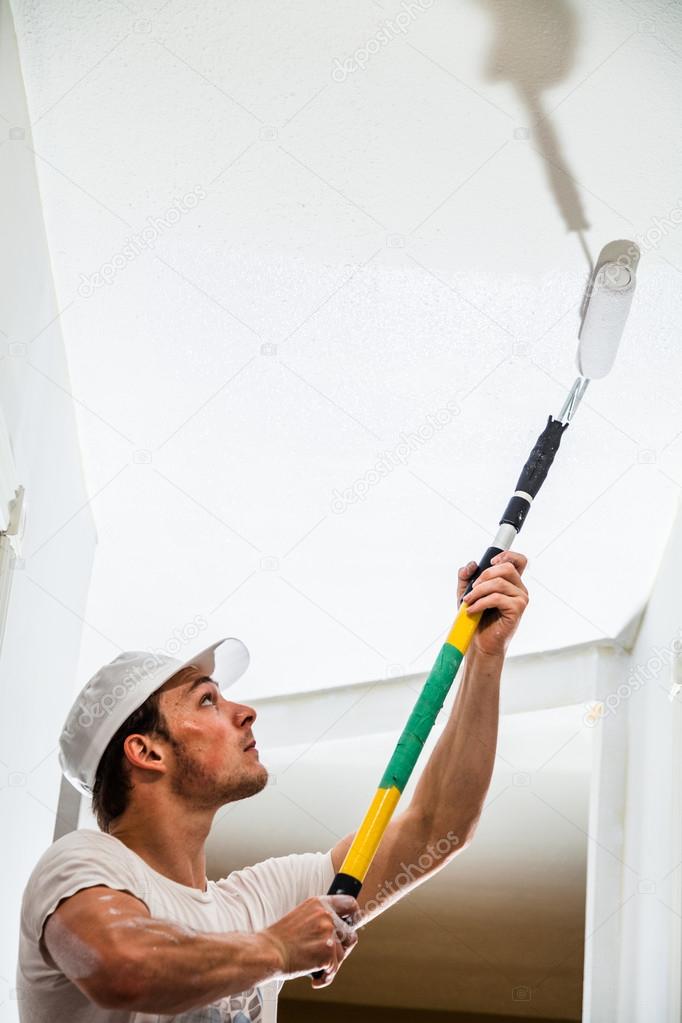 See also: "How to paint the ceiling in the apartment - choosing the right paint."
If you are wondering how to properly paint the ceiling, then you should take into account the following tips. First of all, you need to correctly type the paint. To do this, buy a special inclined tray with a recess. The roller is impregnated with paint in a recess, and then squeezed out on a sloping surface. Thanks to this material, exactly as much material is taken as needed, and it will be possible to accurately paint the ceiling (read also: "How to fix the ceiling after painting: useful tips").
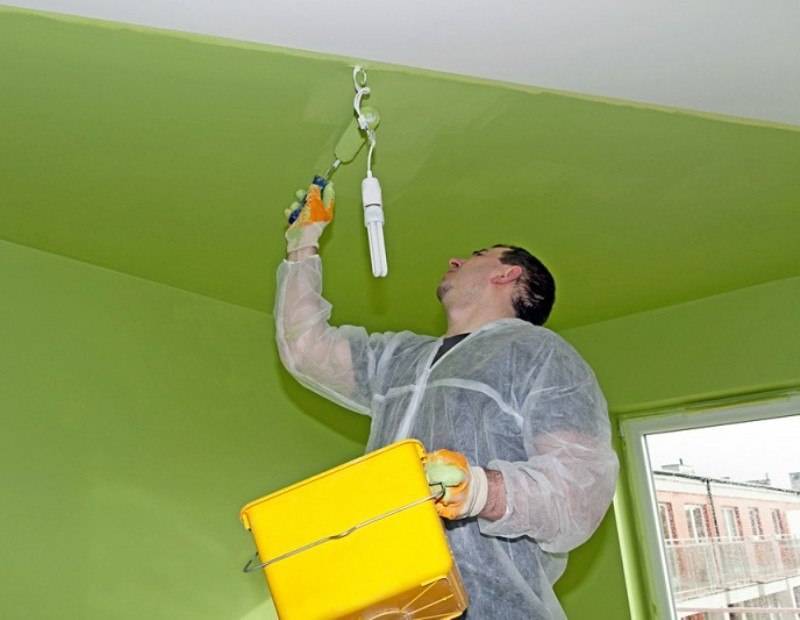
Proper painting is not difficult. On the surface, you just need to walk with a fleecy or foam rubber roller. Usually two or three coats of paint are applied. Corners and hard-to-reach places are treated with a brush. Paint for the ceiling surface must be liquid. So that it does not have time to thicken, it must be applied quickly, but at the same time carefully. You can watch to understand how to properly paint the ceiling of the video.
Work begins from the window. The first of the layers is applied parallel to the wall on which the windows are located, and the second - perpendicular to it. In one movement, one layer of paint should go down, and the next strip should only slightly overlap the next one. Then on the ceiling there will be no areas that differ in color.
Before re-painting, it is necessary to identify poorly painted areas and treat them first. Then it is worth walking with a roller all over the ceiling. Areas that have already been painted twice can be painted with a third coat, but with a semi-dry roller. It will help you learn how to paint the ceiling - video.
How to paint the ceiling correctly, see video for details:
How to paint the ceiling in the room with your own hands
9857
Painting the ceiling yourself is not as easy as it seems at first glance.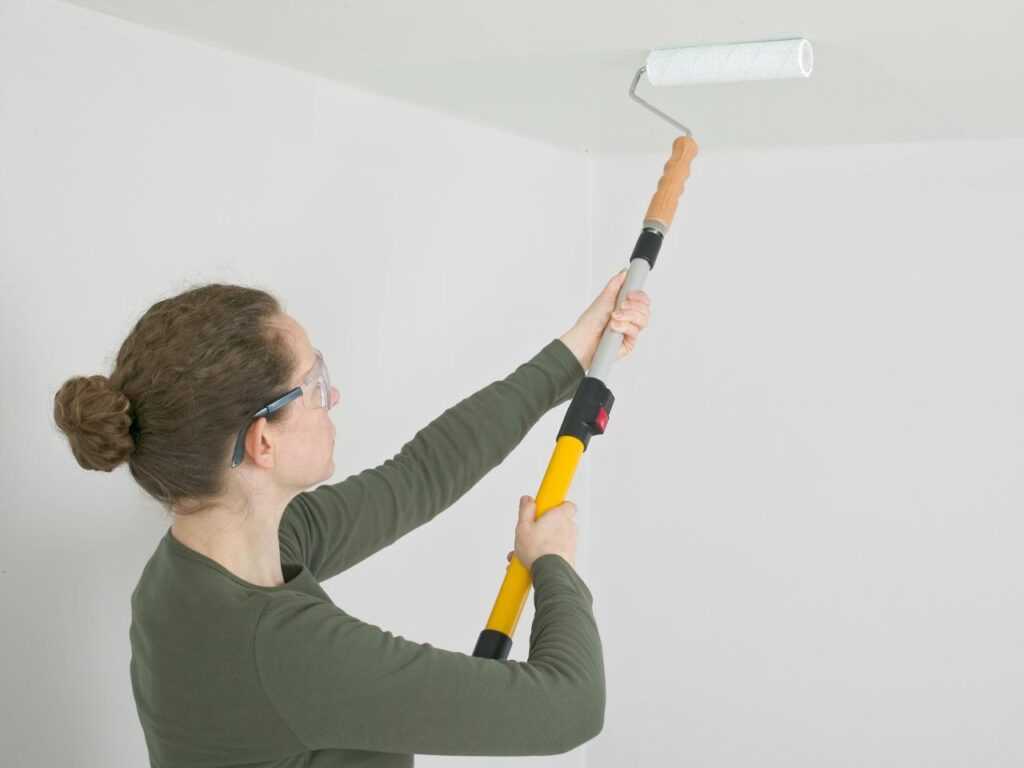 We recommend starting with the theory: the article will help you quickly learn the basics of finishing the ceiling, after which it will be enough for you to practice a little to “fill” your hand.
To answer the question of how to properly paint the ceiling, you need to analyze in detail two stages - preparing the base and applying paint.
The necessary actions within the preparatory phase depend on the initial data:
Foundation preparation
Ordinary whitewash, acrylic, water-based or varnish coatings are thin - even small irregularities on the ceiling will be striking. Dark spots must also be eliminated, otherwise they will show through the fine finish and more layers of paint will be required to hide them.
In order for the paint to adhere well, the surface must be clean and even. It is necessary to eliminate all irregularities, cracks, traces of mold and dirt.
Removal of old whitewash, wallpaper, paint
-
Old whitewash is washed to the ground with warm water.
 This is not necessary if the putty is strong, without crumbling areas - it will be the basis for applying paint.
 -
Wallpaper is also removed with water - moisten it abundantly and leave it for a while so that it is well saturated. If enough water is applied, they can be removed without much difficulty.
- If the ceiling is covered with an even layer of water-based paint with no damaged areas, new layers of paint coating can be applied on top. If the old paint is peeling in some areas, the entire surface must be cleaned by treating with hot water and waiting 20-30 minutes for it to soak. When the old coating swells, remove it with a spatula. Treat the surface again with water.
To quickly remove the old finish, wet the ceiling in parts.
Paintable finishes
- Wooden beams, boards, etc. To preserve the natural pattern of wood, they are often simply varnished.
- Plastered and puttied concrete floor.

- Gypsum plaster. It is more plastic than usual - it is easier to achieve a perfectly flat surface with it.
- Metal frame sheathed with plasterboard sheets - they do not need to be further processed. It will only be necessary to cover the seams with a primer and seal with putty, sealant.
In order for the paint to adhere well, the surface of the ceiling must be as level as possible.
Reinforced concrete slab work
- Surface irregularities are concealed by sheathed metal frame or plaster - cement or gypsum mortar. It is important to note that the gypsum mortar is not suitable for a bathroom or bathroom - the material does not tolerate high humidity. A universal solution for any premises - cement mortar.
- The ceiling is wiped with a sponge - water removes dust and smooths out minor irregularities in the base.
- Any paint color is suitable for light-colored ceilings. For a rough surface - only matte compositions.
 Glossy do not fit well on a granular surface.
 - Coarse-grained putty is covered with a solution of sand, cement. Further - fine-grained. The bottom layer must be primed and allowed to dry, only after that the top layer is applied.
- The material is reinforced with a thin polymer mesh to avoid cracking. The top layer is leveled with fine emery.
- To prevent mold from appearing on the ceiling, an antiseptic impregnation is applied to protect against bacteria.
Painting over old finishes
-
Make sure that the surface is ready for painting - areas that are crumbling should be removed. Cracks open up. The angles between the ceiling and the wall are checked - the interpanel joints are subject to the greatest deformations.
-
If the connection between the ceiling and the wall is uneven, remove the old plaster from these places with a hammer or chisel. Clean the areas of dust, dirt and moisten with water.
 Then the prepared areas are sealed with plaster, diluted according to the instructions. The treated surface must dry completely.
 -
The starting putty is applied and, after drying, it is sanded, covered with a primer layer. Then the surface is treated with a finishing putty, which, after complete drying, must also be sanded and all dust removed from it.
-
The final stage is the primer of the entire surface of the ceiling with a foam roller. Do not press hard on the roller to apply the primer evenly.
Putty should be given special attention. If the ceiling is well leveled and all surface imperfections are hidden, painting the ceiling will not be a big deal.
Can a new coat of water-based paint be applied over the old one?
Water-based paint itself is a durable coating, but can peel off over time, especially in high humidity areas. If this does not happen, you can apply a new layer on top of the old paint.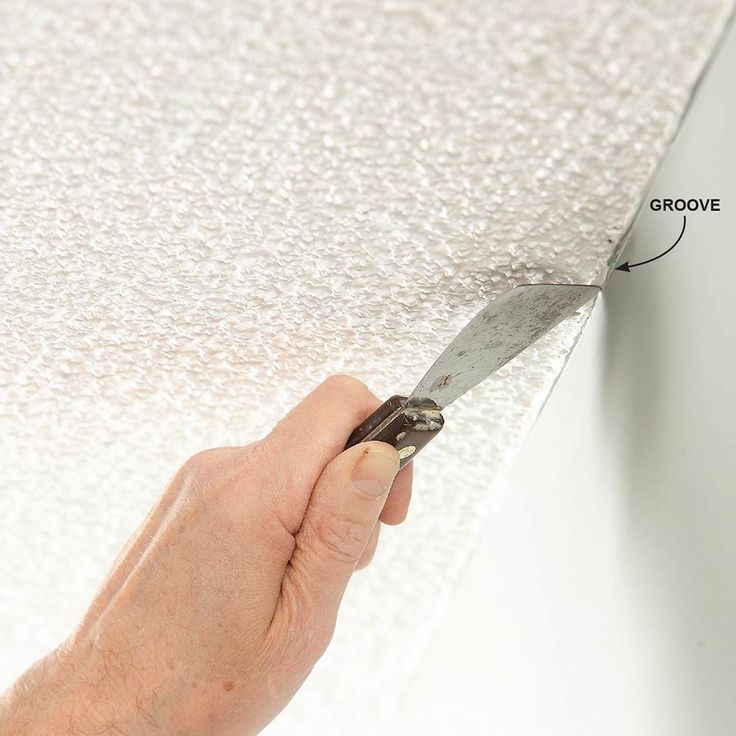
If the old material peels off in some areas, then a complete removal of the entire decorative coating is required. Some craftsmen simply scrape off the paint with coarse-grained sandpaper and apply a leveling putty layer on a rough surface. But it is better not to take risks and completely remove the paint with water - water-based paint is easily removed.
A few important tips for a quality ceiling painting:
-
paint must be applied quickly;
-
structural paint will help to hide minor flaws on the ceiling;
-
for the bathroom and kitchen, it is better to use a waterproof detergent composition;
-
use plastic barriers to protect walls from splashing paint;
-
use masking tape and glue web when painting joints;
-
so that the paint does not peel off, the drying process should take place in a dark room without drafts;
- it is not recommended to paint in a cold room with high humidity - the drying process will be delayed.
 Or, conversely, at high temperatures - so the paint will dry too quickly.
Painting the ceiling from wooden beams.
Preparation of boards, logs, beams
- Translucent compounds are often used for this material to make the wood look natural.
- If there are damaged areas, they are cut off, polished.
- Boards stacked to dry. This is necessary so that after laying they do not deform from moisture.
- Wood is impregnated with flame retardants and antiseptics.
- For better adhesion to the paint, the surface is primed after the impregnation has dried.
Preparing plasterboard sheets
- Using self-tapping screws, GKL is mounted on a suspended aluminum frame or glued to a concrete floor.
- Identify problem areas on the ceiling of movable panels: reinforce the seams between the sheets, butt the ends tightly.
- The joints of the ends are puttied using a plastic reinforcing mesh, which will prevent the appearance of cracks during internal deformations.
- Preparing the face of the drywall is almost never required. Putty damaged areas, if any, and screw heads.
- Coat the surface with primers that improve paint adhesion - for each type of coating a different composition is produced.
Plasterboard ceiling. GKL is mounted on a suspended aluminum frame.
Sunroof for painting
If an inspection opening is provided in the ceiling, the hidden hatch is mounted in a suspended aluminum frame before it is faced with GKL.
If the opening is small - from 20x20 to 120x60 cm in size, we recommend the hatch for painting "Tablet C".
Ceiling hatch "Tablet" for opening sizes from 20x20 to 120x60 cm.
Model feature:
- To prevent damage to the finishing material when the door is opened, the design of the hatch provides for a "smart gap" - a patented solution of the Praktika company.
- Sheet GKLV "Knauf" on the door allows you to paint the hatch with any mixture.
- A rubber seal is installed along the perimeter of the opening, which prevents dust from settling on the door and in the space behind the hatch.
If the opening should be as large as possible, we recommend the Grand skylight.
The maximum size of the Grand ceiling hatch in a single-door design is 2400x2000 mm.
- In a single-door version, it is possible to manufacture a hatch up to 2400x2000 mm in size.
- It is possible to install a chandelier or decorative elements weighing up to 10 kg on the hatch door - the mechanism of the axial hinge of the hatch is designed for a high load.
- Felt seal in the design of the model prevents drafts and dust settling around the perimeter of the opening of the hatch.
How to choose ceiling paint
The first thing you need to decide is the type of paint, depending on the composition:
-
Oil and alkyd paints - produced on the basis of oils, resins, drying oils.
-
Water-based and water-dispersion paints - based on water.
For the ceiling in residential premises, it is better not to use oil and alkyd paints: the composition dries for several days, has a strong unpleasant odor, and is toxic. Their scope is for outdoor work. They create an elastic film that protects the coating from external negative factors.
To create a characteristic glossy sheen on the ceiling, if necessary, it is better to use a special alkyd varnish.
The best choice for the ceiling in the apartment - water-based or water-dispersion paint. This type is considered the safest and does not have a persistent unpleasant odor. Dries quickly: water evaporates, a film on the surface is created by pigmented particles in the composition.
Do not use facade paints in residential areas - they are produced to different standards and have completely different properties.
Р Difference between water-based and water-dispersion paint
As a rule, the composition of paints is identical, only in one case microparticles are used - an emulsion, in the other larger particles - a dispersion of a substance.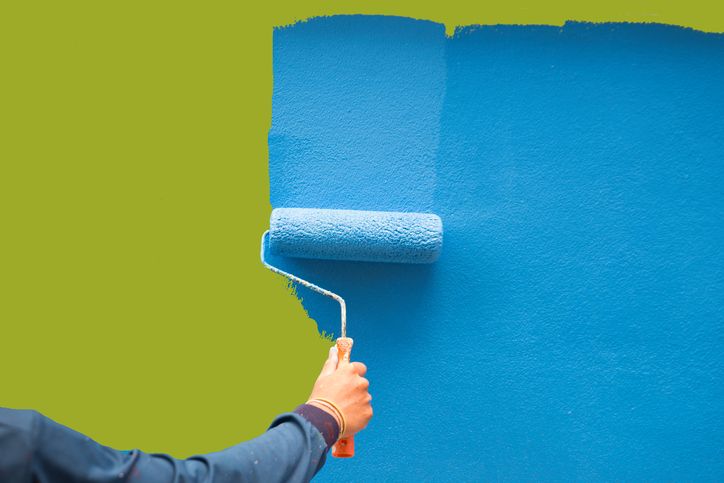
Varieties of water-based ceiling paint:
-
Silicate - with the addition of liquid glass or colored pigments. Budget type of paint with good performance and long service life - up to 25 years. The downside is high abrasion, so it is not recommended to wash such a ceiling afterwards.
- Mineral - based on slaked lime or cement. This type of paint is suitable mainly for concrete and brick surfaces. Minus - fragility.
-
Acrylic - based on acrylic resins. If latex is present in the composition, it is resistant to water and high humidity - it can be used in the bathroom and in the kitchen. If there is no latex in the composition, the ceiling cannot be washed - it is better to use such paint in a bedroom or living room. Suitable for ceilings with cracks no more than 1 mm - they can be hidden with a double layer of acrylic paint. It fits well on any absorbent surface: wood, brick, concrete, plaster. It is cheaper than silicone and latex.
 Offered in the widest range of shades.
 -
Latex is the most durable water-based paint. More elastic than acrylic. Hides millimeter cracks. The best option for new buildings with shrinkage problems. Suitable for bathroom and kitchen - resistant to water. Cons - high price and instability to exposure to light. May begin to flake when the temperature drops below 0°C.
- Silicone - with the addition of silicone resins. Suitable for wet rooms, resistant to direct exposure to water - the ceiling can be washed. Has antifungal properties. With this paint, you can mask cracks up to 2 mm. Minus - high price. But the consumption is economical: thanks to good hiding power, even one layer can be enough.
- Polyvinyl acetate - PVA based emulsion. This paint can be thinned with water. No strong odor, non-toxic. Not all types are suitable for rooms with high humidity - traces of condensate and water drops may remain on the paint. Polyvinyl acetate compounds are not resistant to low temperatures - they freeze at 0 ° C.
 Time-consuming painting of wooden surfaces - after the first layer has dried, it must be sanded, then a second layer must be applied and re-sanding after complete drying.
Determination of paint consumption
To do this, it is important to know the exact area of \u200b\u200bthe ceiling. Then you can focus on the information on the paint packaging, or make your own calculation.
On average, 100-120 g / m2 is needed to finish the ceiling with water-dispersion paint. To do the job efficiently and apply the paint evenly, you will need two or three layers. When using a roller and a brush, the material consumption will be approximately the same. Given the lack of experience - as a rule, this is fraught with an overrun of the material, approximately 300 g of paint per m2 will be needed. The exact volume can depend on many factors, so it is better to buy paint with a margin.
Paint recommendations:
-
Each package of paint has information on whether dilution of the composition with water is required.
 If the manufacturer recommends dilution, then water, as a rule, requires no more than 5-10%, so that the consistency takes the form of liquid cream.
 -
The diluted composition must be used immediately, until the paint has thickened. If dilution with water is not required, simply mix the paint.
-
Use paint from the same manufacturer of the same brand - this is a guarantee that the coating will be uniform and uniform.
-
If paint tinting is required, it is better to entrust it to specialists - they will help you choose the right shade and mix the colors in the right proportions.
How to paint correctly:
-
Use a special inclined tray with a recess. The sloping surface helps to squeeze out excess paint from the roller - this will allow you to apply even layers.
-
To paint the ceiling with high quality, apply the paint not in one thick layer, but in several thin ones so that there are no gaps.
-
Each new strip of paint should only slightly cover the next one, so that subsequently there are no areas on the ceiling that differ in color.
-
After applying the first layer, inspect the ceiling - apply the second layer of paint first to poorly painted areas, then to the entire ceiling. The areas already covered with the second coat, paint over again with a semi-dry roller.
-
Drying of the paint should take place in natural conditions - no need to use electric heaters or fans.
DIY ceiling painting instructions
Required Tools
- Paint roller. For oil compositions, velor, fur or thread are suitable. For water-dispersion - any kind. To avoid leaving lint on the surface, choose a foam roller. However, the nap roller is the best tool for covering difficult uneven terrains, as it penetrates into voids. Long bristles spread the paint evenly and leave less smudges than short bristles.
 The length of the pile is 1 cm sufficient for a smooth overlap.
 - Brushes - for processing corners and hard-to-reach places where it is difficult to work with a roller. They can be of different hardness: the harder the brush, the thicker the paint layer will be.
- Flat basin or tray, which will be convenient to dip the roller, brush.
- Film to protect furniture from paint ingress.
- Stencil, masking tape, if you want to create a drawing.
- Airbrush. If you want to paint a large area ceiling, it is better to use an electric or pneumatic spray gun.
The roller moves smoothly back and forth. The stripes are overlapped.
Painting process. How to work with a roller and brush
- It is better to finish the ceiling before working on the walls and floor, so as not to spoil them. Furniture that cannot be moved to another room is covered with a film.
- Finishing the ceiling is carried out with the windows closed.
 Otherwise, the paint may thicken and lie unevenly, stains will appear. The optimum temperature in the room is at least 5 degrees.
 - Substrate prepared, prefinishing dry and set. After puttying and priming, skirting boards and stucco moldings are attached.
- The roller is immersed in water for a few minutes to soften the pile for better distribution of the mixture.
- The paint is diluted to the desired consistency - follow the instructions on the package.
- Painting begins with hard-to-reach areas, corners - the work is done with a brush.
- Roller is used next. Calculate the required amount of the applied solution when dipping: if there is too much paint on the roller, splashes and smudges will appear on the ceiling. If not enough, the material may not be enough to apply the layer. The stripes will turn out uneven if you dip the roller differently each time.
- The main part of the ceiling is rolled from the wall with a window: the strips of the first layer are laid parallel to it, the second - perpendicular to the first layer.

- The paint is applied with smooth movements, the tool does not need to be rotated. The roller moves back and forth in a straight line. Each new strip of paint should overlap with the previous one by a couple of centimeters. There should be no free areas between the stripes - they will be noticeable after applying a second layer. To hide the gaps, additional layers will be required - the cost of finishing the ceiling will increase.
- Go down the ladder more often to check the quality of work. Application errors may not be noticeable at close range. To assess the quality of the application, provide good lighting in the room.
- Roller and brush must be immersed in water during work breaks.
Calculate the right amount of paint on the roller: if there is too much of it, splashes and smudges will appear. If not enough, the material may not be enough to apply the layer.
To finish the ceiling of a large area, it is better to use an airbrush to get a uniform coating without smudges and stains.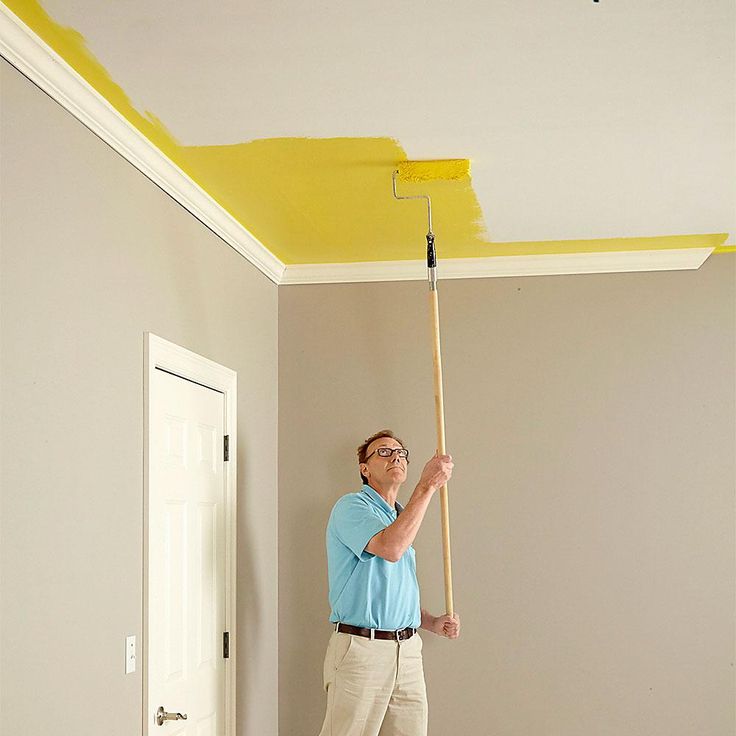


.jpg)