Room painting basics
How to Paint a Room: 10 Steps to Painting Walls Like a DIY Pro
AD It Yourself
Learn how to paint a room in your home or apartment with these easy DIY steps and brighten up any space in no time
By Lindsey Mather and Elizabeth Stamp
All products featured on Architectural Digest are independently selected by our editors. However, when you buy something through our retail links, we may earn an affiliate commission.
Learning how to paint a room properly is essential for beginning DIY’ers, new homeowners, and veteran home improvement experts alike. After all, it’s pretty painless, relatively inexpensive, and—should something go horribly wrong—easy to fix. But before you grab your roller and get started with your first coat, it’s essential to have a plan of attack. So we asked a handful of experts for their best painting tips and tricks to get you started. Read on to learn how to paint a room and see step-by-step what you’ll need to do to make sure your project is a success.
While San Francisco based designer Nicole Hollis may have turned heads for painting the exterior of her home jet black, we're prone to the moody blue she chose from Farrow & Ball for the bar.Douglas Friedman
1. Plan your approach
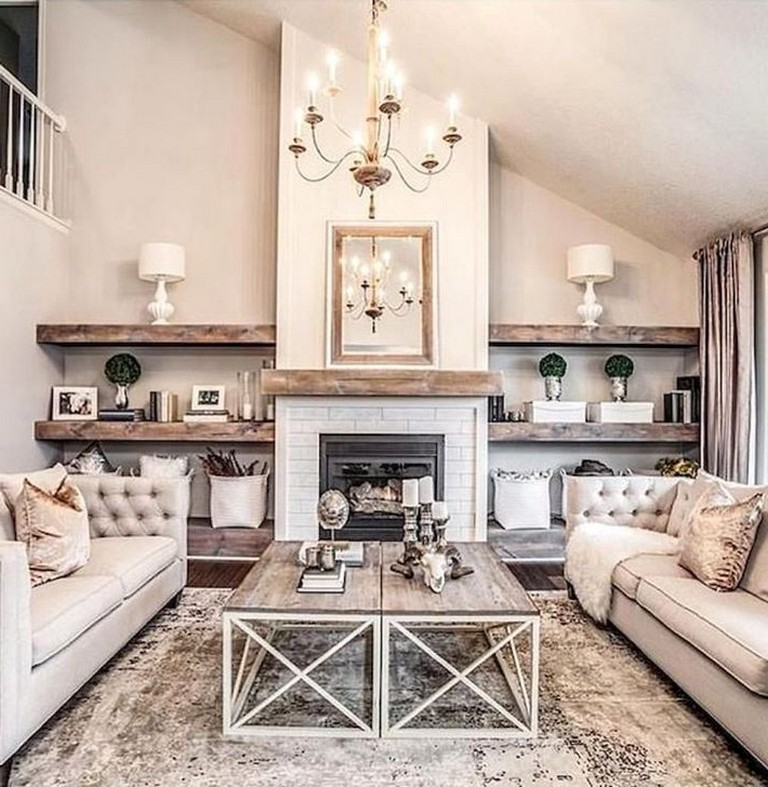
Start by thinking about how you want the finished project to look and remember that you’re not limited to four walls or an entire room in the same color. Consider painting an accent wall in a bold hue or highlighting moldings in a contrasting shade or finish. And don’t forget to look up and see whether the ceiling could use a refresh as well.
Alexander Gorlin used Parma Gray by Farrow & Ball on an accent wall in a New York apartment.
2. Choose your color
Browsing through fan decks and paint chips can be overwhelming. Start by figuring out the general color characteristics: Do you want a warm or cool shade? Neutral or saturated? If you have existing furniture or art, you’ll also want to consider how the shade will complement them. Once you have a sense of what you’re looking for, pick a few shades and get samples—lots of direct-to-consumer brands, like Backdrop and Clare, will send you adhesive swatches you can slap on the wall for a better sense of shade (and it’ll save you a trip to the store). Test the colors to see how they look in the room at different times of day.
Many paint companies also have tools on their websites that will let you upload a photo of your space and preview different colors on the walls. But colors can look different in real-world conditions, so you’ll still need to try it out in the space.
Test samples of your color choices in the room to see how they look in different lighting conditions.
Photo: Richard Drury/Getty Images
3. Pick out your tools and materials
Every project is unique and you may need different tools depending on the paint you choose and the condition of your walls, but there are a few must-haves:
- Paint
- Paint roller
- Paint roller extension pole
- Drop cloths
- Paintbrushes
- Paint tray
- Sandpaper
- Painter’s tape
- Rags
- Putty knife
Click here for a shopping list to order all the paint supplies you’ll need to get started—from sanding and priming to your very last touch-ups.
Gather all the essential tools before you start.
Photo: Anika Salsera/Getty Images
4. Determine how much paint you’ll need
Whether you’re painting a powder room or the exterior of your house, the general rule of thumb is one gallon per 400 square feet, says Carl Minchew, vice president of color innovation and design at Benjamin Moore. But that’s just a rough guideline: To get a more precise number, which you’ll definitely want for large projects, use a paint calculator like the ones provided by Benjamin Moore or Pratt & Lambert; they take into account window and door measurements. (And both assume two coats of paint per project.)
Most Popular
Planning on whitewashing a charcoal gray wall? You’ll likely need additional paint when going from dark to light. On the other end of the spectrum, a deep color base tends to require more coats of paint than a lighter color, says Carolyn Noble, color marketing and design manager at Pratt & Lambert. She recommends applying a gray-tinted primer to the surface before you paint your walls a saturated color to help reduce the number of applications. When it comes to finish, you may have heard that the glossier it is, the higher the coverage rate, but it’s not enough of a difference to change the number of gallons you need to buy, Minchew says.
If you’re painting a highly textured surface rather than a smooth one, buy a little extra, says Julianne Simcox, Pratt & Lambert associate brand manager. Cabinets with complicated millwork require more paint, too; Minchew suggests purchasing about 10% more than calculated.
Calculate the correct amount of paint you’ll need to spare yourself trips back to the store and wasted paint.
Photo: Daniel Acker/Bloomberg/Getty Images
5. Prep the walls and the room
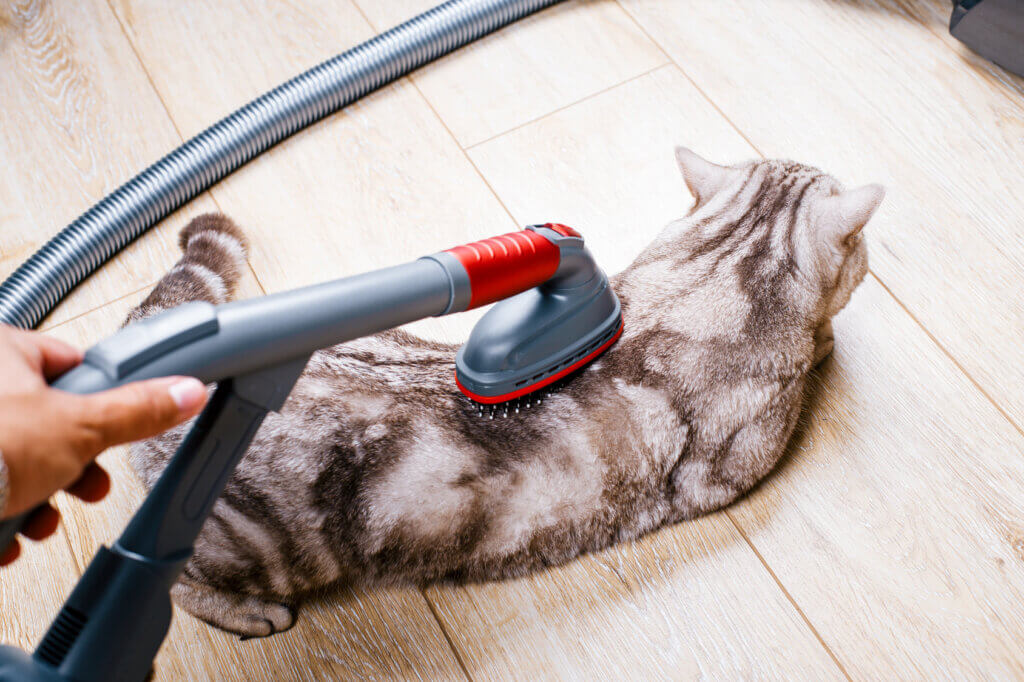
You don’t want to damage your favorite sofa or that heirloom Grandma gave you, so empty the room of all the furniture. If you don’t have enough space to relocate everything you own, push it all to the center of the room.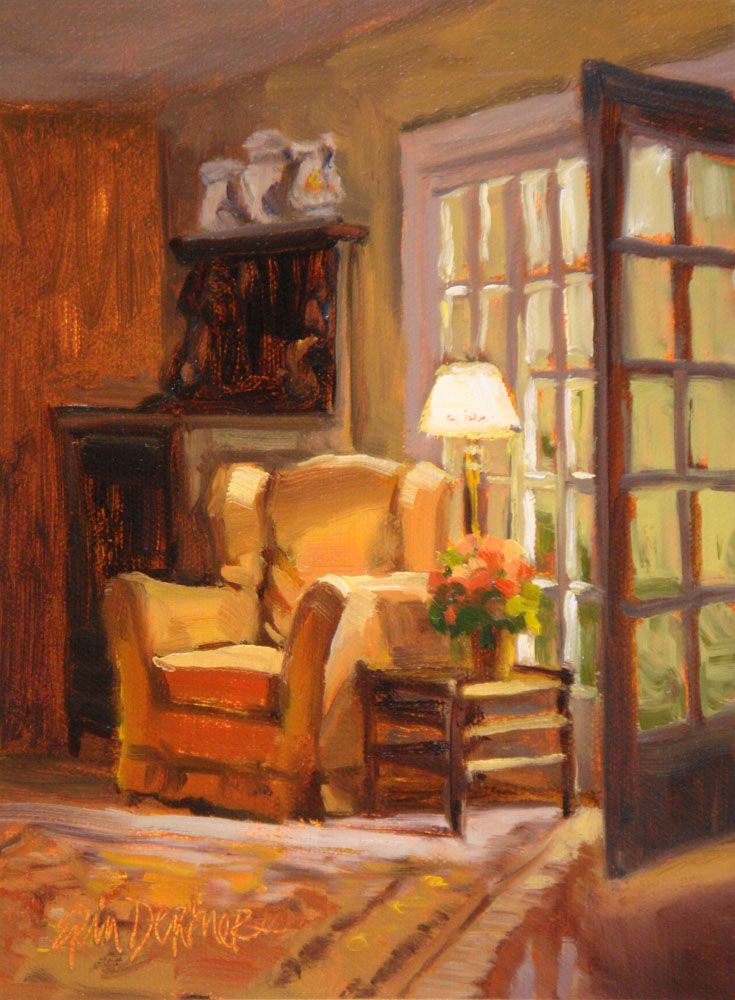 Cover the pieces with a drop cloth or lightweight plastic sheeting and do the same with the floor, as well as any cabinetry or countertops that might be in danger of excess splatter. “Don’t skip the drop cloth—paint will splatter, we promise,” say New Jersey contractors—and cousins—John Colaneri and Anthony Carrino, the stars of the HGTV series Cousins Undercover and Kitchen Cousins as well as The Build Up and Grand Design on Ellen DeGeneres’s Ellentube.
Grab a roll of painter’s tape—the cousins recommend FrogTape—and firmly apply it to the edges of the room’s corners, base and crown moldings, and door and window casings, using a putty knife to seal if needed. “Getting a good seal so paint doesn’t get under the tape is everything, plus it will pull away clean after everything is dry,” Colaneri and Carrino say. If you dare (or have an artist’s steady hand), you can skip taping entirely. Remove light switch and outlet covers and apply painter’s tape to protect outlets and switches from paint drips. Before you get started, make sure you know how to repair drywall so you can clean up any nicks in the walls.
Most Popular
Protect floors and furniture with drop cloths.
Photo: Patti McConville/Getty Images
6. Mix your paint
Use a wooden paint stick to stir the paint, and re-stir often throughout the project. Paint that isn’t stirred consistently can lead to the ingredients separating and you’ll risk compromising the true color you’re going for. If you’re using more than one gallon of paint, combine the cans in a large bucket in case there is a slight variation in color.
Mix your paint early and often.
Photo: Tetra Images/Getty Images
7. Pick your painting techniques
Your paint is mixed and your roller is at the ready, but make sure to plan a strategy before you get started. Work from the top of the room down, starting with the ceilings. Planning a bold focal wall? Paint the adjoining light-colored walls first. “Don’t worry if you get paint on what will be your accent wall—the dark paint will cover up whatever lighter paint found its way there. After the lighter wall dries, tape off that edge so the dark color doesn’t bleed onto your new paint,” Colaneri and Carrino advise. If you’re covering up dark walls with a brighter hue, plan on three coats: your primer, plus two coats of the new color to ensure nothing shows through.
Most Popular
Tackle one wall at a time. Take a brush and “cut in”—paint along the molding and the corners from top to bottom—while your painting companion uses a roller to cover the main expanse of the wall, staying away from those more precise spots. When applying paint with the roller, use long strokes in a W pattern for ample coverage (and to avoid those pesky roller marks). Once the wall is dry to the touch, it’s ready for a second coat.
If you are painting the trim, remove the painter’s tape and wait for the walls to dry before applying tape to the walls. Start with the trim closest to the ceiling, move on to door and window frames, and, finally, the baseboards.
Start by cutting in near moldings and corners with a brush.
Photo: Banks Photos/Getty Images
8. Don’t forget ventilation
Watching paint dry is no fun. Make sure your space is well ventilated throughout the project by opening windows and using fans. “Keeping the room warm and a fan blowing definitely helps speed up the drying process,” the cousins say. “If it’s a damp day, it will take much longer for the paint to dry.”
Open a window or use a fan for ventilation.
Photo: Stephen Simpson/Getty Images
9. Clean up
You’ve done multiple coats, but it’s not time to relax just yet. Remove all the painter’s tape and gather drop cloths, making sure any spills or splatters are dry before you move them. For latex- and water-based paints, clean brushes with soapy water, though oil-based paints will require mineral spirits. You can use a painter’s brush to clean and reshape bristles. If you want to reuse roller covers, use the curved edge of a 5-in-1 tool to remove the excess paint under running water (they’re also useful for opening a paint can, removing nails, and scraping).
Most Popular
Clean brushes with soap and water if you used latex- or water-based paints.
Photo: Ableimages/David Harrigan/Getty Images
10. Give yourself enough time
The amount of time your project will take depends on the size of your room, how you’re painting, and your skill level. For instance, using a dark shade on the walls and painting the ceiling and trim will take longer than just doing the walls in a neutral color. While some spaces can be done in a few hours, others may take several days. Be sure to budget more time than you think the job will need and don’t forget to take prep and cleanup into account.
Shopping guide
ExplorerenovationDecoratingpaintDIYAD It Yourself
Read Moread-it-yourself
How to Clean Blinds in Less Than 30 Minutes
Expert-approved tips to keep these window coverings—from wood to vinyl blinds—in tip-top shape year around
By Jennifer Beck Goldblatt
How to Paint a Room
Catherine Falls CommercialGetty Images
1
Sand Away Flaws
Valentyn Semenov / EyeEmGetty Images
To apply a perfectly smooth coat of paint to walls, ceilings, and woodwork, you must start with a perfectly smooth surface. One pro told us that "sander," would be a more fitting job title for him than "painter," since he spends so much time pushing sandpaper.
Sanding with the appropriate abrasive paper helps level out spackling compound and drywall joint compound patches, flattens ridges around nail holes, and feathers out repairs to inconspicuously blend into the surrounding surface. Sanding also removes burrs and rough spots in painted wood trim, such as baseboard moldings and window and door casings. And roughing up a glossy painted surface with fine-grit sandpaper allows the new paint coat to adhere more easily.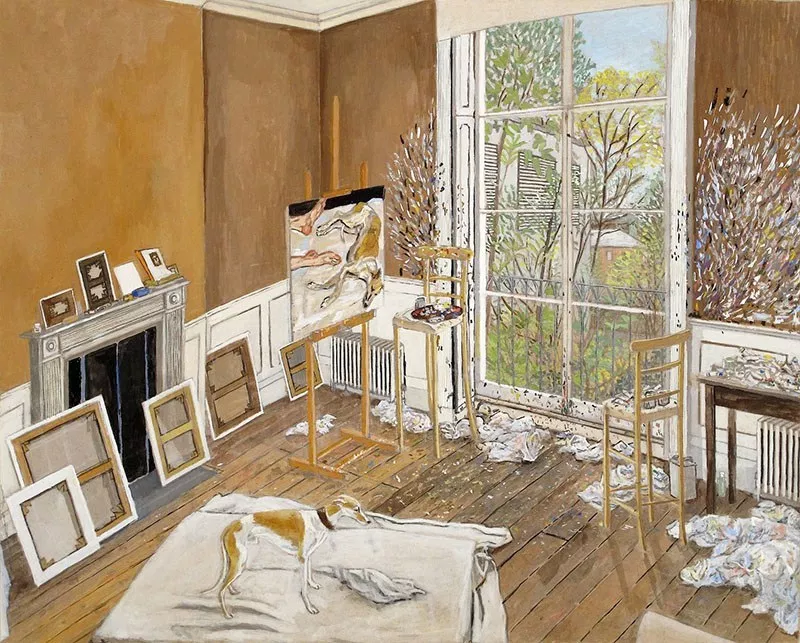
Use a sanding pole fitted with 220-grit sandpaper to sand the walls vertically from the baseboard up to the ceiling. Be sure to overlap each stroke slightly to keep from missing any spots. Then, sand horizontally along the top of the baseboard molding and along the tops of the walls at the ceiling. Don't apply too much pressure on the sanding pole or its swiveling head might flip over and damage the wall. Plus, sandpaper tends to load up (clog) when you press down too hard.
To sand decorative woodwork, try using a sanding sponge, which gets into crevices and easily conforms to contours.
2
Press Tape With a Putty Knife
GeorgePetersGetty Images
Painter's tape is an indispensable part of every paint job, especially when masking off wood trim. But nothing is more discouraging than peeling off the tape only to discover that paint has bled through the tape and gotten all over the trim. To avoid the pain-in-the-neck chore of scraping off the errant paint, do a thorough job of adhering the tape to the trim before you start painting.
Apply the tape to the wood trim, then run a putty knife over the tape to firmly press it down for a good seal. That'll stop any paint bleeds. And be sure to use true painter's tape, not masking tape. Masking tape leaves behind a sticky residue that's hard to clean off. Plus, paint can cause masking tape to buckle and wrinkle, which lets paint seep beneath it. Painter's tape can be left on for days (some types up to two weeks) and still peel off cleanly.
🛠 Tackle This Next: Pro Tips For Installing Crown Molding
3
Cover Furniture
Timothy Dahl
When painting a room, don't bother lugging all the furniture out of the room. Instead, push all the furnishings to the center of the room and then cover it with plastic sheets that are taped at the bottom. This will protect the furniture from paint drips and splatters, and also from all the sanding dust.
4
Use Tinted Primer
Thanapol Kuptanisakorn / EyeEmGetty Images
Before the pros paint walls, they fill holes and patch cracks with joint compound. But if you paint directly over the patched areas, the compound will suck the moisture out of the paint, giving it a flat, dull look—a problem called "flashing." And those spots will look noticeably different from the rest of the wall. To avoid seeing patched areas through the finished topcoat of paint, it's important to first prime the walls.
However, instead of using white primer straight from the can, pros tint the primer with a little gray paint or with the color of the finish paint. Tinted primer does a better job of concealing patched areas and covering up the old paint color. As a result, the finish paint coat will be more vibrant and may require fewer coats. This is especially true when painting over colors like red or orange, which could require three or more topcoat coats if you don't first apply a tinted primer.
5
Buy the Best Supplies
Ezra Dyer
Don't cheap out on paint and brushes. Cheap brushes are false economy. Purchase the best brushes you can afford, clean them well, and they'll last you a lifetime. A $3 plastic brush is going to make it look as if you smeared paint on the wall with a rake. And, the bristles will fall out into the paint. Buy Wooster or Purdy paintbrushes, which cost a bit more than standard brushes, but are much more durable and apply paint very smoothly. A quality 2½-inch-wide angled sash brush is an excellent all-round paintbrush. It's versatile and you can wash and reuse it until the bristles wear down to a nub.
It's also important to buy the best paint you can afford. It'll go on easy, offer the best coverage, and last a long time. Plus, you'll be able to wash off grubby fingerprints without taking off the paint. And the whole painting job will go quicker and easier—and look better in the end.
➡️ Try These: The 8 Best Paintbrushes for Nearly Any Painting Project
6
Flood
Eliminate Brush and Lap Marks with Paint Extender
Floetrol/Amazon
Now 30% off
$10 AT AMAZON
7
Scrape a Ridge in Textured Ceilings
BanksPhotosGetty Images
When painting along the top of a wall in a room with a textured ceiling, it's almost impossible not to get paint on the ceiling bumps. Pros have a simple solution: run the tip of a slotted screwdriver around the perimeter of the ceiling, scraping off a little bit of the texture. The screwdriver creates a tiny ridge in the ceiling, which the tips of your paint bristles naturally glide into.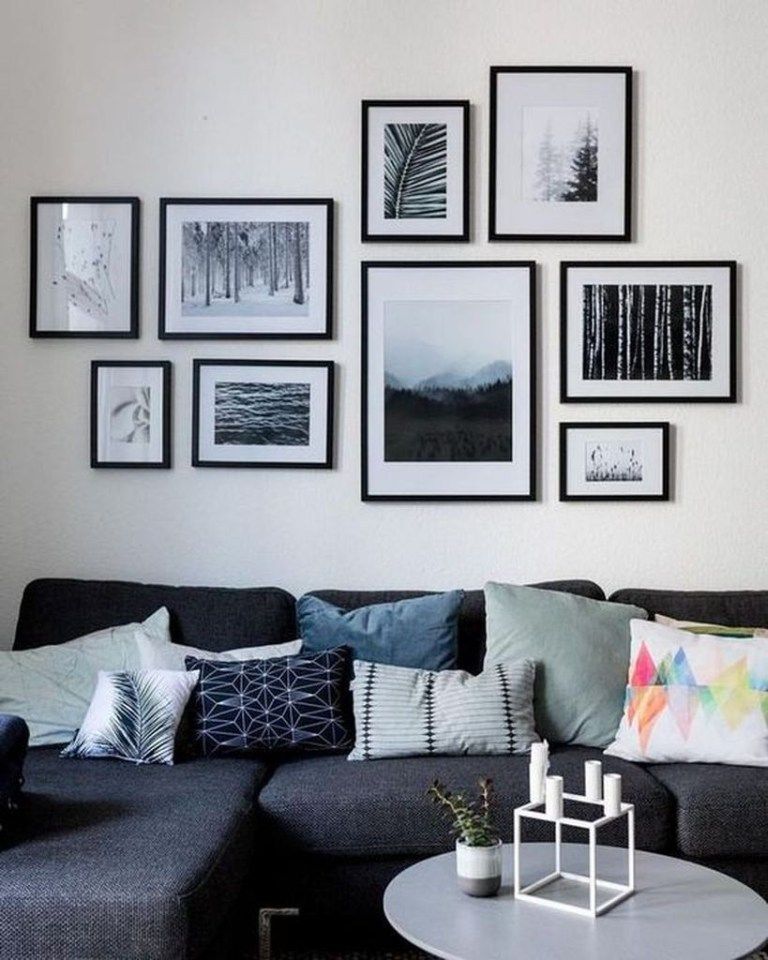 Now, you can cut in around the ceiling without getting paint onto the ceiling. And you'll never even notice the missing texture.
🪛 Check These Out: The Best Screwdriver Sets for Building, Deconstructing, and Quick Repairs
8
Bates Choice
Scrape (Don’t Tape) Windows
Now 36% off
$7 AT AMAZON
9
Box Paint for Consistent Color
Ezra Dyer
When you buy two or more cans of the same color paint, guess what? They're almost never the same exact color. That's because paint color varies very slightly between cans. And that small difference can be glaringly obvious if you open a new gallon halfway through covering a wall. To ensure color consistency from start to finish, pros mix their cans of paint into a five-gallon bucket, a technique known as "boxing" paint. Then, you can paint directly out of the larger bucket, which eliminates the need to pour paint into a roller tray (though you should keep in mind that the heavy bucket is harder to move).
10
Finish One Wall Before Starting Another
pastorscottGetty Images
Most DIY painters cut in all the room corners, and then go back and roll paint onto the walls, but that's not the correct way to paint a room. Pros get a seamless look by cutting in one wall, and then immediately rolling on the paint before the cut-in sections dry. This allows the brushed and the rolled sections to blend together beautifully.
Also, cover your paint bucket, tray, or container with a damp towel when switching between brushing and rolling; that'll keep your paint and tools from drying out when not in use.
🪣 These Will Help: Tools to Help You Paint Like a Pro
11
Buy an Extra Bucket or Two
Ezra Dyer
It's smart to have a couple of clean, empty buckets
on hand when painting because freshly shaken paint doesn't stay freshly shaken for very long. And you can't bring settled paint back to life with a stir stick alone. So, you must pour paint back and forth between two buckets until you've mixed in the solids that have collected at the bottom of each can. That's the best way, and really the only way, to ensure your paint is properly and thoroughly mixed. And if you have paint in several different cans, mix those too to ensure color uniformity.
12
Wash Roller Covers
RUBEN BONILLA GONZALOGetty Images
Odd as it may sound, it's important to wash brand-new paint-roller covers before using them to spread paint. Pre-washing gets rid of loose bits of fuzz that inevitably come off once you start painting. Wash the covers with water and a little bit of liquid soap, then run your hands up and down the covers to pull off any loose fibers, a practice called "preconditioning." And you can start using the roller covers right away; you don't have to wait for them to dry.
13
Use Canvas Drop Cloths
Tetra ImagesGetty Images
Professional painters don't use old bed sheets as drop cloths, and neither should you. Thin sheets won't stop splatters and spills from seeping through to your flooring. And don't use plastic sheeting either. While plastic does contain spills, the paint stays wet for way too long. And if you step in wet paint, you'll end up tracking it throughout the house. Plus, wet paint on slick plastic becomes very slippery.
Use what the pros use—canvas drop cloths. They're more expensive, but canvas isn't slippery, it absorbs splatters, and it's durable enough to last a lifetime. And unless you're painting a ceiling, you don't need a jumbo-sized drop cloth to fill the entire room. A canvas cloth that's just a few feet wide and runs the length of the wall is ideal for protecting the floor.
🔨 Your Next DIY: How to Restore a Concrete Patio
14
Light It Up
Ezra Dyer
Here's another painter term for you: "holiday. " That's when you miss a spot without realizing it. It's easy to do, especially with similar colors or rooms with bad lighting. So, get yourself a good, bright work light and use it to check your work, either as you go or when you finish a section. Holidays typically occur around the edges of a room, where you used a brush instead of a roller. Holidays are easy to fix when you're still working, but much more annoying after you've cleaned up and put everything away.
15
Klean-Strip
Clean Dirty Walls With Degreaser
$19 AT AMAZON
16
Take Off Those Electirc Plates
Ezra Dyer
This is a no-brainer. Instead of laboriously masking off or cutting around electrical outlet plates and switch plates, grab your screwdriver and take them off. Then you'll be able to quickly and easily paint around each electrical device without making a mess.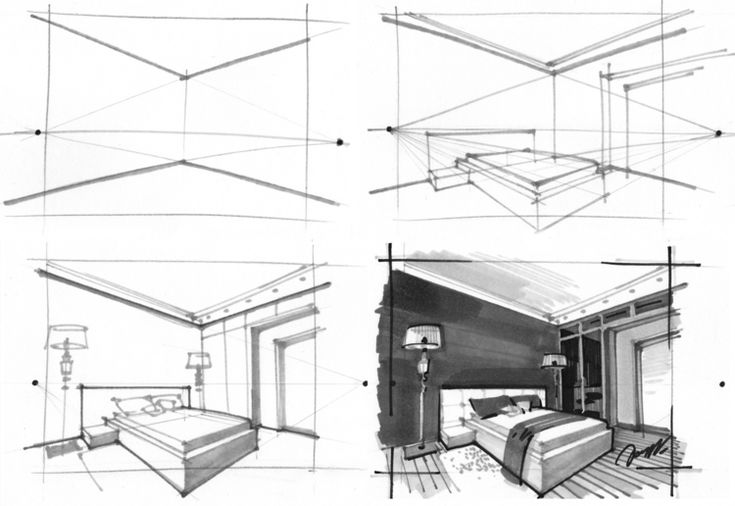 Just be sure to keep track of all the screws, so you can put the cover plates back on once the paint dries.
✅ Extra Credit: How to Cut Screws and Bolts
17
Start With a Loaded Brush
Ezra Dyer
Pros take a "load-and-go" approach to painting. They load the bottom 1½ inch of their brush bristles with paint and then tap each side of the brush against the inside of the can. That knocks off heavy drips and prepares the brush for painting.
By contrast, homeowners often take a "load-and-dump" approach: they dip the brush into the paint, then drag the loaded bristles along the sides of the container, wiping off most of the paint. The result is a brush that's too dry and has too little paint.
18
Push Paint to Avoid Runs
Kathrin ZieglerGetty Images
When your brush is loaded with paint, it's easy to create drips and runs by applying too much paint in room corners or along wood trim.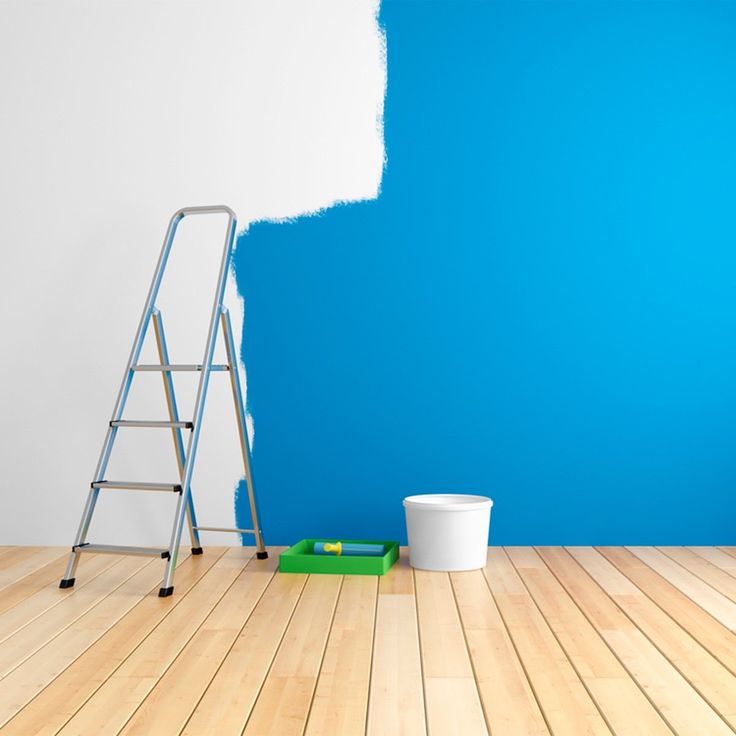 To avoid those issues, start brushing about 1/2 inch away from the cut-in area. As the brush unloads paint, move closer and slowly drag the brush along the trim or corner. Let the bristles gently push the paint against the cut-in area where the walls meet. You may have to do this a couple of times to get complete coverage, but it'll avoid excess paint collecting along woodwork and in corners.
19
Give Yourself a Good Set
Ezra Dyer
In painter lingo, a "bad set" is when you're in a physically bad position while painting. For example, maybe your ladder isn't quite close enough, or you're in an awkward spot with your brush. The good news is that most bad sets can be avoided. Just climb down and move the ladder. Sure, it's annoying, but it's not as annoying as falling into your paint bucket because you were hanging off your ladder like an America's Cup crew member. And sometimes a bad set can be resolved by moving an obstacle. If the refrigerator is forcing you into a tough painting position, stop and roll it out of the way.
🪜 This Will Help: The Best Extension Ladders for Your High-Up DIY Tasks
20
Bag It Up
Ezra Dyer
When you're ready to quit for the day—but haven't finished painting—leave the roller cover on the roller frame, then soak the cover in paint. Wrap the cover in a plastic bag to create an airtight seal. That'll keep the roller cover fresh until you return to painting the next day. If you can't return to painting for several days, pull the roller cover off the frame and toss it out. Then use a new roller cover the next time.
As for your brushes, rinse them clean with warm, soapy water, especially if you're using latex paint, which is water-based. Use paint thinner to clean off oil-based paint. Then rake the bristles out straight with a brush comb and slip the brushes back into their original covers or wrap them in newspaper.
Ezra Dyer Senior Editor Ezra Dyer is a Car and Driver senior editor and columnist.
TECHNIQUE and TECHNOLOGY of wall painting.
In this section we will consider various questions on materials and wall painting technology.
A lot of comments have accumulated, and we have divided them into several pages.
Page 1
Page 2
Page 3
You can ask your question on Page #3. Page 1.
1. What is the basis for interior wall painting? nine0003
Depending on the requirements of the customer for painting, we use one of two bases:
The first base - the classic and most popular - is painting the wall on the finishing layer of plaster (or on non-woven or any other wallpaper glued to the wall ).
The second basis for painting in the interior is a canvas on which the painting is created, and which is then glued to the wall (or installed together with a stretcher in the place allotted for painting). nine0003
The second version of the basis for painting is convenient to use when, for some reason, it is impossible for artists to be on the painting object, but it is necessary to complete the work itself. In this case, the monumental work has some mobility both at the time of installation and in case of damage to the wall plaster (for example, a leak in the house), since, if necessary, it can be separated from the wall. But this option has a drawback - in large-scale paintings, it is difficult to avoid the appearance of joints and seams between the edges of the canvas, since the width of the canvas is limited. nine0003
The first version of the painting directly on the wall plaster or wallpaper is convenient to use in almost all cases and in any room, dry or damp. The main thing here is to prepare the wall well, since the painting itself will already be inseparable from it.
2. How to prepare the wall for painting?
To put it quite simply, the wall for painting should be prepared as if it were a normal painting, nothing special or additional needs to be done here.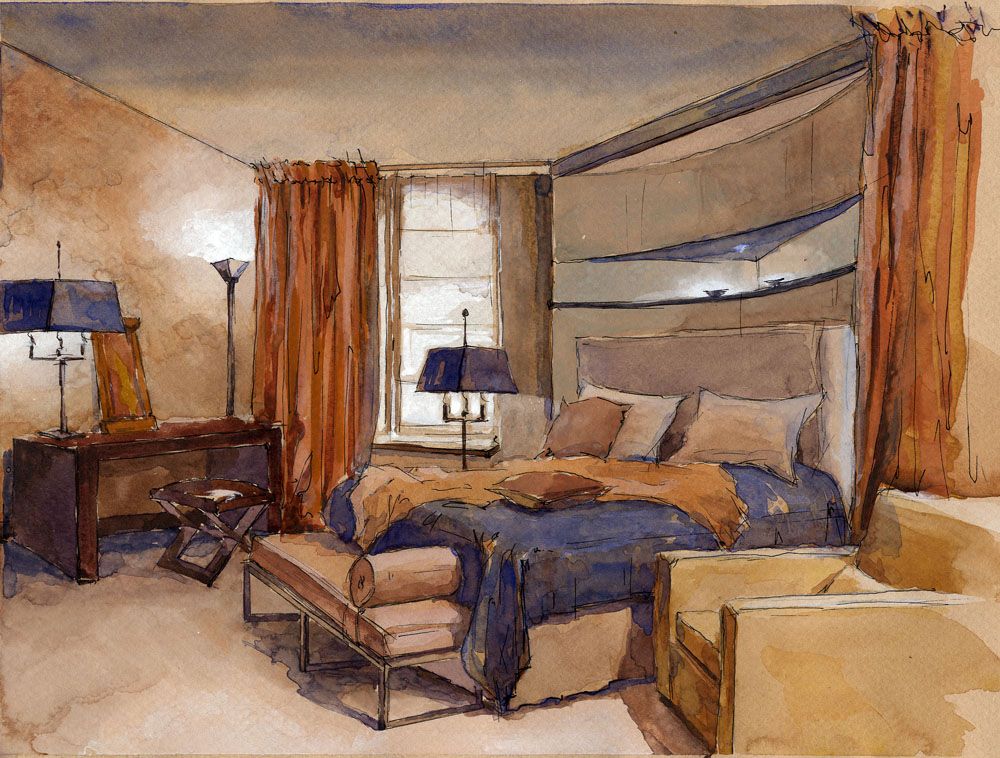 nine0003
All the work of preparing the wall is usually done by a construction team of craftsmen. Therefore, we will not delve into the nuances of building materials and technologies within the framework of this article.
Let us just remind you that it is necessary to prepare a wall for painting very efficiently, since the durability of the painting itself depends on it. If the wall is poorly prepared, then the painting may crack over time along with the plaster, at the joints of drywall or wallpaper, peel off, crumble or change color. nine0003
The work of artists on painting usually begins with the application of an acrylic primer (impregnation). The primer gives a strong protective layer, prevents sprinkling of the surface, strengthens it. Provides excellent bonding of the paint to the wall. For dry and wet areas, different primers are used.
In order to simply and visually imagine the modern technology of wall painting, below is a conditional diagram that shows all the main stages of wall preparation and painting in the form of layers, starting from the base of the wall and ending with varnishing the finished painting ( on the example of the mineral base of the wall):
1. Wall base.
2. Plaster coat.
3. Finishing putty.
4. Primer.
5. Painting layer.
6. Acrylic lacquer (optional).
3. What is the process of wall painting?
Wall painting is carried out in stages:
a) Search for an idea for wall decoration.
b) Development of sketches and approval of the final version of the sketch of the future painting with the customer. nine0003
c) Wall primer.
d) Transferring the picture to the wall and, if necessary, linear rendering of the entire composition.
e) Execution of painting with paints, work on local spots of the composition, volumes and details. It is carried out from the general to the particular, which allows you to maintain the integrity of the entire painting.
e) Coating the finished painting with matt varnish to give additional strength to the surface of the painting (optional). nine0003
Painting completed.
4. What materials are used for wall painting?
Primer - We impregnate the wall with a construction acrylic primer. In wet rooms, special moisture-resistant primers with antifungal additives are used.
Painting - We paint with acrylic paints (construction and art). In wet rooms, special acrylic paints are also used, which give a very durable surface. Acrylic paints are non-toxic, diluted with water, dry quickly, are universal in use - they can be used both as body strokes and glazes on almost any surface. After drying, they give a durable film that is not washed off with water and resistant to ultraviolet radiation. Therefore, the painting can be wiped (washed) with a damp cloth and it will not fade in the sun. nine0003
We write with brushes (synthetics, bristles, squirrels), rollers, palette knives, rags, pieces of paper, adhesive tape, foam rubber, etc. We use an airbrush, spray gun or balloons depending on the tasks of painting.
Lacquer - If necessary, we cover the finished painting with a layer of matt acrylic varnish, which increases the protective properties of the wall painting. But this is optional.
All materials are included in the cost of painting, they do not require a separate payment.
5. What are the stages of cooperation with the customer?
This is the scenario in which we usually work - from receiving an application to the successful delivery of the painting.
Application. Cooperation begins with your application for a wall painting. Leave us a request in any way convenient for you: CONTACTS. To calculate the price, we will need to know the following about your painting: 1. The size of the painting; 2. Desired terms and deadlines for completion of work; 3. Address of the object; 4. Wet or dry room, or is it outdoor painting; 5.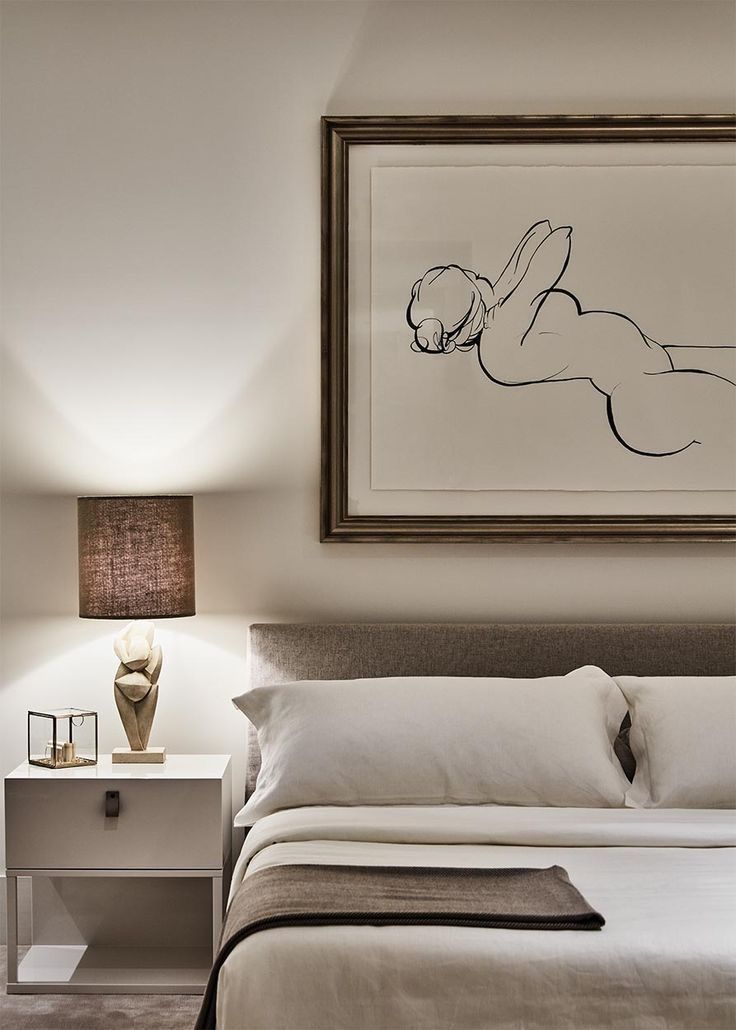 Do you need to make a sketch, or do you already have a picture; 6. What do you want to draw, picture style; 7. Whether it will be necessary to work in the evenings, weekends or at night; 8. How the wall is prepared, what kind of surface it has; nine. Altitude of work
Calculation and approval of the cost. Having received information about the painting, we will calculate everything and inform you of the cost of our work.
We always try to quote an adequate and accurate turnkey price that will not change during the course of cooperation. The price already includes all materials, sketches and work.
Next, we approve the price of painting with you and, when all agreements are reached, we proceed to the next stage:
Contract and advance payment. We meet you at the site, take measurements, sign a contract, and you pay an advance. Usually it is 50% of the cost of the work. In cash or non-cash form. We issue a check.
Painting sketches. If you need to develop a sketch, then we execute several variants of sketches for painting, based on your wishes. We also do visualization of sketches in the interior. You choose which of the sketches you like best. If the sketch does not meet your requirements in some details, we will finalize it. If you like the sketch completely, then it is approved for execution. nine0003
Painting. After the approval of the sketch, we carry out the necessary preparatory work and begin work on the painting at the facility. We guarantee you a careful attitude to the objects of your interior, do not stain anything and take out the garbage. Also, we do not disrupt the deadlines for the completion of work, we do everything efficiently and politely. At the time of our work, there is no need to stop the work of the office (or any room) - we can work on weekends, evenings and nights, and we also adjust the creative process of creating a mural to the specific tasks of the project. nine0003
Acceptance of painting and payment of the balance. Upon completion of our work, we will notify you of the readiness of the painting for acceptance. You look at everything and, if you like everything, we sign the acceptance certificate, and you pay the rest of the amount for our work.
6. How much does wall painting cost?
The cost of the entire painting is calculated from the cost per square meter, depending on the complexity and care of the details. Our prices can be found in the PRICES section. nine0003
7. Do you need artists to join your team?
No. We are currently not recruiting artists.
8. What objects do you paint?
We are engaged in interior and (in the warm season) outdoor art painting. We paint all types of objects - commercial and residential: apartments (living rooms, bedrooms, kitchens, hallways, bathrooms, balconies, loggias, etc. ), houses and cottages, swimming pools, billiard rooms, bars, restaurants, office spaces, cafes and much more other. nine0003
Our work is the creation of works of monumental art.
9. May I ask you a question?
Of course! Write, we will try to answer.
But first look at the comments below, maybe your question has already been discussed in the discussion:
style directions, basic materials and workflow nine0239 0 Comments
The world of modern design offers unlimited possibilities and a lot of options for creating a unique interior with unusual ideas. One of the most interesting ideas is wall painting in the interior. This is one of the most aesthetic, unique and unusual types of processing and decoration of walls in rooms.
Basic styling
Wall painting is not suitable for all styles. Before planning the implementation of such a design solution, you need to decide on the basic concept of the room. Below are the main directions that allow the decoration of the walls in the room. nine0003
Classic
This style does not lose its relevance, regardless of the change in fashion trends, and is considered one of the most sought after. The main features of the classics: restraint, straightforwardness of forms, a harmonious combination of details and a calm atmosphere.
The room, decorated with a classic idea, is distinguished by smooth walls, clearly defined silhouettes of details and restrained tones of noble shades. Wall painting perfectly matches the general concept of the classics. As for the plot, it is best to choose a realistic landscape or still life. nine0003
Despite the fact that the classics belong to conservative trends, this style is distinguished by a variety of forms, techniques and color schemes.
Baroque
The Baroque trend was the next stage in the development of classicism. Characteristic features of the Baroque style: pomposity, pretentiousness and, to some extent, excessive luxury. Unlike the classics, which are characterized by rigor and restraint, baroque demonstratively emphasizes wealth, and the immoderate magnificence of decoration can be traced in every detail. Ornate patterned compositions, ornaments replete with small details, and floral designs with lush flowers are suitable for painting walls for a baroque interior. nine0003
Empire
The Empire style is the final stage in the development of classicism. It is a harmonious combination of imperial luxury and classical restraint. Picturesque interior design can reflect an eclectic concept, that is, a combination of elements from different directions. For this direction, images of monumental structures of ancient architecture, as well as fairy-tale characters borrowed from other cultural movements, such as griffins, sphinxes or centaurs, are suitable. The combination of realism and fairy-tale motifs fits perfectly into the concept of this style. It is important not to overdo it, as an excessive abundance of bright details breaks the harmony and visually reduces the cost of the design. nine0003
Arabic style
Interior design in this style is able to convey the charming atmosphere of the East and the originality of the Arab culture. The main features of this direction: the absence of images of animals and people. This stylistic trend is dominated by geometric and floral ornaments and ornate complex patterns that have a certain rhythm.
Modern
The design of the walls in the Art Nouveau style is not to be confused with other areas. This style is characterized by the presence of living elements. One of the main distinguishing features is the harmony of complex plant motifs with wavy lines and fantastic creatures. The color scheme should include only natural simple tones. Art Nouveau perfectly combines the desire for simplicity and rationalization with elegance and graceful subtlety. nine0003
In addition to this direction, there are many modern styles. For each of them, a certain design solution is suitable.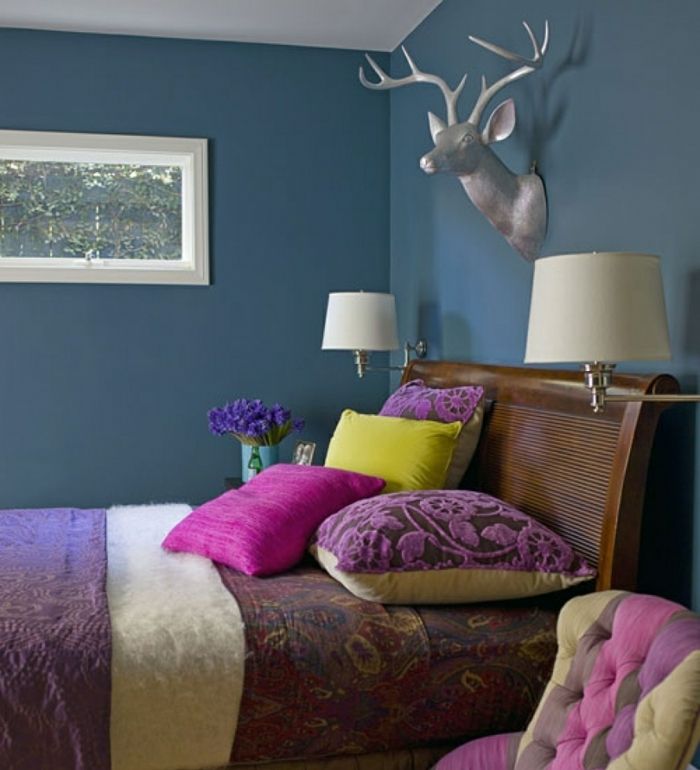 For example, if we are talking about painting walls in a futuristic style, you can depict a space plot with a 3D effect, and in a high-tech room, abstract art or a cityscape depicting skyscrapers and a freeway would be quite appropriate.
Basic wall painting technologies
Modern masters are practically unlimited in the choice of directions and painting techniques. The most popular technologies are: nine0003
-
airbrushing. In this case, the images are applied using an airbrush that sprays paint. This technology allows you to apply the thinnest layers of paint and make the most smooth color transitions;
-
Fluorescent painting involves the use of special paints that will glow with ultraviolet radiation. The artist has at his disposal not only a huge palette of shades, but also the ability to create amazing illusions and effects. This technology allows you to convey the realism of the reflections of the night city and the restrained moonlight, as well as to give a more pronounced relief to any landscape; nine0003
-
fresco is one of the most famous technologies that came from antiquity.
 The main feature is the painting on the damp surface of the wall. Painting is distinguished by expressive texture and high strength;
 -
volumetric wall painting allows you to visually expand the room and create the effect of "broken space". The rooms decorated in this style are unique. This technique allows you to imitate any architectural objects, giving them an unusual concept: a staircase hiding in the sky, a balcony overlooking the universe and much more. The main feature is the realism of an unusual fantasy story; nine0003
-
screen painting is available to absolutely everyone. To apply ornaments through a stencil, it is enough to have minimal skills in working with paints;
-
Acrylic paints are one of the most popular methods for decorating a space. Paints have a lot of advantages: they dry quickly, have no smell, are easy to apply and retain a rich color even under the influence of sunlight. Painting the walls in the interior with acrylic paints will require a certain skill.
 nine0003
What you need to paint the walls with acrylic paints
Before proceeding to the creative stage, you should prepare the surface. First, the wall should be cleaned of materials used in the previous finishing process, and a layer of primer should be applied. After careful sanding with sandpaper, acrylic primer should be applied.
Then you should choose suitable brushes of different thicknesses. Squirrel, pony and cow ear brushes are preferred. You will also need a simple pencil to draw the initial sketch. nine0003
After that, you can start applying the paint layer. You should buy a can of white acrylic wall paint and dyes. A water emulsion is used as a diluent.
The final step is applying varnish. This will give the creation wear resistance and durability.
Wall painting in the interior is a great way to create something unusual and unique. The main wishes for the picturesque design are compliance with the general concept of the design of the room, a sense of proportion and the ability to place accents.