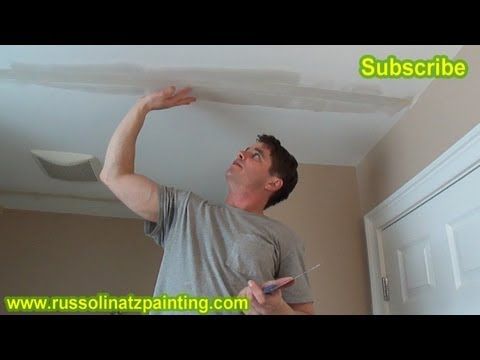
Repairing ceiling cracks in drywall
How to Fix a Crack in the Ceiling
By
Lee Wallender
Lee Wallender
Lee has over two decades of hands-on experience remodeling, fixing, and improving homes, and has been providing home improvement advice for over 13 years.
Learn more about The Spruce's Editorial Process
Updated on 12/21/22
Reviewed by
Deane Biermeier
Reviewed by Deane Biermeier
Deane Biermeier is an expert contractor with nearly 30 years of experience in all types of home repair, maintenance, and remodeling. He is a certified lead carpenter and also holds a certification from the EPA. Deane is a member of The Spruce's Home Improvement Review Board.
Learn more about The Spruce's Review Board
The Spruce / Kevin Norris
Project Overview
While it can be alarming to look up and see cracks in the ceiling, not all cracks indicate serious structural problems. Cracks in the ceiling are a common occurrence, and often their impact is more cosmetic than structural.
Learn how to differentiate minor ceiling cracks from more serious cracks that need immediate attention. Plus, find out how to fix a minor crack in the ceiling from below, without doing major drywall work.
What Causes Cracked Ceilings
Damage From Above
Ceilings aren't just the room-facing part that you see most of the time. Ceilings have a top side, as well. Up in the attic, the ceiling is usually unprotected. With just loose-fill or fiberglass insulation over the drywall, the drywall is prone to damage from anyone who moves around or anything heavy that drops.
Improper Taping Joints
Long, straight cracks that follow the direction of the joists are often the result of improperly taped drywall seams. The tape may not have been applied well before it was covered up with additional joint compound.
Water Damage
Water from the roof, flashing, or vents may leak down onto the top of the drywall ceiling.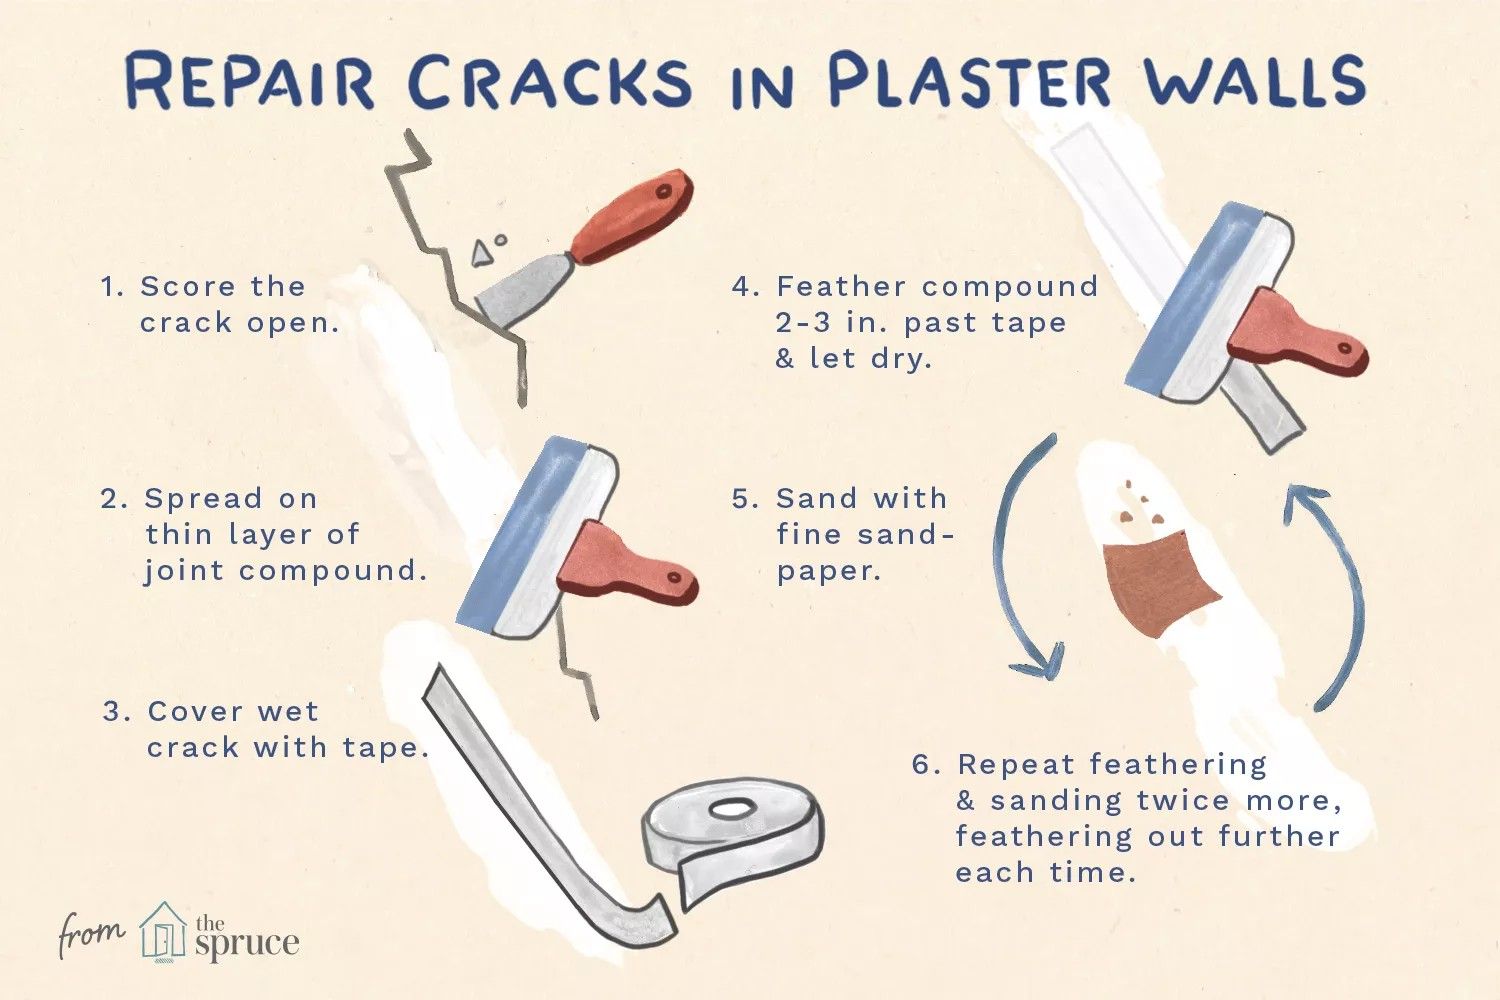 Water damage may manifest itself as yellow or brown stains or as bubbled paint. Cracks are often part of water damage, as the water may leak into the seams between drywall panels and loosen the joint tape.
Structural Damage
While foundation settling is to be expected, structural damage isn't. A home's structural damage can begin in the basement, with the joists, beams, foundation wall, band joist, and sill plate. Working upward, damage can affect windows and doorways, walls, and then eventually the ceiling.
How to Know If a Ceiling Cracks That Are Serious
Long ceiling cracks that run in continuous lines, especially those that match up with wall cracks, often indicate serious problems. The issue, then, goes far beyond the crack. It's a foundation problem, with the ceiling crack being only a minor byproduct. With this type of problem, you will usually have doors that stick in their doorframes and windows that open and close with difficulty. In some cases, the effects are even seen on the exterior, with gaps developing between the house and masonry staircases, pathways, or patios.
If the ceiling crack is accompanied by a significant bow in the ceiling, this usually means a serious problem from above: the attic joists or trusses.
Safety Considerations
When moving around in the attic, be careful not to step on the drywall between the joists. Attic insulation called vermiculite may contain asbestos. If you see small grayish silver or brown pebbles, call an asbestos mitigation company for testing and removal.
Equipment / Tools
- Utility knife
- Five-in-one tool
- Putty knife
- Drywall knife
- Sandpaper
- Paint roller and tray
- Drywall jab saw
- Drill
- Circular saw
- Ladder
Materials
- Drywall joint compound
- Paper drywall tape
- Primer
- Ceiling paint
- 1/2- or 5/8-inch drywall
- 1/2-inch plywood
- Drywall screws
The Spruce / Kevin Norris
How to Fix Minor Ceiling Cracks
-
Clean Ceiling Crack
Use the utility knife and five-in-one tool to pry off loose paint and drywall compound.
 Remove old mesh or paper tape, too. Work lengthwise with the crack, not sideways.
 The Spruce / Kevin Norris
-
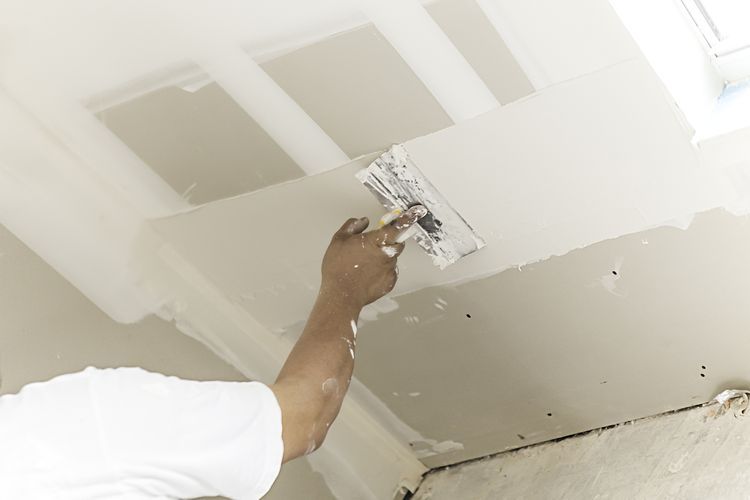
Spread Joint Compound
With the drywall knife, spread the joint compound on the crack. Spread about 3 inches wide. Spread thinly.
The Spruce / Kevin Norris
-
Apply Tape
Apply the paper tape to the wet joint compound. Center the ceiling crack with the tape, as much as possible. Press the tape with the drywall knife.
The Spruce / Kevin Norris
-
Apply Joint Compound
Apply a thin layer of joint compound over the tape. Feather out the edges to cover up the edges of the tape.
The Spruce / Kevin Norris
-
Touch up Joint Compound
After the joint compound has dried, sand off any high spots. Touch up any missing areas of the joint compound. This may require a full second coat. Allow to dry and sand to smooth.
The Spruce / Kevin Norris
-
Prime and Paint
After the joint compound has dried, prime the area, then roll on ceiling paint to match the existing ceiling paint.

The Spruce / Kevin Norris
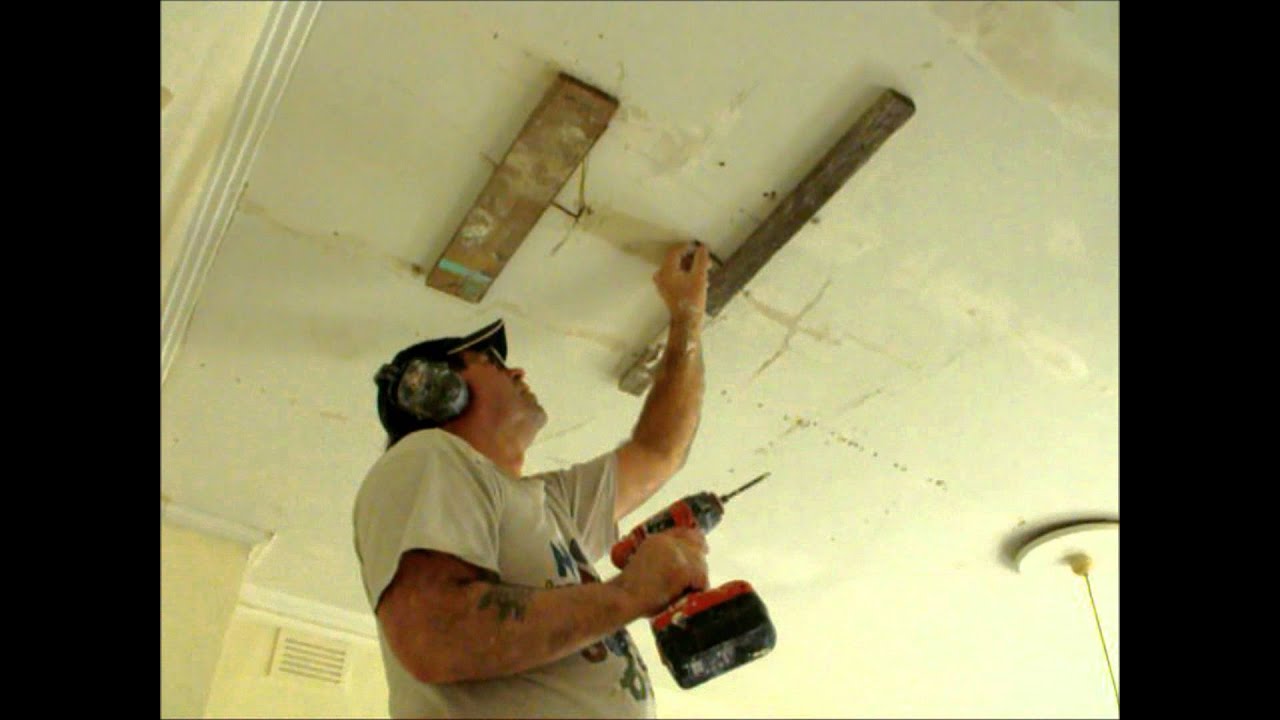
How to Fix Major Ceiling Cracks
-
Clear Attic
To fix major ceiling cracks, you need to access the attic. Attic access doors are usually found in bedroom closets, hallways, or garages. With the flashlight, find the area of the crack. Clear loose-fill or fiberglass batt insulation.
The Spruce / Kevin Norris
-
Cut out Cracked Drywall
Use a drywall jab saw to cut out the area of the crack, plus 1 to 2 inches beyond the crack.
Tip
It's helpful to cut a regular shape with parallel sides (such as 6 inches wide by 48 inches long) rather than irregular shapes that follow the crack.
The Spruce / Kevin Norris
-
Measure Joists
Before leaving the attic, measure the distance between the joists. On most homes with joists spaced 16 inches on-center, the distance should be 14 1/2 inches.
The Spruce / Kevin Norris
-
Create Plywood Backer Board
Below, cut 1/2-inch plywood 14 1/2 inches wide by the length of the hole you created in the drywall plus 3 or 4 inches extra on both ends, up to 8 feet.
 Add extra plywood if necessary.
 The Spruce / Kevin Norris
-
Cut Drywall Replacement Section
Use a utility knife to cut out 1/2-inch or 5/8-inch drywall to match the thickness of the existing drywall. Cut a piece to fit the ceiling cutout.
The Spruce / Kevin Norris
-
Place Plywood Backer Board
Move the plywood backer board into the attic and place it over the cut-out area. Temporarily place a heavy item on the board before you go downstairs. The heavy item will hold the plywood in place while you drill from below.
The Spruce / Kevin Norris
-
Attach Replacement Section
From below, screw the drywall replacement section onto the plywood with drywall screws. Install additional screws through existing drywall and into the extra plywood backer at each end.
The Spruce / Kevin Norris
-
Finish and Paint
Finish the edges of the repaired section with drywall tape.
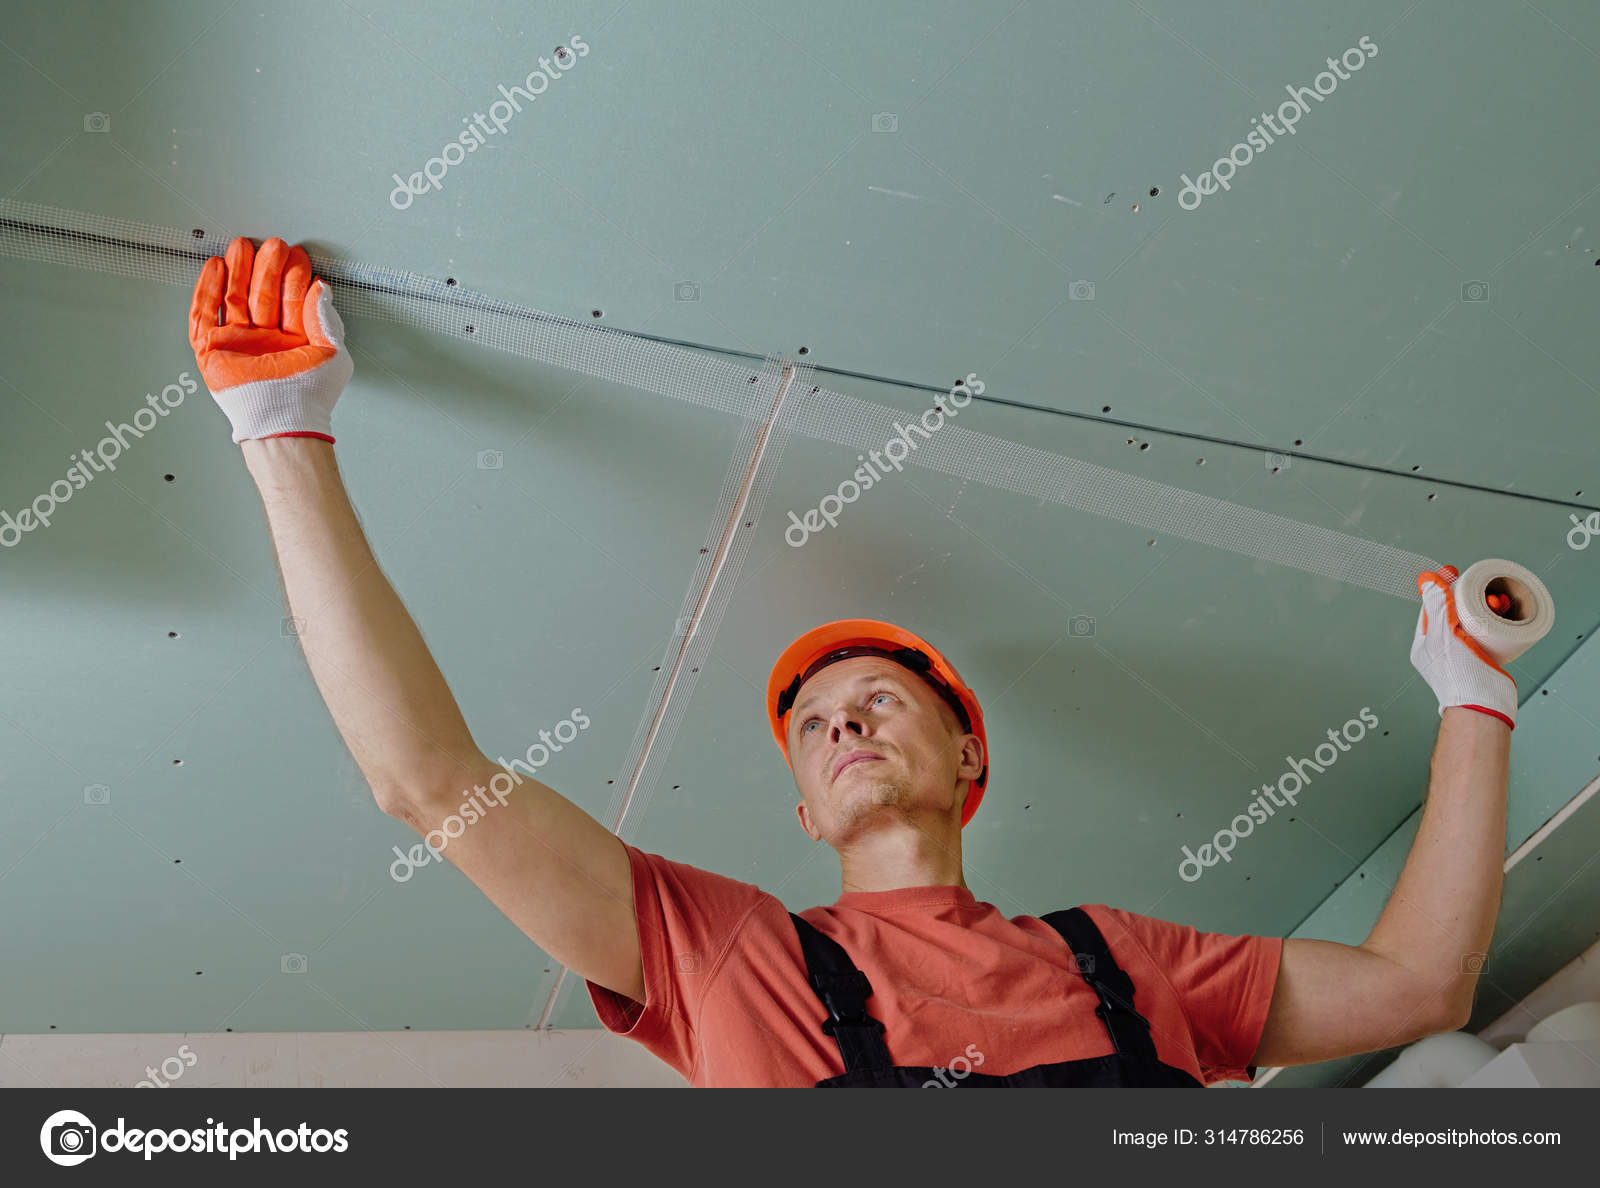 Apply joint compound to cover the edges. Sand. Roll primer over the patch, then paint to match the ceiling paint.
 The Spruce / Kevin Norris
When to Call a Professional
Call a foundation repair company or general contractor if you suspect that the home has foundation damage or damage to the rest of the house.
The Do’s and Don'ts of Ceiling Repair
istockphoto.com
Cracks appear in drywall and plaster for several reasons, from normal settling of the house, to faulty workmanship, roof truss uplift, or water leaks. While repairing cracks on walls is pretty straightforward, it’s a bit more complicated with ceilings, which typically have some type of texture applied and are overhead, making the repairs a (literal) pain in the neck. By following a few time-honored techniques, a savvy homeowner can often successfully repair cracks in ceilings without too much trouble. The trick is knowing what to do first, what tools to use, and recognizing whether it’s time to call in the professionals.
DO pinpoint the cause of the crack.
Sometimes, the cause of a ceiling crack is apparent, such as visible water stains on the ceiling, which indicates a leak caused the joint compound to soften and crack. A delicate spider web of hairline cracks is often the result of applying joint compound too thickly, which resulted in shrinkage and the development of cracks as it dried. Before tackling this ceiling repair, correct the cause of the cracks, such as fixing leaks to prevent cracks from recurring.
DON’T proceed without a plan.
Depending on the type of ceiling texture and the extent of the crack, ceiling repairs might involve removing some of the texture to make the repair and then patching the ceiling with a product that matches the rest of its surface. Rather than smearing some spackle into the crack with a finger (which sometimes works!), consider whether retexturing or painting will be necessary to give the ceiling a finished look after the crack repairs are complete.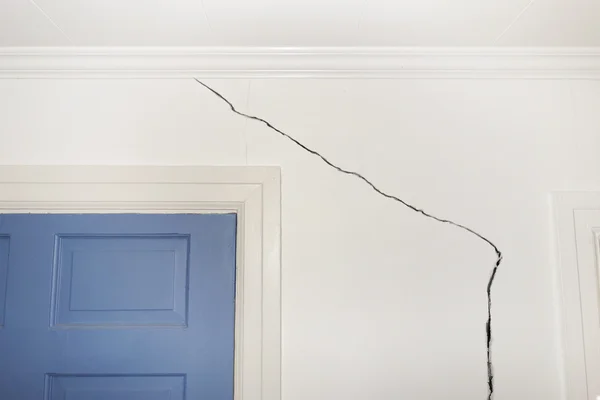 For the best results, consider all aspects of the project and the desired outcome.
RELATED: 9 Ceiling Types You’ll See in Homes
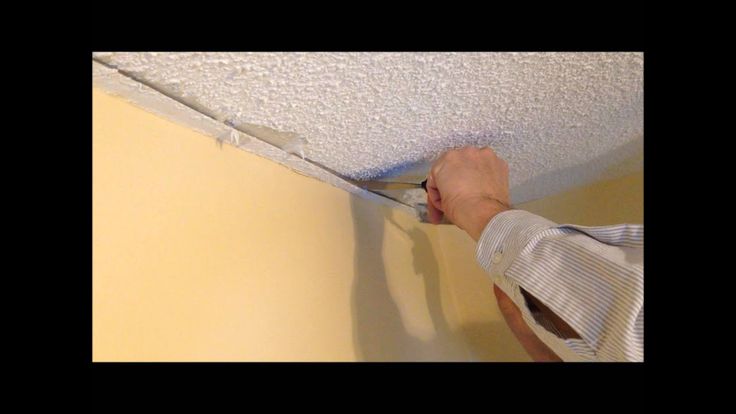
DO consider popcorn ceiling removal.
All the rage in the 1960s and 70s, popcorn ceilings that still survive today are often dust and grime collectors, and any type of crack repair is likely to stick out like a sore thumb. Since this type of ceiling can actually reduce a home’s market value, this may be an excellent time to get rid of the texture or cover it up with drywall panels or rigid foam panels. Popcorn ceilings installed before 1978 may contain asbestos, so it’s vital to find out what type of popcorn texture is on your ceiling before making repairs. It’s usually better to have an asbestos-remediation expert remove a popcorn ceiling that contains asbestos.
istockphoto.com
DON’T cheap out—buy the right tools for ceiling repair.
If the crack is a very thin hairline—and it’s been there for a while—odds are you can simply put a little spackling on a finger and smear it carefully into the crack, taking care to wipe away residue from the surface.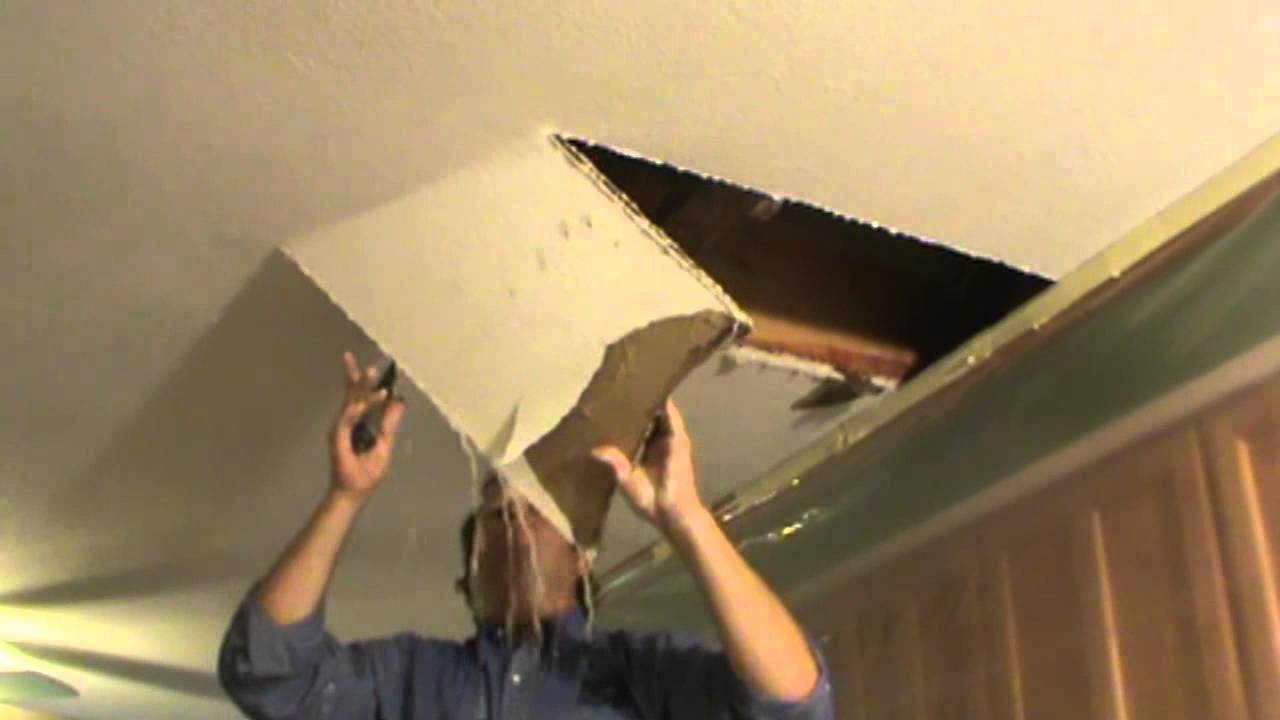 More often, however, the crack will be larger, or the ceiling will have multiple cracks. When this is the case, using the right tools and materials will provide the best results. A 6-inch taping knife works well for removing loose ceiling texture and peeling paper. A small tub of premixed drywall mud is necessary for filling the cracks, and using mesh or paper drywall tape to reinforce the compound is helpful. A drywall sanding sponge comes in handy for smoothing the surface after the mixture dries.
istockphoto.com
Get a pro to do it for you
Receive free, no-commitment estimates from licensed contractors near you.
Find local pros
+DO protect the walls and floor.
Wet drywall compound has a way of dripping everywhere when you’re working overhead, so take steps to protect walls, the floor, and any other items in the room. Lay down a canvas tarp on the floor (plastic drop cloths can become wet and dangerously slippery), and cover any furniture with lightweight plastic drop cloths to avoid ruining them.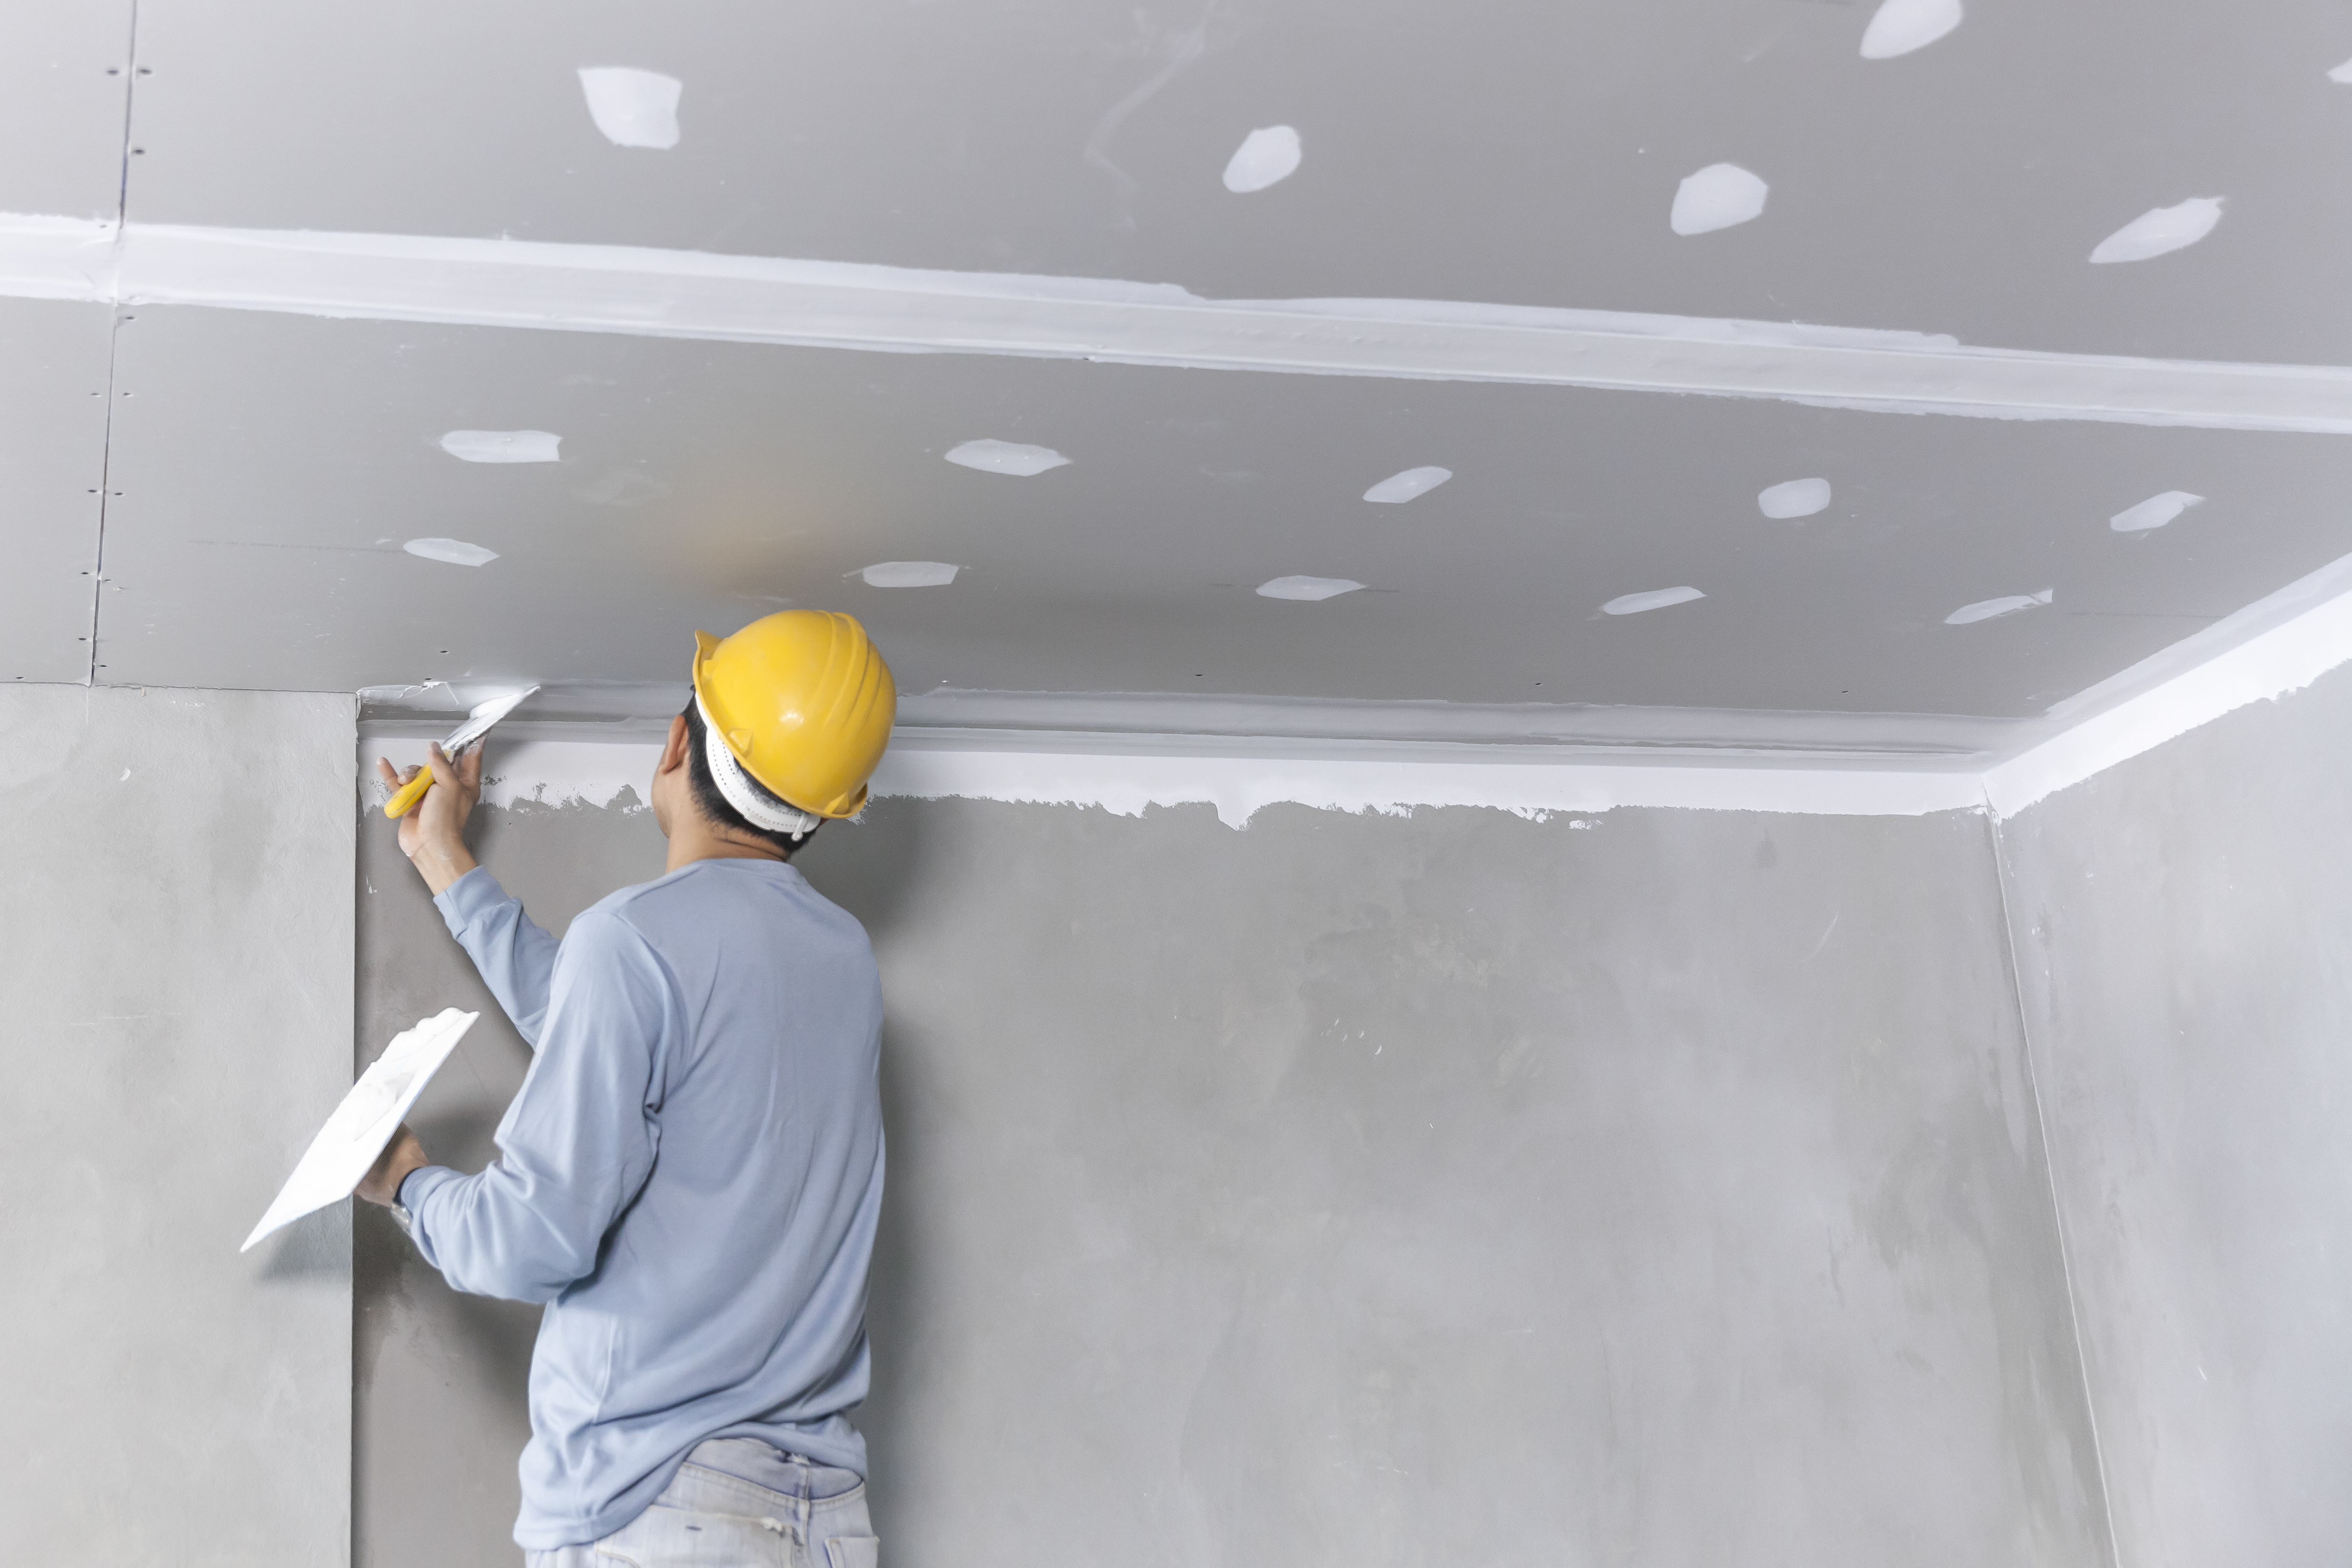 If the ceiling crack is near a wall, consider covering the wall with a plastic drop cloth to keep splatters off.
DON’T shorten time for drying.
Ceiling crack repairs made with wet drywall compound should be completely dry before another coating is applied. The general rule-of-thumb here is to apply the mixture in the thinnest coat possible, making sure to remove excess with a taping knife. When completely dry, the compound will turn a bright white color. At that point, it can be sanded down and recoated.
DO try a flexible patching compound.
If you’ve repaired a crack in ceiling drywall before, only to have the crack reappear a few weeks or months later, consider sealing the ceiling repair with a flexible product such as Elastopatch Smooth Flexible Patching Compound (available from Amazon). Rather than applying standard paper or mesh drywall tape to the crack, brush on a thin coat of Elastopatch with a small brush—directly over a crack that’s been filled with compound or spackling and then sanded smooth. One or two coats of Elastopatch is all it takes to form a flexible seal over the repaired crack.
DON’T forget to stay safe.
Sanding drywall compound can create billows of dust, and a DIYer should wear a dust mask in addition to eye protection before tackling the task. In addition, when working overhead, use only a sturdy step ladder (no wobbly chairs or stools) in order to reach the ceiling.
istockphoto.com
RELATED: 11 Breathtaking Ideas for a Wood Ceiling
DO add a finishing touch.
Repaired cracks can look nearly as bad as the cracks themselves if the repairs don’t match the rest of the ceiling. Ceiling patch repair products are available in sprays and semi-liquids for applying with a sponge—be sure to get one that matches the ceiling’s texture. Painting the ceiling is also an option, in which case, look for a high-hiding ceiling paint in a neutral color.
DON’T skip other ceiling updates.
Once the ceiling repair is complete and the ceiling texture has been patched, a dated light fixture or a rusty return-air vent can mar the new look. Consider replacing an old light fixture with a new one, and replace an old vent—or at least clean it and give it a fresh coat of paint—to give the whole room a fresh new look.
istockphoto.com
Get a pro to do it for you
Receive free, no-commitment estimates from licensed contractors near you.
Find local pros
+ 90,000 from the ceiling, walls and joints, how to close up, how to avoid cracksContent
- Why are cracks on drywall
- than to cover the cracks in drywall
- How to fix cracks on a plasterboard
- 9000
- How to fill a crack on plasterboard ceiling
- How to fix a major crack in a ceiling
- How to fix a crack in a drywall wall
- How to fix a crack in a drywall joint
- How to fix a hole in drywall
- How to avoid cracks in a drywall ceiling
- Expert Tips
- Conclusion
Finishing the walls and ceiling with plasterboard sheets is good for everyone The perfect geometry transforms an old room into a modern one. As soon as it comes to repair and finding a solution to the problem, how to fix cracks in the drywall ceiling, a slight panic begins. Nevertheless, the solution to the problem is possible, but some experience with gypsum and putties based on it will be required.
Why drywall cracks appear
There can be several reasons for damage to the cladding. Most often, cracks on a plasterboard ceiling appear as a result of:
- Mistakes made when planning the ceiling finish;
- Violations of the technology of laying drywall on the ceiling;
- Wall shrinkage processes, ceiling deformations;
- Violations of drywall manufacturing technology.
The last point is the most critical, if the ceiling finish begins to crack, even when unloaded, then repairing cracks in drywall becomes meaningless. In such a situation, it is necessary to completely remove the finishing material, correct the shortcomings of the mounting profile and re-lay sheets of better material.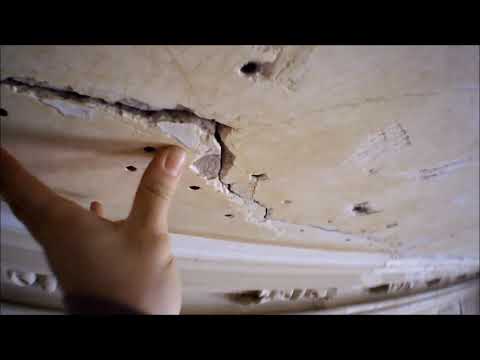
The situation with house shrinkage is considered to be difficult.
In this case, the most stressed sections of the ceiling lining must be removed to keep them intact. Sometimes, in order to prevent cracks from spreading, you have to cut and remove entire sections of drywall on the ceiling. Only upon completion of shrinkage, it is possible to look for areas of "bullying" of wall mounting profiles and deformation of the frame on the ceiling.
How to cover cracks in drywall
The most unpleasant quality of gypsum is its fragility. If a crack appears in the cured gypsum stone, it will spread from edge to edge, just as any non-ductile material bursts.
Drywall is in the best position, the sheets are coated with thick paper to prevent the formation and spread of cracks on the surface of the ceiling. It is possible to cover up drywall gaps, but without restoring the protective coating, the problem can only be removed for a short time.
Sometimes it is not possible to remove and replace the ceiling finish for technical reasons, in this case it is possible to temporarily seal the gaps with:
- Finishing putty with plasticizer and fiber.
 It is better to use Ceresit or Knauf with increased adhesion;
 - Acrylic sealant;
- Decorative plaster.
The latter option is generally considered stock, but the composition of the decorative plaster mixture includes separate components that increase strength and adhesion. Therefore, the material has high ductility and strength. In some cases, it is many times better than special gypsum putties.
You can also use a specialized compound from Knauf. Fugenfüller plaster mass is designed specifically for sealing joints at the joints of drywall sheets. The seal is sufficiently ductile and at the same time fluid to penetrate into the thinnest cracks.
A crack can only be repaired with ordinary plaster or alabaster for a very short time. A small temperature drop will cause the repair material to quickly fall out of the crack.
How to fix drywall cracks
Before attempting to repair damage to the ceiling, a little preparation needs to be done.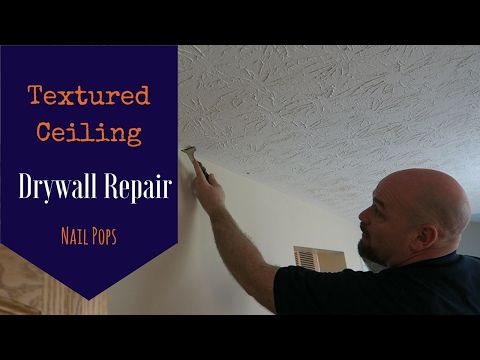 A chance to fix a crack in a drywall ceiling will only appear if its propagation is stopped.
If the line has reached the edge of the drywall sheet, then in this part we simply temporarily seal it with adhesive tape, after which we look for and find the end of the crack. With a thin drill with a diameter of 3 mm, we drill the stop point of the damage line.
Cutting the damaged area
The next step is to increase the width of the crack, that is, to perform its cutting. This is a fairly simple procedure that requires accuracy and patience. Just like that, covering the damaged area with putty and thereby fixing the crack on the plasterboard ceiling will not work. Firstly, the viscous material will not penetrate deep into the crack, and secondly, the drywall material will quickly pull water out of the repair compound, and the strength of the seam will turn out to be quite low.
Cut with a thin, sharp knife. The edges of the crack expand up to 3-4 mm and increase the slope of the walls up to 60 to . After cutting, the cross section of the crack acquires a wedge-shaped shape.
If possible, it is best to carefully remove the drywall sheet from the supporting frame. In this case, you can perform a similar cut on the reverse side of the sheet. Double cutting is considered more convenient and reliable.
How to fix a crack in a plasterboard ceiling
It is more difficult to remove a crack from a ceiling than from a wall, and even more so from the surface of a drywall sheet that has been removed and laid on a table. The repair problem lies in the fact that even after careful sealing and coating with a repair compound, the putty material will remain in a plastic state for quite a long time, 20-30 minutes. Therefore, the laying of gypsum putty will move away from the surface of the drywall.
Important! The place of damage must be primed and dried for at least 12 hours.
Repair is usually carried out in two stages. Initially, a putty mass is laid in the crack, it is carefully pressed through and rubbed with a spatula. Immediately, without a pause, a thin ribbon, 4-5 mm wide, is cut into the crack, cut off from the masking grid of the sickle. The edges of the laid ribbon are sealed into drilled holes at the ends of the crack.
After approximately 40 minutes, the lubrication procedure must be repeated. First you need to remove the remnants of the old mass remaining at the edges of the groove. After that, a fresh layer of repair putty is applied and another tape is laid, this time at least 40 mm wide.
After the repair mortar has dried, the damaged areas are puttied again, this time using the finishing compound. And finally, in order to remove traces of repair, the drywall surface is polished with a thin emery mesh.
How to remove serious cracks from the ceiling
A small crack 20-30 cm long is not a particular problem, it is easy to seal it up or even repair it with Liquid Nails, acrylic Moment or any other similar material.
Most often, the situation with drywall on the ceiling is much more serious.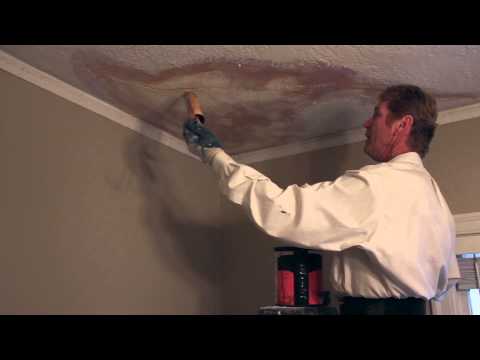 If the house is wooden, built on a "quicksand", or the gable roof on the box of the building is set incorrectly, then the ceiling will be twisted regularly. As a result, drywall on the ceiling will periodically creak and crack.
The length of such damage can be on average from 30 cm to 1.5 m. In this case, sickle and putty simply will not help, their strength will not be enough to remove or compensate for the stress in the thickness of the drywall.
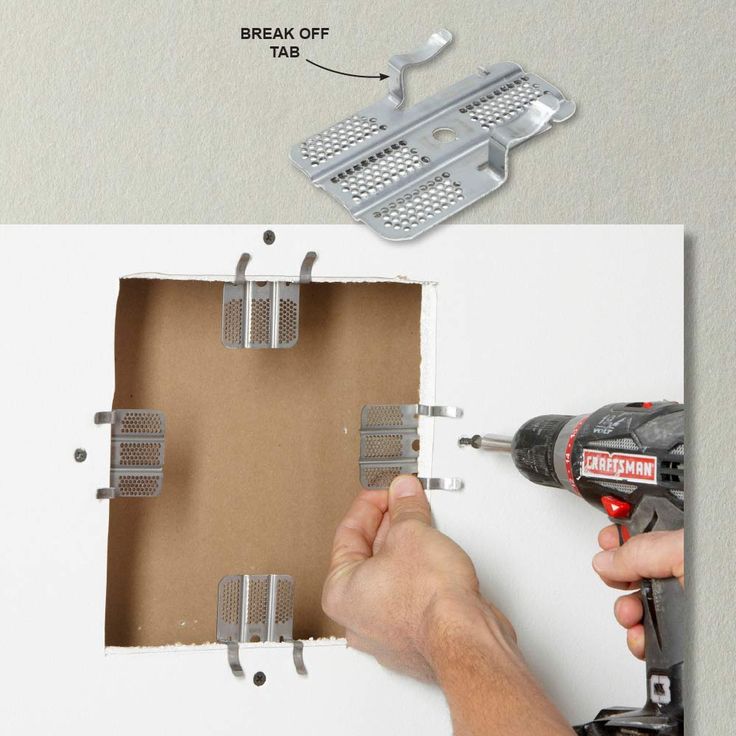
In this case, a crack in the plasterboard ceiling can be removed with a special reinforcing tape of the “American” type. The presence of double-row perforation along the side edges and a very dense, durable base easily withstands the strongest loads. "American" is very convenient when working with drywall in cases where you need to remove damage or repair joints.
Before laying the material, the crack must be glued with a gypsum-based mass with the addition of acrylic. Alternatively, you can use any suitable adhesive, but always on an acrylic basis. The damaged place on the ceiling is rubbed with an adhesive mass, then you can apply finishing putty and sculpt a reinforcing tape.
How to fix a crack in a plasterboard wall
It is quite possible to repair damage to the surface of plasterboard walls using the same method as in the case of repairing the ceiling. In a similar way, drilling and cutting of cracks is performed, and since the wall drywall is thicker than the sheets for the ceiling, it is desirable to make the groove larger, about 1.5-2 cm wide.
Many craftsmen, after applying a primer to the inner cavity of the groove, perform the so-called gluing, that is, acrylic glue is applied in small dots in depth along the entire crack, in increments of 10-15 mm. It is impossible to completely glue a crack on the wall. Sizing is done in order to remove stress in the material. The adhesive has a higher ductility, so most of the load will be transferred through the inner joint.
After the adhesive has dried, fill the groove with a small amount of filler and dry thoroughly.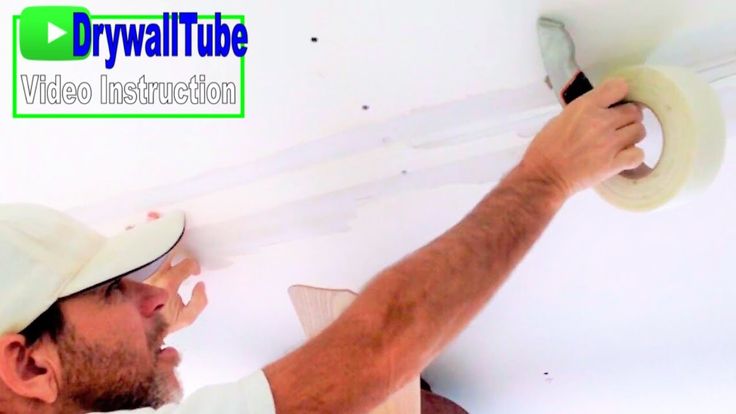 It is primed, and after 4-5 hours it is possible to apply the main layer of the repair mass with the laying of the sickle tape.
How to Repair Cracks in a Drywall Joint
Damage to the joint between two drywall sheets is considered to be one of the typical failure situations in a cladding. A certain number of self-tapping screws are screwed into the material, which weaken the edges of the drywall. If the carrier profile is also laid incorrectly, then even with a little effort, the edge may simply crack, or even fall off from the main part of the sheet.
In order to remove such damage, it is necessary first of all to cut the joint, that is, cut off a part of the sickle with a knife and remove the putty mass of the joint.
Carefully cut the edges of the crack, trying to make the groove deep enough to lay the maximum amount of putty. We blow and free the damaged area from gypsum dust, prime with acrylic, as in the previous case.
The edge crack at the joint is considered very difficult to repair the ceiling or walls, so it is not possible to solve the problem with putty alone.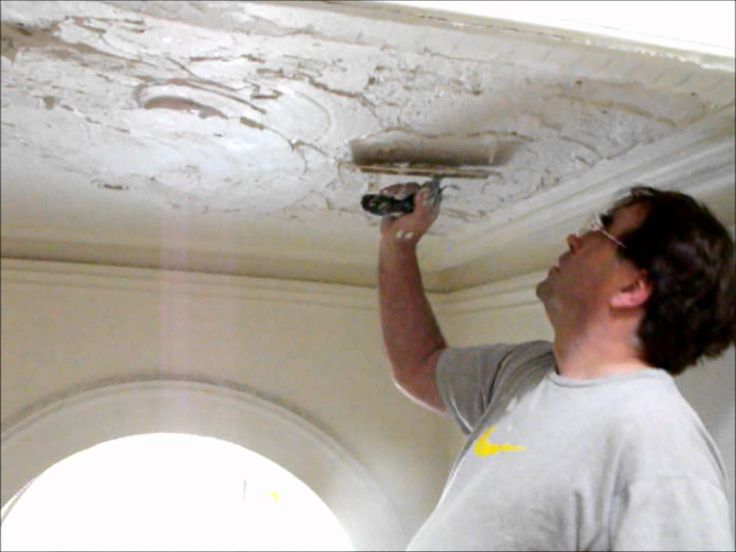 For example, many craftsmen prefer to cut a crack to a through state with consistent sizing of the bottom with silicone.
Next, you need to remove the remnants of the sealant, and glue the rest with acrylic with a sickle seal on the finishing putty. Upon completion of the work, the surface of the drywall must be reinforced with a fiberglass sheet glued along the damaged joint.
Tip! If the crack is superficial, then you can generally limit yourself to surface grouting with acrylic Moment.
How to fix a hole in drywall
The choice of repair technology and materials for restoring through damage depends on the size of the hole and its location on the ceiling or wall.
A small hole from a hit by a tool or a misplaced nail, repaired with conventional acrylic sealant. In this case, it is acrylic material that is used, since the seam after drying can be painted in the color of the main surface of the drywall. If you try to remove a hole from the ceiling with silicone, then the damage will be clearly visible even after several layers of primer. It will be almost impossible to remove traces.
Another thing is if the size of the hole is in the range of 3-5 cm. In this case, you can remove the hole as follows:
- Cut the edges with a utility knife, cut off paper, fibers and coating residue;
- The edge of the hole is well treated with an acrylic primer, remove the excess from the drywall, or a shiny spot will remain;
- Spots of damage are rubbed with joint putty. It will be necessary to lay several layers and carefully pass with a spatula until the material completely fills the hole for the entire thickness of the drywall. Surplus to remove "under zero".
Carefully listen to the cork, then on the surface, using a blade, cut out a square of paper covering around the hole, a couple of centimeters larger than the damaged area.
Next, you need to clean the place, remove the remnants of the paper base, glue the freed surface and plaster the hole. If the hole in the drywall is located near the loaded area, then before sealing it is advisable to seal the square with a piece of fiberglass, and only then try to remove the traces of repair with putty.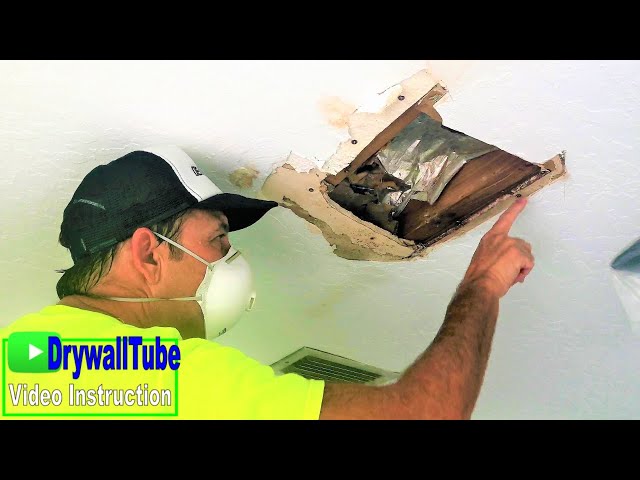
How to avoid cracks in plasterboard ceilings
Cracking in ceiling and wall materials is most often the result of improper installation of the supporting profile. As a rule, the number and dimensions of the galvanized U-profile and Omega side strips are taken in accordance with the standard recommendations of the manufacturers, but this is not enough for complex ceilings. The number of profiles and suspensions must be doubled.
If the house is built of wood, and no more than six months have passed since the completion of the work, then it is best to assemble the ceiling and walls according to a temporary scheme, with a minimum amount of fasteners and without grouting joints. It doesn't look very pretty, but it's the only way to identify and remove problem areas on the ceiling in the future. After a year, you can remove the temporary decor, strengthen the supporting profiles and lay the cladding on the ceiling.
Expert advice
Usually, in problematic areas, they try not to use drywall. If the choice has already been made, then it is best to take a heavier and thicker wall plasterboard sheet, and at least double the number of supporting profiles. In this case, the joints between the sheets should be immediately sealed not with a sickle, but with a denser "American".
Conclusion
Fixing cracks in plasterboard ceilings is easy, but that's not the point. The very fact of cracking of the material already indicates that serious miscalculations were made in the choice of finishing scheme. Therefore, in such a situation, it is best to first remove the cladding or consult with the craftsmen so as not to redo the cracked sheets on the ceiling again, at a loss.
- Do-it-yourself wall soundproofing
- How to clad walls with your own hands
- Wallpaper options for the kitchen with a photo
- Grouting ceramic tiles
Plasterboard Ceiling Cracks - Sealing Gypsum Board Surfaces
Although the completion of repairs is a welcome event, there is an opinion that repairs cannot be completed, they can only be temporarily suspended.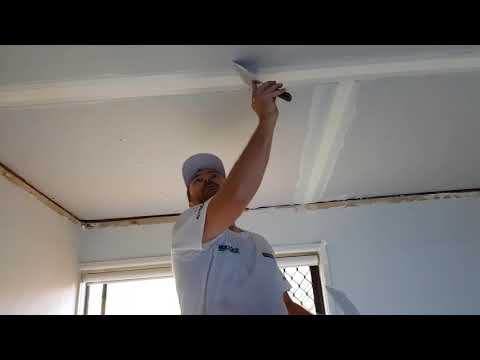 There is, of course, some truth in this, especially when the work is done in parts over several years. But here's the problem: the matter has not yet been completed, and the plasterboard ceiling, from which repairs usually begin, has begun to crack. This can be discouraging, because at first glance there are no visible reasons for such a phenomenon, and the craftsmen assured that the product would not fail. The situation can become even more complicated when the room has already been finished and everything is put in its place. It seemed that the hour had finally come when it would be possible to feel comfortable at home, and here it is. What to do if, just a few months later, clearly visible cracks appeared on the plasterboard ceiling? We will try to give an objective assessment of what happened and find a way out: what measures to take to eliminate the problem.
Causes of cracking on a plasterboard ceiling
We note right away that there may be several reasons for damage to the ceiling and not all of them can be eliminated.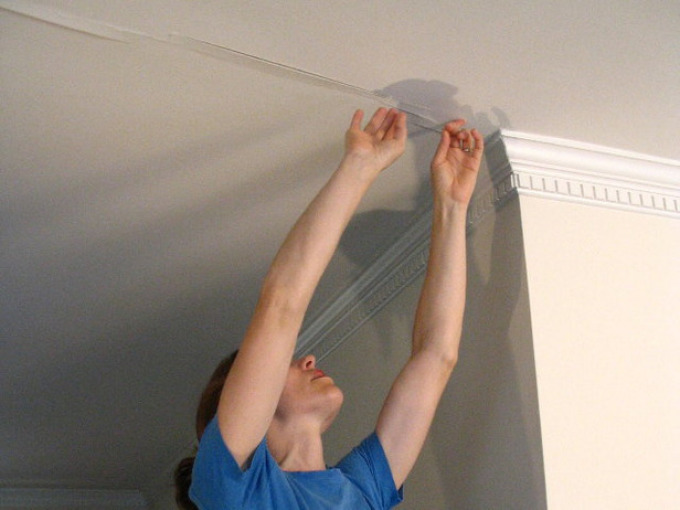 Let's pay attention to them in more detail:
Objective reasons
What they are:
- general shrinkage of the structure. Yes, this is indeed a problem, since it is far from always possible to foresee and prevent it. Perhaps your house or apartment is part of a newly erected structure, then the occurrence of shrinkage is not surprising. In such cases, it is better not to hurry with finishing work. If time permits, it is better for the new building to stand for a while, at least for a year or two, and then it will be possible to bring it into proper shape. In other cases, when shrinkage of the house occurs and many years after the start of operation, it remains only to restore the surface from time to time, maintaining its external and functional characteristics;
- small vibrations of structures caused by earthquakes. Sometimes we may not notice that something unusual is happening: a chandelier is swinging, furniture is shaking, etc.
 However, the ceiling is likely to react sensitively to what is happening and may crack. Although this rarely happens, this factor should not be discounted, especially in areas located close to seismic activity zones.
Subjective reasons
Their list includes:
- The sheets were installed on the frame without the necessary offset. In other words, the seams also have a through cruciform strike, while it was desirable to achieve the location of the gypsum plasterboard apart. In particular, this problem can manifest itself where the area of the ceiling surface is significant. Such a change in the seams can be caused even by ordinary external vibrations created by street transport;
- , when mounting the suspensions, they were fastened not with two, but with one self-tapping screw inserted into the central hole. Perhaps it seemed to the installers that the hangers were rigid enough and one fastener would be enough to fix them, or maybe it was a matter of haste or excessive savings.
 The suspension on one self-tapping screw gradually sags under the weight of the plate and can cause cracks. A loose ceiling also does not hold a dowel with a self-tapping screw built into it, which is why sagging is also possible;
 - the sealing of gypsum plasterboard tile joints on the surface is of poor quality. Sometimes they are not completely filled with putty mixture, as a result of which the sheet has a small space for displacement. A fully filled joint creates a monolithic joint that prevents cracking;
- no primer coat. Without a primer, the degree of adhesion of the putty to GKL decreases. And if there is dust left on the seams, sooner or later it will make itself felt;
- drywall joints on the canvas are puttied without reinforcing sickle mesh. The strength of the seams noticeably suffers from this and, in addition to cracking, they also begin to crumble;
- has not been chamfered. On the sides of the plates, as a rule, there are no technological recesses for applying putty, so you have to take a sharp knife with a hard blade or a special planer for plasterboard and chamfer at an angle of 45 ° along the entire length of the short side of the sheet.
 This also applies to working with slab fragments;
 - wood was used as the frame material. Although the use of wood is not prohibited, if at the time of installation it was damp or not treated with hydrophobic compounds, it can change its volume and length, causing longitudinal and transverse deformations. The use of a wooden frame is justified in dry, small-sized rooms. In rooms with a significant area, there is a high probability that the ceiling made of plasterboard on a wooden frame will crack;
- flooding from above. Yes, probably the most unpleasant thing that can happen in this case. Sometimes the amount of moisture leaking from neighbors is insignificant and it only slightly moistens the ceiling covering from above, without seeping through the thickness of the slab. But when the water dries, it can cause cracks to form on the drywall at the very seams. If the neighbors do not behave honestly, it is problematic to understand anything in this case.
Troubleshooting
Whatever the reason for the appearance of cracks on the plasterboard ceiling, you don’t want to put up with it for a long time.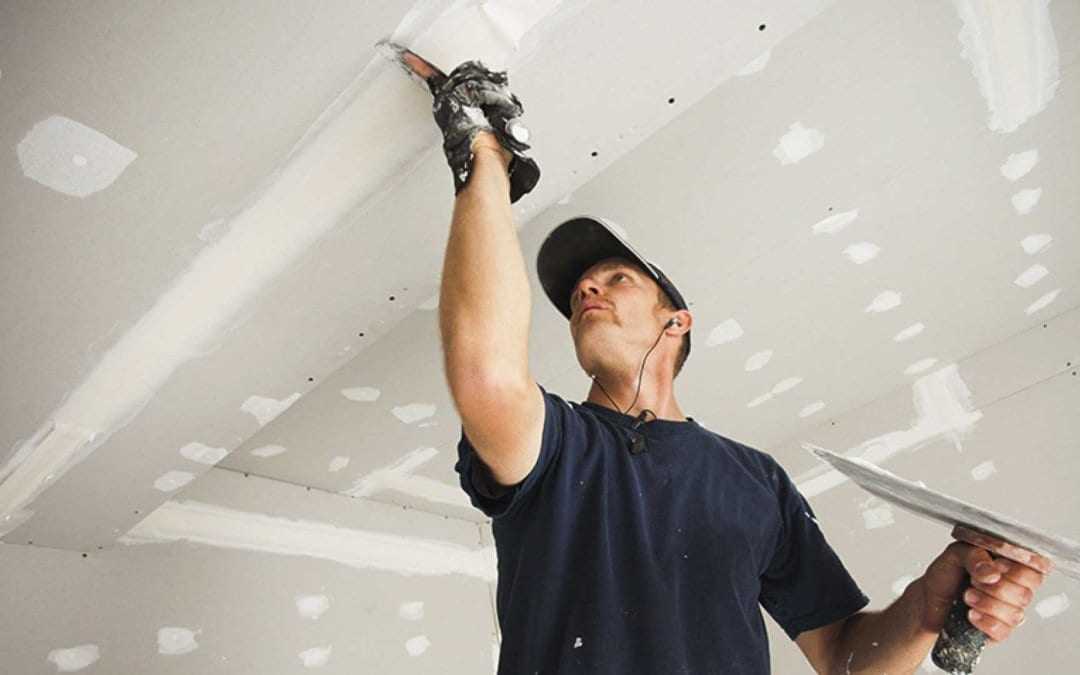 But before starting restoration work, you need to make sure that the cause of the problem is correctly identified, otherwise the situation may repeat itself.
First, let's check the condition of the coating. To this end, you can press it a little to the top in several places and determine if there is a large backlash and general sagging of the structure. If this is traced, then you need to come to terms with the fact that you will have to redo the entire surface. When the problem is local in nature, it will be enough to define its boundaries.
Materials and tools
When starting to repair the ceiling, you need to have on hand several spatulas of various widths, a construction knife, sandpaper, a grout board with a grit size of 220-360 and a screwdriver, in case you need to dismantle a damaged fragment of the coating .
Tip : We will use a primer liquid, a strong putty like Knauf Fugenfuller and a regular finishing putty like SatenGips as restorative materials.
Let's not forget about the paint, which should be enough not for some area, but for the entire ceiling, since local painting will most likely stand out from the rest of the coating. We will also prepare a paint roller and an appropriately sized paint tray.
Possible crack repair steps:
Cracks in plasterboard ceilings can range from simple to complex. If contour or cobweb-like cracks are observed in a separate area, it is better to completely dismantle it and examine the condition of the entire structure from the inside. If several ceiling hangers fall out, it is advisable to seal the holes for them or drill new ones next to them and securely fix them. And then screw the cut out fragment back, or replace it with a new one.
Starting the repair of the damage itself, do the following:
- we clean the seam with a knife and deepen it with a spatula for the entire thickness of the plasterboard;
- we remove the paint on both sides of the crack by 5-10 cm, and even more, since you will have to apply putty.
 The paint can be moistened with warm water and allowed to soak, and then removed with a spatula after 10-15 minutes;
 - interfering self-tapping screws can be unscrewed and screwed side by side, but so that they fall into the supporting profile;
- with a stiff brush, remove debris, dust from the seam and treat it with a primer;
- after the primer dries, prepare a sickle mesh and knead Knauf Fugenfuller. You don’t need to knead a lot, so you may not have time to work out the material until it sets;
- carefully fill the seam with putty and immediately lay a serpentine mesh on top of it, smoothing it with a spatula and slightly sinking it. Make sure that there is no excess putty in the seam, otherwise, after drying, a bump will form, on top of which there will be a mesh, which then, together with the bump, will have to be removed, violating its integrity;
- after the joint putty has dried, it can be primed again and allowed to dry;
- after removing coarse irregularities, we proceed to apply the final layer of putty.