Removing drain from kitchen sink
How to Remove Kitchen Sink Drain? (Step-by-Step Tutorial)
By Emma (Sunrise Specialty Staff)
Do you have a bowl under your kitchen sink drain to catch dripping water? We know that you understand that a container under the sink is not a plumbing design anywhere, not even in hell.
As homeowners ourselves, we correctly understand how irritation builds with the rising level of water in the bowl. We have seen frustration overflow from keeping an eye to ensure the bowl does not overflow.
In this DIY guide, you will learn the ten steps to remove a kitchen sink drain and install a new one to replace it.
Tools and Supplies
- A basket or wrench
- A pair of pliers
- A kitchen sink drain kit
- Some penetrating oil
- Plumber’s putty
How to Remove a Kitchen Sink Drain
Apply the following steps to remove your leaking kitchen sink drain and install a new one that will save your bowl for a more prestigious duty that catching drain water.
Step 1: Shut Off Water Supply
Reach for the shut-off valves in the sink cabinet to turn off the hot and cold water supply to the kitchen sink faucet.
This step may not be necessary as the part of the sink you will be working on does not deal with the water supply tubes.
However, turning off the shut-off valves is something a novice in plumbing should get used to doing.
This precaution will ensure you do not make a mess of your work even when you turn on the water faucet unknowingly, especially if you have installed a touchless kitchen faucet.
Step 2: Loosen the Drainpipes from the Drain’s Tailpiece
There is a connector ring that holds the P-trap and the tailpiece from the sink drain together.
Secure an adjustable wrench on this connector and loosen it through an anticlockwise movement of the wrench.
Once you have loosened the tight grip of the connector with the wrench, you can use your bare hand to disengage it faster from the tailpiece.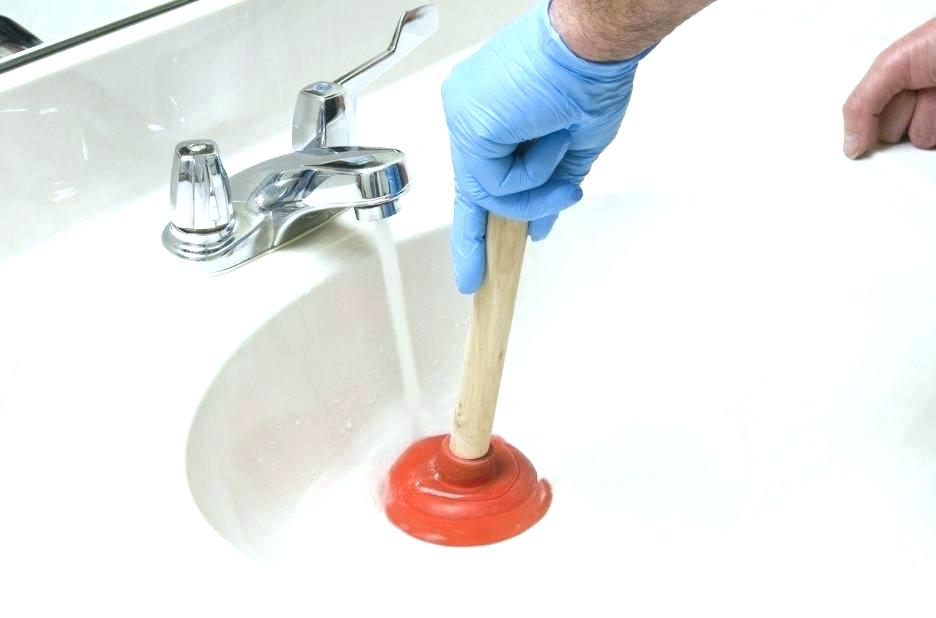
Step 3: Disconnect the Tailpiece
Some tailpieces have threads that lock in with the threads on the sink drain strainer. You can remove the tailpiece by turning it counterclockwise to unscrew it from the bottom of the drain strainer.
Step 4: Unfasten the Sink Drain Lock Nut
There is a locking nut, also known as basket nut, used to secure the kitchen sink strainer tightly under the sink.
When this nut is tight enough, and the sealing components like the plumber’s putty and the rubber washers are in good shape, the sink drain is not supposed to leak.
So, if your sink drain is leaking, it could be a malfunction of any of the sealing components, or the lock nut not been tight enough.
Step 5: Make use of Penetrating Oil
The lock nut is a metal component, and the likelihood of it getting rusty in a humid environment like the kitchen sink is not improbable.
If you find loosening a rusty lock nut, as stated in step 3 daunting, then you can spill the right quantity of penetrating oil to weaken the lock.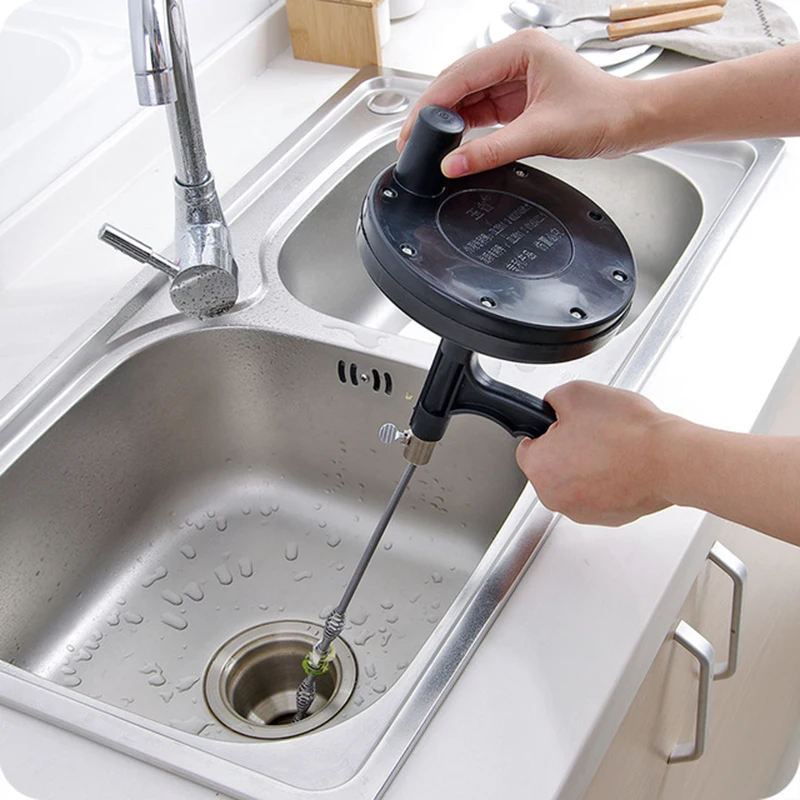
Allow the oil enough time to seep into the threads of the nut before you put a wrench to it.
We advise that you apply the penetrating oil on the lock nut the night before this project to save the time you will spend waiting.
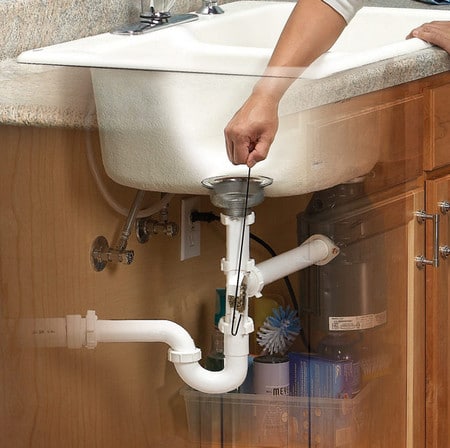
Step 6: Remove the Basket Strainer
Once you have disengaged the lock nut, and have taken out the friction protection and the rubber washer sealing the bottom of the sink’s drain hole, you can then remove the basket strainer.
You may have to give it a little push from under the sink to break it off the dry plumber’s putty. Only apply as much force as is reasonable to avoid pushing the whole sink basin off the countertop
Step 7: Clean the Hole left by the Old Drain Strainer
Expect that the hole left by the drain strainer will be dirty from scraps of dry putty and some amount of gunk. Scrape off the putty with a putty knife and wash and dry the hole in preparation for the new basket strainer.
Step 8: Install the New Drain Strainer
Turn the new sink drain strainer over and apply some plumber’s putty around its body.
Put the drain strainer down the sink’s drain hole and press it down to achieve an even seal with the putty between the sink and the drain strainer.
Do not press the basket strainer so hard such that the entire putty is squeezed out. Clean off excess putty squeezed out as you pressed the drain strainer down the hole.
Step 9: Seal the Underside of the Sink’s Drain Hole
Crawl into the sink cabinet and put a rubber-seal washer over the bottom of the drain strainer.
Also, put a friction-protection band over the rubber washer before you secure the drainer strainer tightly with a lock nut.
You should grip the drain strainer with a pair of needle-nose pliers to prevent it from turning round along the wrench while you are fastening the lock nut.
Step 10: Link the Drain Strainer with the Drainpipe
Once you have secured the basket strainer tightly to the sink’s drain hole, connect the tailpiece to the base of the drain strainer.
We advise that you use a brass tailpiece over plastic types for reasons of durability.
Secure the drainpipes to the bottom end of the tailpiece with a ring connector.
Carefully tighten up this connector with a wrench to avoid cracking it or the drainpipes.
Step 11: Test the System for Leakage
Turn on the shut-off valves and turn on the faucet. Allow the water to drain over a reasonable length of time during which you inspect the joints for any leakages. You should tighten up any component you find leaks.
Conclusion
A leaking kitchen sink drain is not what you can learn to put up with for long. You can try, but you will soon tire from taking out bowls of water from under your sink. This guide will help you to remove your leaky sink drain and install a more functional one.
We would like to know how helpful this guide has been to you. Send us your questions and do not fail to share this information and subscribe to get updates on our other DIY guides.
How To Remove Kitchen Sink Drain
If you notice a musty smell and damp patches in the sink cabinet, you must act fast to prevent further damage.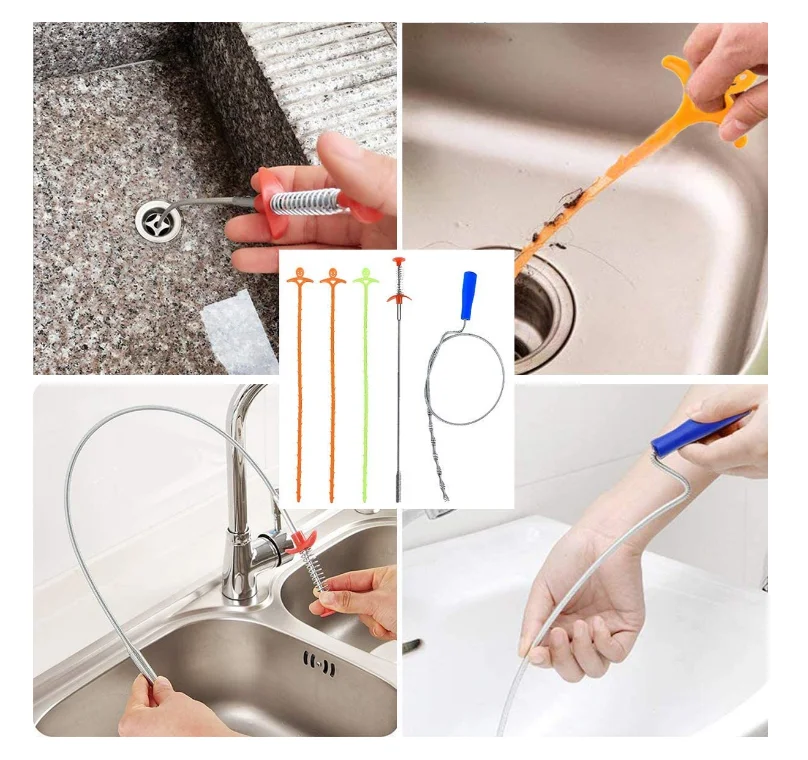 In this situation, the culprit is typically a leaking sink drain. Fast action makes for an easy repair.
If you have never carried out this repair, don’t worry! Let us walk you through how to remove a kitchen sink drain and replace it.
In This Article
- Why is Your Kitchen Sink Drain Leaking?
- What Type of Basket Strainer Do You Have?
- How to Remove a Sink Drain
- Choosing Your New Sink Drain
- How to Install a Kitchen Sink Drain
- Test For Any Leaks
- Need Some Help Finding the Right Connection?
Why is Your Kitchen Sink Drain Leaking?
Unfortunately, there is no go-to reason why sinks leak. Instead, there are a range of problems that you will need to explore.
Here are some typical causes of sink leaks:
- A broken seal: If the plumber’s putty surrounding a joint is too thin, water seeps through
- The putty dries and perishes: It takes a long time, but putty dries with age.
 As it does so, it becomes brittle and can’t expand and contract as it should. Cracks begin to show, and pieces break off
 - The drain wears out: Stainless steel drains are durable, but not impervious to corrosion. Sometimes you need a new drain or sink basket
What Type of Basket Strainer Do You Have?
The basket strainer catches large items that may have accidentally fallen into the sink. This item can sometimes be the source of the leak, and servicing it depends on the type of strainer you have.
Typical strainers include:
- Locknut strainer: New homes are more likely to have this type. This design looks like a ring that surrounds the threads. A rubber washer between the head and strainer seals any gaps and prevents seepage
- Locknut strainer with screw attachments: This model uses a plate that fits over the threads instead. Screws in three or four corners secure the plate to the sink
- Bell washer strainer: This type encloses the strainer completely.
 A single nut connects the housing to the basket strainer
How to Remove a Sink Drain
Read over each step carefully, and get the proper tools required for your sink before you begin.
Disconnect the Drain from the Piping
Lay down an old towel or cloth first to catch any water that spills out. Put down a small tray or box to store washers or screws you remove safely.
Now find the coupling nut that connects the sink strainer to the pipe. It’s either metal or PVC, and most nuts are relatively easy to spot compared to the rest of the drain.
If the coupling nut is PVC, loosen it by hand, turning it in a counterclockwise direction. Metal nuts may be stiffer, so use an adjustable wrench for them. Again, turn it counterclockwise to loosen it.
If the basket strainer spins as you’re loosening the nut, use pliers to hold it in place from the top. It is best to ask someone to help, but you can stretch to reach it on your own. Once you’ve loosened this fitting, the pipe should come loose.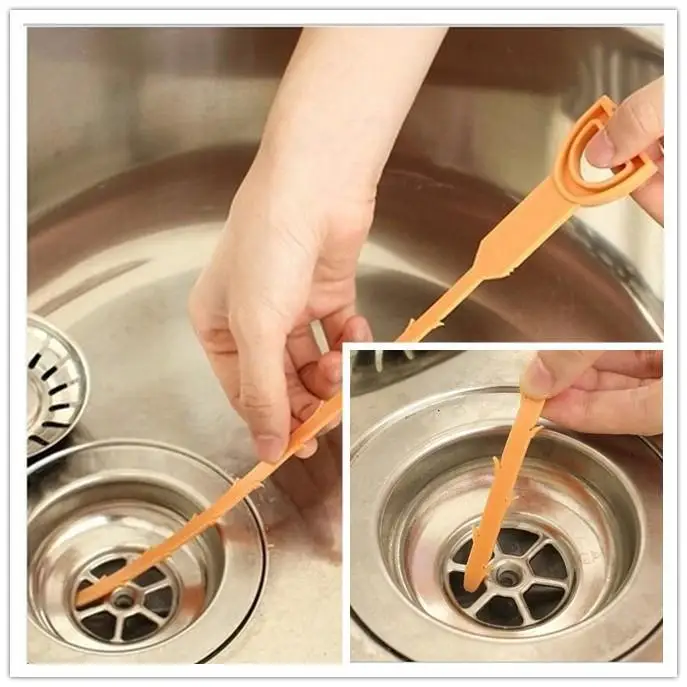
Optional: Disconnect the drain pipe where it joins the P-trap. This will free up some space to make it easier to work.
Loosen the Sink Strainer
If your model uses screws, remove those using a standard screwdriver. Be sure to match the head and size to the type of screw. Place them in the box or tray and remove the plate.
If your model uses a single locknut, you’ll loosen it in much the same way that you did the coupling further down. You may need to shift it using an adjustable or pipe wrench. You can also stop by a hardware store to purchase a locknut wrench.
Once you’ve loosened the fitting enough for it to spin smoothly, unthread it by hand. If the rubber washer is still in reasonable shape, you can put it back afterward.
At Mr. Kitchen Faucet, we suggest that you replace the washer with a new one. They are not that expensive, and it’s easy to swap it out now that you have everything disconnected.
If you have a bell washer strainer, loosen the nut at the bottom. You may then wriggle the housing free. If it doesn’t budge, use a screwdriver to pry it off.
What if the Connections are Rusted Together?
Sometimes the nut or screws are entirely rusted. Removing them is not easy, so now might be the right time to call in a professional.
If you’d prefer to be your own sink plumbing kitchen hero, be sure to work carefully. Start with a generous application of WD40, cola, or lemon juice. Cola or lemon juice seem like odd choices, but they both dissolve rust and can be used in a pinch.
Allow the liquid to saturate everything, and wait five minutes. Try turning the nut or screw again. If you can’t, apply more liquid and wait a little longer.
If the nut doesn’t budge using pliers or a wrench after this, you’ll have to try something else. In this case, you may even have to cut through the metal and then chisel the residue away.
A rotary multi-tool, along with the correct blade, will cut right through the nut. The danger is that you could also slice the drain or nick the pipe, so work slowly.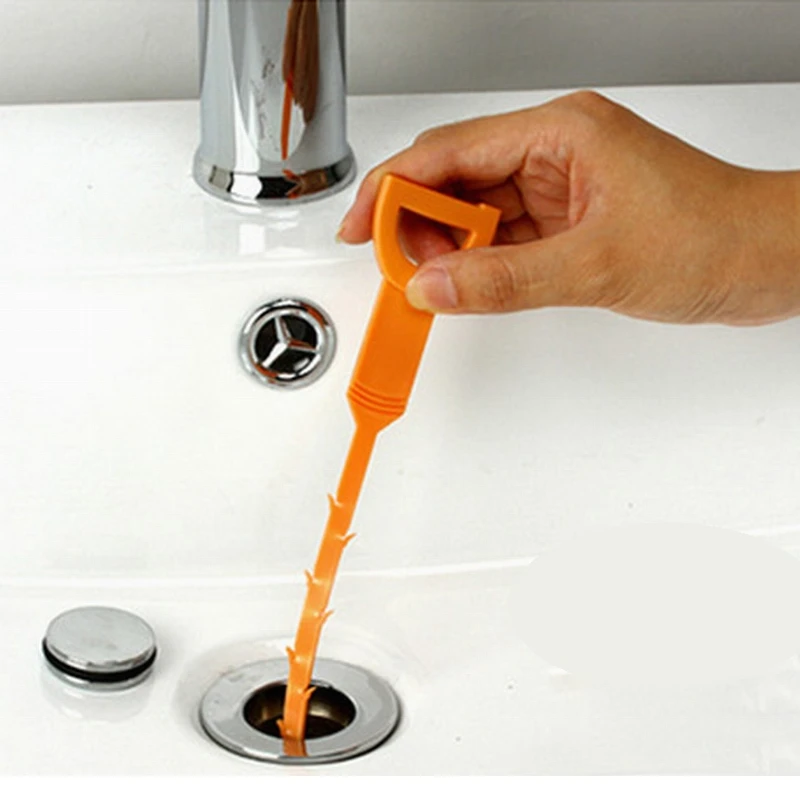
Rusted screws are tricky to pry out. See if you can loosen them by twisting the thread-end with pliers. Work slowly and evenly so that you don’t snap the thread.
Remove the Sink Drain
Once you’ve loosened the plate, nut or fixture, twist the basket strainer. If the fitting and strainer gate doesn’t move, jiggle it a little. This action helps to dislodge sealant remnants. Try to chip away any stubborn little bits with a chisel or pliers.
If it still doesn’t move, lightly hammer the bottom with a mallet. Take care not to damage the sink drain.
Once the sink drain loosens, continue to wiggle it around until you can push it out entirely. Using a plastic knife, scrape away any plumber’s putty from around the opening where the sink drains.
Note: Use plastic to avoid scratching the stainless-steel surface. Scratches allow dirt and moisture to accumulate, speeding the deterioration of the metal.
That’s the end of part one of the sink drain kitchen removal.
Choosing Your New Sink Drain
Drains come in a standard size, but it’s how the drain connects to the sink that you need to get right. For the best results, take the part that you just removed to the hardware store and let them choose the correct drain.
While you’re there, get a new gasket, a putty knife, plumber’s putty, or a non-water-based silicone.
When to Use Silicone Instead of Plumber’s Putty?
With some modern sinks, you must use silicone. If yours is that type, you’ll have seen silicone or a gasket sealing the joint. If you’re not sure, check the manufacturer’s recommendations for your sink and drain.
You can skip the store and get the parts online, but you need to be careful. Order the items about a week before you want to start so that they arrive on time. Choose a drain and nut system that matches yours exactly. If you are not sure what sink parts you need, please go to the store for expert help.
How to Install a Kitchen Sink Drain
Getting the old basket strainer and strainer grate out is the hard part. From here, it will be an easy process.
Take roughly a ping pong ball sized amount of plumber’s putty out of the container. Preferably use a little too much than too little as it’s easy to scrape away excess putty after installing your sink drain.
Roll out the plumber’s putty into a cylindrical shape. Make it roughly as thick as a pencil and long enough to circle the drain opening.
If you need a little more, add an extra length, and roll the two together. Now lay the ring of plumber’s putty around the sink opening, making sure you place it relatively evenly.
Place the new drain and grate and press it down firmly. Keep going until the excess putty squishes out of the sides.
It looks messy now, but you need to do this to get a good seal. Any gaps in this layer will allow water to drip through. Use your putty knife to remove leftovers.
Wipe the drain down with a damp rag to clear off any remnants of grease. A little soapy warm water will remove any fingerprints on the outside of the drain as well.
The Putty Isn’t Enough on its Own
The pressure of the water when it gushes down the kitchen sink causes the pipes to rattle. If you don’t fix them in place, they’ll break free of the housing pretty quickly.
Fixing the new drain sink strainer in place isn’t a tough chore. Just work backward from the steps above.
Securing Your Work
Remove any packaging on the new parts. Then start by securing the new sink strainer from the bottom. How you’ll do this depends on whether you have a nut, plate, or bell design.
The single nut is the simplest system, and you may secure it by hand most times. Thread the locknut onto the thread. Then screw it into place clockwise. The nut should sit flush against the bottom of the sink and sink strainer.
If your model has a plate and screws, position the plate with the hole in the center. Line up the holes for the screws on the sink strainer and sink. Tighten them into position, taking care not to strip the heads.
Should your model use a bell wash strainer, fit it over the sink drain.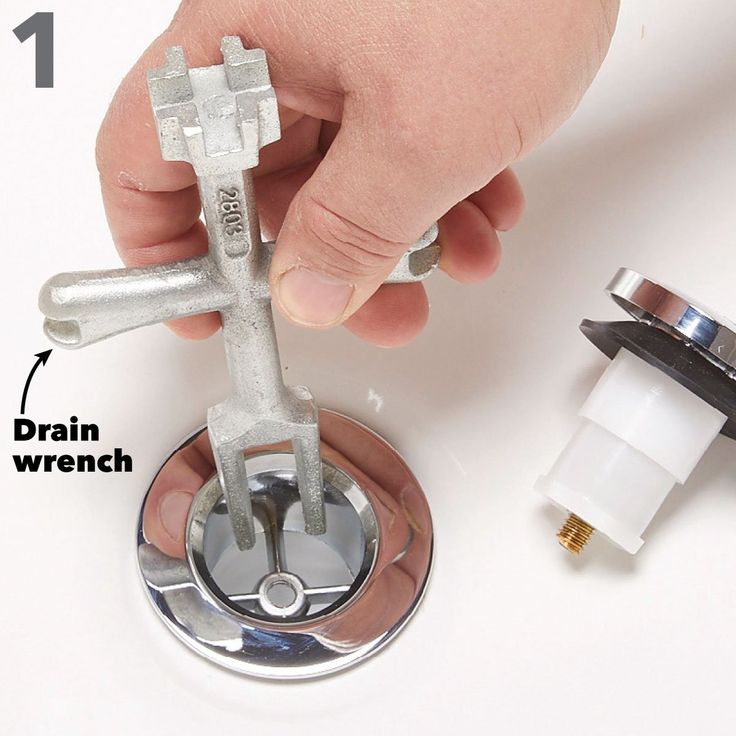 Then use the locknut provided to secure it in place. It’s wise to use a pipe wrench or pliers to tighten it correctly.
Connect the Drain Pipe to the Kitchen Sink Drain
Whether or to you’ll need a wrench for this task depends on the type of nut.
With a metal nut, use the wrench. For PVC, you can use your hand. Twist the nut into place under the sink strainer using a clockwise motion until it is snug.
Test For Any Leaks
Put the plug into the drain and fill the sink with water. Run a piece of paper towel along the drain pipe.
If the paper towel gets wet, you’ll have to remove the drain and start again. Should the sheet stay dry, the installation is fine.
There’s just one more test to perform. Remove the plug so the water can drain out of the sink. Take the dry piece of paper towel and run it around the nut that connects the sink drain and piping.
If the paper is dry, everything’s okay. If water comes through, tighten the nut a little.
Need Some Help Finding the Right Connection?
Mr. Kitchen Faucets wants to make our customers’ lives simpler. If you need to upgrade your kitchen sink entirely, look over our sink comparison chart or read our helpful reviews.
How to clean the sink and bathtub siphon with your own hands
Contents:
- Solution No. 1. Cleaning the sink drain with folk remedies.
- Solution #2: Clear blockage with household chemicals.
- Solution #3: Cleaning with a plunger.
- Decision No. 4. Radical disposal of blockage - disassembly of the siphon.
- How to prevent clogging?
Even the most modern sink or bathtub can become clogged. The most problematic area in this sense is the kitchen sink. When washing dishes, pieces of food, cleanings, fats washed off plates, coffee grounds, etc. fall into the drain. Fats settle on the inner surface of the pipes, other debris sticks to them, gradually accumulating. Over time, the layer thickens, and eventually If not cleaned regularly, clogging may occur. In the same way, clogs appear in bathrooms: hair, residues of detergents, toothpaste appear in the drain hole, sometimes tiny pieces of sponges, threads, etc. are accidentally dropped there. As a result, all these small contaminants accumulate and form a dense cork that does not allow water to pass through. The fact that the siphon in the sink or bathtub is clogged can be guessed by the appearance of an unpleasant odor, but the most striking sign is slow draining of water up to the complete stagnation of water in the sink. If such a nuisance happened to you, then you should contact the services of a plumber, but first you can try to deal with the problem yourself.
Solution #1: Homemade sink drain cleaning.
Classic bath or sink drain cleaner - a mixture of baking soda and vinegar. These substances react violently, forming carbon dioxide, due to this reaction, the debris plug is broken, and the blockage is removed. You need to act as follows: pour a pack of soda into the drain hole and add a glass of vinegar.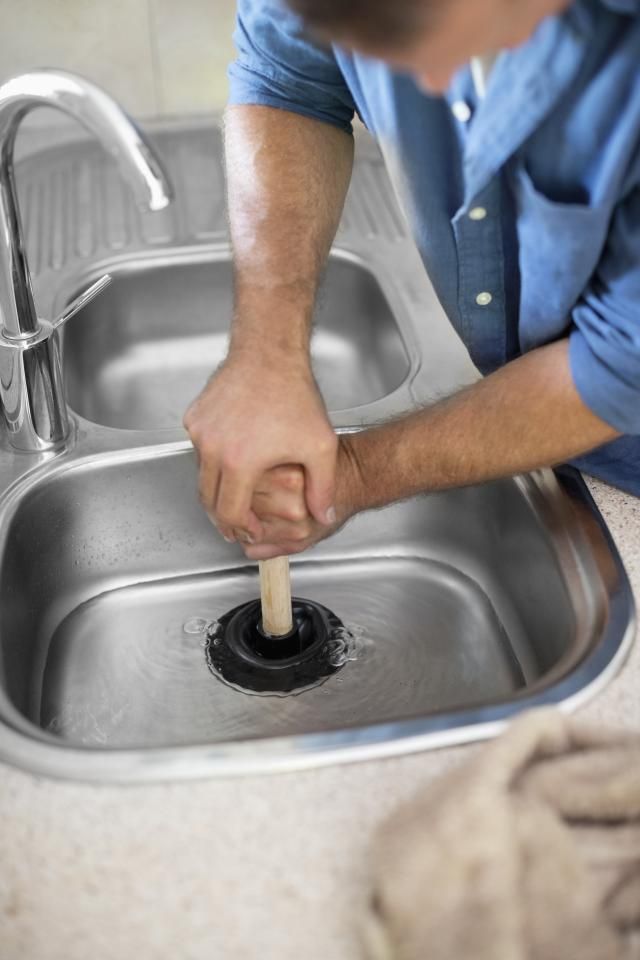 Active gas formation will immediately begin, so try to quickly plug the hole with a cork or a damp cloth. Wait 20-30 minutes and pour a large volume of hot water. You will know that the blockage has been eliminated by the speed of the water leaving - if the sink is quickly freed, then you have done it. It must be said right away that0017 cleaning siphons with soda helps in simple cases, when the blockage is not serious. It will not hurt to carry out such treatment as a preventive measure - cleaning with soda helps to remove fatty deposits from the inner surfaces of the pipes, and this, in turn, reduces the likelihood of contamination.
Solution #2: Clear blockages with household chemicals.
To clean the siphon in the bathroom, manufacturers of household chemicals offer special formulations. Be sure to choose exactly those tools that are designed for cleaning pipes; such products do not contain aggressive components, that can adversely affect the condition of the equipment.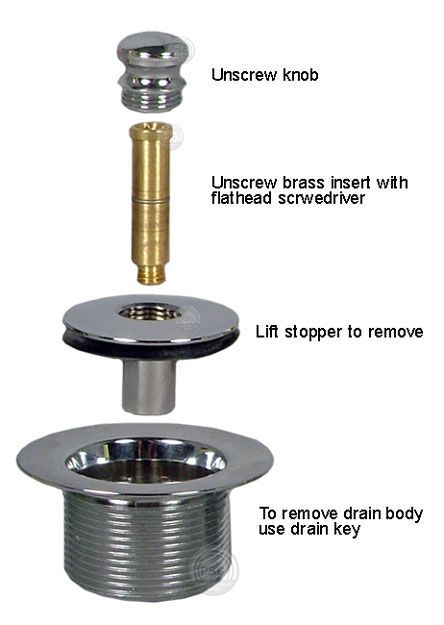 The agent should be poured into the drain for the time specified in the instructions, and then rinsed with a strong stream of water. This method is effective even in the case of severe clogs, but be aware that many ready-made formulations have an unpleasant odor and are prone to vaporization, so it is better to leave the bathroom while the product is working.
Solution #3: Cleaning with a plunger.
Plunger, as well as home remedies, is also a traditional method of dealing with blockages in the sink and bath. A rubber cap with a handle made of wood or plastic is found in almost every home, and it is not difficult to use it. The principle of operation of the plunger is based on the fact that it creates an area with high pressure. Recall that the siphon connecting the sink or bath drain pipe to the sewer is a kind of water seal, thanks to which odors from the sewer do not spread through the kitchen and bathroom. To remove debris with a plunger, pour hot water into the drain hole, then press the plunger firmly against the drain and press it vigorously several times. Pressurized with air and water the blockage will collapse and the water will flow freely.
Solution No. 4. Radical disposal of blockage - disassembly of the siphon.
If none of the tried and tested method helped you, then you will have to resort to at least - parsing the siphon. Despite the fact that this solution is quite laborious, it has two significant advantages:
- when disassembling the siphon , the debris is guaranteed to be removed, which means that the clogging problem will be solved with one hundred percent probability;
- parts of the siphon can be thoroughly rinsed, getting rid of finer dirt and greasy deposits. Thus the occurrence of a new blockage becomes unlikely.
Before disassembling and cleaning the sink siphon, you need to prepare a container for dirty water, rubber gloves and a rag. If there is still water in the sink or bathtub, then it must be removed. Then proceed with the disassembly, observing the following procedure:
- unscrew the upper and lower rings that hold the parts of the siphon, and then disconnect the siphon itself from the pipe.
 Drain the water;
 - remove all dirt by rinsing with hot water and mild detergent;
- if you have a corrugated siphon installed, then do this: after removing the siphon, close one end of it with a tight plastic bag, pour hot water with dissolved detergent, close the other end with the same bag and shake vigorously several times. These manipulations will degrease all the folds;
- assemble the siphon, remembering to check the reliability of all connections and their tightness, and turn on the water. If you did everything right, then the water will instantly leave the sink or bath.
How to prevent blockages?
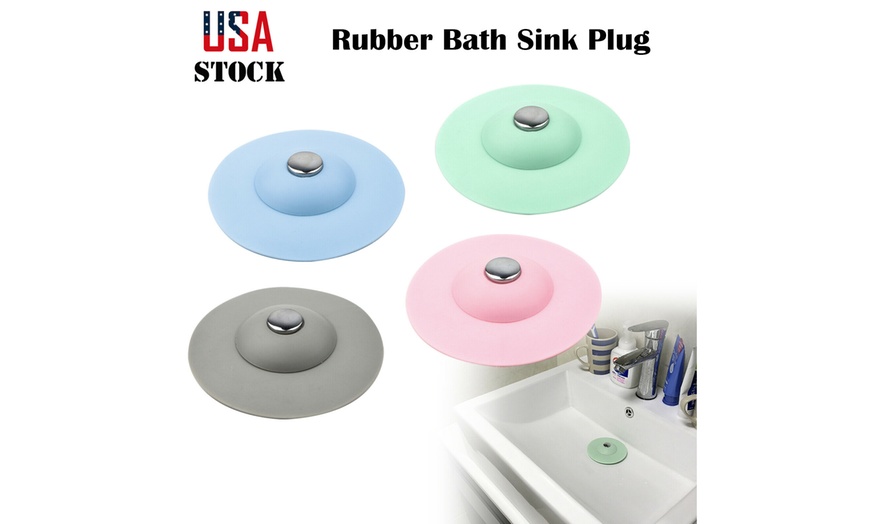
Clogs in the siphon of a sink or bathtub are an unpleasant phenomenon. Despite the fact that you can eliminate the garbage plug yourself, it is still better not to bring the equipment to such a state. An ordinary grate installed on the drain hole will become an obstacle to blockages. This small accessory catches most of the waste and is very effective in preventing sewer clogging. Weekly cleaning recommended, flushing the drain with a jet of hot water, and once or twice a month you need to clean the drain with soda and vinegar. All these procedures do not take time and do not require material costs, but they will contribute to the durability of your equipment.
Easy Ways to Clean and Refresh Your Kitchen Sink
Are you most often faced with clogged drains? kitchen ? Are you looking for ways to fix the problem yourself instead of calling a plumber? This article is especially for you. Read and learn how you can quickly get rid of the problem yourself, and much more.
How to clean your kitchen sink
The sight of your dirty kitchen sink with oil and grime stuck to the wall can be maddening. The thought of removing all the dirt with your hands can make you feel disgusted. But wait! Why It Shouldn't Be So Hard For people who find it difficult to keep their kitchen sink clean, here are a few tips that can help.
1.
 Wash the dishes immediately.
 Storing dirty and unwashed dishes in the sink for too long can lead to bacterial growth in both the pots and the sink. In addition, the oils and grease left from the dishes form a thick film, which will then be difficult to wash off.
2. Deep cleaning
Every kitchen sink is required تنظيف Including once every two weeks. To do this, you can use a mixture of baking soda, borax, salt and lemon juice. Just chill the powder over the sink and let it sit for a few minutes. Then thoroughly clean it of dirt and oil with a hard scrub. Finally, rinse the drain thoroughly with hot water.
3. Clean the sink after use.
Spending time cleaning your sink every time you use it can save you the tedious task of deep cleaning your kitchen sink. Just a gentle scrub with soap and scrub after you do the dishes and your kitchen sink is ready to go again.
4. Grate lemon and salt.
This is a simple and light lemon juice and salt scrub.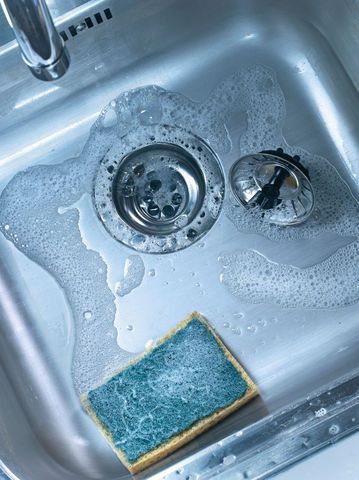 Lemon is easy to find in every home, there is also salt. Just sprinkle salt on the sink and rub half a lemon into the sink as you scrub it while it squeezes out the juice. Both ingredients help remove oil and straw from the tub, while the use of lemon adds a fresh scent.
5. Scrub with dish soap.
This is probably one of the best ways to clean your metal sink every day. Just use dish cleaning tape, rub the metal and clean it thoroughly. Then rinse with water. In a few minutes you will have a shiny clean metal sink. However, this cleaning method is designed for wastewater that is cleaned daily and leaves very little dirt or grime to wash off.
6. Spray cleaner.
This is for those days when the kitchen sink doesn't need much cleaning; Just a good wipe. To do this, mix in equal proportions vinegar and water with a small amount of lemon juice. Shake well and spray on sinks and countertops. Then dry the area with a soft towel. However, the spray has a short shelf life; So do it in small portions.
7. Flour as a detergent.
This cleaning method is exclusively for stainless steel sinks. Wipe moisture from the sink with a kitchen towel. The sink must be completely dry before flouring or it will turn into a paste. After dusting with flour, begin to wipe the surface of the sink in a circular motion with a cotton towel. Keep rubbing until the tub is clean.
How do I remove the drain from the kitchen sink?
It is not only the kitchen sink that requires thorough cleaning, but also the drain. If the drains are clogged and there is a blockage, then after a while there will be stagnant water in the sink. To turn off the drain, you can call a plumber or try the methods listed below.
1. Remove blockage with hot water.
This method is inexpensive and simple to drain cans. Bring water to a boil and remove as much standing water as possible. As soon as the water boils, drain it into the drain filter. You may need to repeat this several times until the drying is gone.
2. Use salt and hot water.
Salt and hot water together weaken drain pipes. Take about ¼ cup of table salt and pour it into the drain pipe. Let him sit for a few minutes. Then pour boiling water into the drain pipe of the sink.
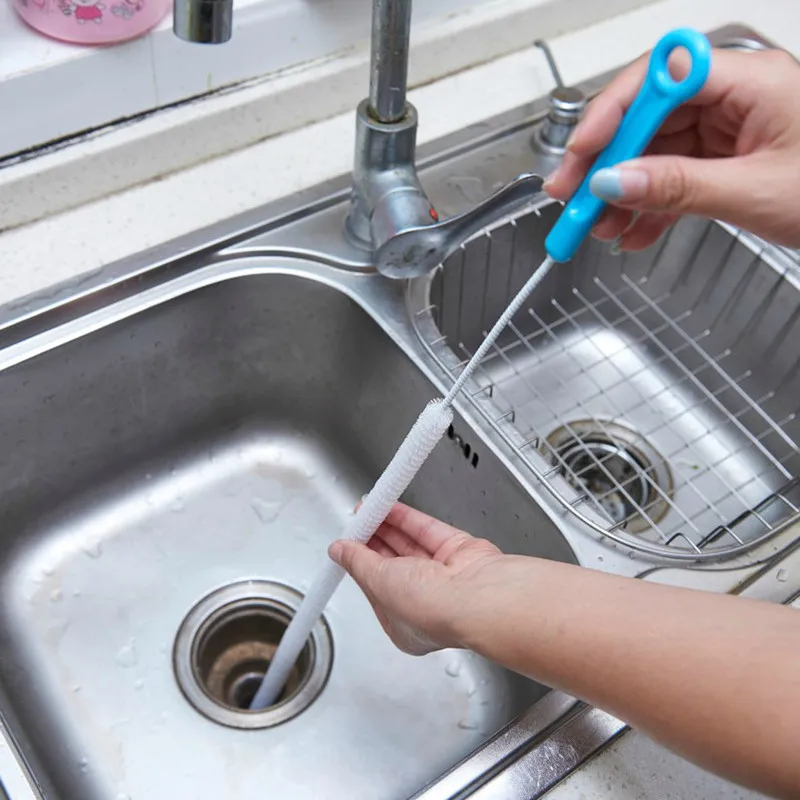
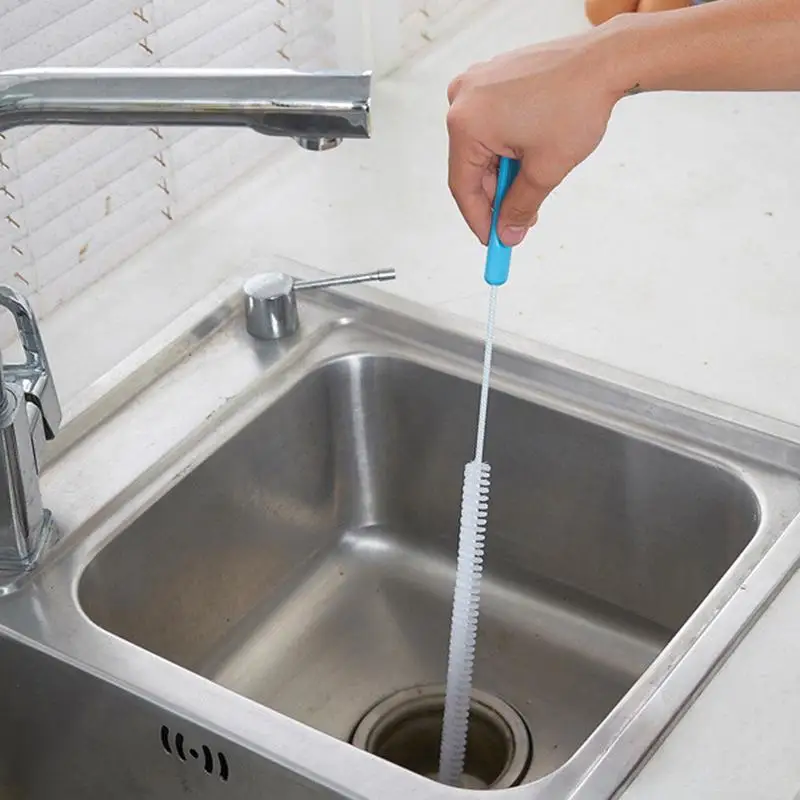
3. Disable manually
Although this method may seem quite successful to some, it is effective. Pull out the drain pipe of the sink and push out the clogged objects with a stick. Then put the tub tube back in.
4. Dilute apple cider vinegar and baking soda.
After removing the standing water from the sink, take 1-2 cups of baking soda and pour it down the sink drain. Then pour in the same amount of apple cider vinegar. Once you do this, a bubble will appear. Once it cools down, put the cork on the sink and let it sit for 15-20 minutes. Then pour hot water. However, if it doesn't separate, you can repeat this method.
5. Add table salt and baking soda.
These two components are well suited for separating sink drain pipes.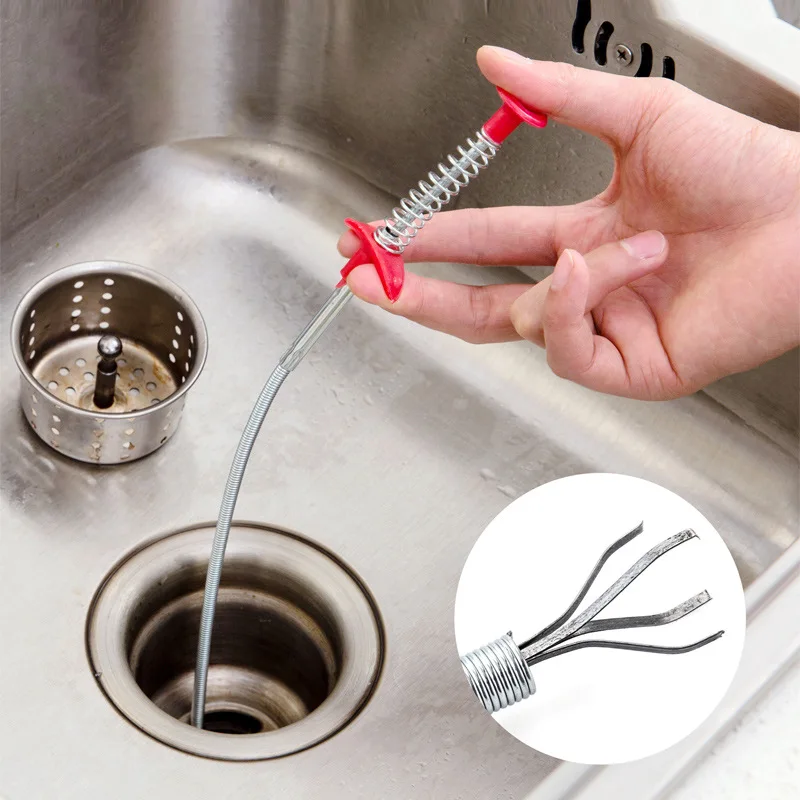 Mix baking soda and half the amount of table salt. Pour the mixture down the drain tube of the sink and let it sit for a few hours. Then pour the boiling water down the drain to clear the blockage. If necessary, you may have to repeat the procedure.
6. Parting with a diver.
If other methods fail, you can try a plunger. However, before sealing other sockets with a damp cloth or cork. Place the plunger on top of the drain hole, making sure it completely covers the drain pipe hole. Then vigorously dip it several times. Once the stingers are clogged, pour in hot water.
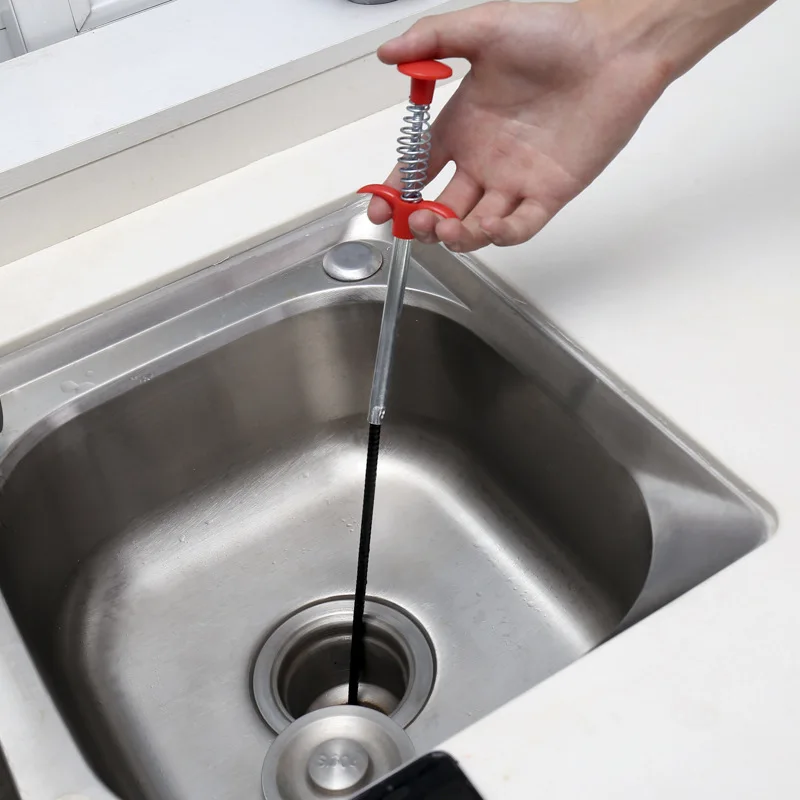
7. Come down with a metal hanger.
To do this, take an old and unused metal hanger. Open and unroll to make a long metal wire that looks like a plumber's snake. Use it to pull out the clog or push it out. Then pour hot water.
8. Unpack the vacuum cleaner.
Vacuum acts like a piston. However, this method can only be achieved with a wet and dry vacuum cleaner and you will need help as well.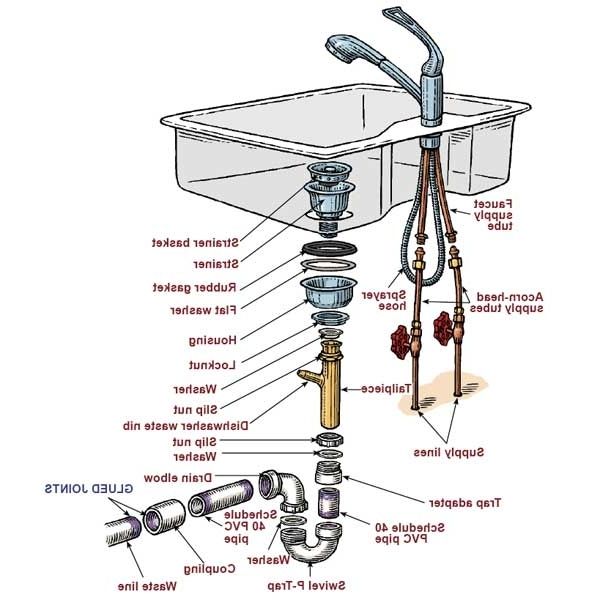 First, you should cover the place near the sink with carpet, because water can splash. Then, as if you are applying a piston, fit the vacuum hose tightly (put the piston cup over the hose opening). Then turn on the vacuum cleaner. If a blockage occurs, the sound will be different than when the drain tube is empty. Continue brushing until the sound changes. If the sound does not change for a while, turn off the device for a while and turn it back on. However, be careful not to damage the tubes. After the pipe is loosened, drain a large amount of hot water into the sewer.
questions and answers
Below are answers to some frequently asked questions.
1. How do I clean a ceramic sink?
Below are some ways to clean your ceramic sink.
- Fill the basin with water and drain all the water. Then sprinkle the entire sink with baking soda. leave it for a while
- time. After about 15-20 minutes, wash the sink with a damp sponge (squeeze out excess water well).
 Remember that your brushing is going in the right direction if the baking soda forms small clumps.
 - Cut 2-3 lemons in half. Take half a lemon and start rubbing the basin, squeezing out the juice. If there are dark spots or blemishes, rub them on the skin of the lemon. Let the lemon juice sit for a while and then rinse the sink with hot water.
- Mix equal amounts of bleach and water in a spray bottle. Shake well and spray in the sink. Leave on for 10-15 minutes, then wipe down the sink with a rough rug.
2. How to remove acid stains from the kitchen sink?
- First, try to wash off the acid stain by spraying it with water. However, if the acid has been there for a long time, the water will not wash the stain away.
- If the above solution does not work, try this method. Mix equal amounts of baking soda and water to make a paste. Apply it to the stain.
- If water and baking soda do not work, add ammonia to the baking soda and apply it to the stain.