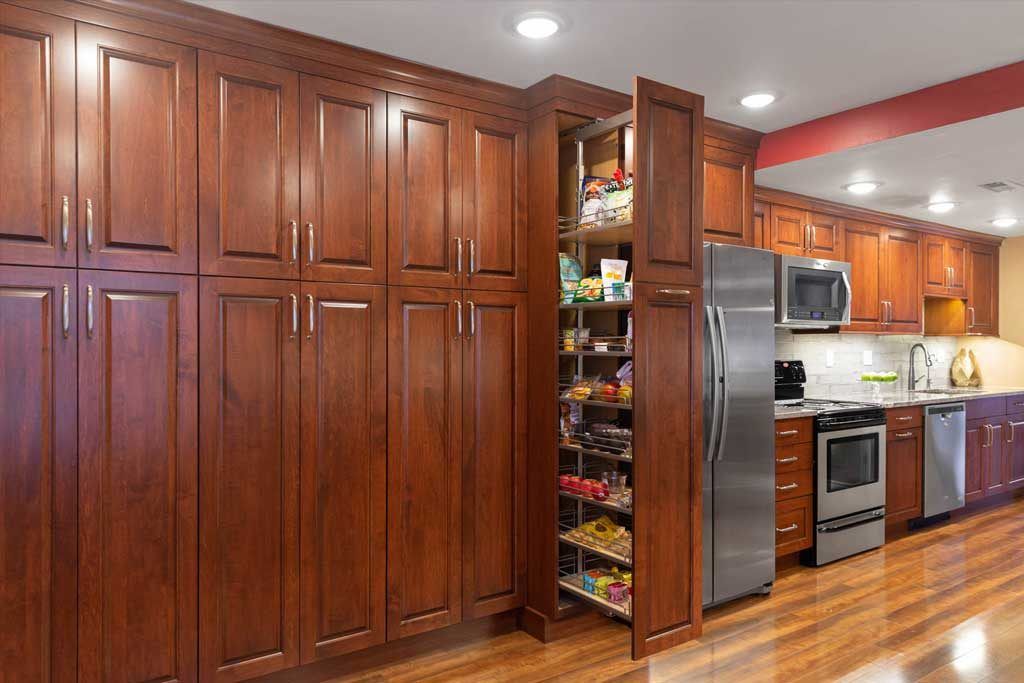
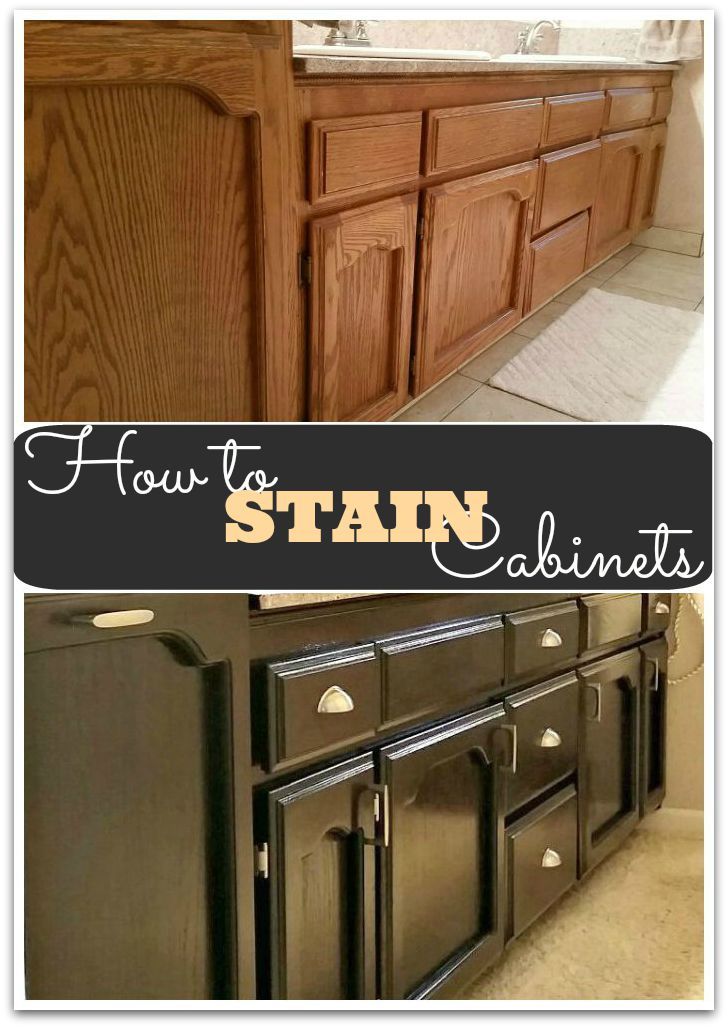
Re staining kitchen cabinets
How to Stain Wood Cabinets
What can we help you find?
Search
Search
If your budget doesn’t have room for new cabinets, don’t worry. You can give your wood cabinets a quick makeover with a fresh coat of stain. Using a different color stain—even as simple as going one shade darker or lighter—can give your kitchen, bathroom or other rooms in your home the new, updated look you want.
Step 1: Choose a Stain
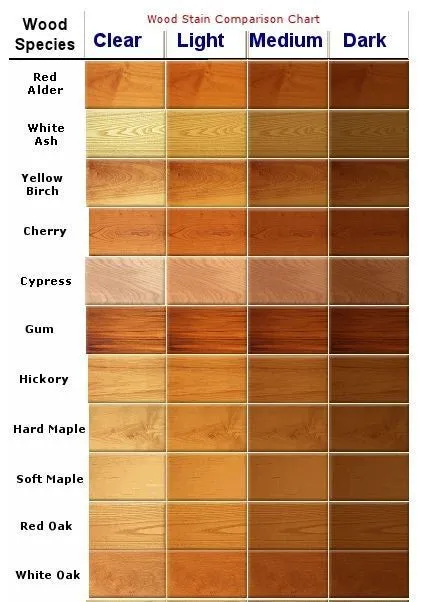
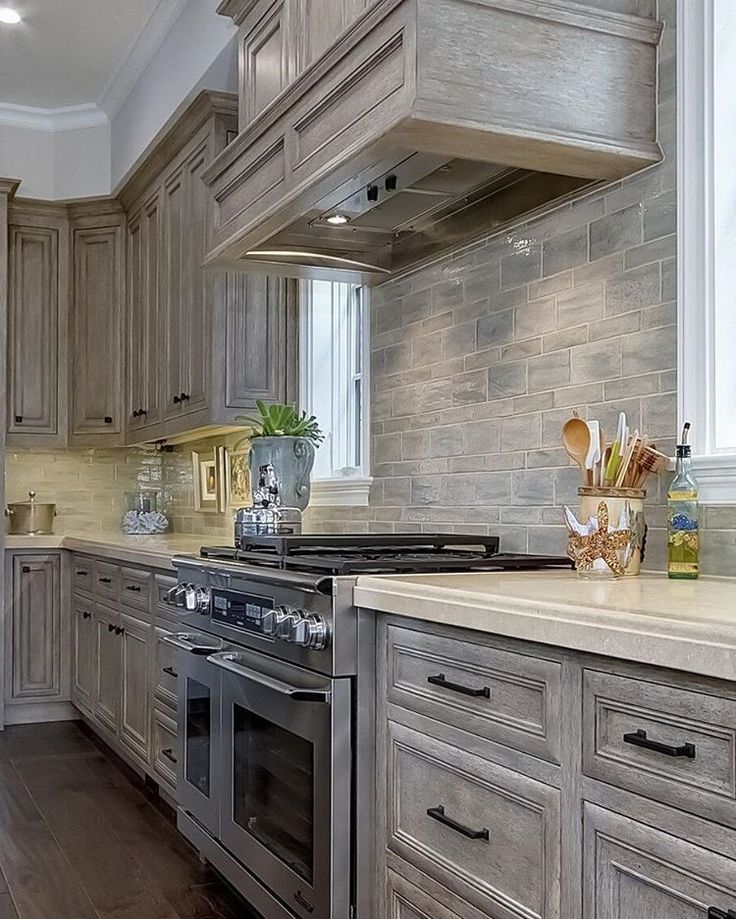
Decide on a stain finish. Before starting, you need to have an idea of what you want your finished cabinets to look like. The color or shade of stain you use affects how a room feels, especially the kitchen. To open up a room and make it feel larger, opt for a light stain. To add warmth to a larger kitchen or room and make it seem cozier, choose a darker stain. Also, keep in mind the type of wood from which your cabinets are made. You want the stain color you are going for to complement the wood. Some stains work better with a particular wood more so than others. You must take into consideration the natural color of the wood and the size of the wood’s pores. For example, woods such as rosewood, cherry and mahogany are types that are rarely stained because of their natural appearance. They are usually just protected with a clear coat. Woods such as maple are less porous than others and so are harder to stain. For help deciding, get advice from an associate at your local True Value hardware store.
There are several types of stains to choose from. There are oil-based and water-based stains, gel stains and stain/sealer in-one formulas. Oil-based stains penetrate into the wood without raising the grain but carry a strong odor. Instead, you may choose a water-based stain. They’re eco-friendlier and offer easy soap-and-water cleanup. They do often require a light sanding to minimize raising the grain.
Never use deck stain on cabinetry.
Step 2: Remove Hardware, Doors and Drawers, and Clean Surfaces
Remove cabinet doors and drawers, and their hinges, handles, knobs, closures and other hardware using a screwdriver.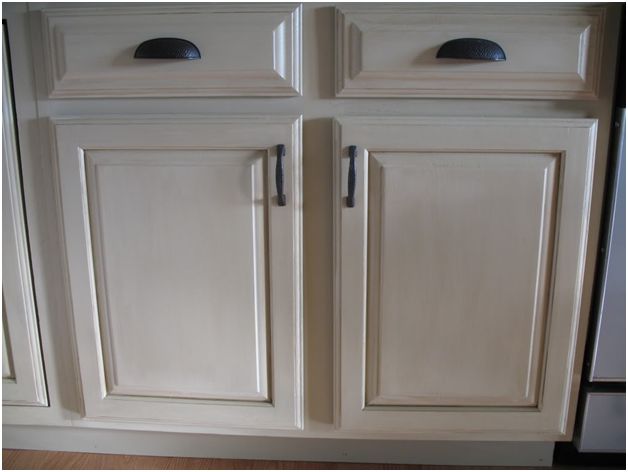 If you're going to stain your cabinets with the doors on, you don't have to remove the hinges. Just mask them with painter's tape. Keep in mind, though, that staining the pieces may be easier with them removed.
Be sure to protect floors, countertops and any other surfaces in your kitchen or work area with drop cloths or plenty of newspaper. Also, remember to keep track of the hardware and which door or drawer corresponds with it
Clean the wood with trisodium phosphate (TSP), a heavy-duty cleaning powder. Dilute the TSP with water according to the manufacturer’s specifications. Use a sponge and the TSP solution to wash doors and cabinet exteriors, letting them dry completely.
Use TSP as directed by the manufacturer. TSP can corrode metal and damage finished wood. Be sure to wear protective eyewear and rubber gloves.
Step 3: Remove Old Finish
Remove the existing finish by sanding. Use a medium/low-grit sandpaper to remove the old finish and to smooth out any imperfections in the wood. Work carefully around any decorative details and curved areas. Always sand with the grain of the wood. Any swirl marks caused by sanding will stand out when you stain.
Using chemical strippers is another and often easier method. Using a medium-sized paintbrush, apply the solution evenly over the surface. Let it soak for 20 to 30 minutes then remove the old finish using a plastic scraper or a smooth, round-edged putty knife. The surface may be soft, so be careful not to damage it with the scraper. Allow the piece to dry completely. Most chemical strippers need to be mixed with water, so check the manufacturer’s directions before applying.
Always follow manufacturer’s instructions and wear rubber gloves and protective goggles when using strong chemicals.
Never strip furniture near an open flame, as stripping chemicals can ignite.
Ventilate the room with fans or open windows — or remove cabinet doors and work in a well-ventilated work area like the garage or outside, if weather permits.
Once you’ve removed the old finish from the surface, use a clean rag to remove the finish from any areas you might have missed and to ensure the wood is completely bare. Let it dry.
If you use a stain stripper to remove the old finish, it’s a good idea to lightly sand the surface afterwards with fine-grit sandpaper. This will ensure a tighter bond between the wood and the new coats of stain.
Step 4: Apply Sanding Sealer
Applying sanding sealer or pre-stain wood conditioner is similar to priming the wood. The sealer helps the wood absorb the stain evenly. It can also be applied after staining to reduce the number of finish coats necessary. Shake the sealer container thoroughly and apply two thin coats using a small paintbrush. Don't let the sealer puddle or fill in decorative grooves. Wipe off any excess stain with a clean cloth. Let the sealer dry completely before lightly sanding with medium-grit sandpaper in the direction of the grain. Wipe the wood again with a clean cloth.
Step 5: Start Staining
Apply stain with a cloth or medium-sized paintbrush and allow it to penetrate into the wood. Coat once for a light stain or apply additional coats for a darker shade. Wipe off excess stain with a clean cloth and allow the piece to dry completely. Lightly sand between coats using fine-grit sandpaper.
If you are using water-based stains, you can minimize raising the grain by moistening the wood with a damp cloth and sanding. Allow the wood to dry completely and sand lightly with fine-grit sandpaper. Repeat as necessary.
When staining cabinets, you usually don't have to worry about the inside of the drawers or cabinets since these parts are rarely visible. But you may want to stain the inside of cabinet doors.
Step 6: Finish It
When you're done staining and the surfaces have dried, make sure you’re happy with the color of the wood. Use a small- or medium-sized paintbrush to apply a light polyurethane sealer or clear varnish to the wood to give it an extra layer of protection and a shine that will last for years.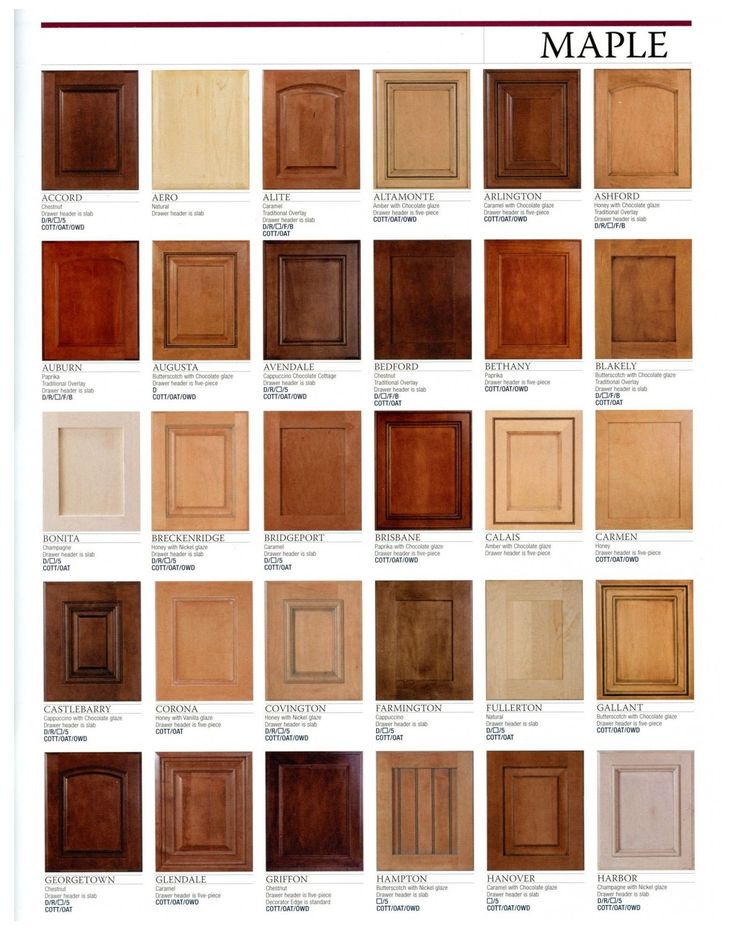 Follow the manufacturer’s instructions for application tips and drying times.
Reinstall the cabinet doors and drawers and their hardware after the stain and finish has dried completely.
Congratulations! With a little work and a few coats of stain, you've got “new” cabinets and you didn't break the bank.
Project Shopping List
Here’s what you’ll need to complete this project successfully.
How to Refinish Cabinets and Give Your Kitchen a New Look — Bob Vila
Photo: istockphoto.com
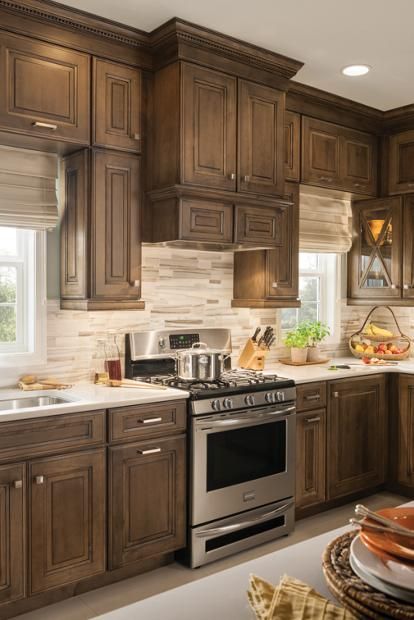
Refinishing cabinets is one of the best ways to give your old, ho-hum kitchen a fresh new look, and it can make a big difference in the way you feel about a space. After all, having expensive cabinets hanging on your kitchen walls doesn’t mean much if you don’t like the color. That’s why many homeowners think about refinishing cabinets with a stain color of their own choosing. It is a big job, but there’s an even bigger payoff.
Before you begin refinishing your cabinets, however, it’s best to do a little detective work. You need to know what materials you’re working with to see if the job is even possible. But, with that research and a lesson on how to refinish cabinets, it’s possible to give a kitchen a serious upgrade.
Safety Considerations for Refinishing Kitchen Cabinets
Before we go too far, it’s important to consider the safety and environmental concerns involved with kitchen cabinet refinishing. You’ll probably need to employ harsh chemicals and create a lot of airborne particulates, so safety does matter.
First, make sure to refinish the cabinets in a well-ventilated area. If the cabinets aren’t mobile, open windows and use a box fan to keep air moving. Next, be sure to wear a respirator when working with chemicals or sanding to avoid inhaling harmful substances. Finally, avoid damaged or stained skin by donning a pair of chemical resistant gloves.
Finally, remember that some chemicals used in kitchen cabinet refinishing (particularly during stripping or staining) are flammable, so be sure to play it safe around any heaters, open flames, or anything of the sort. Oily rags can also combust if left in a pile, so hang them to dry before throwing them out.
Advertisement
RELATED: The Best Under Cabinet Lighting of 2021
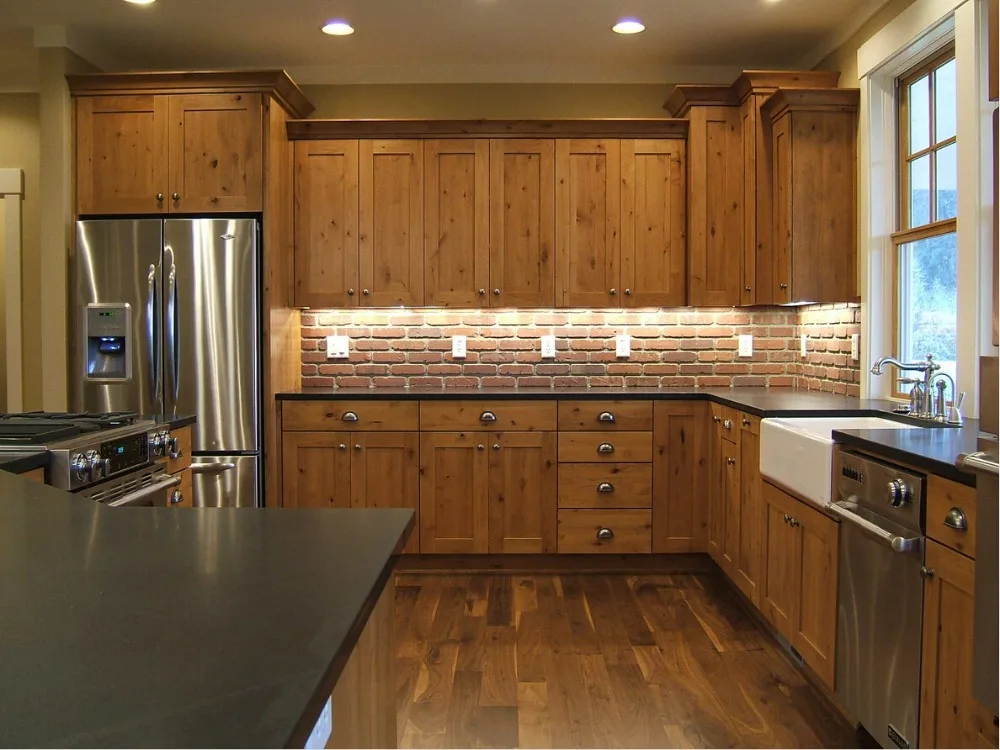
Method 1: Refinishing Cabinets to Make Them Lighter
Photo: istockphoto.com
Refinishing darker cabinets to make them lighter is probably the most involved method of refinishing, and it takes some specific knowledge, tools, and materials. With the following list and steps in mind, you should be able to remove the finish, paint, and stain from wood-based cabinets to bring them to a lighter finish.
SUPPLIES– Sandpaper
– Paint stripper
– Chlorine bleach (if necessary)
– Wood filler
– Wood sealer
– Denatured alcohol
– Stain
– Varnish
– Respirator
– Rubber gloves
– Sanding block
– Scraper
– Putty knife
– Orbital sander
– Rags
– Paintbrush
– Steel wool
– Tack cloth
STEP 1 : Remove the cabinet doors.

Before embarking, remove one of the doors and sand off a small area of the finish on the back. Do the same to an area at the back of a rail or stile (horizontal or vertical framing member).
If the doors and drawer fronts are made of hardwood, remove them and take off all the hardware.
Note: If the doors and drawer fronts are fiberboard, forget about refinishing them with stain. The only way you’re going to get the cherry, oak, or birch tones you love so much is by applying a veneer or buying all new doors and drawer fronts.
STEP 2 : Strip the old finish from the cabinets.
In a well-ventilated room (or outdoors), use a paint stripper to remove the existing finish. Removing a clear coat finish should be a lot easier than removing paint, but you may have to use an aggressive stripper or chlorine bleach to remove the old stain. The job is messy and potentially unhealthy, but if you’re careful, it’s better than blowing thousands of dollars on new cabinets.
Note: Removing paint from cabinets, or any wood furniture, requires patience. Not all of the paint lifts off after the first application of remover, and maybe not after the second or third, either. It’s imperative to work in a ventilated space, to wear a respirator, to wear protective gloves and a long-sleeve work shirt.
Advertisement
Use a sharp scraper to remove as much finish as possible and use whatever you have on hand (old spoons, dental tools, etc.) to scrape contours and crevices.
STEP 3 : Fill damaged wood with wood filler, then proceed with sanding the cabinets.
Fill dents and deep scratches with wood filler, then sand thoroughly until all finish is removed and the wood is super smooth with no scratches.
Make your first pass with an orbital sander using 100-grit paper, your second with 180-grit paper, and your last pass with 220-grit.
STEP 4 : Apply a sealer.
Before applying it, thin out the sealer to a 50-50 concentration with denatured alcohol.
Apply the sealer (this is sometimes called a wood conditioner). A sealer does just what it says: It seals the surface with a light, thin coating so that when you apply stain, the color goes on evenly. Zinsser’s Bull’s Eye Seal Coat, an alcohol-based sealer that’s easy to apply and dries fast, is a good option.
When the sealer dries, lightly rub with 000 steel wool, then clean the surface thoroughly with a tack cloth.
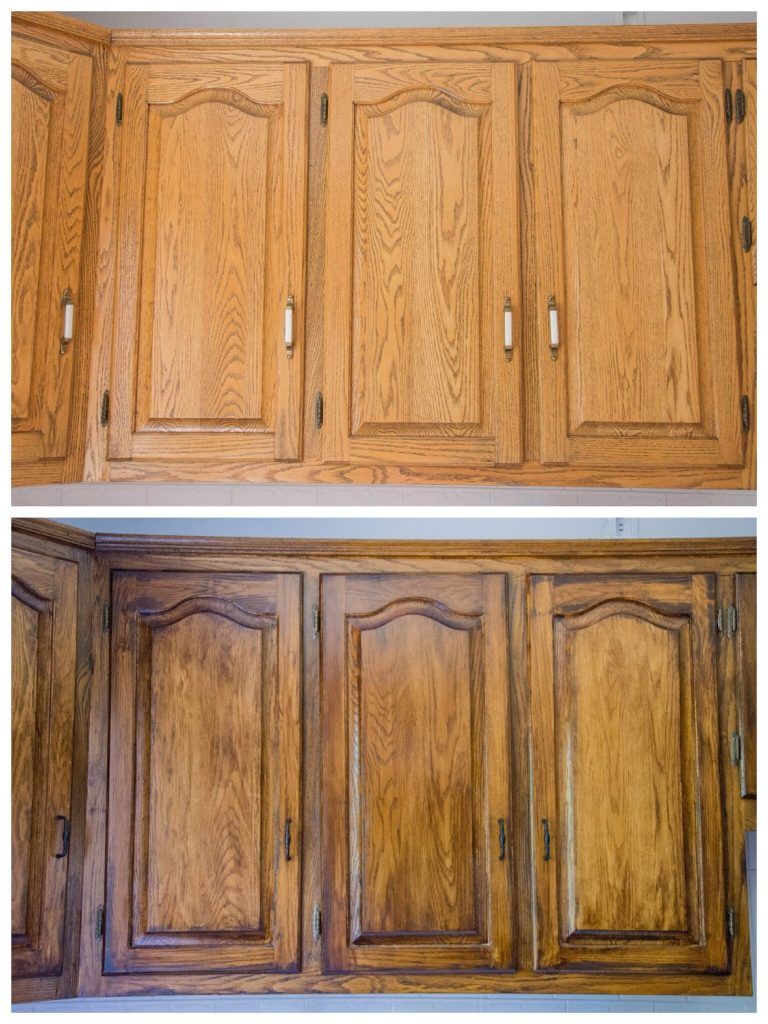
STEP 5 : Apply the stain.
Apply stain using a soft cotton rag, a brush, or a brush in combination with a rag. Experiment until you find a combination that allows you to apply a consistent tone.
If the stain is going on too dark, rub some it off. Too light? Don’t worry. You can apply another coat after the first one dries.
Once the stain dries, follow up with another very light rubbing with 000 or 0000 steel wool before cleaning with tack cloth.
Note: It’s always wise to experiment on the backside of a single door before committing to the project, just to be sure you’re going to be pleased with the results.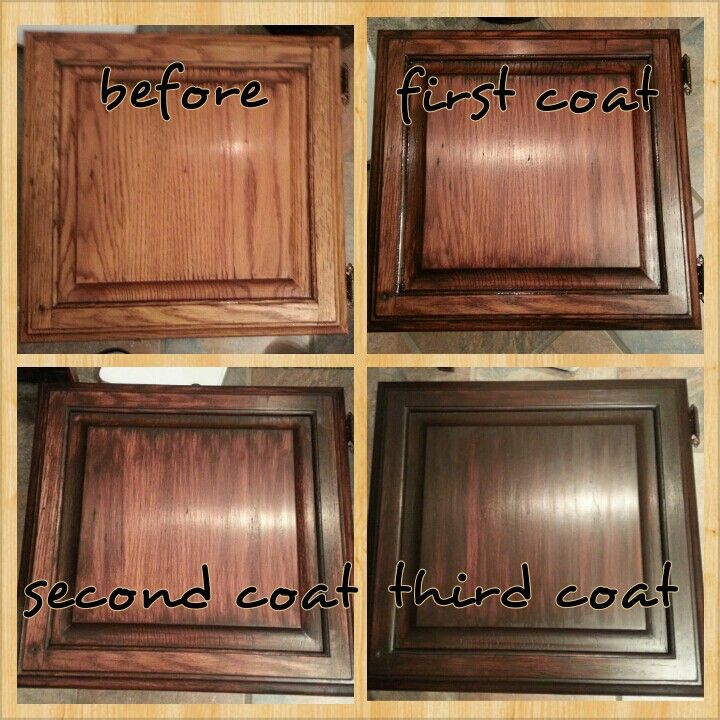
Advertisement
STEP 6 : Add a protective varnish to the cabinets.
Now you can apply a protective coat of clear polyurethane varnish. Applying any clear coat must be done in a dust-free environment.
Read the directions on the can and follow them, but when it comes to thinning, you may need to deviate from the product literature. Most makers say you won’t have to, and maybe that is the case under perfect conditions, but I find that it’s usually necessary to pour in a little mineral spirits to keep the polyurethane flowing smoothly and drying without brush marks.
RELATED: These Cabinet Customizations Are Totally Worth It, According to Pro Organizers
Method 2: Refinishing Kitchen Cabinets to Make Them Darker
Photo: istockphoto.com
If you want darker-toned cabinets than what you currently have, you may be able to simply tint the existing finish. This method of refinishing kitchen cabinets, or cabinetry in any space, is much easier to accomplish than others that require stripping and sanding, but there are still a few ins and outs that you need to know.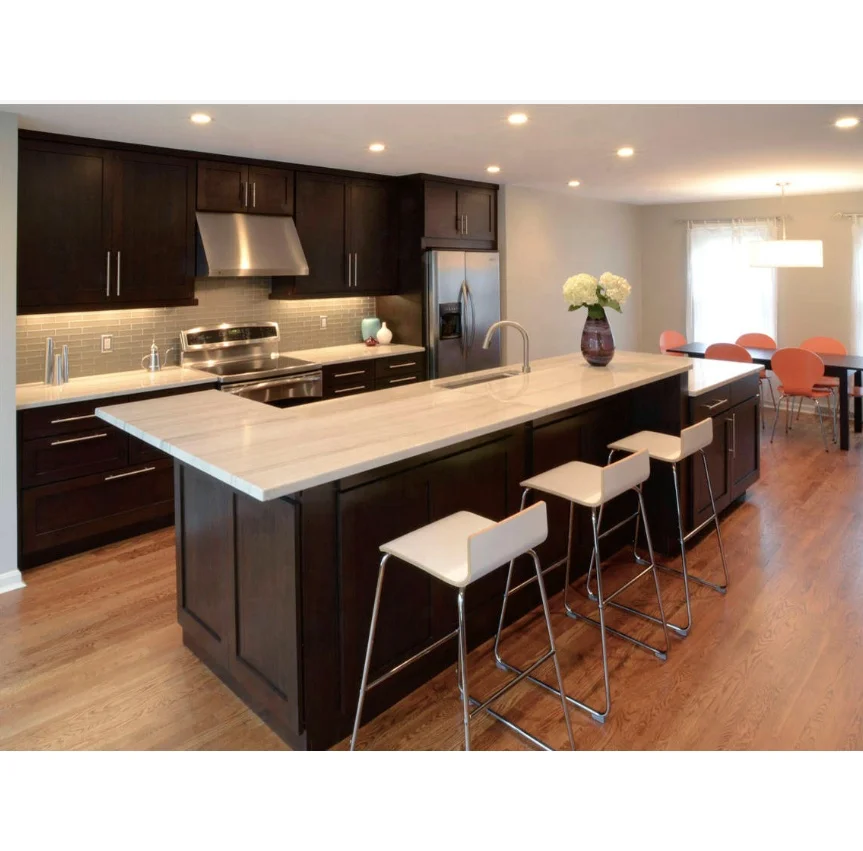
– Respirator
– Rubber gloves
– Trisodium Phosphate (TSP)
– Water
– Sandpaper
– Tack cloth
– Tinted polyurethane varnish
– Paintbrush
– Polyurethane finish
STEP 1 : Remove and wash doors and drawer fronts.
After removing the doors, drawers and hardware; begin by thoroughly washing grease and wax off the cabinets with TSP and water.
STEP 2 : Sand and dust the cabinets.
Lightly sand and wipe off the dust with a tack cloth.
STEP 3 : Apply a tinted polyurethane.
Experiment with a tinted polyurethane varnish (such as Polyshades by Minwax) to see if you can achieve the tone desired. Tinted polyurethanes combine stain and varnish in a single product.
Note: It’s always wise to experiment on the back side of a single door before committing to the project, just to be sure you’re going to be pleased with the results.
Advertisement
RELATED: How to Stain Cabinets
Method 3: Repainting Kitchen Cabinets
Photo: istockphoto.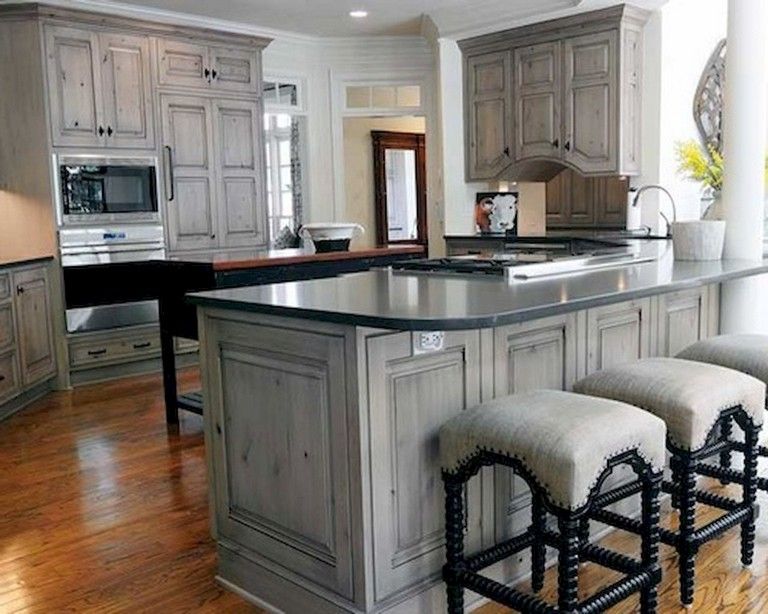 com
com
While it might make the biggest impact, repainting kitchen cabinets is actually quite a bit easier than restaining them. And, since you’re applying a whole new coat, the color possibilities are endless.
SUPPLIES– Respirator
– 220-Grit sandpaper
– Foam sanding block
– Tack cloth
– Degreaser
– Primer
– Paintbrush
– Paint roller and tray
– Enamel cabinet and trim paint
STEP 1: Remove the cabinet doors and hardware.
Start by removing the doors, door knobs, drawer fronts, drawer pulls, and other hardware from the cabinets. For very large kitchens, it’s a good idea to number the cabinet doors and drawer fronts to ensure you know where to put them back.
STEP 2: Lightly scuff the cabinets’ surfaces.
Cabinets are typically smooth and covered with a bit of polyurethane. While primer can adhere to this surface, it’s better to scuff it up a bit first. Put on a respirator and use the 220-grit sandpaper and foam sanding block to lightly scuff the surface of the boxes, face frames, drawer fronts, and doors.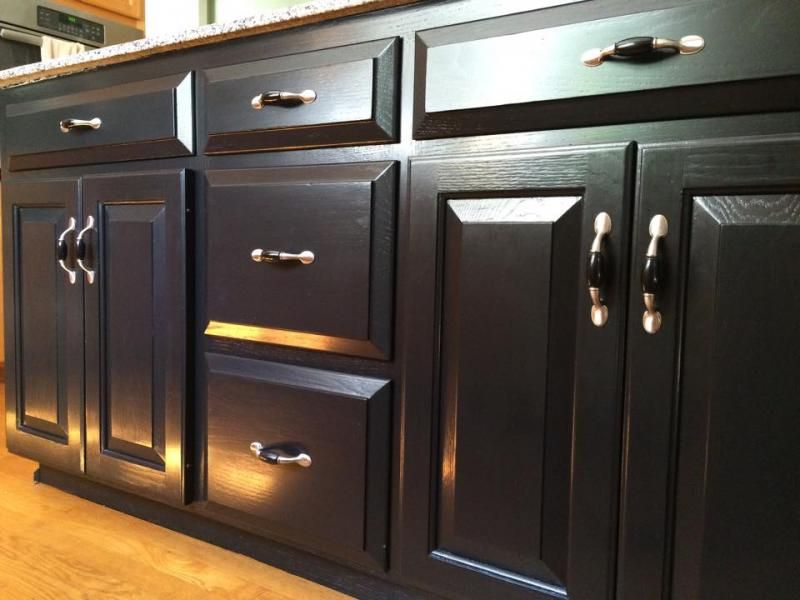 The foam sanding block should be able to get into intricate door profiles.
Keep in mind that your goal isn’t to sand down to bare wood. Instead, you simply want to roughen the surface of the existing finish to give the primer something to hold on to.
RELATED: The Best Primers for Kitchen Cabinet Transformations
STEP 3: Clean the cabinet surfaces.
After scuffing, remove the dust from the cabinets with a tack cloth. Take your time with this step as any dust that stays behind is going to create a rough texture on the cabinet.
While you’re sanding, you’re inadvertently transferring oils from your fingers to the cabinets. Also, cabinets see a lot of cooking oil, as well, and neither substance is conducive to a great paint job. The answer to this conundrum is to use the degreaser to clean the entire surface of the boxes and doors. Once clean, the surface is ready for primer.
Advertisement
RELATED: The Best Paint for Kitchen Cabinets
STEP 4: Prime the cabinets.
After pouring primer into the paint tray, use the paintbrush and roller to coat the boxes, face frames, doors, and drawer fronts with primer. Be sure to brush the primer into any cracks or corners, especially along the door profiles. This finish might look a bit streaky, but you should only need one coat of primer before moving to paint. Pour the excess primer back into the can and clean the brush and paint tray while allowing the primer to dry.
STEP 5: Paint the cabinets.
Once the primer dries, it’s time to paint the cabinets. Put a new roller cover on your paint roller and pour some paint into the paint tray. Use the brush and roller to coat the doors, face frames, drawer fronts, and boxes with an enamel paint made specifically for cabinets and trim for the best results. After allowing the first coat to dry, apply a second coat of paint. Once dry, put all the doors, drawer fronts, and hardware back on and enjoy the fresh, new, updated look in your kitchen.
RELATED: The 14 Freshest Kitchen Cabinet Colors
Final ThoughtsPhoto: istockphoto.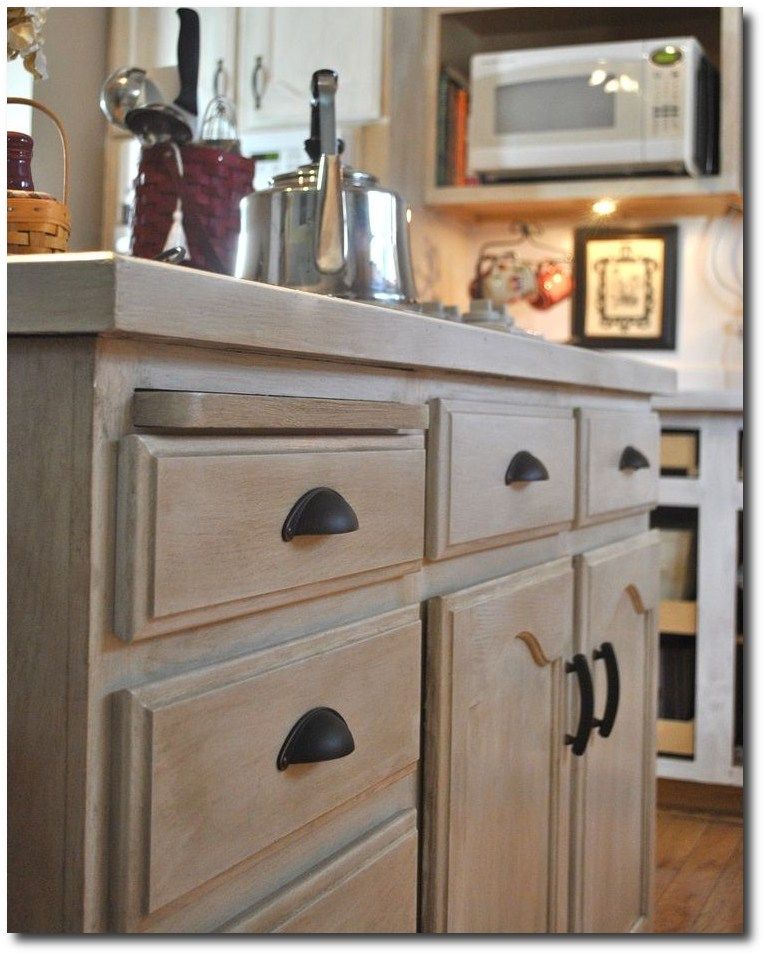 com
com
With this primer on how to refurbish kitchen cabinets, you have the knowledge necessary to give those boring or ugly wood boxes and doors a facelift. Whether sanding down to bare wood and restaining kitchen cabinets, using a tinted varnish to darken the color, or painting your cabinets, be sure to wear the proper safety gear while you tackle this big-impact project.
FAQs About How to Refinish Kitchen CabinetsThat might feel like a lot of information about the refinishing kitchen cabinets, and it’s hard to cover everything in one coat. If you still have questions about restaining cabinets or simply refurbishing old kitchen cabinets, this section is for you.
Advertisement
Q: What is the average cost to refinish cabinets?Generally speaking, the cost of refinishing kitchen cabinets (with labor) will run between about $1,800 and $4,000, depending on the size of the kitchen. You can save up to 75 percent of that cost if you tackle the project yourself.
It is absolutely worth refinishing kitchen cabinets. If your boxes and doors are still in good shape, a fresh coat of stain or paint can breathe new life into an old space and save you up to $20,000.
Q: Is it cheaper to reface or refinish cabinets?Generally speaking, refinishing cabinets is less expensive than refacing kitchen cabinets. Cabinet refacing costs, on average, $7,132.
Q: Why is my wood blotchy after stripping?Usually, discoloration is caused by old stain that’s deeply embedded in the wood. Liquid strippers and sanding might not even be an option, so it’s best to go with a darker stain or paint that will hide the blotchiness.
Refinishing your cabinets?
Get free, no-commitment project estimates from pros near you.
Find Pros Now
+in a different color, what paint, step by step instructions, photo
If you want some updates in the interior or fresh notes and bright colors, the easiest way to transform the interior is to paint the surfaces of the facades. The painting process is quite simple, but still has several features, so this article will focus on how to properly paint old kitchen furniture.
Even the easiest way - painting the kitchen - will significantly change the look.
The main advantages of painting with your own hands
One of the significant advantages of painting a kitchen set with your own hands is that in order to make changes to the interior of the kitchen, you can not spend a lot of money, but only buy paint. Moreover, the help of specialists will not be required, because even someone who has never done such work before can cope with this task. In general, this is why this update method is the most popular - it is economical, simple and takes a little time.
You don't need to invest a lot to transform your kitchen furniture, you just need to buy some paint.
How to repaint a kitchen set with your own hands
Many people wonder if it is possible to repaint a kitchen set in some other color? Actually, why not? Yes, you certainly may. Moreover, everyone can carry out such a procedure. This is a great way if you want to change the interior of your kitchen without spending a lot of money and time. You just need to understand all the details, such as the choice of paint, the correct sanding and priming, precautions, color combinations, and so on. These important nuances will be discussed, because it is better to familiarize yourself with the important points in advance so as not to encounter unexpected surprises during the staining process.
Painting a set is easy. If you have never done this before, then you can easily cope with this work.
Tools and materials
In order not to be distracted by various details and trifles during the painting process, you need to prepare everything you need in advance. Therefore, further we will talk about what materials and tools will be needed in order to paint the kitchen set with your own hands.
List of materials needed:
- spray paint;
- sandpaper;
- wood primer;
- solvent;
- gloves;
- putty;
- safety goggles;
- masking tape;
- glisal or varnish;
- new fittings, if you want to transform the facades of the headset;
- oilcloth or newspaper on the floor to avoid splashes on surfaces.
List of required tools:
- brush or roller;
- grinding machine;
- building hair dryer;
- screwdriver or screwdriver;
- spatula;
- paint tray.
Coloring will take a fairly short time without much diligence.
How to choose the right paint
Modern manufacturers offer a wide variety of different types of paints, but not all of them are suitable for kitchen facade surfaces. Definitely not worth buying water-based or oil paint. These two types are likely to lie unevenly and streaks will form. Also, experts do not recommend using acrylic paint, as it does not tolerate moisture and exposure to cleaning agents.
The best option is aerosol alkyd paint in cans or car enamel.
The most suitable option is aerosol alkyd paint in cans or car enamel. This type of paint is easy to apply, does not form smudges and is particularly reliable, durable, as well as resistant to moisture and temperature extremes.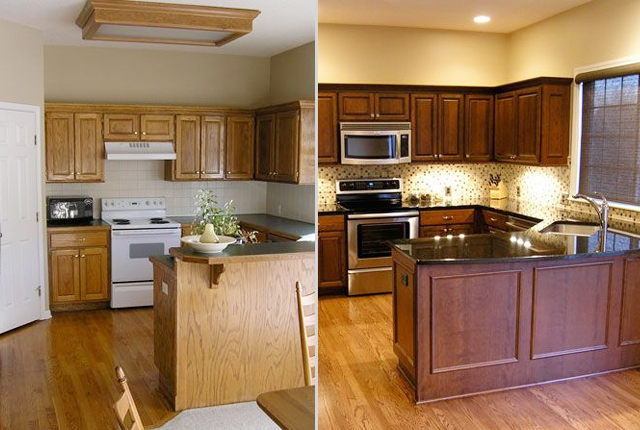
Responsibly, you need to approach the selection of a new color scheme. It is worth preparing for the fact that when changing the color of the facades, you will have to change the textiles in the room.
It is important to remember that it is better not to combine only dark or only light colors. Don't forget about bright colors.
You can choose one color or several matching shades. In order not to miscalculate with the choice of color, you can give preference to a neutral color scheme. As a rule, these are shades of beige, brown, gray and white. It is impossible to make a mistake with such combinations, which means that even a beginner can cope with the task of choosing a palette. You need to be careful only with combinations of dark colors. The most popular and best option is to paint the upper cabinets in light colors, and the lower cabinets in dark ones. This solution is perfect for classic interiors.
Two bright or two neutral colors is an interesting option, here you should rely on your own taste.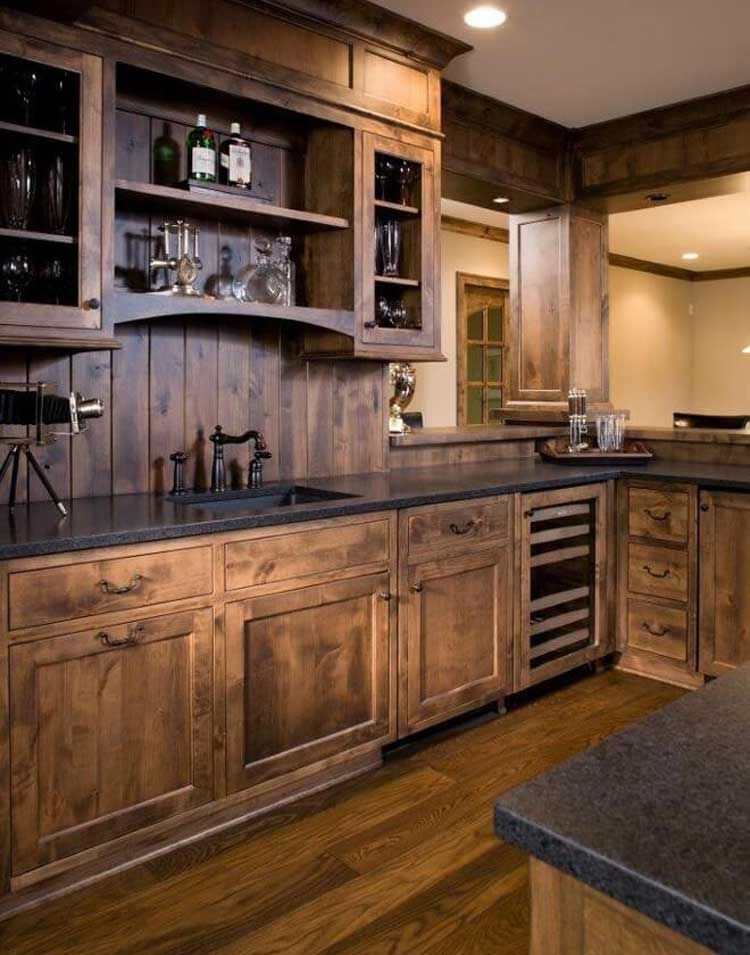
Do not forget about bright colors, they can become an accent of the interior and add mood to the space. Black color can be combined with red, light green, mint, pink, beige, and blue, lilac, blue colors are perfect for combination with white. It is desirable that one color is predominant, and 1-2 suitable shades are added to it.
If you want something very bright, you can combine contrasting colors. For example, the color of lilac and yellow, orange and blue, red or pink with blue - there are a huge number of combinations.
If you want to have an original interior, combine contrasting colors.
Instructions on how to paint a kitchen set with your own hands
The process of painting kitchen facades is quite simple. So simple that you can complete this task without any experience and any special knowledge on this topic. It is only important to adhere to certain rules and sequence of work. Just for this, a special instruction has been prepared, thanks to which you can, firstly, understand the correct sequence of actions, and secondly, learn many important details of each of the stages.
The main thing is a competent approach, and simple coloring will give new life to an old headset.
Preparation
There are some preparations that need to be done before the staining process can begin. For example, facades must be removed before painting, as well as handles and all kinds of fittings, if any, must be removed from them. Decorative inserts and hinges must be sealed with masking tape to avoid getting paint on them. The work surface must be protected with a film or newspaper so as not to stain the floor or the working kitchen table. In addition, before proceeding with the staining process, you need to take care of your own safety and prepare protective equipment. Among them:
- gloves;
- points;
- respirator.
Personal protective equipment when working with paints protects a person from the harmful effects of chemicals.
Additional information: A respirator must be used even if the chosen paint is non-toxic, as dust is still unavoidable.
Priming and sanding
Remove the old headset coating first. This can be done by sanding the surface with sandpaper. First you can use sandpaper with a coarse grit, then with a fine one. A grinder or nail polish remover will help simplify the task. You can use a blow dryer to remove the PVC film. The film must be heated with a hair dryer from the front side, and then carefully remove it from the surface.
If there is a PVC film on the surface, remove it with a building hair dryer.
Important! During the performance of such work, a pungent odor will appear in the space, so it is necessary to carry out the procedure in a non-residential premises, if possible.
After sanding is complete, clean the surface with a damp cloth or sponge to remove dust. Next, you need to degrease the surface with a special solvent.
When choosing a primer, you need to pay attention to the fact that the material for plastic and wood will be different.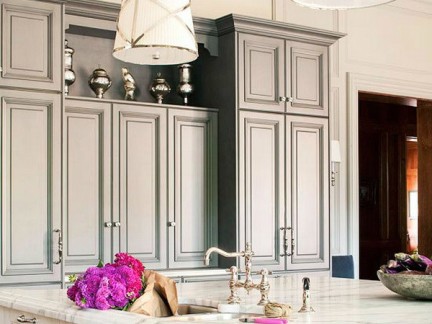 Do not neglect the advice of sales consultants.
To completely remove all irregularities, we apply putty. After drying, you need to process with sandpaper again.
It is important to choose a quality primer, as its quality depends on the quality of the painting.
The primer is usually applied in two coats. Each layer should dry well, after finishing the primer, you need to leave the product for about a day.
Coloring
Getting to the main part - coloring. In order for do-it-yourself painting to be done correctly, you need to apply 2-3 layers of enamel to the surface. To do this, use a brush with soft bristles or a roller. Tool movements must be in the same direction. An effective and convenient way would be to use a can. It distributes the paint without any effort, and the application is uniform.
For perfect coloring, apply paint by moving the brush or roller in one direction, no need to rush.
Additional information! If you plan to apply several shades, then the borders can be separated with adhesive tape, thereby protecting them from paint.
After painting is complete, allow the surface to dry completely. Usually, manufacturers write the time required for this on a can of paint or on a spray can.
If you are using a series of tones, cover the borders with masking tape. Of course, spray painting will be more accurate.
Lacquer finish
Lacquer for kitchen front surfaces, glossy or matt. You can choose the simplest option. A glizal can be a substitute for varnish. This substance is applied after painting, its task is to give a glossy sheen to the painted surface. Glizale needs to be diluted with water. All proportions and more detailed instructions for everything can be found on the packaging of the product.
Lacquering facades and countertops is a simple and fast process.
The glazing method can also be considered. With it, you can create decorative patterns on the surface. The technique lies in the fact that using polyethylene, a damp sponge and hard-haired brushes, you need to move from one part of the facade to another. Lines and ornaments can be absolutely chaotic. After doing this work, you need to leave the surface for about a week so that it dries.
Paint must be applied in the selected direction in the direction of travel of the tool.
Important! Lacquer and glisal have a strong pungent odor. It is important that the room is ventilated during work, and you also need to take care of good ventilation after completion of work.
Tips for painting a kitchen set with your own hands
Painting the facades of a kitchen set is a simple process. Every person can feel like a designer and update the interior in his kitchen, even if he has not previously encountered such an occupation and does not have any experience and knowledge in this matter at all. This article described in detail how to repaint a kitchen set with your own hands in order to fix all the most important things in your memory, we will once again list the main nuances and useful recommendations.
- In order for the painting to be successful, it is necessary to choose the right paint and primer material.
- Do not neglect the preparatory work. It is important to protect the floor and work surface of the headset in advance, so that later you do not have to puzzle over how to get rid of paint splashes.
- In order to avoid inconvenience during the staining process and not have to be distracted by anything, you need to prepare all the necessary tools and materials in advance.
- All precautions must be observed and protective equipment (gloves, respirator, etc.) must be used, and the room must be well ventilated.
By following these simple guidelines, you can make the process of painting surfaces as simple and even enjoyable as possible. After all, it is important, when doing such work on your own, that it is not a torment, but becomes a pleasant pastime. The result will be of the highest quality and will delight the owners of the kitchen and guests of the apartment for many years.
The main thing is a competent approach, and a simple coloring will give new life to an old headset.
Video: how to repaint kitchen furniture with your own hands
50 kitchen design options after repainting
6 painting steps and instructions
Kitchen cabinets don't always need to be replaced, sometimes they need to be repainted. Renovation of kitchen furniture is now an extremely fashionable trend. Beautiful facades often have great potential that can be highlighted with the right paint. Before deciding to completely get rid of the old kitchen decor, take a brush or roller. It may turn out that painting furniture white will be the bull's-eye!
Contents of the article
Replacing or painting kitchen furniture, what to do?
DIY is one of the fastest growing trends. Repairing old kitchen furniture, or rather painting it, which has already survived its best years, is a positive trend dating back to the good times when do-it-yourself was appreciated and individual appliances were respected. Better to repair than throw away, freshen up instead of replaced, right? Moreover, we will always have time to buy a new one, if there would be, as they say, money. And the easiest and most effective way to give the kitchen a neat look is to paint it with quality paint. Here's how to do it competently, we will discuss in this article step by step, in 6 simple steps.
Kitchen furniture wears out the fastest. High intensity of use, exposure to grease, stains, exposure to water vapor and, finally, the risk of damage means that after a few years we can notice more or less serious scratches or abrasions on the fronts of drawers and cabinets. On the other hand, such minor flaws do not necessarily mean that they need to be replaced. Kitchen paint is often a much better (and certainly cheaper!) way to replace it.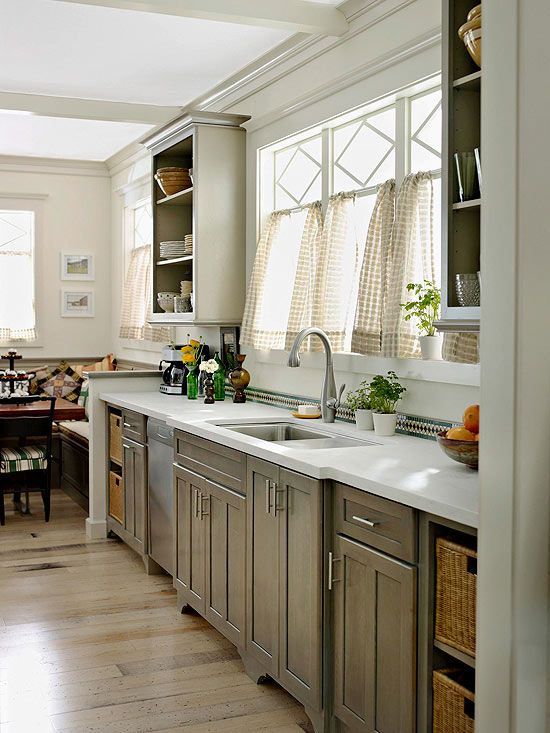 It is enough to apply several layers, replace the handles or the countertop, to change a lot in the design of the kitchen.
What paint to choose for painting kitchen furniture
Of course, our mission has a chance of success if we focus on a quality product. Many people who start their adventure with DIY furniture repairs - kitchens and other areas - are in doubt about which product is being used. Do I need paint for veneered furniture or is it standard wood furniture paint? There is no single answer.
The manufacturer's recommendations and the product data sheet, which describes the applications, are of key importance. Usually, painting kitchen furniture made of MDF board, as well as veneered or even wooden furniture, requires us to purchase one product.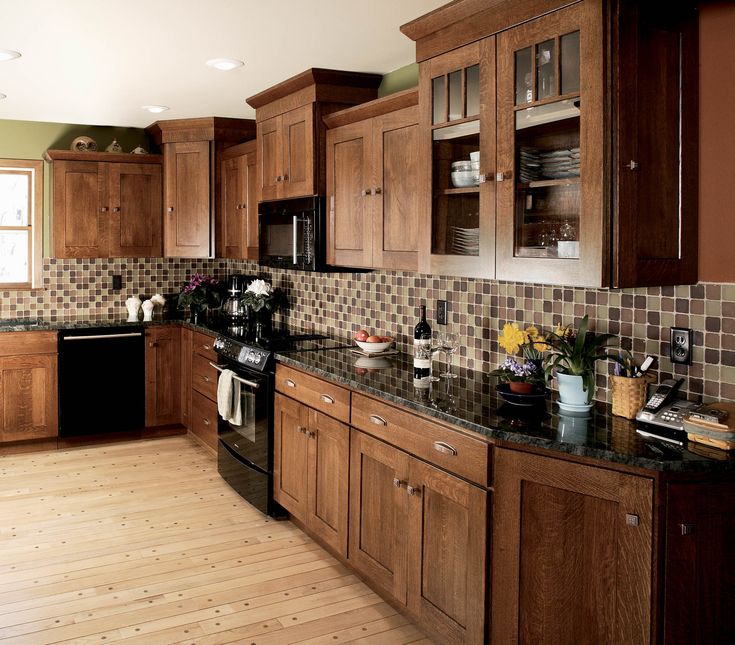
These are mainly acrylic paints, universal, resistant to a number of factors, including exposure to solar radiation or cleaning. Manufacturers often produce special paints for painting wooden furniture, which allow you to achieve the perfect visual effect and effectively protect the surface.
Applying enamel with a brush or roller is difficult. For painting kitchen facades with your own hands, it is better to choose auto enamel. It is offered in pressurized cans, which allows you to achieve an even coat without any hassle.Features of kitchen paints
To paint kitchen cabinets well, you need to take into account the nature of the composition, water resistance, degree of hiding power, and, of course, color. In fact, the choice is not so great:
- Oily - they are called so because the solvent for them is not aqueous solutions, but oily ones. This option is remarkably resistant to the action of moisture and steam, perfectly tolerates temperature changes.
 However, the structure of the paint is viscous, it is difficult to apply it. To repaint the facade well - without streaks, bumps and light spots, you need a lot of experience. In addition, oil formulations dry for a long time, and drying is accompanied by a heavy unpleasant odor.
 - Acrylic paints. They use water as a solvent, so they are completely safe and hygienic. For the kitchen, it is necessary to choose waterproof acrylic compositions, otherwise the painted set will quickly lose its appearance. The composition lays down very easily and evenly, so painting the facade of the kitchen with your own hands is quite simple. In fact, waterproof paint is also washed off with each wash. However, this does not happen so quickly: visible abrasion is observed no earlier than after 500 cleanings
- Alkyd enamels - paints based on organic solvents. For the kitchen, this option is considered the best, as it has a remarkable hiding power; safe, dries quickly and easily and does not wash off.
 The coloring layer is resistant to steam and condensate, does not absorb dyes and soot and is insensitive to temperature. All its advantages can be observed in finished kitchens made of MDF with enamel coating.
 - Repair paints (e.g. repair paint V33) . This is a special range of products for the repair of kitchen furniture and other surfaces (including ceramic tiles or even household appliances - depending on the type). They are easy to apply and provide a durable and very attractive surface.
Aerosol paint
The most convenient option for painting the facade of the kitchen at home is aerosol paint in cans, for example, acrylic or car enamel due to its heat and moisture resistance. Acrylic spray paint is durable, damage resistant and available in many shades.
Aerosol car enamel provides the greatest strength, visually looks smoother, perfectly tolerates heat and temperature changes Aerosol paint in cans is used in a variety of areas, including it is applicable in household and repair work for painting furniture.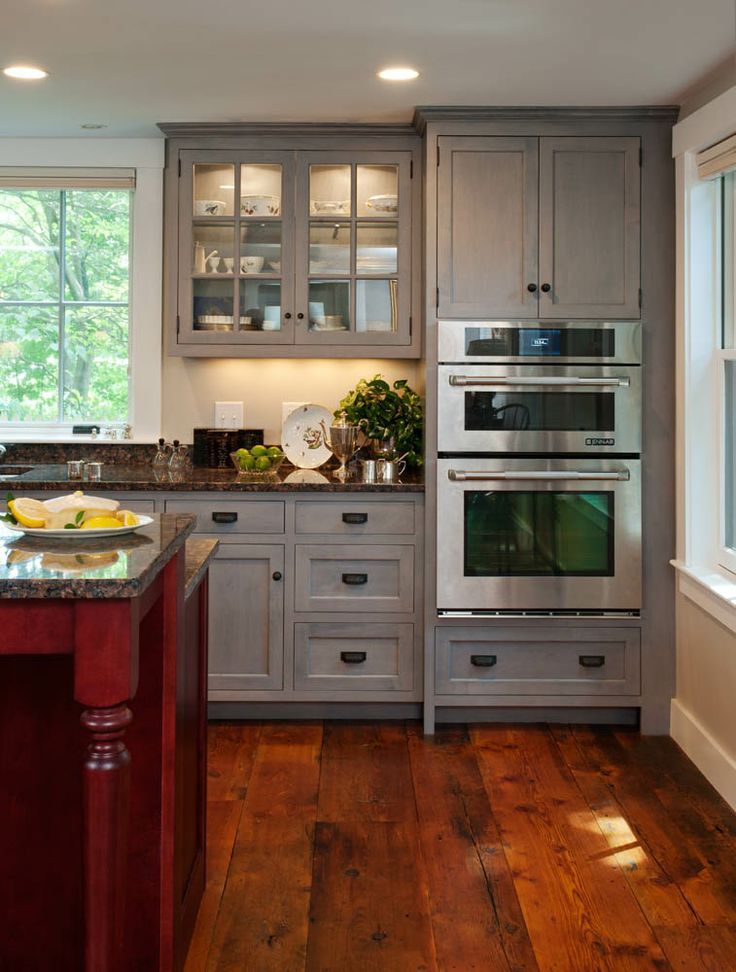 Low cost, ease of spraying and the ability to create a perfectly even coating make you choose this particular paint and varnish material and make it indispensable for repair and decoration.
Of course, spray painting will be more accurate. Here we must remember that during operation, part of the material will be sprayed to the sides. Therefore, it is necessary to cover everything around with a film so that the paint does not get. For a more saturated color, you can paint again after the first layer has completely dried.
A perfectly glossy finish can be achieved by applying several coats of lacquer with intermediate polishing after each coat driesImportant! Before starting work, we protect all surfaces that we are not going to repair and paint, such as countertops, as well as walls and floors, it is advisable to cover them with masking film and stick with masking tape
Video - How to update an old kitchen
Choosing a paint color
Kitchen cabinets can be painted in one color or several, which is becoming very popular , it is important that the color scheme is in harmony with the overall interior. It will be easy for those who have taste, but for beginners in this business it will be a little difficult.
Consider the following options:
- Neutral solution . This includes all varieties of beige, as well as brown, black, gray and white. Combining these colors, it is quite difficult to make a mistake, you just need to carefully combine dark tones.
 The most common option: the upper cabinets are light in color, the lower cabinets are dark. This combination is more suitable for classic interiors.
 - It is important to remember that it is better not to combine only dark or only light colors. Do not forget about bright colors. So, black can be combined with red, light green, mint, pink, beige, white with blue, lilac, blue, beige with red, lilac with cappuccino color, burgundy with cream, white, wood color, etc. Two bright or two neutral colors is an interesting option, here you should rely on your taste. The theme of vegetables and fruits will look no less interesting.
- If you want to have an original interior, combine contrasting colors - yellow with lilac, orange with blue, blue with red or pink. For a more relaxed atmosphere - orange with red or yellow, green with yellow or blue with green.
- To date, the use of several colors at the same time has become widespread.
 For example, two calm shades can be “diluted” with a colorful detail. You can use a different color for each individual facade - your kitchen will be in retro style.
See examples in the photo below:
Read also:
9000 How to paint the kitchen headset: Repair in 6 stagesColor solutions for the interior of the kitchen: Description and best design examples
Painting kitchen cabinets is often a much better solution than buying a new low quality, inexpensive kit, especially if the furniture is still functional and easy to use. A universal, well-known and applicable principle in many areas, which can be applied to the repair of kitchen furniture: the most important thing is preparation. The final effect will depend on how accurately we prepare the equipment for further work.
1.
 Defect detection and minor repairs
 The first thing to consider is the furniture. We will check the condition of cases, facades, skirting boards, shelves, cabinets and drawers, we will check how serious the damage, scratches and cracks are. It is possible that they can be supplemented with a special mass (for example, with wood defects) or sanded with sandpaper. By the way, let's think about adjusting and profiling (and in some cases replacing) fittings, hinges and guides.
2. Preparation of surfaces for painting: matting
Of course, only a change in color will allow us to make a diametrical metamorphosis of kitchen furniture. To achieve a beautiful (and durable!) effect, let's first prepare the furniture for painting. To do this, we will disassemble the handles and handles, which will allow us to accurately perform the work. It will not always be necessary to disassemble cabinet doors. We can do this to facilitate repair work.
It turns out that the repair of kitchen furniture from different materials is basically very similar.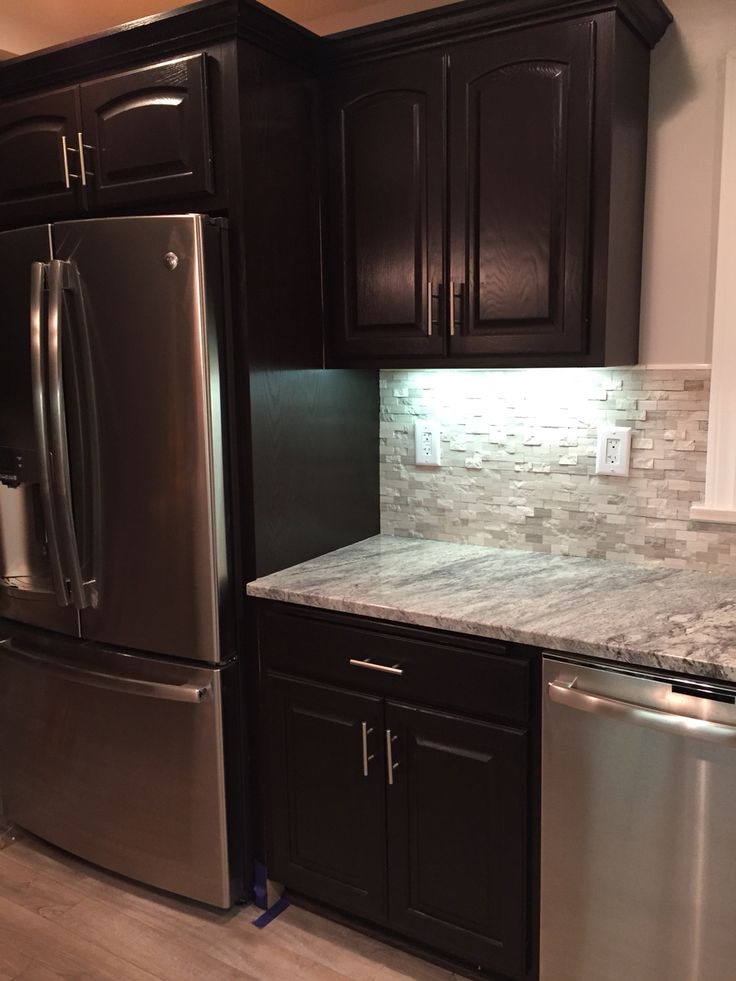 The basis here is matting the surface, that is, rubbing with sandpaper and at the same time grinding all the bumps and reducing scratches. Why is it so important? If the surface is not rough, the new paintwork will not provide adequate adhesion. As a result, after a while, it will begin to flake off.
First we mat the furniture with coarse-grained sandpaper, then we smooth the surface and get rid of burrs with fine-grained paper. Such procedures will ensure perfect adhesion of the paint to the furniture.
A sander will greatly facilitate manual workWant to achieve the most even and durable finish? Then it is worth sanding the surfaces after each coat of primer, paint and varnish (except for top coats)
You can also use nail polish removers. To remove the PVC film, you will need a building hair dryer. With it, it is necessary to heat the film from the front side and carefully remove it from the facade. Please note that a rather pungent odor will be emitted during the work, so it is advisable to choose a non-residential premises for this procedure.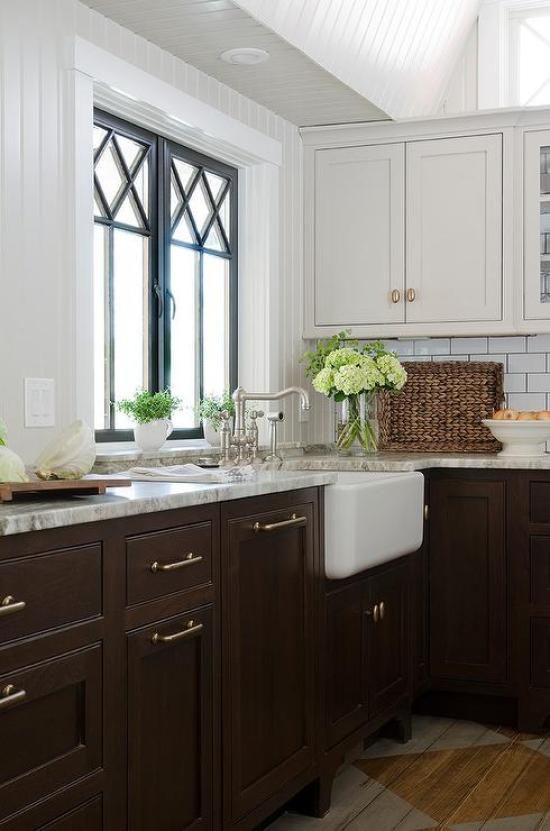
In addition, we prepare both veneered and wooden furniture for further work. In the case of veneers, first check their condition. If they stick out and start to come off, let's tear them off the facades. We remove all chipped paint and its peeling fragments from the surface of wooden furniture - if the furniture was previously painted.
Finally, remove the dust generated during operation with a vacuum cleaner, and then wipe the furniture with a damp cloth and detergent. Let's try to remove the grease that could affect the adhesion of the paint layer to the furniture3. Primer
The primer for plastic or for wood is different in composition, so before you update the facade of the kitchen, consult with the sales assistant in choosing the right product. The quality of the primer determines how well the painting will happen. The substance must be applied in 2 thin layers.
Before applying the compound, arrange the parts so that you are comfortable.
After each application, it is recommended to wait until completely dry, and then treat the primed surfaces with sandpaper to level the coating and enhance paint adhesion. After that, leave the product for a day.
4. The process of painting the set
We start painting veneered, plank or wooden furniture as soon as it is completely dry. We will need a small brush, a large brush, a narrow and wide roller - the size of the tools must be adapted to the specifics, furniture design, length and type of bristles and paint.
In the product data sheet, because each paint may have different requirements. The manufacturer's recommendations should also be followed when it comes to painting conditions, the number of coats or the time interval between one coat and another.
In order to paint the facade of the kitchen with high quality yourself, to avoid streaks and any other marks, it is recommended not to take too much paint on a brush and roller, to drive over the surface with smooth, even movements We start painting kitchen appliances from their hard-to-reach places, corners, corners and details.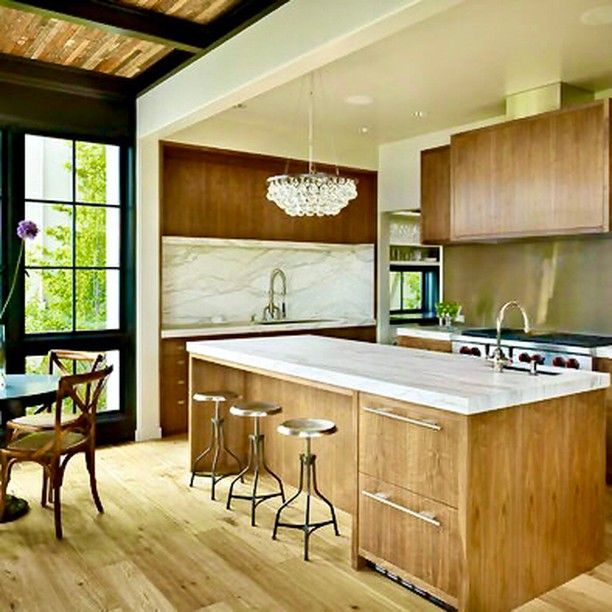 For this, a small brush is useful, thanks to which we can accurately cover the cavities or milling with paint.
Then we move on to painting large surfaces - use a larger brush or roller. We paint fragment by fragment, first with a brush, and then with a roller, covering the next parts of the furniture with paint.
Tip! The brush for painting the facade of the kitchen at home should be new. With it, it is easy to paint recesses, joints, corners, small details, in general, all those hard-to-reach places where it will be difficult or impossible to reach with a roller. For even application of paint, purchase a roller on foam rubber, and a special paint tray will make the work more convenient and will not absorb a lot of paint material into a brush or roller
5. Replacing the decor of the front of the kitchen set or getting rid of unnecessary elements
A brilliant trick that allows you to visually refresh the look of old kitchen furniture is to remove the front trim. In addition, think about replacing the legs (those covered with an overlay usually do not look very designer). These two simple steps will allow you to optically shift the center of gravity: the floor will become more visible, and the body will become lighter, thinner and less massive.
Decoupage cards or napkins with a pattern are used here, you can take various pictures cut out from magazines, print some picture on a printer. We place the images on the facades, glue them on PVA, leave them to dry completely. At the end, we cover with a transparent varnish in several layers.
Even an inexperienced painter can decorate boring facades of a headset or hide local damages (scratches, chips, stains, etc.) with decoupage drawingsAdditional decorative processing
Additional materials help create unusual effects on the surface, no matter the color scheme:
- Stencil or tulle allow you to create lace designs.

- Glisal will be needed to create relief patterns.
- Masking tape and stencil are used when there are two or more shades when finishing.
- It is more convenient to display gold and silver patterns with a thin brush. This should be done after the varnish layer dries.
- With the help of an airbrush, artistic painting is performed according to sketches.
- Cling film is a technique used to create marble surfaces. At such moments, the products simply glisten, while drawing veins and highlighting the relief texture.
- With a simple comb, it is easy to draw a relief graceful structure.
- Unique rustic facades are created by applying a rough canvas or mesh to the surface.
- Embossing - this technology is applicable with the help of pimpled film. The surface will look like alligator skin when painted.
The main thing is a competent approach, and a simple coloring will give new life to an old set
Painting kitchen furniture with your own hands is a complex process, but it involves the use of a creative approach.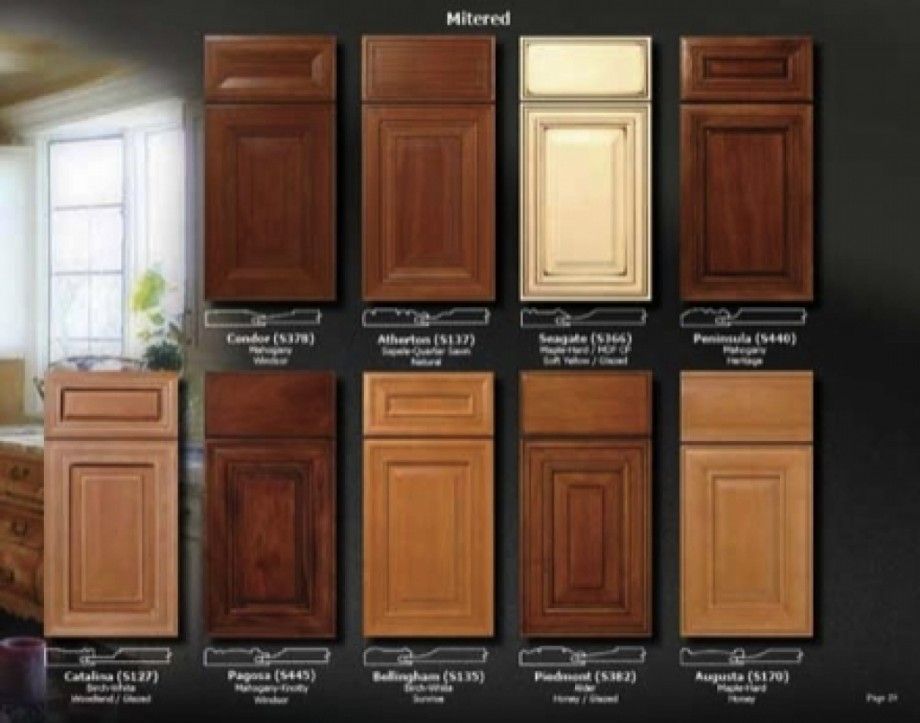 You will have to spend a lot of time, but the result will pleasantly surprise not only the owners, but also the guests who will visit you. There are no restrictions on the options used, everyone finds the closest option. It remains only to select the appropriate materials.
6. Replacement of accessories
Details, little things, small elements can make a significant, even diametrical change in the appearance of kitchen furniture. When planning a comprehensive kitchen renovation, do not forget about replacing handles. Thanks to this, it is much easier to achieve a given interior style. There are rustic and modern, industrial and classic pens in every store, just pick the ones you like best. Believe me, if the accessories are not rare and there is nothing valuable in their design, you should not bother with their repair.
Read also:
How to choose high-quality accessories for kitchen furniture
Video-painting of kitchen facades MDF
photos of example of furniture
The following presents several photo recimids of kites and after painting. Pay attention to how updated and bright the kitchen furniture has become, and how the interior of the kitchen has changed.
To summarize
How to repair and paint kitchen furniture, so that the result does not disappoint? First evaluate the range of damage and work required, then select the best paint product.