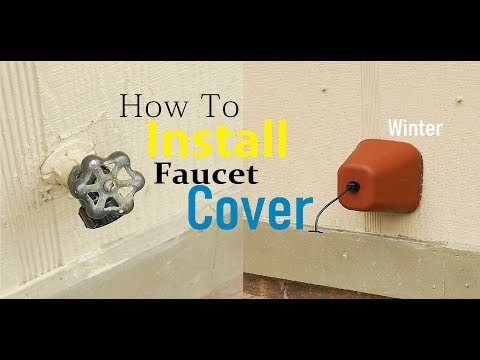
Protecting outside faucets from freezing
How to Prevent a Frozen Outdoor Faucet
Winterizing your outdoor faucet, also known as a hose bib or water spigot, is a simple project. If it’s not done correctly, the consequences could be serious. A frozen outdoor faucet can cause serious water damage to your home and property. Luckily it is easy to prevent a frozen faucet if you follow these tips.
Why Do I Need to Winterize my Outdoor Faucets?
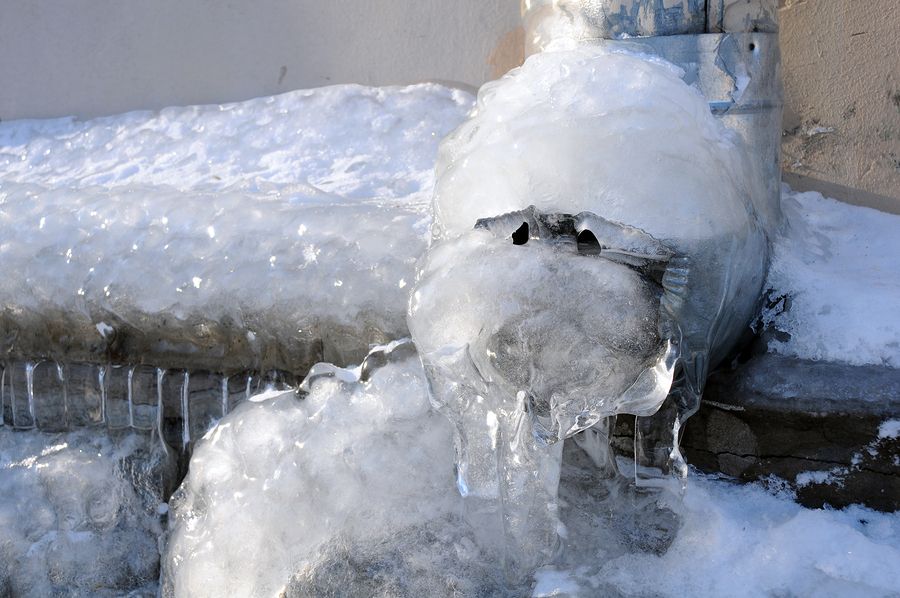
Water expands as it freezes, so if water is inside your pipes when the temperature drops below freezing, the ice can grow too large and burst the pipe. While the problem may not be immediately obvious (especially if the leak is inside the wall), a clear indicator that there’s an issue is if there’s water spraying outside.
If you see water around the spigot or inside your house, call your local plumber immediately! Waiting too long to fix the issue can result in extensive damage to your home.
Thankfully, avoiding a frozen outdoor faucet is easy. Winterizing is not expensive and you can do it yourself. A few minutes now can save you time, money & frustration.
3 Steps to Avoid a Frozen Faucet During Winter
1. Disconnect Your Hoses in Fall
This step is important because a connected hose holds water even when the faucet is turned off. When the temperature drops, the water freezes inside of the hose and pipe and can burst. We often see instances where the break happens in winter but people don’t notice until spring when they turn on the outdoor faucet. Depending on where the break is you can get water spraying inside or outside your home when you turn the water on.
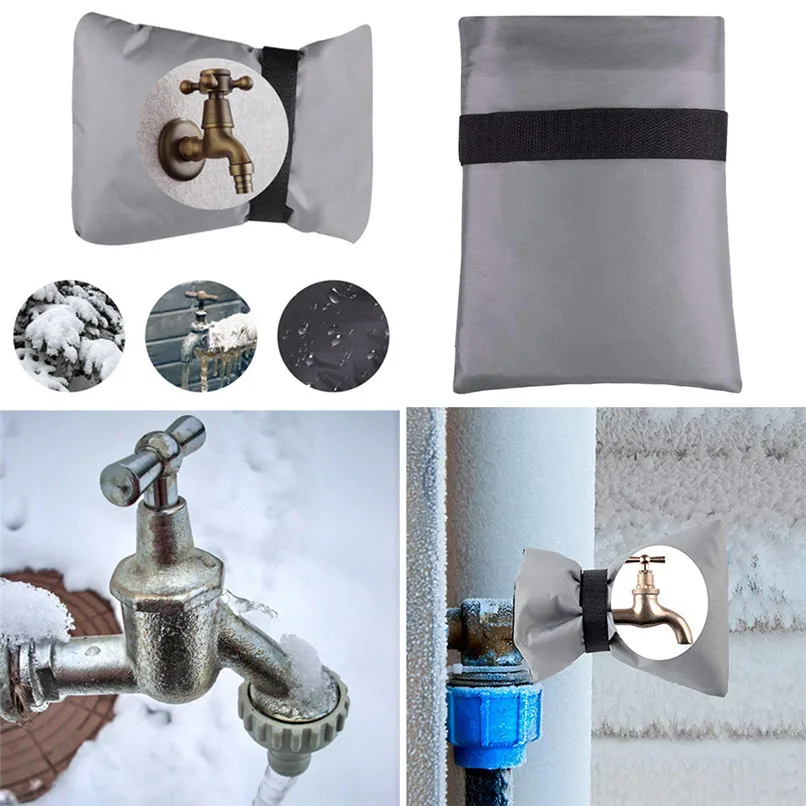
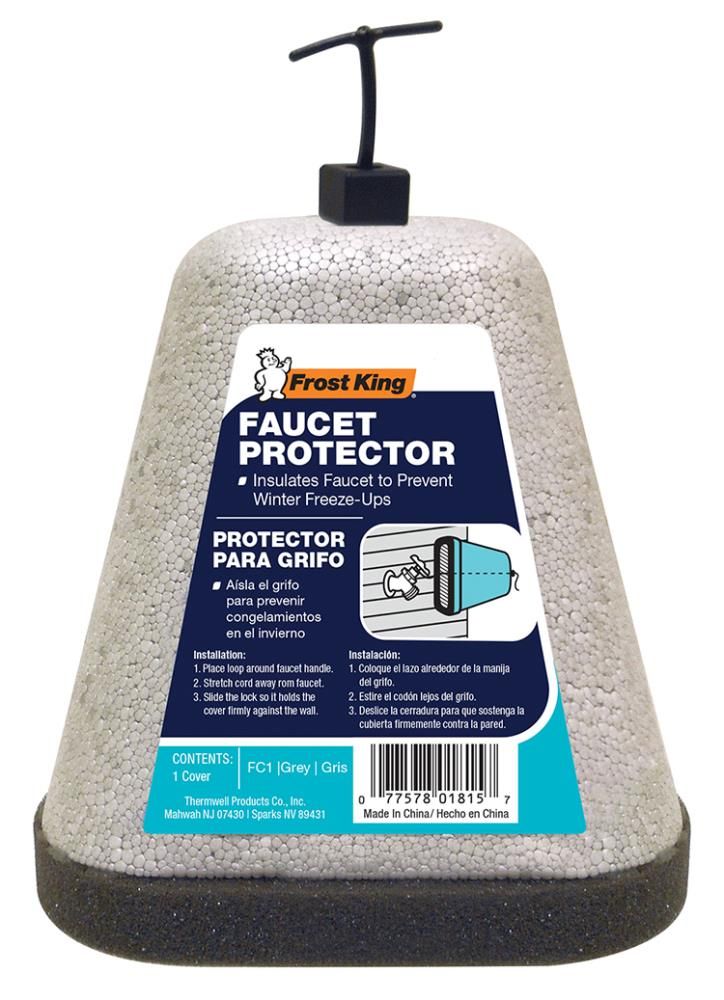
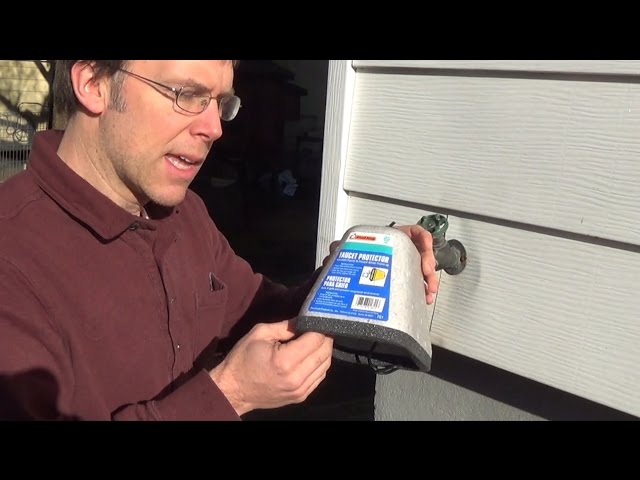
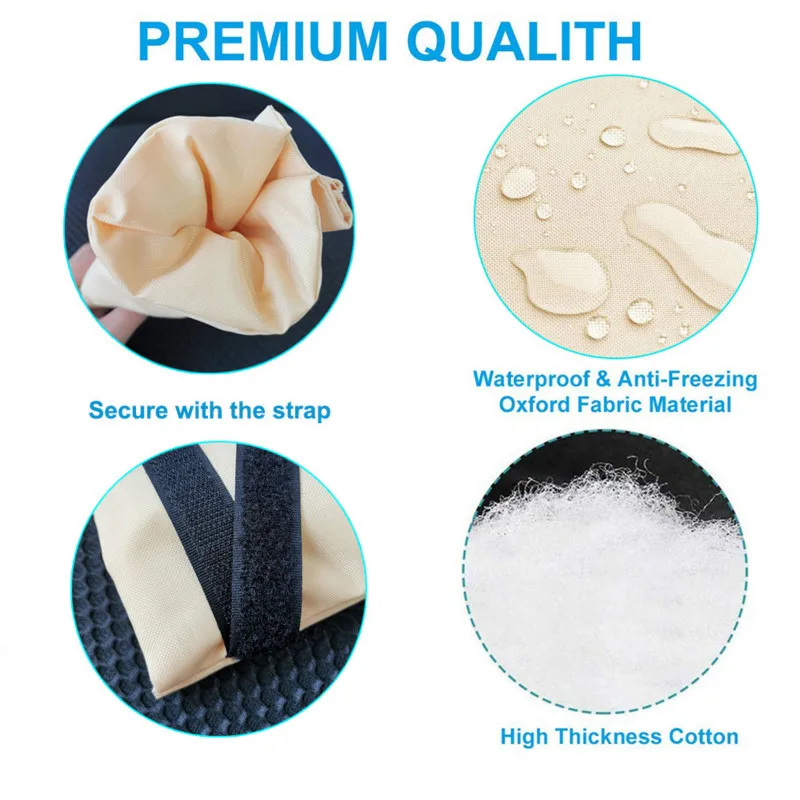
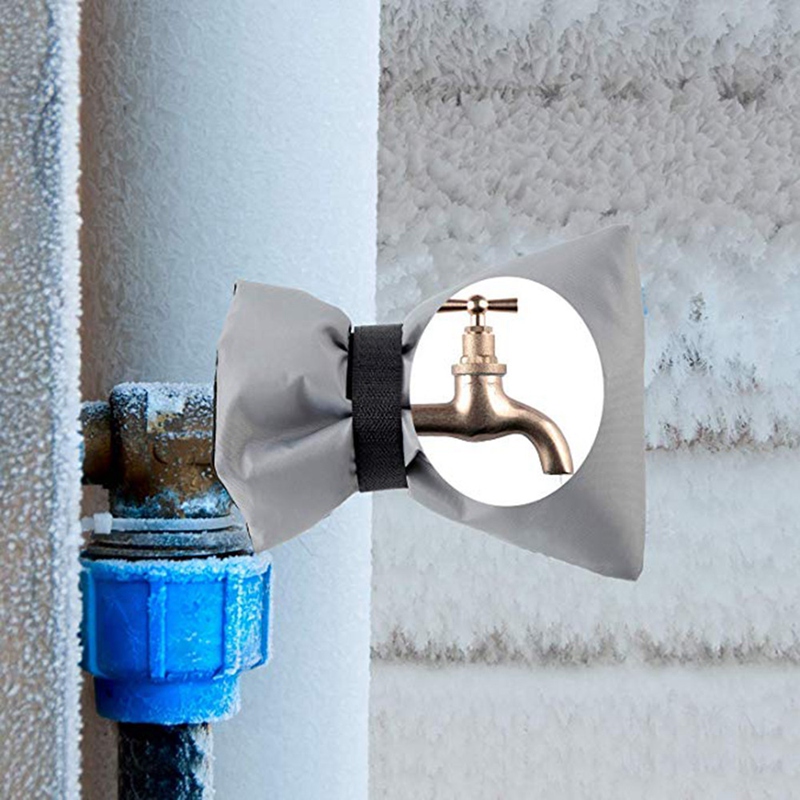
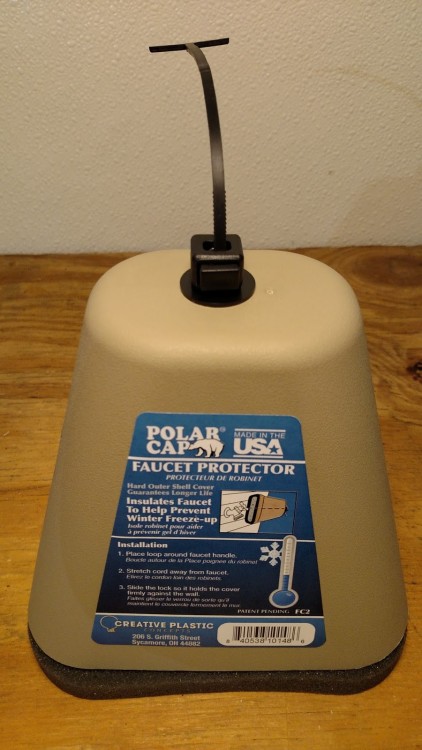
Outdoor faucet covers are easy to install and protect from freezing during winter.
2. Use an Outdoor Faucet Cover
Disconnecting the hose is important, but doesn’t completely solve the problem – you also need a faucet cover. Luckily, most hardware stores carry inexpensive Styrofoam covers that keep your faucets isolated and protected from the winter elements.
Simply purchase and install based on the manufacturer’s instructions, making sure to secure it tightly in place. This little step can save you a lot of frustration and potential water damage.
3. Install a Frost-Free Faucet
If you have already experienced problems or are looking for a more permanent solution, you can talk to your plumber about replacing your faucet with a frost-free spigot. This is an outdoor faucet designed to operate in freezing temperatures. You still need to disconnect the hose in the winter. A frost-free faucet can break if the hose is left connected because the water stays trapped in the faucet head and pipe. You won’t notice you have a problem until spring when you turn on the faucet.
A few preventative steps today can save you time, money and effort in the future. Call a trusted plumber right away if you suspect that your faucet is broken or you need help winterizing it. They will help you decide what works best for you, your family and your home. You can also check out our article on 10 ways to prevent frozen pipes for more things you can do to protect your home this winter.
How to Prevent Outdoor Spigots From Freezing
By
Bob Formisano
Bob Formisano
Bob Formisano is a licensed architect and builder with nearly 40 years of experience building new homes and restoring older homes. One of his specialties is repairing old systems dating back to the 1920s, including galvanized water pipes, knob-and-tube wiring, and more. His home repair articles for The Spruce span more than 10 years.
Learn more about The Spruce's Editorial Process
Updated on 08/02/22
Reviewed by
Richard Epstein
Reviewed by Richard Epstein
Richard Epstein is a licensed master plumber with over 40 years experience in residential and commercial plumbing. He specializes in estimating as well as design and engineering for plumbing systems, and he works for one of New York's largest union plumbing construction companies.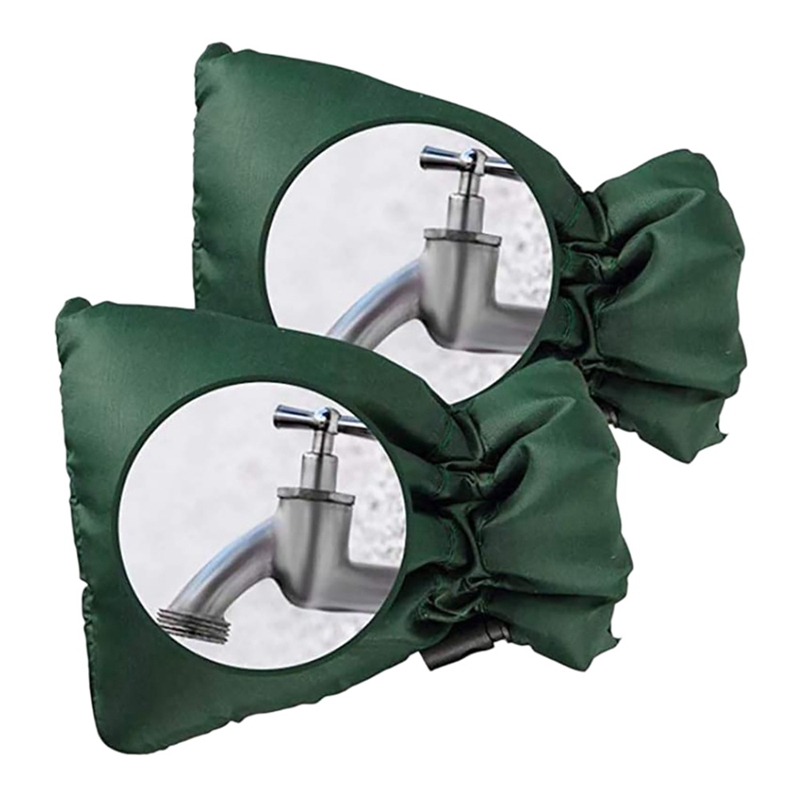
Learn more about The Spruce's Review Board
Fact checked by
Jessica Wrubel
Fact checked by Jessica Wrubel
Jessica Wrubel has an accomplished background as a writer and copy editor, working for various publications, newspapers and in public libraries assisting with reference, research and special projects. In addition to her journalism experience, she has been educating on health and wellness topics for over 15 years in and outside of the classroom.
Learn more about The Spruce's Editorial Process
The Spruce / Sarah Lee
Project Overview
Worrying about outdoor spigots freezing every winter is something that most homeowners can relate to. But this doesn't have to be such a perennial problem.
If you have a standard spigot, there are simple winterizing steps you can take that make it unlikely you'll have a problem with freezing. You can also go a step further and replace a standard faucet with a frost-proof faucet.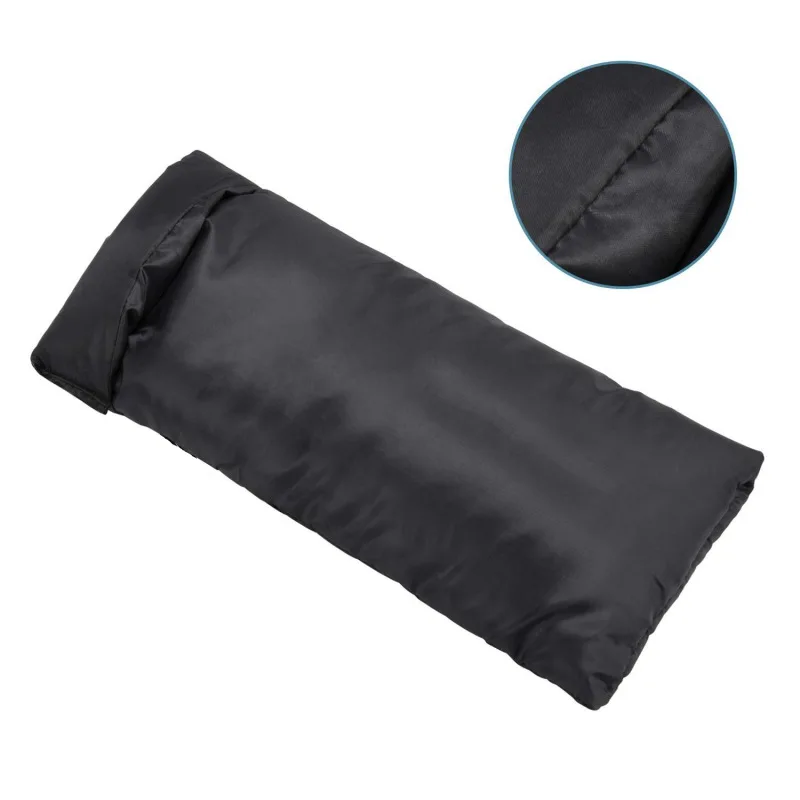
What Is a Frost-Proof Faucet?
A frost-proof (also called "freezeproof" or "frost-free") faucet provides better protection against freezing and eliminates the need to winterize the faucet—other than removing the hose.
Keep reading for two ways to prevent your outdoor spigots from freezing during the wintertime.
Equipment / Tools
Winterizing a Standard Spigot
- Bucket
- Channel-lock pliers (if needed)
Installing a Frost-Proof Faucet
- Screwdriver
- Channel-lock pliers
- Tape measure
- Tubing cutter or hacksaw
- Caulk gun
Materials
Winterizing a Standard Spigot
- Insulated faucet cover
Installing a Frost-Proof Faucet
- Frost-proof faucet with push-fit connector
- Sandpaper or emery cloth
- Corrosion-resistant screws (if needed)
- Exterior caulk
The Spruce / Sarah Lee
How to Winterize a Standard Spigot
-
Remove the Hose
If there is still a garden hose connected to the outdoor faucet, remove it from the spigot, drain any residual water in the hose, coil it up, and store it in a dry location.
The Spruce / Sarah Lee
-
Shut off the Water
Locate the control valve on the water supply pipe leading to the outdoor spigot. If you have metal water pipes, this is usually a brass ball valve located several feet from the outside wall. Turn the handle on the control valve clockwise until it stops. If the valve has a lever-type handle, turn the lever so it is perpendicular to the pipe.
Tip
As you can see, preventing a standard (not frost-proof) spigot from freezing requires a shutoff valve on the supply pipe leading to the faucet. If your spigot does not have this kind of shutoff valve, it's best to install one to simplify annual winterizing tasks.
The Spruce / Sarah Lee
-
Drain the Spigot
Fully open the outdoor spigot and let all residual water drain out of the pipe. If the water trickles and never fully stops, the indoor shutoff valve is faulty and must be replaced. Close the spigot valve.

Hold a bucket under the shutoff valve and remove the bleeder cap on the valve, if it is equipped with one. You may need pliers to loosen the cap. Let all residual water in the line drain into the bucket. Reinstall the bleeder cap, and tighten it snugly.
The Spruce / Sarah Lee
-
Install an Insulated Faucet Cover
Add an insulated faucet sock or faucet cover to the faucet, if desired. Although these covers don't create any heat of their own, they do trap a small amount of heat radiating from the house, and this is usually enough to prevent the faucet from freezing and bursting—especially if you have also followed the recommended steps for draining the pipes.
The Spruce / Sarah Lee
How to Install a Frost-Proof Faucet
The surest way to prevent an outside faucet from freezing is to replace a standard faucet with a frost-proof one known as a sill-cock. These faucets are controlled with a long rod that extends into the home, where a cartridge or compression valve controls the flow of water. Since the valve itself is located within the safe warmth of the home, it is almost impossible for it to freeze.
A frost-proof faucet is a 6- to 20-inch unit with a hose spigot and control handle at one end and a connector on the other end of the tube for attaching to the indoor water pipe. As a further safety measure, these faucets are designed to be self-draining; when you shut off the faucet handle, any residual water in the long stem will drain out of the tube.
These faucets can be attached to the plumbing pipe with a compression, soldered, PEX, or push-fit connection. For most people, it's best to buy a faucet with a push-fit style of connector, such as the SharkBite brand. This will be the easiest install, as it requires no soldering and can be used with any type of water supply pipe.
If you have trouble finding a frost-proof faucet with a push-fit connector, you can use a standard threaded type, and then use a female threaded-to-push-fit transition fitting to join it to the water pipe.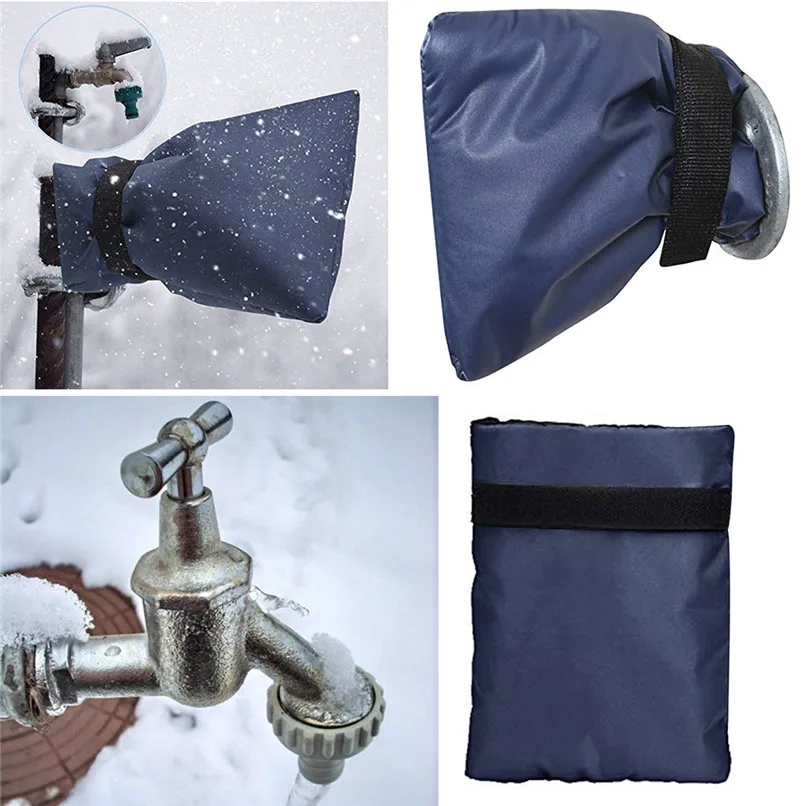 If you have PEX tubing in your home, there are also frost-free faucets that are fitted with PEX-type connectors.
Warning
A project of this scale is best left only to professionals or experienced DIYers: Do not attempt this unless you are confident in your plumbing skills.
-
Shut off and Drain the Water
Turn off the water to the supply pipe leading to the outdoor spigot. If the water pipe does not have its own control valve, you must turn off the water to the entire house, using the home's main shutoff valve.
Open the outdoor spigot and drain the remaining water from the supply pipe.
The Spruce / Sarah Lee
-
Remove the Old Spigot
To remove the outdoor faucet spout, start by removing any mounting screws, then turn the spout counterclockwise to unscrew it from the end of the pipe. You may need to use a pair of channel-lock pliers to twist the faucet spout. Pull the faucet out from the wall on the exterior side.
 Purchase a new frost-free faucet of the same size. It is important that the length and diameter of the pipe match the old faucet.
 The Spruce / Kevin Norris
-
Prepare the Water Supply Pipe
Because of the long valve stem on a frost-proof faucet, it is usually necessary to cut the water supply pipe where the tube of the faucet will connect to it. Use a tubing cutter (for copper pipe), a hacksaw (for galvanized steel or PVC pipe), or a PEX tubing cutter for PEX pipe. Remove and discard the cut-off section of pipe running to the outside of the house.
Debur the inside and outside of the cut end of the water supply pipe with sandpaper or emery cloth. Make sure the outside of the pipe is clean and smooth so it can accept the connection fitting on the new frost-proof faucet.
Mark the end of the pipe at the push-in distance specified by the manufacturer (usually about 1 inch from the cut end of the pipe).
The Spruce / Kevin Norris
-
Attach the Frost-Proof Faucet
Insert the frost-proof faucet through the wall from the outside and position the spout so it is right-side-up.
 Go inside and push the faucet's fitting end straight onto the pipe, pushing as far as the fitting will go. It should reach the push-in mark on the pipe, indicating the pipe is fully inserted into the fitting.
 If you are using a standard threaded-type faucet, screw on the push-fit transition fitting to the faucet's tube first, before attaching it to the water pipe.
From the outside of the house, secure the faucet flange to the wall surface using corrosion-resistant screws, which are usually provided with the faucet.
The Spruce / Kevin Norris
-
Test the Faucet
Open the valve on the faucet, then turn the water back on at the shutoff valve and allow water to run freely out of the faucet spigot. Open and close the faucet spigot several times to confirm that it is working properly and that there is no leaking where the faucet tube connects to the water pipe.
When satisfied that the faucet works correctly, seal the joint between the faucet flange and the house wall with exterior caulk.
The Spruce / Kevin Norris
Protection of well pipes against freezing in winter
When using a well in winter, the most problematic sections of the water supply, laid outside, can freeze.
These include:
- a pipe located inside the well near its top;
- place of contact of the pipeline with the concrete ring of the well;
- the pipeline itself, if it is laid above the freezing depth of the soil;
- place of entry of the pipeline into the house.
These sections of the pipeline, subject to freezing, cannot be protected from freezing by wrapping the pipes with insulation. Pipelines with cold water are protected from freezing by a heating cable. It is advisable to use a self-regulating heating cable for these purposes.
Frost protection of domestic pipes using self-regulating type cables has a number of advantages over other heating cables:
• saves electricity;
• in severe frost, the power given by the cable to the heated surface is maximum;
• places of the pipeline, subject to freezing more than other parts of the pipe, heat up more;
• at positive outside air temperatures, the pipe, located in the frozen ground, continues to heat up slightly.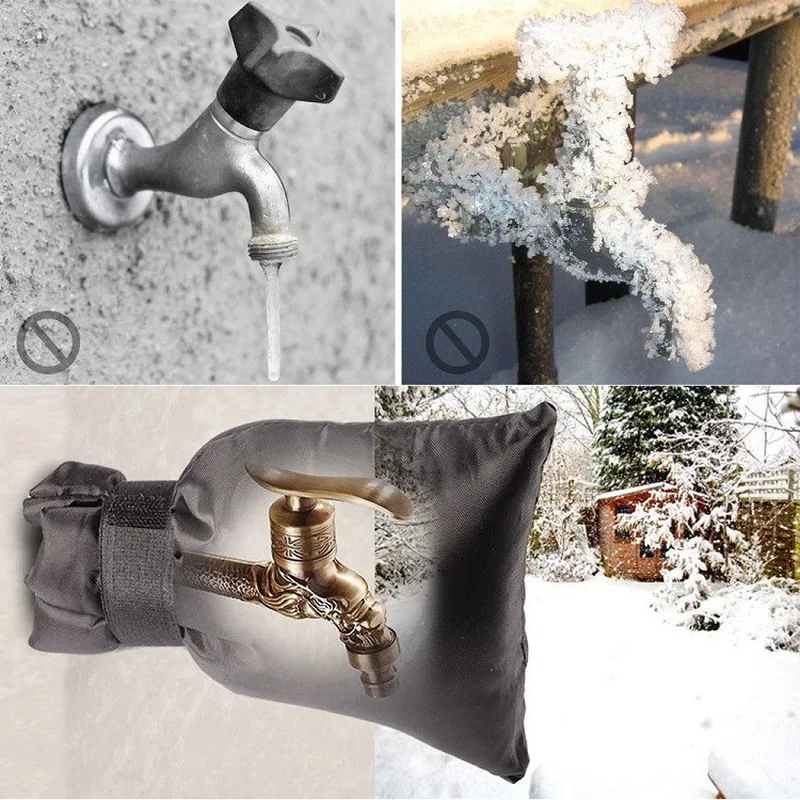
When using self-regulating heating cables, there is no need to use controls such as relays, sensors, thermostats.
Installation of heating plumbing cable
It should be noted that before installation work it is necessary:
- to seal the ends of the heating cable with special waterproof sleeves;
- connect the power cable to the heating cable.
The heating cable is laid along the pipeline, pressing the flat surface of the cable with an adhesive aluminum tape to the surface of the pipe. After that, the entire section of the pipe is insulated. For this, it is advisable to use a tubular type heater.
There are ready-made sets of heating cables on the market designed to protect household pipelines from freezing. You can not buy the heating cable itself, but purchase a kit ready for use. It is a heating section ready for laying, with already mounted cable glands, and a section of the supply cable connected to it.
It must be remembered that any type of heating cable poses a certain danger in terms of electrical safety. Its use is subject to certain rules. After laying the heating cable, the following conditions must be met:
- the heating cable must be supplied with power through an appropriate circuit breaker;
- a residual current device must be used;
- The cable shield, if any, must be earthed.
Output:
With the correct use of a self-regulating heating cable to protect the well water supply, you can reliably protect it from the effects of cold.
MERRILL MA anti-freeze faucet, with anti-siphon valve
Merrill MA series of wall-mounted faucets with anti-freeze protection - in the VISA GINGER assortment.
- Metal handle - for durability and long faucet life.
- End connection - makes it easy to install the faucet without having to cut an oversized hole in the wall.
- The top stamp marked "TOP", on the inlet end of the wall faucet, indicates the exit direction from the outside of the building when connecting inside the building.
- Chrome-plated for corrosion protection and appearance.
- Anti-Siphon - double safety with air check at the nozzle and at the end of the connection.
- Automatic self-draining - when closed, the wall tap drains itself and opens the end hose due to the air check above the nozzle.
In addition to frost protection, the outdoor tap is protected against possible water ingress from the outdoor side through a hose connected to it. For this protection, an anti-siphon valve is provided in the design of the crane.
Photo courtesy of Santehmsk777.
Installation instructions.
- Drill a 28-30mm diameter hole in the wall where the faucet will be installed. Choose a place for the hole, taking into account the fact that the installation of the crane is carried out from the outside of the building.
 Drill the hole with a slight slope towards the street.
 - Position the wall faucet so that the faucet outlet, spout and therefore the water jet point downwards. When installing the faucet, being indoors, you can orient the correct position of the faucet by marking "TOP", it should be on the upper edge of the hexagon, next to the 1/2 inch inlet thread.
- Place the plastic spacer between the wall faucet mounting flange and the outside of the wall, thin side down, so that the gasket is as close as possible to the flange mounting part.
- The faucet must be installed in such a way that residual water can drain off on its own after the faucet is closed. To fulfill this condition, it is necessary to mount a crane with a slight slope of 2-5 degrees, towards the street.
- If welding is to be carried out in the immediate vicinity of the crane, remove all plastic parts of the crane before starting work.
- Attach the wall faucet mounting flange with two dowel screws or other fasteners to the wall surface.
 Fill the space between the faucet body and the hole in the wall with mounting foam.
Important!
During sub-zero temperatures, it is necessary to ensure that there is no water in the hose connected to the tap and to exclude the risk of water backwater from the street. To do this, turn the valve to the "closed" position and separate the hose during frost. Leaving the hose connected to the faucet will prevent water from draining from the system and may freeze and damage the wall faucet.
The full function of the anti-freeze wall tap is only guaranteed if the water cut-off valve mechanism is located in the heated part of the building. If the building is unheated for some period of time, there are risks of freezing of the premises. In this case, make sure that there is no water in the tap and that the entire system is “mothballed” and ready for winter.
Prices and range of MERRILL faucets, MA series
MERRILL, price list
Updated: February 2023.