Terracing a sloping garden
How to level or terrace a sloping garden
Lighting a slope Drainage Retaining walls Plants for sloping gardens
Traducción Española
Contact Mike
Garden levelling Information on this page;
- Do It Yourself tips to level a slope
-
What materials are used to terrace a slope.
-
Building retaining walls to form terraces.
-
How to level a slope yourself?
-
Sloping Uphill & Sloping Downhill, design tips.
-
How to dig out the soil when levelling a slope.
- Levelling or terracing sloping gardens, require a different approach at the design and build stages, based on whether the garden slopes down and away or upwards toward the house.
The visual stuff like the shape of walls and wall facings, not forgetting garden lighting become important.
- Also if you are terracing or simply levelling your garden to make it easier to get around because of age or problems that affect mobility. The planning of pathways, steps and hard surfaces become very important considerations. My article here garden design for elderly could help.
- Levelling a sloping garden for whatever reason makes gardening easier and creates outdoor dining and play areas. If your garden has a steep slope planned landscaping can make it accessible and usable again.
These are some of the most popular materials used to retain terracing.
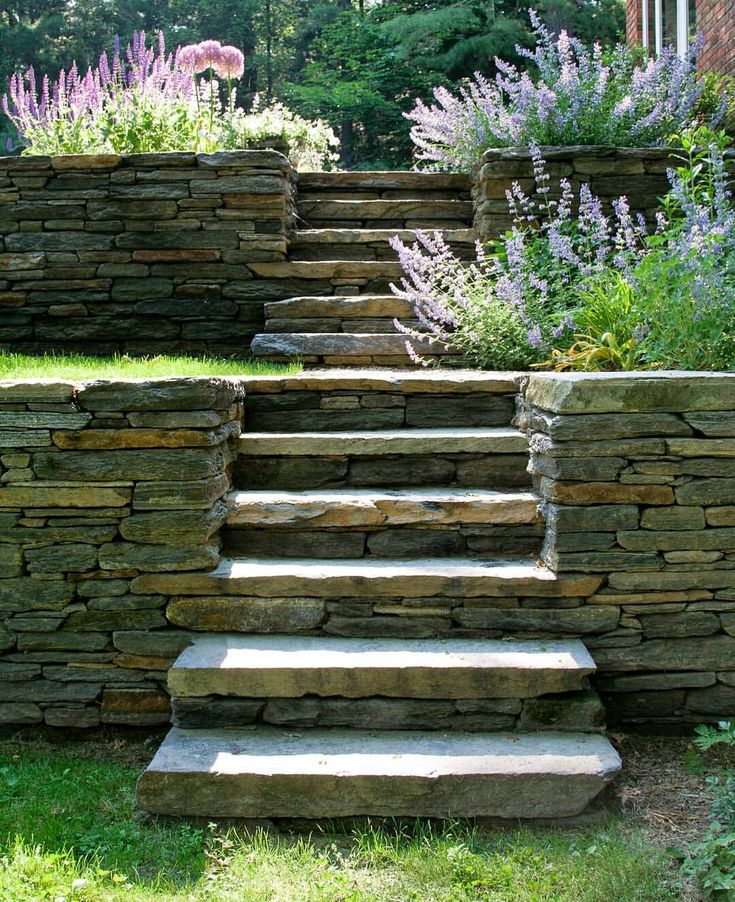
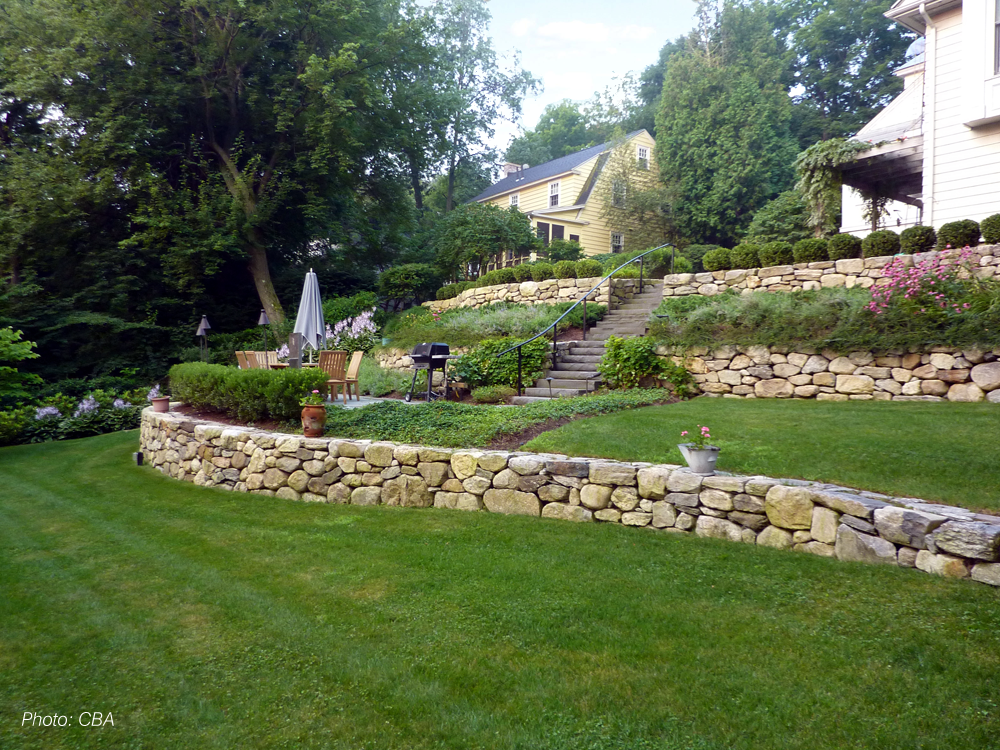
Stone retaining walls using pre-formed concrete stacking blocks (not cheap), breeze blocks, house bricks or natural stone (expensive).
Reclaimed railway sleepers are fairly cheap and treated to last. But the downside with railway sleepers is the oil and tar used to preserve them making them unsuitable for sitting on or contacting with bare skin, especially if you suffer from allergies.
New sleepers are a cleaner, but slightly more expensive option to build the retaining walls from. They will need to be treated over the years to prevent them from rotting.
Gabions (wire cages filled with stone or rubble), are being used more and more in domestic landscaping for building, cheap, safe and attractive retaining walls. See below
Building materials used for paths and hard surfaces where mobility is a key factor.
Materials for paths and hard surfaces should be carefully chosen for safe and comfortable use by people using walking aids and wheelchair users. Surfaces need to be well constructed with a firm, non-slip, level access.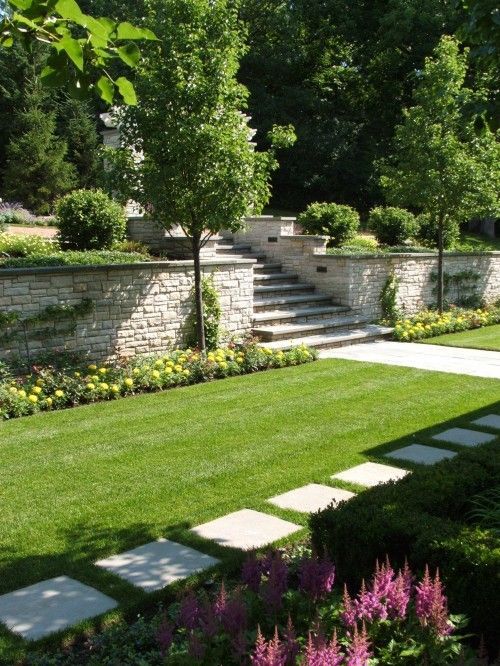 Gravel is unsuitable, however, there's a wide range of materials available. Block paving is fairly easy to lay, looks good and is permeable (lets water through).
Path surfaces should be firm, level, non-glare and non-slip when wet or dry and have a well-consolidated sub-base to avoid the surface cracking up or shifting.
flowerpotman.com
Gabion baskets make building a retaining wall simple
- 3 galvanised gabion baskets which can be used to bring your creations to life.
- 90 FREE gabion connectors to help attach the baskets together.
- 12 FREE strengthening gabion hooks included to reinforce and maintain the shape of the baskets.
- FREE CE certified comfortable protective gloves guarantee easy assembly.
- FREE next working day UK mainland delivery when ordered by 2pm (excluding Scottish Highlands).
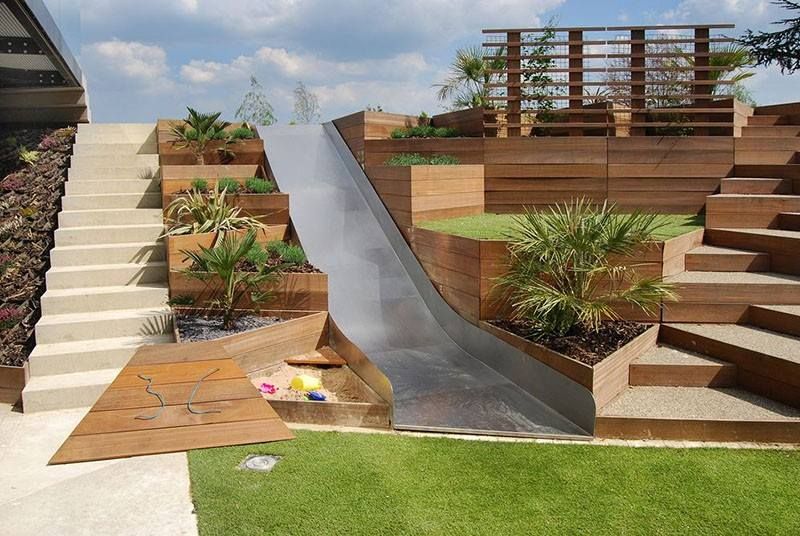
Terracing or levelling a sloping garden adds interest and creates workable space, allowing planting at different levels, maybe flower borders and a patio on the top terrace and a vegetable patch lower down the slope, with a herb garden near the kitchen. The combinations are endless once the slope has been levelled.
For gardeners, plant choice is not limited by soil erosion, for families, space is created for children's play areas and entertaining.
Levelling and terracing a sloping garden takes a lot of time and effort. Shifting earth, maybe digging out clay, but yes it is a job you can handle yourself. Bear in mind though, if things start to go wrong and the walls retaining the terraces come tumbling down. And you end up calling in landscape gardeners to put it right. It will cost lot more in the end. It is very very important to get the retaining wall right.
If you do decide to terrace the slope yourself it is worth the hard graft.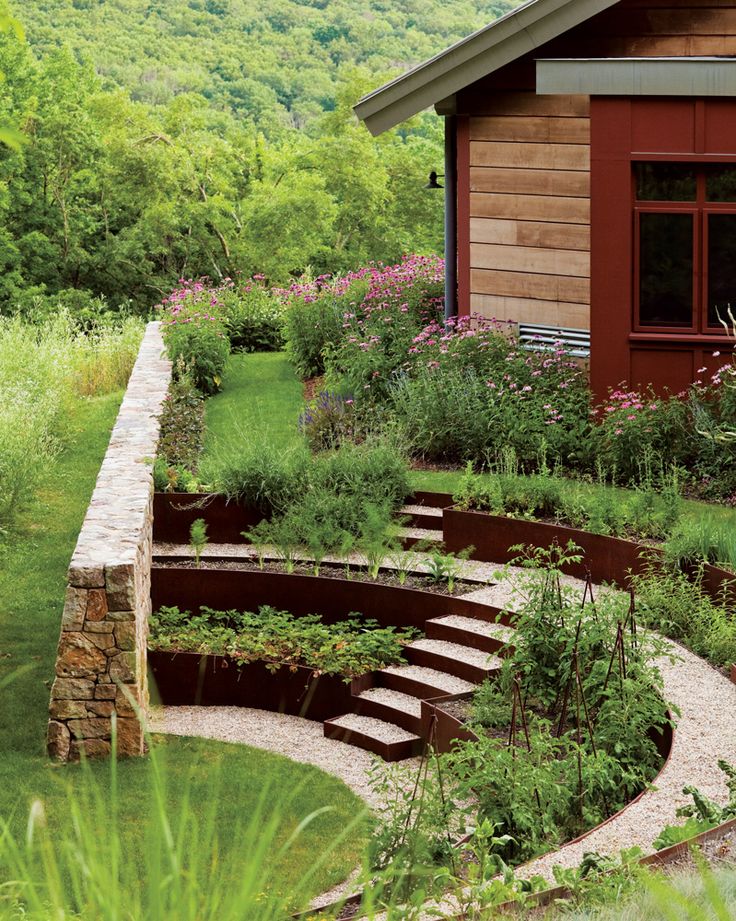 Stopping the impact of erosion by forming even a short slope into terraces will save money on plants and make the area more workable, also makes mowing lawns much easier.
digging the slope
Advice for building safe retaining walls.
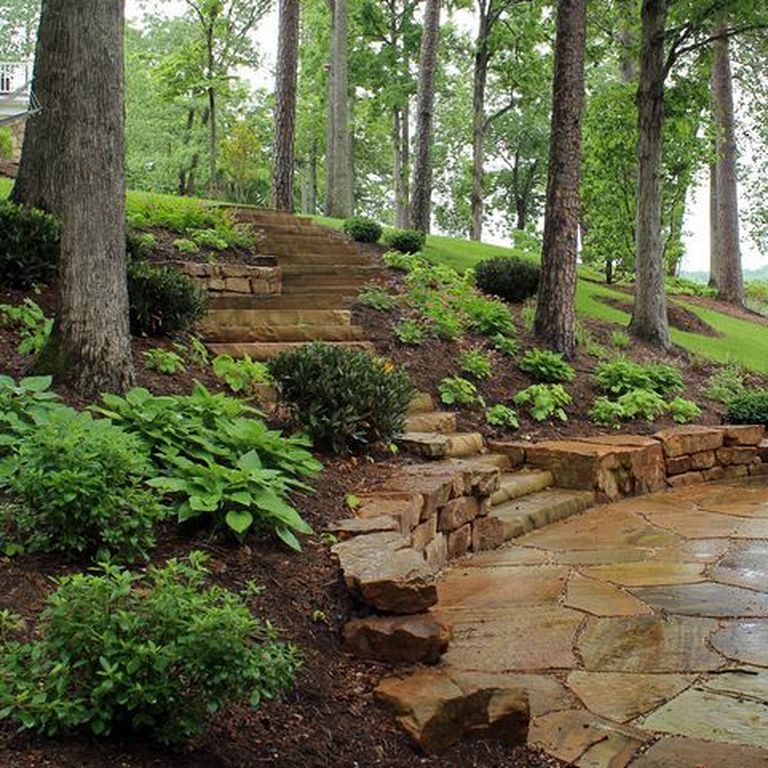
You can use a range of materials to form the retaining walls from the main ones we have discussed earlier, treated wood, gabion wire cages or stone, through to house bricks (reclaimed brick makes an attractive wall), concrete, quarry rocks and if the terracing isn't very steep you can use compacted piled earth. The durability of the wall will depend on the material you use and the quality of the footings you build the wall on.
High retaining walls have the greatest risk of failure. As the retaining wall height increases, the force trying to topple the wall increases by a large factor. For example, if you double the height of a wall, the tipping force can increase by a factor of three or four times.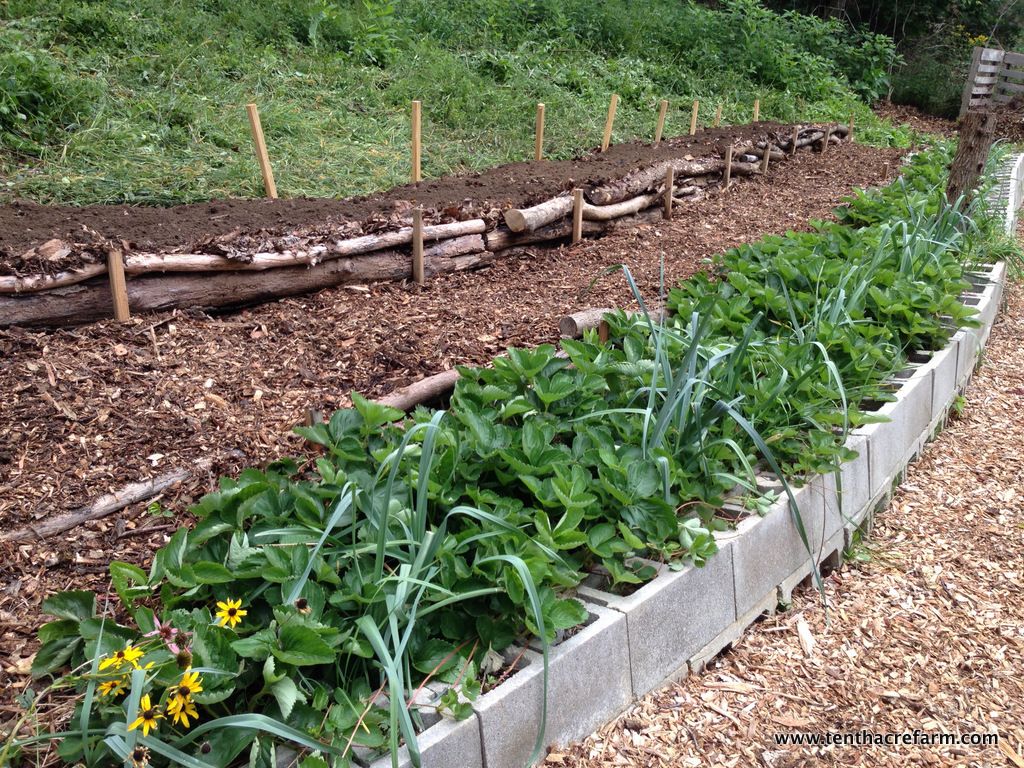
Not to high and not to much.
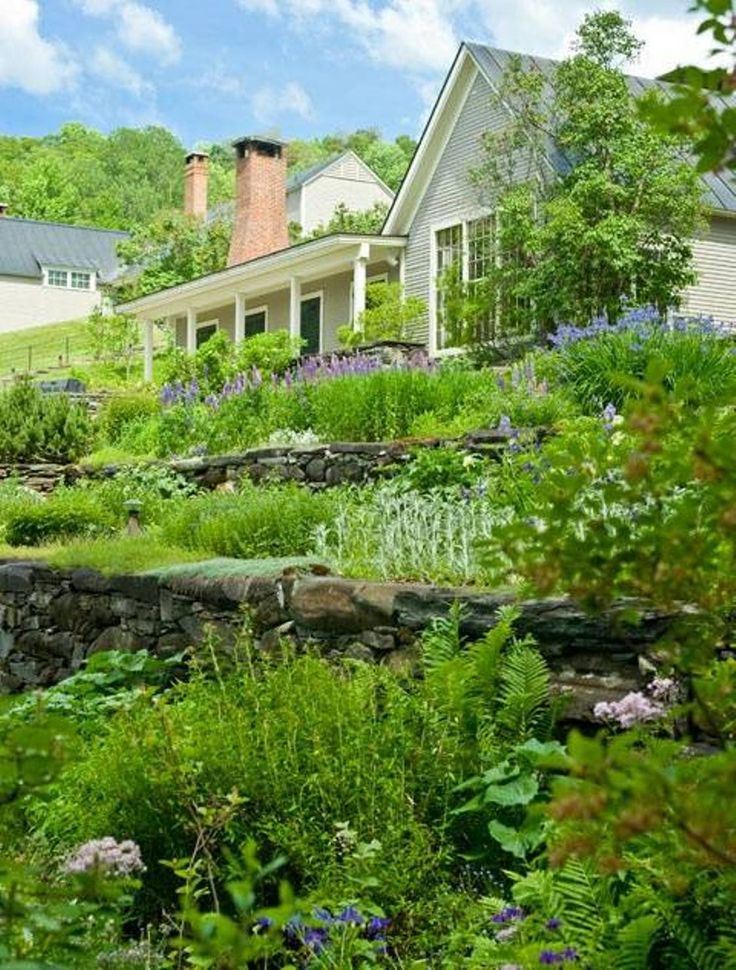
For the reasons we have covered above, if possible avoid very high retaining walls. If your garden slopes away from the house and you're planning a patio area directly outside the house, the further into the slope the patio extends the higher the retaining wall will need to be. A higher retaining wall will need more steps to access the next level. With a downward slope away from the house, it might be worth considering positioning the patio on one of the lower levels rather than sacrifice dining and entertaining space.
Dry stone walls. This article explains how to build stone walls. retaining walls.
How long will it take to level a slope.
Doing it yourself will depend on the size of the garden, the steepness of the slope, number of terraces, access to the skip and how much help you can count on. If I can get a digger onto the slope.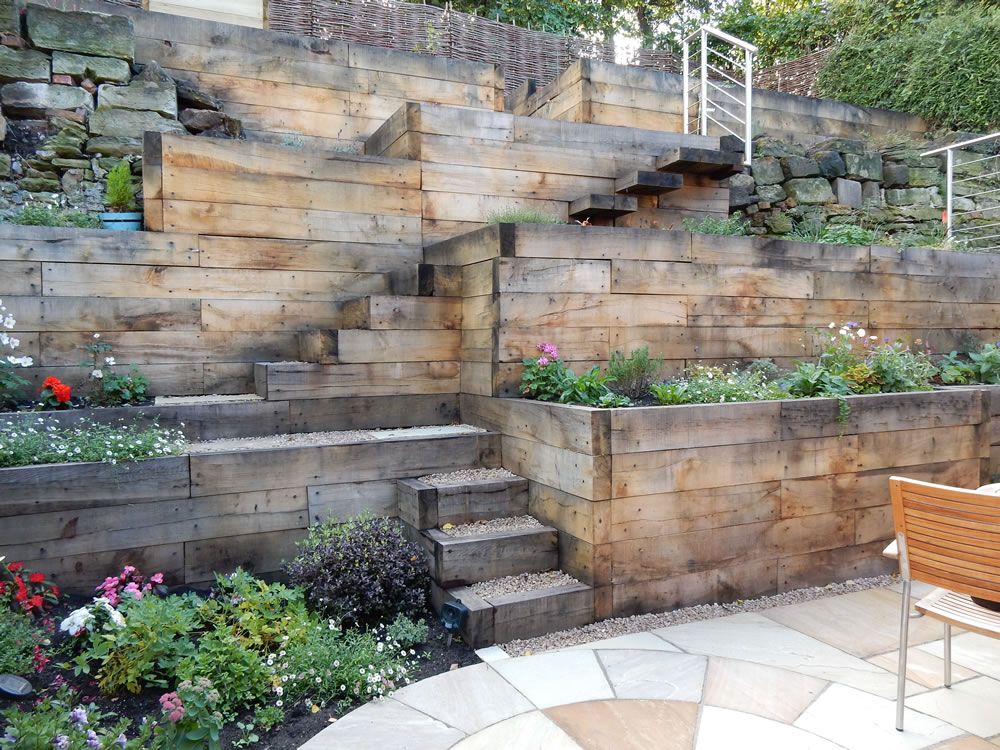 The levelling and terracing work normally takes me a couple of weeks in a small to medium garden.
To save time shifting soil from one area to another.
- We use the cut and fill method to form the terraces.
- This means digging out soil to lower the top half of the area, using the same soil to fill the lower half.
- If you divide the area you intend to level in half, you won't have a lot of surplus topsoil to get rid off.
- Before starting levelling, you will need to have the new retaining walls in place.
As you dig deeper into the slope you may hit clay or stone, possibly rock. So, it is a good idea to have a pick-axe handy. Bury the clay and rock saving the best soil for the top
Diagram of the cut and fill method of moving soil to level a sloping garden.
- 3 galvanised gabion baskets which can be used to build retaining walls,
- 90 FREE gabion connectors to help attach the baskets together.
- 12 FREE strengthening gabion hooks included to reinforce and maintain the shape of the baskets.
- FREE CE certified comfortable protective gloves guarantee easy assembly.
- FREE next working day UK mainland delivery when ordered by 2pm (excluding Scottish Highlands).
Gabions filled with stone or rubble), are being used more and more in domestic landscaping for building safe and attractive retaining walls.
You are now ready to begin building the retaining walls and levelling the terrace. Before you start however, its worth spending a little bit of time considering the different design ideas for uphill or downhill slopes. This can make all the difference in the aesthetics of the finished job.
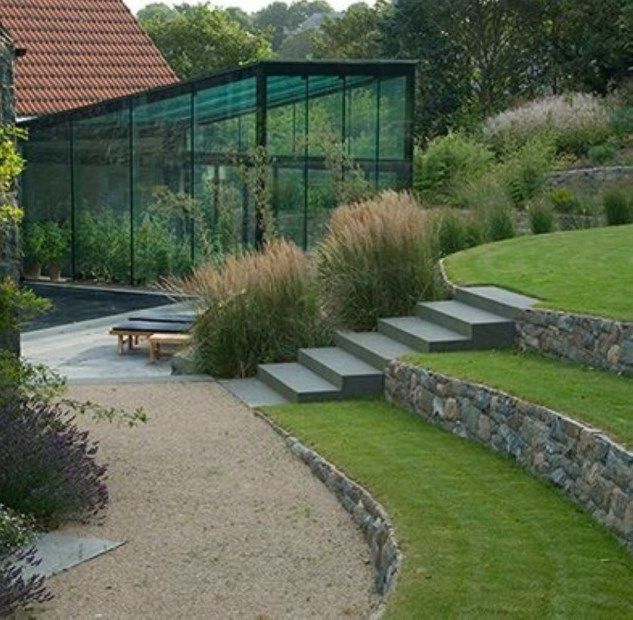
Both uphill slopes and downhill slopes need a slightly different approach at the design stage. On a downward slope viewed from the house you only see the tops of steps and walls.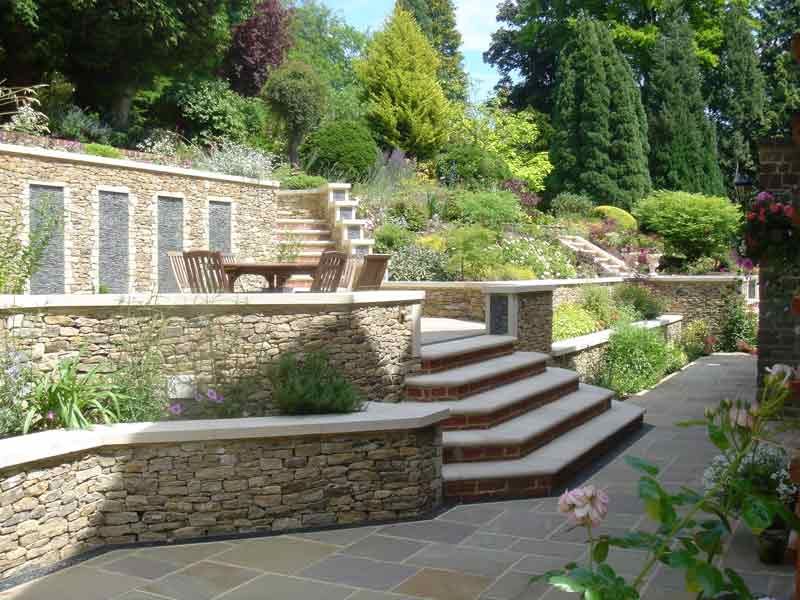 However, with an upward slope viewed from the house. The steps and walls become the focal point.
Downhill slopes often look better with straight walls, sweeping paths and gradual slopes.
Uphill slopes look better when the walls are curved making the retaining walls a garden features.
To get an idea of what you will end up with, stand at the bottom of the slope you are designing the terraces into and imagine the finished job. Do you like what you will be looking at one day? It is an expensive undertaking terracing and levelling a sloping garden. The benefits will be, easier maintenance, space to entertain and space for kids to play safely. With an extra bit of planning it will look good too.
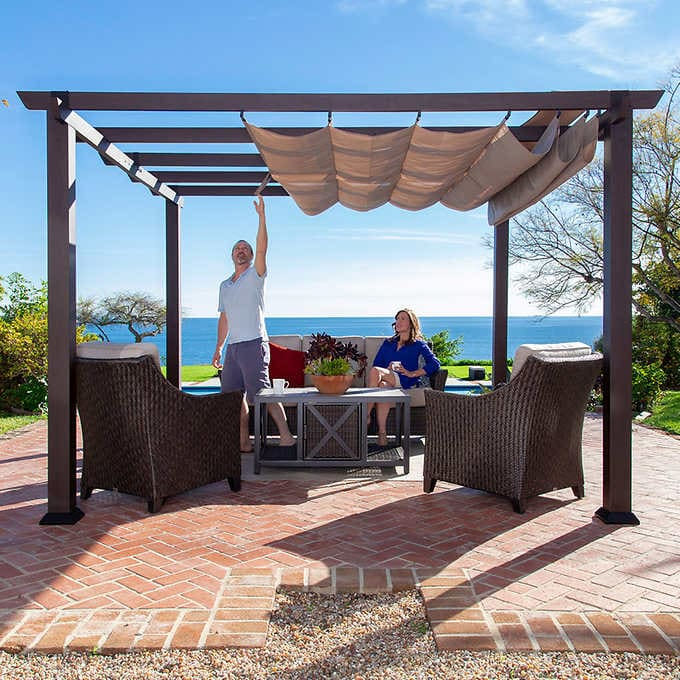
Paved terrace. The golden rule for a paved terrace is that it is big enough to dine and entertain without falling of the edge. To work out the space you will need. Place a dining table in the middle with six chairs around the table, now move the chairs back 18".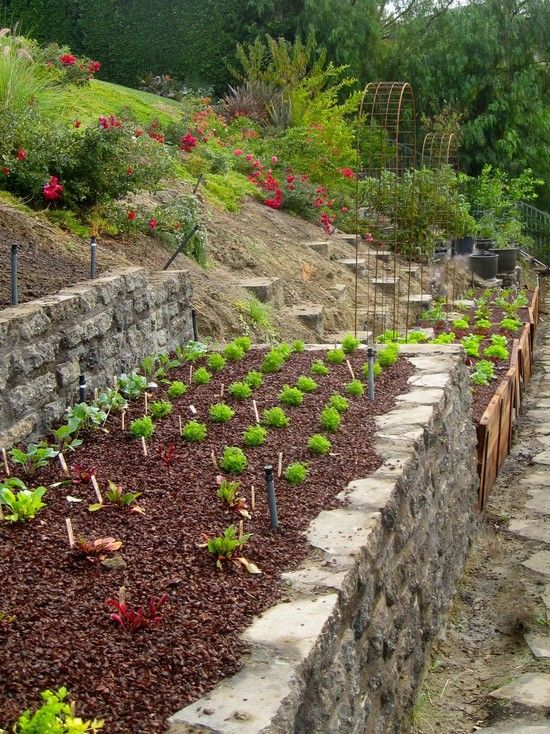 That's the minimum space you should aim for and don't forget to include space for the BBQ! What you include in your sloping garden design will depend on the size. Creating to many different levels will mean that terraces could be too small to build a comfortable dining area.
Kids play area and seating. A family with young children might want to include a safe play area and maybe a sand pit/shed to store the kids' toys. If you are not including a paved terrace. Aim to have plenty of natural seating spread around the garden. The tops of stone retaining walls and sleeper raised beds make great places to sit and ponder. Try to have seats spread around to follow the sun. Also, make the steps wide enough to sit on.
Illuminating slopes, terracing and steps. Positioning garden lighting tips, can be found here. lights on a slope
What features can I include in my terraced garden.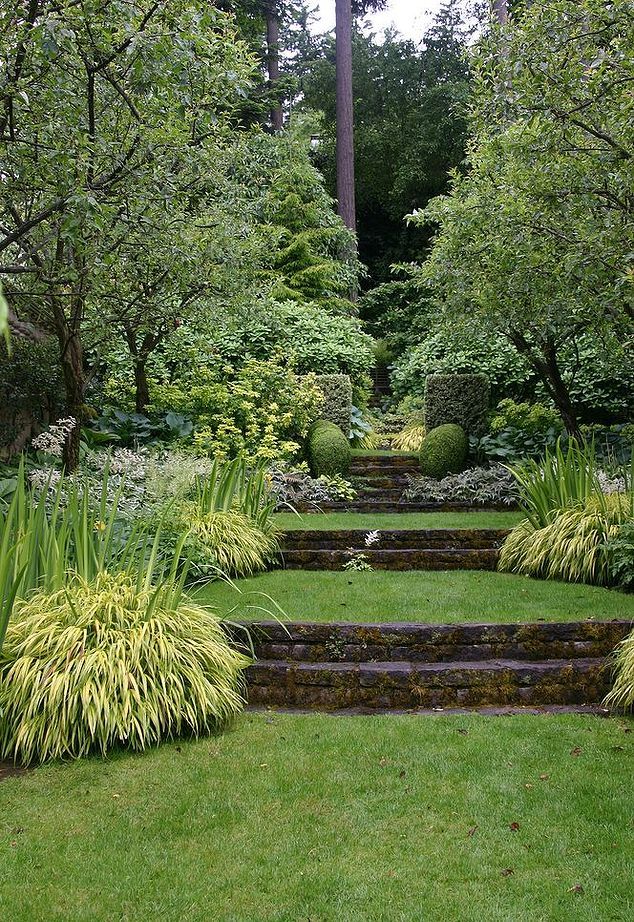
Features; Can include birdbaths, bird feeders, big flowerpots and trellises all add interest. But don't go over the top in a small sloped garden. Too much clutter makes it look smaller, design tips can be found on my small garden page.
Water features.
Water features and streams running from the top to the bottom work well and look good in a sloping garden. They seem to connect the various terraces together and the sound of running water bubbling over pebbles is something else.
Existing plants and shrubs can be dug out whilst the groundwork is going on, planted in containers and flowerpots and saved for replanting when the terracing is complete. Working around plants is time consuming.
Plants for terraces.
Some deep rooting plants as well as looking good, actually help retain the soil stopping erosion on slopes whilst shallow rooting plants, like ivy can cause erosion.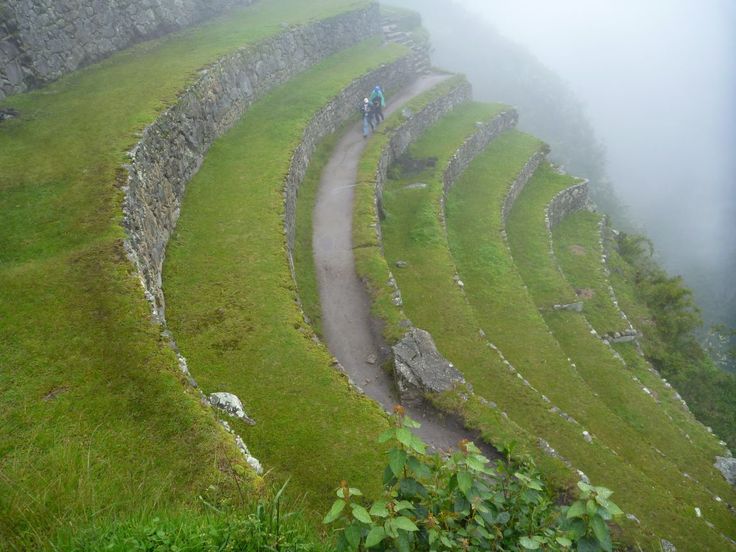 I have listed plants on this page best plants for slopes
Plants that like to flow down slopes like coneflowers, black eyed susan, garden phlox, shasta daisies, purple russian sage, herbs like catmint and creeping phlox work well on the edge of a terrace.
Plants like artemesias and soft wooly lambs ears with grey or silver foliage add contrasting colour against brighter blooms and dwarf evergreen shrubs.
Vegetable beds. You may of course be unsociable and more interested in growing your own vegetables than entertaining. I am, that's what my wife says anyway! If like me, a growing area is more important than paving, include space for a compost heap. If you can't completely level the growing area, a slight slope won't effect the plants.
What you include in your sloping garden design will depend on the size. Creating too many different levels will mean the terraces could be too small to build a comfortable dining area.
What do you want from your levelled garden.
You can see why it is worth taking time to think about your new terraces before you start levelling the slope or calling in a landscape gardener to do the groundwork. When I am called in to price a terracing job, I always ask this question "What will be the main purpose of the new terraced garden?" It's expensive to make major design changes once the levelling is started.
Don't be put off by the cost, or hard work if you are going to do the work yourself. Soil erosion, areas you can't get to and slippery slopes can be a nightmare, especially as we get older. With some thought and hard work it really can be turned into a safe place to enjoy using again.
If drainage is a problem, visit my lawns and garden drainage page.
Gabion baskets make building a retaining wall simple
The Benefits of levelling or terracing a slope include;
- Creating space to build functional patios and kids safe play areas.
- For gardeners stopping soil erosion and rain water washing the nutrients and seedlings away.
- For older gardeners, the main benefit after levelling the slope and forming terraces, is the garden will be easier to work on and get around.
- Make it an enjoyable place to be in, instead of a daily challenge.
Hope you find the DIY levelling tips useful, but if you haven't got the time? We are Landscape gardeners specialising in levelling, terracing and landscaping sloping gardens in Weston super mare, North Somerset, Somerset, Bristol, Portishead, Clevedon, Nailsea, Yatton and Bridgwater and sometimes further afield. Contact Mike
Here's a Quick Way to Terrace a Hill [+ Free Download]
Are you challenged with sloping land? Here’s a solution to stop erosion on a hillside and create an easily-navigable terrace garden. Oh, and don’t forget to grab your FREE DOWNLOAD: Building a Check Log Terrace Quick Start Guide at the end of the article.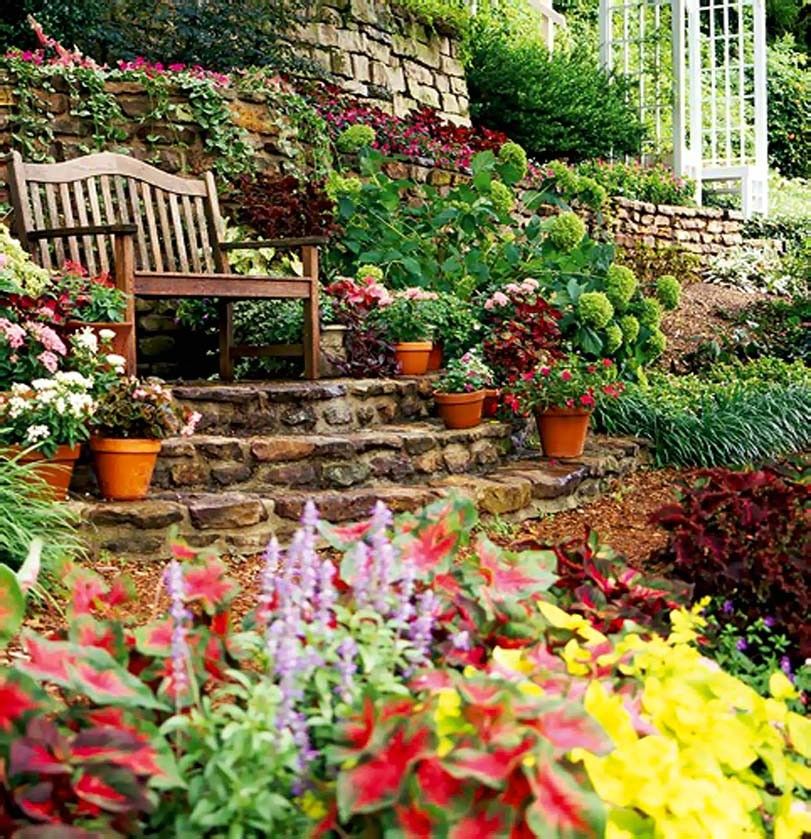
This page may contain affiliate links. Please read my disclosure for more info.
In 2011, I started Hillside Community Garden, and as the name implies, we had a steep challenge. The hillside was prone to land-sliding and erosion. Any topsoil and nutrients that may have been there at one time had since washed away.
We were looking for a garden terrace solution that not only helped stabilize the hillside, but also helped increase fertility (to make up for all that had washed away). Oh, and the solution needed to be cheap and low tech, because after all, we’re just a volunteer group operating on a small budget.
Check Logs: A Garden Terrace for a Slope
I sought council from local permaculture practitioners, who suggested that I look into the concept of check logs.
I had no idea what check logs were, but I found more information in Edible Forest Gardens as well as in Rainwater Harvesting for Drylands and Beyond, where they are referred to as check dams.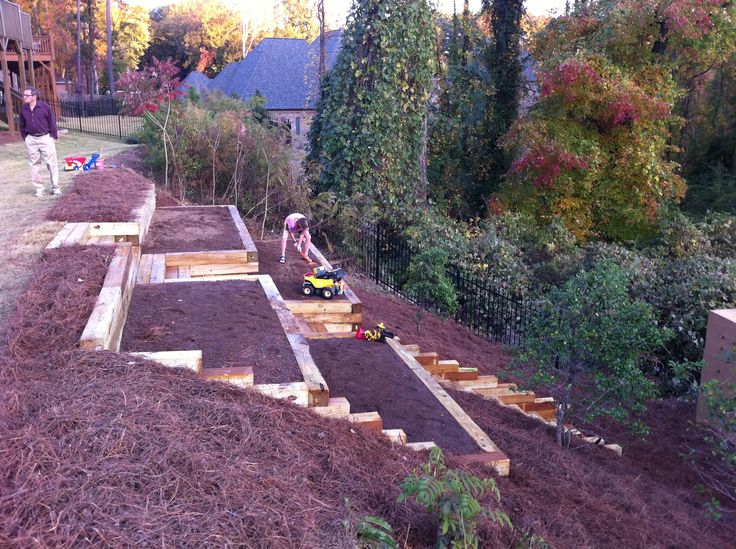
A Check Log Terrace Summary
So what is a check log terrace?
In this method, logs and brush are laid across the hillside like a beaver dam and held in place with wooden stakes. Organic matter is added above the dam.
Perennials are planted above and/or below the dam, whose roots will soak up and slow the rain and nutrients as they rush down the hill.
Want to grow fruits, vegetables, and herbs in your front yard landscape without sacrificing curb appeal? Check out my mini guide, The Permaculture Inspired Edible Landscape.
Building a Check Log Terrace in 8 Steps
The following are the steps to build your own check log terrace.
#1: Drive stakes along an elevation contour line.
Contour lines are those that you see on an elevation map.
Imagine a flat dinner plate with a tablespoon of water on it. When the edges of the plate are level (all on the same elevation contour), the water stays on the plate.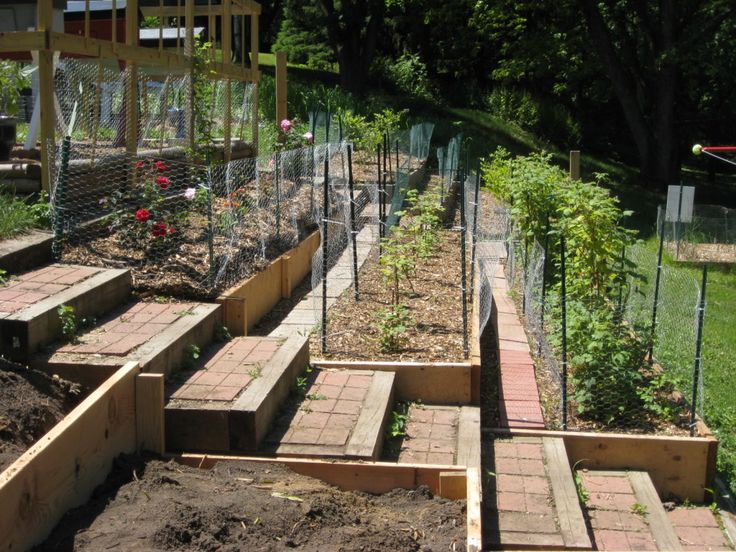 However, if one edge dips to the side (changes elevation), the water runs off.
When building terraces, find the contour line to keep the rainwater on the plate (terrace) so it can slowly sink in. A low-tech gadget called an A-frame level can help identify contours. Read all about this tool and how to build one here.
Drive stakes in along the contour line every 2-6 feet. The steeper the slope, the closer together the stakes should be.
Make stakes out of waste wood, buy 2 x 2 x 36-inch untreated pine stakes from a home improvement store, or buy untreated wooden deck balusters.
#2: Lay cardboard as a weed barrier behind the stakes. (We covered enough space to make a garden terrace three feet wide).
Free cardboard is a great weed blocker in managed garden areas. Lay cardboard like shingles on a roof—start at the bottom, top pieces at the top of the slope. Overlap the pieces by several inches on all sides—weeds will find any openings.
#3: Lay logs, limbs and brush uphill of the stakes to act as a dam.
We used logs and limbs that we cleared from the area in preparation for this project. If your check log area is already cleared, a local tree trimming company may be able to supply you with the wood you need.
Logs and limbs 1-4 inches in diameter work best. Logs that are 6-8 inches in diameter will work, too, but first, dig a little trench for them to sit in, to take some pressure off the stakes.
Pile the logs up so that they’re slightly higher than level, because the terrace will settle over time. Like this:
#4: Plug up the holes.
Pack twigs, brush, and leaf litter into the logs and limbs to act as a filter and hold in soil.
For this reason, fall is a perfect time to build a check log terrace!
#5: Add soil uphill of the limbs and brush, on top of the cardboard.
Fill soil on top of the cardboard until it’s level with the terrace. The soil will settle over time, so expect to add more in the future.
If you want to plant below the dam instead of above it, you can skip this step.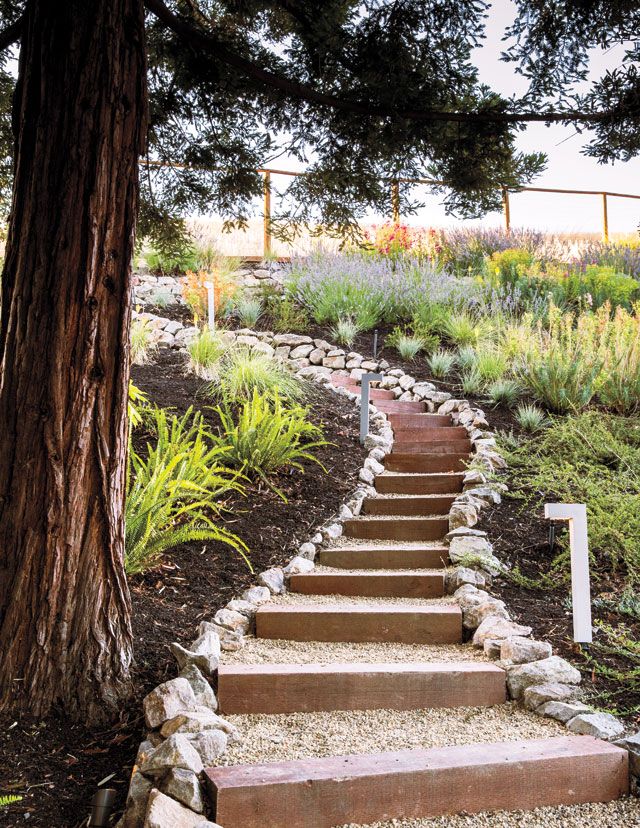
#6: Observe the terrace after a couple of hard rains.
How did it hold up? Are there any low spots that need more logs, leaf litter, or soil?
Check log terraces provide the foundation for wood chip paths to flank either side of this to-be fruit tree terrace.
Check log terraces provide the foundation for wood chip paths to flank either side of this to-be fruit tree terrace.
Tired of generic permaculture design advice that you can’t apply to your specific goals? If so, check out my Permaculture Design Program and get the tools and support needed to create and implement your own permaculture design.
#7: Plant perennials in the new soil.
At this test garden, we’re planting fruit trees, berry bushes, and edible/medicinal herbs. It’s best to focus on perennials, whose roots will be permanent fixtures in the terrace to stabilize the hillside.
For my favorite planting ideas, see:
- Create a Food Forest
- How to Build a Fruit Tree Guild
- 4 Berry Bushes That Fertilize, Too!
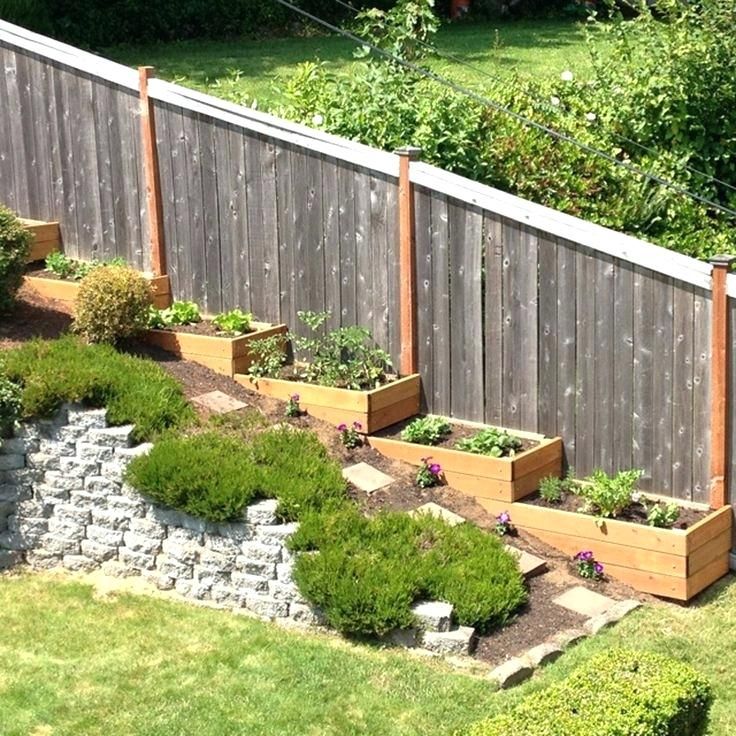
The lower cinder block terrace includes strawberries, while the upper terrace is planted with raspberries.
Mulch the planting area well to reduce erosion and to stabilize the soil in these new planting areas. I like white clover. For more ideas, see: Mulching in the Permaculture Garden.
#8: Observe over time.
As the terrace settles and decomposes over time, there may be little spots here and there that need to be plugged up, or a stake that needs replaced.
In general though, this little ecosystem you’ve built will do a good job of stabilizing itself without a whole lot of work on your part.
6 Benefits of the Check Log Terrace Garden
#1: Aerate Soil
Check logs loosen and aerate this soil so you can have a successful hillside garden.
#2: Catch Nutrients
Check logs are like nets, catching essential nutrients before they rush away in the rain.
See: How to Prevent Soil Erosion in Gardens and on Farms.
#3: Improve Plant Life
In check log terraces, plants thrive in the loose, aerated soil, rich in nutrients.
#4: Increase Organic Matter
Rich, aerated soil attracts worms and other beneficial soil organisms.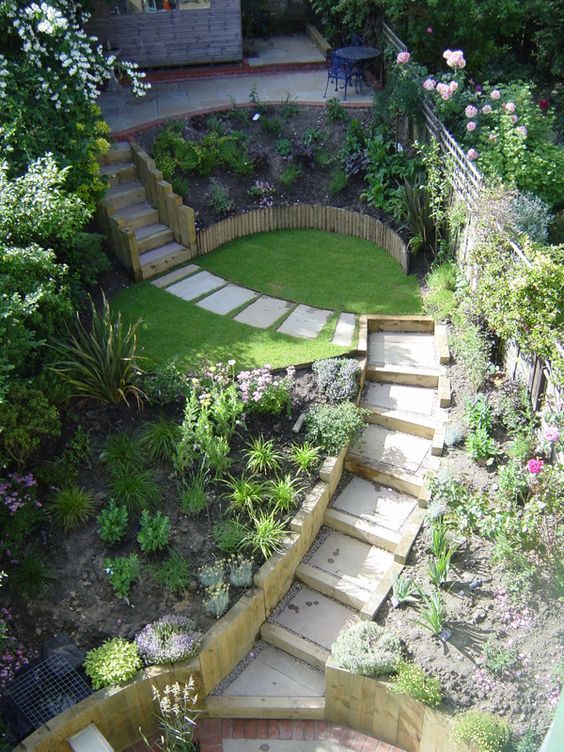 As they go about their daily business, they wiggle in and out of the new and old soil, forming little tunnels and fertilizing everywhere they go.
Worms excrete a sticky exudate in these tunnels, which holds the loosened soil together so it doesn’t wash away. The tunnels allow air, water, and nutrients to penetrate deeper into the soil, preventing even more runoff and building nutrient-rich soil to support thriving plants.
#5: Attract Beneficial Fungi
Fungi are an indication of healthy, mature soil, and show up fairly quickly in check log terraces because of the decomposing logs. These fungal networks form beneficial relationships with the roots of the plants, and catch and hold both soil and nutrients.
#6: Build an Ecosystem With Very Little Work
Ultimately, a check log terrace on a slope will become its own self-sustaining ecological system, drastically improving the stability of the hillside and contributing to the regeneration of an eroded landscape.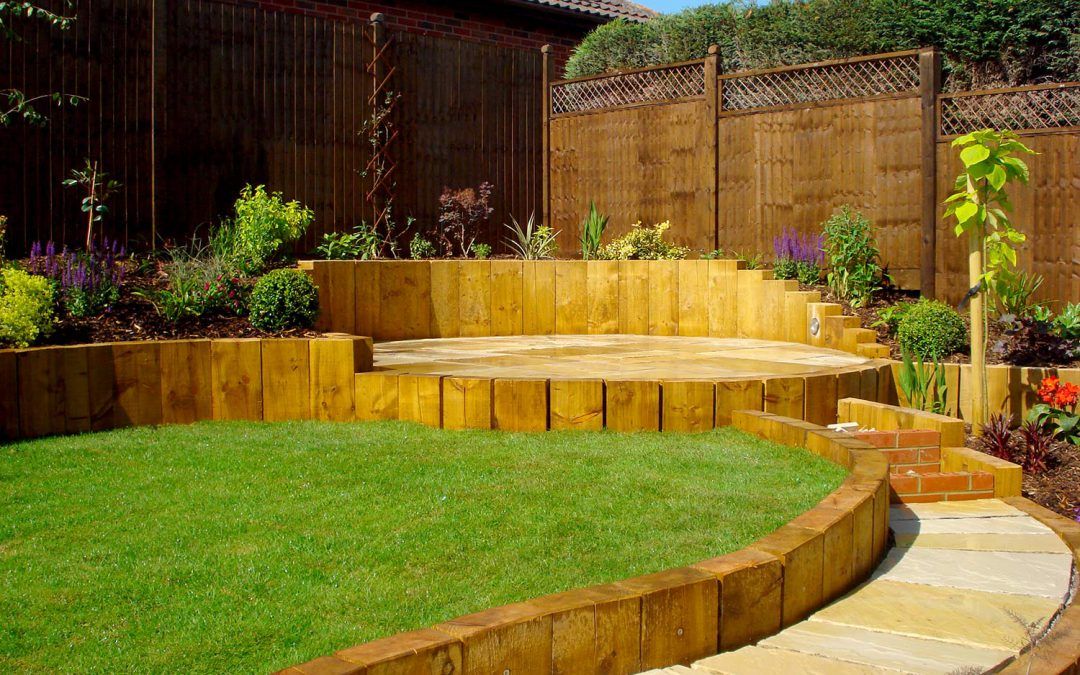
SUMMARY
A check log terrace is so simple that it’s worth a try on your hillside today. Even better: if you change your mind, it’s just as cheap and easy to deconstruct 🙂
What do you think? Will a check log terrace garden improve your hillside?
READ NEXT:
- 6 Flowers to Grow in the Vegetable Garden
- Front Yard Rainwater Catchment
- How to Use the Power of Observation in Permaculture Site Design (+ Free Worksheet)
Terracing a site with a slope: preparation, creation of retaining walls
Terracing is a method in landscape design that allows you to create several more even areas from an inclined area. Together with slope leveling, terracing allows:
- Create a simple drainage system, which means preventing or eliminating soil water erosion.
- Perform zoning of the territory and design it uniquely.
- Useful to use all available space.
- Move around the site safely.
Terraced slopes look impressive, but the use of this technology has several significant drawbacks:
- Preparatory work: soil assessment, analysis of the depth of groundwater.
- Plants require a lot of effort to take care of: they need more frequent watering.
- High set-up costs.
To minimize imperfections, it is important to inspect the site in advance, especially the slope, its angle. This will help prevent unnecessary spending on unnecessary designs. Also, before creating terraces, you need to designate for yourself their functional purpose. If you plan to grow plants on the site, it is better to immediately choose those that require less watering.
Contents
Types of terraces and their features
The purpose of using future terraces and the angle of inclination of the land plot determine the choice of a structure of a certain type. It can be the following types:
Types of terraces: 1 - ridge; 2 - trench; 3 - terrace-ditch; 4 - stepped.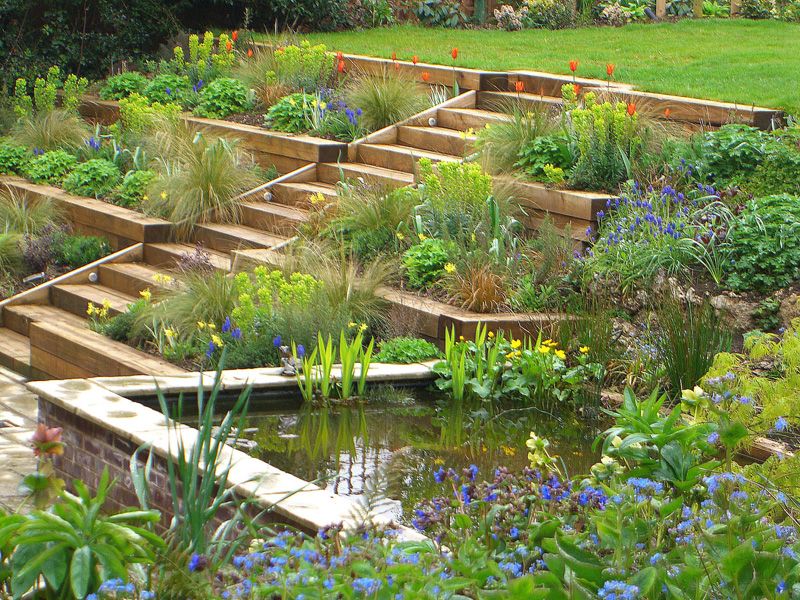
- Stepped structures are suitable for areas with a slope of 8-12 degrees. Steps are made from 3 to 15 meters wide and reinforced with masonry.
- Trench terraces are used if the slope angle is more than 10 degrees. A layer of fertile soil is removed from the trench and from the adjacent territory. The bottom layer of soil from the trench is used to create ramparts. After the shafts are formed, the previously removed soil layer is laid out on the bottom of the trench.
- Ridge structures are created when the site slopes up to 8-12 degrees. Mounds of ridges are formed across the slope, their height is about 30-50 cm.
- Ditch terraces are used on steep slopes, the angle of which is from 35 to 40 degrees. Soil is taken out of storm ditches and shafts are poured from it. Each subsequent shaft is made higher than the previous one by 2-2.5 m.
How to terrace a plot with a slope?
Preparation
The first stage of terracing is to assess the topography of the site, the possibility of terracing on it and the feasibility of such work.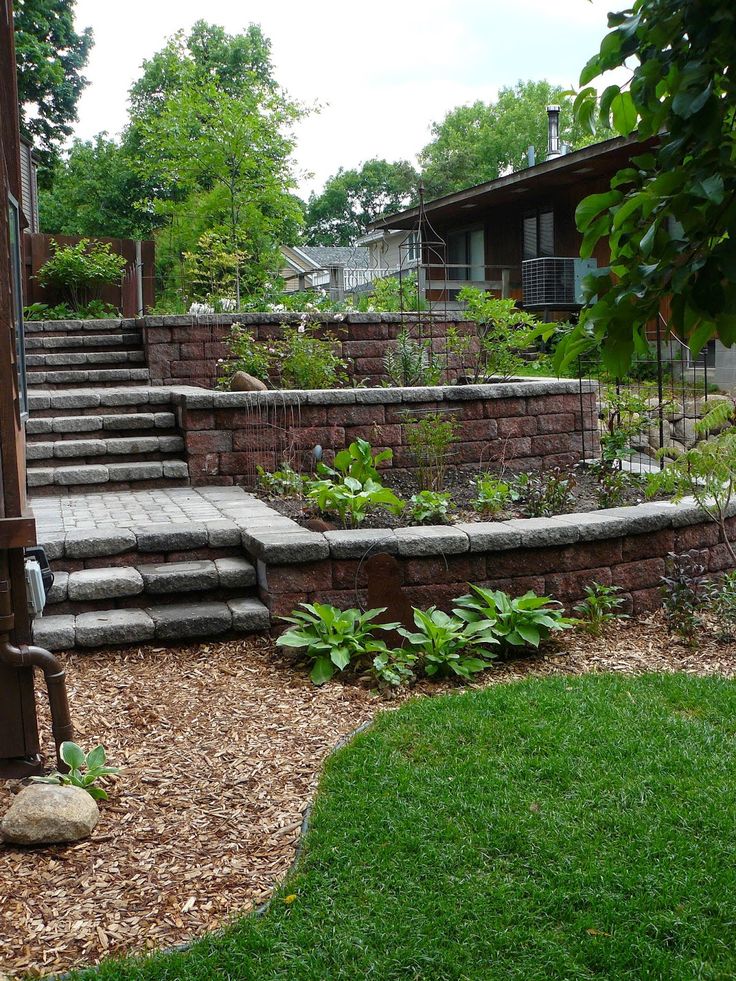 Then you should pay attention to the following characteristics of the territory where the creation of terraces is planned:
- Soil composition, its features. This will allow you to determine what is the optimal purpose of the selected site.
- Groundwater depth. A high level of occurrence will require the creation of a drainage system.
- Slope value, height differences. Both the choice of the type of terraces and their functional purpose, the design features of steps, stairs, and plants depend on these characteristics.
When all the parameters are calculated, you need to work out a plan indicating all the terrace areas and their width, the height of the retaining walls, the location of the stairs.
When creating a plan, it is important to remember the basic principles of terracing:
- Inadmissibility of removing the natural relief.
- Designing not only relief, but also buildings.
- Installation of surface storm drains.
The plan must correspond to the site where the terracing will be carried out. To do this, the territory must be divided into separate fragments in accordance with the rules of dimensional binding. If there are buildings, such objects as flower beds, reservoirs, they should be indicated on the layout plan, reflecting their location.
Creation of terraces
After the preparatory work on planning, you can start marking the desired area. It must be fenced around the perimeter with stakes with a stretched cord or wire.
Marking contours on the slope: A - line of placement of pegs-benchmarks; B - contour lines of the slopeThe first peg is driven in at the top of the slope, the rest of the stakes are located below. They must divide the slope along its surface. The width between them should be half the planned width of the terrace.
Then use a spirit level to find the transverse points on the slope. The level of the point on each line is equal to the level of the points indicated by pegs along the slope.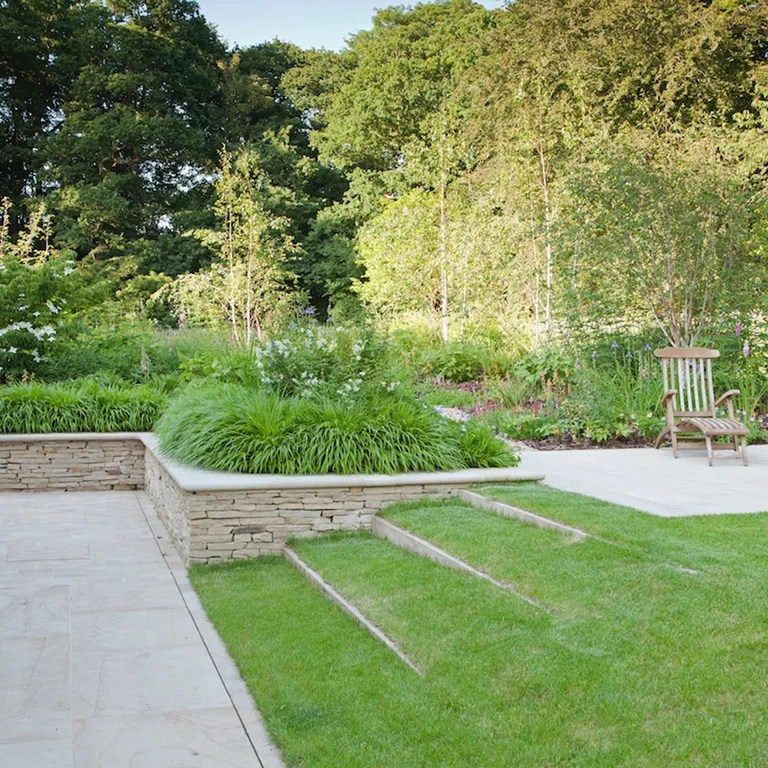 After marking these lines, you can start adding soil, forming terraces in accordance with the plan. Their surface should be made with a slight slope to prevent stagnant water on the site.
The fastest way to do this is with an excavator, as in this video:
Strengthening slopes
When the platforms are ready, their slopes must be strengthened. This will strengthen the terraces, preventing soil from washing out. There are several ways to strengthen terraces. They depend on the slope of the slope:
To create a wooden retaining structure, first dig a recess along the slope 10 cm deeper than the dug-in part of the logs.
The width of the pit is 20 cm wider than their diameter. Then the bottom needs to be covered with crushed stone and compacted. The logs are installed vertically, tightly to each other, then the trench is covered with rubble, poured with concrete and covered with soil.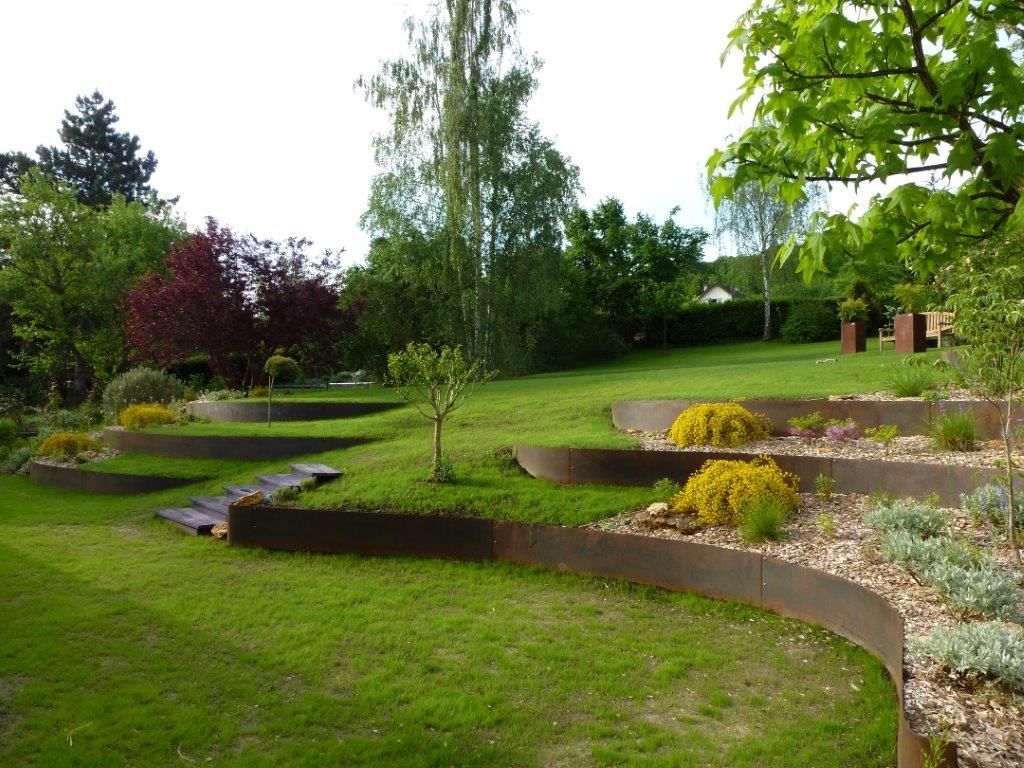
Wooden formwork must be built for concrete stumps. Pour stones and gravel into it in layers, pour each layer with concrete. For the outflow of water at a height of 5 cm, a drainage pipe must be laid.
A stone structure is built by stacking stones and fixing them with cement mortar.
A brick retaining wall will require a concrete foundation. Bricks are held together with a cement mortar with the addition of fine-grained sand and water. Drainage holes are made in the first row. The lower 5-6 next need to be strengthened, so the bricks are laid out in one and a half or two rows.
Brick retaining wall: 1 - crushed stone; 2 - brickwork; 3 - drainage hole in the masonry; 4 - concrete foundation.When installing retaining walls, special attention must be paid to the nuances of the work.
The construction of the support structure starts from the bottom of the site. It is not placed vertically, but with a slight slope relative to the slope, in order to increase the strength and durability of the support.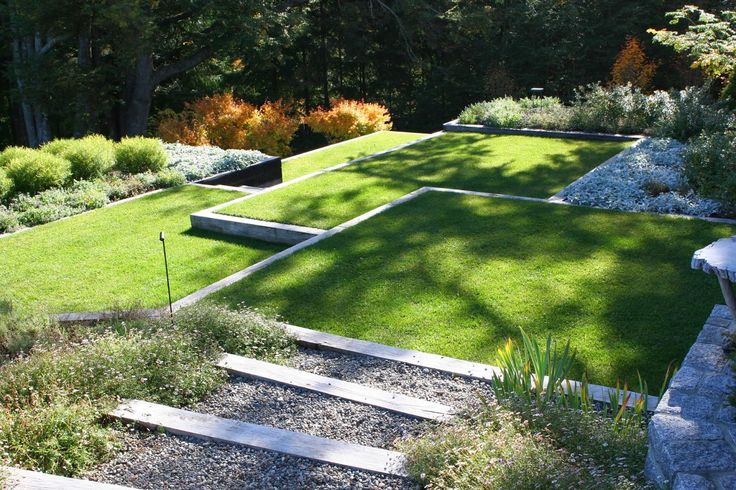 In this case, it is necessary to observe the proportions of the retaining wall, the ratio of its height to width is 3:1.
Decoration
The final stage of site terracing is the decoration of terrace areas.
Herbaceous plants, shrubs, fruit trees can be used for decoration. Features of the created structures allow you to create hedges. To do this, next to the retaining walls, you need to plant climbing plants, such as grapes, ivy, creeping vines. The plants used can be both ornamental and fruit crops.
Own garden on terraces When planning terraces for growing plants, it must be borne in mind that the angle of inclination of the site significantly affects the illumination, humidity, and soil temperature. So one degree of slope shifts climatic factors by 8-10 km in the direction in which it is directed. That is, on the southern slope with a slope of 1 degree, you need to grow plants that are grown in a climate located at a distance of 8-10 km to the south.
In addition to flower beds and bushes, terraces are ideal for building small waterfalls, a group of ponds on neighboring sites.
dizlandshafta
Terracing a dacha on a slope: a bed on a slope
If your plot is located on a slope, you can make a beautiful and original landscape element - a terrace.
When terracing a slope, it is important to assess the size of the plot, usually terraces do not exceed 80 cm with a width of at least 5 meters. Their number depends on the size of the garden plot, sometimes it is 2 or 4 terraces, in large areas there can be much more.
Terracing slopes protects the soil from landslides and erosion. Each of them can be designed individually, but so that all together they look harmonious.
The main stages of terracing a suburban area
First you need to level the surface. How to do it? First, it is necessary to conduct an eye survey in order to estimate the number of terraces and the size of the ledge.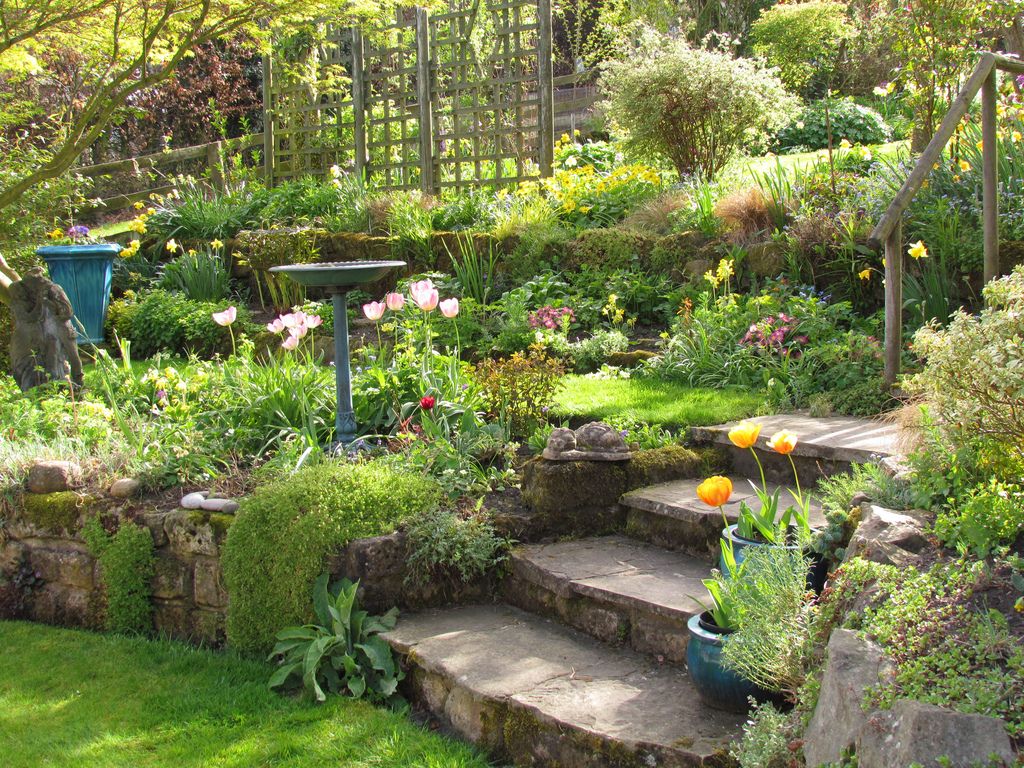 Then the slope is broken with the help of pegs from top to bottom into segments equal to one and a half width of the terrace, and, moving across the slope, using the level, they find points that are located at the same level as the first peg. By placing auxiliary pegs at these points, they find a line that cuts the slope exactly horizontally. Having completed work with the first line, they move on to the next peg and determine the direction of the second horizontal.
Then, after determining all the horizontals, they begin to form a terrace. When backfilling, its surface must be made not horizontal, but with a slight slope, the opposite of the slope of the slope. Next, the terrace is reinforced with a retaining wall.
Pay attention to the design of the walls, as they attract attention in the first place.
Retaining walls are: wooden, concrete, stone, brick.
How to make a wooden retaining wall
Wooden retaining walls, of course, look more natural and beautiful, but their service life is short, much shorter than that of walls made of other materials.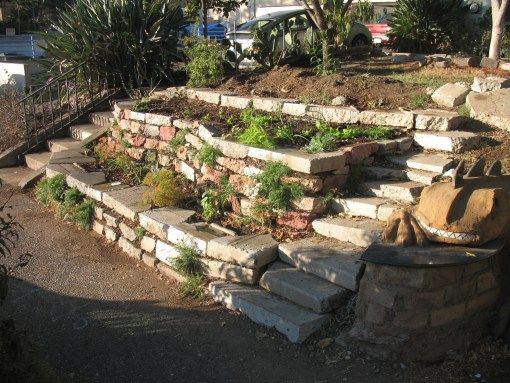 But the price of this material is not so high. Such walls are made of logs or beams. With a wall height of 1 meter, the bars and logs should go underground for half a meter and rise above it by 1 meter. Accordingly, the diameter and length are calculated with smaller or larger differences.
How to build a wooden wall. First, a trench is dug, 10 cm deeper than the dug-in part of the bars and 20 cm wider than their diameter. Then the bottom is covered with rubble and carefully rammed. Next, the bars are installed tightly to each other. Between themselves, the bars are fixed with nails or wire, and from below they are covered with rubble. From the inside, the wall is covered with roofing material. Next, the trench is poured with concrete, then they fall asleep and tamp the soil. To protect the beam from moisture, their surface is fired or treated with special means, it can also be covered with hot bitumen.
Concrete retaining wall
Concrete walls do not look very nice and to fix this, they are usually covered with tiles, shingles or pebbles.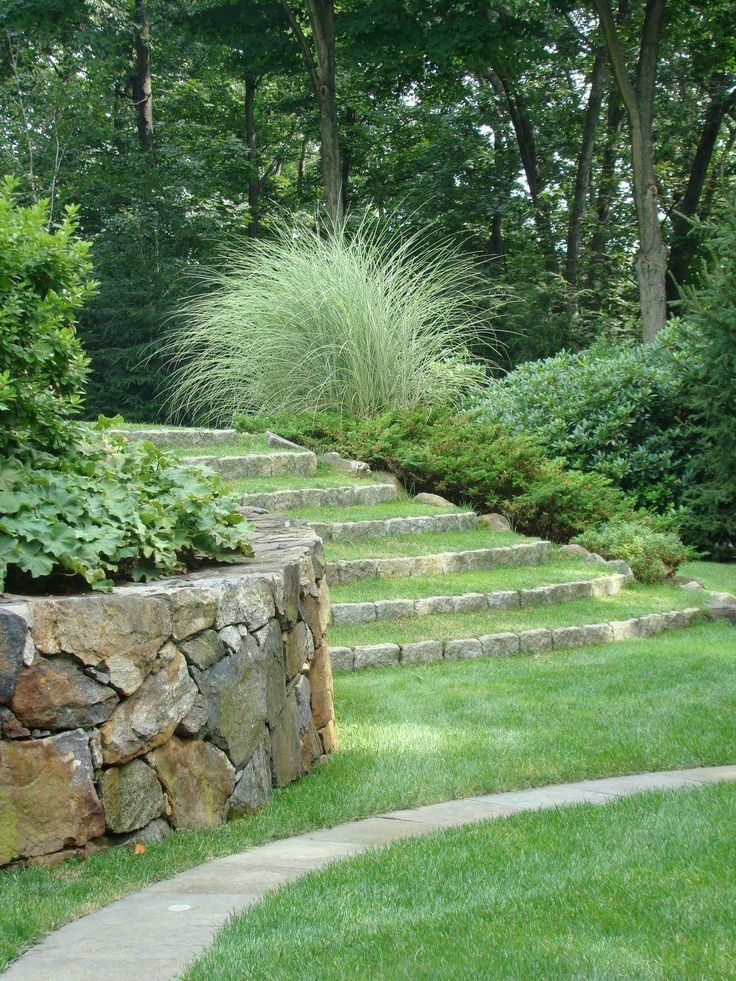
To build a concrete wall, first formwork is made from planks or boards. Outside, it is necessary to make supports that can withstand the weight of concrete. Further, large stones are laid in the lower row of formwork, and the voids between them are filled with gravel. Then the stones are poured with a small layer of concrete. Then the process continues, laying the stones in layers and pouring them with concrete until the entire formwork is filled. It is necessary not to forget to lay drainage pipes at a height of 5 cm from the ground level to drain water.
How to make a brick retaining wall
Brick walls look very nice if they are built of good quality and good material. Such walls are usually made if the house is also made of bricks. Clinker bricks with high strength and moisture resistance are best suited for its construction.
When building a brick wall, by analogy with a concrete wall, a foundation is made. In the first row of brickwork, it is necessary to make drainage holes with a slope towards the lower terrace. The thickness of such a wall directly depends on its height, that is, the higher the wall, the greater its width. Reinforce the wall by thickening its lower part (5-6 rows) to one and a half or two bricks. Bricks are placed on the mortar. A mortar of 1 part cement, 3 parts fine sand and 3 parts water.
Stone walls are the most expensive, but also the most durable. For its manufacture, raw sawn or chipped stone is taken. It is usually basalt, quartzite or granite. Walls of various shapes can be laid out from stone.
Creeping plants can be planted along the upper edge of the wall, the hanging stems of which will partially cover vertical surfaces. And by attaching wire to the walls, you can make supports for climbing species. For landscaping, you can use climbing plants in special containers, which are placed in niches of retaining walls.
Climbing plants such as ivy or wild grapes, sweet peas or clematis can be planted along the wall.
How to decorate the terrace
The terrace can be decorated with small flower beds or flower vases.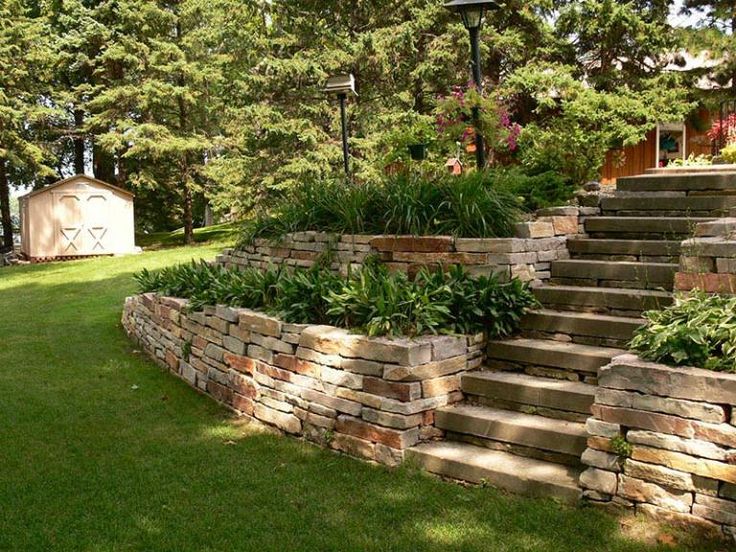 The terrace looks very nice, entwined, for example, with purple clematis, next to which there are small flower beds with orange flowers, for example, calendula.
The terrace is usually decorated with floral arrangements, usually of undemanding plants and flowers. As in ordinary flower beds, the main thing is to choose a good combination of colors according to color and flowering time.
On the slopes of the terrace, it is best to plant shrubs that will hold the soil. It can be barberry, wild rose, euonymus, etc. Coniferous ornamental shrubs look good on the terraces.
Fountains, cascades and small waterfalls running from one terrace to another will be a wonderful decoration of the garden.
If the wall is laid without the use of mortar, then the gaps between the stones are filled with soil, compacting it tightly. In the seams between the stones, in this case, you can also plant plants. On the sunny side, you can plant phloxes, thyme or shaving, on the shady side, rezuha, saxifrage or bells will look beautiful.