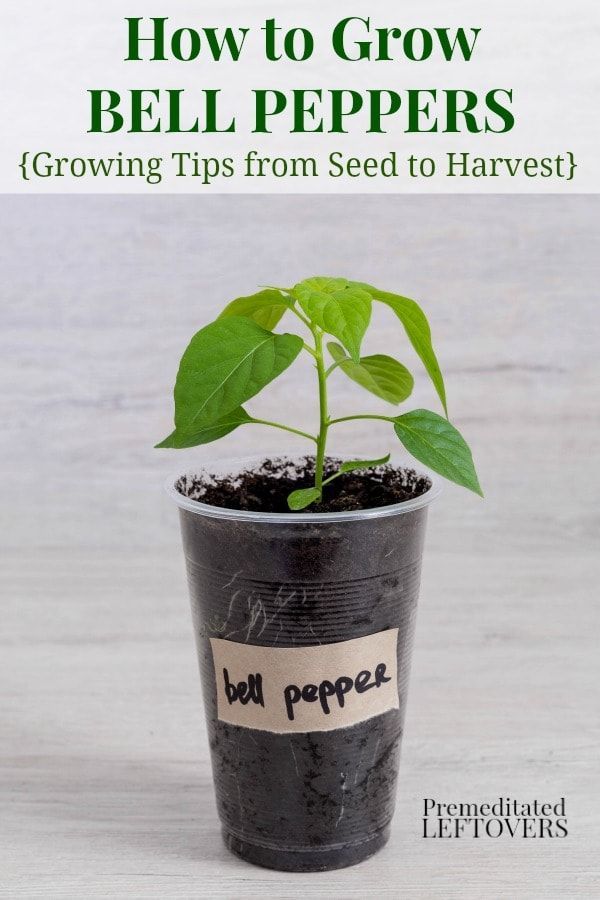
Planting bell peppers from seed
Beginner’s Guide on How to Grow a Bell Pepper Plant
If you’ve just started planning the perfect layout for your veggie garden, you might be looking for some ideas on what to grow. As temperatures slowly start to rise in the spring, you may be dreaming about vibrant tomato vines, mouth-watering cucumbers, or the perfect bell pepper plant.
While bell peppers might not be the easiest fruit to grow — yes, just like tomatoes, bell peppers are technically a fruit — they are certainly well worth the challenge. These warm-weather species make a great addition to refreshing salads or as a healthy afternoon snack. They’re also great eaten raw or cooked.
With that in mind, it’s time to learn the fundamentals of growing a bountiful bell pepper plant. We’ll show you the different types of peppers to consider and the basic elements needed to cultivate these delicious, versatile, and crisp veggies (er, fruit).
Peppers 101: Pepper VarietiesBefore we get into the technicalities of growing bell peppers, it’s important to understand a few basic things.
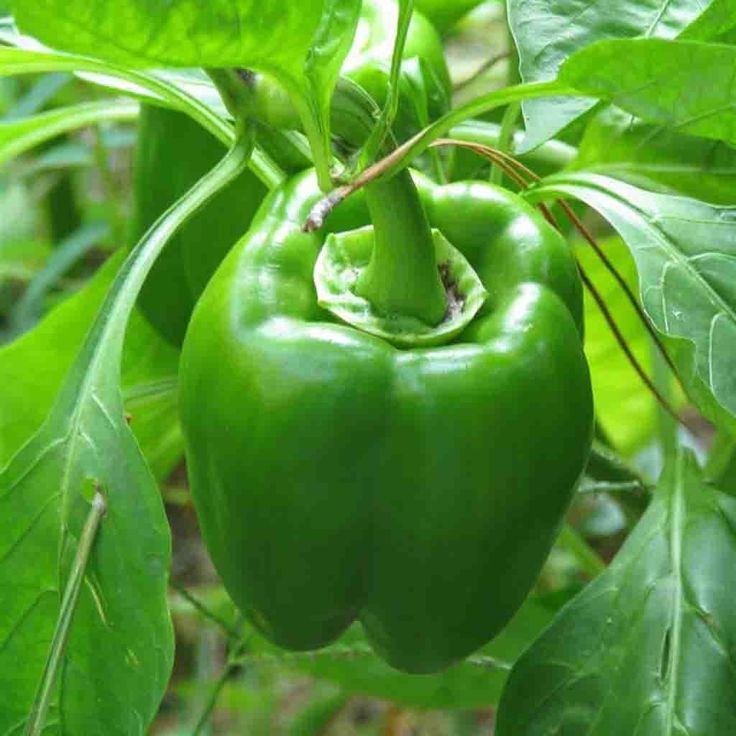
The bell pepper plant (Capsicum annum) belongs to the nightshade family, which spans more than 2,300 species, including eggplants, potatoes, and tomatoes. One of the greatest attributes of peppers is that they come in a variety of colors, shapes, and sizes, making them one of the most versatile foods used in many different cuisines worldwide.
Unlike their spicier cousins — like jalapeños and serrano peppers — bell peppers do not contain capsaicin, the compound responsible for pungency and heat in hot peppers.
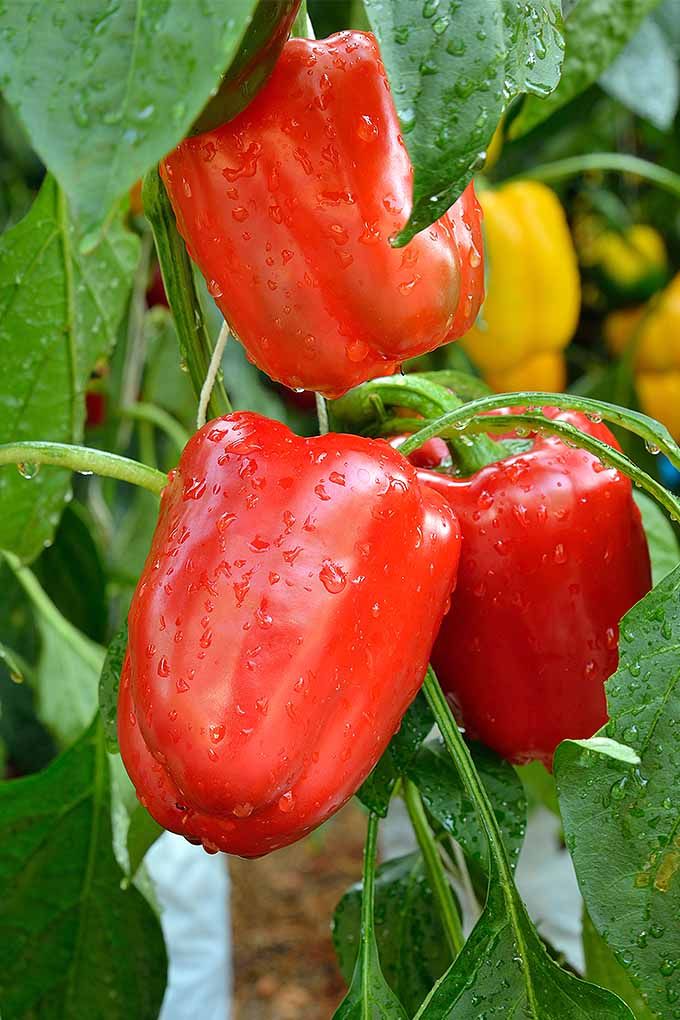
Ever wondered if green bell peppers and red peppers come from different plants? Well, they’re actually the same pepper that are simply at different maturity stages. They start green, but if you leave them to mature on the plant long enough, they’ll eventually achieve their full color: a bright and deep crimson red.
Fun fact: The longer you allow your bell peppers to mature, the higher their vitamin C content.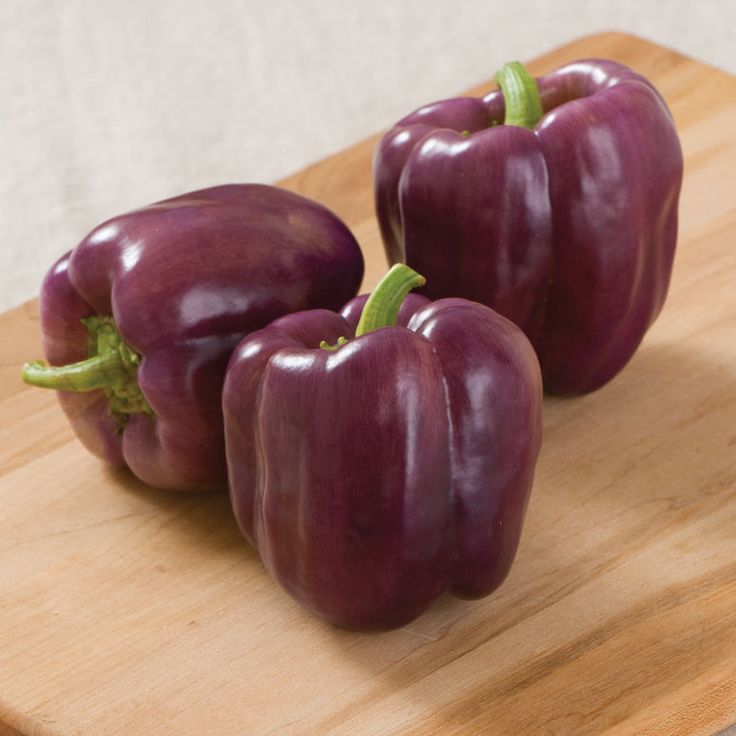 Red bell peppers that are allowed to mature fully also have a sweeter flavor!
While peppers are quite resilient to garden pests, you may want to opt for resistant varieties to ensure your pepper-growing experience goes smoothly. Some of the best species include:
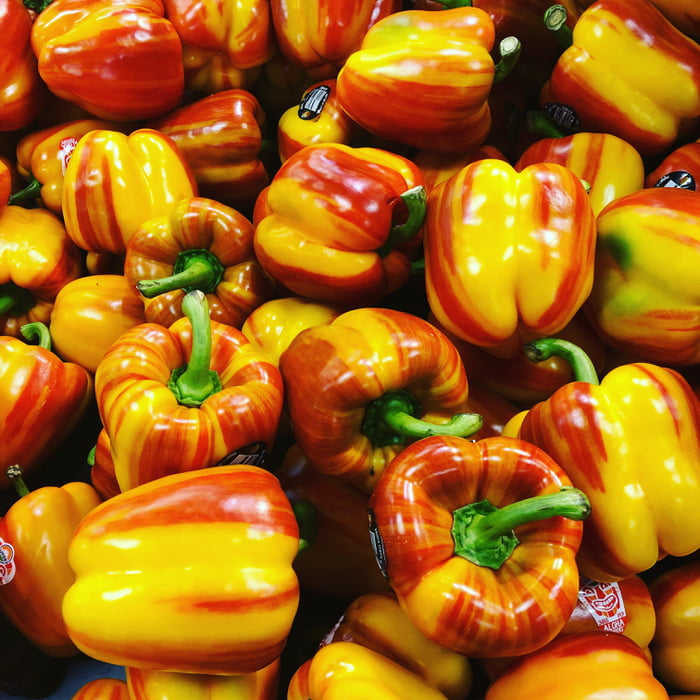
- Green peppers that turn into red sweet peppers: Sweet red Marconi, Lady bell, Gypsy, Lipstick, Bellboy, Sweet California wonder
- Orange peppers: Orange sun, Milena
- Yellow peppers: Golden California wonder, Honey bell, Marengo
No matter if you decide to grow just one type of bell pepper plant or you want to put your gardening skills to the test with a pepper bundle, you’ll need to learn the basics of how to grow thriving and healthy plants.
How to Grow a Bell Pepper Plant: The BasicsThe first thing you should know about bell pepper plants is that they’re quite sensitive to cold temperatures, so it’s a good idea to start them indoors before their growing season begins (spring/summer).
Keep in mind that sweet bell peppers have a long growing season — they take between 60 to 90 days from sowing to harvesting — so the sooner you get started, the better. It’s recommended to sow your bell pepper seeds 8 to 10 weeks before your last spring frost date. You can use the Back to the Roots grow calendar to find out when that is.
Germination occurs within 10 days, and once the first set of true leaves appears, you can begin transplanting them outside if that’s your goal. (Bonus: Bell pepper plants can also be grown indoors.)
But before you move your bell pepper plant out into the open, make sure to check that the nighttime temperatures do not go below 70°F, as this may shock your young plants and contribute to their premature demise. The best way to support these plants is to wait for the last frost danger to pass.
Get Enough SunAs a true warm-weather crop, bell peppers love direct sunlight and full sun, so place them in a location where nothing is blocking the light.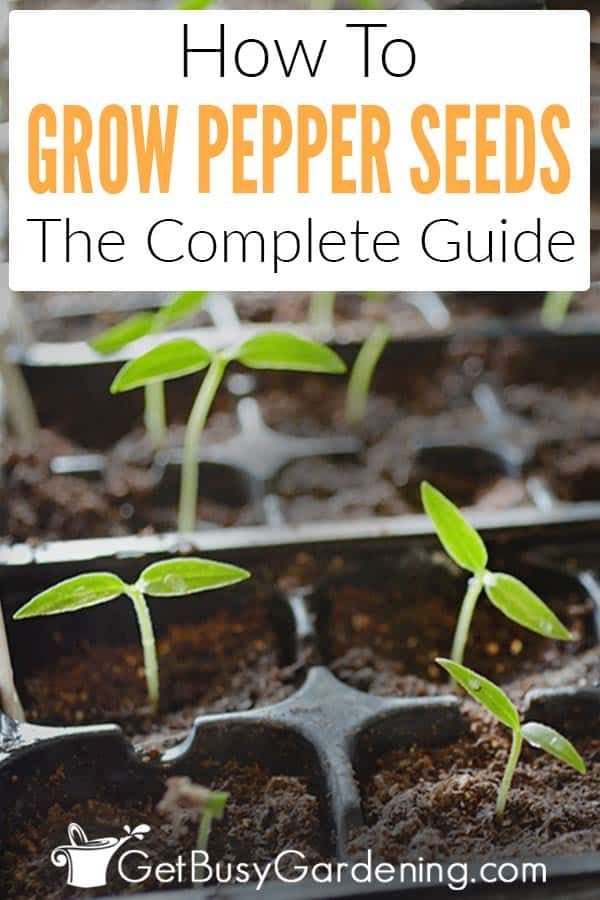 If you live in a climate with extreme high heat and intense sunlight, your peppers may be susceptible to sunscald, especially the younger leaves and more tender fruits. While they may look aesthetically unappealing, sunscalded bell peppers are still edible and equally tasty.
Bear in mind that to produce large and healthy fruit, pepper plants need plenty of full sun, at least 6 to 8 hours every day.
Don’t Water Too MuchFinding the right watering balance is the key factor to a thriving bell pepper plant. Since sweet bell peppers cannot tolerate extremely high temperatures, it’s essential to water them appropriately to prevent diseases. If you live in a desert climate or experience a very dry summer season, it may be necessary to hydrate your plants daily — especially in the early morning or evening to prevent water evaporation.
To avoid diseases and pests, such as anthracnose or blossom end rot, avoid overhead watering and make sure you water deeply and evenly at the base of the plant.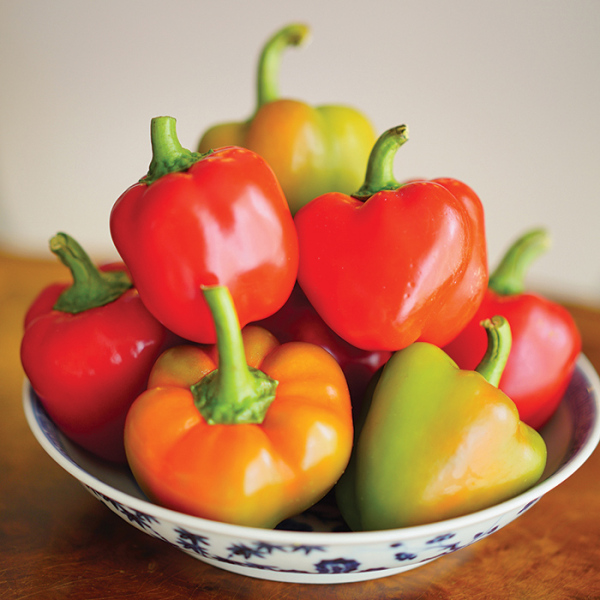 By doing so, you encourage the development of a strong and healthy root system, which in turn will make your plant more resilient to overcome any bumps in the road.
Bell pepper plants prefer sandy to loamy soil, which is enriched with organic matter. You can either buy a potting mix with these characteristics or purchase all the elements individually and create your own. If you’re not sure what the best option is, don’t be shy — ask one of the staff members at your local Home Depot Garden Center for an opinion.
Note: Fertilizing is an important step in vegetable gardening. But don’t go crazy and over-fertilize as it usually encourages your plant to grow more foliage and produce less fruit, which is obviously not the goal.
Since water is vital for growing bell peppers, choosing the proper soil is undoubtedly the best way to ensure optimal moisture levels. These plants don’t like wet feet, so opting for sandy, loamy soil will ensure good drainage and help the soil temperature rise quicker, a key factor in the cultivation of bell peppers.
Equally important is the soil pH. Veteran gardeners claim that a slightly more acidic soil (between 6.0 and 6.8) is the optimal environment for your bell pepper plant to yield a bountiful harvest. Mixing some coffee grounds into the potting mix is a natural, eco-friendly way to balance the pH levels of the soil and support your plant’s growth.
Pro tip: To prevent blossom end rot — which is primarily a calcium nutrient deficiency — crush some eggshells and add them to the soil. It’s an easy, organic way to provide your plants with an extra nutritional boost.
To speed up the warming of the soil and help retain some moisture during hotter days, consider covering it with a dark mulch.
Choose Your ContainerIf you live in a small apartment with a tiny balcony and think you don’t have enough space to grow bell pepper plants, think again!
Bell peppers are a perfect match for container gardening and raised beds, so you can easily squeeze them into even the smallest spaces.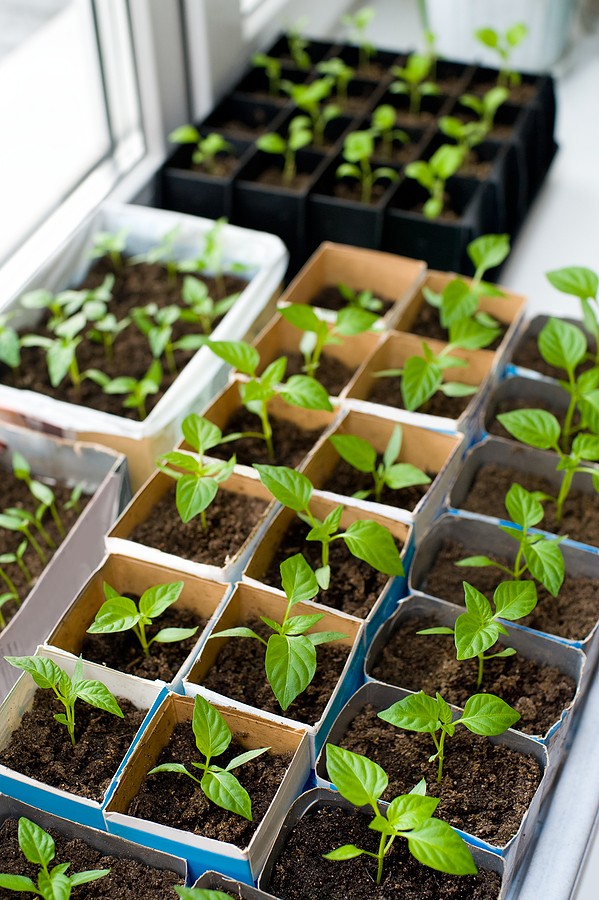 Since these veggies (OK, fruits) require good drainage, a raised fabric bed — like this one from Back to the Roots — is a fantastic and affordable home for your bell pepper plant.
The Back to the Roots Fabric Raised Beds are made with durable felt and are double stitched, so you can easily move them around without worries. They also come with internal grow walls to prevent root tangling between different plants, which means you can plant all sorts of different veggies, herbs, and houseplants simultaneously.
Keep in mind that, like tomatoes, bell peppers benefit from some type of staking or structural support. Tomato cages are a great alternative, and they’re easy to set up. Just make sure you put them in place when the plants are still young, as it can be tricky to position them around fully mature plants.
Growing Bell Pepper Plants Is Rewarding and FunThe coolest thing about peppers is that they come in all sizes and shapes, and you can find a variety that caters to your taste.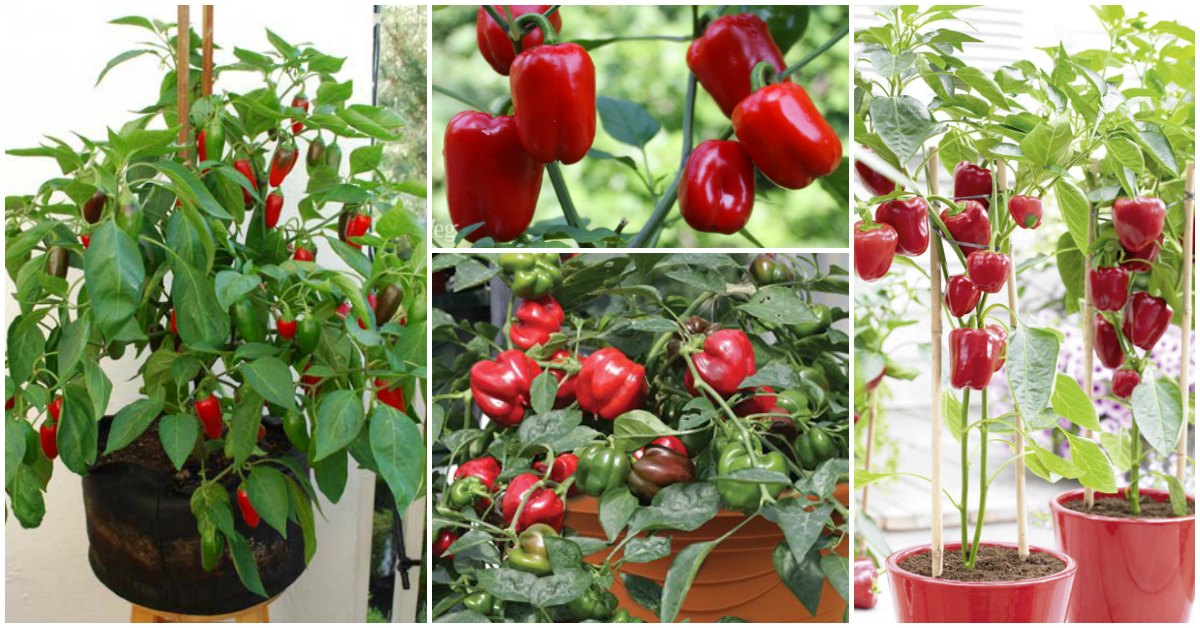 From sweet to spicy, they offer a great range of flavors that will take your cooking to the next level.
While growing and maintaining a bell pepper plant does come with its challenges, you’ll feel incredibly proud when that first tiny pepper makes its debut in the world. To learn more tips and tricks for cultivating these crunchy and delicious edibles, check out our comprehensive guide on how to grow peppers from seed to harvest.
How To Grow Peppers From Seed: Complete Guide
As an Amazon Associate I earn from qualifying purchases. Read full disclosure here.
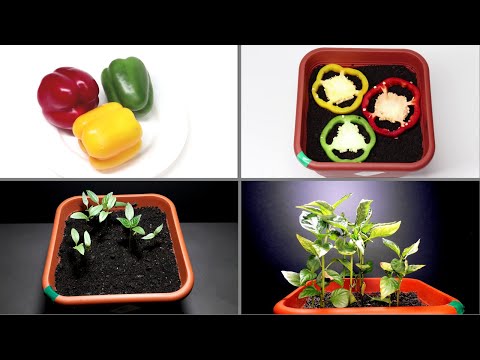
Growing peppers from seed can be a bit challenging for beginners, but it’s actually pretty easy. In this post, I am going to show you exactly how to grow peppers from seed, step-by-step, and give you everything you need to be successful!
Peppers (aka capsicum) are one of my all-time favorites! My husband loves them too, and we’ve grown tons of different varieties (both hot and sweet) from seed over the years.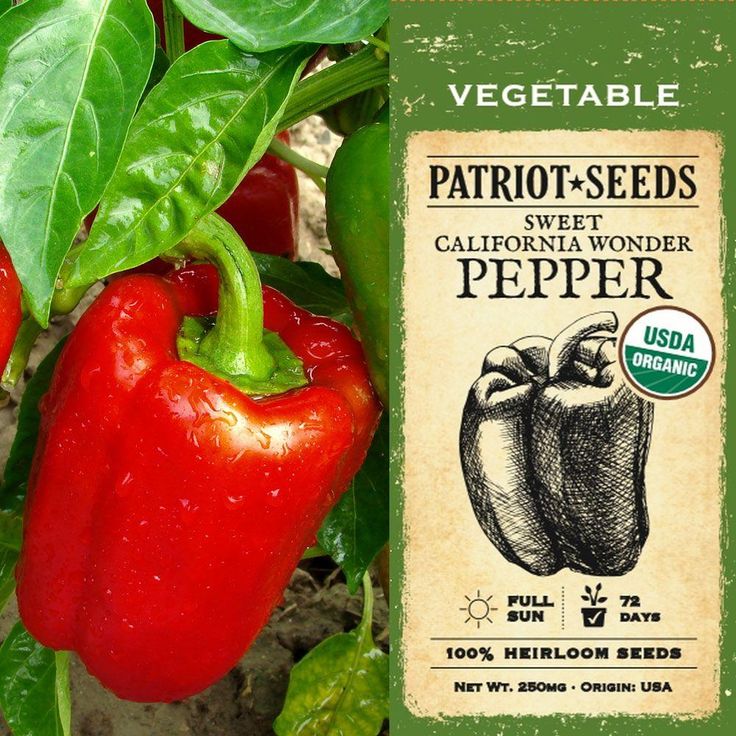
When it comes to growing seeds, you may have heard that peppers are difficult to germinate – and it is true.
But once you learn a few special tricks, you’ll see just how easy it is. So in this guide, I’m going to show you exactly how to grow peppers from seed, step-by-step.
I’ll cover everything from the best method to use, when to start, planting instructions, germination time, seedling identification and care, transplanting, fixing common problems, faqs, and more!
Table of Contents
Growing Peppers From Seed
This is a general guide to growing peppers from seed, no matter what kind they are. So you can follow these instructions for any type that you want, the steps are the same for all.
Types Of Pepper Seeds To Grow
One of the things that I love the most about growing pepper seeds is the amazing selection I can find.
You can’t get much diversity in the seedlings at the garden center, they usually only carry a handful of different ones.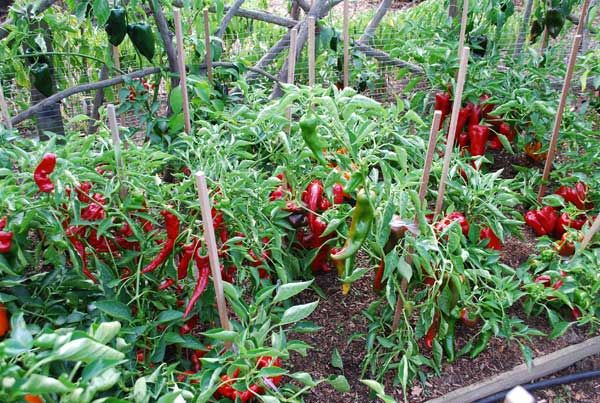
But the number of varieties of seeds you can find is awesome! There are so many different kinds to choose from, it’s pretty crazy.
They range anywhere from the mild flavor of bell peppers, to the sweetness of banana peppers, and the medium heat of chilies… all the way up to spicy cayennes, jalapeños, and the super HOT habanero or ghost peppers.
You name it, I’ve probably grown it! Some of my favorites are cayenne (hot), jalapeno (hot), bell (mild), padron chile (mixed), and purple bell (mild)
Different types of pepper seed packetsRecommended Pepper Seed Starting Methods
Pepper seedlings take a long time to get large enough to produce mature fruit, and they require a fairly long growing season.
They can also be a bit slow to germinate (some varieties take up to a month!). So, unless you live in a warm climate, I recommend starting pepper seeds indoors, rather than direct sowing them.
Related Post: 3 Seed Starting Methods That Every Gardener Should Try
When To Plant Pepper Seeds
The best way to get a good crop is by planting the seeds indoors 8-12 weeks before your average last frost date.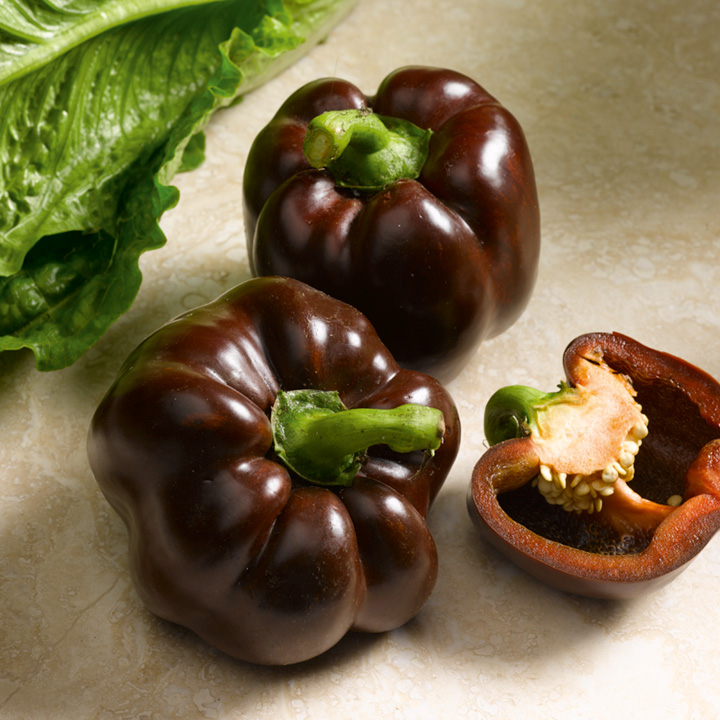
The exact date for when to start pepper seeds depends on where you live. I’m in MN (z4b), and our average last frost is around May 15th. So, I plant them indoors sometime in early March.
Planting Pepper Seeds
Another thing that makes growing peppers from seed easy is that you don’t need to do anything special to prepare them for planting.
No nicking, soaking or cold stratification needed. You can put them straight from the packet into the soil, and they will grow!
A quick word of caution here… if you want to plant the seeds from hot peppers, make sure to wear gloves when handing them.
Otherwise the capsicum oils can get on your hands, and cause discomfort (or worse, get in your eyes, OUCH!).
Related Post: How To Dry Peppers (5 Best Ways)
Hot pepper seeds in my gloved handHow To Plant Pepper Seeds Step-By-Step
You don’t need to buy a ton of expensive equipment to grow peppers from seed, but you will need a few things. You may even have some of this stuff laying around the house. Here’s what you’ll need…
Supplies Needed:
- Seedling flat with a lid
- Seed starting soil or peat pellets
- Seeds
- Water
- Heat mat (optional)
- Latex gloves (if planting seeds from hot peppers)
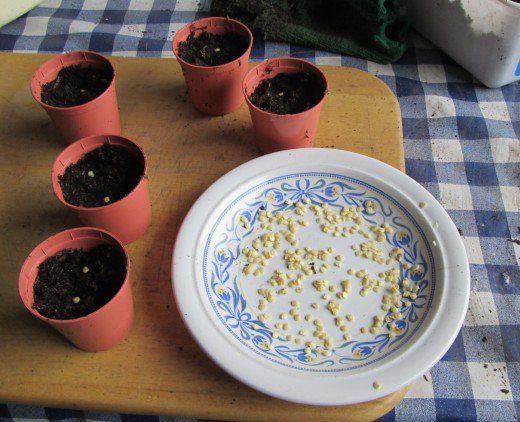
Step 1: Fill the seed trays – Fill the cells with damp seed starting soil, or pre-moisten the peat pellets. Then place them into the trays.
Step 2: Decide how many seeds to use – If you’re using brand new seeds, then you can just plant one per cell/pellet. Otherwise, if they are old or have a low viability rate, then plant 2-3 per cell/pellet.
Step 3: Plant the seeds – The rule of thumb for planting depth is twice as deep as a seed is wide. So plant pepper seeds about a 1/4″ – 1/2″ deep.
To plant them, you can either lay the seeds on top of the soil, then gently push them down.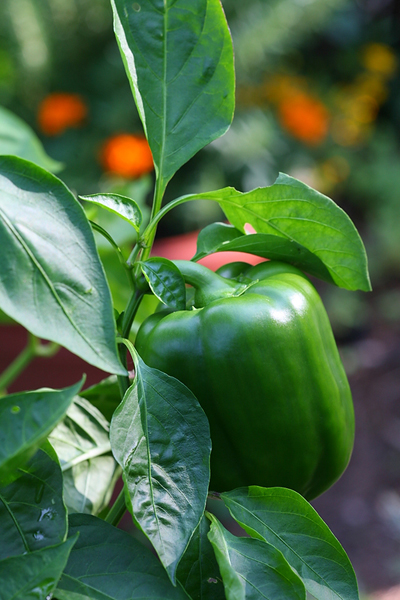 Or you could make the holes first, then drop the seeds in.
Step 4: Cover the seeds with soil – Fill the holes back in, then gently press it down to make sure the seeds come in contact with the soil. Don’t compact the soil though, just gently press it down.
Step 5: Add water – If the soil is not already wet, then you should add water. It’s best to water from the bottom so you don’t disturb the seeds.
Simply pour it into the tray until it’s just above the drainage holes, or about 1/4 of the height of the pellets. Dump out any excess water that hasn’t been absorbed within 15 minutes.
Step 6: Cover the tray – Place the clear plastic lid on top of the tray to help keep the soil warm, and ensure that it stays moist.
Step 7: Place the tray in a warm spot – If you can, put it on top of a heat mat. That will help speed up germination.
Otherwise, place it in the warmest spot you can, or run a space heater nearby. If it’s too cold, it will slow down germination, or the seeds may not grow at all.
Pepper Seed Germination Time
When it comes to growing peppers from seed, you need to be patient. It can take anywhere from one week to almost a month for them to germinate. Some varieties are faster than others.
If yours are taking forever, then it may be too cold. To germinate them faster, put the trays on a heat mat, or over a vent. It’s amazing how much faster they germinate when you add bottom heat.
What Do Pepper Seedlings Look Like?
When they first sprout, pepper seedlings will have two leaves that are narrow and pointy. These first two leaves are called the “seed leaves” (or cotyledons, if you want to get super technical).
All of the next leaves that grow after that are called “true leaves”, and those look like tiny pepper leaves. Those will usually start forming within a week or so after the seed leaves have opened up.
Pepper Seedling Care Tips
Once the seeds start to grow, you might wonder what to do next. Yikes! Well don’t worry, cause one of the best things about growing peppers from seed is that the seedlings are very easy to care for.
You can learn all about general seedling care here, but below are a few quick tips that are more specific to caring for pepper seedlings…
Watering
Peppers seedlings need to be watered consistently, but don’t like soggy soil. Allow the very top of the soil to dry out a bit between waterings, but never let it dry out completely.
If you accidentally overwater them, and the soil is soggy, empty all the extra water that’s sitting in the tray. Then, turn a fan on low, and position it to blow over the tray. This will help the saturated soil dry out faster.
Light
If pepper seedlings don’t get enough light, they will start to grow leggy and reach for the nearest window. So, in order to keep them growing thick and compact, it’s best to use a grow light.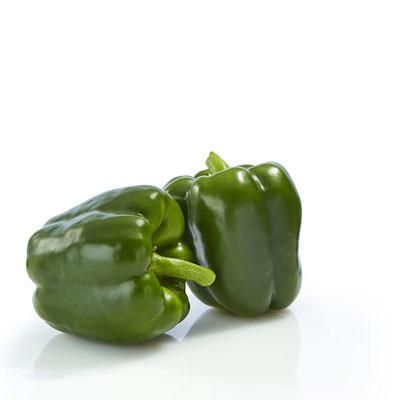
Hang a grow light a few inches above the tray as soon as they germinate, and use an outlet timer to keep it on for 14-16 hours per day.
Pepper seedlings reaching for the lightFertilizer
Once the true leaves begin to form, it’s time to start fertilizing. But don’t give them a full strength dose right away. Use a weak dose at first, and slowly increase the strength as they get larger.
I use (and highly recommend) an organic compost solution (or I make my own with compost tea bags). Or you could use a plant starter fertilizer.
Air Circulation
Once all (or most) of the seeds in a flat have germinated, it’s time to give them some airflow. Remove the lids, and run an oscillating fan over them on the low setting.
This will help to strengthen them, and also prevents problems with mold growth in the trays. Plug it into the same timer as your lights, or run it for a shorter period if you prefer.
Pepper seedlings growing indoorsPotting Up Pepper Seedlings
Once your pepper seedlings have started to outgrow the trays, pot them up into larger containers to give them plenty of room to grow larger.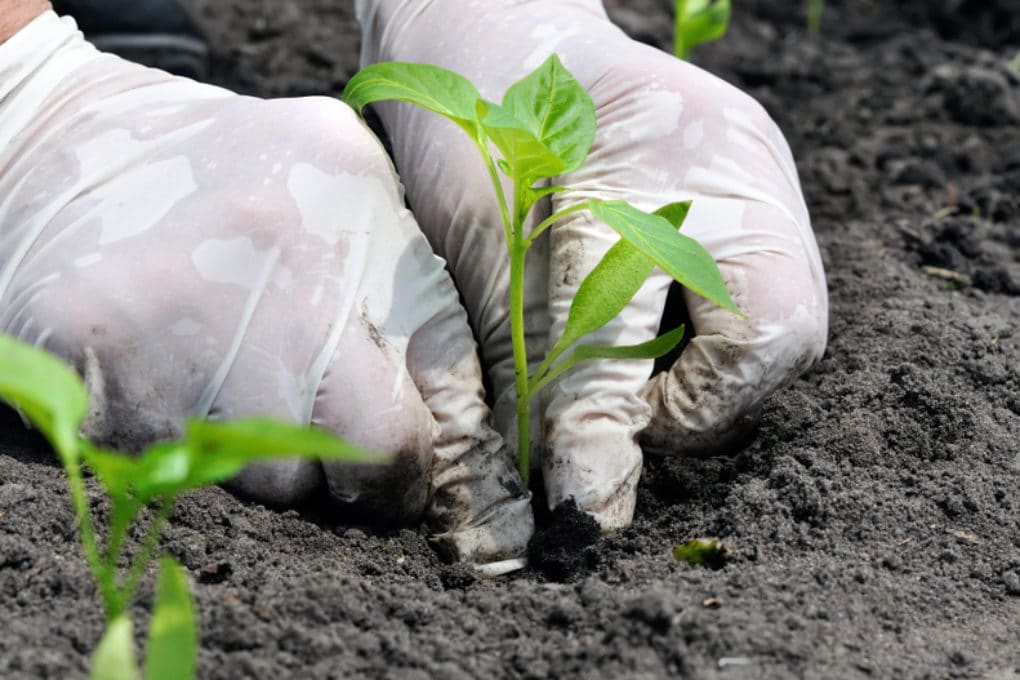
I like using plantable pots to make it easy for transplanting into the garden. If you like that idea, but prefer a more sustainable alternative to peat, try coco coir or cow pots.
Otherwise, you can use small plastic nursery pots (which are reusable). Or even recycled containers like yogurt cups or small milk cartons (just be sure to poke drainage holes in the bottom!).
Potting up pepper seedlingsTransplanting Pepper Seedlings Into The Garden
Once the weather warms up in the spring, we can get pretty antsy to get our seedlings planted into the garden!
But it is essential that you transplant them at the right time, and do it correctly, or all of the hard work you put into growing peppers from seed will be for nothing.
When To Transplant Pepper Seedlings
Pepper seedlings hate the cold, and they could be killed if you move them into your garden too early. Even if they do survive the cold, their growth could be stunted by it.
So, it’s best to wait to transplant them until after all chance of frost is gone, and the soil has warmed up.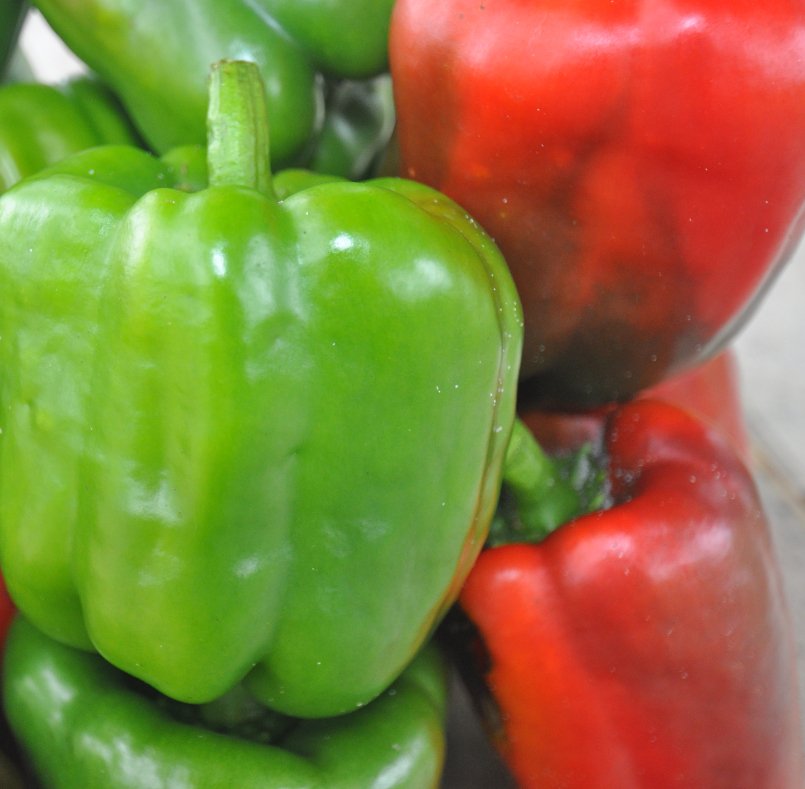 Here in zone 4b, that is usually in early June.
Hardening Off Pepper Seedlings
But wait! Before you can think about planting them into the garden, they must be hardened off first to prepare them for life outdoors.
Since they’re used to living in a warm indoor environment where there is no rain, wind, or direct sun, you need to toughen them up for life outside. So do not skip this step.
Hardening pepper seedlings before transplantingSpacing
Most pepper plants stay pretty compact, and don’t need a lot of room to grow. So, plan to space your seedlings 12-18″ apart in the garden.
Larger varieties may need a bit more room. But they like to be touching each other a little bit once they get larger, so don’t space them too far apart.
Pepper Seedling Planting Depth
For best results, plant your pepper seedlings slightly deeper than they were in the tray or pot. Don’t go super deep, just about 1/4-1/2″ deeper than they were before.
At minimum, you should plant them at the same depth, just make sure that all of the roots are completely buried.
How Long To Grow Peppers From Seed To Harvest
As I mentioned above, they take a fairly long time to mature. Depending on the type you have, it can take 4-5 months (100-150 days) to grow peppers from seed to harvest.
Some grow much quicker than others do. And of course, they will start producing much faster in the ideal conditions. So give them plenty of heat and sun for the best results.
Mature peppers ready to harvestTroubleshooting Problems Growing Pepper Seeds
It’s super frustrating when you struggle to grow pepper seeds, especially when you have no idea what’s wrong (or how to fix it!).
You can find out more in my detailed guide for fixing common seedling problems here. But below I have listed a few of the most common things you may struggle with…
Pepper Seeds Won’t Germinate
Failure to germinate can be caused by a few things. It could be old seeds that are no longer viable, too much or too little water, or not enough heat.
Pepper Seedlings Falling Over
This is caused by a disease called seedling blight (aka: damping off), and it’s from using dirty equipment.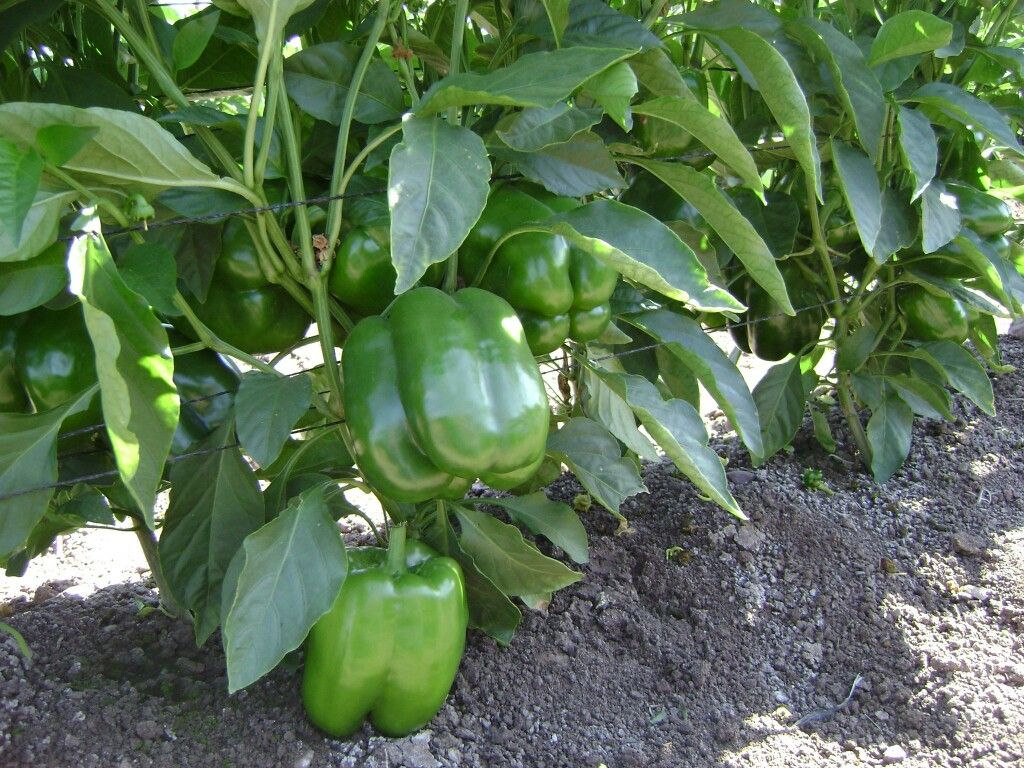 Unfortunately there’s nothing you can do to save them once they flop over. But in the future, be sure to clean and disinfect the flats before using them again.
Leggy Seedlings
Lack of light will always cause seedlings to grow tall and leggy. Usually a sunny window will not provide enough light for them, so be sure to get a grow light.
Seedlings Not Growing
If your seedlings aren’t getting any bigger, then it’s probably too cold for them. Move them to a warmer location. Overwatering can also slow their growth, so be sure the soil is never saturated.
FAQs About Growing Pepper Seeds
Below I will answer some of the most frequently asked questions about growing peppers from seed. If yours wasn’t answered in this post, then please ask it in the comments below.
How many pepper seeds per hole?
When using new or fresh pepper seeds, you can plant one per hole. If you’re using old seeds that have a low viability rate, then plant 2-3 per hole. If more than one germinates, thin out the weakest once they have 2-3 sets of true leaves.
How deep do you plant pepper seeds?
In general, you should plant seeds twice as deep as they are wide. So plant your pepper seeds 1/4″ – 1/2″ deep.
What is the fastest way to germinate pepper seeds?
By far the fastest way to germinate pepper seeds is heat. They will sprout much, much faster if you add bottom heat, and place them in a warm location.
Can you plant seeds from a pepper?
Yes, as long as they are mature. Small, immature seeds from a pepper that isn’t ripe will not grow.
Do pepper seeds need light to germinate?
No, pepper seeds do not need light to germinate. However, the seedlings will start reaching as soon as they sprout, so be sure to turn the light on right away.
Growing pepper seeds is easy once you get the hang of it. Following this detailed guide will give you the best results. Plus, once you know how, you will be able to grow any type of peppers from seed that you want!
Up next, read all about successful pepper plant care.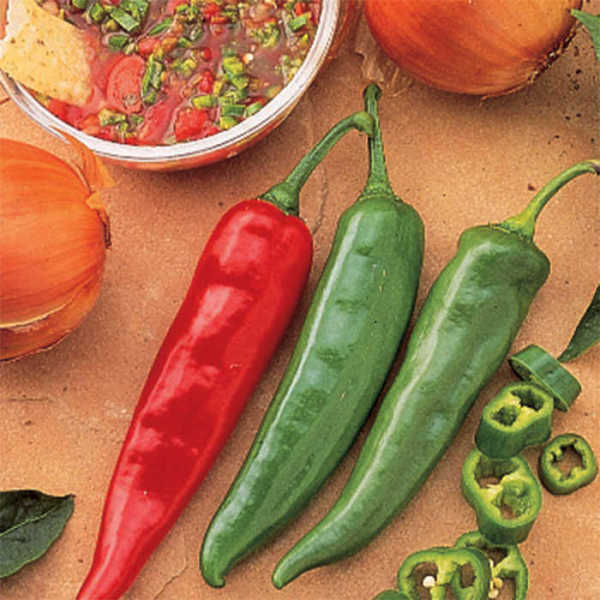
If you’re feeling overwhelmed by starting your garden from seed, or need someone to show you exactly how to do it all, then you need my online Seed Starting Course. It’s a comprehensive online training with step-by-step videos and support to guide you along every step of the way. Enroll and get started today!
Otherwise, if you just need a quick-start guide to growing seeds indoors, then my Starting Seeds Indoors eBook is the perfect answer.
More About Growing Seeds
- How To Grow Tomatoes From Seed & When To Start
- How To Grow Broccoli From Seed: Step-By-Step
- How To Grow An Avocado Tree From Seed
- How To Plant Cucumber Seeds: A Step-By-Step Guide
- How To Grow Tomatillos From Seed & When To Plant
Share your tips for growing peppers from seed in the comments section below.
Sowing pepper seeds for seedlings and picking: step-by-step instructions
As you sow seeds for seedlings, so you will reap the harvest.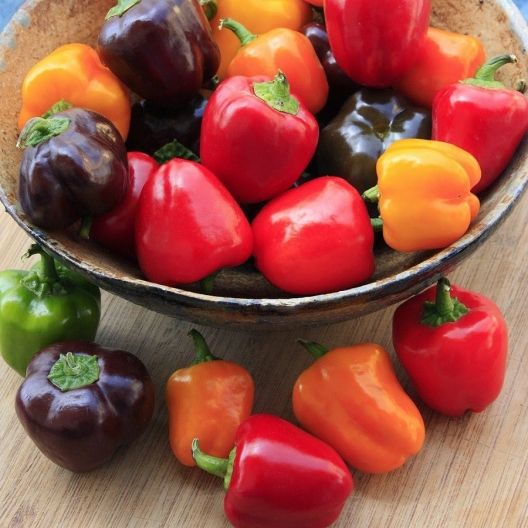 We will tell you how to plant pepper seedlings so that they grow strong and healthy. It is necessary to start sowing at the end of winter.
Pepper as a crop ripening in an average of 15-18 weeks requires early sowing of seeds for seedlings. As a rule, this procedure is carried out in February - early March in order to get the first harvest in June-July.
To make sure that the sowing time is correct, we advise you to check the information on the packaging.
You will need:
- pepper seeds,
- seedling containers,
- universal soil,
- plate,
- paper napkins,
- glass,
- potassium permanganate,
- eggshell,
- transparent bag or cling film,
- wooden stick,
- greenhouse for seedlings,
- paddle,
- watering can,
- atomizer.
Step 1. Preparing pepper seeds for sowing
An important step in growing pepper seedlings is preparing seeds for sowing. Since the seeds of this crop germinate for a long time, they must first be germinated.
Decontaminate seeds. This step can be skipped, but we recommend disinfecting the seeds in a pink solution of potassium permanganate. It is enough to hold them there for 30 minutes.
Soak seeds. Wrap the seeds in a paper towel, soak well, place on a plate and wrap in a plastic bag or cling film.
Place the seeds in a warm place. Place the plate with seeds in a warm place (preferably on the radiator). Make sure there is enough moisture. After about 3 days, the seeds should swell and hatch.
Step 2. Preparing the soil for pepper seedlings
When the seeds are ready to be planted, it's time to prepare the soil. For seedlings, a universal soil is suitable, which can be bought at any store.
Garden soil can also be used. If it was kept on the balcony all winter, before sowing the seeds it is brought into a warm room for 4-5 days so that it warms up.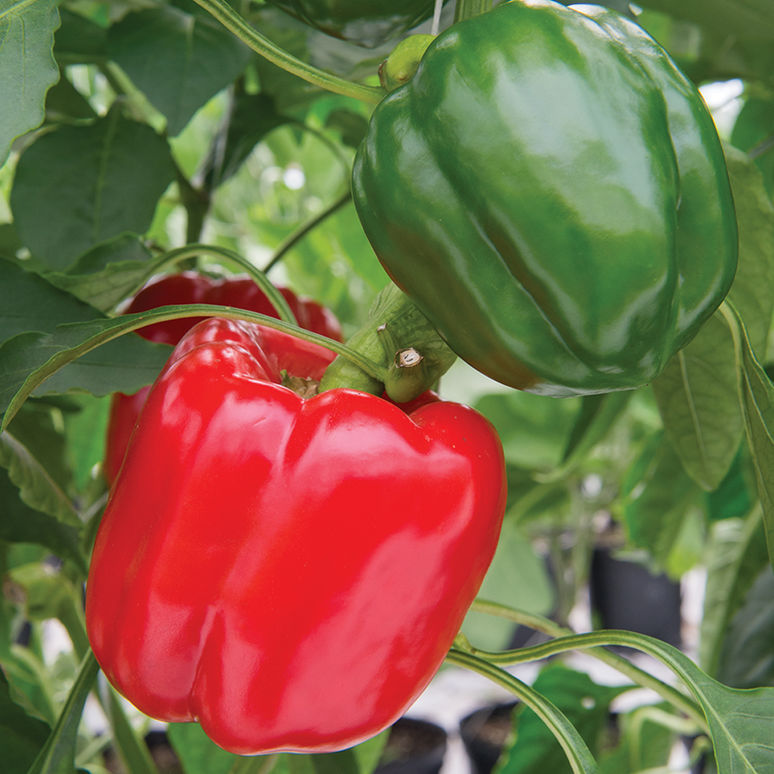
You can also mix equal parts universal soil with garden soil and add wood ash to this mixture.
Step 3. Preparing the seedling containers
Pepper seeds can be sown in a seed box and then picked into separate containers. But if you are going to grow seedlings without picking, the seeds should be sown immediately in separate containers. Suitable as special containers, and the most ordinary plastic or paper cups.
The bottom of the container must be filled with drainage. It can be fine gravel, expanded clay, but it is best to use crushed eggshells, which will not let the water stagnate, but the shifts will rot, and will become a good top dressing for growing seedlings.
Then carefully spread the soil with a spatula and water it well.
If the soil has settled after watering, add more soil and water again.
Step 4. Sowing the seeds
When the seedling containers are filled with soil, you can start sowing.
1. Make holes in the soil. Pepper should be sown to a depth of 1.5 cm, so do not make holes too deep.
2. Spread the seeds. Then carefully cover them with soil.
When sowing seeds in a common container, it is important to keep a distance of 3-5 cm so as not to damage the seedlings when diving.
3. Moisten the soil. Spray the surface of the soil with warm water from a spray bottle.
Step 5. Caring for planted peppers
So you have planted peppers. Now it is important to properly store containers with seedlings so as not to ruin the plants.
1. Cover the container with foil. It is best to use cling film. If you are using a greenhouse, you do not need to additionally cover the container.
2. Place the pepper in a warm place. Place the containers with the seedlings on the battery. When using a greenhouse with automatic heating, the task is simplified: just plug it into a power outlet.
When placing containers on the radiator, it is important to ensure that they are not exposed to drafts.
3. Illuminate seedlings . As soon as you notice the first shoots, the seedlings must be illuminated with a fluorescent lamp or a special fitolamp so that the length of the daylight hours is at least 12-14 hours.
4. Keep the soil moist. Both excess and lack of moisture in the soil is dangerous for seedlings. It is advisable to water them with warm melt (or settled tap) water.
Seedlings can be watered with a pale pink potassium permanganate solution.
Step 6. Pepper seedling picking
When 2-3 true leaves have appeared on seedlings, you can start the picking procedure.
1. Water the soil. This must be done so that the earth ball separates well.
2. Prepare the soil in the same way as when sowing pepper - make holes in each container for seedlings.
3. Separate the seedlings. Carefully separate the seedlings with a spatula so as not to break the stem.
4. Plant the plant. Sprinkle it with earth up to the point of growth (thickness above the rhizome).
5. Water generously. Again, room temperature water must be used.
Picked seedlings should be kept away from strong light for a few days to allow them to adapt.
Aftercare is easy:
- occasional heavy watering;
- additional illumination if necessary;
- top dressing with complete mineral fertilizer;
- hardening before planting in a permanent place.
By following these rules, you will be able to grow healthy pepper seedlings that will bring you a good harvest.
Planting Pepper Seeds for Seedlings: How to Sow Properly
To get a great harvest of sweet peppers, you must first properly grow strong seedlings at home. The procedure for growing a crop is in many ways similar to eggplant and partly to tomatoes, but there are also cardinal differences. Pepper reacts sharply to temperature fluctuations (sharp drops) and an unsuccessful transplant (dive), which greatly reduces the level of its vitality, and it slows down in growth.
Therefore, before you start sowing pepper seeds for seedlings, you need to familiarize yourself with the main features and rules for its cultivation. Next, you will find detailed step-by-step instructions for preparing and directly planting pepper seeds for seedlings at home, as well as useful photo and video materials.
Contents
- 1 How to choose a good variety of sweet peppers
- 2 How to plant pepper seedlings
- 2.1 When to sow seeds: optimal sowing time
- 2.2 How to prepare the seeds for planting for seedlings
- 2.3 Which substrate
- 2.4 Selecting capacity for landing
- 2.5 Scheme of landing
- 2.
 6 Direct landing
- 3 Care for pepper sowing after sowing
How to choose a good variety of sweet pepper
Please note! The site already has several detailed review articles about the most popular and best varieties of sweet pepper, which will definitely help you make your choice:
- The best varieties of sweet bell peppers for outdoor and greenhouse cultivation (red) .
- Yellow and orange peppers .
How to properly plant pepper seedlings
It is very important to properly plant pepper seedlings. And above all, choose the optimal time for sowing, prepare and process the planting material itself, soil and containers. And, of course, sow the seeds themselves to the desired depth.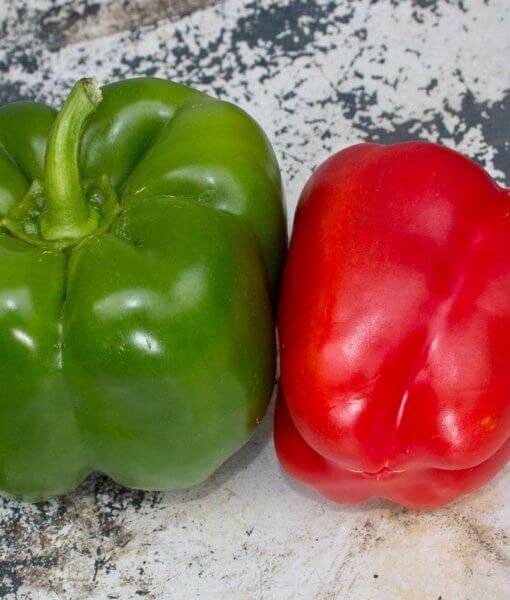
When to sow seeds: optimal sowing time
Please note! The site already has a detailed article on how to correctly calculate the timing of sowing pepper for seedlings , including favorable days for landing in 2022, according to the lunar calendar .
How to prepare seeds for planting seedlings
Please note! More information on the preparation and treatment of pepper seeds before sowing seedlings can be found in this article .
In order to properly and effectively plant pepper seedlings, it is important to pre-treat the seeds. This procedure will help to disinfect the planting material, and also activates its vitality in a shorter time.
Please note! The shelf life of pepper seeds should not exceed 3 years.
Further, germination is significantly reduced.
Important! On sale you can find coated (granulated) pepper seeds. Such planting material does not need any preparation: it is already processed and coated with a special nutrient shell. It must be sown dry so as not to wash off the protective film.
Technology for preparing pepper seeds for sowing:
- disinfection (pickling) in a pink solution of potassium permanganate (this is a very weak agent), much better in a solution of Fitosporin (Alirin, Hamair is also suitable) for 20-30 minutes (in gauze), followed by rinsing under running water;
- soaking in a growth stimulator, for example, in Epine or Zircon (according to instructions) in order to enhance growth processes;
Alternatively, you can use an infusion of ash (1 tablespoon per 500 ml of water, let stand for 2 days), in which you need to soak the seeds wrapped in a gauze bag for 4-5 hours.
- germination (soaking) of seeds in water (growth stimulator can be added) for their swelling and subsequent awakening (germination).
If you just immerse the seeds in water, there will be no effect, because oxygen is required to awaken them. Therefore seeds need to be soaked in a damp cloth (namely a cloth or cotton pads, they can grow roots into gauze) so that both moisture and air can access the seeds). For example, put it on a saucer, and cover it with a plastic bag (food film) on top so that the moisture does not evaporate quickly, in other words, create a greenhouse effect.
At the same time, the optimum temperature for seed germination of pepper is + 23-28 degrees. Therefore, it is better to put a saucer with soaked seeds in a warm place, for example, on a kitchen cabinet for 2-3 days until germinates.
Which substrate to choose
In order for seedlings to have all the necessary components for growth and development at the initial stage, a special soil should be selected.
The soil mixture itself should be loose, light and nutritious, and its acidity should be close to neutral.
If the gardener is unable to prepare it himself, the problem can be solved by purchasing prepared soil for growing seedlings of pepper (which is usually also suitable for eggplant and tomatoes).
If desired, the necessary soil mixture can be prepared independently by combining and mixing the following components:
- garden (garden) soil;
- peat;
- perlite, coco or river sand.
Some gardeners initially sow germinated seeds at pure coco substrate (no earth), to be potted later with soil, although again soil can be mixed with coco.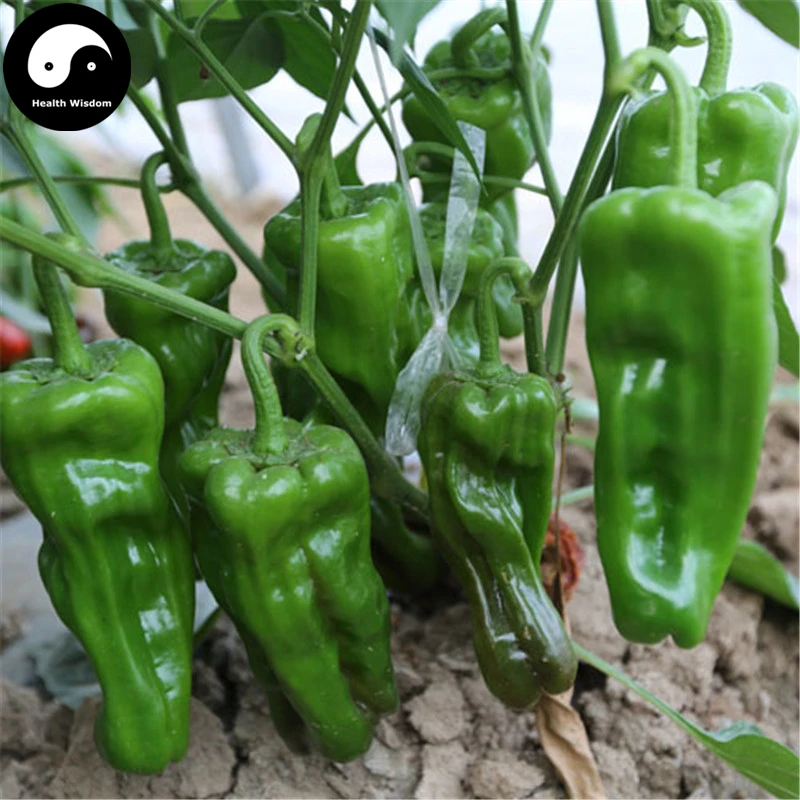 But the method is very risky, it is better to just experiment with it first.
Tip! Before sowing seeds of peppers, the correct solution is to carry out preliminary disinfection of the soil. For example, it can be steamed in the oven or microwave. Or shed with a bright pink solution of potassium permanganate, or even better with a preparation Fitosporin (according to instructions).
Choice of container for planting
Each gardener decides which container is better to use for planting crops.
Naturally, if you are going to grow with a pick, then it is initially logical to sow in a common container (wooden box, plastic container), and then pick into individual containers. Although initially it is possible to sow in small (0.1-0.2 liters) personal cups (pots or cassettes).
If without a pick, then, of course, immediately into separate sufficiently voluminous containers (from 0.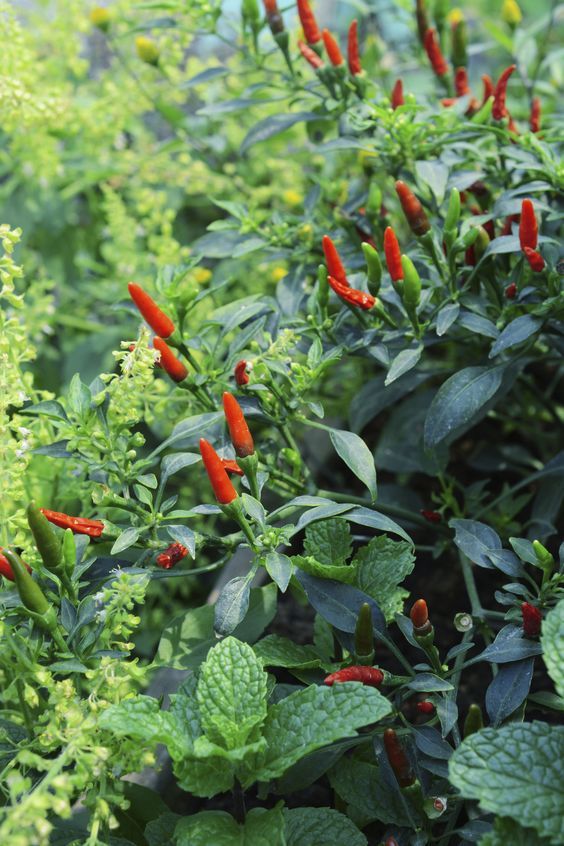 5 liters).
Important! The main requirement for a landing container is that it must have drainage holes.
As an option, you can also (optionally) add a drainage layer of expanded clay or fine gravel.
To understand the advantages and disadvantages of one or another landing container, it is worth considering several options.
Plastic cups
The most popular and convenient container for growing seedlings of pepper and other crops.
For planting and further picking, plastic cups with a volume of 100 to 500 ml are required.
Advantages: multiple use, extraction of seedlings without damaging the roots, low cost.
Disadvantages: lack of drainage holes, need for an additional pallet, instability, inconvenience during transportation.
Wooden box
The advantage of this container is that it is durable and you can make it yourself, saving the family budget.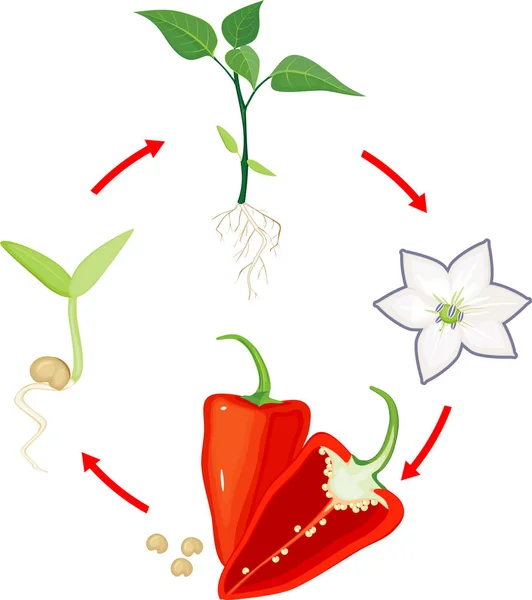 In addition, when transporting seedlings, no additional devices are required.
The disadvantage of the wooden crate is that it is heavy when filled. In addition, with further transplantation into the ground, seedlings are almost impossible to pull out without damaging the root system.
Therefore, boxes, as a rule, are used only for the initial sowing of seeds, and in the future, individual containers are already used for picking.
Plastic cassettes
Cassettes are plastic cells connected to each other. Now they are offered for sale in a very wide range, which allows you to choose containers of different sizes complete with a tray and a transparent lid.
As a rule, plastic cassettes are used for picking, but, in theory, they can be used for initial seeding.
The advantage of using them is that they are already equipped with drainage holes, are easily cut with scissors into individual specimens, and are also light in weight and allow you to easily remove seedlings from the cell (during transshipment and planting in the ground).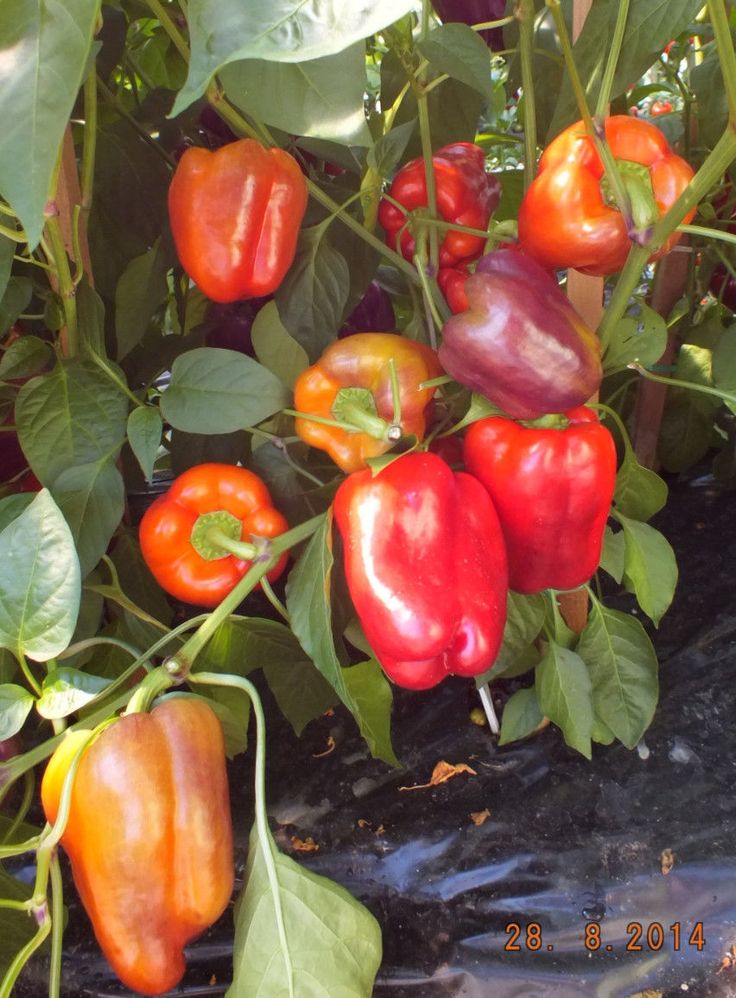
The disadvantages of the structures include fragility and relative inconvenience during further transportation of seedlings.
Peat cups (pots)
They are round containers made of ecological material (peat and cardboard, ideally 70% and 30%).
Ideal for picking.
The main advantage is that they dissolve in the soil and additionally nourish the plants, while the root system is not damaged. In other words, seedlings are planted without taking them out, but, together with the pot , deepening it into the ground.
The main disadvantages of these planting containers is that they quickly evaporate moisture, therefore regular and frequent watering is very important. However, because of this, they quite often moldy (due to overflow). In addition, peat cups have a relatively high cost.
By the way! There are also peat cassettes .

Peat tablets
They are compressed peat, which is placed in a thin shell. Before sowing seeds for seedlings, you must first soak the tablets in water for about 10 minutes.
Tablets are easy to use, stimulate the development of a strong root system, as they have a balanced nutritional composition. The disadvantages include the rapid evaporation of moisture, the need for an additional pallet and a high price.
By the way! Recently it has become popular to plant in snails. Indeed, this is convenient, but peppers do not tolerate picking, and with this method, rather severe damage to the roots occurs during picking. Therefore, it is better to leave it for tomatoes, for which the transplant is not at all terrible.
Planting pattern
When sowing sweet pepper seeds, it should be understood that over time, seedlings will need more space, so they should be planted initially with a distance so that they can fully develop before picking, without interfering with each other.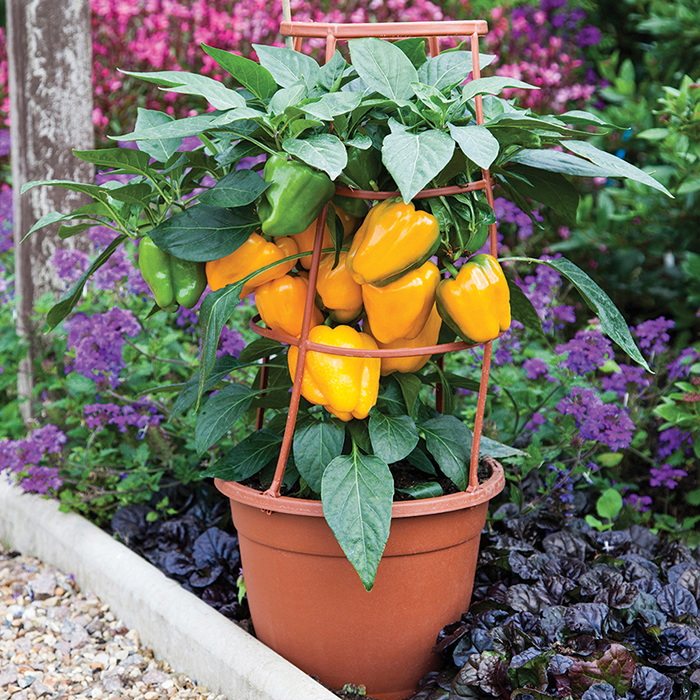
Important! In the case of dense plantings, the risk of developing diseases will increase: seedlings will be excessively stretched and develop poorly due to lack of light and nutrition.
Bell pepper seeds are recommended to be planted in rows at a distance of 1.5-2 cm from each other and with a row spacing of 3-4 cm . The more free space each seedling has, the longer it will be able to fully develop without picking. Such an optimal sowing technology will contribute to the normal cultivation of seedlings in the future.
Think! Some gardeners believe that it is better to grow pepper without picking at all, in other words, the seeds should be planted immediately in separate pots or at a greater distance (3-5 cm from each other, 4-6 cm in a row).
Direct planting
Step-by-step instructions for sowing sweet pepper seeds for seedlings:
- Pour the prepared soil into the container.
- Pour with warm water and allow the moisture to soak in and the soil to settle.
- Make rows 1 cm deep with allowable row spacing.
By the way! Some people plant peppers at a depth of 1.5 cm, but the recommended one is exactly 1 cm.
- Spread the seeds at a distance.
- Cover with soil and moisten the surface with a spray bottle.
- Cover the container with a transparent lid or plastic bag (film) to create a greenhouse effect.
- Put in a dark and warm place until sprouts appear at +25-27 degrees, for example, on a kitchen cabinet.
Video: sowing pepper seeds for seedlings
And the next video shows an even more detailed process of sowing sweet pepper seeds for seedlings:
Care of pepper seedlings after sowing
In order to end up with strong seedlings, you should familiarize yourself with the basic rules for caring for and growing peppers.
Please note! The site already has a detailed article about how to care for pepper seedlings at home .
Temperature and light conditions
degrees at night).
In the future, for stable growth of the above-ground part, not to the detriment of the development of the root system , the air temperature during the day should be within + 22-26 degrees, and at night - + 16-18 degrees . The optimum soil temperature is - + 19-21 degrees.
Pepper is a short daylight plant.
Therefore, in order for seedlings to fully develop, daylight hours should be only about 9-10 hours (and even less for late varieties).
sowing seedlings occurs early enough, then, of course, it is optimal to place the seedlings on the southern windowsill, but a western or eastern window is also suitable (or even better, a southwestern or southeastern one).
However, if your windows face the north side or you often have cloudy weather, then seedlings cannot do without supplementary lighting.
Watering
Watering pepper seedlings at home should only be done when the top layer of soil dries up , avoiding overflow and drying out of the earth (especially withering of plants).
Important! Water for watering pepper seedlings should be separated and warm (+25-30 degrees) or at least at room temperature.
Picking
Pepper negatively tolerates any damage to the roots and recovers for a long time after transplantation, so picking should be done very carefully.
Attention! For more information on how to properly pick pepper seedlings, read here .
How to care for seedlings after picking
Further care for pepper seedlings is similar: you need to maintain temperature and light conditions, as well as watering in time and, if necessary, start feeding.
Top dressing
Top dressing is an important element in the care of pepper seedlings at home. However, if you originally used nutrient soil, then you can usually do without additional fertilizer. But if the appearance of the seedlings causes concern, then top dressing is simply necessary, it will help the plant develop normally.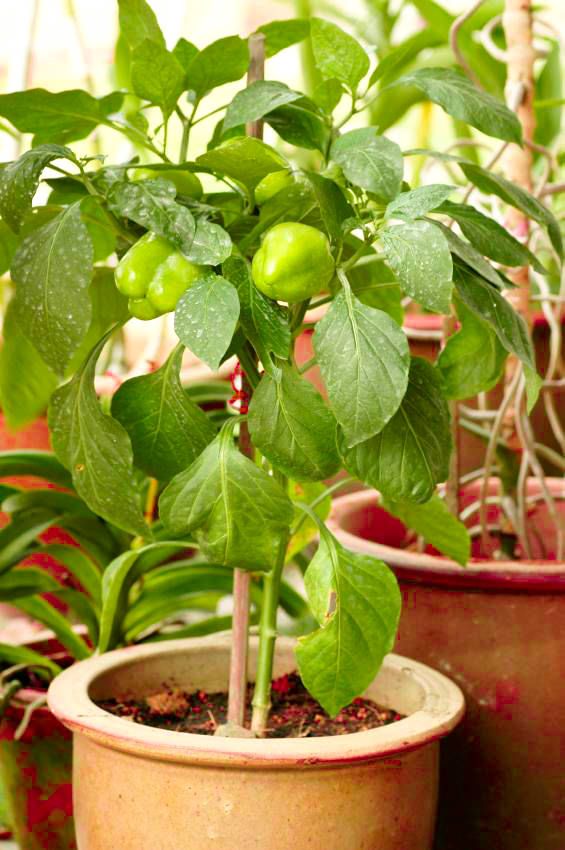
By the way! If your young plants need additional nutrition , then you will find all the information about feeding pepper seedlings in this article .
Preparation for planting in the ground - hardening
) so that after transplantation they do not get into a strong stressful situation.
To do this, 2 weeks before planting the seedlings in a permanent place in the open ground, you should start preparing it, in other words, harden it, gradually taking the seedling containers to the balcony or to the greenhouse.
When and how to plant pepper seedlings in open ground: optimal timing
Plant pepper seedlings in a permanent place only when there is a threat of return frosts minutes, and the air temperature will not be lower than +15 degrees regardless of the time of day. At the same time the soil should warm up to at least +10 , and preferably + 12-15 degrees.
As regards appearance requirements, pepper seedlings should be strong, with a well-developed root system and have 8-12 true leaves at the time of planting. In addition, early cultivars should have prominent first buds.
Thus, the approximate time for planting pepper in the ground in the South of Russia is the second half-end of April, in the Middle lane (Moscow region) - the second half of May, and in the northern regions (Urals, Siberia) - not earlier than the 3rd decade of May - the beginning June. Around the same time, pepper is also planted in the North-West (in the Leningrad region).
Naturally, it is possible to plant in a greenhouse earlier (for 1-2 weeks), because. soil in closed ground warms up faster.
The procedure for planting pepper seedlings in open ground is standard: transfer the seedlings into pre-prepared planting holes, maintaining the integrity of the earthen coma, and then thoroughly shed.