Clippings from plants
How to Grow Plants From Cuttings
By
Marie Iannotti
Marie Iannotti
Marie Iannotti is a life-long gardener and a veteran Master Gardener with nearly three decades of experience. She's also an author of three gardening books, a plant photographer, public speaker, and a former Cornell Cooperative Extension Horticulture Educator. Marie's garden writing has been featured in newspapers and magazines nationwide and she has been interviewed for Martha Stewart Radio, National Public Radio, and numerous articles.
Learn more about The Spruce's Editorial Process
Updated on 09/09/22
Reviewed by
Kathleen Miller
Reviewed by Kathleen Miller
Kathleen Miller is a highly-regarded Master Gardener and Horticulturist who shares her knowledge of sustainable living, organic gardening, farming, and landscape design. She founded Gaia's Farm and Gardens, a working sustainable permaculture farm, and writes for Gaia Grows, a local newspaper column. She has over 30 years of experience in gardening and sustainable farming.
Learn more about The Spruce's Review Board
The Spruce / Jiaqi Zhou
Project Overview
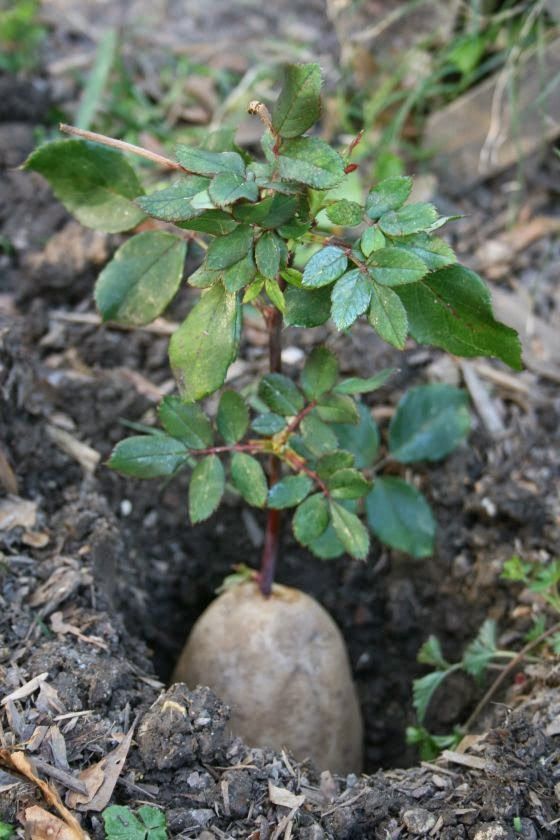
Garden plants can be propagated in many ways, but one of the easiest methods is taking stem cuttings, placing them in water or a growing medium until they develop roots, and then planting the rooted cuttings in soil.
Growing plants from cuttings is a common way to create new houseplants, but it can also work for many garden plants. In cold-weather zones, some gardeners take clippings of tender annuals and root them indoors to prepare a supply of new plants for garden planting in the spring.
Soft-stemmed herbaceous plants are the easiest to grow from cuttings, but many woody plants can also be propagated with this method.
Watch Now: How to Propagate Dipladenia
When to Take Stem Cuttings
Stem cuttings can be taken and rooted at almost any time during the parent plant's active growth period.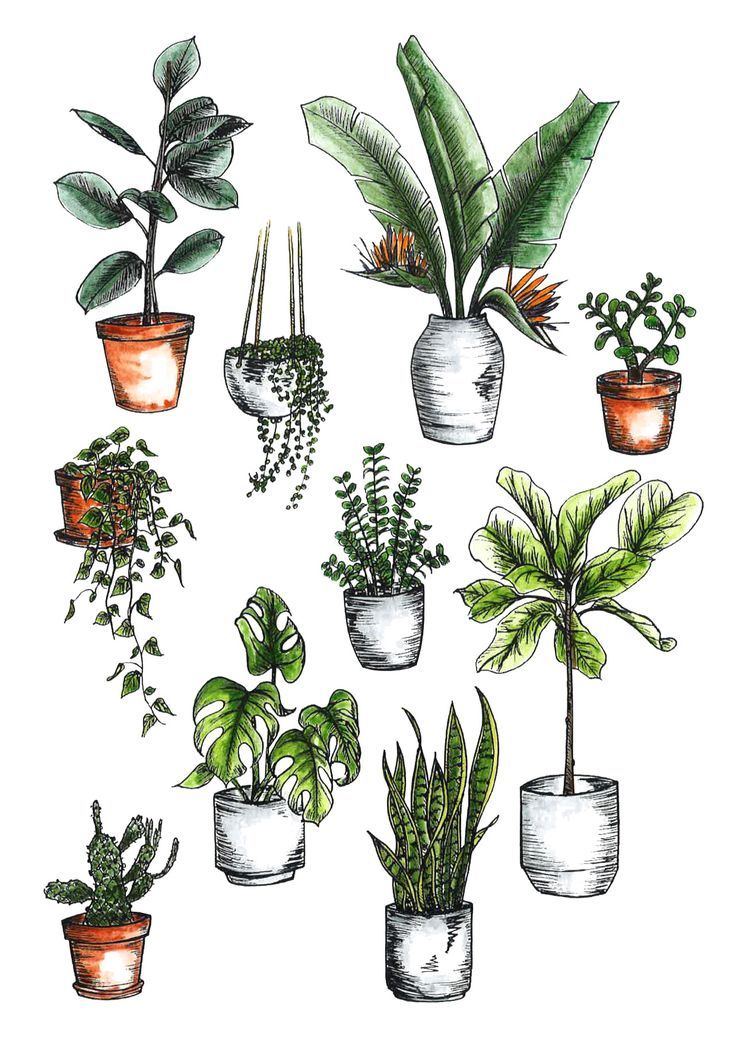 In cold climates, you can take cuttings in the fall before frost arrives, root them indoors, and then transfer them to pots. By springtime, you will have vigorous potted plants that can go back into the garden.
Before You Begin
The key to successful rooting of stem clippings is to find the moisture and temperature level appropriate for each type of plant. Do some research on the species you are trying to propagate to learn the conditions it likes best. It's best to take several clippings to maximize your chances of success.
Many herbaceous annuals and indoor houseplants will quickly grow to maturity. Cuttings from perennials and woody plants such as shrubs can be harder to root, and they may take longer to reach maturity.
Tip
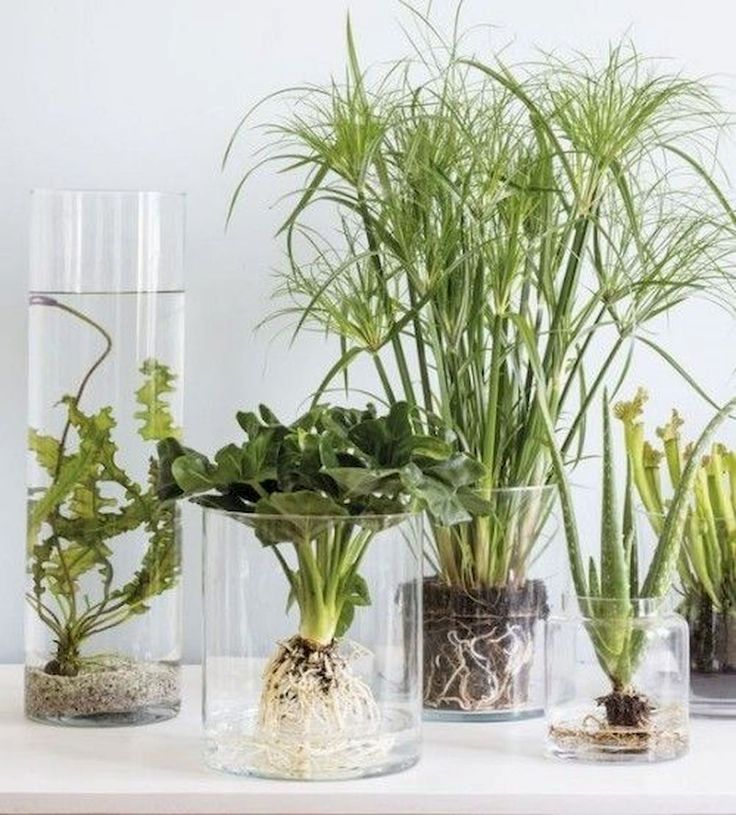
Many plants can be propagated by rooting their cuttings in a container of plain water. However, transferring a water-rooted seedling to soil is not always successful, so it's generally better to place the cutting in a potting mix to root. It's critical to keep the potting mix moist, but not soggy, during the rooting period.
Equipment / Tools
- Razor blade or scissors
- Pencil or stick
Materials
- Existing plant (parent plant)
- Plastic bag
- Soilless potting mix
- Rooting hormone
- Containers for planting
- Alcohol
The Spruce / Loren Probish
How to Grow Plants From Cuttings
-
Prepare a Container
Fill a clean 6-inch deep container with soilless potting mix to hold cuttings for rooting. A soilless mix drains well and provides suitably moist conditions that encourage the cutting to root.
Don't use ordinary garden soil, as it might contain pathogens that can kill the cutting before it ever takes root.
The Spruce / Loren Probish
-
Choose a Parent Plant
Select a healthy parent plant from which to take cuttings. Avoid plants with diseases or lots of drooping or dying foliage.
 The best specimens for cuttings will have plenty of new growth and be large enough that taking cuttings will not harm it.
 Tip
Good green growth is more important in a parent plant than plentiful flower buds. Too many flowers can actually hinder the ability of a cutting to grow roots.
The Spruce / Loren Probish
-
Find the Best Stems for Cutting
Choose green, soft (non-woody) stems for cuttings. Newer growth is easier to root than woody, older stems.
Look for a stem with a node—a bump along the stem where a leaf or flower bud attaches. This point is where new roots will emerge.
The Spruce / Loren Probish
-
Take the Plant Cutting
Use a pair of scissors or a razor blade that has been sterilized in alcohol to make a clean cut just below a node. The cutting doesn’t need to be long, but it should contain at least two leaves and one node.
A cutting that is 4 to 6 inches long is usually sufficient.
 Longer cuttings sometimes dry out when placed in their growing medium.
 The Spruce / Loren Probish
-
Prepare the Cutting
Place the cutting on a flat, hard surface, and make a clean, parital slice through the middle of the node with a sterilized razor blade. Scarring the node will increase the chances of roots emerging from this spot.
Then, remove all but one or two leaves on the cutting. The cutting needs some leaf growth to continue photosynthesis, but too many leaves will consume energy that would otherwise go to root creation.
If the leaves are very large in proportion to the stem, cut off the top halves of the leaves.
The Spruce / Loren Probish
-
Apply a Rooting Hormone (Optional)
- Some plants root easily, but a rooting hormone can help others by stimulating the cutting into sending out new roots.
- Fill a container with water, and place some rooting hormone into another container.
- Dip the node end of the cutting into the water and then into the rooting hormone.
- Tap off any excess hormone; too much actually hinders chances for success.
The Spruce / Candace Madonna
-
Bore a Planting Hole
Use a pencil or similar pointed object to poke a planting hole into the soilless potting mix. Making the hole slightly larger than the stem diameter will prevent the rooting hormone from being wiped away when you embed the stem in the pot.
The Spruce / Loren Probish
-
Plant the Cutting
Carefully place the cutting into the hole you made in the potting mix, and gently tamp the soil around it. You can fit several cuttings into one container, but space them so the leaves do not touch one another.
The Spruce / Loren Probish
-
Cover the Pot With Plastic
Place the container with the cutting into a plastic bag. The bag will keep the humidity high and hold in heat.
 But don’t seal the bag completely because some airflow is necessary to prevent fungal rot.
 Keep the container in a warm spot in the house, ideally in an area that experiences filtered light. Don’t put the cutting in full sunlight until new leaves begin appearing along the stem.
The Spruce / Loren Probish
-
Monitor the Cutting
Until roots form, keep the soil slightly moist but not so wet that condensation forms on the inside of the plastic bag. Check regularly for signs of rot, and remove any suspect cuttings as soon as you spot trouble.
After two to three weeks, begin checking for roots by tugging gently on the cutting. When you begin to feel resistance, it means roots have developed. At this point, you can transplant the cutting into its own pot or the ground.
The Spruce / Loren Probish
30 Plants That Grow From Cuttings in Soil
Watch Now: 19 Timelapses Perfect for Plant Lovers
Article Sources
The Spruce uses only high-quality sources, including peer-reviewed studies, to support the facts within our articles. Read our editorial process to learn more about how we fact-check and keep our content accurate, reliable, and trustworthy.
Plant Propagation. University of Maine Extension
How to Propagate Plants Using Stem Cuttings
By
Jon VanZile
Jon VanZile
Jon VanZile is a Master Gardener who wrote content for The Spruce for over a decade. He is the author of "Houseplants for a Healthy Home," and his writing has also appeared in the Chicago Tribune, and Better Homes & Gardens, among others. Jon began collecting plants over 10 years ago and he maintains a growing collection of rare and tropical plants.
Learn more about The Spruce's Editorial Process
Updated on 10/08/21
Reviewed by
Debra LaGattuta
Reviewed by Debra LaGattuta
Debra LaGattuta is a gardening expert with three decades of experience in perennial and flowering plants, container gardening, and raised bed vegetable gardening. She is a Master Gardener and lead gardener in a Plant-A-Row, which is a program that offers thousands of pounds of organically-grown vegetables to local food banks. Debra is a member of The Spruce Gardening and Plant Care Review Board.
Learn more about The Spruce's Review Board
The Spruce / Claire Cohen
Project Overview
One of the great joys of gardening is propagating new plants. There are many ways to do this, but one of the easiest is by snipping off a piece of stem, placing it in a potting medium, and nurturing the cutting until roots develop. At that point, you can transplant the rooted cutting into a pot or directly into the garden.
Learn How to Propagate Plants by Rooting Stem Cuttings
Propagating through stem cuttings is a form of cloning because the new plant will be an exact genetic match to the parent plant. That's not always the case with the other popular way to propagate plants—collecting seeds, germinating them, and planting. Many hybrid plants produce seeds that don't "grow true" to the parent plants, so rooting stem cuttings is the most reliable way to propagate hybrid plants.
Rooting stem cuttings is most often used to propagate houseplants, but there are many garden plants that you can propagate using this method. In cold climates, cuttings from tender garden plants, such as coleus or impatiens, can be taken in late fall, rooted indoors during the winter, and then planted outdoors in spring. And though it's a bit more difficult, many woody plants can also be propagated by snipping stem cuttings and rooting them.
The Spruce
Tip
There are two ways to root stem cuttings: placing them in water or embedding them in potting soil or another growing medium. Many plants, such as coleus, spider plant, and pothos, will readily root in water. But the water method can cause the roots to be quite fragile, and some plants resist rooting in water altogether. It's generally best to root your cuttings in some type of potting medium if possible.
When to Take Stem Cuttings
Stem cuttings can be taken and rooted at almost any time, but the technique is more successful when the plant is not in full bloom. When your goal is to propagate outdoor garden plants over winter, take your cuttings after the plant's bloom period is over in fall, or trim off any flowers or flower buds from the stem you are snipping off. A stem cutting that contains flowers or flower buds is putting too much energy into flower production to allow for good root development.
For shrubs and other woody plants, rooting via stem cuttings is most likely to succeed if you take cuttings from new growth that has not yet become woody. April through June is usually the best time to take cuttings from woody plants. Moreover, using a rooting hormone is essential when attempting to root cuttings from woody plants.
What is rooting hormone?
Rooting hormones, whether in powder, liquid, or gel form, are chemicals that stimulate the growth of roots when applied to the severed end of the plant cutting before placing them in a growing medium.
Before Getting Started
Every plant species has an ideal type of potting mix that works best for rooting its cuttings. For many plants, an ordinary commercial potting mix based on peat moss works just fine. But other plant species root best in a more porous mix, such as vermiculite, sand, seed-starter mix, cactus/succulent mix, or some mixture of these ingredients. Never use ordinary garden soil to root your cuttings. It's always best to use a sterile "soil-less" growing medium because it will be free of soil pathogens that can ruin your attempts at propagation.
Do a little bit of research on any plant you want to propagate from stem cuttings. It's easy to learn what experts recommend as the best growing medium to use for propagation.
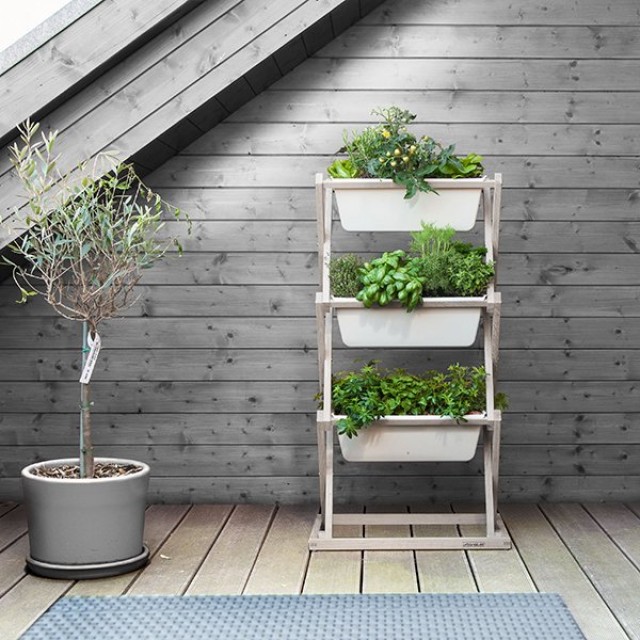
How to Make Your Own Plant Propagation Station
Equipment / Tools
- Sharp knife, scissors, or pruners
- Small trowel
- Pencil or sharp stick
Materials
- Soilless potting mix
- Planting tray or small pots
- Rooting hormone (optional)
-
Take Cuttings From a Healthy Plant
Cut a 3- to 6-inch-long piece from a healthy portion of the parent plant's stem, using a sharp knife or pruners to cut the stem at a 45-degree angle.
 This angled cut will maximize the area available for roots to develop. If possible, take cuttings from the newest growth on the plant
 Each cutting should have at least two or three sets of leaves along its length. Make sure the cutting includes at least one growth node (a bump on the stem from which leaves or flowers sprout) that can be buried in the growing medium. Roots will sprout from this node, as well as from the cut end of the stem.
It's not uncommon for some attempts at propagation to fail, so it's best to take at least three cuttings to ensure success. Woody plants can be especially temperamental, so taking six or more cuttings is a good idea.
The Spruce / Claire Cohen -
Trim the Leaves and Apply Rooting Hormone
Remove the leaves from the bottom node of the stem cutting. Usually, you can simply snap off the leaves. Make sure to retain at least three to four leaves on the stem cutting.
As an optional step, apply a powdered or gel rooting hormone to the trimmed end of the cutting and to the area where the leaves were removed.
The Spruce / Claire Cohen (Many plants will root successfully from cuttings without the use of rooting hormone, but using hormone can speed up the process, and it might be essential for some hard-to-propagate plants.) If you are using a powdered hormone, it helps to moisten the stem before rolling it in the powder. If you are using gel hormone, simply dip the end of the cutting into the hormone.
 -
Plant the Cuttings
Prepare a planting tray or small pots with soilless potting medium, such as a seed-starter mix or vermiculite. Poke a hole in the medium with a pencil. Then, insert the end of each cutting into the growing medium and lightly tamp the mix around the stem of the cutting to hold it upright.
The Spruce / Claire Cohen -
Tend the Cuttings
Most plants will not root well in full sun, so place the cuttings in a location where they will receive a 50/50 ratio of shade to dappled sunlight. For most plants, cuttings thrive on warmth and humidity, and the growing medium should be kept evenly moist but not drenched while roots develop.
Inspect the cuttings every two weeks, looking for new leaf growth and root development. If flower buds or blooms develop, pinch them off. New leaves will assist with root growth, but flowers divert energy away from root development.
Some plant species will require special treatment in order to root their cuttings. For example, the recommendation for some tropical plants might be to place the pot and cutting in a loosely tied plastic bag to increase the humidity level. Or, warmth-loving plants might require that you place the pot and cutting in a particularly warm place, or on a heating mat, during the rooting process. Always research the particular needs of the plant species you are trying to propagate.
The Spruce / Claire Cohen -
Transfer the Cuttings
When you see that new leaf growth is developing along the stem of the cutting, it usually means that healthy new roots are established. Once you feel resistance when slightly tugging on the cutting, it means the roots are sufficiently developed.
The Spruce / Claire Cohen At this point, you can transfer the cutting to a new pot with fresh potting soil. A small trowel or large kitchen spoon is a good tool for scooping out the rooted cutting and transferring it to its new pot.
 Tip
Remove leaves that turn brown or black as the stems are rooting. Discard any cuttings that turn soft or show other signs of rot or fungal disease, as these will soon succumb to their disease.
Moving New Plants Outdoors
When it's time to move the new plants you propagated from rooted cuttings to the outdoors, it is important to gradually acclimate them to outdoor conditions—a process known as hardening off. This process involves giving the new specimens increasingly longer exposure to the outdoors over a period of one to two weeks. Set the plants outside for only one to two hours the first few days and gradually increase the time exposure. Place plants outdoors during the warmer part of the day, but bring them back indoors during the cool nights.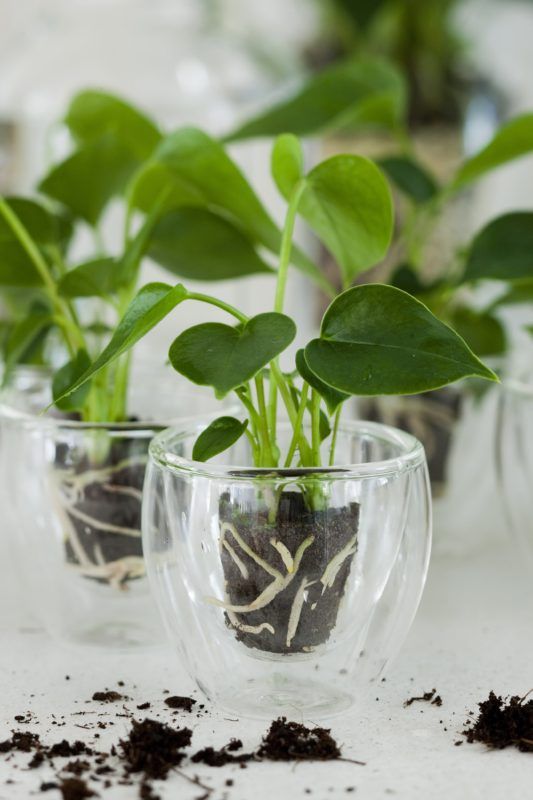 Gradually, the plant will become accustomed to the outdoor environment. Once nighttime temperatures are reliably at 50 degrees Fahrenheit or warmer all night, your new plants can be safely planted in the garden.
30 Plants That Grow From Cuttings in Soil
Tenderloin. Express course garden pruning
Tenderloin
Branch pruning is used in almost any pruning. A cut is called the complete removal of a branch or shoot, as they say, "on the ring." This operation is necessary both in the formation of young plants, and in the sanitary pruning of old and neglected ones. The cutting of branches usually does not provoke an increase in the growth of the remaining ones, apart from the possibility of the appearance of fatty shoots or "tops" in large wounds.
In this and other drawings, dotted lines indicate the removed parts of the plant, as well as branches, the position of which is changed with a garter or spacers.
Pruning position
Correct
Incorrect
Ring cut. Small branches are cut with secateurs. For a clean cut, the cutting blade of the pruner must be facing the side of the remaining part, as the shear blade will crease the tissue. When cutting, the branch is slightly bent along the blade. So it takes less effort to remove it.
Ring cut
It is even more important to correctly determine the location of the cut. At the base of the branches, as a rule, there is an annular influx, along the upper part of which a cut should be made. If you cut a branch higher, a stump remains, which almost always rots, and a hollow can form in this place. If, on the contrary, the cut is made too close to the trunk, the wound is very large and does not heal well.
Cutting branches without ring bead. It is more difficult to determine the cut line on branches that do not have annular flow. For example, on outgoing at an acute angle. To find out the place of the cut of such a branch, two imaginary lines are drawn from its base from above: one parallel to the trunk, the other perpendicular to the axis of the branch being cut. The line that bisects the angle between these lines shows the place of the cut or cut.
Branch cut without ring bead
Cut large limbs. A branch that is not too large is simply supported by hand when sawing; you can pull it back a little as it grows. If the branch is large and heavy, it is cut in several steps. When sawing off in one step, the branch can break off under its own weight, which is why long difficult-to-heal scuffs form on the trunk. First, a cut is made from the underside of the branch at some distance from the trunk. The depth washed down - half the thickness of the branch or a little more. They practically saw until the file jams. Then they make the second washed down from above, a little further from the base, and break off the branch. For very long branches, it is better to remove parts of it gradually in several stages. The remaining stump is sawn off already along the annular influx. At the same time, it is also useful to file the bark at the bottom of the branch first to avoid tearing it off.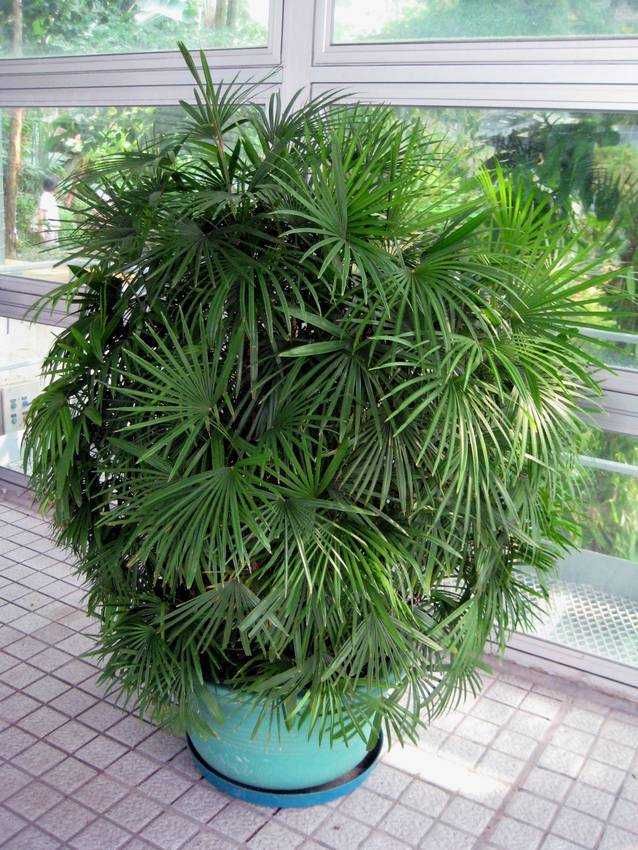
Sawing off a large branch in three steps
Consequences of sawing off a large branch in one step
Cutting large branches in one step
Result of incorrect sawing
Correct
Wrong (stumps left)
It is possible to combine two useful activities - cutting out excess shoots and harvesting green cuttings for rooting.
Overgrowth removal. For this operation to be effective, the undergrowth must be removed correctly. No stumps, even if for this you have to get to the roots! From the left stumps, overgrowth will appear many times more.
Cutaway replaces cutting. If, at the very beginning of development, shoots are identified that can thicken the crown, as well as spinning tops and all sorts of others that cannot be used with a specific benefit, it is advisable to break them out immediately. This is much easier than cutting and less traumatic for the plant. In addition, the plant will not have to expend energy on the formation of branches, which will be removed anyway. The shoot, which has reached a length of 5–10 cm, is broken out with fingers with a “heel”, i.e. a piece of wood. The resulting wound quickly heals without any treatment.
Blinding of the kidneys. Blinding, or removal, of the kidneys - the same breakdown, but at an even earlier stage. It is used in those parts of the plant where the development of shoots is generally undesirable. For example, this is a trunk in plants formed in a standard form, or a rootstock of a grafted plant.
Particularly "advanced" gardeners can afford to remove unwanted shoots in any place of the crown already at the bud stage, than to replace any cut, and even more so cutting. But this is rather art and in a sense pampering.
Shortening
Shortening. Shortening, or pruning, differs from cutting in that the branches or shoots are not completely removed, but only reduced in length by cutting off the end part. Shortening the shoot by less than one third of the length is considered weak pruning. It does not cause the growth of a large number of shoots, almost does not affect the development and the beginning of the fruiting of the tree. Removing more than half the length of the shoot is a strong shortening and has a significant effect on the plant. The beginning of fruiting is moving away, many new shoots are formed, thickening the crown. Often they have powerful growth and do not have time to fully mature, which affects their winter hardiness. Therefore, strong shortening is used with caution and only in special cases when it is necessary to provoke the emergence of new shoots, weaken the growth of an overdeveloped branch to subordinate it to another, remove a damaged or unripe part of the shoot, etc.
Kidney pruning
Correct
Wrong (cut too low)
Wrong (stump left)
Wrong (the cut is tilted towards the kidney)
Kidney pruning. On the shoot, a bud is selected from which they want to get a new shoot, and a cut is made on this bud. A proper cut into a kidney should be smooth, free of burrs, and sloped about 45° away from the kidney. The lower edge of the cut is located slightly above the level of the kidney base. The top edge should be just as high as its top. If the cut is made lower, the kidney may dry out or, at best, produce a weak shoot. If, on the contrary, the cut is made too high, the new shoot may deviate significantly to the side. At the same time, the stump will still dry out to the kidney. Sometimes spikes are specially left, to which shoots are tied. Subsequently, these spikes are cut out or they fall off on their own.
For opposite or whorled buds, cut straight over the buds, close enough to the buds to avoid damaging them.
Correct
Wrong (cut too much)
Wrong (stump left)
Cut for translation. Branch pruning “for translation” is used for rejuvenation, to change the direction of growth, etc. A suitable branch is selected on the branch, next to which a cut is made. Just as with shortening by a kidney, one should strive to reduce the cut area, avoiding both too low cuts and leaving stumps.
Stump cutting. Used to rejuvenate shrubs. For a tree, this technique is too harsh, and if it remains alive, it will turn into a bush. The trunks of the bush are simply cut down, leaving small stumps - from 10 to 50 cm. If the plant is very old or too weakened, i.e. there is a risk that it does not “want” to grow, the operation is extended for two years or longer, cutting down the stems one by one.
Pinching. Pinching or tweezing is essentially a shortening. It is used in the summer on growing shoots, namely, they break off (pinch off, cut off - it doesn’t matter, it would be convenient) their non-lignified tops, where the growth point is located. Pinching inhibits the growth of branches and allows you to turn them into overgrown or semi-skeletal. However, pinching, like shortening, can have far-reaching consequences, not always desirable. Therefore, you should not use this technique without having a clear goal in front of you and an idea of \u200b\u200bhow to achieve it.
This text is an introductory fragment.
PNG of everything in the world: people, plants and objects for collage
Menu− 25% off everything except archival courses with promo code AUTUMNSC until October 24
Collection of Free Downloads
Jessica Nguyen
01/21/2021
Reading Time: 8 min
Finding the right staffing to submit an architectural project and then painstakingly cutting objects out of the background is a tedious task. Moreover, there is not always time for this.
We have compiled a list of resources where you can download ready-made PNGs for collages and visualizations for free: images of people of various appearances, objects, animals and plants from works of art, films and photographs. If you know more, write to us and help complete the collection!
MrCutout
https://www.mrcutout.com
Large and varied collection of realistic PNG files, not only with people, but also with plants, animals, objects and machines. You can download up to 2.5 MB per day for free - for a larger volume you need to buy paid access.
Clipped
http://www.clipped.io
A community where architects can not only download but also upload their cutouts1. There are more than 300 PNG people in the collection, and in addition - files with neatly clipped animals, objects and various modes of transport. All PNGs are free to download.
Gobotree
http://www.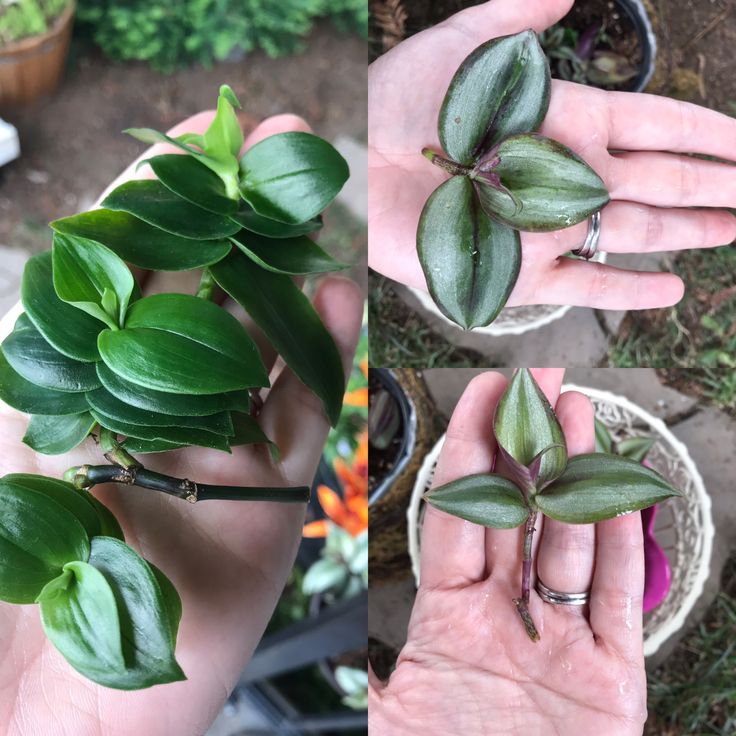 gobotree.com/
A site with a huge selection of PNG images of people, plants, objects and animals. In addition to characters cut out of the background, Gobotree provides textures and backgrounds for collages.
Searching for images is quite convenient: the site has a selection by category and search by tags. You can download up to 10 images per month for free, but not in very high resolution - to download more high-quality PNGs, you will have to buy a subscription.
Studio Alternativi
https://studioalternativi.com/
A large base of staffing for architectural collages and other useful objects: here you can find PNG, vector images of people, furniture, plants and animals, as well as DWG files, families Revit and even brushes for Photoshop.
Many PNG sets can be downloaded for free - among them there are thematic collections: for example, famous architects, famous fashion models, characters from horror films or characters from the TV series Friends.
Nonscandinavia
http://www.nonscandinavia.com
Nonscandinavia has a wide variety of PNG people you can download. The name of the resource speaks for itself: the creators of the collection urge to leave the selection of fashionable Scandinavians from Skalgubbar worn to holes and add people of different nationalities to the collages - simpler, but no less charismatic.
XOIO AIR
http://xoio-air.de/
Character collection resource: On XOIO AIR, you can find PNG images of office workers, a collection of people in winter clothes, and characters with various lighting effects and specific angles - for example, a photo from above. The collection is small, and site navigation is not very convenient, but you can download collections in whole archives.
Lessici Inclusivi
https://www.instagram.com/lessici.inclusivi/
Instagram account of the Italian team Verso . Young architects share an inclusive selection of PNG people with anyone who sends them a private message.
toffuu
https://www.toffu.co/
Toffu creates vector staffing for architectural visualizations - usually paid, but there are exceptions: for example, a set of vector people in medical masks called Pandemic.
Making vector people in Illustrator is not difficult at all, the Toffu team has written a detailed tutorial. The creators promise that soon on toffuu it will be possible not only to buy sets of characters and items, but also to sell your own.
Kaleidoscope
https://kaleidoscope-arch.tumblr.com
Kaleidoscope's small Tumblr account defies the glossy standards of architectural visualization, with a collection full of non-trivial female images, PNGs from various minorities and people with disabilities.
BLK IMG
https://black-img.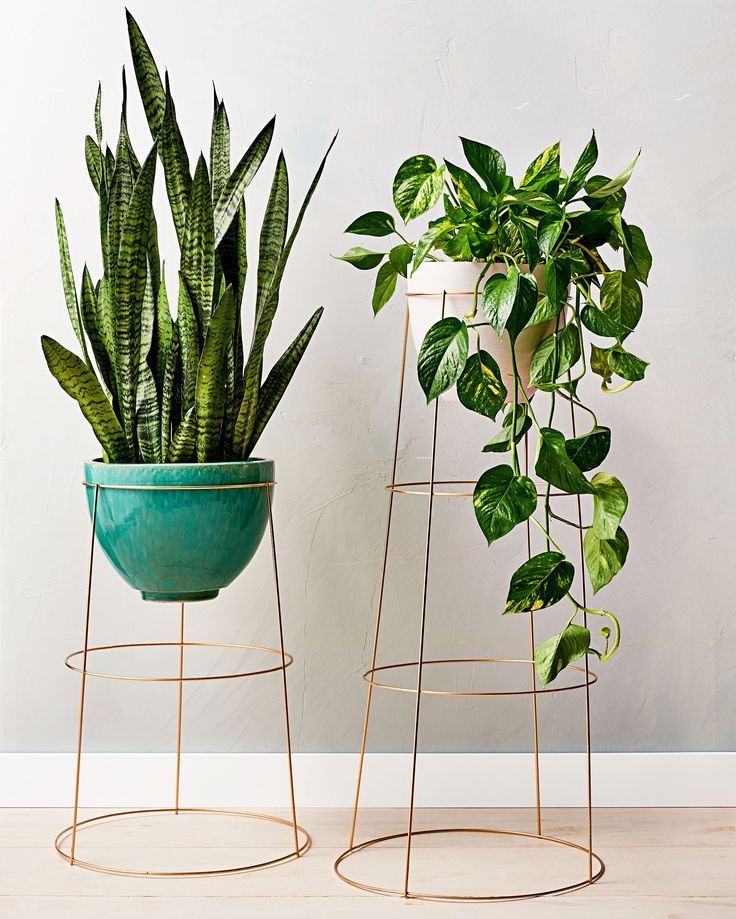 com
com
The portal is completely dedicated to high-quality cutouts of black people. The creators of the collection support the Black Lives Matter movement, and explore the values and aesthetics of African American culture on their Instagram and the Research section of the site.
Escalalatina
http://www.escalalatina.com/
A site in Spanish with representatives of Latin American culture. Here you can find clippings from photos of ordinary people, as well as PNGs of legendary characters - artist Frida Kahlo, architect Luis Barragan, and TV star-wrestler Alejandro Munoz Moreno, nicknamed Blue Demon .
russia .png
https://vk.com/rus_png
The public can be safely called a group art object - some users cut out characters and entourage from numerous memes and photographs from the expanses of Russia, while others created piercing and ridiculous out of them postmodern collages.
The "Russia .png" collection has not been replenished for two years, but the public remains an extensive archive of PNG staffing from Russian reality.
Cutartsis
https://cutartsis.com
Site with a collection of cutouts from Russian students - architects from SPbGASU and developers from MIPT. As the name of the site suggests, the PNG men in this collection are cut from artworks: paintings and films.
PE EN GE
https://vk.com/pngluxurycutouts
Public with 47 original collections of PNG people, textures and objects of completely different origins: from clippings from movies and works of art to models from fashion shootings of digital magazines .
Element
https://welcometoelement.com/
A collection of cutouts by London-based architectural visualization studio Element - all images are free, but may be used solely for architectural submissions.
Juan Carlos Ramos
https://juancarlosramos.org/
A small collection of cutouts by California architect and visualizer Juan Carlos Ramos.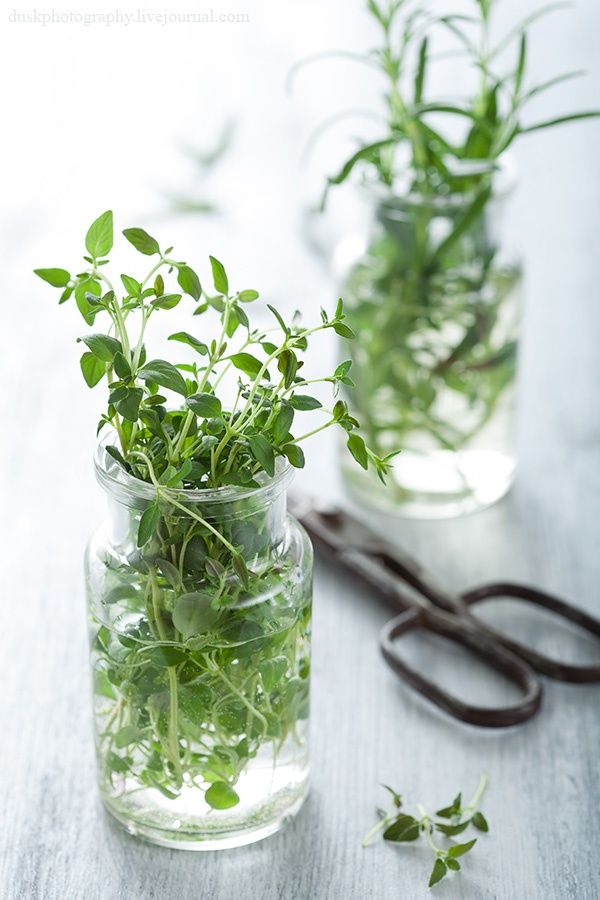 In total, you can download two archives with PNG men for collages and exterior visualizations.
PNG of all lovers
http://bit.ly/SC-png-love
Own selection of Soft Culture with couples, couples and partners for collages. We have collected movie characters, characters in paintings, art and photography projects, as well as real lovers who were remembered among the architects, designers and artists of the 20th century.
More articles
-
article PNG of all lovers: couples, couples and partners for collage Famous architects, artists, movie characters and painting characters with their lovers Read
-
article Photoshop. History of creation Who, when and how invented the chief graphic editor Read
-
article Cut Out Art: People for Collage Characters and spaces from paintings by Edward Hopper Read
-
article Cut Out Art: People for Collage Characters from paintings by David Hockney Read
-
article Cut Out Art: Plants for Collage Tropical plants from paintings by Henri Rousseau Read
-
article Cut Out Art: People for Collage Characters from the paintings of Winifred Knights Read
-
article Cut Out Art: Plants for Interior Collage Flowers from paintings by Jonas Wood Read
Leave your e-mail if you want to subscribe to our new materials
* By clicking on the "Subscribe to news" button, you consent to the processing of your personal data
Wait, please.