Plan a kitchen garden
How to Create a Kitchen Garden (Potager): 6 Garden Plans
A kitchen garden provides you with fresh vegetables—and will look good doing it, too! Learn how to plan a kitchen garden in the style of either a traditional row garden layout or a potager garden, which intermixes vegetables, fruit, flowers, and herbs.
Planning Out a Kitchen Garden
With a kitchen garden, the goal is to walk outside your backdoor and select the freshest of foods for your meals. The garden is positioned right next to the house for convenient harvesting, as well as near a water source. Learn more about which vegetables and edibles to grow in a kitchen garden!
Often companion flowers are added to the same garden to encourage pollination and act as natural repellent or trap to pests. See our Companion Planting Guide.
Potager Garden. Credit: Jardins du Manoir d’Eyrignac.
What Is a Potager Garden (A French Kitchen Garden)?
Some folks say that a vegetable plot would look out of place in their yard. They imagine ruler-straight rows and unsightly muddy gaps where plants have been dug up. But there’s no reason that vegetable gardens can’t be as beautiful as flower gardens!
The idea of intermingling vegetables, fruit, herbs, and flowers isn’t a new one. The French have been doing it in their “potagers” (kitchen gardens) for centuries. It’s a more casual, informal approach that works with nature and is similar to a flower garden except focused on edibles!
No chemicals are used, crops are rotated, and appropriate companion planting means natural repellents are the last word! This sustainable practice encourages a range of birds and pollinators.
With a “potager” kitchen garden, you can have your cake (well, veg) and eat it, too!
Video: See Our Potager Kitchen Garden
Plants to Grow
Imagine colorful flowers with colorful edibles! Think of textures and scents, too! Here are some suggestions:
- Colorful and scented edibles: Purple basil, pink chard, scarlet runner beans, curley parsley, colorful hot pepper plants, blue-green or red cabbage leaves, bright nasturium, purple chives, rosemary, sage, thyme, savory, and blue borage, strawberries.
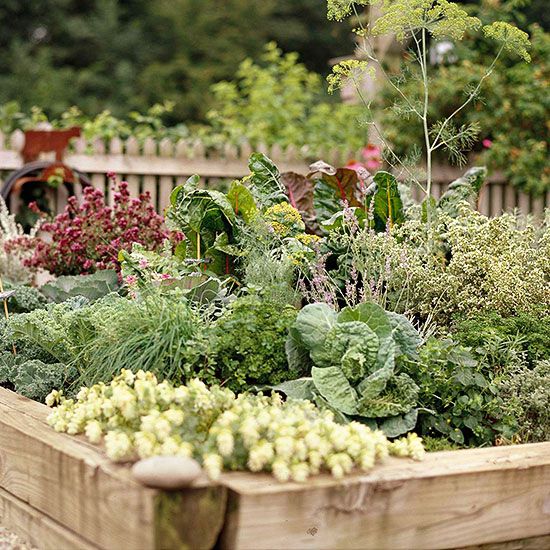
- Colorful and scented flowers (include self sowers!): Bee balm, cosmos, marigolds (dwarf), mallow varieties, fragrant gerandium, sedum, columbines, coreopsis, sweet peas, poppies, globe thitle, fleabane, gladiolus, hollyhocks, speedwell.
Living Borders
Fruit trees work well in a kitchen garden! Consider espaliered apple or pear trees can be trained to grow on a brick wall or on wire fences for a see-through effect. You could also use blueberry bushes as an edible hedge.
Perennial vs. Annual Vegetables
You do want to keep annual vegetables and perennial vegetables separate in the kitchen garden to make it easier to till and amend your annual beds. For the quick-growing annuals, instead of using rows, consider creating little triangles or pockets of plantings. Then when annuals such as lettuce or radish mature, you can sow more seeds and have a succession of planting to keep the beds full.
6 Kitchen Garden Layouts and Plans
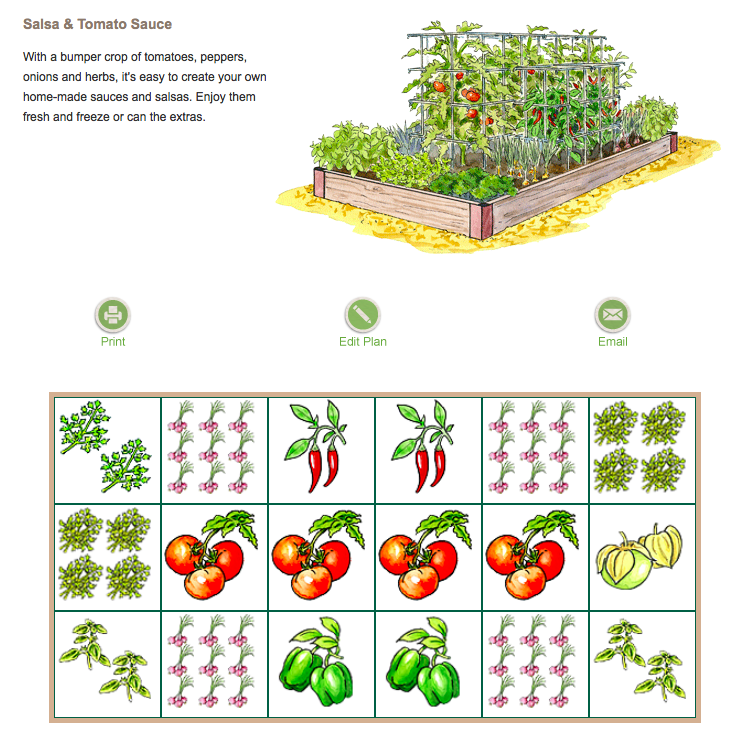
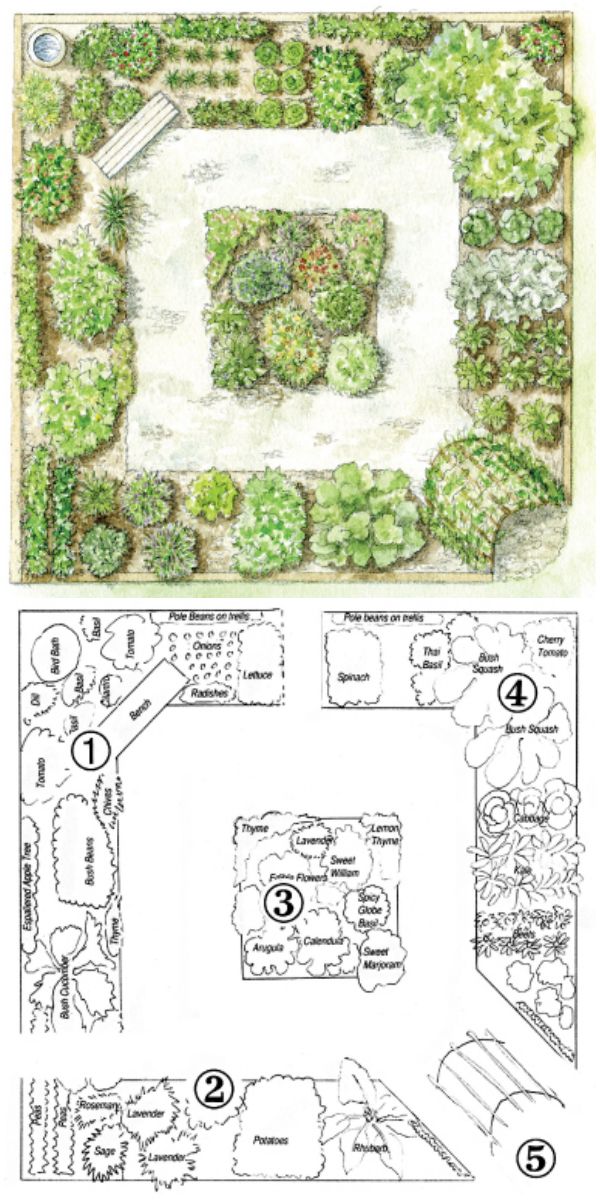
Below are some samples of different types of kitchen garden layouts (from traditional to potager) shared by Almanac gardeners! We hope they provide inspiration Find hundreds more garden plans by your location here!
1.
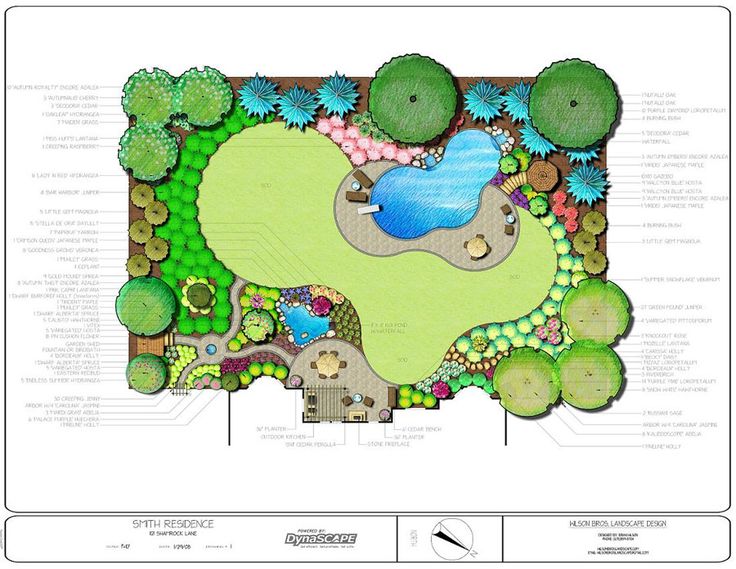 Potager Kitchen Garden Layout
“We just finished our 2019 garden plans for our potager garden. I can’t rave enough about The Old Farmer’s Almanac’s Garden Planner. It’s completely worth the fee, if you need a more comprehensive planner.” —Read the full review from 2 Bees Farm!
Garden Location: St. John’s, Arizona
Garden Size: 59’ 11” x 59’ 11”
Garden Layout: Potager / Country garden
Sun or Shade: Sunny
Garden Soil Type: Good soil
See full plant list here!
2. Kitchen Garden Layout With Raised Beds
This is our second year in the garden!
Garden Location: Near Toronto, Canada
Garden Size: 56’ 0” x 56’ 0”
Garden Layout: Raised Beds/Home Garden
Sun or Shade: Sunny
Garden Soil Type: Good soil
See full plant list!
3. Kitchen Garden Plan With Raised Beds
Create a three-season vegetable garden in the southern U.S. (This garden is zone 7a/b.)
Garden Location: Georgia
Garden Size: 20’ 11” x 19’ 11”
Garden Layout: Raised Beds
Sun or Shade: Sunny
Garden Soil Type: Heavy/clay soil
See full plant list!
4.
 Kitchen Garden Plan: Raised Beds
“My Blue Heaven” organic garden!
Garden Location: Spokane, WA
Garden Size: 69’ 11” x 29’ 11”
Garden Type: Home garden
Garden Layout: Raised Beds
Sun or Shade: Sunny
Garden Soil Type: Good soil
See full plant list.
5. Kitchen Garden Plan: Raised Beds
Garden Location: Charlottesville, VA
Garden Size: 20’ 11” x 19’ 11”
Garden Type: Home garden
Garden Layout: Raised Beds
Sun or Shade: Sunny
Garden Soil Type: Good soil
See full plant list.
6. Kitchen Garden Layout (Potager)
Simple country garden and orchard combo with lots of variety.
Garden Location: Mitchell, Ontario, Canada
Garden Size: 50’ 0” x 29’ 11”
Garden Type: Home garden
Garden Layout: Potager / Country garden
Sun or Shade: Sunny
Garden Soil Type: Good soil
See full plant list here.
Looking for more ideas? See our layouts for other types of gardens.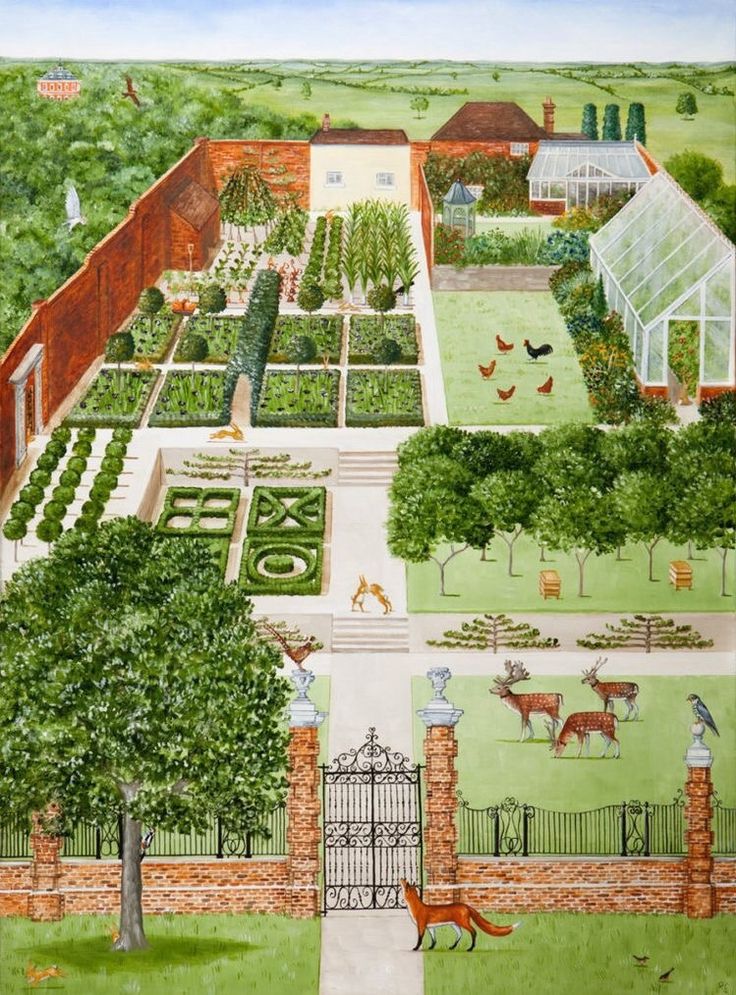
Plan Your Kitchen Garden Online
Our online Garden Planner is a super smart way to organize a kitchen garden and optimize your harvest. It calculates your plant spacing, cues which plants work best together, calculates your planting dates, and helps you become a better gardener! Try the Almanac Garden Planner here.
Planning a kitchen garden: from layouts to the best crops
When you purchase through links on our site, we may earn an affiliate commission. Here’s how it works.
(Image credit: Future)
There is something so satisfying about planning a kitchen garden – laying down ways to provide your own homegrown vegetables, fruit and herbs for the kitchen table, all year round.
Planning a kitchen garden begins with inspiration – provided by countless kitchen garden ideas – however, the next step transforms these ideas into a reality. From figuring out the right position and defining its size and shape through to picking your crops, discover how to start planning a kitchen garden to add a new dimension to your vegetable garden ideas.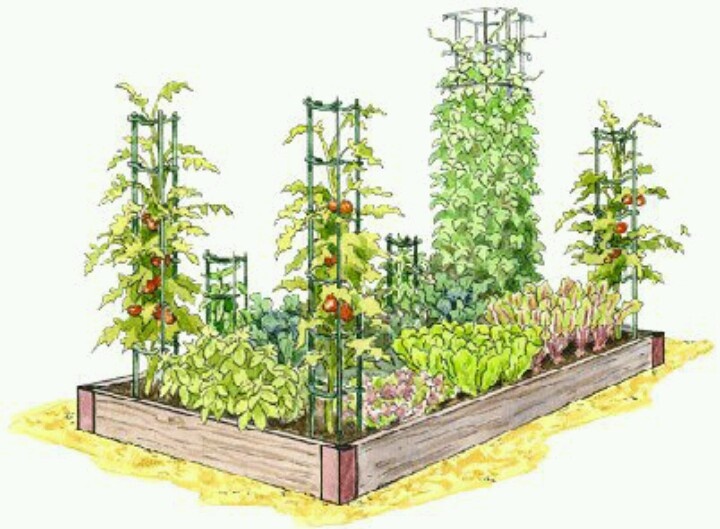
Planning a kitchen garden
'Have you heard the promise that every minute planning saves you 10 minutes in execution?' says Nicole Burke, founder of Gardenary and author of Kitchen Garden Revival . 'My years in the kitchen garden keep convincing me that every minute spent planning the garden really does save, not just 10 minutes of execution, but maybe 10 weeks of frustration.'
'A kitchen garden should be planned according to the size of the available space. A good way to start is by drawing a sketch of the area and then dividing it into squares or rectangles. Each section can then be allotted a specific type of vegetable or herb,' advises Lindsey Hyland, founder of UrbanOrganic Yield .
(Image credit: Alamy)
What is the difference between a kitchen garden and a vegetable garden?
Before you get started planning a kitchen garden, it is important to know the difference between a kitchen garden and a vegetable garden.
A kitchen garden is a small, compact space, located close to the house (ideally near the kitchen) where you can quickly nip out to get herbs, tomatoes, salad greens or other delicious produce when cooking.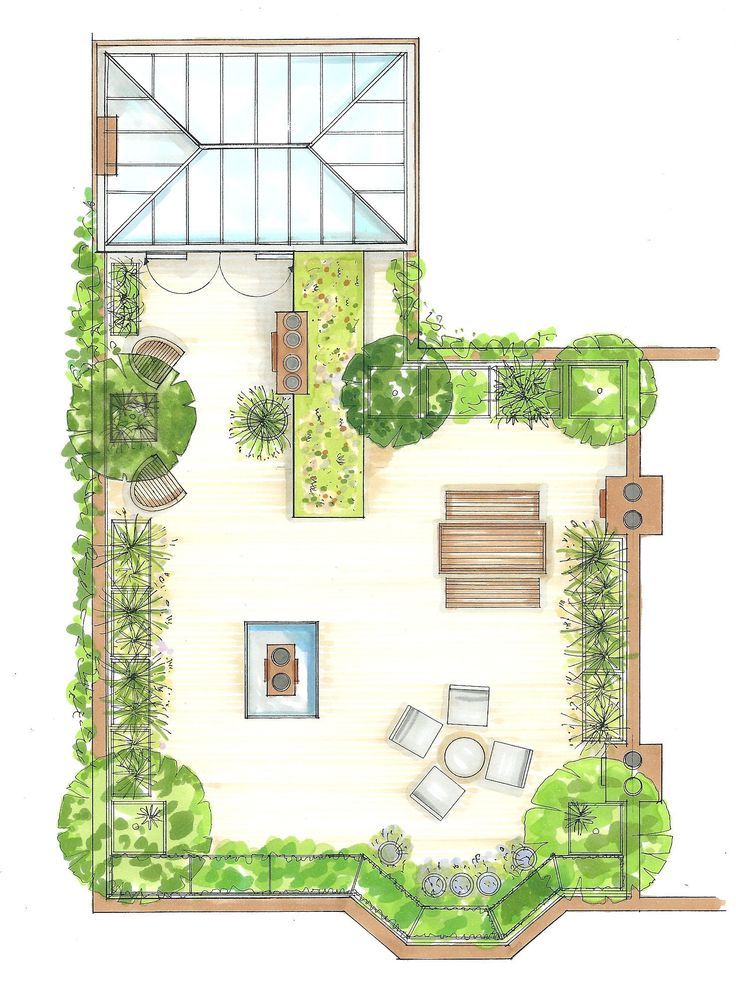 They often also incorporate a sitting area, and are more curated and aesthetically pleasing than large vegetable gardens.
Vegetable gardens, on the other hand, are usually more functional, expansive and industrious spaces where large numbers of vegetables are grown. Vegetable gardens can range from a few feet to acres.
How do you plan a kitchen garden?
Kitchen gardens and the grow-your-own movement has seen a recent resurgence, and it's understandable. Growing the best fruit trees and planting the easiest vegetables will reward you with the freshest and tastiest crops to enjoy straight from the ground. Plus, you can be sure of enjoying wholesome, organic food, bursting with nutrients and free of any chemical nasties, as you will know everything that has gone into growing those tasty edibles.
- Work out how much space you have – take some time to consider what would suit your needs and where you may have space for beds or containers when considering how to plan a kitchen garden.
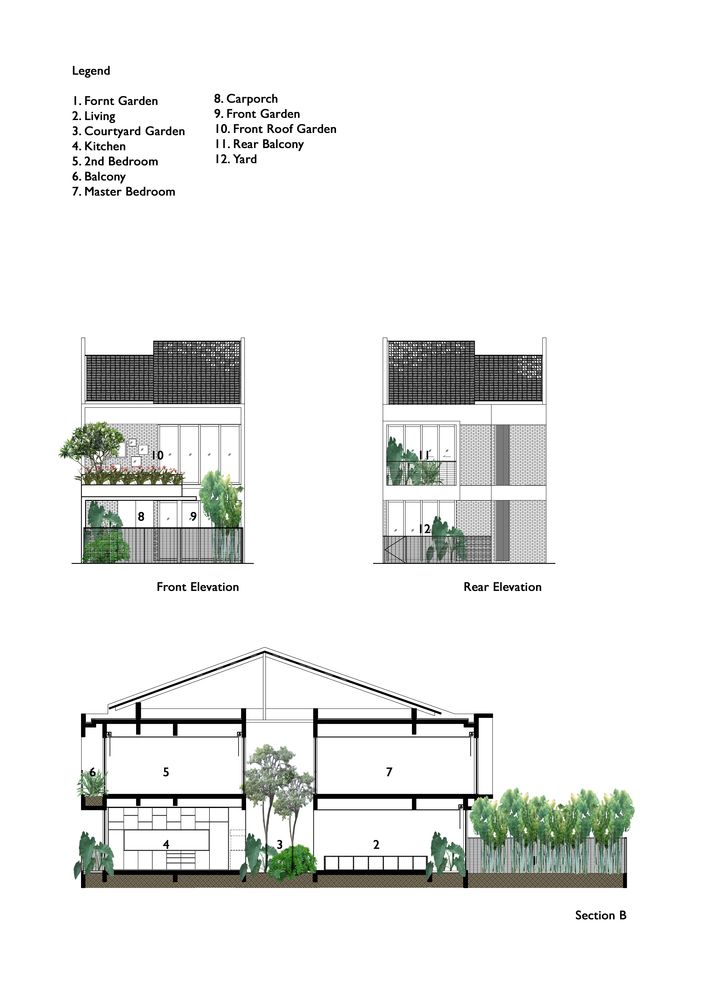
- Decide on the size of plot you would like to create and can manage.
- Draw up a plan of the beds needed. A large plot with room to grow a lot of crops will involve a lot of work, both in terms of preparation and maintenance, so be realistic.
- Consider combining a kitchen garden into borders – you may already have space for a dedicated kitchen garden, but if not you can grow crops with clever small vegetable garden ideas, by mixing them amongst ornamentals in the flower beds.
- Grow in pots – a wide variety of crops can be grown in vegetable garden container ideas in even the smallest backyard.
- Think vertically – vegetable garden trellis ideas allow you to grow crops upwards in the narrowest of spaces, against fences and walls.
- 'Arches and pergolas can be used to support climbing plants, such as beans and even pumpkins, freeing up more space for crops at ground level.
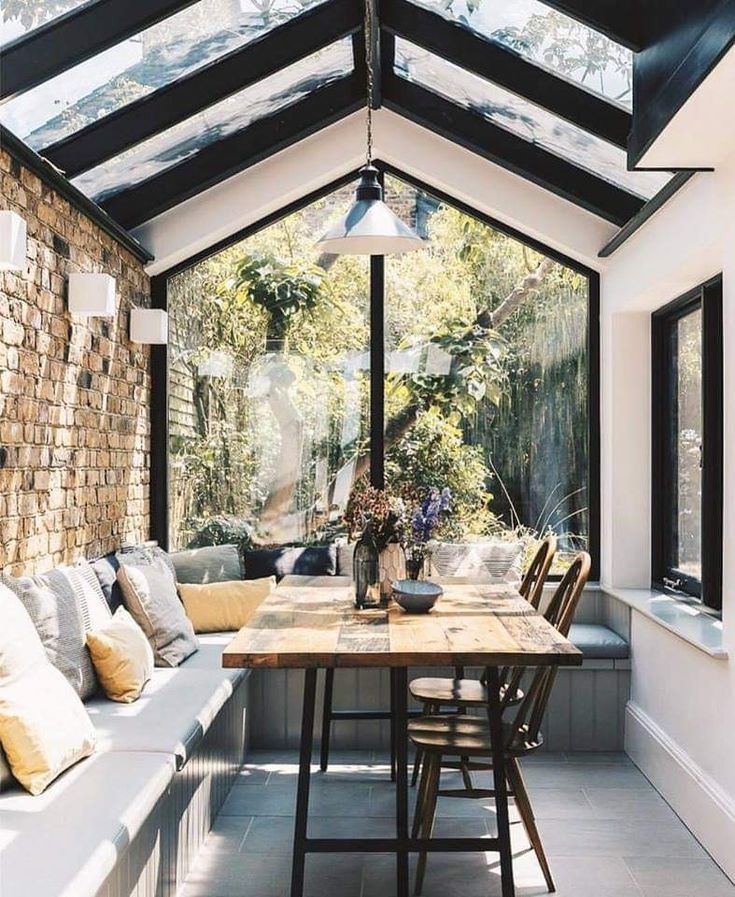 Space limitations can lead to creativity,' says horticulturalist Aaron Bertelsen.
 - Planters and shelves can be attached to a wall, and pots can be arranged on ladders or steps. You can easily double the growing space in a window box by hanging pots from it. Even if space is limited, with some creative thinking you can see many ways of planning a kitchen garden.
(Image credit: Alamy)
- Take note of weather patterns: 'Understanding the weather predictions in terms of the high and low temperatures for the next seven to nine months is the first step to how to plan a kitchen garden,' says Nicole.
- What is your kitchen garden's micro-climate? 'Although most of us are taught to learn our gardening zone, this doesn’t always give us a clear picture of what’s happening in our own local area each month in terms of weather,' she adds. So, take some time to chart out the predicted weather for the rest of the year first.
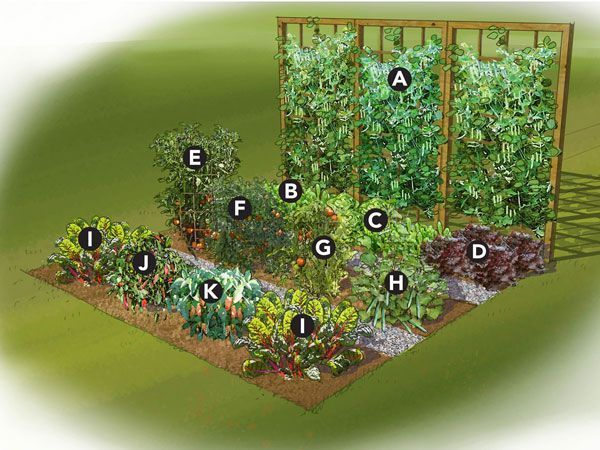
- Match plants to the temperature and weather: 'Each plant in the kitchen garden, from lettuce and potatoes to carrots or tomatoes, has a particular type of temperature and sunlight they prefer to grow their best. So for how to plan a kitchen garden, match the plants you want to grow with the months when the weather will suit them best,' explains Nicole.
- Make a plan for each month in the garden. 'Knowing the predicted weather for each month, and the plants that prefer that particular amount of heat and sunshine, you can start to chart out how to plan a kitchen garden and what you’ll plant and harvest each month in the garden,' says Nicole. Plan for small plants like radishes and lettuces to be ready as soon as 45 days from planting and larger plants to take as much as 100 days before you can harvest.
(Image credit: Gardenary.com)
What are the advantages of having a kitchen garden?
There are lots of advantages to having a kitchen garden, including:
- GROWING QUALITY CROPS – you fruit, vegetables and herbs will not only taste better but will also be better for you than commercially grown veg as they are higher in nutrients.

- BEING MORE SUSTAINABLE – one of our favorite sustainable garden ideas, growing produce in your own kitchen garden cuts down on your reliance on intensive farming and significantly reduces the carbon footprint of your food.
- GOING ORGANIC – growing vegetables organically is surprisingly easy and will cost a fraction of the price of purchasing organic produce in the supermarket.
- GOOD FOR YOUR MENTAL HEALTH – gardening offers so much more than just a delicious crop, spending time amongst nature and growing plants has also been medically proven to have positive effects on your mental (and physical) wellbeing.
(Image credit: Future/Leigh Clapp)
When should I plant my kitchen garden?
You can start planning a kitchen garden at any time, but it is best waiting until spring before you start planting. 'You can start planting your kitchen garden whenever the temperature starts rising and you are past the frost day which usually is after the third week of April. You can start planting the seeds of your produce indoors toward the last weeks of winter, this way you'll have more mature plants ready to be planted outside during spring,' says landscape designer Jonathan Fargion .
However, there are a few vegetables that can be planted at other times throughout the year, explains Lindsey Hyland:
- Tomatoes, peppers and eggplants should be planted in May or June.
- Zucchini, yellow squash and cucumbers can be planted in June.
- Beans, corn and okra can be planted in late June or early July.
- Lettuce, spinach and other greens can be planted in early spring, late fall or even during the summertime.
- Potatoes can be planted in early spring or late fall.
- Herbs can be planted at any time of year.
You also can't beat Swiss chard and perpetual spinach that will crop for a whole year and throughout the winter.
(Image credit: Alamy)
How do you plot a kitchen garden layout?
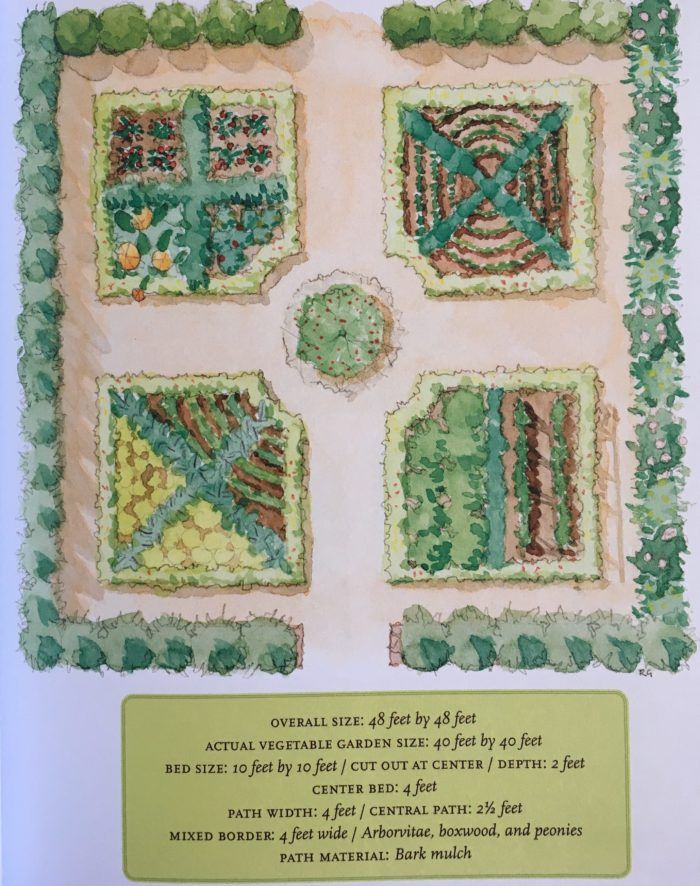
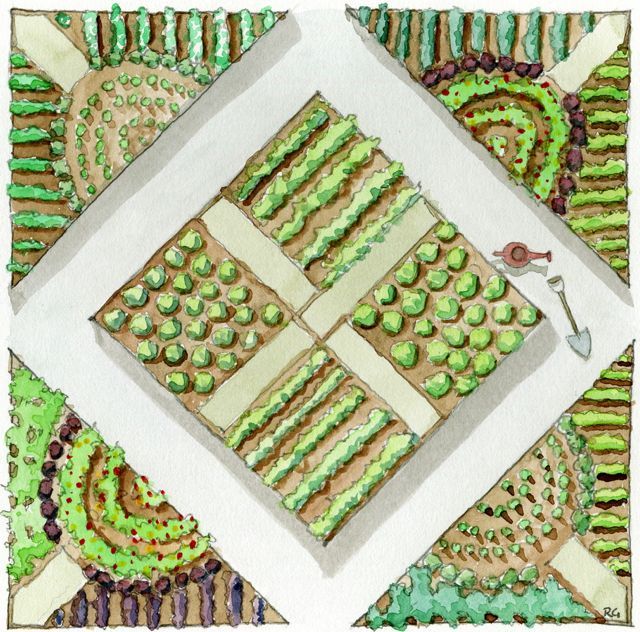
If you want a traditional vegetable plot, aim for a neat and structured layout with a system of raised beds and garden path ideas. This formal style is known as a ‘potager’. Divide into four areas, ideally with paths, with a small, round central bed if you have the space.
‘The four beds are then allocated to different plant groups,’ explains plant expert Sarah Raven . ‘Use the first one for roots, subdivided between new potatoes, beetroot and carrots. Use the second for crops like beans and peas (known as legumes). The next one should be for salad and herbs, and the final one a mix such as courgettes, sweetcorn and leafy greens like chard and spinach.’
Every plot is different, so work out the best design for your space and needs. There are no rules and you can mix fruit, herbs, vegetable and flowers together, in rows or in blocks. Draw the design on paper first to get the layout clear in your mind.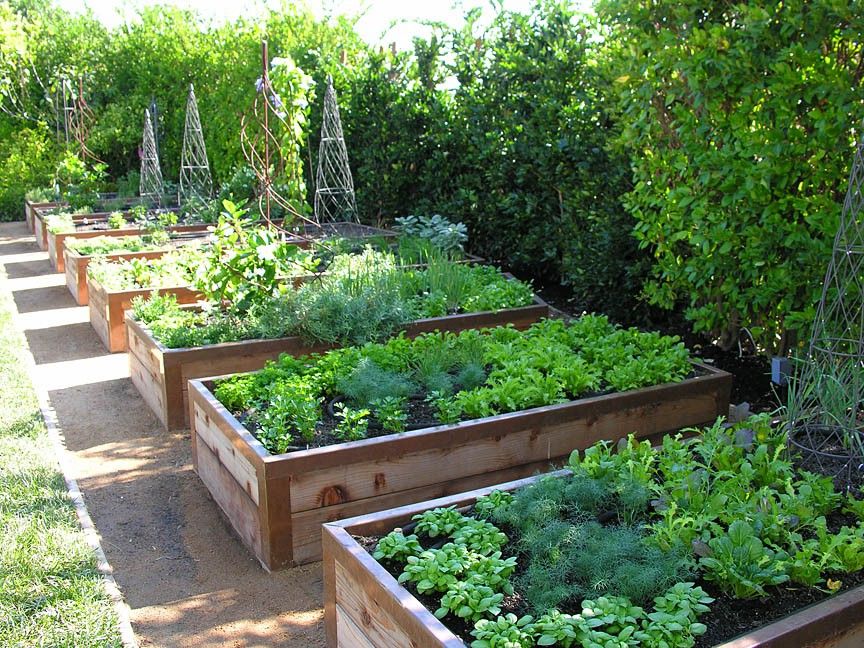
Symmetry and balance are key elements in designing a kitchen garden with a formal layout, but they also work to add drama and focus to an informal look. For the highest yield, though, stagger the plants in triangles.
It can be helpful to mix plantings as a large area with a single crop can attract more pests.
Don't forget to include access pathways so that you can get between crops for weeding, planting and harvesting.
(Image credit: Leigh Clapp)
How do I start a small kitchen garden?
There are crops that can be started each month of the growing season that will give you a succession of crops.
Aim for small, successional sowings and plantings every couple of weeks for a year-long harvest.
'While garden stores might have you believe that you can only plant your garden in spring each year, the truth is that there are plants and seeds you can add to the garden each and every month of the growing season, as long as you plan it out,' Nicole says.
Starting in summer with your kitchen garden gives you a varied selection to sow for harvesting through the autumn and winter, including beans, beetroot, spring cabbage, sprouting broccoli, cauliflower, carrots, chard, cut-and-come-again leafy salads, peas, pumpkin and pak choi.
There are many crops that can be sown directly into the warm soil. You can also buy small vegetable plants from nurseries to add directly into beds or containers.
(Image credit: Alamy)
Growing a kitchen garden in raised beds or containers
Raised beds are an easy and manageable choice for kitchen gardens. They can be filled with organically rich, deep soil ready to use. They are the perfect choice if the soil in your garden is not of a good quality.
Raised garden bed ideas offer good drainage and increase soil temperature and can also act a barrier to pests such as slugs and snails. You can buy ready-made beds or make them yourself. Line timber beds with black polythene to keep the timber dry and increase longevity.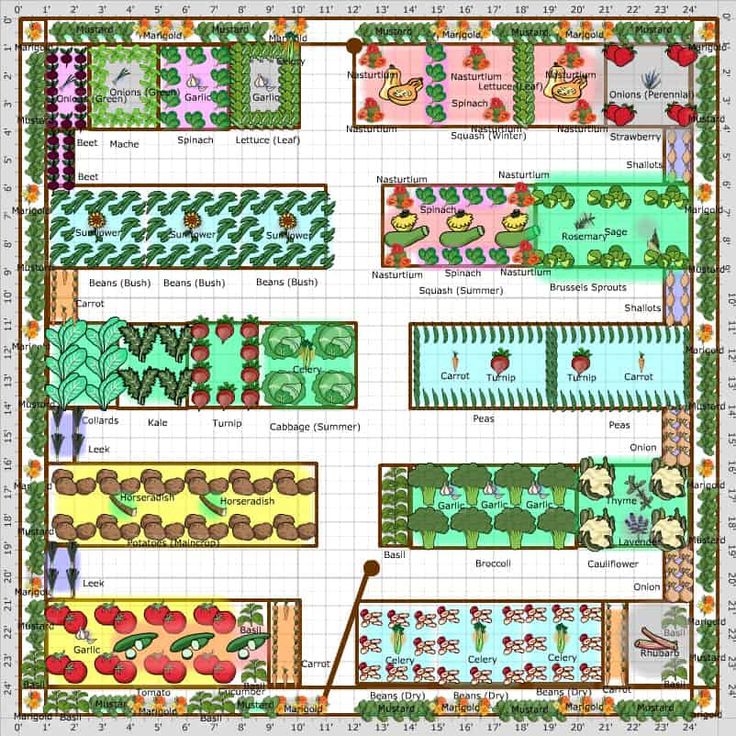 Four beds would work well with crop rotation – you can learn more with our guide to crop rotation.
Containers can also be used to grow many fruit, vegetables or herbs. There are many different types of upcycled and recycled containers that can be put to this use, just ensure that they are big enough for the chosen crop and that the material they are made from is safe for the purpose.
A tripod of beans in a container or rising out of a garden bed takes up little room and looks pretty in flower.
(Image credit: Leigh Clapp)
What can you grow in a kitchen garden?
You can grow almost anything in a kitchen garden. The key to success when planning a kitchen garden, though, is to choose high yield crops that take up little space. For instance, growing tomatoes, while high maintenance and needing plenty of water and feeding, can be done vertically so don't take up too much space, and produce lots of fruit.
As with all kitchen gardening, choose the right plant for the right place, selecting strong, healthy plants that suit the conditions.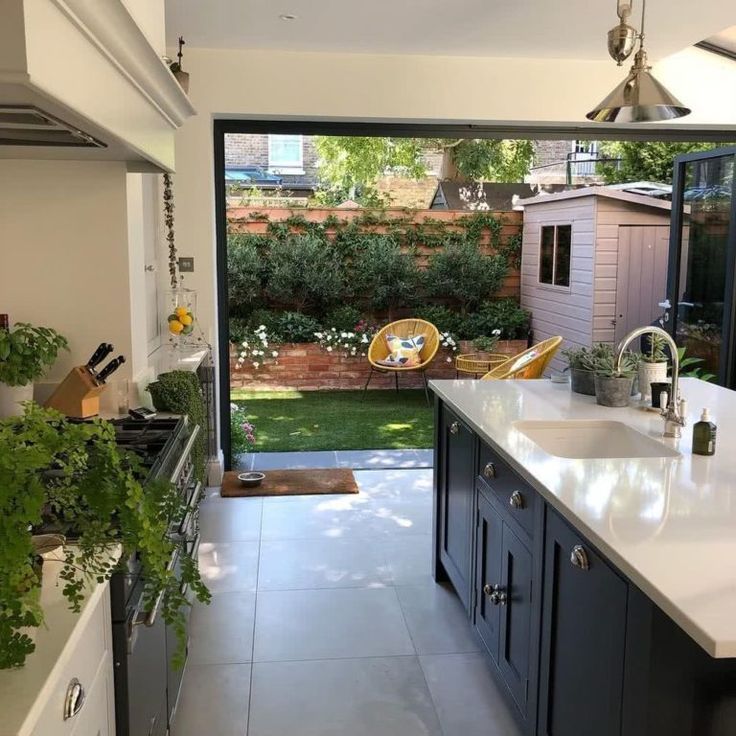
If this is your first time growing edibles it is best to start small, and with the easiest crops, such as cut-and-come-again salad leaves, zucchini – or courgette – beets, strawberries, broad or runner beans, garlic, onions and potatoes.
Aim for a mix of crops you love to eat, herbs you use regularly, and fruit you enjoy – adding in perennial flowering plants, annuals and some shrubs for year round structure.
Sow successionally in the growing season, interplant compatible edibles, and rotate crops to avoid disease building up in the soil. Pop in some bulbs for spring color, such as tulips and alliums, during the 'hungry gap' – when harvests are lower.
Henrietta Courtauld and Bridget Elworthy of the The Land Gardeners are known for their pretty planting combinations. 'Big pots of tulips look lovely planted with mint, and we also incorporate peonies in a kitchen garden and interplant with Verbena bonariensis and cosmos for when the peonies die back,’ they advise.
'Move the flowers around the beds each year – looking for beautiful combinations and always experiment,' they add.
It's worth hunting out organically grown seeds and plants, as conventionally grown plants are often already loaded with pesticides and chemical fertilisers – exactly the type of things you are trying to avoid.
Try using companion planting when you grow your own veg, as a natural and organic way to reduce pests attacking your crops, increase yields and to attract beneficial insects - such as edging with chives or marigolds. Aim to be as organic as possible for the most nutritious produce.
(Image credit: Leigh Clapp)
Factor in herbs to your kitchen garden plan
Herbs, such as mint, thyme, parsley and sage, are expensive to buy but easy to grow, and many are perennial so will keep supplying your kitchen year after year.
'Herbs are the perfect plants to grow in your kitchen garden given their versatility and universality in recipes, and you can also grow multiple varieties in a small space. They offer the best 'bang for your buck' given you often only need a small amount for each recipe but they can cost a lot when buying direct from the grocery store. This way, you also don't have to worry about waste either!' explains Sandra Nanka, herb expert and owner at Mudbrick Herb Cottage .
'There are some herbs that are even ideal to keep in a restricted container so they don't overtake your whole kitchen garden, such as mint, nasturtiums, oregano, parsley, calendula and chives. A salad green mix which you can harvest in small amounts as needed is another great plant to grow in your kitchen garden.
(Image credit: Peter D Anderson / Alamy Stock Photo)
Easy kitchen garden crops to grow
ONIONS are easy to grow. Plant in spring and they will be ready for lifting by early midsummer and store until early winter. And don't forget, onion companion planting can improve your crop.
SQUASH comes in many varieties, some summer, some winter so when looking at planning a kitchen garden they are a good choice for a succession of crops. Sow in spring outside where they are to grow. They are also good for growing in large containers.
AUBERGINES can be treated much as you would treat tomatoes. Sow seeds in spring and place in a propagator or on a warm window sill. Ideally grow in a greenhouse or cold frame as they need plenty of warmth.
PLUMS are not difficult to grow but need a warm, frost free spot in well-drained, moisture retentive soil. Mulch in mid spring and thin out young fruit to avoid over laden branches breaking.
RADISHES are easy to look after and you will see quick results. Enrich the soil with good compost and sow seeds about 1cm deep and at least 2.5cm apart between March and August. They will be ready to harvest after about a month.
(Image credit: Leigh Clapp)
LETTUCES are easy to grow and cut-and-come-again leaves will give you a selection for weeks. Sow every few weeks so that you can enjoy them through the year. They like fertile, moisture-retentive soil.
CARROTS can be sown in March or April in the open. For sweet, small carrots, sow every few weeks from early spring to late summer for a harvest from June to November. Plant in full sun for earlies, or part shade for main crop varieties, with plenty of organic matter dug in.
BEANS are among the easiest vegetables to grow when considering how to plan a kitchen garden, particularly for beginners. Plant once frosts have passed, in a sunny spot, in well-drained soil.
POTATOES are truly delicious when homegrown. If growing potatoes, plant them out from early spring, they grow best in fertile, slightly acidic, loose soil, and need watering regularly.
STRAWBERRIES can be planted in April for a summer harvest. Feed from flowering to harvest time with a product high in potassium.
ZUCCHINI/COURGETTES can produce up to 4kg of vegetables in a growing season, with two plants ample for most families
What is the best position for a kitchen garden?
Positioning the kitchen garden close to the kitchen allows you to pop out quickly and grab a handful of herbs or a larger harvest as needed.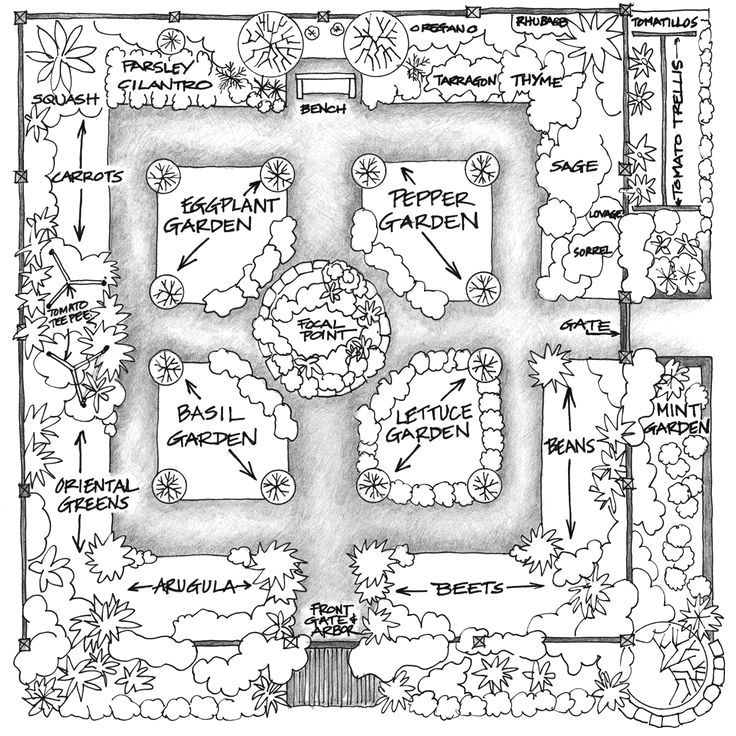
If you prefer a more informal look opt for a vegetable patch amongst cottage garden ideas, with a mix of crops, flowers and shrubs. You can grow edibles anywhere – you don’t need a dedicated plot.
‘Choose an area you can get to easily,’ says Sarah Mead, head gardener at Yeo Valley Organic Garden . ‘That way you can harvest and add successional plantings throughout the season. Don’t be afraid to mix edibles and ornamentals for a really interesting display.’
This also means you rarely plant the same crop in the same place, giving you an easy solution to crop rotation.
(Image credit: Gardenary)
For success in planning a kitchen garden you need to get right the principles of sun, water, soil and wind protection
SUN – for crops to grow well they ideally need morning sun and around six to eight hours of direct sunlight every day.
If you don't have the right sunny conditions in your backyard, though, don't despair as there are some fruit and veg that still grow well in a part shady spot – these include lettuce, greens, some herbs, cherries, rhubarb, raspberries, blackberries and blackcurrants.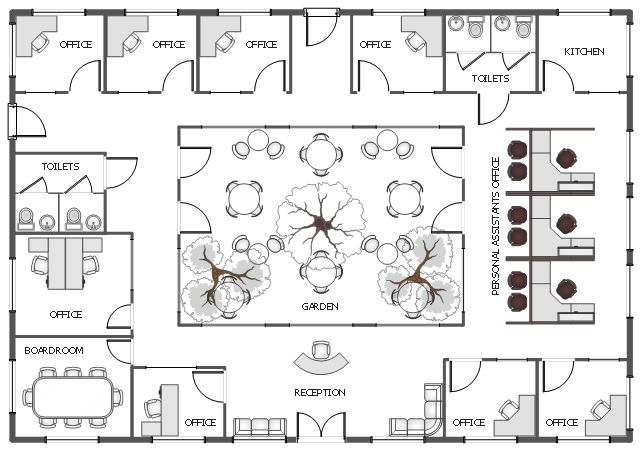
WATER – position your kitchen garden in a spot where you have easy access to water, or where the hosepipe will extend to. Crops can get very thirsty during summer months, so you don't want to be lugging water up and down the yard all day!
SOIL – the ideal soil is rich in nutrients, has an open texture to allow water and roots to penetrate, while holding moisture well. The less you do to the soil the better; single digging is sufficient and many gardeners advocate a no-dig method, which uses thick mulches to suppress any weeds.
WIND PROTECTION – is also important when planning a kitchen garden, so hedging, fencing or hurdles can be used to shelter plants from the wind. Added to which, these can help you to maximize every space by growing crops up the vertical surfaces, such as espaliered vegetables or fruit, or peas, beans and cucumbers up climbing frames.
Mixed native hedging, such as hawthorn intermingling with dog roses, around the plot can provide attractive shelter and protection.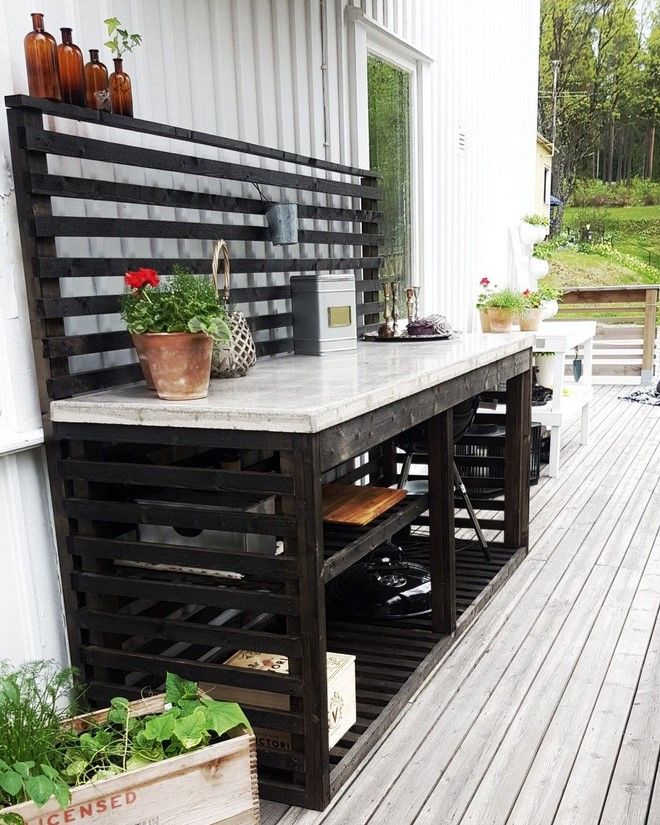
(Image credit: Jamie Innes of Artisan Landscapes)
How do I make a vegetable garden look pretty?
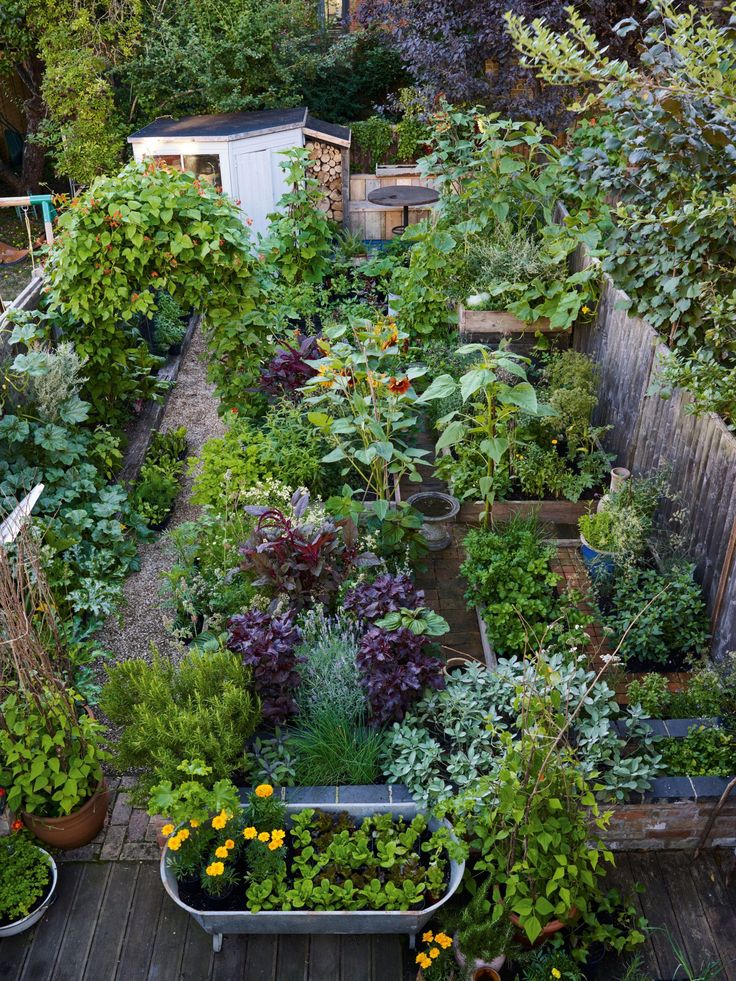
Growing crops among flowers is a way to introduce edibles if you don’t have the room or time for a separate kitchen garden area. By having produce interwoven with companion plants and cut flowers can create an attractive feature that is too lovely to have hidden away at the bottom of your backyard.
You can integrate a small selection of edibles among herbs and flowers, moving crops and flowers in rotation. A wide variety of herbs, such as rosemary, chives and sage, are an attractive addition in any garden.
Remember that many fruit and vegetable plants are also quite beautiful to look at – such as the vibrant stems of chard against the deep green crinkle of the leaves, or deep purple veins on cabbages – so they can be a decorative addition to your garden planting, too, and needn't be hidden away.
At RHS Rosemoor in Devon in South West England, ornamentals and edibles blend in an effervescent profusion in the kitchen garden.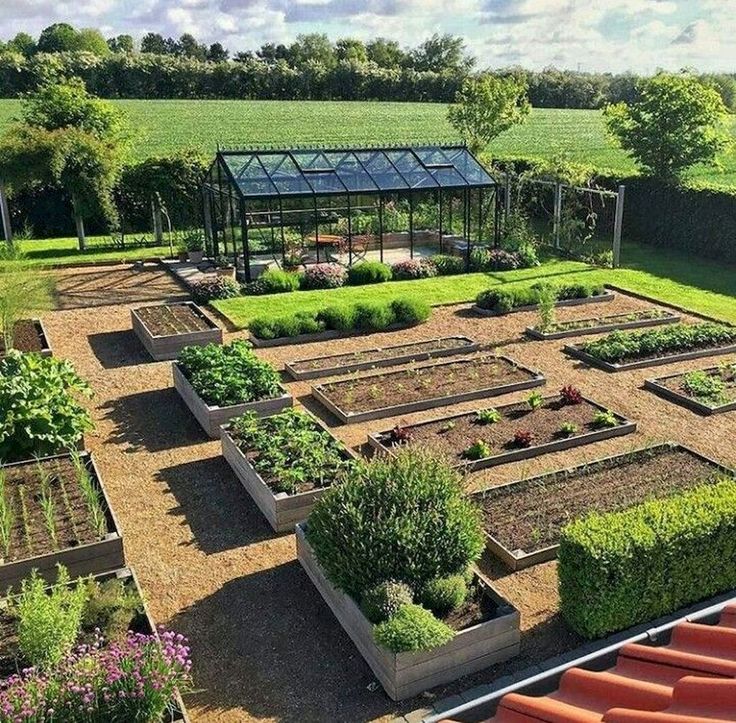 They grow the likes of Kale ‘Black Magic’ and ‘Redbor’ next to each other, 'as the dark green and red foliage of the two varieties contrast so well with one another,' explains Peter Adams, the Edibles Team Leader.
Another attractive combination used is the bold colors of Swiss chard varieties including ‘Fantasy’, ‘Bright Yellow’ and ‘White Silver’, with surrounding plantings of borage, Californian poppies, and the delicate flowers of coriander ‘Confetti’, helping to set the chard off.
(Image credit: Yeo Valley Organic Garden)
‘Swiss chard has lovely ornamental value,’ says Jamie Innes of Artisan Landscapes . ‘It can also be allowed to bolt, which can have a really interesting effect on a mixed border. The leaf formation makes them look like a type of tropical Verbascum.’
Kale can be worked into naturalistic plantings. ‘I especially like the glaucous blue-tinged forms. They seem to work really well against the backdrop of a golden haze of ornamental grasses,’ says Jamie.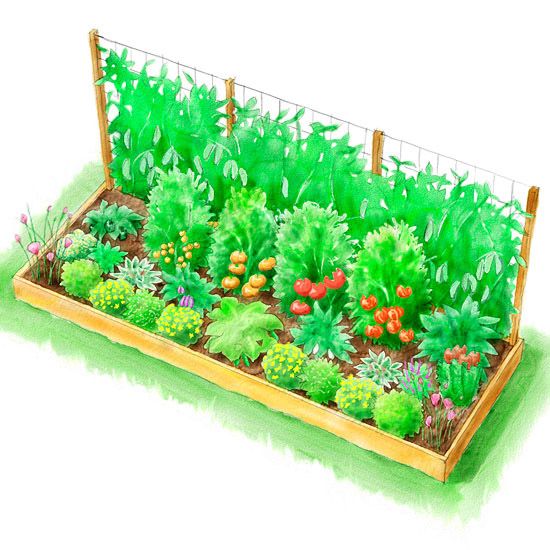
If you want something a little more exotic, Jamie suggests trying New Zealand yam (oca). It has a long growing season with lush lime green foliage. ‘The harvested tubers come in a wonderful range of colours and look beautiful on any plate of food.’
Peter Adams offers more advice for how to create a kitchen garden that is pretty as well as productive:
- Look for color: When choosing varieties to grow, look for ones with particularly attractive features, such as colorful leaves and stems, including Beetroot ‘Bull’s Blood’, or unusual leaves like curly kales that come in a fantastic array of colors, such as kale ‘Candy Floss’. Make use of vegetables with unusual flower colors, such as broad bean ‘Crimson Flowered’ and runner bean ‘Celebration’ or ‘Painted Lady’ .
- Build layers up in your kitchen garden; it adds depth and height, which are important, too.
- Don’t always grow lots of one thing: dotting the odd unusual vegetable or fruit among the mix helps to capture the eye.
- Let plants such as dill and poppies go to seed – their seed heads are beautiful and as they self seed it will help naturalize your kitchen garden in years to come, as they germinate and fill gaps naturally.
(Image credit: Leigh Clapp)
How do you prepare the soil for a kitchen garden?
Soil health is vital when planning a kitchen garden. Healthy, fertile soil, with good structure encourages good growth in the fruit and vegetable plants by helping them to absorb water and nutrients.
Test the PH levels of your soil to see if it is more acid or alkaline as this will help you choose the best crops to grow.
Clay soil types will need breaking up and takes longer to warm up so is better for later crops. Light, sandy soils are better for early vegetables but will need plenty of compost and manure adding. These bulky materials release nutrients slowly, improve soil condition and to help retain water.
Penny Hemming, head gardener at Riverford Organic , offers this basic recipe for a nice, crumbly, rich-smelling and loose textured compost that makes a fantastic soil conditioner within six months:
- Add one third green materials, such as stems, lawn clippings, kitchen waste and teabags - not cooked food, diseased waste or weeds, to.
 ..
.. - Two thirds brown materials, such as twigs, roots, straw, ashes or wood chippings.
- Air is important for decomposition so start the heap with a load of broken branches.
- Add the ingredients in layers.
- Water occasionally.
- Cover to encourage the build up of heat.
- Turn every few weeks.
Henrietta Courtauld and Bridget Elworthy research plant and soil health and advise to grow 'a lot of green manures, such as phacelia, buckwheat and mustard, which look beautiful, heal the soil and also attract beneficial insects.'
Crop rotation will also help to put new nutrients in the soil and avoid the build up of diseases.
(Image credit: Leigh Clapp)
This feature was created by H&G sister brand, Period Living magazine
Subscribe to Period Living for more inspiration
Period Living is the UK's best-selling period homes magazine.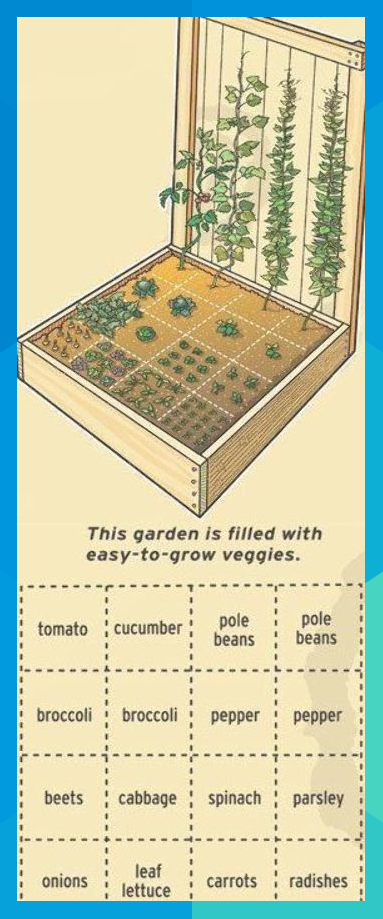 A subscription provides you with all you need to know about caring for and improving a traditional house and garden
Leigh Clapp is a professional photographer with over 25 years experience, primarily as a garden specialist photojournalist but also with food and travel. She delights in exploring gardens, discovering the tiny elements to their overall essence and meeting lots of enthusiastic gardeners along the way. Leigh’s work appears in magazines, newspapers and books, both in the UK and abroad, including Period Living, Country Life, and Gardens Illustrated; as well as being sole photographer for a number of books, including Garden Details, Feng Shui in the Garden, Vertical Gardens and From the Garden – fresh seasonal cooking.
With contributions from
- Holly ReaneyContent Editor and Sub-editor
How to properly plan a garden plot
Increasingly, a dacha is no longer just a place to solve food problems, but also a place to relax.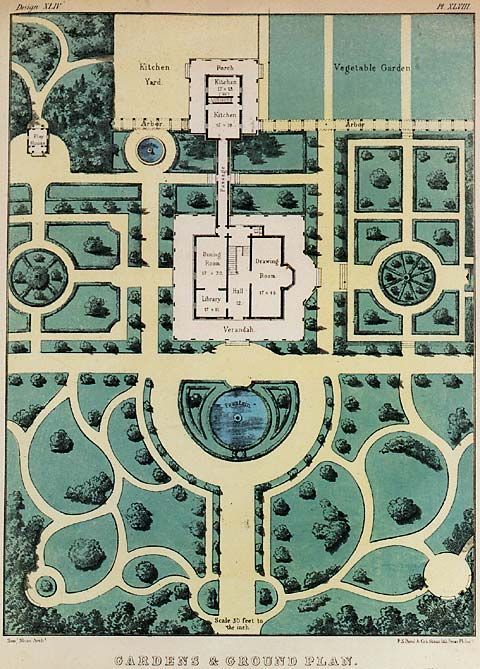 And not the whole area is allotted for the garden. How to plan a garden so that there is not only a harvest, but also that it is beautiful? And I also want to leave a place for garden "beauty". Everything is possible, you just need to find the right approach.
Article content
CHOOSE OF Garden
9000 9000 LIGHT LIGHT LIGH Then they grow and bear fruit normally. It is necessary to choose a place for a vegetable garden taking into account this fact. It is especially important to allocate a well-lit area for a garden for the middle lane and northern regions. It will be beautiful and convenient if everything is done according to the rules Before planning, take a closer look at how the shade is distributed on your site during the day. It is not only buildings that are discarded.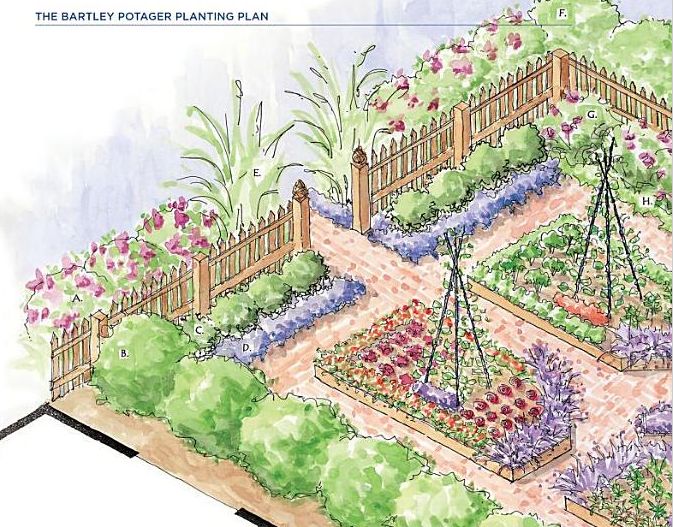 Another shadow gives a solid fence, trees and shrubs. According to the results of observations, divide the area into three groups: illuminated all daylight hours, until noon and all day in the shade.
For regions with a cool climate, the best place for a garden is where the sun shines throughout the day. In the south, choose other areas - in partial shade. For the southern regions, it is ideal if the sun is only in the morning, and in the afternoon the plot is covered with shade. Where there is shade throughout the day, only shade-loving plants can be planted. There are few of them in the garden, but there are enough flowers or ornamental plants. So you can make a flower bed.
How many beds do you need
To plan a garden, you need to know how much space you need to allocate for each type of plant. When you decide on the area, it will be possible, already in the planning process, to choose the size of the beds and their shape.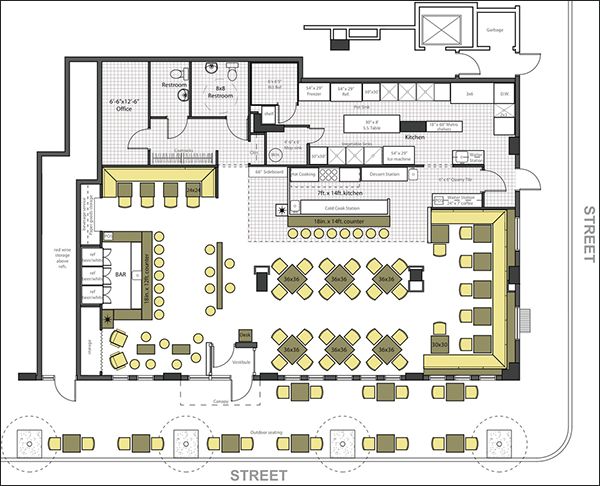 So, how many beds do you need? First of all, you must decide what you want to grow in your garden and how many kilograms you would like to have each of the crops. The easiest way to do this is in the form of a table.
| Vegetable | Yield in kg per hectare |
|---|---|
| Potatoes | 250-300 kg |
| Carrots | 230-270 kg |
| Cabbage | 500-600 kg |
| Beets | 300-370 kg |
| Bow | 100-120 kg |
| Tomatoes | 60-70 kg |
| Cucumbers | 350-420 kg |
| Eggplant | 200-350 kg |
| Sweet pepper | 150-200 kg |
Next, you need to find yield data per hundred square meters in your area. Data is needed for each type of plant that you want to grow. The table shows the average yield in Russia.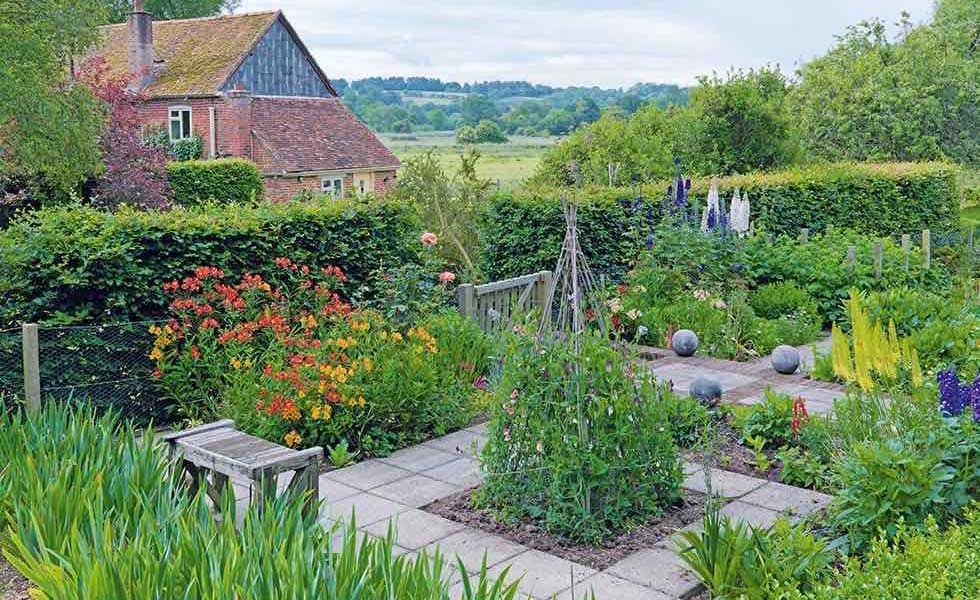 We counted them into kilograms per hundred square meters. By region, they will differ, and significantly. But for the first estimate, you can take these numbers. After the first harvest, adjustments can be made. You can also try to find out from your neighbors how many vegetables they grow and focus on local indicators.
Calculate crop area
All you have to do to calculate the area you want to grow is divide the amount you plan to harvest by the crop yield. Get how many acres you need to allocate for this vegetable. Then, when planning a garden, decide on the length and width of the beds, then you can finally understand how much space is required.
Two gardens. And there, and there, there is everything you need. It all depends on preferences and on the required volumes of grown productsLet's look at an example. For example, we want to grow 250 kg of potatoes, 50 kg of onions, 50 kg of tomatoes and 50 kg of cucumbers. We consider:
- The yield of potatoes is 250-300 kg per hundred square meters.
 We want the same 250 kg. That is, we will allocate 1 hundred square meters for potatoes.
 - Luca want 50 kg. Productivity - 100-120 kg. We consider: 50/100 = 0.5 weave.
- Tomato need 50 kg. Productivity is 60-70 kg. Calculation: 50/60 = 0.8 weave.
- Ogurtsov plan to get 50 kg. The yield is 400 kg, we get 50/400 = 0.125 weave.
In the same way, we count for all plants that we want to grow in the garden. We add up the obtained numbers and compare the result with the area that we can allocate for the garden, make adjustments.
This is if done "according to science". If a garden is more of a pleasure for you, then take a plot plan on a scale, make patterns of beds of different shapes and sizes on the same scale. Move the beds around the site until you get a picture that you like. Then just distribute the vegetables in the beds. But, even in this case, it is necessary to take into account the illumination.
There is no gain in area, but it looks interesting and the illumination can be betterLocation of beds
If we talk about orientation to the cardinal points, then the most optimal placement of beds is from north to south.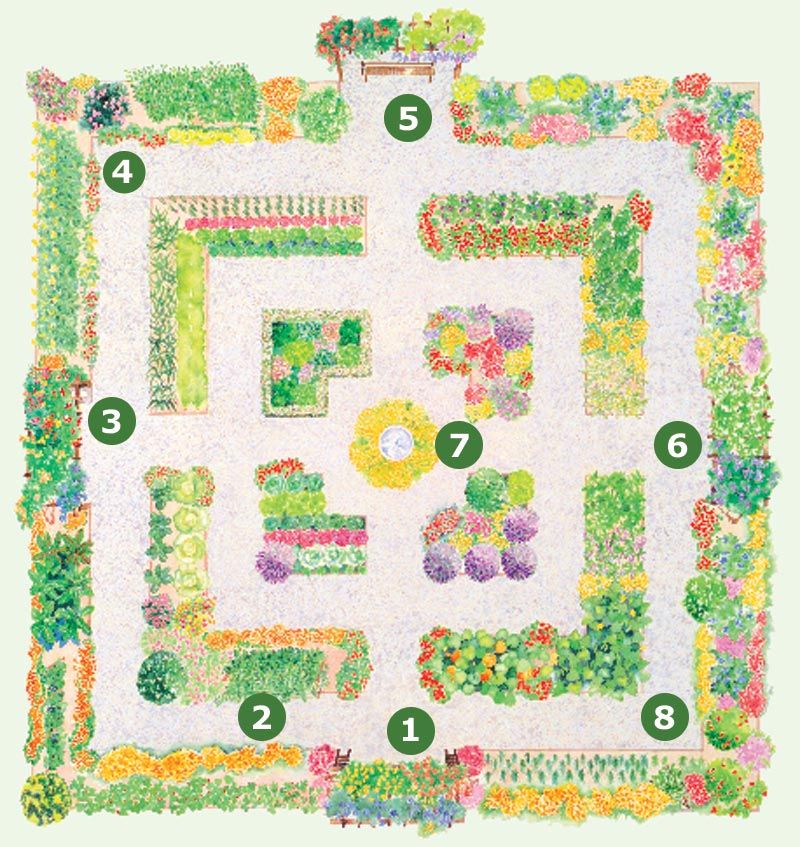 In this case, the landing will be illuminated all day, the shading will be minimal. But this is true for regions with cool summers. In the southern regions, the problem is different. Not how to achieve better lighting, but how to prevent the sun from burning plants. The task is the opposite, but it is by no means easier. Here the plus is that the orientation of the beds is not so important.
Northern regions
The choice of a place for vegetable crops is also influenced by the location of the region, the presence / depth of groundwater. Recommendations for the northern regions:
- Arrange the beds from north to south.
- Guessing that the shadow of the house or trees on the garden falls the least.
- When the water level is high, we try to take the highest places under the garden or make ditches around the perimeter to drain water.
- We arrange high or raised beds.
These are general principles and rules. See for yourself what suits you and what doesn't. As for the high beds, it is worth saying that they require more time and money for the device. But they justify themselves. Firstly, they warm up earlier, and secondly, soil waters and substances dissolved in them have a minimal effect on plants. Thirdly, the garden season can be extended, since it is easy to make something like a greenhouse by making arcs on which to stretch the covering material. This will also protect the crop from sudden frosts.
Garden in the south
For the southern regions, the layout of the garden is subject to other principles. It is necessary to protect the plants from the scorching sun and ensure normal watering. Here's what you can do:
High beds in the south are also applicable, but really high and with light walls (whitewashed). Reasons are different. In the southern regions with dark soil, it heats up so that it is impossible to walk barefoot - it feels like in a frying pan.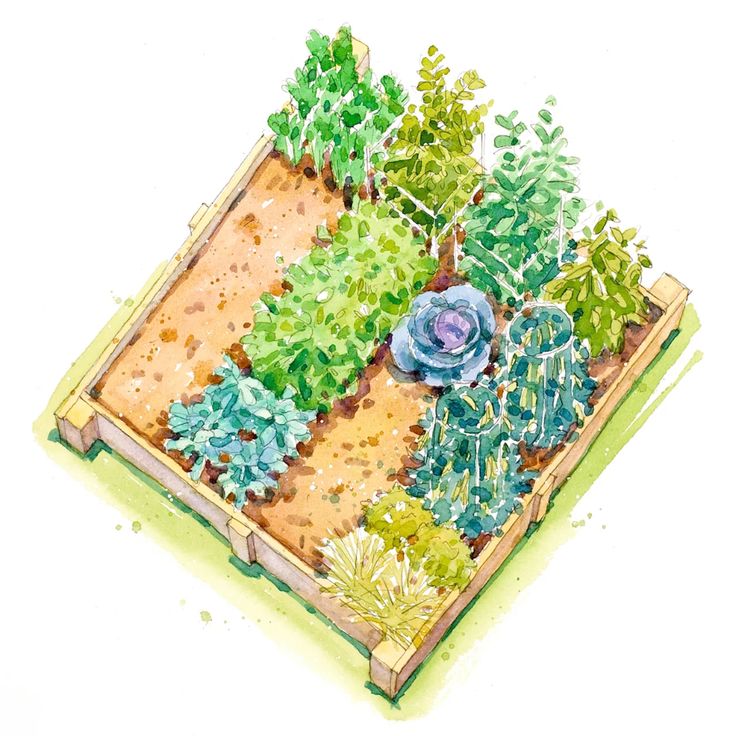 With high beds, lift the plants above the hot ground. Well, a limited amount of soil is easier to shed. In addition, you can also put up arches and pull on a covering material or shading net to protect from the scorching sun.
Growing method and width of beds and row spacing
Not all gardeners divide their plots into beds. Many simply plant plants in rows, not even always separating one crop from another. Sometimes the separation is a wider "pedestrian" aisle. In principle, this is possible, but dividing into beds makes it easier to care for, makes the garden more attractive. When properly processed, it increases yield.
Who said that it should only be straight?How to plan a garden for beds
There are several systems for dividing into beds. They determine the width, the length of the landing, and some also the row spacing.
- Narrow beds . The width of the beds is 45 cm, the distance between them is 90 cm. Why is that? In a regular bed, the edge plants are usually taller and stronger because they get more light.
 For this reason, they make a bed 45 cm wide, planting only two rows of plants. Thus, high yields can be achieved, even sun-loving varieties ripen in the middle lane. But there is also a significant minus: wide aisles reduce the “working” area, and they are also overgrown with grass that you have to fight with.
 The famous gardener Igor Lyadov grows a splendid harvest on narrow beds
- Normal beds or regular width - from 50 cm to 90 cm or even up to 1 meter. Row spacing - from 40 cm to 60 cm. They can be level with the ground or raised. Raised - this is without walls, but the seedbed is higher than the level of row spacing. The height difference is formed due to the brought soil or the site added from other places.
- Raised beds . Walls are made from boards, slate or other similar material, humus, a layer of earth are poured inside the box. Such beds are not flooded by floods or rains, they warm up better. They are more comfortable - easier to handle, no need to bend too low.
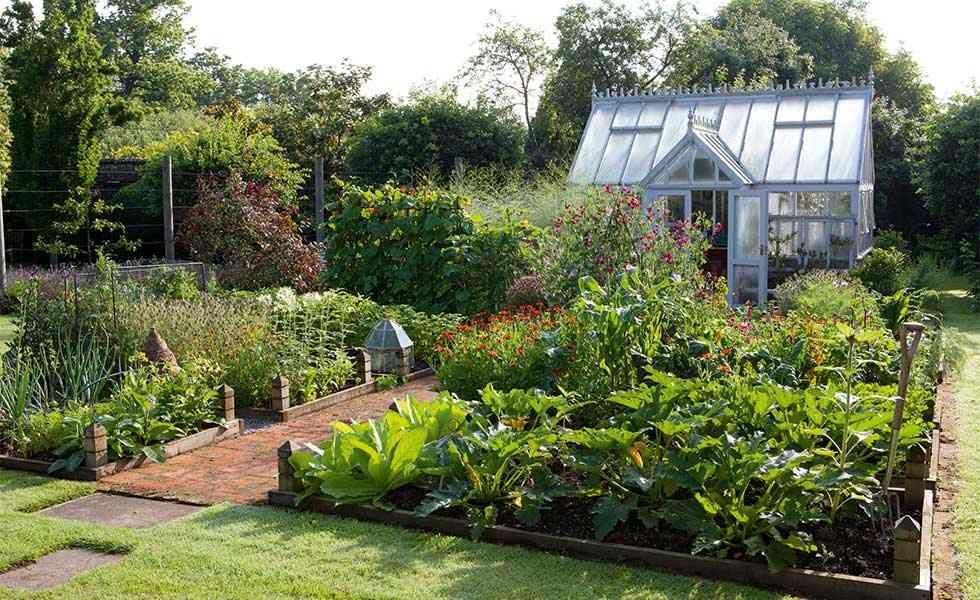 But the cost and time for the device require more.
 Increasingly, beds occupy only part of the garden. The rest of the plot is allocated for a recreation area, garden, rock garden and other similar garden "excesses"
- Warm beds . Differ from high "stuffing". Inside the box of boards or slate, branches, foliage, humus, a layer of soil are laid in layers, in which plants are already planted. Width - up to 1 meter. The good thing is that rotting foliage warms up the soil, which allows you to plant plants earlier. This is important for the northern regions, for the southern regions it is not so important, but it is also practical due to the higher results that the prepared soil gives.
You can use any of the methods for growing plants in garden beds. You can also choose any width of the beds. Optimally - no more than one meter. Maybe less. We select it individually: it is important that you can easily reach the middle without much difficulty. And not only to reach - you will have to handle the middle of the landing, while it should not be too uncomfortable.
Bed shapes
The traditional shape of the beds is a rectangle. Its width, as you understand, is from 45 cm to 100 cm and depends only on your desire and the chosen method of growing. The length of the beds - again, it depends on your desire or on the layout of the site. Why choose a rectangle more often? Because this is the most rational use of the garden area.
Forms of beds can be any. As in this case, they can emphasize the shape of a flower bedIn general, there can be beds of any shape: square, triangle, polygon, circle, oval and more complex shapes. These forms may look more aesthetically pleasing, but more space "walks". So choose the shape of the beds at your discretion. It affects the yield slightly, but the appearance of the garden is very different.
Garden beds on a sloping plot
Planning a garden on a sloping plot is more difficult. Here, the retaining walls set the direction of the beds and it is too difficult and expensive to change something. You have to use what you have to the maximum. Everything is fine on the southern slope - the illumination is ideal, and the retaining walls additionally heat the plantings - they accumulate heat, then warming up the air. Therefore, we make the paths closer to the edge of the leveled area - so that the heat from the walls gets to the plants.
On the northern slope, the retaining wall provides shade. Near the wall, she lies almost all day, while the edge receives more sun. Therefore, we make paths near the wall itself, pushing the beds to the edge of the site. In this case, it is more convenient to process landing one level higher. That way you don't have to bend over at all.
How to lay out beds on the east or west slope? Observe which part is illuminated more, which receives less light. Make paths where there is less light.
You can also make small beds on a slope that is not leveled with supporting walls (example in the photo below). Install two wide boards in parallel (or knock together a couple of boards narrower). The distance between the boards is the width of your garden. Optimal - 70-90 cm.
Beds can be made on the slopes themselvesLay the boards on the slope "on edge". You can dig a little, deepening the bottom edge into the ground. On both sides of the board, hammer in the pins that will hold it in this position. From short lengths of boards, make mini-retaining walls, fill the voids with soil. Now you can plant plants.
It is convenient to grow herbs and aromatic crops on such beds. Suitable for strawberries, you can plant tomatoes or bush beans. In principle, the selection of crops depends on the illumination. And one more thing: weaving or giving a lot of volume plants are not very good on such a slope. And keep in mind that the walls will hardly accumulate heat, except perhaps in the spring. Later they will be covered with greenery.
How to organize a vegetable garden in a small area
Not everyone wants to have a big garden. More and more summer residents prefer to relax in the country, and not to cultivate plantings. Nevertheless, going to the country with a full range of products is “too much” for many. Therefore, they make a couple of beds, where they plant greens and a couple of bushes of various vegetables. In principle, this is a global trend, so there are more than enough ideas for organizing beds in a small space.
A mini-garden can even be set up on a terraceVertical beds
An interesting idea is to grow plants in vertical beds. This name hides a lot of different ways. The only thing that unites them is that plantings / crops are located one above the other. They can be offset or exactly one under the other, but they all tend upward and occupy a minimum area.
Vertical plantings do not require a lot of space Option one - a wall for a vegetable garden. Trays, boxes with earth are hung on an existing or specially built wall or fence, in which plants are planted / sown. This is how green crops and various herbs are grown. If you want, you can plant curly or weaving. But it makes sense to land them together, giving support in the form of a grid, a wooden lattice.
Hanging planters on the wall is not for everyone. Still, you will have to water, so the wall may get wet or the finish will be damaged. In this case, you make a rack on which you place the containers. And this stand may not be near a wall or fence. She can, for example, separate the garden from the garden. Or cover some areas or buildings (in front of the toilet, shed, compost pit).
The most popular variety of boxes and boxesYou can even use large diameter vertically or horizontally fixed plastic pipes in which to cut "windows" for planting. Strawberries feel best in such plantings, but greens and aromatic plants will not be offended.
Garden along the fence
Not everyone has a fence along the perimeter of the entire plot. But if it does exist, beds can be made under it. An exception is corrugated fencing in warm regions. The metal heats up so that everything just burns out. In the northern ones, this is not a hindrance - it will additionally heat the plants.
The arrangement of beds under the fence depends on the groundwater level, soil type and rainfall. If the soil is good, the water is not standing even after heavy rain, you can simply separate the part for planting. You dig up a bed 50-60 cm wide, put a border.
Height and material for the border - your choiceIf the soil is "not very good", there is a lot of water or you just want a more well-groomed appearance, we make high beds. Add partitions and get space for greens, cucumbers / tomatoes. If you do not want to "spoil" the fence, you can make a full-fledged box. In any case, it is tightened from the inside with geotextiles. To protect against moles, you can lay a fine-mesh metal mesh on the bottom.
As mentioned above, the width of such a bed is 50-60 cm.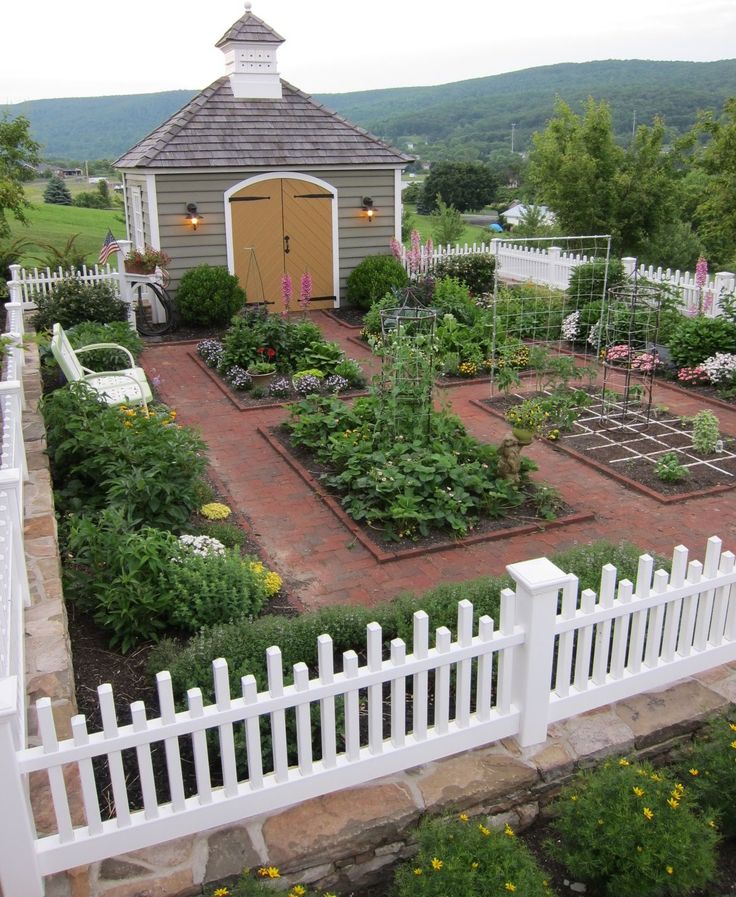 You need to reach the far edge without much effort. And stand in this position for a while - plant, weed, water. Height is entirely up to you. As well as the material of the walls.
A couple of ideas for small garden areas
If you have a small garden and you want to achieve maximum results, give preference to those plants that grow well in your area and guarantee a yield . It is possible to occupy squares for exotics, which probably will not survive, but if the area is large. The same goes for time. If you can allocate a minimum of time to care for the garden, you should not plant plants with complex agricultural technology. They take a lot of time, and a positive result is not guaranteed.
From small areas to the maximum: compaction
Use the principles of dense planting - this is when another plant is planted between plants of one species. Actual for narrow beds or for small gardens. The rules for selecting plants are as follows:
- so that they are not affected by the same diseases,
- to take food from different depths,
- "seals" ripen earlier than "basic".
The landing site must also be taken into account. For example, lettuces and cabbage are best planted in the aisle. The remaining cultures are in the same row as the main species. List of what can be compacted:
- beets - dill, lettuce;
- potatoes - garlic, beans, radishes;
- cabbage - lettuce, dill, spinach;
- carrot-spinach, radish;
- zucchini, squash - beans, beans, dill, corn on the cob (remove young).
These are the most common co-growing schemes. As you can see, dill, radishes and salads do not need to be allocated a separate place at all. They are perfectly combined with various garden crops. Just don't plant them all at once. Optimally - with an interval of a week or 10 days, otherwise everything will reach maturity at the same time, you will not know where to put it.
Pre-seeding and post-seeding
Another way to optimize your garden is to use pre-seeding or post-seeding. Post-sowing is when new plants are planted in place of mature plants. If late-planted species are sown in early spring with fast-maturing species, this is called pre-sowing (pre-sowing). Radishes, lettuce, greens, onions on a feather, watercress are suitable for previous or subsequent sowing.
Principles of crop rotation
In order to have a harvest every year, change the area under planting plants of the same species. For example, don't plant tomatoes in the same place every year. Pests and diseases of a particular type accumulate in the soil. By changing plants, planting disinfectant plants, you destroy pests.
Tomatoes, eggplants, potatoes are all nightshade and have the same pests.
So, when choosing plants, you should also look at the classification of species. To make it easier to navigate, we present a table of order / compatibility of cultures.
| Crops for planting | Good predecessors | Acceptable predecessors | Bad predecessors |
|---|---|---|---|
| Medium and late cabbage | Peas, beans, beans, cucumber, carrots, early potatoes | Beets, cabbage | |
| Early varieties of cabbage, cauliflower | Onions, cucumbers, beans, peas, beans, green grass. | Carrots, tomatoes. | Root vegetables, cabbage |
| Beets | Potatoes, cucumbers, herbs, green manure. | Tomatoes, onions, carrots, cauliflowers and early cabbages | Beets, late and mid-ripening cabbages |
| Cucumbers, squash, squash, zucchini | All legumes, onions, garlic, cabbage, except late. | Potatoes, beets, greens | Tomatoes, carrots, late cabbage. |
| Tomatoes | Cucumbers, turnips, cauliflower, greens, green manure. | Onions, beets, cabbages of medium and late varieties. | Tomatoes, potatoes |
| Onion, garlic | Legumes, potatoes, cucumbers, cauliflower and early cabbage | Beets, tomatoes, late cabbage | Greens, carrots |
| Potatoes | Legumes, green manure, cucumbers, cauliflower and early cabbage | Beets, carrots, medium and late cabbage, greens | Tomatoes, potatoes |
| Greens | Legumes, onions, cauliflower, early cabbage, cucumbers, green manure | Potatoes, beets, herbs, tomatoes | Carrots, late cabbage |
| Legumes | Potatoes, onions, garlic, whole cabbages, cucumbers | Root vegetables, green manure, herbs, tomatoes | Legumes |
How to "change" vegetables in the beds
If you change the places for planting plants according to the table above, it is most convenient to divide the garden into 4 parts.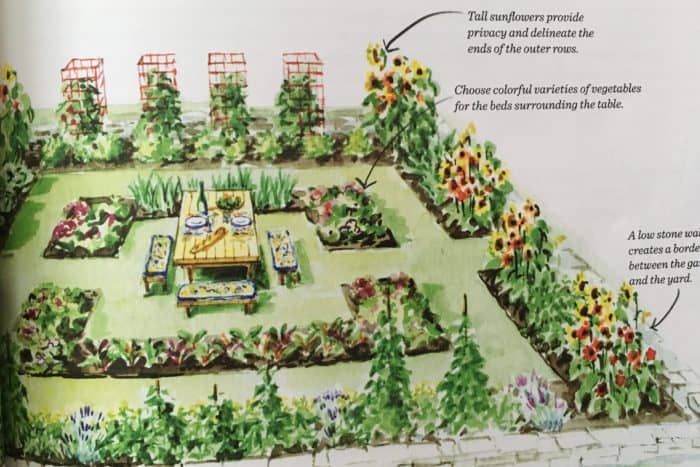 For the first time, plant plants that have the same requirements for soils, fertilizers in a certain area. For example:
- Reacting to the introduction of organics: pumpkin, cucumbers, squash, cabbage.
- Less demanding soils: tomatoes, peppers, eggplants.
- Root crops (carrots, beets, turnips, turnips, rutabagas).
- Potato.
Next year we are moving everything. Since autumn, we add humus to the area where the potatoes were. We plant plants of the first group there. Plants from the second group move to 1 plot, etc. Schematically, the first crop rotation option for the garden is shown in the left figure below.
Proper crop rotation in the garden - what to plant then Sometimes potatoes and tomatoes occupy half the area. In this case, we divide the second half into three sections, where we place the plants of the remaining groups. Every year potatoes / tomatoes move from one half to another, and vegetables in the second half also alternate with each other.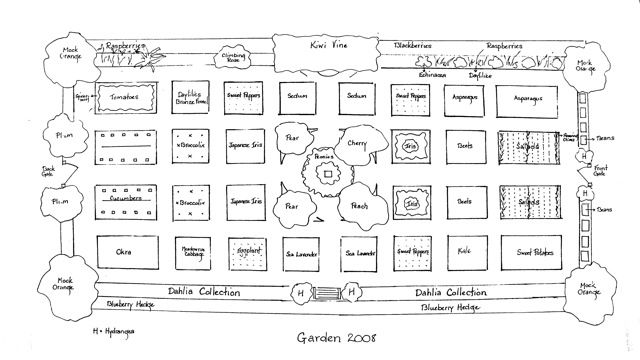 Schematically, such a crop rotation is shown in the right figure.
Green manure
The gardener has two global tasks: to maintain or improve soil fertility and to fight weeds. There is one method that will solve both problems at once - the use of green manure. These are plants that grow quickly, form dense greenery that suppresses the development of weeds. They are sown after or before the main sowing / planting, then the greens are cut off, leaving the roots to rot in the ground. Rotting, they enrich the soil, and also make it looser. And some of the green manure also kill diseases. So this agricultural technique is really very important.
It's not stupid. This is an agricultural technique for improving soil fertilityRules of application
A few basic methods for using green manure. They are sown immediately after harvesting with a solid carpet (lupine, rapeseed, phacelia). Or in early spring before planting the main crops. Scatter the seeds over the surface, then close up with a rake. Green manure is mowed two to three weeks before planting the main plants. Greens can be used for mulching. You need to cut it before the seeds appear, otherwise you will get a new type of weed.
When planting seedlings, green manure may not be mowed. We just make the hole bigger, plant the seedlings, and mulch the soil. If green manure covers the sun, they can be cut, but in general, they even out temperature fluctuations. When the seedlings have taken root, you can cut off the green manure, mulch the soil with foliage.
Types of green manure plants and their choice
Many plants are suitable for soil improvement. When choosing a green manure, take into account what you will plant after it.
- Enriched with nitrogen almost like manure application: alfalfa, clover, sweet clover, chink, lentils, peas, beans, etc. They also kill the nematode.
- General topsoil improvement and nematode control: winter rye and wheat, spring oats and barley, Sudan grass, millet, fescue.
 Dense greens don't rot very well, but make an excellent mulch. Suitable for all types of soil, including acidic ones.
- Soil enrichment (not suitable for acid soils): rapeseed, mustard, colza, radish. The greenery is soft, rots well, but it is necessary to mow it to the pasture of the "arrows". After green manure of this group, you can not plant cruciferous - cabbage, radish, radish, spinach, arugula.
- Phacelia, mallow, amaranth, flax, calendula, tagetes (marigolds) are also good for improving soil fertility. It is necessary to mow before the appearance of buds.
To suppress weeds, green manure can be sown not only in spring or autumn, row spacing can also be sown in summer. Just remember to mow on time. Greens will go to the mulch. For regions with a hot climate, green manure can be planted after the main plants have taken root. In this case, dense greenery will keep the soil from overheating.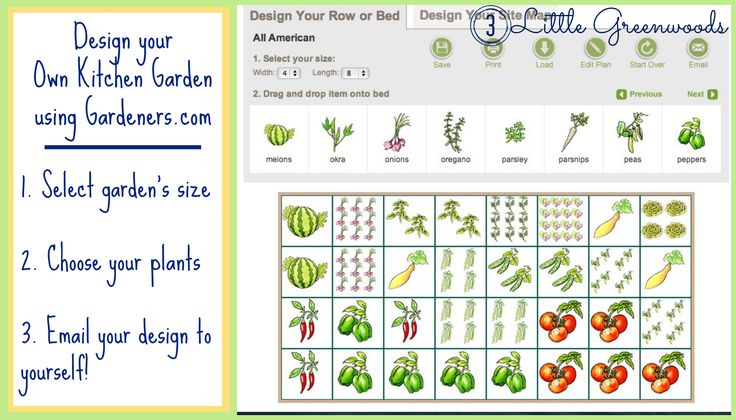
Planting oats/barley and legumes, or flax and calendula between potato rows will result in fewer Colorado potato beetles and hookworms. And phacelia and mustard will help get rid of the wireworm. Plant sweet clover and lupine between tomato bushes - they will prevent horse rot and late blight from developing.
How to plan a garden on a summer cottage
ornamental garden
Despite the fact that the area of vegetable gardens on personal plots is now rapidly shrinking, giving way to lawns and flower beds, few people are ready to completely give up the opportunity to have greens and vegetables grown by themselves on their table. In fact, having calculated the needs of the family, it often turns out that not much space is needed for the garden.
How to properly plan a garden, what needs to be thought out in advance?
First, make a list of the crops you would like to grow on your property.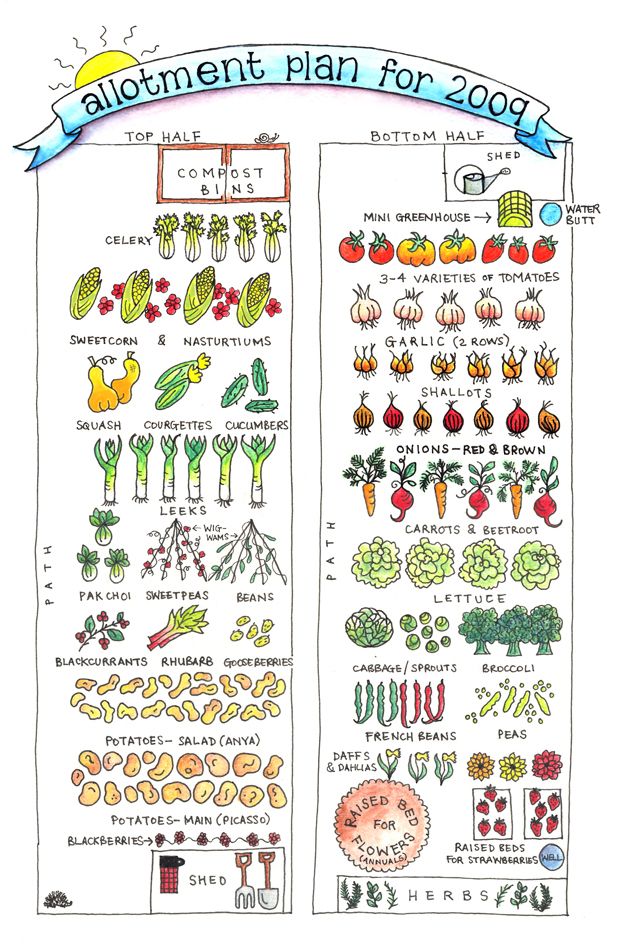 If you already have experience, try to estimate approximately how long it will take you to grow certain vegetables, and if you see that you can’t cope, give up labor-intensive crops or reduce their area.
If you are a novice gardener, try to acquire the necessary literature and study the characteristics of each crop, considering that among them there are early and late, moisture-loving and drought-resistant, perennial and annual plants, those that can be sown directly into the ground and those that are best planted in seedlings.
In order to calculate the area that you need to divert for certain crops, you can navigate the average product output from 1m2.:
Early white cabbage- 2.5-3 kg
Colored, Red-handed, Brussels- 1, Brussels 5-2kg
Carrots, beets, parsley, Pasternak, celery-3-5kg
radish, radishes, turnip -1.5-2kg
onions, onions, garlic-2-2.5kg
Cucumbers -2-3kg
tomatoes, eggplant, pepper-2.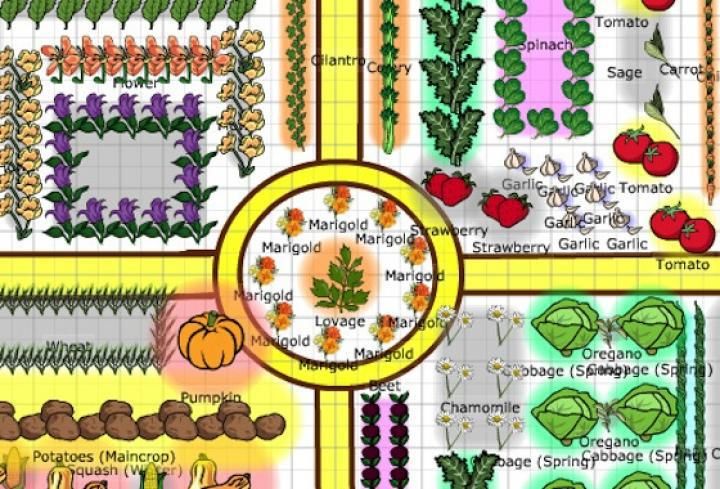 5-3.5kg
9000 pumpkin, pumpkva, pump Zucchini -3-5kg
peas, beans, beans-1.2-1.5 kg
leaf salad, spinach, dill-1.5-2kg
Potatoes early -1.2-1.6kg
Potatoes late -3-3.5kg
ornamental garden
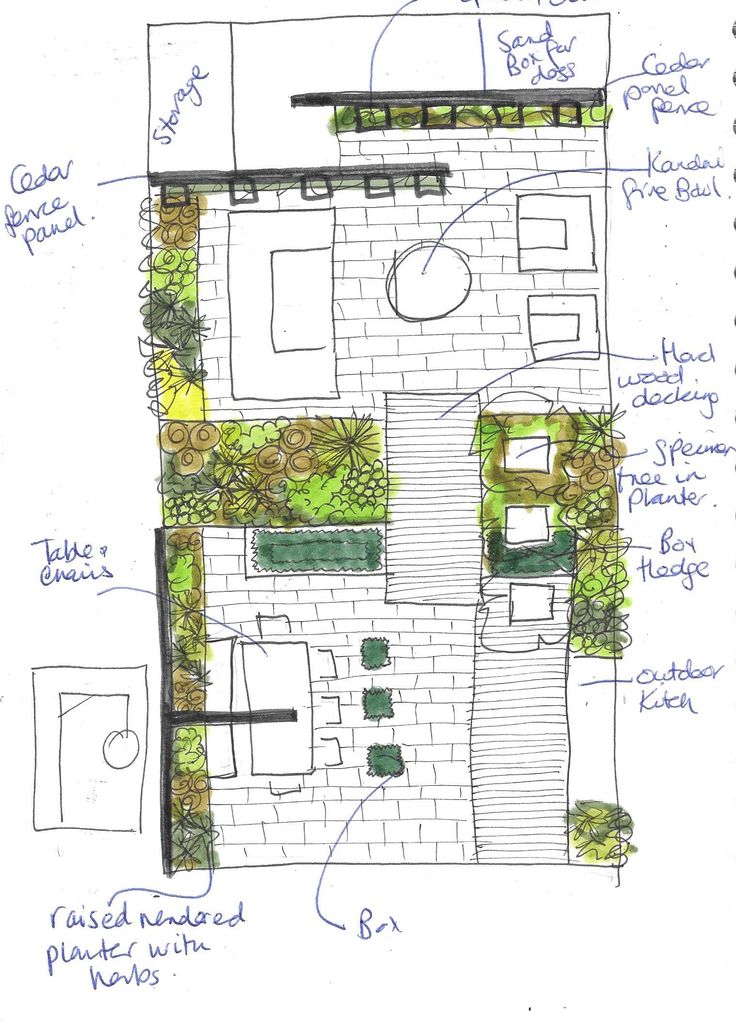
Perhaps when planning, on the contrary, you will have to start from the area that you will have left for the garden after placing other objects on the site, but in any case, after you select the range of crops to be grown, try to draw a plan on paper on a scale future garden.
The vegetable garden is always placed in a sunny place, away from large trees (at least 10 m from the tree trunk), whose roots can compete with vegetable crops for food and moisture. It is advisable to avoid lowlands where there are cold fogs and water accumulates. When the greenhouse and beds are located from north to south, they will receive the maximum amount of heat and light.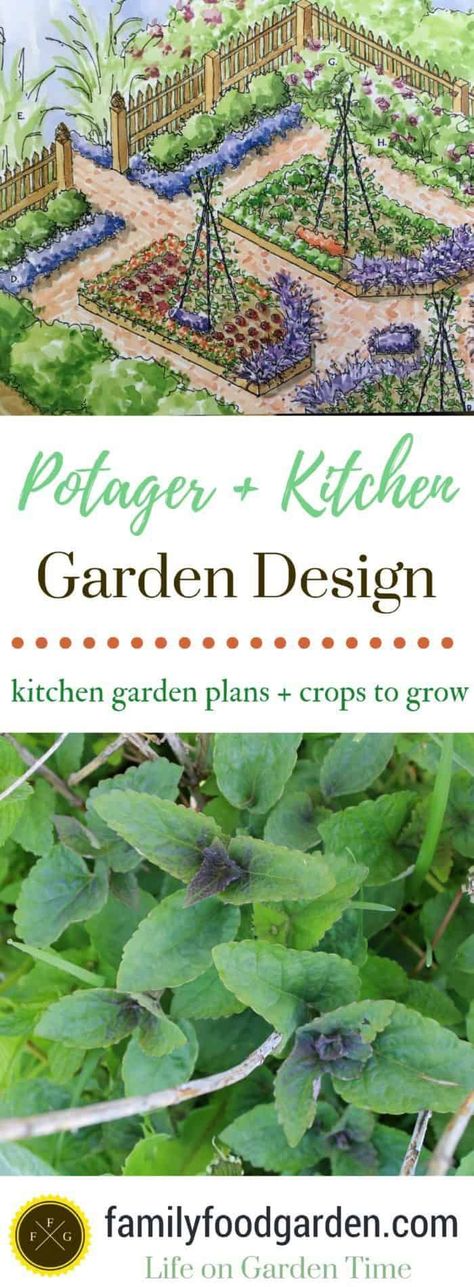
Often, in addition to the beds, a greenhouse, a hotbed, a water tank, a compost box are placed on the territory of the garden, a place is provided for storing inventory, fertilizers, plant protection products. Decide on the dimensions of these objects and plot them on the plan.
The shape of the beds can be different - rectangles, squares, sectors. The beds can be arranged at the level of the tracks or raised above the ground from 10 to 80 cm. It is convenient to care for high ones - less stress on the back. When constructing beds, wood, brick, concrete tiles are used. The paths can also be laid out with wood or tiles, or covered with gravel, after laying non-woven material under them with wood chips, which will prevent weeds from germinating. It is good when the materials from which the garden is made are used in other parts of the garden, and are combined with the general style. It is not recommended to use roofing material, slate and other materials that can release harmful substances into the soil for borders in the garden.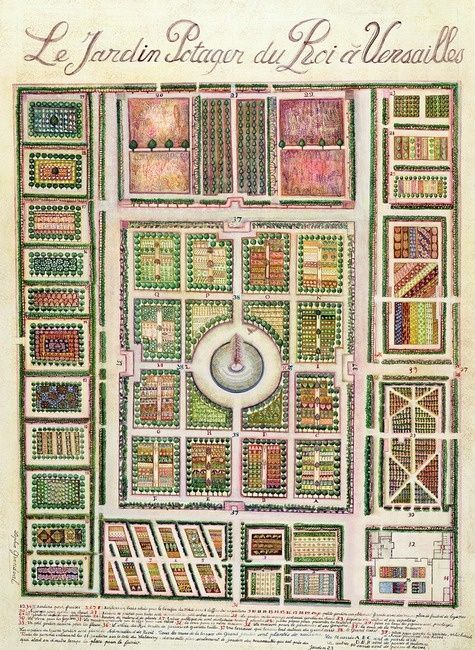 Some vegetables and aromatic herbs (thyme, sage, mint, chives) can also be grown in flower beds, pots, hanging planters.
There are a lot of options for decorating a garden, but with all the variety of design solutions, one should not forget about functionality.
In order to be able to reach the plants without stepping on the ground, they try to make the beds 40-50cm wide if they can be approached from one side, and a maximum of 80-100cm if the paths are located on both sides.
ornamental garden
The width of the paths between the beds is planned to be at least 30cm. In addition to narrow paths, in order to drive through the garden with a wheelbarrow, you may need one main one, 80-9 wide0cm and a small technical platform where you could put buckets, watering cans, a hose, seedlings, prepare mixtures for processing plants. Try to pay attention to the width and number of paths, because if they are too narrow and there are not enough of them, it will be inconvenient to walk on them.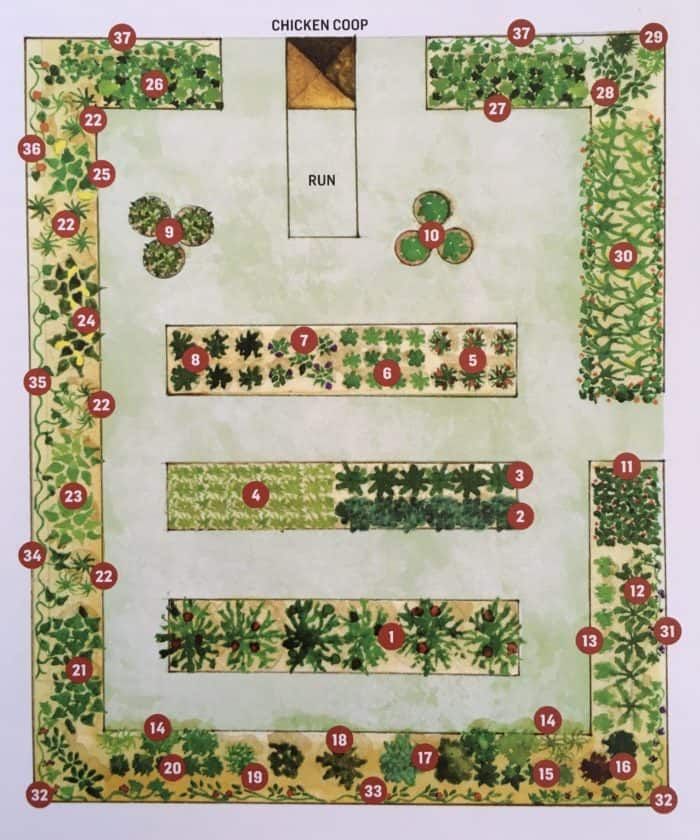 Too wide paths and a large number of them can "eat" a fairly large part of the area of \u200b\u200byour garden. If you do not want to make stationary paths, in some places you can put square slabs of 30x30 cm directly on the ground, which will move along with a change in the landing plan.
Most garden plants need regular watering, some do not tolerate cold water. To do this, it is advisable to bring water here and put a tank of water so that cold water can warm up in the sun.
ornamental garden
Standard sizes of garden greenhouses: width - 1.5m, 2m, 2.6m, 3m; length - 2m,4m,6m,8m. Composters - 80x80cm, 100x100cm. It is convenient to purchase two composters at once by placing them side by side - while one is being filled, the compost in the other has already matured and can be used.
It must also be remembered that if plants from the same botanical family are grown in one place for several years in a row, the soil will eventually be depleted and pests and pathogens will accumulate in it.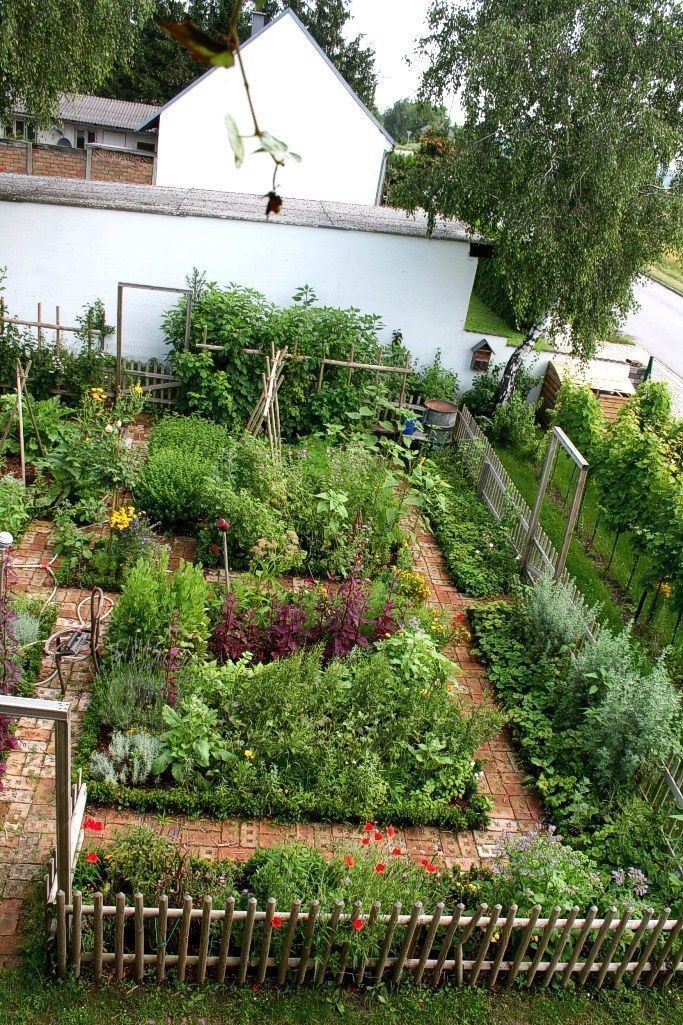 The alternation of crops helps to avoid this - the same garden crop is returned to its original place of growth no earlier than after 3-4 years, with this in mind, they plan the number and size of the beds.
legume family - peas, beans, beans
Family of the nightsowous - potatoes, tomatoes, eggplant, pepper
Cross -color family - radishes, turnips, radish, cabbage, croovas, horseradish, leaf grid
Lulene family, garlic
gourd family - cucumbers, pumpkin, squash, squash
umbrella family - carrots, dill, celery, parsley, parsnip, cumin, coriander, anise
haze family - beets, chard, spinach
It is also useful to use mixed crops on the same bed. The organization of mixed crops is based on the principle of taking into account the mutual influence of different crops on each other. It has long been studied that many plants in close proximity actively grow and develop, and it is strictly forbidden to plant some crops next to each other, since their struggle for light, water and nutrients can lead to a sharp decrease in yield. For example, for carrots, the best neighbors are beans, peas, dill, onions and green onions, parsley, radishes, lettuce, and tomatoes. It is undesirable to grow carrots next to beets.
It is also known that in the garden it is useful to grow some flowers and herbs that release substances that repel animals and pests:
Hyssop - cabbage caterpillars
Kotovnik - earthen fleas, Colorado potato beetle, aphids
Daffodils - moles, mice
Garlic - cabbage caterpillars, rabbits, cabbage fly, larvae, codling moth, slugs, snails, glass peach, aphids, powdery mildew
in the garden, to understand whether everything is conveniently planned, if necessary, immediately make changes, and only then proceed to implement the project.
Plan a place for a small bench in the garden or nearby - it will be possible to relax on it without stopping from work for a long time and admire the results of your labors.