Pantry wall shelving
Pantry Shelves - Etsy.de
Etsy is no longer supporting older versions of your web browser in order to ensure that user data remains secure. Please update to the latest version.
Take full advantage of our site features by enabling JavaScript.
Find something memorable, join a community doing good.
( 198 relevant results, with Ads Sellers looking to grow their business and reach more interested buyers can use Etsy’s advertising platform to promote their items. You’ll see ad results based on factors like relevancy, and the amount sellers pay per click. Learn more. )
Pantry shelving – for pantries and laundry rooms
The store will not work correctly in the case when cookies are disabled.
JavaScript seems to be disabled in your browser. For the best experience on our site, be sure to turn on Javascript in your browser.
Search
Search
Menu
Account
Change country
Select Store
en
| Europe |
| Deutschland |
| Österreich |
| Schweiz |
| France/Belgique |
| Great Britain |
7 Items
7 Items
Show
24 36 48 96
per page
Sort By Position Price Set Descending Direction
Filter
Show
- Decor
-
Decor
white (3) black (3) grey (2) light wood (5) - Material
-
Material
- Price
-
Price
Apply price filter
7 Items
7 Items
Show
24 36 48 96
per page
Sort By Position Price Set Descending Direction
How to make shelves in the pantry with your own hands? 40+ photos and videos
Features of planning storage systems
The most important thing when arranging a pantry in an apartment or private house is to decide what things it will be intended for and correlate the load with the dimensions of the room.
- For a small closet, several rows of shelves placed one above the other are suitable. At the bottom it is better to leave room for boxes and boxes: this way the area will be used optimally.
- The dimensions of the compartments must be made in accordance with the dimensions of the items that will be removed in the pantry.
- If the room has a high ceiling, it is worth providing a place for a stool or stepladder: it will be more convenient to get things from the upper shelves.
- Some pantries have enough free space to make deep shelves. This is not always convenient, and besides, you should leave a distance for the passage and bringing in objects.
Preparation
Before installing storage systems, the pantry needs to be repaired: clean the space, carry out dry and wet cleaning, remove old wallpaper and flooring. If necessary, the walls of the pantry or attic are leveled and also put in order: painted or pasted over.
It is recommended to use a primer containing antifungal impregnations.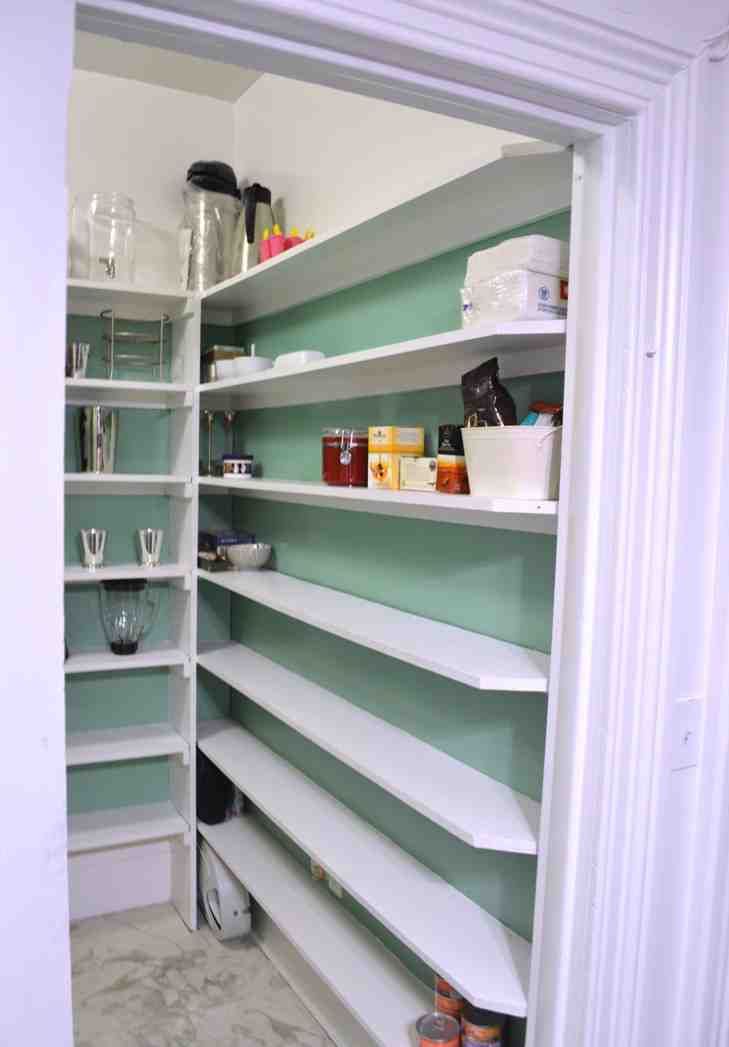
Laminate, parquet or linoleum is laid on the floor. It is also worth equipping the pantry with ventilation and lighting, which will greatly facilitate the use of the room.
Which material can be used?
One of the most affordable and durable materials for creating shelves in the pantry is wood. Boards made of natural wood (pine, larch), as well as chipboard, are fixed to metal fasteners. The heavier the items that will be stored in the pantry, the thicker the boards should be. For conservation, large equipment, construction tools and other heavy things, it is worth providing an additional stiffener.
If you make shelves in the pantry with your own hands, you can use what is at hand - wooden pallets, old unnecessary furniture, plastic fruit boxes. Plywood is considered a budget option, but thin sheets are not suitable for heavy items. Lightweight but durable plastic is suitable for storing books, clothes and bulk products. It is easy to care for it, besides, the material is not afraid of moisture.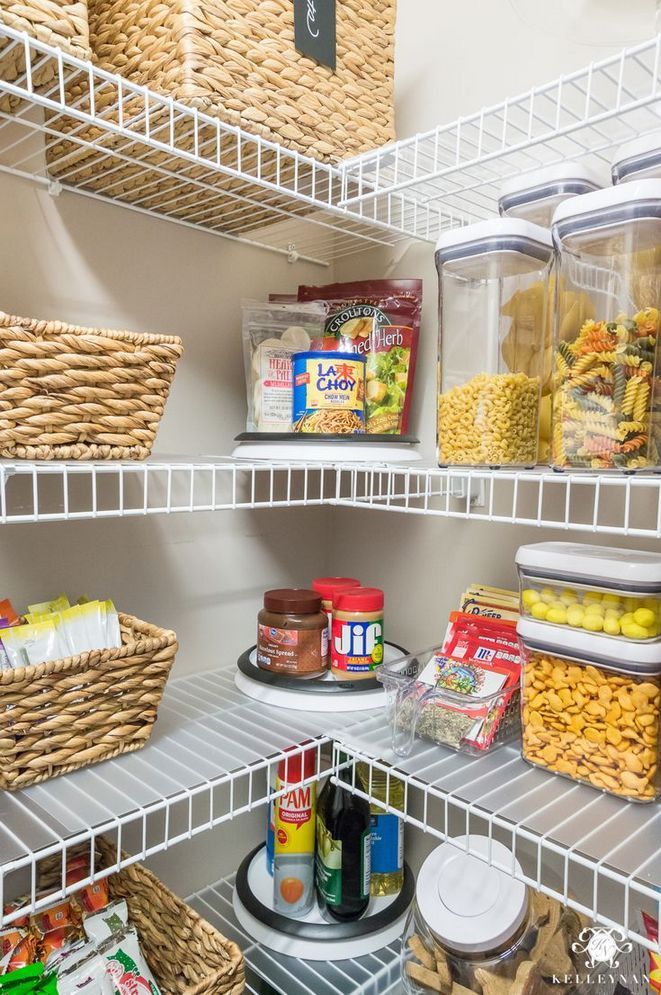
Metal racks are considered the most durable and do not require additional reinforcement. Modern products have a collapsible design, they are easy to rearrange and transport, in addition, the material easily withstands temperature changes. When buying, you should pay attention to the coating - it must be protected from corrosion with a special composition.
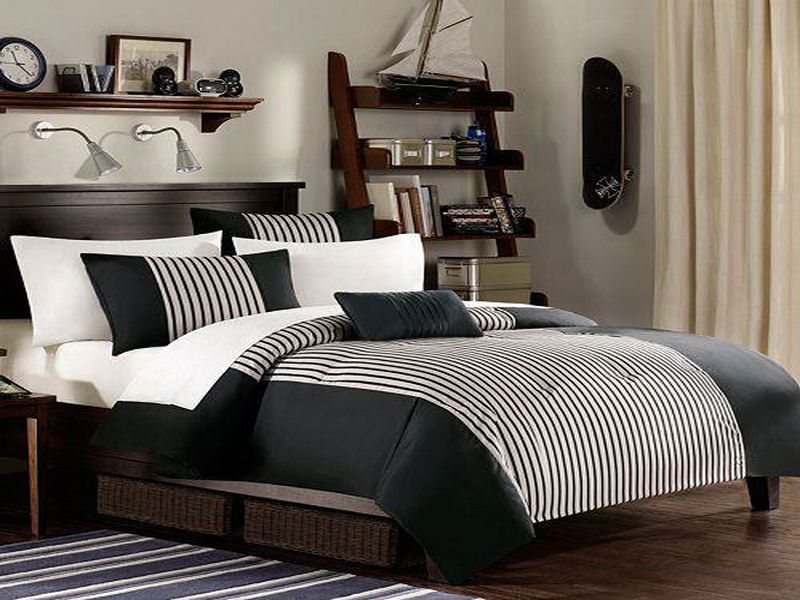
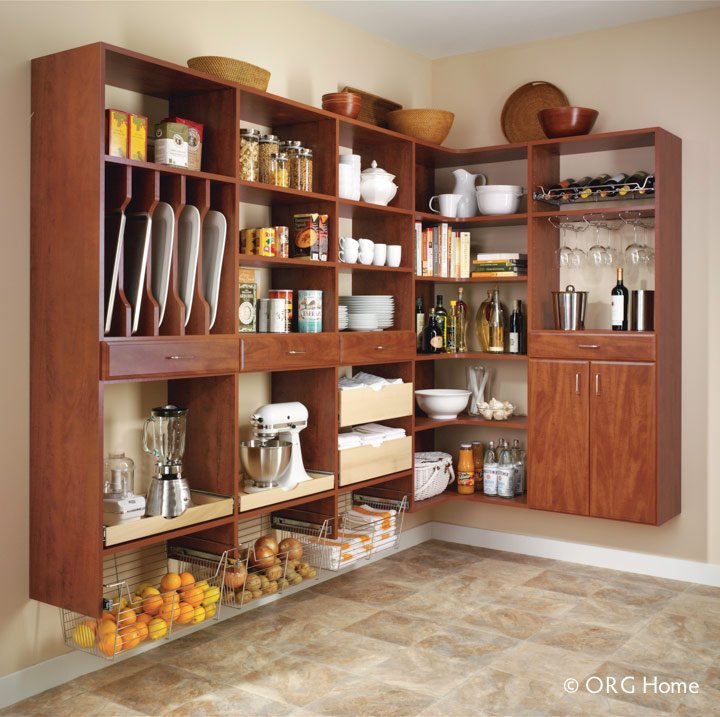
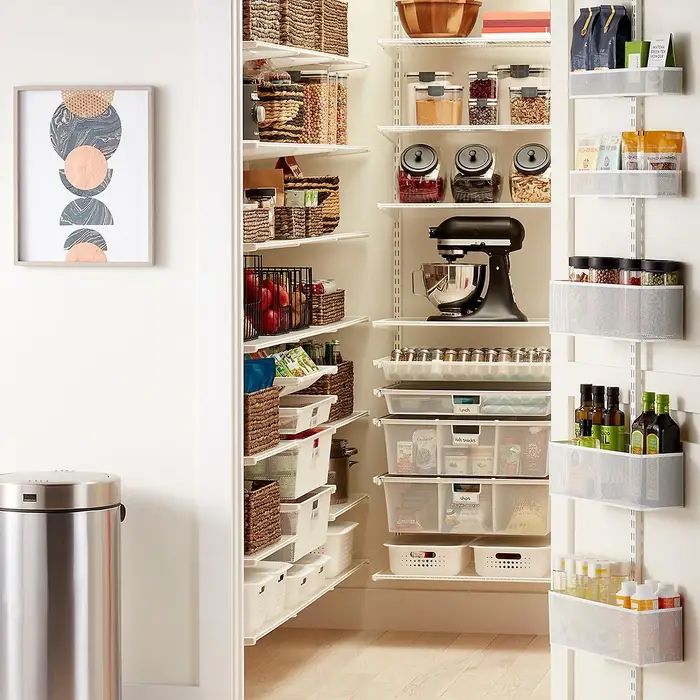
Pictured are shelving, drawers and wall shelves for a spacious pantry.
How best to arrange the shelves in the closet?
The size of the utility room primarily affects the placement of shelves.
- A small closet (about 2 meters) allows you to install shelves in only one row - linearly, along one wall. Sometimes designs are made rounded - this shape allows you to win a few centimeters and use three walls.
- The corner arrangement in the form of the letter "L" is considered much more practical, but the storage area must exceed 2 meters. For maneuvers, you need to leave a small passage, especially if the room is elongated and narrow.
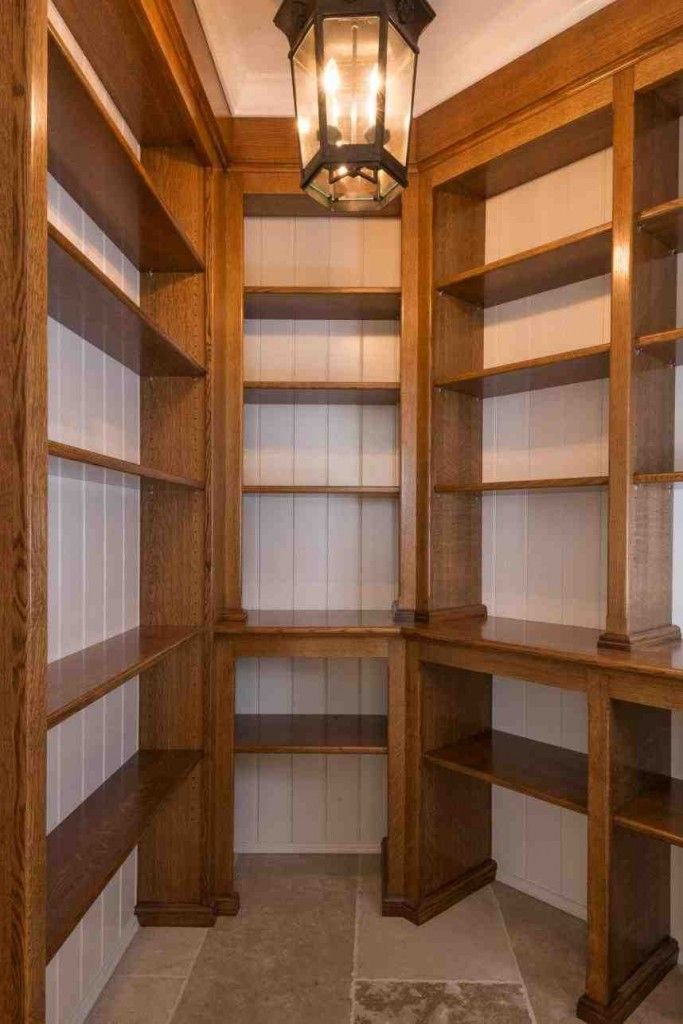
- In a large utility room, it is best to place shelves in the shape of the letter "P". In this case, it is necessary to calculate the depth of the structures so that there is room for movement in the middle.
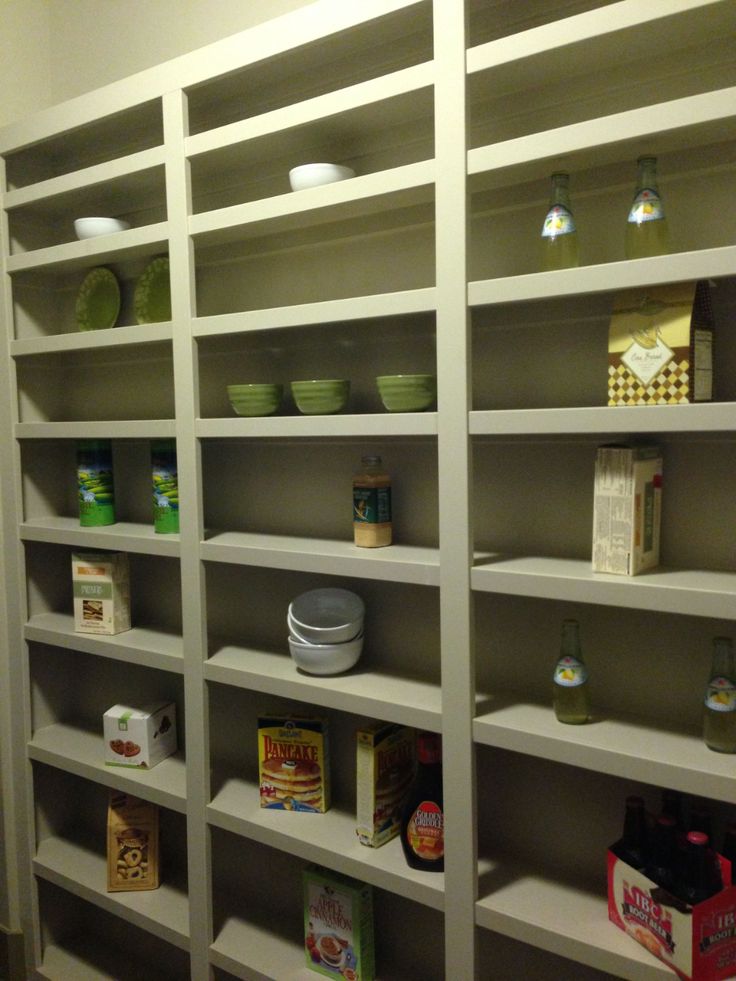
The photo shows a pantry in which the racks are functionally arranged in the shape of the letter "P".
Deciding on the dimensions
The most popular and practical form of shelves is straight. The length of the shelf is usually equal to the length of the wall. If the distance between opposite walls is 2 meters or less, then the shelf does not need additional support. Otherwise, the structure should be strengthened, especially if it is planned to store rolls and tools.
The thicker the wooden shelf, the more fasteners it requires. Also, its strength is determined by the distance between the support posts: the more massive the structure, the smaller the gaps.
In order to use the shelves comfortably and safely, the heaviest items must be stowed down.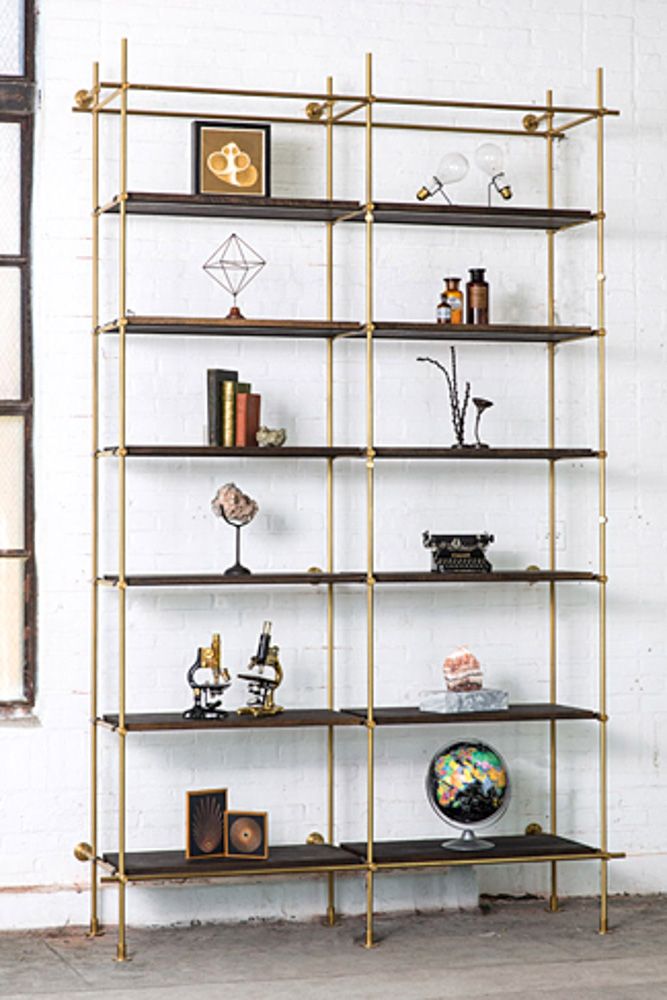 The width of the protrusions should decrease from bottom to top. The standard shelf width for cans with preservation is 30 cm. The height depends on the dimensions of things.
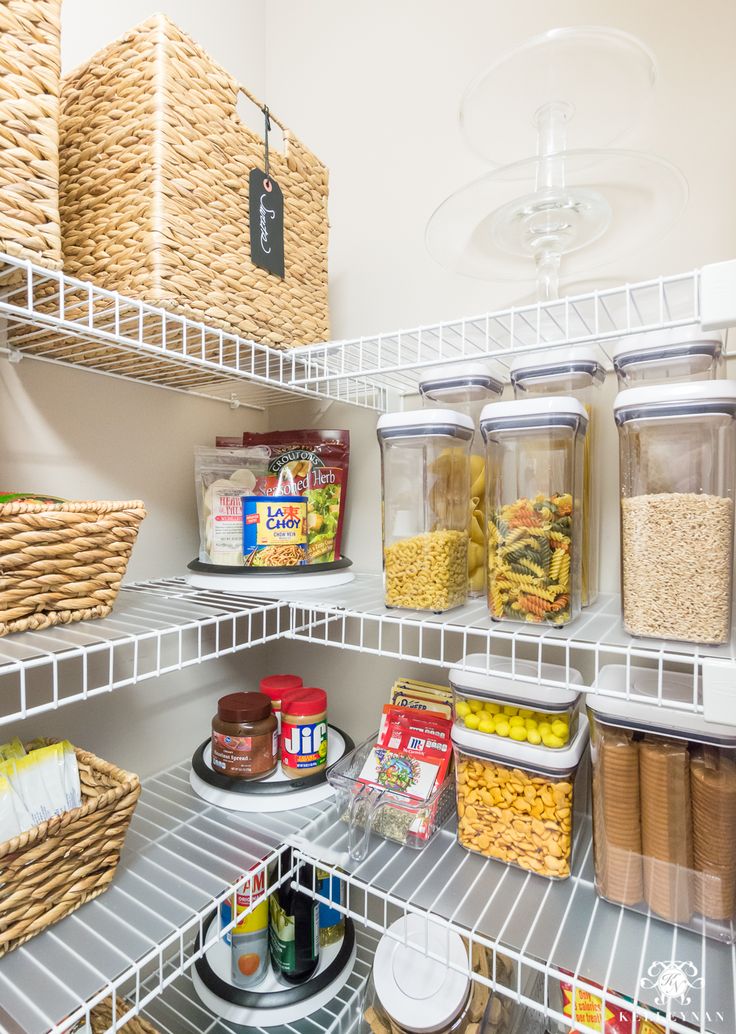
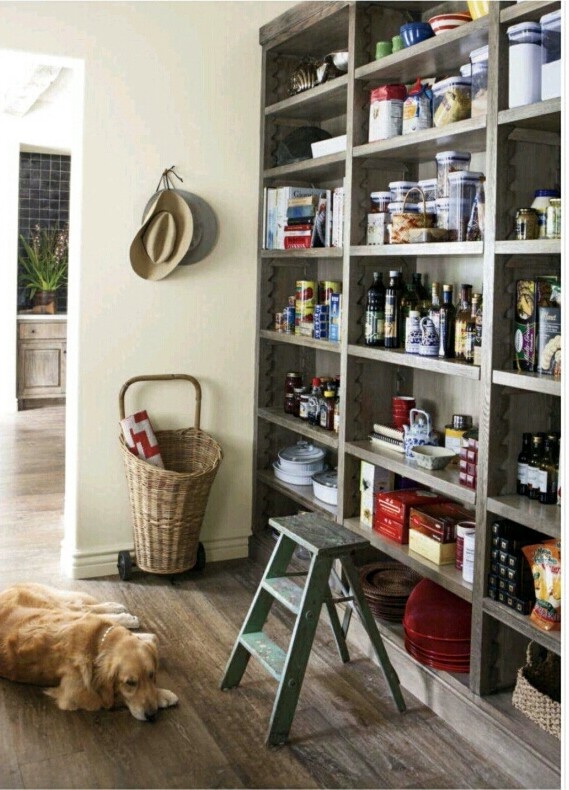
Pictured is a pantry with a wide aisle between wooden shelving.
DIY Shelf Options: Step-by-Step Instructions
You can save your family budget with homemade pantry shelves and detailed tutorials below.
How to make a wooden shelving unit for a pantry?
Before starting work, it is necessary to measure the walls of the pantry and create a drawing of the desired structure. Next, prepare in advance the consumables necessary for the manufacture of functional shelves.
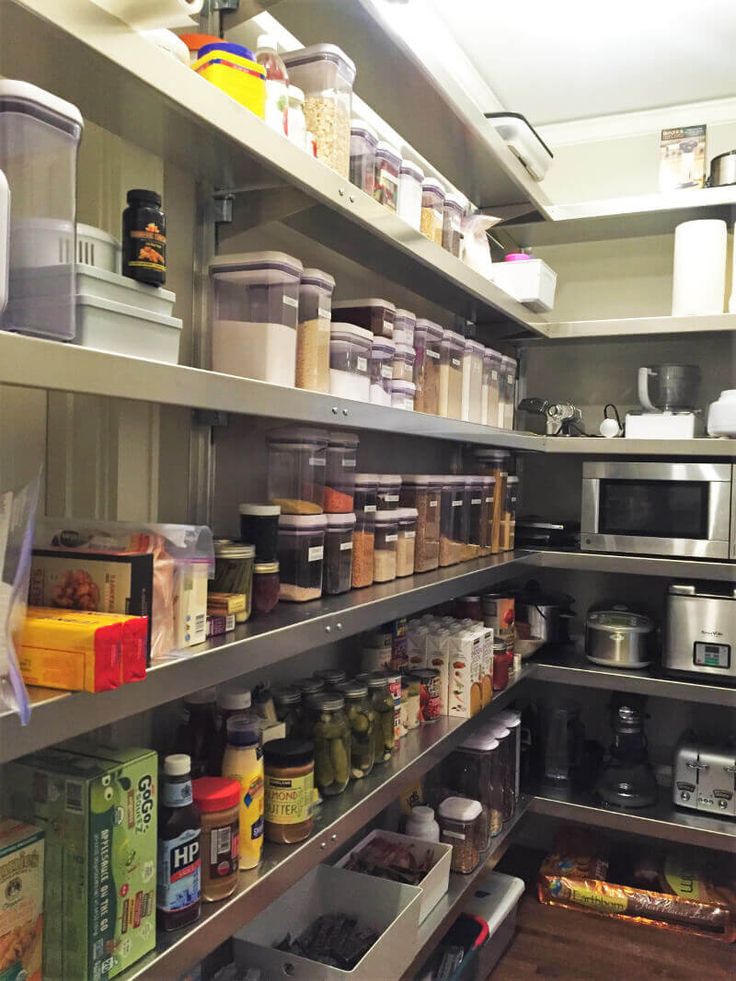
The photo shows a linear self-made shelving made of wood, occupying the entire wall of the closet.
Tools and materials
For work you will need:
- Planed block for a vertical post (8 pcs, about 2 m).
- Beam for horizontal supports (12 pieces, approx.
 50 cm, depending on the depth of the rack).
 - Boards or lining for shelves (the number depends on the depth of the shelves, the length - on the length of the wall).
- 16 metal corner fasteners (corners).
- 45 screws (3.5x25).
- About 70 thin studs.
- Wood impregnation and brush.
- Building level.
- Roulette.
- Hammer.
- Electric jigsaw.
- Screwdriver.
Step-by-step instructions
- First you need to prepare the material. Using a hacksaw or electric jigsaw, we cut the bars and lining in accordance with the dimensions of the future pantry rack.
- We apply impregnation, carefully processing every detail. You need to dry for as long as indicated in the instructions on the bank.
- We fix the corners with screws at the level where the shelves will be located:
- We fix horizontal bars as follows (4 such structures should be obtained):
- We install the lining horizontally, nail it with thin nails:
- We make the second shelf in the same way: we fasten the corners, fix the horizontal bars, attach the lining.
- We lay the upper horizontal bars, fasten them.
-
The shelves in the pantry are ready. In this way, you can make a rack of any height, depth and shape.
You can learn more about how to make shelves in the pantry from this video:
DIY wall shelves
This is the easiest and most economical way to make hanging shelves for a small closet. The amount of material for the shelves depends on the size of the room and the number of floors.
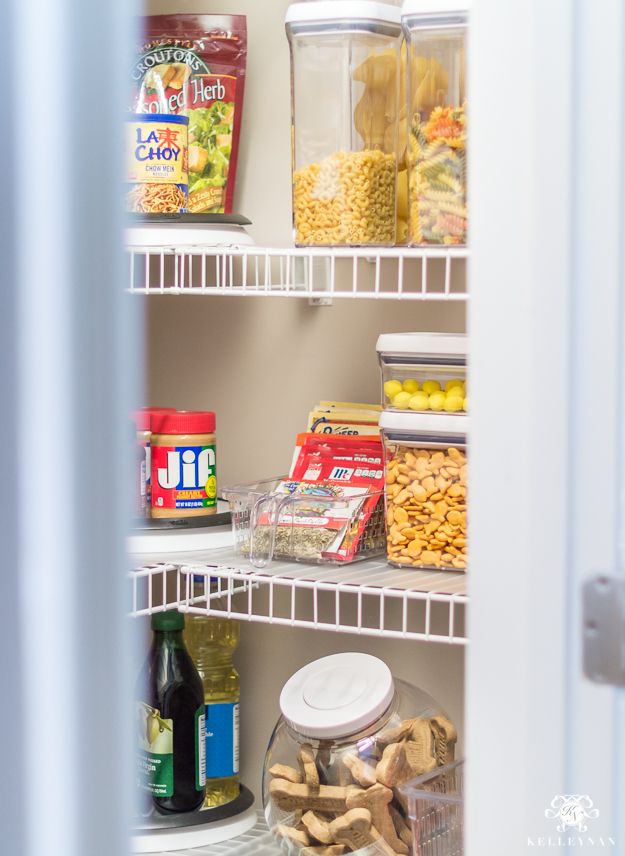
In the photo there are pantries in small apartments such as Khrushchev or Leningradka, equipped with simple shelves.
Tools and materials
To make shelves in the pantry with your own hands, you will need:
- Planed bars.
- Plywood, chipboard, boards or remnants of old furniture.
- Self-tapping screws for fastening.
- Screwdriver.
- Thin nails.
- Hammer.
- Level.
- Jigsaw or hacksaw.
Step-by-step instructions
- Sawing timber and plywood according to the size of the pantry. If desired, they can be painted or varnished. For the frame of one shelf, you will need 1 long and 2 short bars, for the base - a plywood sheet or boards of the required size and thickness. We make markings on the walls and securely fasten the bars.
- Making markings for the next shelf.
- We mount the shelf in the pantry.
- We fix it with nails.
And this video shows how to install a wall shelf in the pantry in two ways: on the brackets for chipboard and on the standard brackets.
Shelves in the pantry from the profile
Solid U-shaped shelving for a spacious pantry is obtained from metal profiles.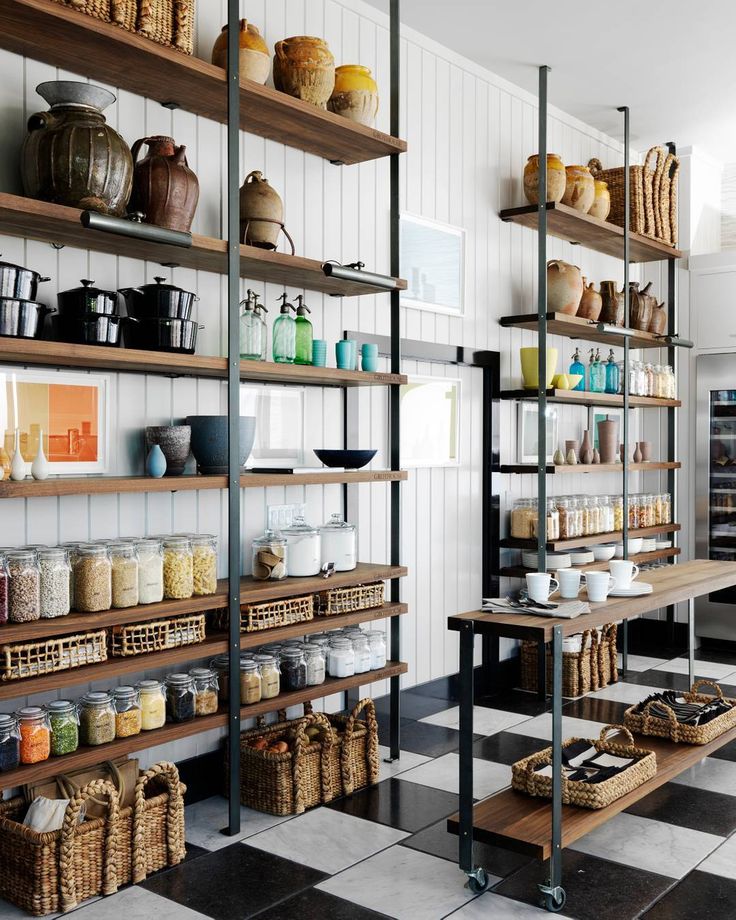 Having understood the principle of operation, you can make shelves of any configuration, replace plywood with wood, cover the metal profile with paint and create a loft-style rack.
The photo shows two types of shelves for the pantry, made by hand from metal profiles and wood.
Tools and materials
- Guide profiles 50x40.
- Guide profiles 50x50.
- Plywood or wooden boards.
- Roulette.
- Building level.
- Metal shears.
- Electric jigsaw.
- Screwdriver.
- Dowel-nails.
- Self-tapping screws.
- Ladder.
Step-by-step instructions
- We make a drawing and calculate the amount of materials. We cut the profile into components in accordance with the dimensions.
- Marking out horizontal lines. We fasten guide profiles 50x40 to the walls using dowel-nails.
- We make the frame of the first shelf, put it on temporary supports from the profile.
- We cut a sheet of plywood with an electric jigsaw:
- We fix the finished parts with self-tapping screws.
- We replace temporary racks with rails. Shelves on the walls in the pantry are ready.
This video clearly shows how to make shelves in the pantry from the profile:
Photo gallery
You can see other options for shelves in the pantry in the photo selection below.
Shelves in the pantry: how to make shelving with your own hands
Top
01/23/2019
1 star2 stars3 stars4 stars5 stars
Shelves and racks - that's what will help organize the storage of food stocks and things.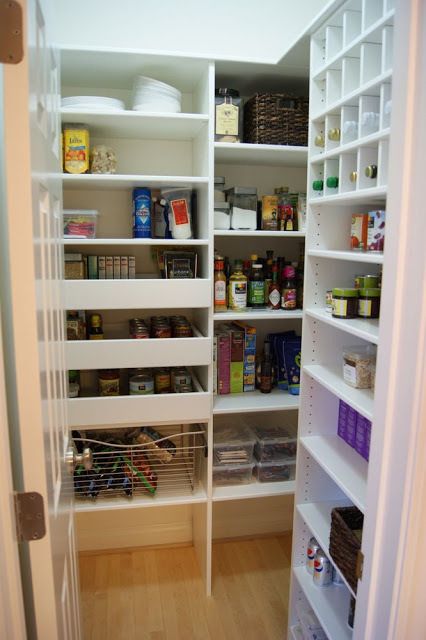 We suggest what and how to make them in order to organize a comfortable space in the pantry.
Photo: Instagram @Pixabay
Making shelving in a closet is easy, and in some cases even faster than finding a store-bought one. Indeed, each house or apartment has its own layout, and some of them do not imply a place for storage in principle. Then the owners try to optimize for organizing things a small area on the balcony, under the stairs, in the hallway, in the built-in drywall niche.
It is clear that shop furniture may not be suitable in such conditions and an individual sketch will be required. We will tell you in more detail how you can equip a utility room and what to prepare for work.
Preparatory stage: choosing the location of the shelves and materials
Usually the shelves are attached to the wall separately or made of them stationary and mobile shelving for the pantry. This is equipment with side racks or walls. By location in space, they can be:
- Linear. Elements are located on one or two opposite walls. Suitable for small areas up to 2 m.
- Corner. More capacious designs in the form of the letter G, but in a small space may not fit.
- U-shaped. Ideal if you have a large or elongated and narrow closet at your disposal. But you need to consider whether there is free space in the middle so that you can easily enter and take something.
- With rounded edges. It is convenient to make such surfaces in cramped pantries. They save a little space and are less traumatic.
Less common storage systems with drawers and in the form of a constructor - when the compartments have different lengths, widths and are located not only horizontally. This is understandable: to make such furniture, you need more time and knowledge than for a simple design. There are also prefabricated or modular open cabinets. They include different elements: shelves and containers that can be easily swapped, assembled and disassembled.
Which material is suitable for the manufacture of shelves: photo of racks
If you plan to put the preservation in three-liter jars, large appliances or other heavy things into the closet , choose wooden or metal parts . They are stable, they can even be loaded with building materials. True, in this case it is recommended to install a stiffener. The alternative is plastic: it is lightweight, also withstands a serious load, does not require additional processing and does not mold, it is easy to wash.
Wooden shelves can withstand a lot of weight. It is only necessary to choose the right thickness of the product and the number of fasteners.
Reinforced glass, MDF, plywood can be used to store bulk products in containers, vegetables, small items or collectibles, light dishes, clothes, books.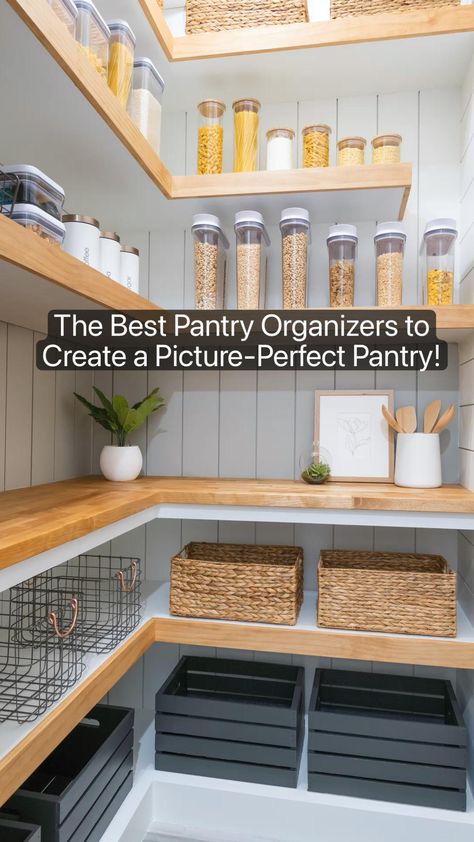 If you will keep fragile items in the back room, attach bumpers to the compartments so as not to lose property due to awkward movement.
Wood (preferably pine or larch) is considered the best option for arranging a home closet. It looks aesthetically pleasing and is easier to use. Another plus is that most of the tools to work with it are usually at home or easier to find.
We have not listed all of the shelving materials. Often the choice of craftsmen falls on what is at hand. For example, wooden pallets, plastic boxes for vegetables and fruits, disassembled old furniture. From all this, convenient storage systems can also turn out. The main thing is to think over all the little things well: what you will clean in the closet, in what quantity and in what order.
If nothing comes to mind, check out the pictures we've put together. In the photo - do-it-yourself options for shelves in the pantry. Perhaps among them you will find an idea for your apartment.
For structures made of wood you may need: building level, tape measure or ruler, jigsaw or hacksaw, hammer, drill or perforator, screwdrivers, screws, self-tapping screws, sandpaper, protective impregnation (stain, paint), stands, brackets , scissors for metal (if a profile is used), a marking pencil.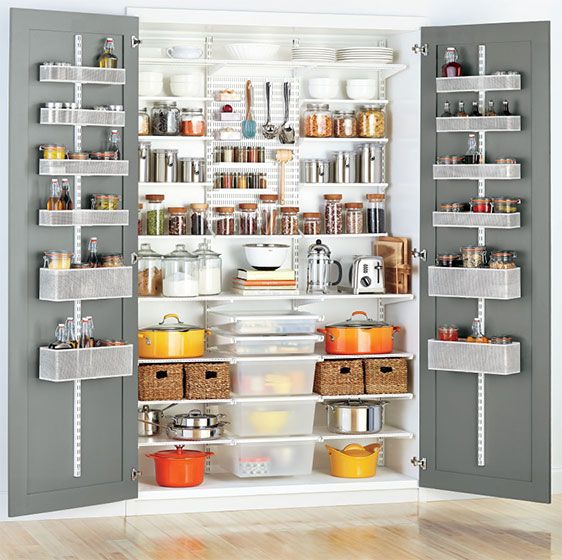
What to consider when planning storage in the closet
As we have said, it is important to think about what exactly you want to keep in the closet and relate it to the area. If it is small, then it is better to equip roomy mezzanines, and put drawers or baskets below for items that you use less often than others. This option is not suitable for building materials.
Don't get carried away when calculating the depth of your shelves. Remember that you need to leave free space between them so that it is convenient for you to enter, take something, turn around, take out bulky items. It is desirable that the passage occupies at least 70 cm. In a room with a high ceiling and an upper tier directly below it, provide a place for a ladder or ladder.
Measure the longest containers you plan to store and make a few compartments just for them.
A few more tips for arranging shelving for a pantry in an apartment
- Straight shelves without intermediate supports are suitable only for small closets with a distance of no more than 2 m from wall to wall.
 Otherwise, the board will sag.
 - The width of the projections increases from top to bottom, the heaviest items should be stowed down. It has to do with safety and convenience.
- Use the rule: the larger the load, the thicker the material (this applies to wood, plywood), more fasteners and less space between the support posts.
- The optimal width of the mezzanine for jars with blanks is 30 cm or more.
- Light equipment should preferably be fixed against the wall, massive buildings are stable due to their weight.
- Provide separate pantry lighting before starting other work.
- Before installing storage systems, the utility room must be prepared: carry out a thorough cleaning, if possible, align the walls, re-paste them, paint or veneer.
- If necessary, coat the walls with antiseptic impregnation to protect against mold.
- If the room will be open, paint its walls in bright colors that match the surrounding interior.
Considering all the tips and features of your room, draw a sketch of the future closet with the designation of the design parameters and proceed to its creation.
How to make shelves in the pantry with your own hands: step by step instructions
Manufacturing technology depends on what type of equipment you have in mind and what materials you will use. Consider first the option of attaching a frame made of aluminum or steel corners to the wall. The first material is lighter, the second is stronger and is suitable for structures with heavy loads.
Shelving with fixing
- Start by marking. Transfer the dimensions of the parts in accordance with the drawing to the corners using a marker and mark the places for the holes for attaching the elements to each other and to the wall.
- Saw the blanks with a grinder or hacksaw, drill the marked holes. Next, bend the frames, fasten them together with bolts, screw them to the racks.
 Lean the resulting structure against the wall, mark the attachment points on it. Drill the wall at the marked points, insert dowels and attach the rack with self-tapping screws.
 - The penultimate stage is the manufacture of shelves. Cut them out with a jigsaw or hacksaw according to the dimensions from the sketch, attach them to the corners and correct the errors. In order not to be mistaken, you can first use a cardboard template, according to which the part is adjusted. After all the parameters are verified, you need to remove the roughness on the sections. Use a file and abrasive paper for this. Then impregnate the wood with a stain or other protective solution, dry it, varnish it and dry it again.
- The final step is fixing the rack elements. According to this instruction, you can mount the corner, U-shaped and conventional linear storage system. Instead of metal parts, you can use a bar with a section of 50 * 50. The procedure will be the same.
Photo: Instagram @metallperm
Photo: Instagram @stavsvarman
DIY wall shelves
If your apartment has a very small closet and you plan to store not too heavy things in it, hang some ordinary shelves no more than 1. 5 m in length. For this you will need:
- Rectangular, iron brackets
- Wood, plywood, 2 cm boards, or other shelving material
- Fasteners
- Electric jigsaw
- Screwdriver or perforator for attaching elements to each other
- Building level
- Pencil
First, mark the wall, make holes for the brackets and screw them to the surface with self-tapping screws. After that, cut out the details of a suitable size, sand them with sandpaper, paint with stain and varnish. Wait until they dry. If you use boards to make the structure, connect them together with bars located across. Attach the parts to each other with self-tapping screws. The distance between the tiers of the bookcase should be approximately 50 cm.
These shelves are suitable for storing seasonal products, bulk products, household appliances and any light items.
Storage shelving unit without fixing
Let's consider the production process of a shelving unit that does not need to be fixed to the wall.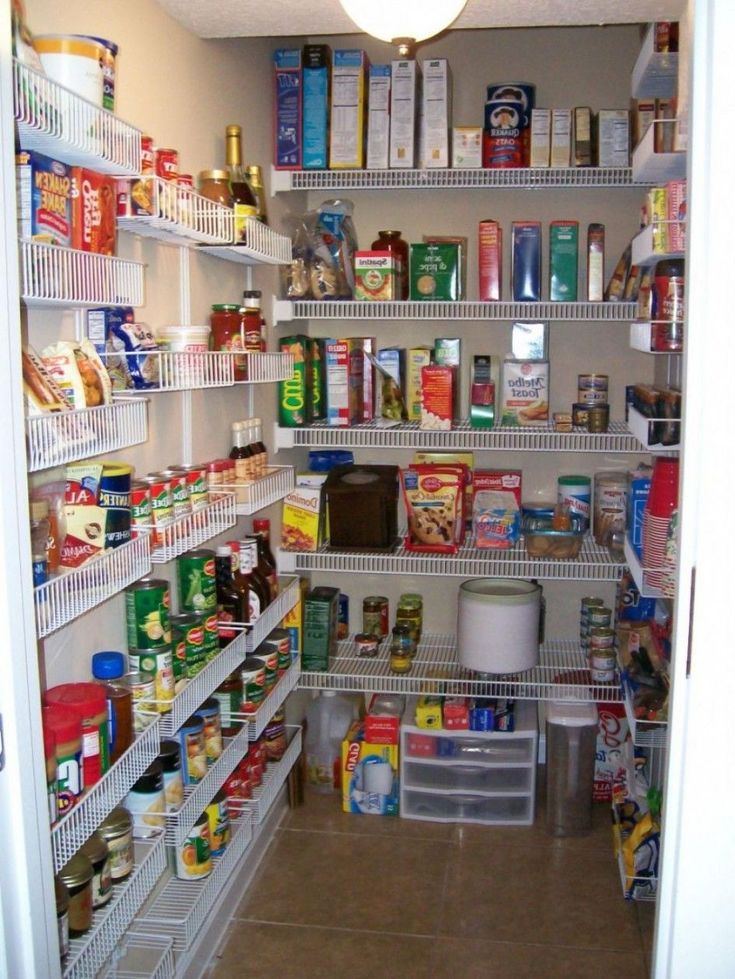
In addition to the set of tools from the previous instructions, you will need a hand router. Prepare the beam for the side racks, chipboard or other floor material.
- On the support bars of the same height (approximately 2 m), make grooves on one side. The width of the recesses is 20 mm, the gap between them is 12-13 cm.
- To secure the structure, pin the upper and lower subframes together and cover them with plywood sheets. These will be the bottom and top shelves.
- Cut or join other elements and insert them into the slots at a comfortable level.
The result is an almost modular system. At any time, you can change the height of the ledges and fill the room with more bulky things, or vice versa, add details and organize the storage of accumulated little things.
A back wall can be attached to increase the stability of the rack.
Photo: Instagram @woodmood_ukraine
You will get a similar design.