Lime washing stone
How to Limewash a Stacked Stone Fireplace
Today is the day. This is your complete step by step guide to limewash a stacked stone fireplace. I promise it’s a very doable project. In fact, we did this in just three half days. I hope this encourages you to take an element in your home that you may not love and really give it new life. We are so thrilled with the results and encourage anyone thinking about this project to jump in. Without further ado, let’s learn how to limewash your stacked stone fireplace.
THE FINISHED PROJECT
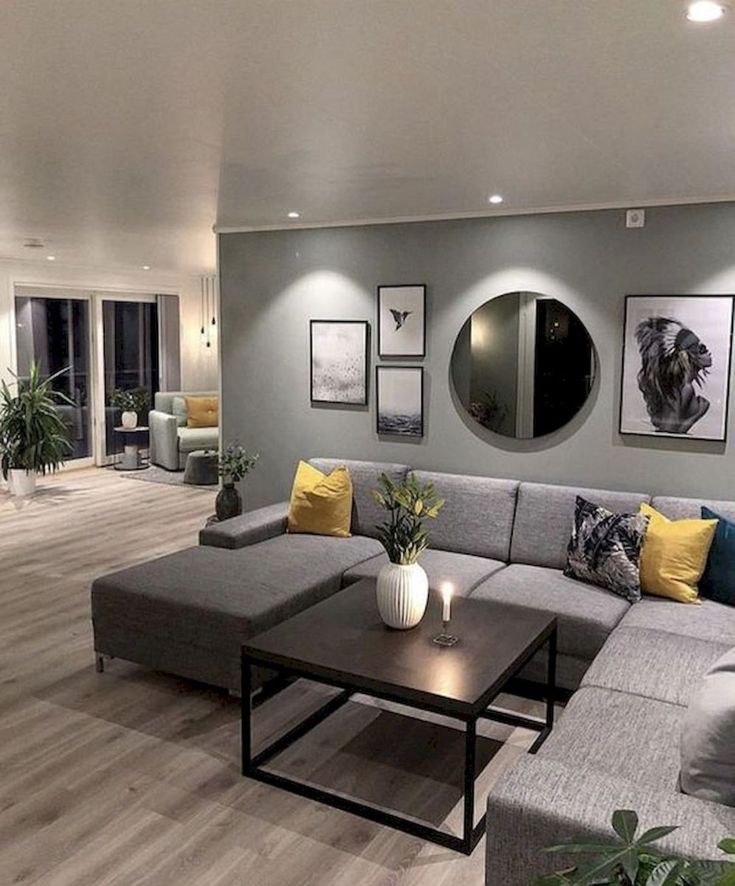
It’s always fun to start with the reveal. We couldn’t be happier with the outcome. We still need to drill a hole for the Frame TV cable and stain the mantel. The mantel is hollow to allow for the TV box to sit inside. I love that I can switch up this artwork whenever I want.
THE BEFORE
The quote to have a professional limewash this (grouting not included) was $1000. We were able to tackle this entire makeover (including grout and supplies) for under $200. While it was three days of sweat equity it was absolutely worth it.
PREP WORK
- Clean the stone. Before you jump into painting, feel the stone. Is it dusty? If so, wipe with a damp cloth. Because the fireplace is inside, it should be rather clean. Ours was dusty from when we refinished the wood floors.
- Tape off the surrounding walls with paper. A roll of brown paper worked for us.
- Cover the hearth and nearby floor with a dropcloth.
- Turn on some great music. That’s what got me through the project.
THE SUPPLIES
Meet your new best friends. This is pretty much all you need to limewash the stone, but they are all very important.
- plastic bucket
- multiple white rags
- large Romabio paint brush
- spray bottle filled with water
- Romabio limewash paint tinted to the color of your choice
ABOUT THE LIMEWASH
Romabio created this limewash product and it’s not only organic but free of any fumes or smells.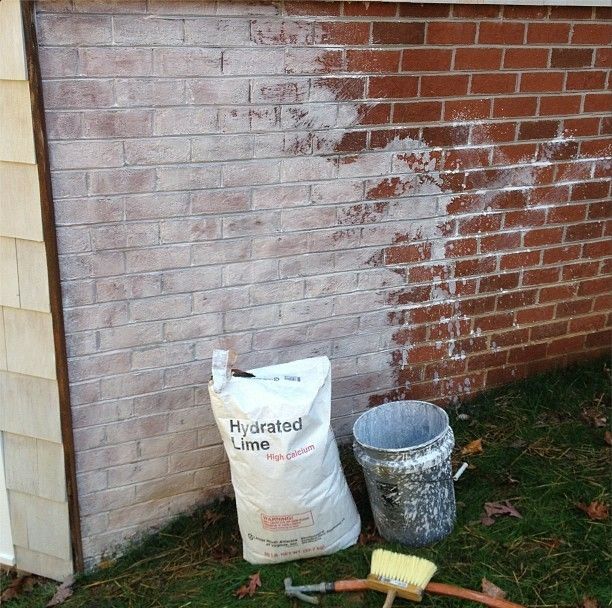 It cleans up beautifully and was a dream to work with. We used the Classico Limewash tinted Riposo Beige. We love the soft beige color but you can choose to tint it any color you like. Just call around to find which of you local paint stores carry this. That store should also carry the large brush. It was very necessary.
DILUTE THE LIMEWASH
You need to dilute this product. They recommend diluting it 50-100%. We started with just one cup of paint and 1/2 cup of water. Looking back, I wish we had added 3/4 cup of water. I did the second day and it was not only easier to paint with, but much faster. But this is the part that is trial and error. It is a messy paint and will be dripping while you do it. That’s ok. It’s just the process. And you’ve covered your floors so no worries. Just keep track of your proportions so you can replicate as you go. We chose to only add one cup of paint with the water until it was gone. Then we mixed more. I just didn’t want to waste it and I wasn’t sure how much we would go through.
THE FIVE SIMPLE STEPS
- spray a section of stone with water
- apply limewash with the brush
- let dry 10-60 minutes (I waited 20-30)
- spray with water again
- use a rag to distress to your liking
1: SPRAY THE STONE WITH WATER
I listed the 5 step process above so you can reference. I worked in sections that were about 2 x 3 feet. Spray the stone with water. You want it to be damp but not dripping. Gently tap with a rag if it’s too wet.
2: BRUSH ON THE LIMEWASH
Dip your brush in the paint (a little goes a very long way) and start painting. Remember it is drippy and messy. That’s ok. Look at the tip of my paint brush. I only added about 1/2 inch of paint when I dipped the brush in the bucket. Don’t submerge the brush. You are really just working with the part of the brush that will meet the stone.
3: ALLOW LIMEWASH TO START DRYING
Wait 20-30 minutes. Grab yourself a snack. Or start another section if you want to be really efficient.
4: SPRAY WITH WATER AGAIN
Return to the same section and spray with water.
5: DISTRESS WITH A RAG
Next use a white rag and distress to your liking. This is a bit tricky as the paint looks more diaphanous when it is wet (it dries more opaque). Don’t be afraid to give it a good scrub if you want to bring back some of the color variation in the stone. If you dilute it at 75% you will probably see more of the color variation come through.
PRO TIP: Try one small section with the 5 step process. Allow to dry. See how you like it? If you love it, continue. If you want to tweak things (dilute with more water, distress more, etc) you can adjust moving forward.
This limewash is very forgiving. If you were using it on the outside of your home you could literally hose it off even after a couple of days. It really sets after five days. The problem is you can’t hose down your fireplace (unless it’s an outdoor one) so you want to test the process and then move forward.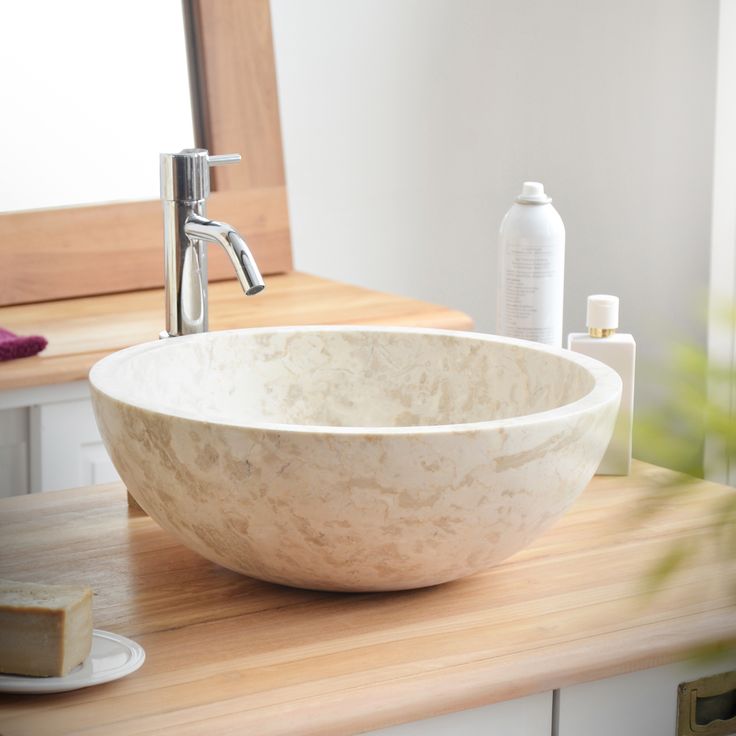 But know you are working with a very forgiving product so don’t stress too much.
I really wanted some of the character of the stones to come through. You can always use a little bit of sandpaper later on to scrape away a bit more paint. Worked really well for me. I wanted each stone to look a bit different.
PRO TIP: This pertains to later, but do you see how tight some of those gaps are? I still added a thick grout line over every gap. That is where overgrouting comes in. More on that below.
JUST JUMP IN
I literally woke up one morning and said, time to do the fireplace. So by the time I researched and bought my supplies it was 2:00 before I started. Soon it was evening and this girl was getting tired. But progress nonetheless.
END OF DAY ONE
I called it quits at this point and actually panicked. I also poured a glass of wine. While I loved the limewash, I wasn’t loving how it looked without grout and thought I had ruined it. I even had one of my best friends give me a pep talk. She told me to see it through in the morning. This is your pep talk. I truly believe that the grout takes this to the next level. So keep on keeping on.
DO YOU NEED A PEP TALK YET?
As I woke up the next morning, I still didn’t feel confident. It just looked so busy and those black shadow lines were not the look I was going for. After working so hard to limewash it, I was super discouraged. Sharing that in case you get to that point. The grout is magic. Pour some coffee and get back to work.
TIME FOR GROUT
My advice is to grout the next day. It’s time consuming and tedious so you want to be well rested. There is nothing difficult about grouting, it’s just tiring. My husband mixed the grout for me. You’ll need a large bucket and a way to mix it (he bought an attachment for his drill). This part can be a bit messy.
You are looking for a consistency of peanut butter or frosting. It should be thick but easily spreadable.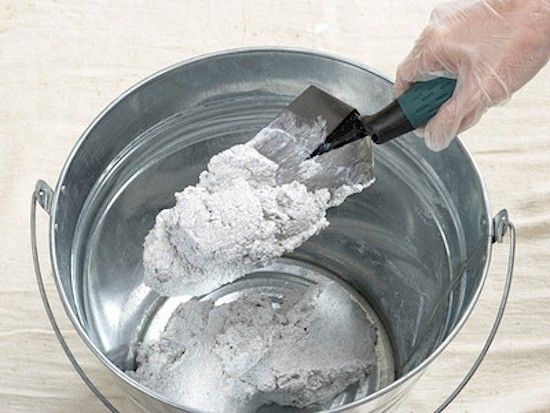
We used Mapei Large Tile and Stone Mortar in white. The grout is a bit stinky so if you are worried about smell, this is the part that has that. It never bothered me, but it’s worth mentioning.
We then put it in ziplock bags. We did end up buying a professional bag (looks like a cake decorating bag) but honestly it worked pretty much the same. Both tend to get clogged. I also found the professional bag to be too heavy. Grout is surprisingly dense and weighs quite a bit. Just be patient. If the grout isn’t coming out, there is likely a chunk stuck near the opening.
Cut the tip off the corner of the bag and just go for it. Start with a small cut because you always enlarge it if you need more grout to come out. The issue with stacked stone is that it isn’t symmetric like brick nor are the stones flush with one another. The more I grouted the more I realized that perfection isn’t the goal. You want this to look messy otherwise it will look like your lines aren’t straight. I hope that makes sense.
The above photo shows what it looks like when you squeeze the grout on. It’s not pretty. When you wipe it, it takes shape. You can leave as much or as little as you like. The term overgrout means that you’ll leave much more and everything will blend. Some of our gaps were so tight that I just grouted right over the line to make it appear like there was a larger gap. Hence the term overgrout.
Once you grout a section, wait a few minutes and then wipe away the access. I used my finger to wipe it away. They make tools for this but I feel like I have more control using my finger. I will say it was very rough on my hands but oh well. As I wiped it away, I held a styrofoam cup in my other hand so I could wipe the extra from my finger into the cup. Do whatever works for you.
WARNING: This part is extremely messy. I can’t stress that enough. Your hands will be a mess but it’s worth it.
FINISHED GROUT UP CLOSE
This is a photo fo how it looks once you wipe it away and let it dry. The grout looks gray as it goes on but dries white. We wanted the contrast. Remember that with stacked stone all of your gaps are different, so overgrouting helps to soften all of that. It gives the illusion that there are larger gaps between the tightly stacked stone.
You can tint your grout should you want something other than white.
HOME STRETCH
I made it through almost the entire fireplace and then my fingers gave up on me so my hubby swooped in to finish. Grouting took a good portion of day two. It’s a tedious process but it really makes the entire fireplace come alive.
Don’t forget to grout the sides of your stone, too. Do you see those dark lines down the edges. Just add a nice line of grout and spread it carefully with your finger.
If you look to the left of my husband’s shoulder, you can see the grout almost disappears. It dries white and bright. But that gives you an idea of how it would look if you choose grout similar to your stone color.
PAINTING THE HEARTH & TOUCH UPS
Once your stone is complete, you can get rid of the drop cloths and tackle the hearth.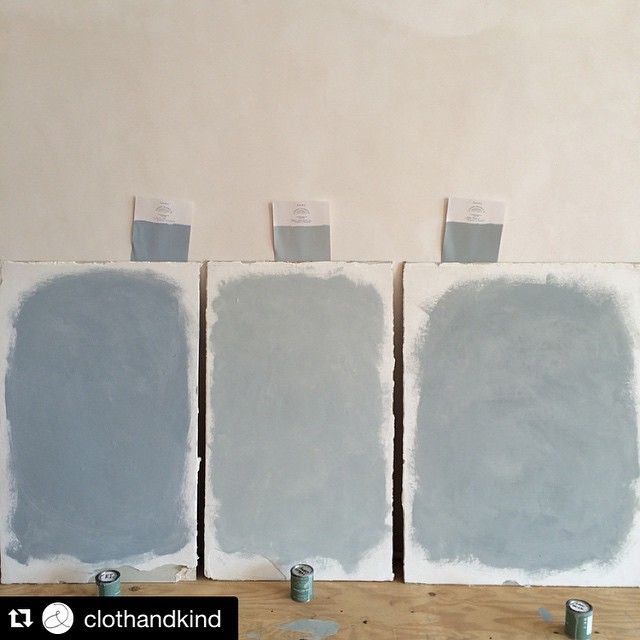 I ended up doing two coats of limewash on ours. I did not wipe any away.
A foam brush comes in handy to do the edges. It is also great for touch ups. I did the hearth and touch ups on the third day. Some of the stones had some dark spots here and there so I was able to go back and just add a dab of the limewash paint. You don’t need to do the 5 step process for touch ups. Adding a little dab works well.
PRO TIP: The bucket of diluted limewash can be covered and used the next day. It does not dry out. We did end up using almost the entire container of limewash. There was just enough for me to touch things up.
TIMING
Looking back with the knowledge I have now, this is the schedule I would recommend:
- Buy supplies ahead of time
- Day 1: Limewash all of the stone (cover extra limewash and save for touch ups)
- Day 2: Grout the fireplace
- Day 3: Touch ups (nice to step away and come back to this with fresh eyes on day 3)
We originally thought we would tint the grout. I am so thankful we didn’t. Had we hired someone, I would have had them tint the grout close to the stone color. That would have been a big mistake because we love the contrast with the white grout. It works well with our space and millwork.
ONE LAST LOOK
mantel | coffee table | ottomans | tv | chandelier | flameless candles | grid box | stems
What a difference a couple of days can make. I really hope his was helpful. This project takes very little know-how and more diligence than anything else. And it’s not about making it perfect. It’s about creating an overall beautiful look. Crank up the tunes, take your time, and know it’s not a race. The end product will be so worth it. Let me know if you tackle your stone and how it goes.
*See more before photos of our home here (and this room when we moved in).
Is this the same house?-Treatments for Brick and stone • Segreto Finishes
Is this the same house?-Treatments for Brick and stone
Jul 26, 2021
Hi Friends! I hope you are enjoying the summer! Thank you for all your comments on our story on how to transform brick with limewashing!! This week we will see other options for brick and your stone! Whether it is inside or out, plasters, slurries, and limewashes can transform and update without major construction.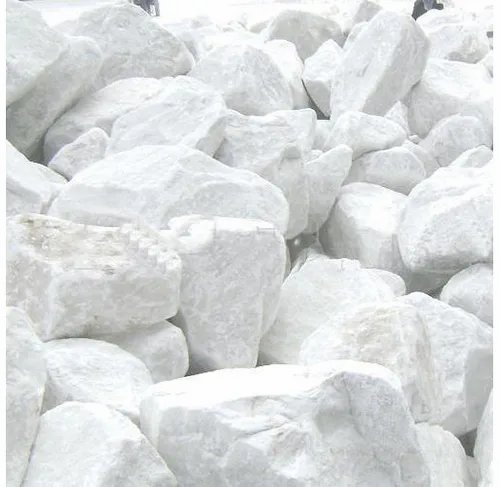
This is a lovely home right down the street from me! I remember watching it go up and thinking how beautiful it was. Well as time goes by so do the trends, in fashion, foods, design, and yes exterior surfaces. The new homeowners, so excited about their house, were lightening up the interiors and wanted the exteriors to reflect its fresh new feel. I was excited to meet my new neighbors, and help them with their family home!!
She had seen a post about an exterior transformation we had done for another home in the area with similar dark stone. Both clients loved the natural stone so they didn’t want to paint it solid, but wanted it in a totally different tone.
The transformation of this home was just what these clients wanted. My new client loved this home’s new softness, but wanted to go lighter, grayer, and more solid!
As you can see in this picture the stucco had already been lightened, which helped, but still was not enough change for the new owners. They wanted to blend the brick, stucco, and stone so they were different textures but the same colorations. I sent her photos of both slurry and limewash exterior brick and stone treatments we had done so she could understand the differences each treatment would lend to the home’s aesthetics.
Here is a beautiful example of a slurry we did over brick. Although you can’t see each brick’s variation it does have movement and changes as moisture is absorbed and released from the brick. She decided she loved the look for the brick and wanted to do a limewash over the stone so it still had a natural stone feel! We had our marching orders and began the color formulations, which on this home with the huge change in color was challenging.
Slurrying over the brick was the right option. I love how the design of the brick stands out more now and lends such a beautiful architectural element. When they were different shades of dark brick the design was barely noticeable. We use an all-natural lime-based product vs a concrete or mortar slurry. In general, lime is a versatile material that has good adhesion, is durable, breathable, and has a low thermal conductivity which means in cool climates it feels warmer than cement and in warm climates, it stays cooler.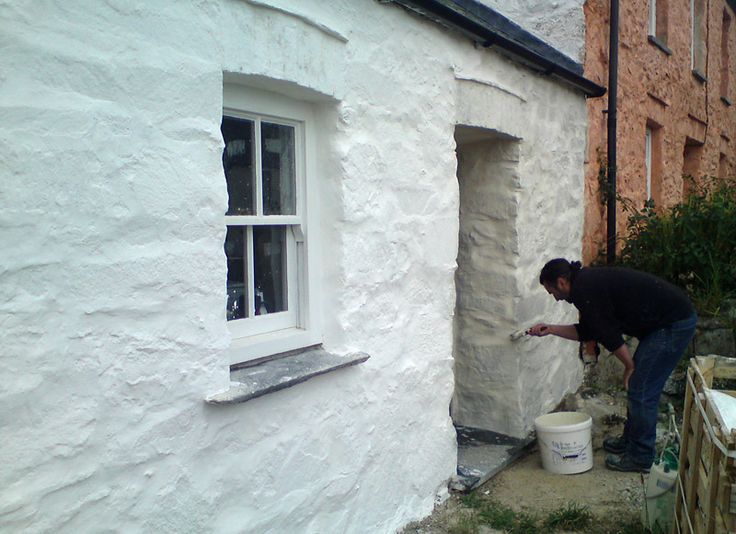
The stone still looks like stone and does not look painted with our limewash treatment which is such a nice textural compliment to the newly slurried brick! Our limewash has no chemical solvents or artificial ingredients. An ancient finish dating back to Roman times, limewash is made from limestone that has been crushed, burned, and mixed with water to make lime putty. The putty is aged, thinned with water, and colored.
Here you can see the combination of all of her newly treated elements-brick, stone, and stucco!! Although over time, lime can decay, because it is more porous than cement, small cracks will happen and can be filled back in by a process called autogenous (or self-healing). Water penetration can dissolve the lime on the wall, filling in the cracks after the water evaporates. Also, as all buildings are subject to movements, lime develops many fine cracks rather than the individual large cracks which occur with a cement mortar or slurry. This allows for old buildings or ones on poor foundations to distort rather than fail completely. LIme is a magical element in building!! It’s why historical buildings have been coated with it for centuries!!
You can see lots of before and after’s in this shot! Stone before to the right and entrance stone is limewashed!! The brick element to the right of the entrance is complete where the second one over and chimney is still the original brown. As the home was taking shape, the homeowners did not care for the carved elements of the old surround or its golden tone. The homeowner called a stone company to see if they could remove the carved elements. They said she would have to replace all of the stone which was not an expense they were willing to incur so she reached out to me for alternative solutions.
My production team was able to remove the carvings for her and repair the stone. Then we mixed a color and applied our process to blend the limestone surround with the newly limewashed stone. What a difference!!!!! This process holds up well in Houston weather and although may need to be touched over time like any exterior paint in Houston, it would be a repair and not a total redo!!
And for the final revel- here is the before. And……………………….
……………the after!!! An entirely different look! Her new lanterns and the front door furthered this home’s new modern feel.
We even limewashed her pots for the finishing touch!
Before:
After!! I can’t tell you how much fun I had working with these so nice homeowners to create their vision for their new home!! It looks as if it has always been this way. We have used many products which are good ones. Wanting a lime slurry product that we could have readily available, tint to any color, with greater durability we have created our own Segreto Slurry!! The best part of my job is the challenge of being better tomorrow than we are today! What surfaces in your home can be transformed rather than replaced to give you the updated look you are wanting?? Til next time. Xo Leslie
Natural stone Limestone Limestone Chirin color, flat, size: 350x160x20
- Description
- Specifications
- Services and services
- Experts
- Questions and answers nine0004
- Reviews
Best offers
Exhibit sample
Click on image to enlarge
Vendor code:
Price for: m2 2 053.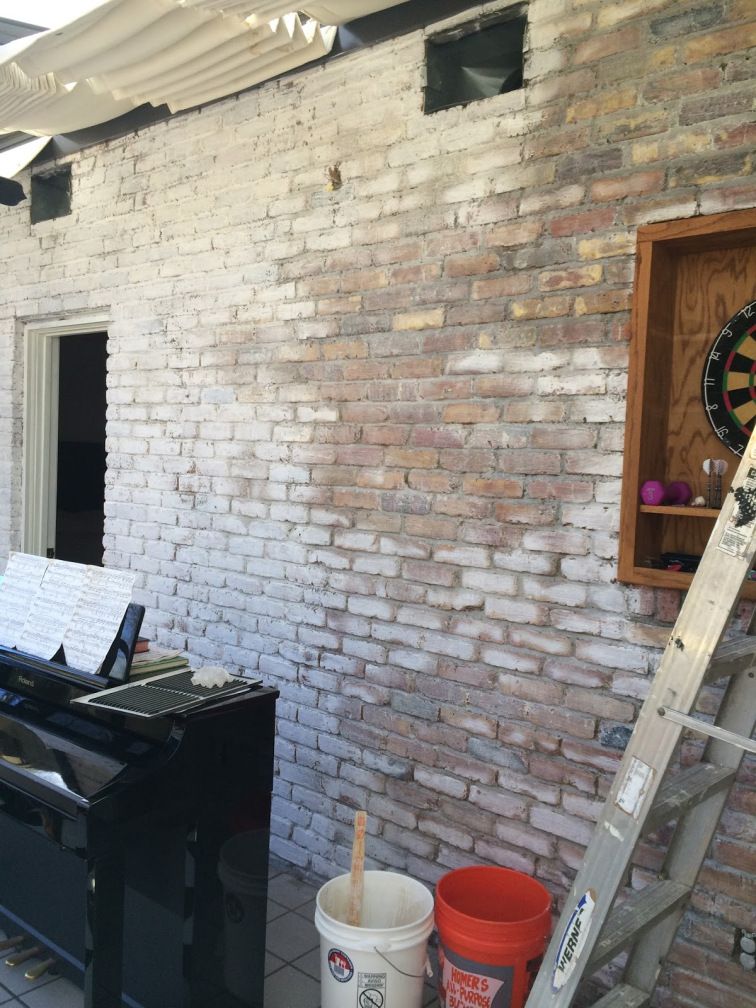 20 ₽ nine0017
Available
Total amount:
--> 2 053.20 ₽
Payment order
CompareIn comparison BookmarkedBookmarked Buy in 1 click In garbage In the basket nine0017
-
Product highlights
-
Evaluate the properties of the product before buying
-
For a comfortable shopping
-
Ask the professionals
-
Answering popular questions
-
What our customers say about
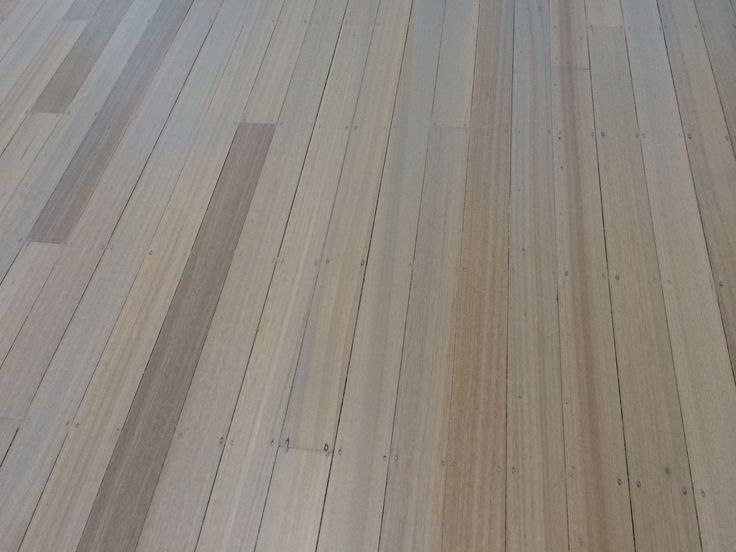
Natural stone Limestone is a durable and environmentally friendly material for house cladding. It does not emit harmful substances, does not burn and does not pollute the environment, and its service life reaches 100 years or more. The stone is produced in the form of a flat tile with a size of 350xx20mm. Limestone has a variegated smooth beige surface. It can be used alone or combined with other facing materials, such as clinker tiles, porcelain stoneware, planken. nine0017
General characteristics ?
Code 1C ? :00-00106633Our offers ? : Best Offers / Sample on display Type ? :Natural stoneArticle ? :H-1Brand ? :Dagestan stone Collection ? :LimestoneProducing country ? : Republic of Dagestan (Russia) Production status ? :produced
Appearance ?
Imitation ? :stone surface type ? : smooth Type of masonry ? : masonry without grouted joint Type of element ? : flat kind of color ? :variegatedTone ? :light color ? :beigeManufacturer color ? :chirinsky
Dimensions and weight?
Length, mm ? :350Height, mm ? :20 Thickness, mm ? :20 Element size, mm ? :350x160x20
Physical properties ?
Type of stone? :Limestone
+
+
+ nine0017
+
+
natural stone Description
Best offers
Exhibit sample
Click on image to enlarge
Vendor code: nine0017
Price for: m2 2 053. 20 ₽
20 ₽
Available
Total amount:
--> 2 053.20 ₽ nine0017
Payment order
CompareIn comparison BookmarkedBookmarked Buy in 1 click In garbage In the basket nine0017
-
Product highlights
-
Evaluate the properties of the product before buying
-
For a comfortable shopping
-
Ask the professionals
-
Answering popular questions
-
What our customers say about
Natural stone Limestone is a durable and environmentally friendly material for house cladding.