Clean grout between tiles
8 Super Effective Methods for Cleaning Grout
Photo: istockphoto.com
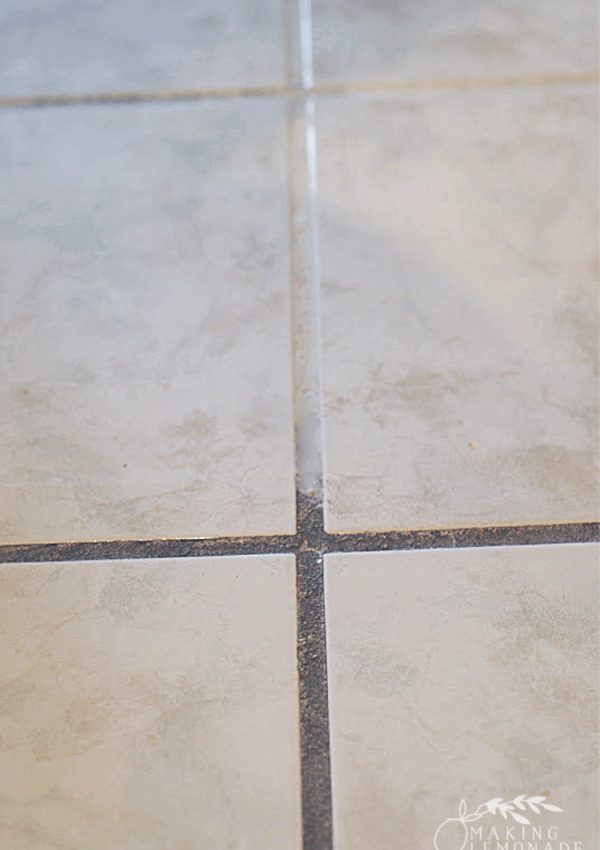
Tile is beautiful, durable, and generally easy to clean, but cleaning grout? That’s a different story. Because it’s typically light-colored and has a porous composition, grout is prone to staining. In a tiled entryway or mudroom, dirt and grime are the usual culprits but in the kitchen, spills are more likely to blame. In the bathroom, homeowners must contend with grout that’s marred by mold and mildew.
The good news is that the best way to clean grout doesn’t come with a big price tag. It’s possible to clean and restore your grout using common household products and of course, a bit of elbow grease.
Before you get started on your grout-cleaning endeavors, understand that it is best to begin with the first cleaning option on this list, which is the mildest, least harmful method. If that doesn’t work, you can work your way up to incrementally more intense, odiferous, and potentially time-consuming options on this list. If you’re in doubt about whether a particular grout cleaner is suitable for your surface, test it in a hidden spot first—under an appliance in the kitchen, say, or behind the toilet in the bathroom.
- Stiff-bristled brush
- Vinegar
- Spray bottle
- Baking soda
- Hydrogen peroxide
- Oxygen bleach
- See full list «
- Grout cleaner
- Chlorine bleach
- Steam mop
There are several types of grout, and most types come in multiple colors. It’s important to take both type and hue into consideration before you start gathering cleaning supplies and making a cleaning plan. The two most common types of grout these days are traditional cement grout and the newer standard, epoxy grout. These grout types can be further broken down as follows:
Advertisement
- Sanded grout.
 Made with cement, sanded grout has grit that you can see and feel when working with it. Tilers use sanded grout in larger joints (more than ⅛ inch wide and up to ⅝ inch or 1 inch, depending on the product). It is a solid choice for heavily trafficked floors, but it’s not the best choice for smooth, polished stone. Why? The grit might scratch these surfaces during grout application.
 - Unsanded grout. Unsanded grout is also made with cement, but it doesn’t contain grit. Tilers use unsanded grout for narrower joints, as small as 1/16 inch wide. This durable material is easier to work with and clean up than sanded grout, and it’s appropriate for both polished stones and vertical surfaces like shower walls. Unsanded grout feels stickier and looks a little smoother than sanded grout.
- Epoxy grout. This type of grout holds up better to water stains and tends to be less vulnerable to shrinking or sagging than cement grouts. Epoxy grout will absorb up to 50 times less water than cement grout, and it’s stronger.
 It works well in harsh environments, such as on kitchen backsplashes and in shower surrounds. It is also easier to clean and more likely to return to its original color than cement grouts, which is a big plus if you’re tiling with white or another light grout color. Epoxy grout is also less prone to cracking. On the downside, however, it’s more expensive than cement grout and takes longer to apply.
Some types of grout are precolored and are as a result better able to resist stains and fading. There are also grout formulations that add polymers to provide helpful features such as moisture and mildew resistance. Finally, as you’re figuring out how best to clean your grout, it’s important to know whether the grout has been sealed, or possibly needs resealing. This might affect both how well the grout holds up and what solutions you can use to clean it.
Advertisement
istockphoto.com
1. Scrub dirty grout using warm water and a medium-bristle brush.If you don’t already have a grout scrubber, most home centers and hardware stores carry a number of products that are specifically designed for the purpose of cleaning tile grout. To avoid damaging the grout, opt for a medium-bristle nylon brush, not a hard steel one. Simply spray warm water on the grout lines and scrub in a circular motion, then let it dry. Don’t use too much water or let it sit on the grout for too long. Remember: Porous cement grouts absorb water, which could lead to mildew.
If you know your grout has been sealed but it has accumulated heavy dirt or mild stains, turn to vinegar, that trusty old household staple. Fill a spray bottle with a half-and-half solution of vinegar and warm water. Spray the mixture on the grout, let it stand for 5 minutes, then scrub the surface with a stiff brush. Avoid using vinegar on unsealed grout.
3. Apply a baking soda paste and then spray with vinegar.Cleaning grout with baking soda will bring even more power to the party. Here’s what to do: Cover grout lines with a paste of baking soda and water, then spray on the vinegar solution listed above (remember, only apply vinegar if the grout has been sealed). Once the mixture stops foaming, scrub with a brush, rinse with plain water, and wipe dry. If the grout is unsealed or needs resealing, apply just the baking soda solution and scrub carefully.
istockphoto.com
4. Pour on some hydrogen peroxide.Moderate stains may require you to use hydrogen peroxide, which is available in most drug stores. You can use the product straight or as part of a homemade grout-cleaning paste of baking soda and hydrogen peroxide. This mixture is typically safe for both sealed and unsealed grout.
Advertisement
5. Apply oxygen bleach and let it stand for up to 15 minutes.For tougher stains on really grimy white grout, use oxygen bleach as a grout cleaner. You’ll find this cleanser is most often sold in powdered form; bestselling brands include OxiClean and Biokleen Oxygen Bleach Plus.
Before using oxygen bleach to clean grout, make sure the room is well ventilated, and then carefully read and follow the manufacturer’s directions for application.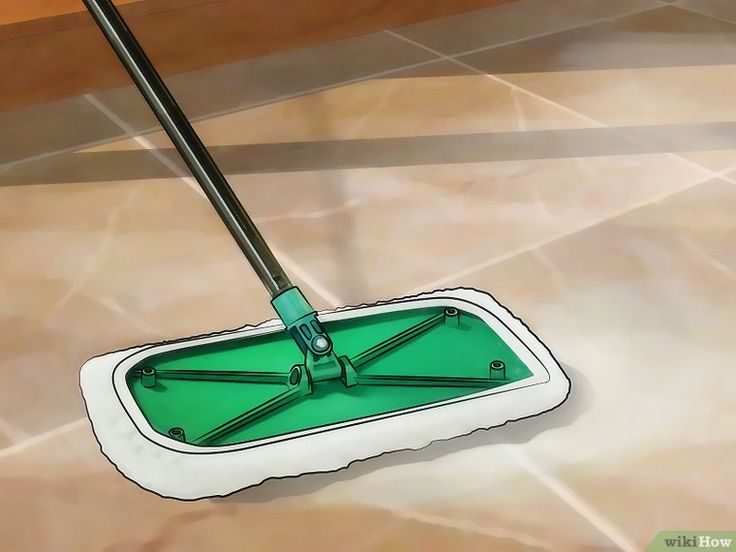 Let the oxygen bleach solution soak in for 10 or 15 minutes before rinsing. Always rinse with clean water and then wipe the area dry so that the dirt doesn’t resettle into the grout lines.
Applying one of the best grout cleaners on the market could make quick work of removing mold and mildew and restoring bright white grout lines. These products work in one of two ways: (1) spray and wipe, or (2) scour with a brush. Spray-on products claim to work without scrubbing. Though they save time and energy, they may contain harsher acids, solvents, or chlorine bleach.
Scouring with a soft brush and cleaner does require a little work, but this method can be especially effective on floors and heavily soiled grout. Before you begin using one of these products, read the active ingredients carefully, and heed the instructions—particularly the safety precautions.
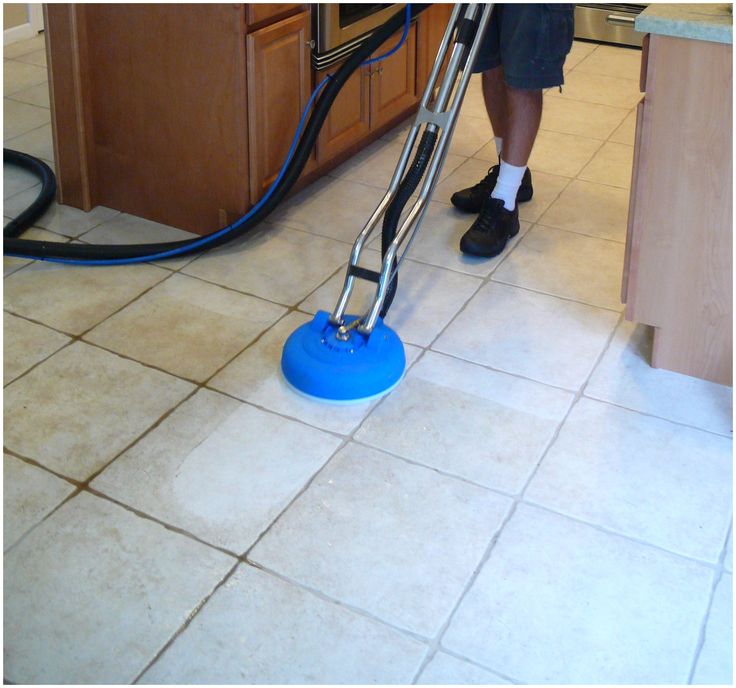
7. Steam-clean the worst of grout stains.The best steam mops are effective and environmentally friendly tools for cleaning grout—or, for that matter, many hard surfaces throughout the house.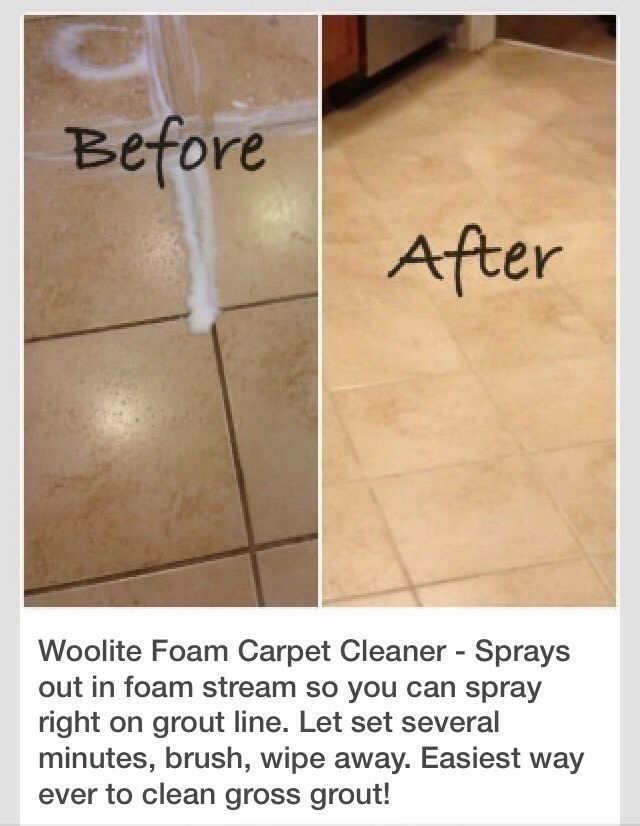 Bissell, Oreck, and Hoover all make steam cleaners for residential use.
istockphoto.com
8. Use chlorine bleach sparingly on grout.Chlorine bleach and commercial cleansers containing chlorine bleach can be used sparingly in extreme cases to clean grout. It’s not a great idea to use them as your go-to grout cleaners because long-term use of caustic cleaners will erode grout. When all else fails, however, a bleach product such as Clorox Clean-Up might be effective.
Advertisement
If you’ve tried any or all of the above methods before you apply chlorine bleach, be sure to rinse the surface completely before proceeding with any chlorine bleach products. This is especially true of vinegar, because traces of vinegar mixed with bleach will emit a highly toxic chlorine gas into the air.
Grout MaintenanceOnce you’re finished cleaning your grout, spray it with household vinegar or a mild grout cleaner and wipe it down once a week to keep it stain-free. Wiping grout with rubbing alcohol will also keep mold and mildew at bay. In any case, just a few spritzes and wipes a week can save you a lot of time and effort cleaning and help you preserve the attractive appearance of your tiled surfaces.
Cleaning grout begins with good prevention, including resealing the grout as needed, cleaning up kitchen spills right away, and using a mild homemade or commercial grout cleaner regularly. Once grout begins to look stained or dingy, refer to the steps above. An important reminder about how to clean grout is to start with the mildest approach because this will be the least likely to damage or discolor grout. If the grout stain persists, move on to progressively more intense methods. Always ensure adequate ventilation and wear rubber or nylon gloves when cleaning grout.
Finally, be sure to keep grout sealed and maintained according to your tiling professional’s or manufacturer’s recommendation, and avoid harsh cleansers or scrubbers if the tile and grout are prone to damage. Keeping grout clean and sealed beats having to paint, repair, or regrout it.
The methods outlined above range from the easiest way to clean grout up to more powerful approaches for more stubborn stains. If you still have questions about maintaining and cleaning tile grout, read on for answers to common concerns.
Advertisement
Q: Does Magic Eraser work on grout?A Magic Eraser and a little warm water can remove residue from the surface of tiles and could be a simple addition to your regular grout-cleaning routine. In particular, regular wiping with a dampened Magic Eraser sponge can remove some of the gray surface on white grout. For heavier stains, you may want to choose it as your first scrubbing option instead of a brush or soft cloth, then progress to something tougher if needed.
Q: Can I use OxiClean to clean grout?Although OxiClean is called “oxygen bleach,” it is actually made of a combination of dry hydrogen peroxide and sodium carbonate, which is similar to baking soda.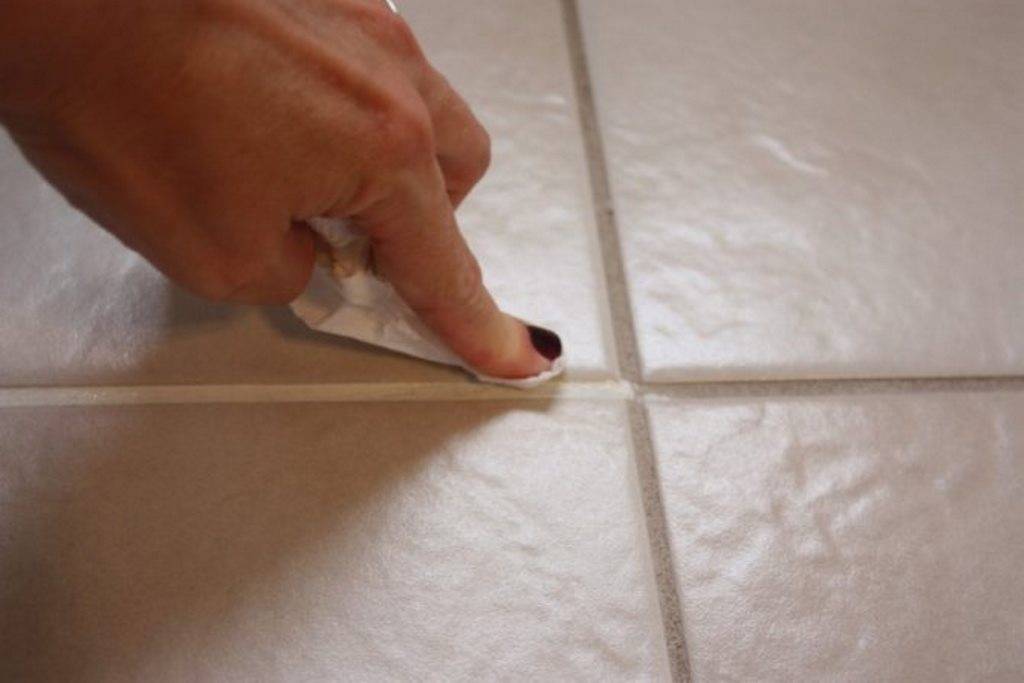 It is less toxic to the environment and more color-safe than bleach.
Powdered OxiClean is safe for use on grout when mixed with water to form a liquid or paste and applied with a cloth, sponge, or grout scrubber. Give the solution from 5 to 30 minutes to sit on the grout before scrubbing away and rinsing.
Q: Can you use steel wool on grout?Do not use steel wool on grout. While the abrasive pad might scrub away the stain, it could also take some of the grout along with it. Plus, steel wool can scratch the tile surrounding the grout joint. Opt instead for a soft sponge or nylon bristle brush, maybe even one mounted on a power scrubber, always starting with the least abrasive material first.
Find trusted local pros for any home project
Find Pros Now
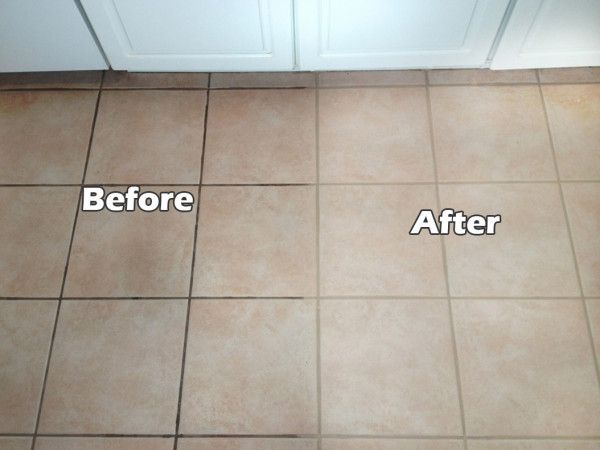
+so lines between tile are good as new |
(Image credit: Jan Baldwin)
Being in the know about how to clean grout is essential whether we’re talking floor or wall tile. The tile itself is easy to keep looking its best, but grout can prove more tricky to deal with.
The issue with grout is that it can be porous and prone to staining. Add to that the fact that in the bathroom particularly the humid atmosphere provides mold with the conditions in which it thrives, so it can speckle grout. Not only does this look ugly, but the spores of this nuisance can be bad for the family’s health.
To restore grout to whiteness, or its alternative original shade, we’ve put together a guide with cleaning tips so you can tackle grout with expert advice from the professionals.
How to clean grout
If you’re asking how to clean grout, the grout in question is likely cementitious grout – something to bear in mind the next time you come to tile a bathroom wall, or indeed one in the kitchen. Epoxy grout is ‘virtually as stainproof as the tile’ according to the Tile Council of North America (TCNA).
These are the methods to use for grout stains. If the grout you are attempting to clean is beyond repair, there is the option to renew the grout completely, in which case you will need to learn how to grout tiles.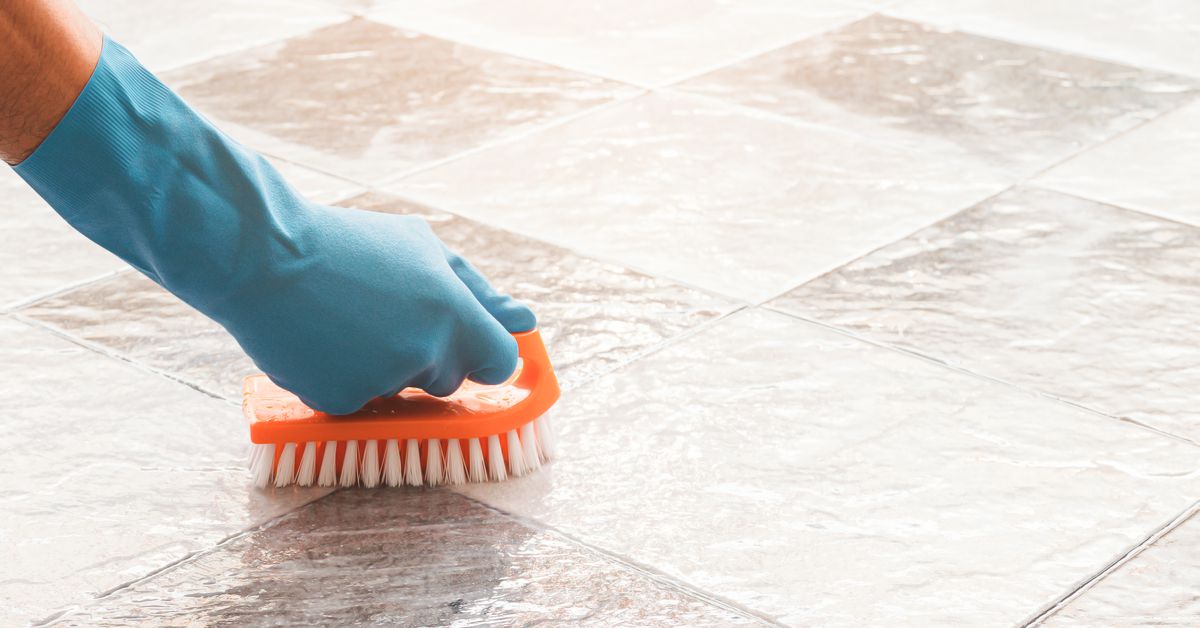
Clean grout as part of cleaning a bathroom – although you won’t need to undertake the task as frequently. You might want to team cleaning grout with cleaning a showerhead, as this is another job that needs doing from time to time rather than weekly.
1. Clean grout with a dish soap solution
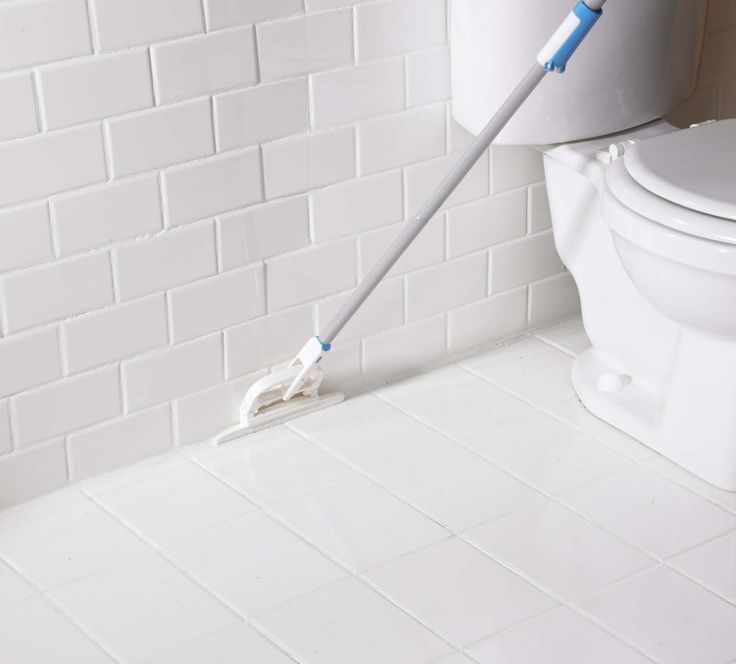
The answer to how to clean grout can be a remarkably simple one. It could be sufficient to clean it along with the tile itself simply using water. However, it may need a little more than this and, if that’s the case, make up a solution of water and dish soap and apply using a microfiber cloth or microfiber mop in the case of floor tile. Remove any residue by wiping with hot water.
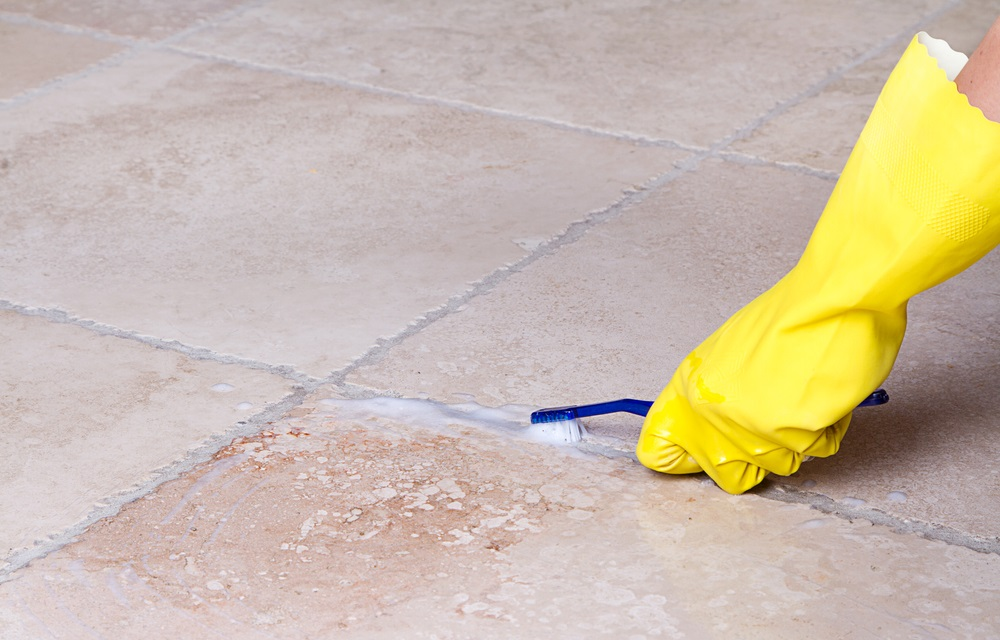
2. Use a brush to scrub grout
If the stains on grout remain, it’s time to put in some work. Dampen the grout with warm water and then use a stiff brush – you can buy grout cleaning brushes on Amazon – to work along the lines to clean the grout. If effort alone is not enough, use an alkaline cleaner combined with the stiff brush or a specialist grout cleaner – we like Grout Eez – plus a brush according to the instructions. Make sure to rinse thoroughly afterwards.
For a less effortful alternative, you might want to take a lead from house rehab specialist Bill Samuel of Blue Ladder Development and get a drill bit brush. ‘This will do a much better job of scrubbing the grout clean than you could ever do by hand,’ he says.
3. Clean floor tile grout with a shop vac
If you’re the owner of a shop vac, this can be a great answer to how to clean grout in floor tile. Apply an alkaline cleaner according to product instructions, then use the shop vac to lift the dirty water, recommends the TCNA. As well as getting rid of the water, the vac will lift the dirt from the grout.
Follow that by rinsing, then use the shop vac again so no soap film is left behind, the experts say.
4. Clean grout with steam
A steam cleaner can be an effective method when the problem is how to clean grout. Steam the grout then it’s a matter of elbow grease once more as you use the stiff brush to lift the dirt from the surface.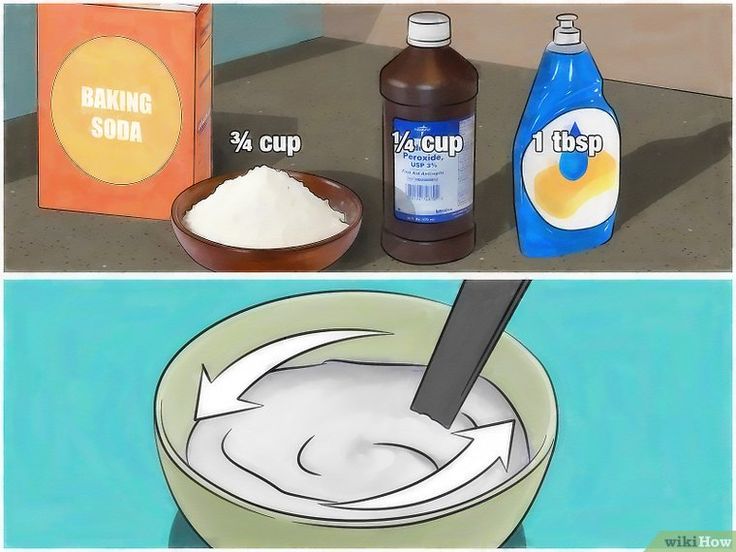
5. Deal with mold on grout
Mold can thrive in the damp conditions of a bathroom and is most often found on grout. If after cleaning the grout as above you’re left with black areas, this is likely to be the culprit. To tackle this, use a specialist mold removing product for grout.
Thinking about using bleach? Be aware that bleach can discolor grout. It can also weaken it over time, so it’s not the answer.
How do professionals clean grout?
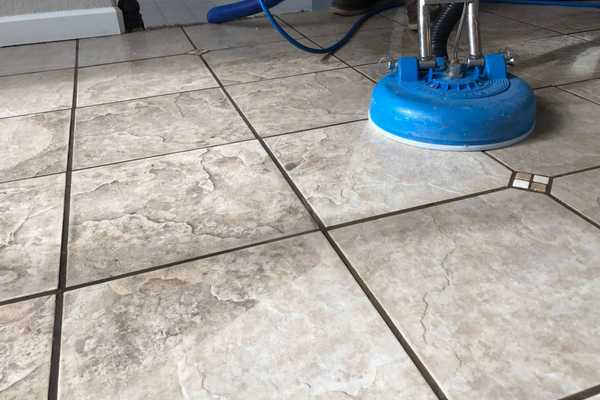
The pros tackle grout with special equipment. ‘We professionally clean grout by first inspecting the grout, then pre-spraying heavily stained areas, and then using a high pressure, hot water cleaning process to remove dirt and ground-in soil,’ says Diana Rodriguez-Zaba, president of cleaning company ServiceMaster Restoration by Zaba .
‘We follow this up with a gentle clean water rinse that also extracts excess water. Once the grout is fully cleaned and dried, we typically apply a sealer to make the grout resistant to spills and stains and easier to clean in the future. ’
’
Wondering if you should call someone in for grout cleaning? ‘Hiring a pro can be helpful when your grout is particularly dirty or when you just don’t have enough time to do it yourself,’ says Bailey Carson, home care expert at Angi . ‘Pros also have access to more specialized cleaning tools, like steam mops, that can clean your floors more deeply than you can when doing it by hand.’
Does vinegar hurt grout?
Cleaning with vinegar isn’t the best choice for grout. The reason is that grout contains cement, which is dissolved by acids, and vinegar is acidic. A strong vinegar solution could therefore be detrimental to the grout – and bear in mind that it can also damage stone tiles.
If you’re using a store-bought cleaner, an alkaline version is what you need – the TCNA suggests products such as Spic and Span or Mr. Clean , or use one of the methods, above. Cleaners to avoid, according to the TCNA, are oil and wax-based versions which leave a film that can attract dirt.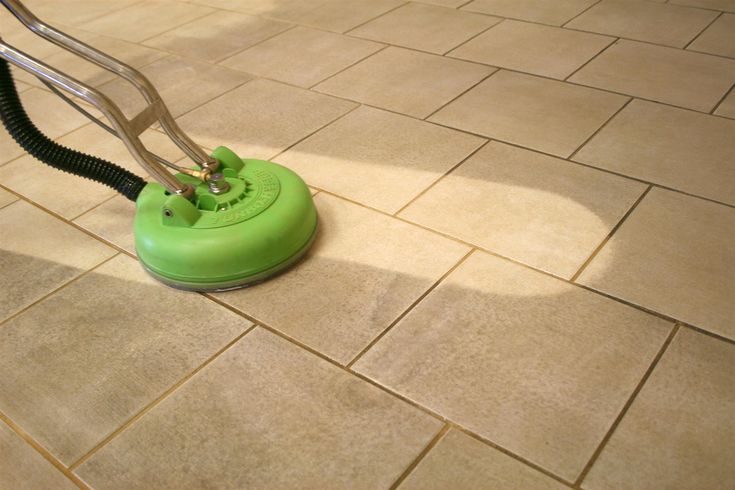
Sarah is a freelance journalist and editor. Previously executive editor of Ideal Home, she’s specialized in interiors, property and gardens for over 20 years, and covers interior design, house design, gardens, and cleaning and organizing a home for H&G. She’s written for websites, including Houzz, Channel 4’s flagship website, 4Homes, and Future’s T3; national newspapers, including The Guardian; and magazines including Future’s Country Homes & Interiors, Homebuilding & Renovating, Period Living, and Style at Home, as well as House Beautiful, Good Homes, Grand Designs, Homes & Antiques, LandLove and The English Home among others. It’s no big surprise that she likes to put what she writes about into practice, and is a serial house renovator.
aesthetic repair technology / How to apply tile grout correctly? / Cersanit
- Preparatory step
- Grout Tools
- Preparation of grout
- Applying grout
- Grout colors
Did you check the grout on the tile before applying it to the joints? This is not talked about in construction blogs, but the final result depends on a simple test.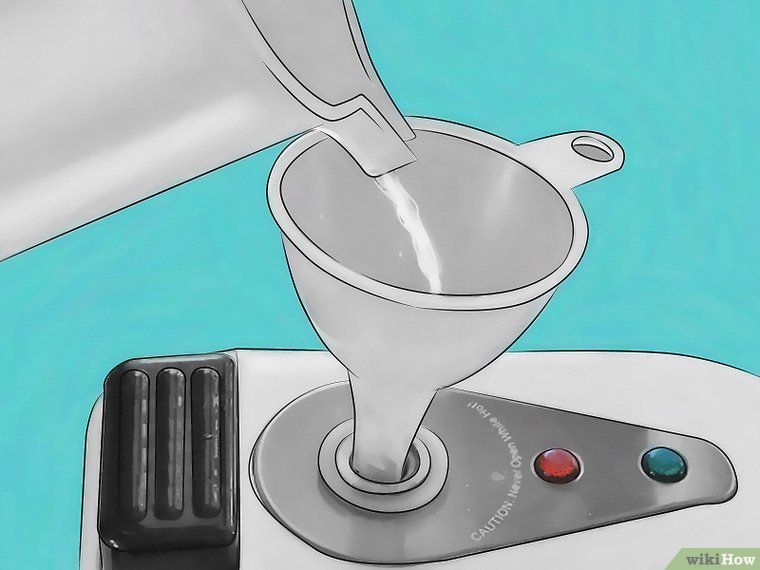 If your finishing material is matte or unglazed tiles, as well as natural or artificial stone, read the material - we will tell you how to work with it correctly. nine0015
Preparatory phase
Grouting is the final stage of finishing work. In order for the seams between tiles of ceramics, glass, porcelain stoneware and mosaics to look good and serve for a long time, special environmental conditions are needed. Thus, work indoors is carried out at temperatures from +5°C to +30°C and at a relative humidity of no higher than 80%. There should be no drafts in the room. Heat must be distributed evenly. If finishing work is carried out on the street, it is better to choose a dry, warm day. Precipitation and direct sunlight should not fall on fresh grout. Wind can also damage the uncured compound. nine0015
For better adhesion of grout to tiles:
-
after installing the tiles, remove the fixing elements,
-
remove excess glue at the joints with a knife, spatula or wooden stick,
-
brush off the dust in the gaps with a brush,
-
vacuum, wash and dry the tiles, nine0015
- both the tile and its base and the tile adhesive must be perfectly dry.
If you are working with ceramic tiles and two-component mixtures, the adhesion will be higher when you wet the ends of the tiles a little. To avoid scratching the cladding when removing the adhesive, use a wooden stick, not a sharp blade. If the surface is porous, the joints should be pasted over with masking tape on both sides so that the grout does not clog into the pores and stains do not remain. Grout the seams should be no earlier than 8-24 hours after laying the tiles. The drying time of the adhesive is indicated on the product packaging. nine0015
Grout tools
Jointing - this is how builders call the process of grouting. At all its stages, certain tools are needed. So, to prepare the solution, use a drill with a nozzle or a construction mixer.
Rubber spatulas fill the gaps, while hard rubber is chosen for epoxy compounds. To prepare the solution, you need a clean container. Intertile seams are cleaned with a paint brush, a knife, a special solvent.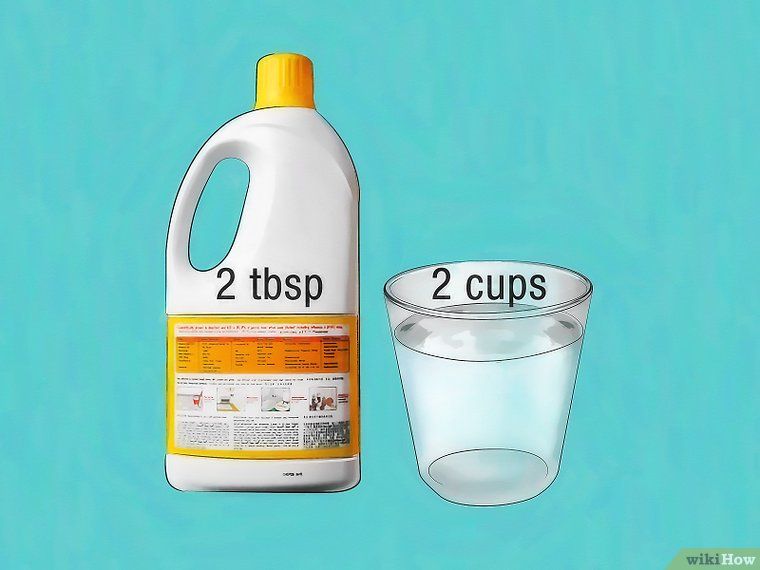 Two-component epoxy-based formulations are applied with a foam sponge. nine0015
Grout compositions are chemicals, so you need to work with them with gloves, you should protect your respiratory organs with a mask or respirator. Excess grout is removed with a dry cotton or cotton cloth.
Preparation of grout
Grouts are of different types:
-
Cement contain Portland cement, additives, fine sand, polymers. Such solutions are used for the final treatment of tiled surfaces in living rooms, bedrooms. nine0015
-
Epoxy two-component grouts are made from resin and hardener-catalyst. The paste can be used for no more than 1 hour, so you need to work with it quickly.
-
Polyurethane solutions are in the form of an aqueous dispersion. These sealants are similar in quality and properties to epoxy grouts, but they do not rub over joints larger than 6 mm.
-
Silicone grouts are suitable for fine work.
 The material does not allow moisture and air to pass through, fits well and does not require time-consuming cleaning at the end of work. However, silicone is destroyed by chlorine, so you need to wash it with special products. nine0015
 -
Latex is used as an additive to cement mixtures or as a finishing coating for joints. It provides durability and waterproof seams.
Composition. For the preparation of grouts, a certain amount of water is used, which the manufacturer indicates on the package. The grout may lose its properties if the recommended proportions are violated. To prepare the solution, water without impurities with a temperature of +15°C to +20°C is used. nine0015
Kneading. Water should be added to the dry mixture gradually, mixing the solution with a mixer and achieving a homogeneous mass without lumps. You can also knead the composition with a drill with a nozzle at 400–800 rpm. In order for the mixture to ripen, it must be kept for 5 minutes and mixed again.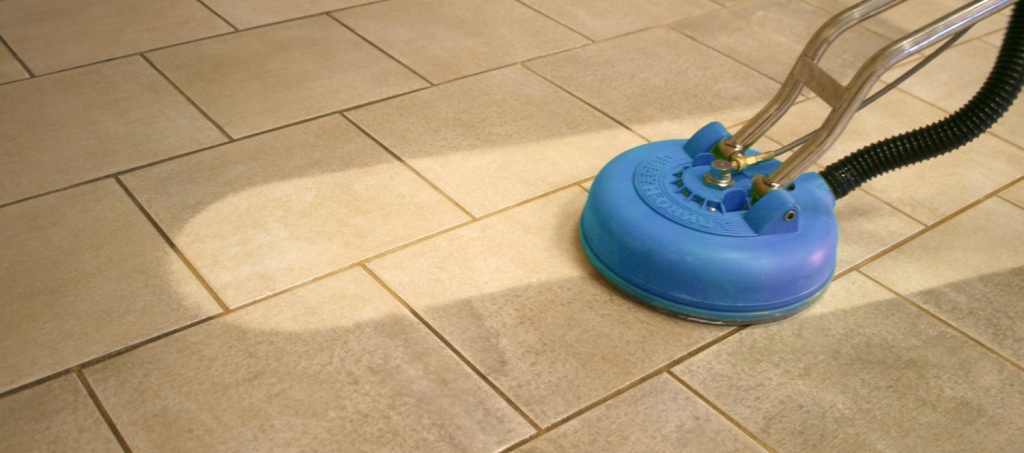
Holding time. The shelf life of the prepared mortar is limited: cement mixtures can be used within 12-24 hours, and epoxy compounds are stored for 45-60 minutes. Therefore, 1-2 squares of tiles are rubbed at the same time, removing excess mass. nine0015
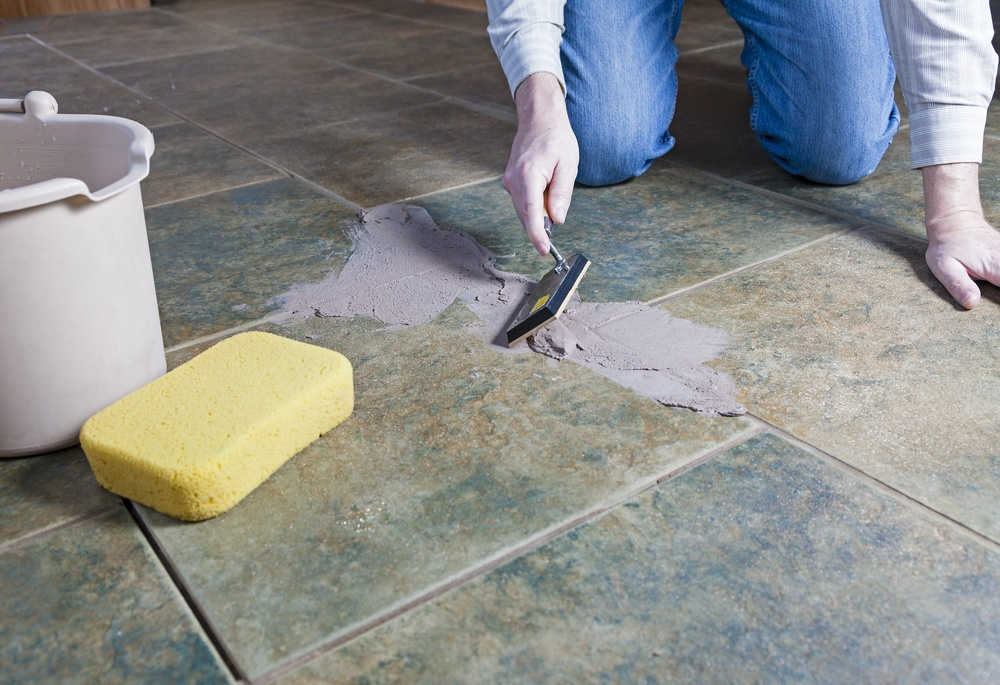
Applying grout
Before you start jointing matte or unglazed tiles, natural or artificial stone, you should make a test. A composition is applied to a small area of \u200b\u200bthe tile to check its properties and adhesion to the material. In addition, you need to understand whether it will be easy to peel off the finishing material, whether it will damage it and whether it will fill the pores. From glossy surfaces, the grout is erased well, and the grout can stain matte and rough surfaces. nine0015
When all materials and compositions have been tested, you can start jointing.
-
The seams are carefully filled with grout using a rubber spatula.
-
Surplus is collected with the same tool, moving it diagonally to the seams.
-
The thickened grout (after 15 minutes) is gently wiped with a slightly damp, well-wrung sponge, forming a seam. The sponge is often rinsed. nine0015
-
Previously, prolonged and intense smoothing can excessively moisten the seam, and then the grout will wash out and its color will change.
-
The dried plaque is removed with a dry soft cloth no later than the period indicated by the manufacturer on the grout package. If you do not wait the prescribed time, you can stain the tile or even damage it.
-
At the end of the work, early contact of the grout joints with water and cleaning the tiles with detergents are unacceptable. The manufacturer prescribes in the instructions when it will be possible to wash the surface. nine0015
Grout colors
The color of the grout is selected either to match the tile or contrast. The mixture should be one tone lighter or darker, but close to the color of the tile, so that the seams are not too bright and intrusive.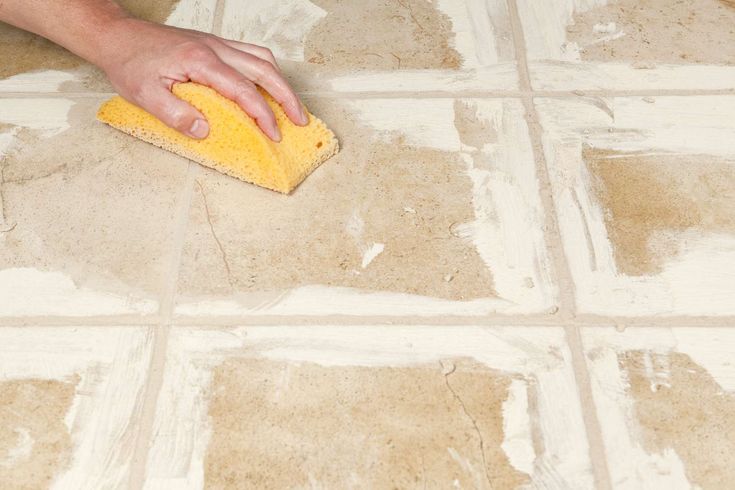 The exception is a design idea, for example, a light green mosaic on the wall in combination with dazzling white seams.
White grouts are impractical. Even after sealing the seams, dirt quickly accumulates in them, which can be difficult to remove. So, for example, in the kitchen, oil deposits often form at the joints and white joints turn yellow over time. nine0015
In order for the color of the grout to meet expectations, a test is made. Dry cement compositions become lighter, so color is often added to the batch to obtain the desired shade. Epoxy grouts usually do not change color when dried, moreover, they retain their original appearance for a long time.
Today, everything is shiny. Pay attention to the gold and bronze compositions, add sparkles to the solution and play with contrasts. If you do everything right, the result will please for many years! nine0015
How to grout tiles, how to grout floor tiles with your own hands
System products
Published: 27-06-2016
Reading time: 13 minutes
Reads: 56996
Rating:
No time to read?
Contents:
- Why is grouting necessary?
- How to choose grout for joints nine0004
- What materials and tools will be needed?
- How to prepare seams for grouting?
- Preparing the composition for work
- How to work with composition
- Tool cleaning
- What to look for when working with epoxy
Laying tiles in rooms and with external cladding should be completed with grouting of tile joints.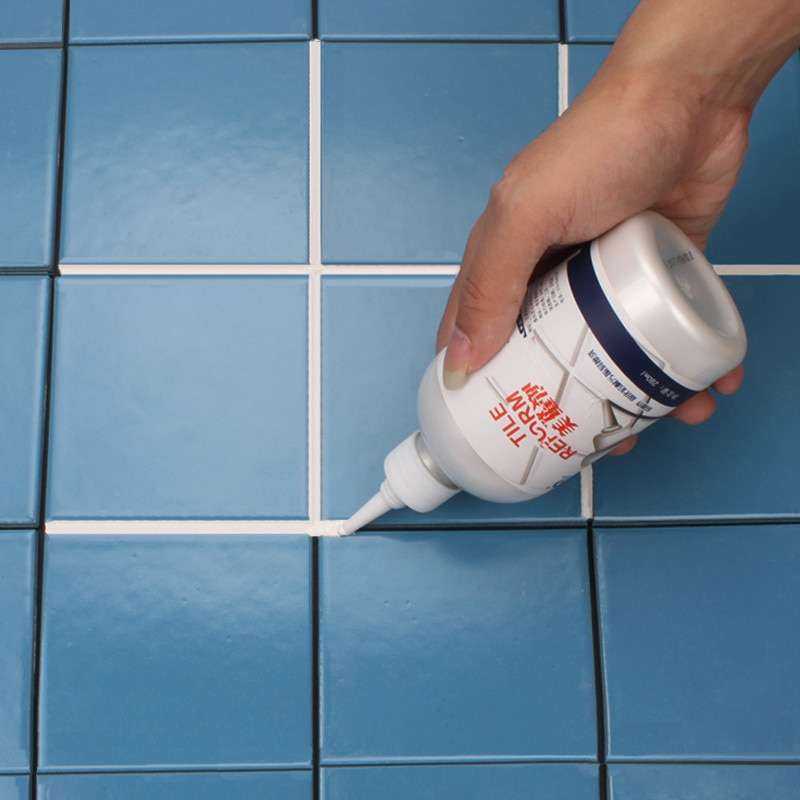 We will tell you how to grout tiles, what materials to choose for this and what mistakes to avoid. nine0015
Why is grouting necessary?
DIY tile grouting
-
tile grouting works like a sealant: it does not allow moisture to pass under the tile, prevents the appearance of fungus and mold in the joints;
-
seam processing helps to hide small differences in their width and other minor defects - chips, dents on the tile, etc.;
- nine0014 grouting tiles on the floor and walls fills the remaining voids in the seams. This ensures a longer service life of the tile coating;
-
ceramic tile grouting is a decorative element that emphasizes the geometry of the tile and sets off its color.
How to choose your grout
Tile grout must meet a number of requirements:
- Composition . According to their composition, grouts for ceramic tiles are divided into cement and epoxy.
 Dry cement mixes are affordable, but not durable, subject to washout and mold on the surface. Epoxy grouts are more expensive in price, but they are durable, impermeable to water and mold, do not wash out of the joint, but require certain recommendations for application.
 - Water resistance . This requirement must be met not only by grout for the bathroom. Most often, tiles are installed in rooms that are somehow exposed to moisture. Therefore, we always recommend choosing moisture-resistant grout for tile joints in the bathroom, pool, kitchen and hallway, epoxy grout is such a versatile compound.
- Weather resistance . If you are looking for an outdoor grout, consider whether the mix you choose is frost and UV resistant. nine0004
- Protective properties - antibacterial, antifungal. High-quality mixtures contain special additives that prevent the growth of bacteria.
If you prefer to choose only high-quality materials for your home or work, look to the Sika brand. We guarantee the highest quality of Sika materials, their durability, ease of use and economical consumption.
For grouting, Sika offers epoxy SikaCeram®-815 EG . They consist of epoxy resin, fine filler and pigment. Once cured, SikaCeram® is waterproof, making it suitable for use in swimming pools and tanks in constant contact with water, as well as for kitchens and wet areas, the joint surface is not susceptible to mold or mildew, and is easily cleaned with household detergents. The composition has high hardness and wear resistance, and fungicidal additives prevent the development of bacteria, mold and fungus. nine0015
SikaCeram®-815 EG Grout - universal composition:
- it is suitable for tiles, marble, glass mosaic;
- is designed for outdoor and indoor use and can be used even in the most humid areas - for grouting in the bathroom and swimming pool;
- can be used for joint widths from 1 to 15 mm;
- has a rich palette of colors - more than 40 shades.
For additional waterproofing of tile joints in wall corners, junctions between sanitary ware and walls, joints between mosaic parts, we additionally recommend using silicone sealant for joints. Such a sealant can be used indoors and outdoors: at any operating temperature, it provides reliable sealing of joints. nine0015
What materials and tools will be needed?
For grouting tiles with your own hands, you need:
-
figured spatula for cleaning seams;
-
grout for tiles in the bathroom and other rooms. It must be diluted with water in the ratio indicated on the package to the consistency of thick sour cream;
-
rubber spatula for filling joints with grout; nine0015
-
a round rubber spatula or a piece of cable for smoothing seams;
-
water and a sponge for wetting the joints and washing off excess grout from the tiles.
How to prepare joints for grouting?
- The tile adhesive must be strong and dry.
- Tiles and grouts must be cleaned of adhesive residue, dust and any other contaminants. nine0004
- Joints and tiles must be clean and dry before starting work.
Preparing the composition for work
Thoroughly mix the hardener (comp. B) until a uniform color (during long-term storage, partial precipitation of the pigment is possible, this is normal and does not affect the final properties of the material) and add it to the container with the paste (comp. A) . Mix the components with a spatula or low-speed power tool with a suitable attachment until a homogeneous mass is obtained. To avoid heating and accelerated curing of the composition, mixing should be carried out at a speed of no more than 400 rpm. No unmixed components should remain on the walls and bottom of the container. nine0015
When preparing the composition in several portions, the mixing ratio of the components must be observed.
If these proportions are not respected, it is possible to change the curing time of the grout up to the complete absence of final hardening, as well as color deviations from the sample or between mixed portions.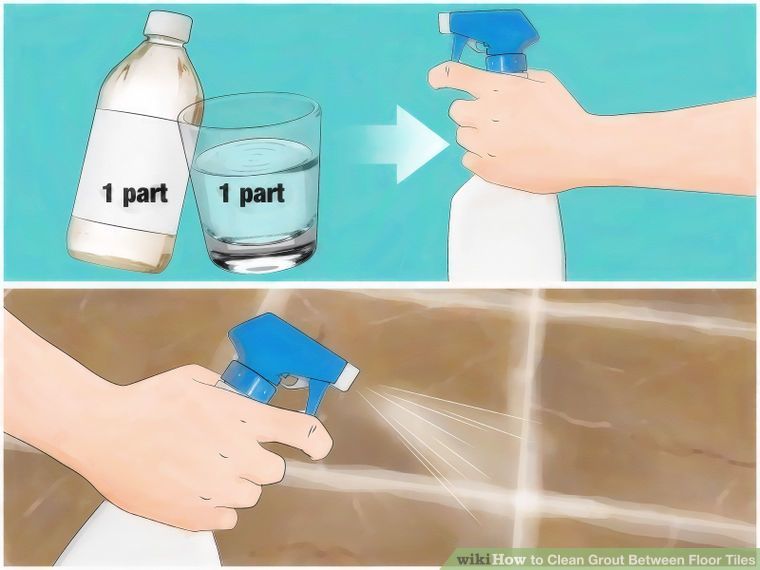
When using metalized filler (comp. C), add it to the already prepared grout (A + B) and repeat the mixing procedure described above. nine0015
The working time (working time) is counted from the moment the hardener is added to the paste and is approximately 60 minutes at a temperature of +23 °C.
How to work with the compound
Filling the joints
Fill the joints with the compound using a special rubber spatula, moving diagonally to the joint. The seams must be filled with the composition to the full depth, without gaps and irregularities. Remove excess composition from the surface of the cladding with the same tool. nine0015
Tile bonding
Use as an adhesive for thin mosaics (less than 5mm thick) to reduce cleaning and grouting effort and reduce overall material consumption.
Cleaning of the cladding
Clean the cladding from excess compound before it hardens, no later than 60 minutes from the moment of its preparation, using a combined cellulose sponge soaked in water.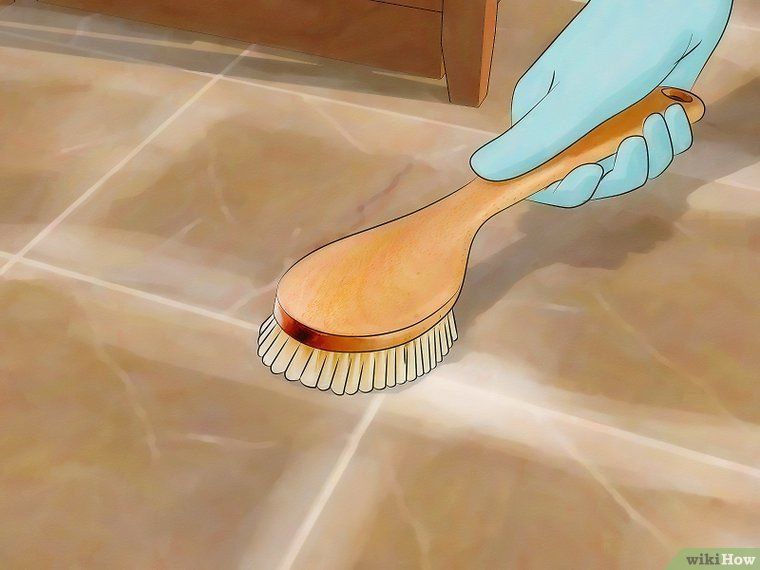 nine0015
Remove the bulk of the dirt with a sponge layer. Removal of grout residues and the final formation of joints should be carried out with a cellulose layer of a sponge, making neat circular movements without washing the composition out of the joints. The sponge should be rinsed as often as possible in clean water.
When working with mosaics, the removal of residues can be started immediately after filling the joints with grout. When working with ceramic tiles and porcelain stoneware, for better formation of the joint, start removing residues approximately 30-40 minutes after mixing the mixture at a temperature of +23°C. An increase in temperature shortens the polymerization time of the composition. nine0015
Foam rubber is not resistant to epoxy resin and over time the sponge becomes unusable and dirty. On average, one sponge is enough to clean 10 m of 2 cladding.
If light traces of grout or clear epoxy film remain on the surface after cleaning, these should be removed with SikaCeram®-958 EC Cleaner. The optimal time range for using the cleaner is from 4 to 12 hours from the moment the composition is prepared. After 2-3 minutes after applying the cleaner, it must be completely washed off with warm soapy water. If necessary, the cleaning procedure can be repeated. More information on the use of SikaCeram®-9 Cleaner58 EC is given in the corresponding data sheet.
When using SikaCeram®-815 EG Epoxy Grout on mosaic, tile, stone or porcelain stoneware with a matt and/or rough surface, the use of SikaCeram®-958 Cleaner Concentrate is mandatory to remove cellulose film! When working with such a surface, it is recommended to apply the cleaner no later than 2 hours from the moment the grout is prepared. SikaCeram®-9 Cleaner58 Concentrate dilute the concentrate with water in a ratio of 1:1 (add 1 part of water to 1 part of the wash) or, in particularly difficult cases, use undiluted .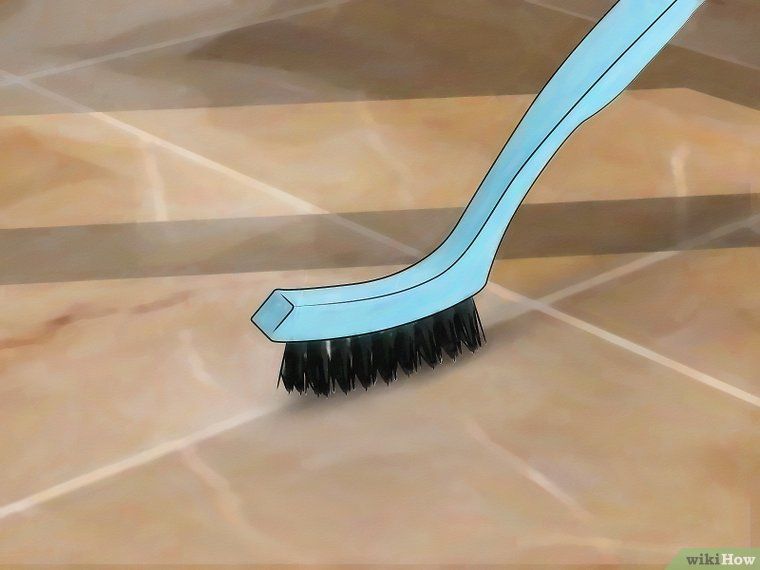
Cleaning of tools
Clean all tools and equipment with warm water or SikaCeram®-958 EC immediately after use. The hardened composition can be removed mechanically by preheating it with a building hair dryer.
Things to watch out for when working with epoxy
- Before applying the mortar, you should read the recommendations of the manufacturer of the facing material and make sure that it can be cleaned from epoxy grout residues. Some types of unglazed tiles, natural stone and porcelain stoneware have a highly absorbent, porous or rough surface. These types of tiles are subject to staining and their cleaning is very difficult or impossible. Even with thorough cleaning of such materials, epoxy grout can create a wet stone effect on them. When working with these materials, it is necessary to carry out tests on their cleaning and avoid the use of grout in contrasting colors. nine0004
- Do not dilute with water or solvents.
- Exterior SikaCeram®-815 EG Chameleon is not recommended as it tends to yellow slightly when exposed to UV light.
 Pigments added to other colors of the composition contain special additives that prevent its color from changing.
 - Due to the high light transmission of the filler, SikaCeram®-815 EG in color "Chameleon" slightly changes its color depending on the color of the ends of the tile.
- Differences in grout shades between batches are acceptable. To avoid discrepancy, it is recommended to use composition kits from the same batch.
- The color of the cured compound may differ from the color representation on the monitor screen, printed materials and labels on the packaging.
- To increase the pot life of the grout, its components may be cooled down (to a temperature not lower than +12 °C). After preparation, the composition can be divided into several portions. It should be borne in mind that when the composition is cooled, its viscosity increases. nine0004
- If the formulation is stored at low temperature, it should be kept at room temperature for 24 hours before use.
Learn more