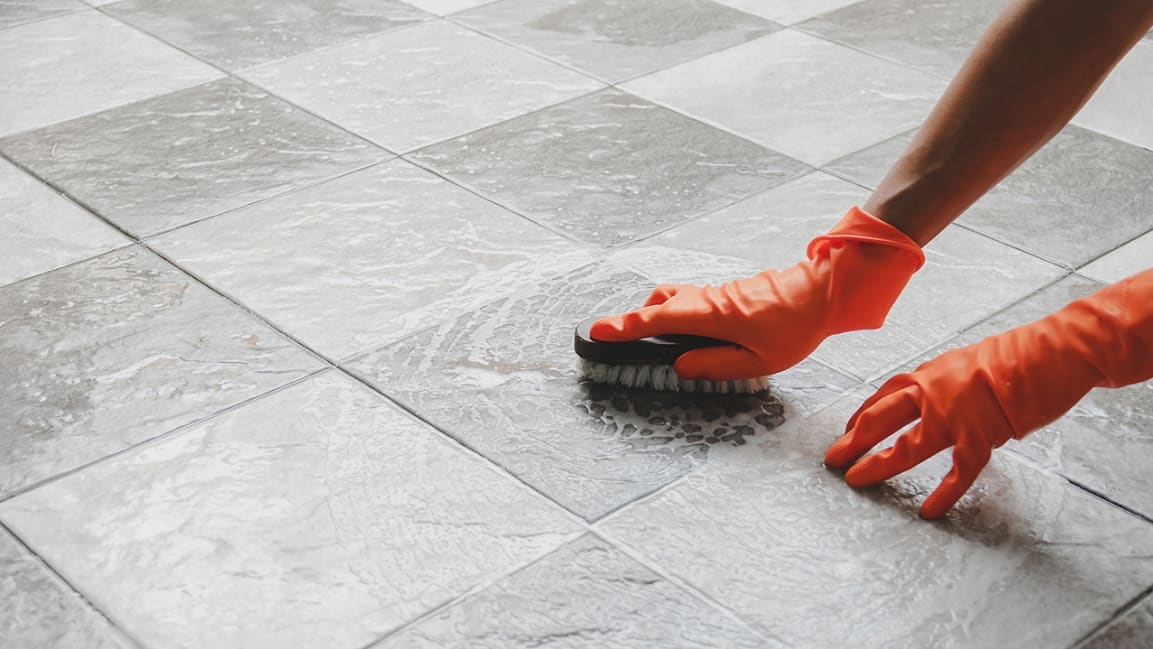
How to clean flagstone floors
How To Clean Flag Stone Correclty: Simple Guide
Flagstone pavers make popular floors, patios, fireplaces, and pool surrounds. When it comes to maintenance, however, many homeowners are unaware of the best ways to clean their flagstone pavers.
If you are looking for an easy guide that explains how to clean your flagstone patio, fireplace, or other flagstone surfaces, continue reading or contact New Life Rockeries today for additional guidance.
Table of Contents
How To Clean Flagstone Patio
Thankfully, flagstone patios aren’t very difficult to clean or maintain. With a few basic household items and half an hour of time to spare, your flagstone patio should be guest-ready.
Here is our simple guide for how to clean your flagstone patio. If you’re wondering how to clean flagstone fireplace or pool pavers, the same method works for those surfaces as well.
How To Clean Flagstone Pavers
Here are the basic three tools you need to clean your flagstone patio:
- A bucket
- Scrub brush
- Dish soap
Steps for cleaning your flagstone patio:
- Put a tablespoon or two of dish soap into your bucket.
- Fill your bucket with warm water — make sure that the soap has dissolved and is sudsy in the bucket.
- Dunk your scrub brush in your cleaning solution.
- Scrub your flagstones until you’ve done the entire patio.
Tip: if there are stubborn stains on your flagstone patio, you can use ammonia mixed with water to clean them away.
How To Clean Mold From Your Flagstone Patio or Pool Surround
If you are dealing with mold growth on your flagstone patio, here are the tools you will need to get rid of it:
- Vinegar (white vinegar works best)
- Scrub brush
Steps for how to clean mold from your flagstone patio:
- Cover your flagstone patio with white vinegar.
- Allow the vinegar to sit on the flagstones for a couple of minutes.
- Rinse the vinegar from your flagstone patio.
- Use your scrub brush to clean your flagstone patio.
Tips For How To Clean Flagstone Floor & Other Flagstone Surfaces
Here are three helpful tips for cleaning flagstone surfaces:
- Avoid harsh cleaners as they can damage your flagstone.
- Use ammonia safely, avoiding letting it touch your skin.
- Sweep your flagstone patio frequently. This will prevent leaves and other debris from staining your patio.
- Lastly, if you’d prefer not to do the flagstone cleaning yourself, hire a landscape maintenance company to do it for you. Rather than allowing an unmaintained patio to stress you out, hire a maintenance team to come clean it.
Flagstone Maintenance & Installation Services
Has the state of your flagstone patio been bothering you lately? If you are tired of the ill-maintained aesthetic your flagstone is emitting and you want a professional maintenance team to clean it up and get it into tip-top shape, give New Life Rockeries a call.
Our landscape maintenance team has experience maintaining flagstone patios and we’d like to use our skills to bring beauty to your outdoor space.
In addition to flagstone maintenance services, our team is able to install gorgeous flagstone patios as well.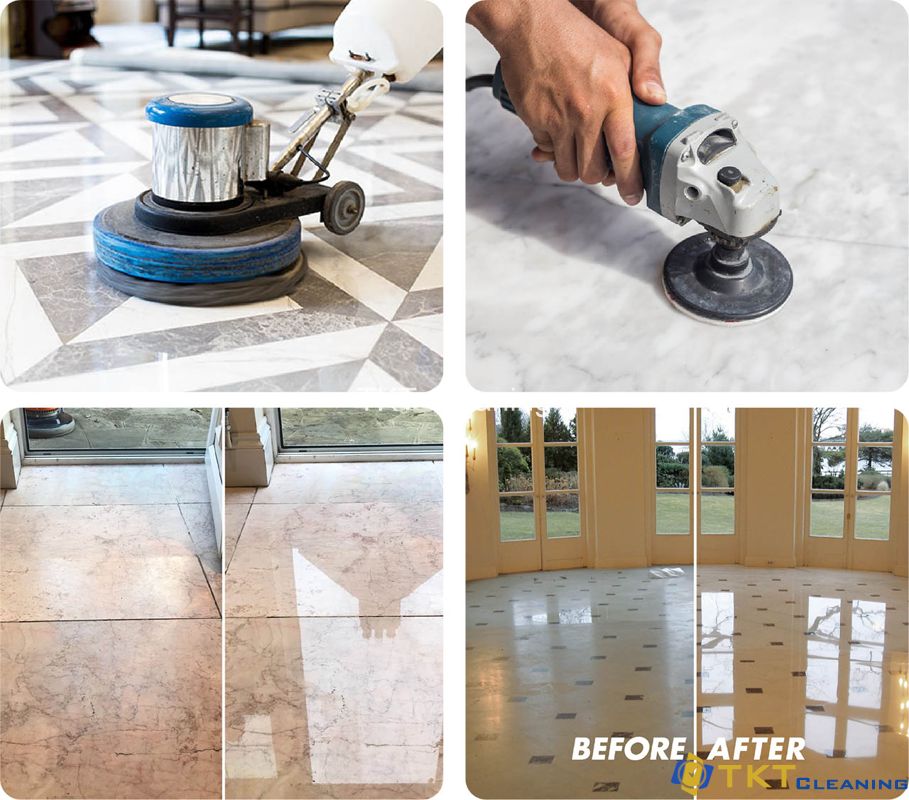 We’d be more than happy to discuss your project and create a customized quote for installing your flagstone patio — just give us a call to get started.
How to clean stone floors – the best methods for flagstones, limestone and marble tiles
(Image credit: Jody Stewart)
Look after stone floors and they will repay you – and your successors – with years, even centuries, of good service. Knowing the best way to clean stone floors will keep them in good condition, and prevent them becoming damaged or stained.
Whether you are cleaning an original flagstone floor that's hundreds of years old, or maintaining a newly laid stone floor, it’s good to know which techniques and products to use along with all the cleaning tips necessary for stone floors.
With a regular, gentle cleaning routine, there is less chance of stains and marks seeping into the stone, and causing permanent damage, and of dusty grit and sand scouring the stone surface.
Roger Hunt, author of Old House Handbook, urges caution before you start.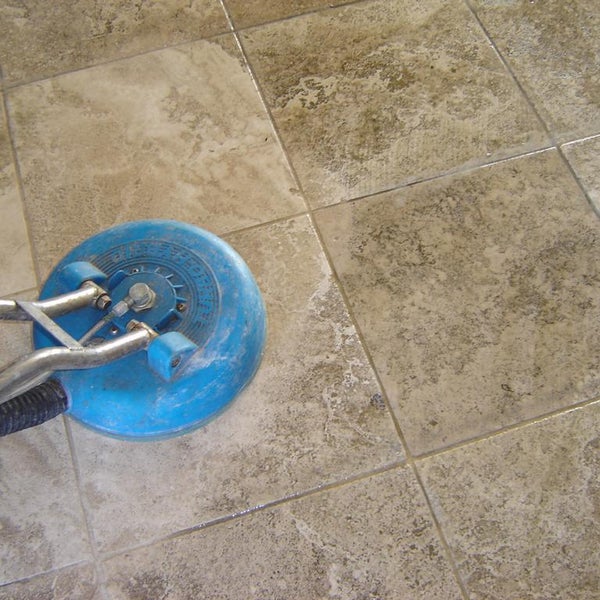 'Think carefully before renovating an old stone floor. Stone floors may move, crack and become uneven, but they invariably benefit from the patina of age. All these characteristics are easily lost if the floor is lifted and relaid or inappropriately cleaned.'
(Image credit: Malcolm Menzies)
How to clean old stone floors
If yours is an old stone floor, Bryan Williamson, of restoration builders Bryan Williamson & Daughters , has some important advice. ‘Avoid over-cleaning it as this will destroy the patina of age which gives the floor its character. If necessary, work gently using a non-acidic cleaner, such as washing soda, a soft scrubbing brush or mop and clean water, but never soak the floor.'
Whatever you're using, it's important to test clean a small area of stone first. Take particular care if you're going to clean marble. As Bryan Williamson says, 'It stains easily and can be damaged even by water. Brush or vacuum off salt efflorescence; never use water. '
'
Prevention is far better than cure when you're cleaning old stone floors. Adopt the same tactics you would for cleaning hardwood floors and cleaning encaustic tiles when you consider hallway ideas. 'Fit doormats at entrances to trap dirt and frequently shake them out. Also fit pads under metal objects in contact with the floor to prevent rust staining,' he adds.
Roger Hunt's key tips for cleaning old stone floors are equally valid for new and old stone floors – as well as for cleaning tile floors in general.
- Wipe up spills promptly.
- Carefully clean off inappropriate marks and staining.
- Sweep the floor regularly.
How to prepare stone floors for cleaning
The first stage of cleaning a stone floor is to dry clean the surface to remove any loose dust, sand or grit. Most stone surfaces can be brushed with a soft brush, or gently vacuumed with the correct hard floor attachment.
You'll need to make sure the vacuum cleaner itself is in good condition and that there is no risk of the stone floor being damaged by worn, rough-edged wheels and attachments.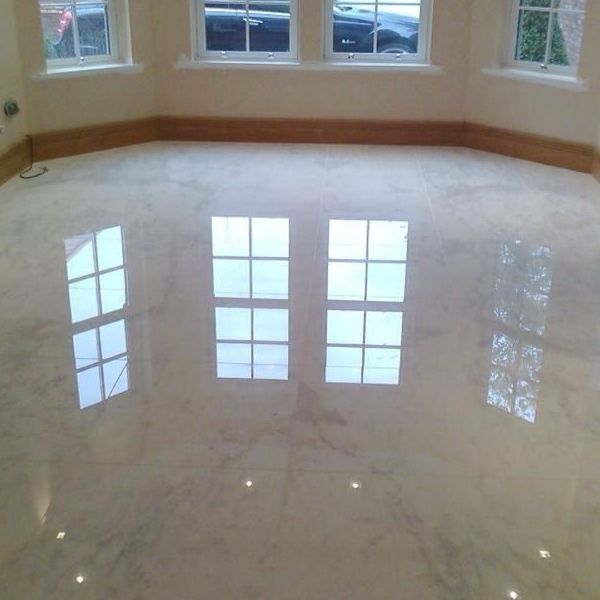 In fact, the experts at Beswick Stone advise against vacuuming if the floor is made of dark stone or slate. 'Scratches will be much more visible and worn out vacuum heads can cause lots of damage,' they say.
Once you've banished dust and grit you can move to the next stage of cleaning your stone floor.
(Image credit: Artisans of Devizes)
How to clean grease and dirt from stone floors
Mike Morris, supply chain manager for Liberon , the wood and floor care experts, has the following advice on removing built-up layers of dirt and grease from stone floors. 'Avoid general, all-purpose floor cleaners. Instead, choose an easy to use, specialist, water-based product that is suitable for use on either sealed or unsealed stone.
'Dilute with warm water according to the manufacturer's instructions. It is fine to use a floor mop or sponge, rubbing more vigorously over dirty areas.
Allow the product to work on the surface for 10-15 minutes then rinse several times with clean warm water and allow to dry thoroughly.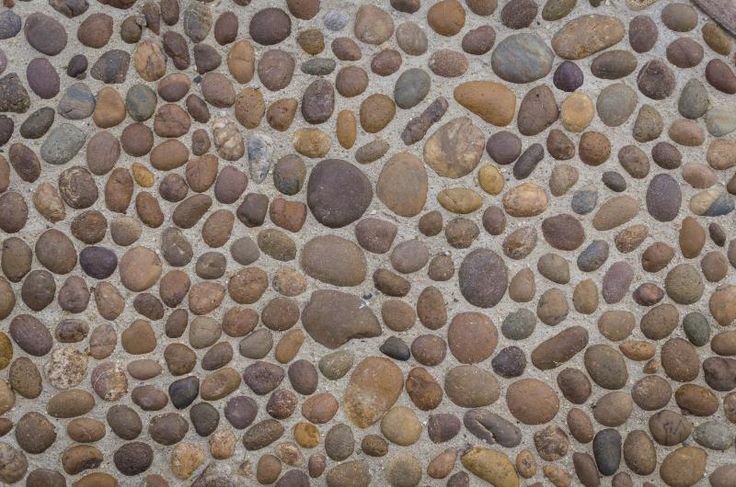 '
'
How to remove stains from stone floors
(Image credit: Original Style)
Removing wine stains and removing coffee stains from flooring needn’t be hard work. But when it comes to removing stains from a stone floor, first check with your flooring supplier for product-specific advice.
'If you have a stubborn stain to remove,' says Morris, 'choose a specialist stone floor cleaner that allows you to pour a small amount neat directly onto the stain. Let the product work for 15 minutes then scrub with a brush to remove the stain. Then rinse with warm water and allow the flooring to dry.'
A specialist product such as Liberon's Stone Floor Cleaner can be used on sealed and unsealed terracotta and stone floors.
Do stone floors have to be sealed?
(Image credit: Fired Earth )
It's important to protect your stone, particularly in a high-traffic or area of high humidity.
'If you're working with new stone,' says Morris. 'Once your stone floor is clean, you should protect it from water and staining with a specialist stone floor sealer. Ideally, finish with either a specialist stone floor wax or - for a more durable surface on high foot traffic areas - a specialist protective coating.'
Colin Roby-Welford, creative director at Fired Earth agrees that a stone floor should be sealed to keep it looking good. 'One of the key things to remember about natural stone is that it’s porous so sealing will protect it from stains and keep it looking its best for years to come.'
'A stone floor can actually even improve with the patina of age but it's really important to follow the product-specific recommendations when you’re installing stone. Once the stone is sealed, spillages won’t permeate the surface and can simply be wiped away.’
How to clean a sealed stone floor
(Image credit: Artisans of Devizes)
'The best way to maintain a fully sealed stone floor is to sweep or vacuum it regularly to remove surface dirt,' adds Roby-Welford. 'The floor can then be given a quick wash with a recommended, product-specific cleaning product.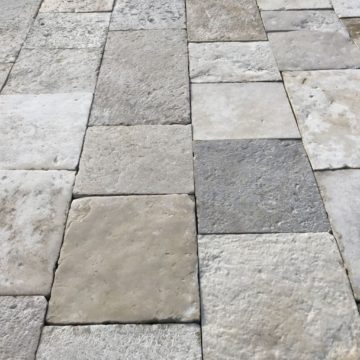 These are formulated to be effective cleansers but also to be gentle on the sealants which are protecting the floor.'
He advises against using generic cleaning products to clean a stone floor, and even warns against using a scrubbing brush. 'General household cleaning products may be too abrasive and can damage sealants, as can good old-fashioned scrubbing. In any case, there shouldn’t be any need to scrub at spillages if you act in a timely fashion since the sealant will form a protective layer to the tiles,' he says.
'A stone floor will require re-sealing every few years to ensure maximum protection from stains. You can do a quick test by dropping a little bit of water on the floor and seeing if it sits on the surface (as it should do) or starts to absorb into the floor (in which case it might be time to re-seal).'
This feature was created by H&G's sister brand, Period Living magazine
Subscribe to Period Living for more inspiration .
Period Living is the UK's best-selling period homes magazine. A subscription provides you with all you need to know about caring for and improving a traditional house and garden.
Is it safe to use vinegar to clean stone floors?
(Image credit: Brent Darby)
While cleaning with vinegar and cleaning with lemon juice are popular because they make use of pantry ingredients, in fact, a stone floor is one of the things not to clean with vinegar, and the same goes for lemon. These, and any other strongly acidic products, can damage the surface of the stone and dull its appearance.
If you prefer to use a natural cleaner, there is one rather surprising household commodity that can be used to clean stone floors. Milk.
Architect Neil Mackay, used skimmed milk to clean the 18th-century flagstones in his Oxfordshire cottage, pictured above.
'As I understand it, the casein in the milk forms a weak binder on the surface of the flagstones, giving them a slightly polished sheen, and keeping down dust,' he says. 'It works best on smooth stones, with a fine, close surface texture. On a coarser stone the effect is a little different, and the stone will temporarily look darker.
'I just washed the floors with warm water and a stiff brush, then scrubbed them again with skimmed milk and let it dry. For a short while it smelled a little milky, but not unpleasantly so. Once it dried, the smell rapidly faded.'
In its Caring for Old Floors technical notes, The Society for the Protection of Ancient Buildings (SPAB) says the use of sour milk applied sparingly with a rag to clean stone floors is mentioned in 19th-century household manuals, and 'can bring up a soft sheen and a degree of protection to the surface of fine-grained stone with an established patina'.
However, SPAB warns against using milk to clean absorbent or damp stone as it may leave a stain. As with all cleaning products, natural or not, it's best to check with your flooring provider and test on a small, unobtrusive area of the floor first.
What to avoid when cleaning a natural stone floor
(Image credit: Beswick Stone)
Beswick Stone offers the following checklist for how to clean natural stone flooring:
Don’t use proprietary brands of floor cleaners or soap. Nothing alkaline (bleach) and nothing acidic. Do use a specially formulated natural stone cleaner that not only cleans but maintains the protective sealant.
Don’t mop every day – stick to once or twice a week maximum. When you do mop, don’t flood the stone. Do sweep & brush regularly.
Closed loop cotton string soft mops that can be wrung out well so you are mopping near dry are good. Micro-fibre mops are even better. Using copious amounts of water is not good on any natural material.
Do not use a soap solution (this will leave a film that will gradually build up).
What are the key things you need to know to clean stone floors safely?
'Don’t over-mop and don't use too much water ,' say the experts at Beswick Stone. 'This is the number one cause of dirty, stained floors. Lock up the mop and get it out once a week.
'And for dark stones and slate, scratches will be much more visible, therefore tired, worn out vacuum heads can cause lots of damage.' Lock up the vacuum cleaner.
How to keep life simple when cleaning stone floors
(Image credit: Artisans of Devizes)
Choose your flooring wisely in the first place. Select more resilient stone flooring in darker or natural shades for heavy traffic areas such as kitchens and entrance halls, unless you're prepared to put in the effort to maintain paler stones. Fired Earth 's Colin Roby-Welford says: 'If you’re at the stage of choosing flooring, try to be realistic about how much time you’re likely to want to spend on cleaning.
While you certainly could opt for gleaming white marble for glamorous kitchen ideas, your floor will only continue to look sparkling white if you’re prepared to get cleaning at the first sign of a spillage or paw print, whereas the very same marble might be a perfect choice for spa-style bathroom ideas. '
'
Sound advice, we are sure you will agree.
Karen is the houses editor for homesandgardens.com and homes editor for the brand’s sister titles, Period Living and Country Homes & Interiors, and an experienced writer on interiors and gardens. She loves visiting historic houses for Period Living and writing about rural properties for Country Homes & Interiors, and working with photographers to capture all shapes and sizes of properties. Karen began her career as a sub editor at Hi-Fi News and Record Review magazine. Her move to women’s magazines came soon after, in the shape of Living magazine, which covered cookery, fashion, beauty, homes and gardening. From Living Karen moved to Ideal Home magazine, where as deputy chief sub, then chief sub, she started to really take an interest in properties, architecture, interior design and gardening.
Proper maintenance of stone floors
Many people fear that natural stone floors will be too difficult to maintain. This is especially true for marble floors. Therefore, for a long time in Russia, marble on the kitchen floor was rare. At the same time, in Europe and the USA, marble floors were fearlessly laid both in the kitchen and in other rooms.
So are stone floors really that hard to clean? What tools and methods can be used to remove everyday dirt and non-standard pollution? nine0003
Regular maintenance of stone floors
Daily cleaning of stone floors is little different from washing any other floor. You will need ordinary tap water, a mop that is comfortable for you, and a specialized detergent. It is better, of course, to buy the appropriate product, especially when it comes to marble floors. If for some reason you can’t get it, choose the mildest product without abrasives in the composition and with a neutral pH.
The procedure is very simple. First, dilute the detergent in water according to the instructions on the packaging. Then, use a mop to rinse the floor. As a rule, once is enough to remove the dirt. nine0003
Rinse the floor for the second time with clean water without chemical additives. This stage is especially important if there are small children or pets in the house. Floor cleaners can be toxic if swallowed.
Ideally, the floor should be walked a third time with a dry or well wrung out cloth. This, firstly, will prevent the remaining moisture from turning into limescale, and secondly, it will eliminate the danger of slipping on a wet floor.
If you do wet cleaning every day, you can not use products all the time, performing only the second and third stages. And once a week or if necessary, add the first stage. nine0003
Washing stone floors from stains
There is no single instruction here, since stains come from very different origins, and the method of removal depends on this. In addition, the stone floor itself can be different. White marble floors are afraid of some influences, black marble floors are afraid of others. It is generally difficult to apply a problem stain on granite floors.
However, there are some general guidelines that can help. And do not forget - it is easier to always have on hand the appropriate special tools that will help you quickly remove the stain than to deal with an already ingrained defect later. nine0003
Any stain should be removed as soon as possible. If it is a greasy stain, dust it with talcum powder, starch, or a similar highly absorbent, colorless product. Don't rub it! As the fat is absorbed into the powder, change it, gently brushing off the previous portion. The last portion is best left for a day or at least overnight. Follow with a neutral pH grease remover.
Color spots on white marble are the main problem that housewives are afraid of. If it so happened that juice, wine or other coloring drink got on the marble floor, first of all throw paper napkins there, but do not try to rub it. When most of the moisture is absorbed, use a sponge soaked in clean water.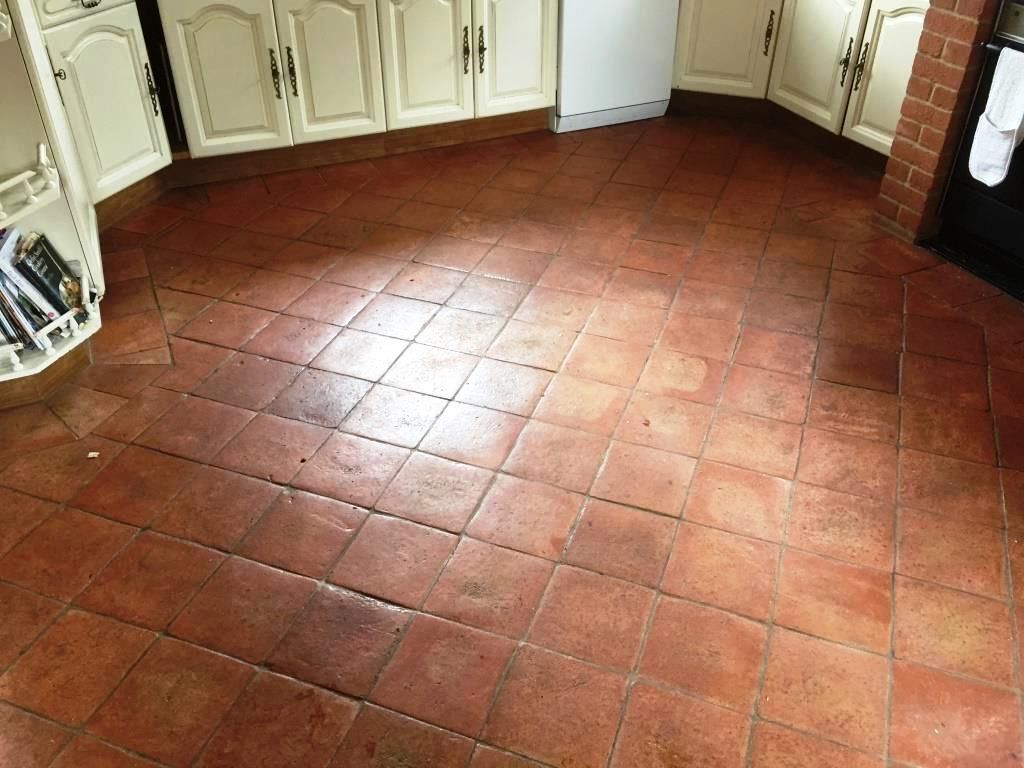 Rinse the area several times and then dry it with paper towels. nine0003
You can also use special products to remove stains - if, of course, you have them at hand. To do this, take napkins or paper towels - always without colored elements. Dilute the cleaning agent in water to the maximum allowable concentration according to the manufacturer's instructions. Moisten the wipes with plenty of solution and spread them in a dense thick layer over the surface of the stain. If the stain is fresh and not too bright, after an hour this design can be removed. If the stain is bright or old, then you need to keep the napkins for a long time. In this case, so that they do not dry out, they can be covered with polyethylene or cling film. At the end of the procedure, do not forget to rinse the area with plain water and dry. nine0003
How not to care for stone floors
Do not use abrasives. Floors made of granite or quartzite are not so easy to scratch with iron wool or pumice stone, but over time, from such care, their appearance will still change.
Avoid cleaners with dyes, especially on light marble or travertine floors. They tend to transfer their shade to the stone. At one time, you may not notice anything, but after a while the floor can be irreversibly transformed. nine0003
No home remedies! Vinegar, ammonia, soda, lemon, acetone and other "finds" are prohibited. There are many tips for using them for stone, but in order to use such tools, you need to accurately imagine how it will behave on a given type and grade of stone, how it can affect its color and polish. And if one technique helped someone, then on another stone and type of stain, it can only spoil the stone.
If you are trying a new product and you are not sure about it, do not wash the whole floor at once. Test on an inconspicuous area. It is better to wait 48 hours, as a negative reaction may not occur immediately. nine0003
Maintenance
Many of the problems with maintaining stone floors stem from the fact that the manufacturer has not done the right treatment. Proper treatment of the floor allows you to reduce all care to everyday. This is due to the fact that professional impregnations simply will not allow stains to appear.
Thanks to modern processing technologies, it has become possible to use travertine and marble floors even in difficult places - in hallways, halls and kitchens. Therefore, there is no need to be afraid to use marble in the kitchen - floors, like countertops and window sills, are easy enough to process with the right tools. nine0003
from stone tiles, flagstones, pebbles
If we talk about natural stone on the floor, then its advantages are beauty and strength. Of course, there is no dispute about beauty. No wonder the palaces had stone floors. And they have survived to this day, despite the fact that thousands and thousands of people walked on them. Any stone, even slate (the most "soft" of finishing stones), will be more durable than any other floor covering. Natural stone floors will serve not only for years. Decades. And grandchildren and great-grandchildren will still walk on it. If the house survives. nine0003
Contents of the article
- 1 Disadvantages: do you really want to?
- 2 Maintenance of stone flooring
- 2.1 Combination with self-leveling polymer flooring
- 3 Types of stone and forms of stone flooring
- 4 Natural stone floors: laying features
- 5 What mortar to use 9005 5 6 Do-it-yourself pebble floor
- 6.1 Pebbles on a grid
- 6.2 Flat pebbles for the floor, bulk
Disadvantages: do you really want to?
But not everything is so rosy. Everyone understands that the stone is hard and cold. You can't do anything about hardness. You just have to calm down. The cold can be overcome. If you plan to put it somewhere in the house or in the apartment, then you will have to do heating, otherwise your feet will be cold even in summer.
Natural stone floors are, of course, beautiful.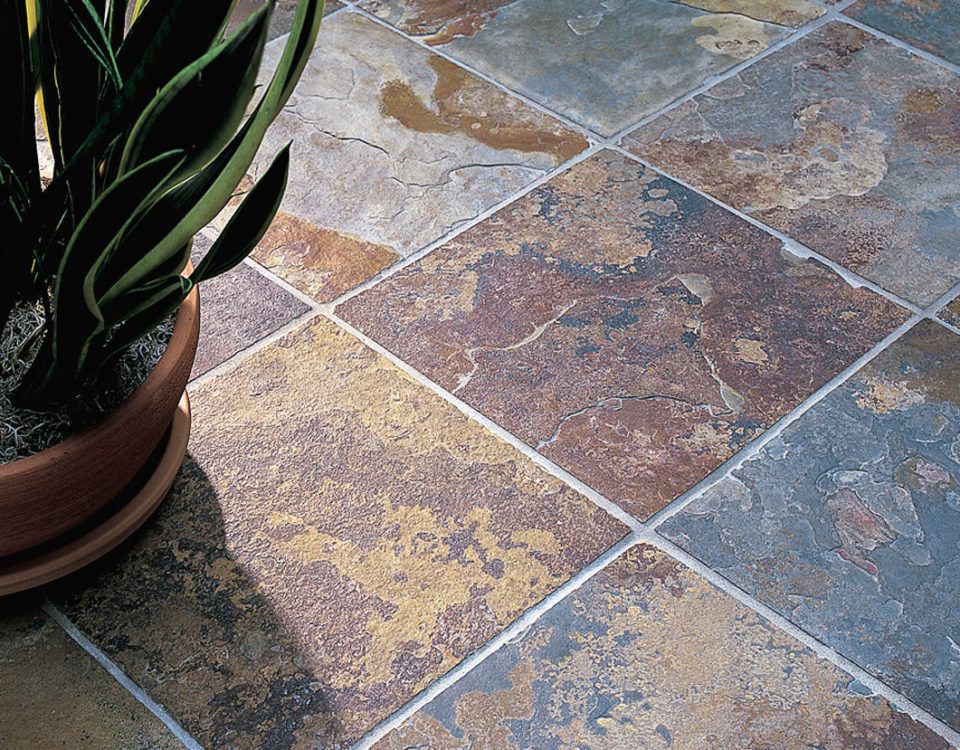 But there are many shortcomings
 Now about whether to put the polished stone on the floor or not. Polished has a "ceremonial" look. It's beautiful, but it needs the right setting. Not all styles fit the sparkling splendor of such a floor. Unpolished, natural stone is “simpler” in this regard, but also not compatible with all styles. So, in any case, stone floors require thoughtful interior design. nine0003
Stone floor care
A few words about the practical side. If you want natural stone floors, be prepared to spend extra time cleaning. At a minimum, you will need to take extra time each week for a thorough cleansing.
Polished stone is easier to clean. In the sense that you have to wipe it often. All the dust and dirt is visible (although there may be colors that level this drawback). But "wipe" and "rub" will be easy. The pores are polished and the dirt does not get inside. But polished is marble, jadeite, serpentine and other similar expensive rocks. Not everyone can afford them.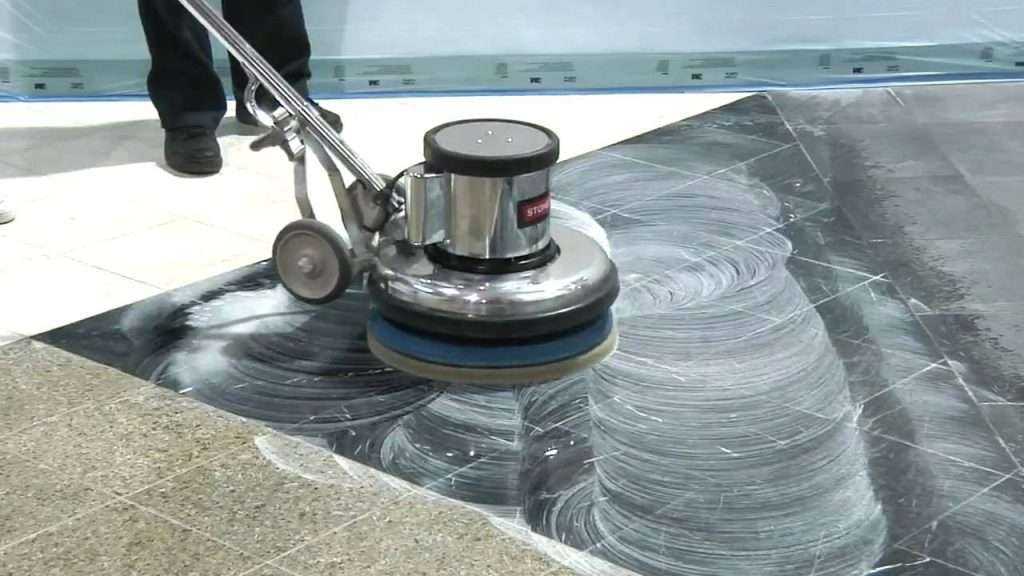 In addition, polished stone is scratched and periodically requires grinding and polishing. There are special professional machines and polishes for this. The price for polishing, as you might guess, is considerable. nine0003 How long will the "peculiarities of the stone" remain pure?
Raw stone with a "natural" saw cut usually has irregularities. Caverns, protrusions and depressions. And they are full of dust and dirt. Washing it out is a pleasure. Bringing "to an ideal state" is almost impossible, even with the "targeted" use of the brush. The way out is to look at “non-ideal” as the features of the material and the uniqueness of the decor.
There is also a polished floor stone. It is somewhere between polished and raw. We have a more or less even surface, but not polished, but leveled. The presence of natural recesses and caverns is not excluded, but they are less than in the untreated. In harvesting, too, something in between, but more dependent on the density or porosity of the selected rock. nine0003 The difference between polished and polished floor stone is the degree of polishing. Visually - in the degree of gloss
Now a few words about the pebble floor. It has been popular lately, as it is the most affordable in terms of price. With a new repair, they try to lay at least small fragments. It is, of course, beautiful. But it's problematic to take care of. First, the pebble floor is uneven. Even special flat pebbles do not give a flat surface. The massage effect is obvious, but it quickly gets boring. Especially when you consider that rubbish, dirt and soot are collected between the pebbles. nine0003
Fill the space between the pebbles with tile grout. The seams are pretty wide. If you want your floor to look normal, once a week or two you will have to take a brush and manually rip out the seams. Neither a washing vacuum cleaner nor a steam cleaner can cope with the task. Only a brush with rather active chemistry and manual labor. The darker the grout, the less often you have to do this. But the trick is that light looks better.
There is another way out - to use polymer grout, not cement. Polymer is smooth and easier to clean. But the price is absolutely not humane. And the grout consumption when installing pebbles on the floor is hoo. In addition, the "term" of the life of the closed polymer grout is short. So you have to work fast. In general, the solution is expensive and difficult to implement. But cleaning will be much easier.
Combination with screed
There is one way to make a stone pebble floor easy to maintain. This is possible if the laid pebbles are filled with a transparent polymer. Visually, it will be a pebble floor, and in terms of operational properties, it will be a self-leveling polymer floor. That is, no pores and cavities, wash, wipe - without any special restrictions. nine0003 A layer of transparent polymer on top - and it is very easy to clean even a pebble floor
But the cost of funds when laying is double.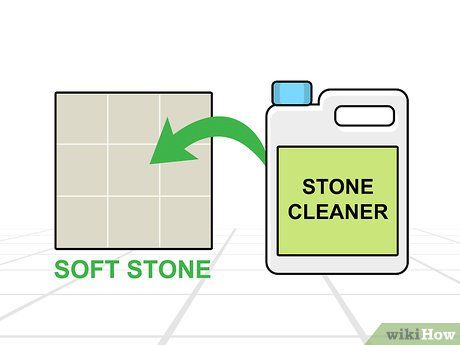 Pebbles are not cheap, polymer self-leveling floor is also quite expensive. In order for it to be truly transparent and scratch-free for a long time, it is better to take a two-component polyurethane self-leveling floor. It is more expensive, but it has proven itself in operation better.
Types of stone and forms of stone flooring
If you still have not abandoned the idea of having natural stone floors, we will get acquainted with the possible options. Various types of stone are used for flooring. From ceremonial and expensive marble, to the simplest - granite and pebbles. Travertine, serpentine, jadeite, sandstone, onyx, slate are also used for the floor. A stone floor can cost as much as a small house. And even the cheapest ones (from slate and granite) will require a lot of money to buy the finishing stone itself, and for glue, and for work. nine0003 Marble is definitely chic…
In addition, there are different materials for finishing the floor with stone. They differ not only in size, but also in appearance.
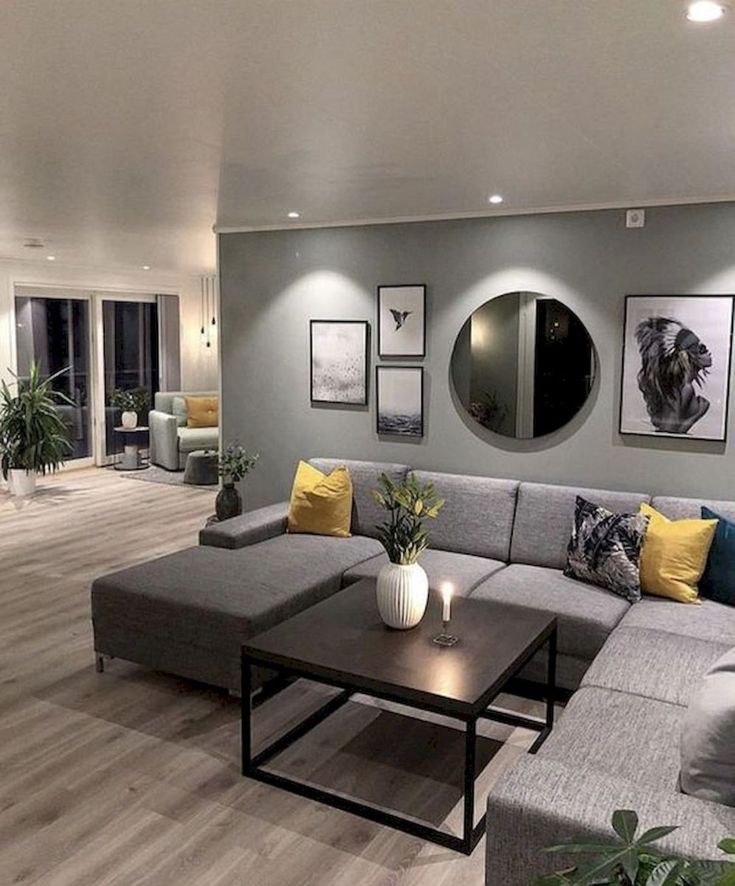
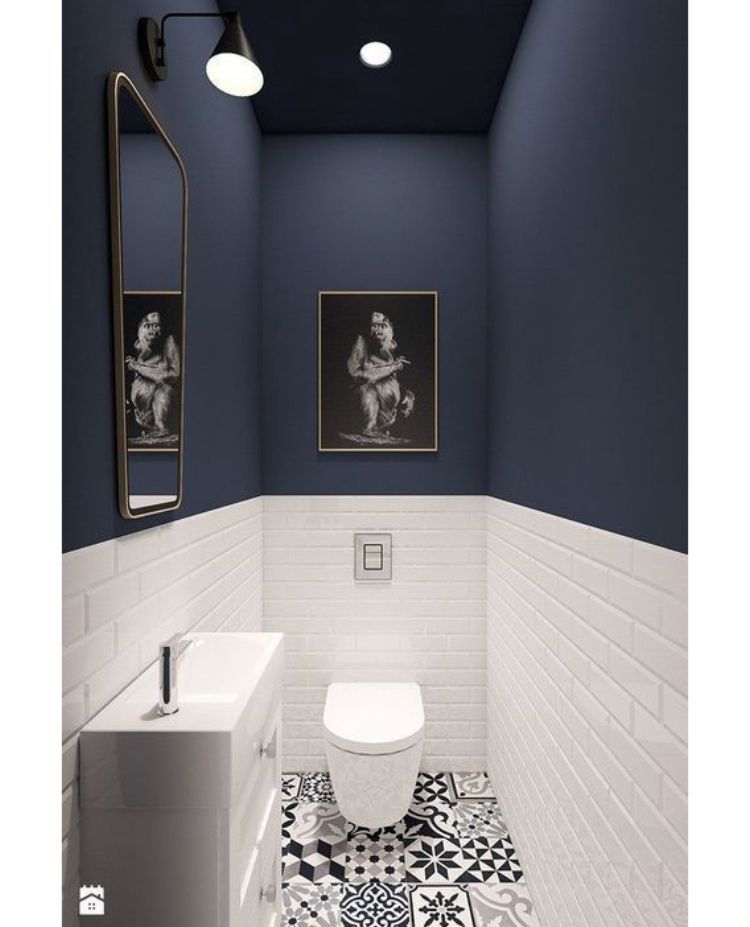
Whatever type of stone flooring you choose, it makes sense to put it in the hallway, hallway, kitchen, balcony/loggia or bathroom. In living rooms it is very uncomfortable and too cold for our climate.
Floor pebbles - better flattenedA good solution also for porches, terraces, open or covered areas, paths. Although, for laying on playgrounds and paths (and on terraces too) there is a more budgetary solution - paving slabs. The stone, of course, is more beautiful and prestigious, durable, but very expensive. nine0003
Natural stone floors: laying features
The most difficult laying is stone slab (plastushki). An irregular shape requires a selection not only of color, but also of shape. Usually, all or a significant part of the slab floor covering is laid out on the floor "dry". Few saw cuts have straight edges. And they are necessary. In such cases, the “excess” is sawn off (a grinder with a diamond disc on a stone), and the trimmings are used to fill in other places. Having finally picked up the fragments, they begin laying the stone on the glue. nine0003 Natural stone for laying on the floor
The selection of pebbles on the grid is approximately the same. Several meshes with glued pebbles are selected so that they “look good” and there are no large gaps between the two fragments. If there is a need, excess stones are removed, the missing ones are added.
Stone tiles are easier. It has the same dimensions. It is only necessary to choose more or less by color. To avoid pronounced stains, laying is carried out from several packs at once. So the color scatter will be a virtue. nine0003
What kind of mortar to put on, work method
Laying any type of stone floor requires a tile adhesive with improved adhesive properties. There are compositions for heavy tiles, porcelain stoneware or stone. This is the material that must be used when laying the stone. You can use tile adhesive for underfloor heating. It also has improved adhesion.
The process itself is the same as when laying tiles or porcelain stoneware: applying glue under a comb (tooth depth at least 10 mm), laying and leveling. After the laying of the stone is completed and the glue dries, the seams are overwritten. For houses and apartments, a grout with improved adhesion is required; for laying on the street, they rub (fill) with high-strength sand concrete. It is possible / desirable to add an additive to increase frost resistance. nine0003 The technology of laying natural stone on the street is slightly different
When laying stone on the floor in glue, remove the protruding composition immediately with wet or dry rags, kitchen paper towels, sponges ... No matter what. There shouldn't be any traces. Otherwise, after the glue dries, you will be tormented by wiping. Especially if the surface is unpolished and slightly rough.
The seams between the fragments must be at least 1/3 empty. The voids are filled with grout.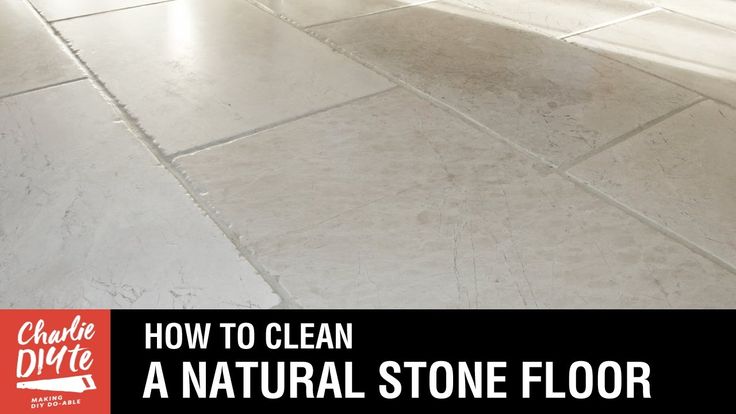 If the solution "crawled" higher than necessary, it is better to remove it fresh. When it dries, it is also possible, but it is more difficult to implement. If the depth of the seam is insufficient, during operation the grout will crumble and pop out in pieces. nine0003
Do-it-yourself pebble floor
The most possible option for DIY is a pebble floor. There are two types of material in stores - flat pebbles for the floor, which are sold by kilograms / tons, and the same flattened pebbles, but glued to the grid.
Pebbles for the floor, flat (fractionated) Regardless of which pebbles you use, you will need to lay them on a flat, dry concrete base.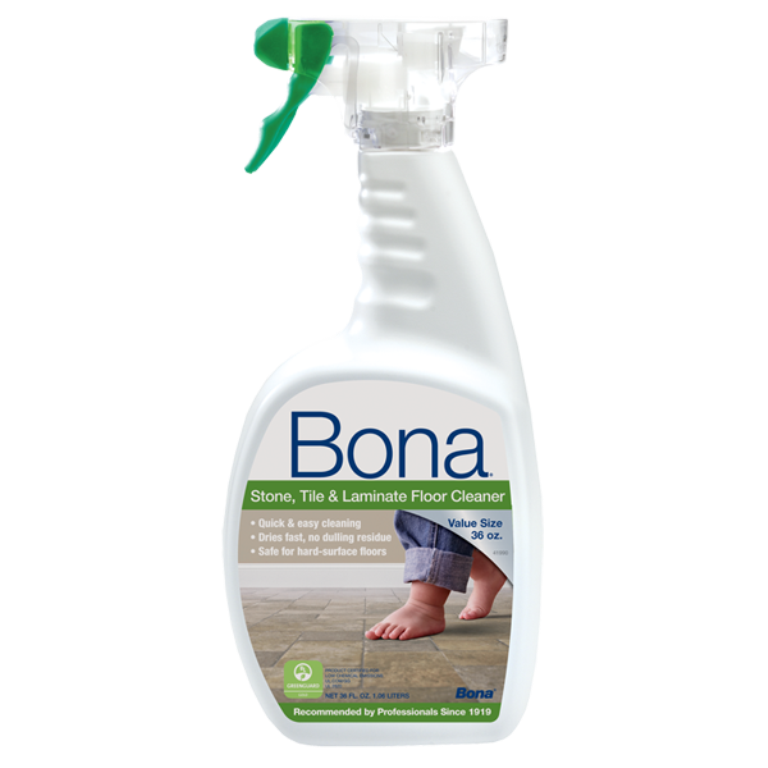 That is, first you need to pour the screed and wait until it gains strength and dries. If you just rub the seams, and do not fill the pebbles with polymer, it is enough to wait for 50% strength to set. Cement-based glue is usually used, and moisture will not interfere with it. For the subsequent pouring of the self-leveling floor, you will have to wait the required 28 days, and then check the humidity. And only on a dry base put pebbles and fill with polymer. nine0003
Grid pebbles
Grid pebbles are more expensive than loose pebbles. But there is a certain gain in time when laying. You do not need to pick up stones and stack them one by one. Grid pebbles are usually square in shape and are often referred to as pebble tiles. Dimensions - from 30 * 30 cm or larger. The stones are glued to a grid with a large cell. It is better if the grid is polymeric. Natural, in this case, is a disadvantage, not a virtue. Natural fibers blacken in a humid environment, changing the color of the pebbles. Not at all what is required. nine0003 Examples of pebbles on a grid. Square tiles made of processed stone can also be glued.
Pebbles can be natural (river and sea), colored (glass or polymer). By colors - plain or mix. Mixed can be with a pattern or just a set of stones of different colors, randomly glued to the base.
During installation, lay the mesh on a layer of adhesive, press it to the required depth. Seems easy. But that's not all. The fact is that when installing pebbles on a grid, along the edges, at the junction of two tiles, quite solid gaps without stones are formed. There is also a grid with large stones, between which there are wide gaps. If left as is, it will take a lot of grout. And you need it good, with high adhesion. What does darling mean. nine0003 The process of laying the pebble floor: laid on a layer of tile adhesive, pressed in
There are two ways to solve the problem:
- Pick up the fragments that fit most closely together. They are laid out “dry” on the floor and by sorting out the best combinations are found.
 At the same time, stones that are too disturbing can be torn off the grid. They can then be used to fill gaps, rotated to the other side or replaced.
 - Do not select too much, but fill in the gaps with pebbles of a suitable size/color/shape. nine0060
Where can I get pebbles to fill the gaps between the tiles? If the hardware store does not have a suitable bulk, you can go to the pet store. The aquarium department often has packages of pebbles. You can also visit garden centers. Now there is a boom in rockaquia (flower beds decorated with stones, pebbles, gravel). So there can also be pebbles of the desired format / color.
Flat pebbles for the floor, loose
All of the above is also true for the independent "set" of the floor from loose pebbles. You lay out some fragment of a stone floor from pebbles without glue on the floor. When the mosaic is assembled, apply glue and move the stones one by one, immersing them to the desired depth.