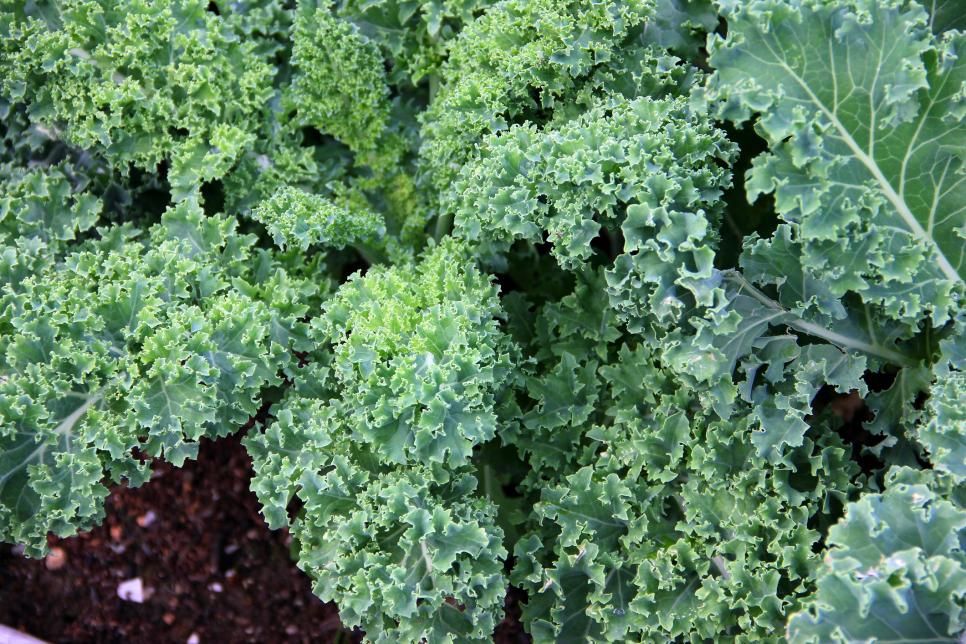
Kale plants growing
How to Plant and Grow Kale
Cold-hardy and resilient, kale is an easy member of the cabbage family to grow. You can set out plants quite early in spring as long as you protect the young plants from severe cold winds with a cover. They will grow steadily for months until the weather gets too warm. You'll get a second chance to plant kale in the fall, when cool weather brings out a wonderfully sweet, nutty flavor that is unique to these cold-natured plants.
Fall is the best time for growing kale in areas where winter doesn't dip below the teens, or in a cold frame farther north, because the leaves are sweeter when they mature in cooler weather. In the kitchen, kale can be steamed, stir-fried, or substituted for spinach in omelets, casseroles, or even quesadillas. It's a wonderful addition to smoothies, too, and tender young leaves make delicious salads.
Quick Guide to Growing Kale
- Plant kale 3 to 5 weeks before the last frost.
In-ground gardens, raised beds, and containers are all excellent growing options.
- Space kale 18 to 24 inches apart in an area with full sun and well-drained, fertile soil with a pH of 6.5 to 6.8.
- Improve native soil by mixing in several inches of aged compost or other rich organic matter.
- Kale is a fast grower, so keep the soil moist by giving it 1 to 1.5 inches of water each week.
- Get the most out of your harvest by regularly feeding plants with a continuous-release plant food.
- For nutritious kale year-round, consider an indoor, water-based growing system.
- Harvest kale starting with the lowermost leaves once they reach the ideal color and are large enough to eat. Leaves reach their peak flavor once they've been kissed by a light frost.
Soil, Planting, and Care
Set out plants in spring 3 to 5 weeks before the last frost; in late summer, you can begin planting kale 6 to 8 weeks before the first frost for fall and winter harvests, and continue planting throughout the fall in zones 8, 9, and 10.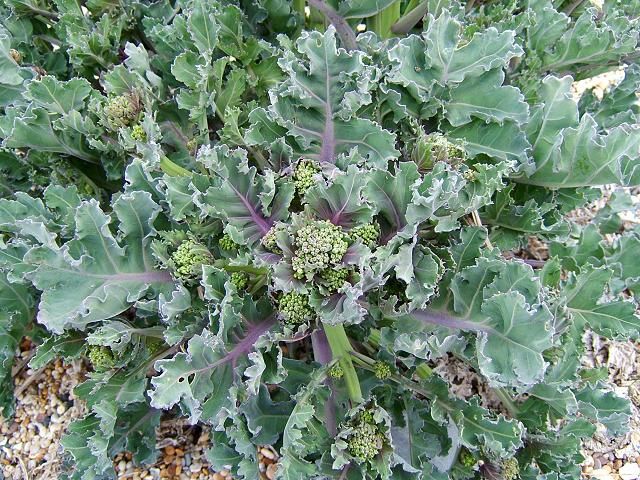 Be sure to choose kale starter plants from Bonnie Plants®, so you know they'll be strong and vigorous.
Kale grows best in full sun, but will tolerate partial shade as well. Plants that receive fewer than 6 hours of sun daily will not be as stocky or leafy as those that get ample sun, but they will still be plenty edible! Like collards, kale likes fertile soil to grow fast and produce tender leaves. Enrich the soil with compost and fertilizer before setting out the seedlings. Apply fertilizer and lime according to test recommendations. If you forgo the soil test, work nitrogen-rich amendments such as blood meal, cottonseed meal, or composted manure into the ground before planting.
The soil pH should be 6.5 to 6.8 to discourage clubroot disease, although the plants will grow fine in a pH of 6.2 to 6.8 if clubroot is not a problem in your garden. To be sure about your soil pH, test the soil with a do-it-yourself kit, or by using your regional Cooperative Extension office. If that seems too complicated, you can simply improve your existing soil by mixing in a few inches of Miracle-Gro® Performance Organics®All Purpose In-Ground Soil with the top layer.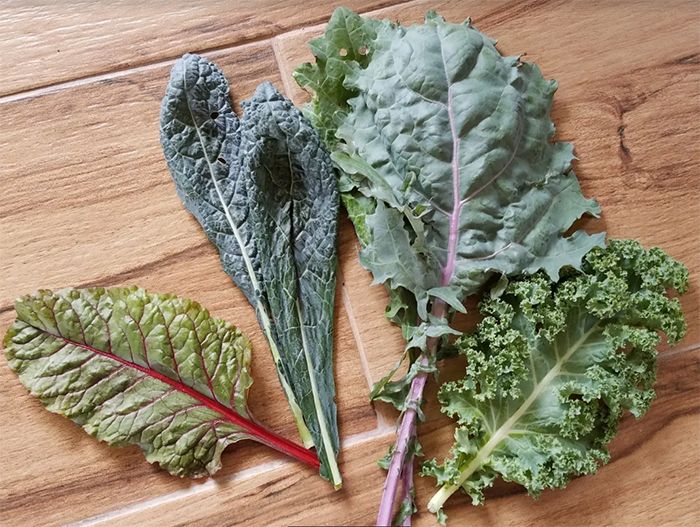 Enriched with aged compost, it will improve both the texture and nutrition of the native soil.
Kale is easy to plant, and grows beautifully in both raised beds and containers. To create the ideal growing environment for the plant roots, fill raised beds with 100 percent organic Miracle-Gro® Raised Bed Soil and containers with Miracle-Gro® Performance Organics® All Purpose Container Mix. Set plants at the depth at which they are growing in the container. Space them 18 to 24 inches apart. The leaves will grow bigger if given a lot of space, but smaller leaves tend to be the most tender. After planting, water plants well. Plants grow best when they have access to both great soil and a continuous source of nutrition, so apply a water-soluble fertilizer such as Miracle-Gro® Performance Organics® Edibles Plant Nutrition regularly for excellent results.
At this point you may need to be patient, because spring-planted kale may stay small until slightly warmer soil temperatures trigger vigorous growth.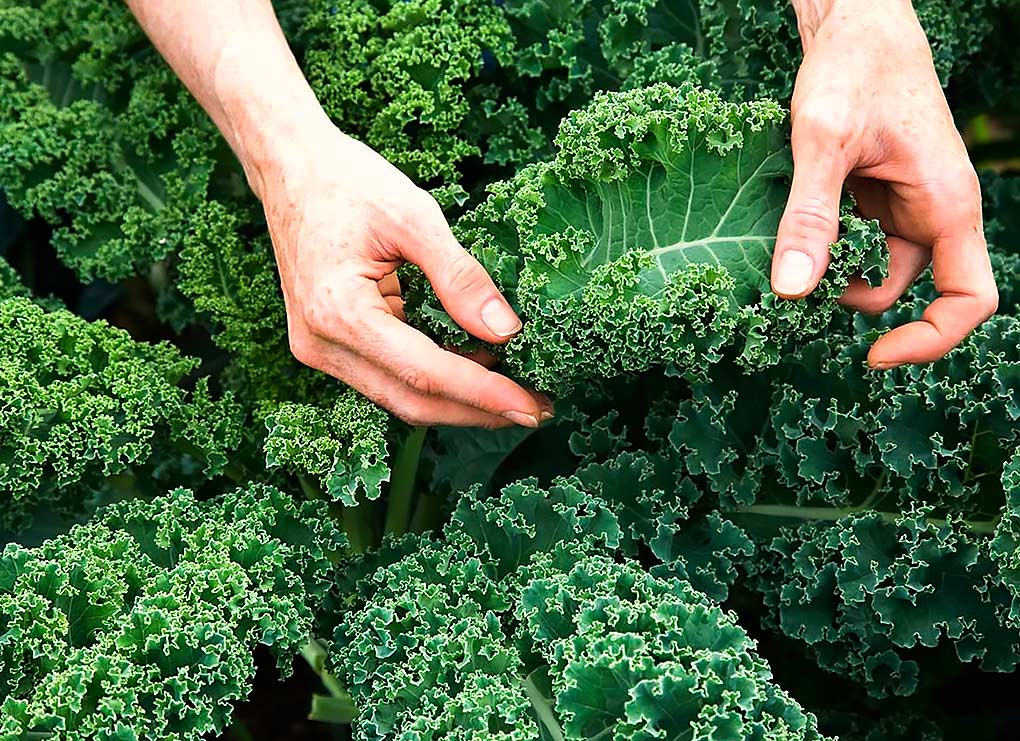 Kale planted in late summer or early fall may sulk through spells of hot weather. Then, when conditions improve, the plants will take off, quickly multiplying in size.
Kale likes a nice, even supply of water, about 1 to 1.5 inches per week. You can measure how much water rain has provided by using a rain gauge in the garden. Mulch with compost, finely ground leaves, weed-free hay, straw, pine needles, or finely ground bark to keep the soil cool and moist and to keep down weeds. Mulching will also help keep the leaves free of splashing soil for a clean harvest.
You also have the option of growing kale indoors. An easy way to do that is in a hydroponic growing system like the Miracle-Gro® Twelve® Indoor Growing System. There's no soil—plants grow directly in water that circulates around the roots, delivering moisture, nutrition, and air. With plenty of light courtesy of a grow light, the system provides top-notch growing conditions for kale. Best of all, you won't even have to go outside to harvest.
Troubleshooting
Kale often grows as a carefree crop, but there are several insects that like kale as much as people do. Velvety green cabbageworms often can be found chewing holes in kale leaves. The larvae of cabbage white butterflies, cabbageworms are more likely to feed on cabbage, broccoli, and cauliflower than to bother your kale.
Colourful black-and-orange harlequin bugs often show up on kale plants that are feeling the stresses of old age. Rather than fight the harlequins, most gardeners pull up and compost old plants if it is mid- to late summer. In late summer, the best way to protect young seedlings from these and other pests (like grasshoppers) is to cover them with a row cover or some other lightweight fabric, such as wedding net (tulle). The covers can be removed in mid-fall, when pest populations usually drop dramatically.
Watch for outbreaks of gray-green cabbage aphids, which often gather in clusters within the folds of frilly kale leaves. Treat small problems with insecticidal soap. Pick off and discard badly infested leaves.
Harvest and Storage
Like collards, kale leaves are sweetest in the fall, after they've been touched by a light frost. Pick the oldest leaves from the lowest section of the plants, discarding those that appear yellowed or ragged. Pick your way up the stalk, taking as many leaves as you like, as long as you leave at least 4 leaves intact at each plant's top (or growing crown). Kale will produce new leaves all winter in zones 7 to 10. In climates where hard freezes are frequent, kale often survives winter with additional cold protection from thick mulch, row covers, or plastic tunnels. Overwintered plants will eventually bolt (producing yellow flowers) in spring, signaling that it's time to remove them and make room for other crops. Wash the leaves thoroughly and store them in a plastic bag. You can eat the stems or discard them—it's up to you. If you cook the kale, the stems will become more tender. Kale leaves will keep for several days in the fridge in a loose plastic produce bag.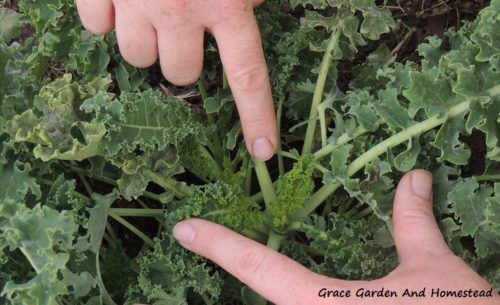
FAQs
Should I harvest leaves when they are young or wait until they grow larger?
It depends. Young leaves work great for salads, but if you're planning to cook the greens, let leaves reach full size. Pick the largest leaves from the bottom and outside of the plant. Avoid picking or damaging the center of the plant where new leaves arise.
How long can I expect to harvest kale?
For many months. You can pick spring-planted kale all summer, but leaves may get tough and bitter when heat arrives. Quality improves again in fall and plants continue growing even winter in mild climates. Frost makes them taste sweeter, and plants are cold-hardy at least to the low 20s. The following spring, though, they will bolt. The same is true for fall-planted kale. Winterbor is an especially cold-hardy one that works well in cold weather. Gardeners in cold climates can enjoy it through winter in a cold frame.
Is there anything I can do to help kale leaves stay sweet?
Warm weather can make kale bitter and tough. While cool temperatures are the key to sweet leaves, you can help keep roots cool by mulching around plants. Making sure plants remain well watered also improves leaf flavor.
I picked kale last week and the patch still looks sparse. Is there anything I can do to jump-start growth?
Fertilize during the growing season for a steady supply of leaves. You can side dress plants with compost or blood meal, spray foliage with diluted fish emulsion, or water with a liquid fertilizer like Bonnie Herb & Vegetable Plant Food.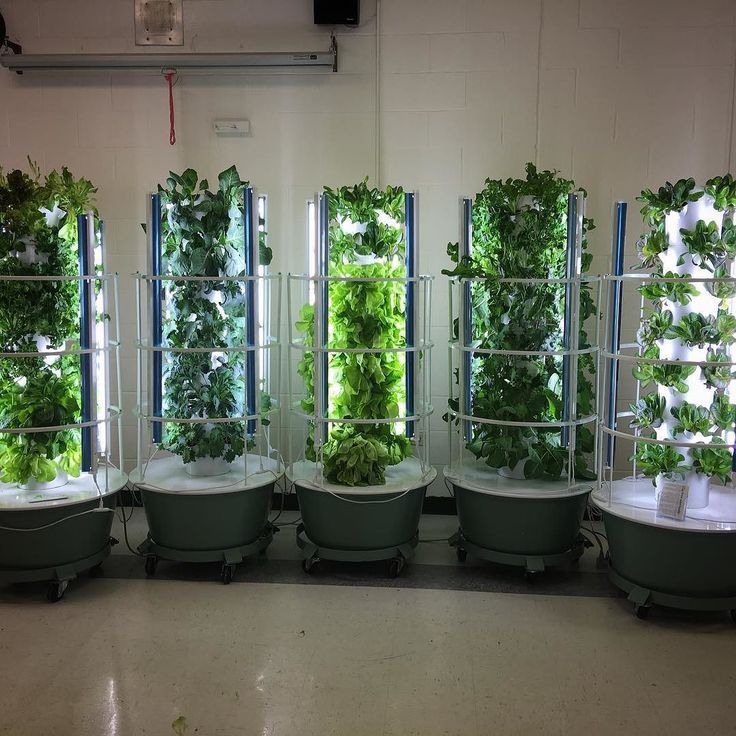
How long can I store harvested kale?
Kale stays crisp in the refrigerator for up to two weeks. Store it in an unsealed plastic bag with a damp paper towel.
Frost is predicted. Should I pick all the kale and store it?
Frost actually sweetens kale. This is the most cold-hardy of all vegetables and will take quite a few of the early frosts before a hard freeze, or "black frost" as it sometimes called, kills it in colder regions. In zones 7 and warmer it often continues to produce leaves all winter long.
Green worms are eating my kale. Can I spray anything that will kill the worms without hurting my family or pets?
Cabbage worm likes to eat kale. If you've noticed a white moth fluttering among the plants, that's the source of your worms. Spray kale with Bacillus thuringiensis (Bt) to control the worms. Bt doesn't affect humans or other wildlife. Bt targets worms, which die after ingesting it. After you spray Bt, worms may take a few bites from the leaves, but they'll stop feeding and die in a few days. Spray any time you spot the moths among plants.
How to Germinate, Water, and Harvest
Kale (Brassica oleracea) is essentially a form of cabbage that doesn't have the tightly formed head associated with most cabbages, and it's grouped in the cooking greens category with collards, mustard, and Swiss chard. Kale plants can be quite ornamental, with textured and curly leaves that come in shades of green, purple, and other colors. Kale has a relatively fast growth rate and can grow from seed to harvest in about three months. It is best planted in the late winter or early spring and can also be planted in the late summer for a fall to winter harvest. Kale does come back every year, but this biennial plant takes two years to complete its growth cycle—so it grows leaves in its first year, while seeds and flowers develop in its second growing season.
| Common Name | Kale, ornamental kale |
| Botanical Name | Brassica oleracea |
| Family | Brassicaceae |
| Plant Type | Annual, biennial, vegetable |
| Mature Size | 1–2 ft.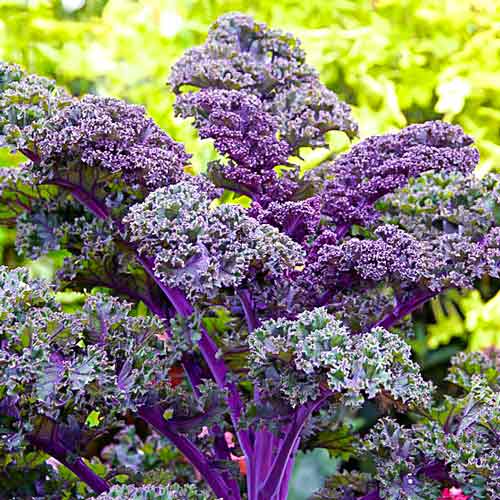 tall, 1–2 ft. wide tall, 1–2 ft. wide |
| Sun Exposure | Full sun, partial sun |
| Soil Type | Loamy, moist, well-drained |
| Soil pH | Acidic |
| Bloom Time | Spring |
| Hardiness Zones | 7–9 (USDA) |
| Native Area | Europe |
How to Plant Kale
Kale is a fast-growing vegetable that does best in a planting location with full sun. Plant kale seeds about 1/2 inch deep, leaving at least 1 1/2 to 2 feet between each plant. High nitrogen content in the soil is important for kale to grow its leaves, so adding a few inches of organic matter like compost to a well-draining soil mixture will encourage a healthy harvest.
When to Plant
Kale can be planted three to five weeks prior to your area’s projected last frost date in the spring. In most regions, gardeners can harvest kale in the summer by planting it at this time. It can also be planted in late summer roughly six to eight weeks before your first fall frost.
Those in warm climates (zone 8 and above) can continue to plant in the early fall for a late fall to winter harvest. Kale takes roughly three months to reach maturity from seed, while cuttings will mature in about one month.
Tip
Cuttings are an inexpensive way to create new plants. Plant your kale in early spring if you plan to take cuttings in late summer. Kale cuttings should be taken in about three months once the plant has become established.
Selecting a Planting Site
Kale grows equally well in pots, garden soil, raised garden beds, and other containers. Kale can grow indoors as long as you have adequate lighting. Soil that’s rich in organic matter and has sharp drainage is ideal, and the planting site also should get ample sunlight. Be sure the kale isn't too close to taller plants that will shade it. Growing kale in a window box can also be successful in south- or west-facing windows, but in very hot climates, east-facing windows can help prevent scorching from the afternoon sun.
Spacing, Depth, and Support
Space kale plants roughly 1 1/2 to 2 feet apart, and plant them at the same depth they were growing in their nursery container. Seeds should be planted around 1/2 inch deep. No support structure is necessary.
Kale Care
The Spruce / Debbie Wolfe The Spruce / Debbie WolfeThe Spruce/Debbie Wolfe
Light
Kale needs full sun to partial shade in most climates, as the fullest growth will occur when the plant gets six or more hours of direct sunlight on most days. However, if you live in a hot, dry climate, provide your plant with some shade, especially from the strong afternoon sun. Heat can make the leaves wilt and lose their flavor.
Soil
Kale plants like to grow in a rich soil that's high in organic matter with a slightly acidic pH (6.5 to 6.8). The high nitrogen content provided by organic matter is crucial for healthy leaf growth. The soil also should drain well.
Water
Kale needs consistent amount of water to stay healthy, generally growing best in 1 to 1 1/2 inches of water per week.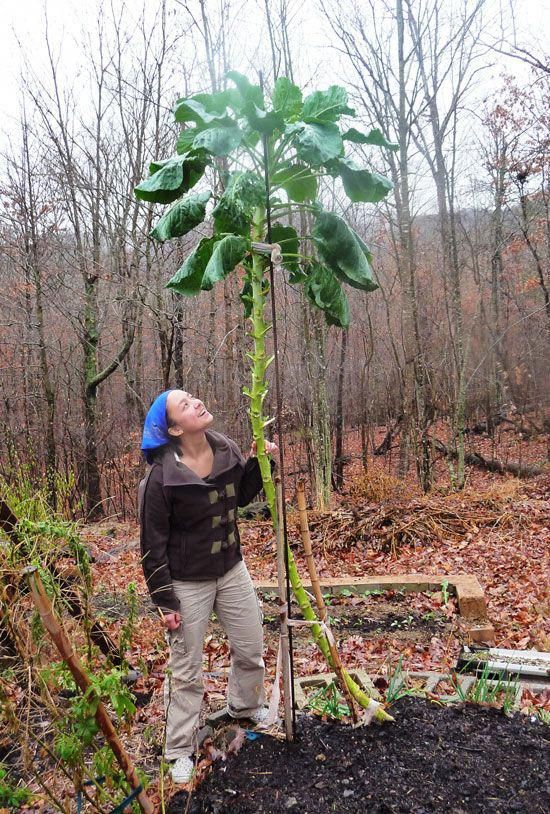 Water your kale plants regularly to keep the soil evenly moist but not soggy. Along with cool temperatures, moist soil helps to keep the kale leaves sweet and crisp, rather than tough and bitter. Mulching around your plants can help to keep the soil cool and to retain moisture.
Temperature and Humidity
The plant is usually considered a cool-weather vegetable and can handle some frost once they're mature. The optimal soil temperature for planting kale is 60 to 65 degrees. All varieties prefer cool temperatures and will be sweetened by a touch of frost. Hot weather turns kale bitter. Kale is a biennial plant, taking two growing seasons (or years) to complete its life cycle, but it's usually grown as an annual. It will collapse if exposed to heavy frosts or snow. But it can be grown throughout the winter in USDA zones 7 through 9 if the winters are mild and there is adequate water.
Fertilizer
When planting, mix fertilizer into the top 3 to 4 inches of soil. Then, feed your kale throughout the growing season, following the instructions on your fertilizer label. Use compost or a high-nitrogen vegetable fertilizer.
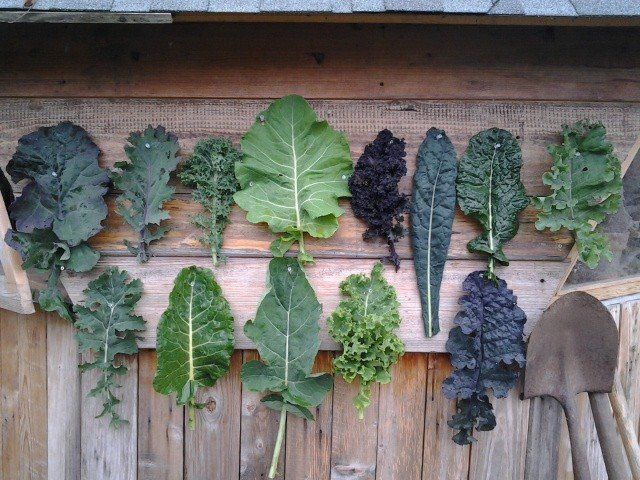
Types of Kale
There are many kale varieties, and they're all worth a try. The curly-leaf varieties tend to hang on longer in cold weather. But the flat-leaf types generally become established faster. Here are some varieties to consider:
- 'Hanover Salad' is a fast grower and an early producer. It has a pleasant taste for eating raw in salads.
- 'Lacinato' is a puckered heirloom kale from Tuscany. It is sometimes listed as Tuscan or dinosaur kale. Its thick leaves are hardy enough to be harvested even after a snowfall.
- 'Redbor' has magenta leaves with curly edges. It features a mild, crisp flavor and texture.
- 'Red Russian' has smooth, tender leaves with purple veins and edges. It is considered one of the sweetest varieties of kale.
- 'Vates' is a dwarf, curly, bluish-green kale that is both heat- and cold-tolerant. It is derived from 'Dwarf Blue Curled Scotch' kale.
Anna Yu/Getty Images
'Redbor' kalevalery_green/Getty Images
'Red Russian' kaleromiri/Getty Images
Kale vs. Chard
Kale and chard have similar appearances. Their leaves are often large, crisp, crinkled, and deep green. Their difference comes in their taste. Kale is generally stronger, with a bitter and earthy flavor. And chard is a much milder green. Plus, kale’s thick stems are typically best removed before eating while chard’s stems may be tenderized by cooking them.
Harvesting Kale
Expect to wait approximately two months for your kale plants to mature from seeds. Check the days to maturity on your seed packet or plant label for more precise timing. Spring-planted kale will be good for harvesting throughout the summer months, but it's especially tasty after a light frost.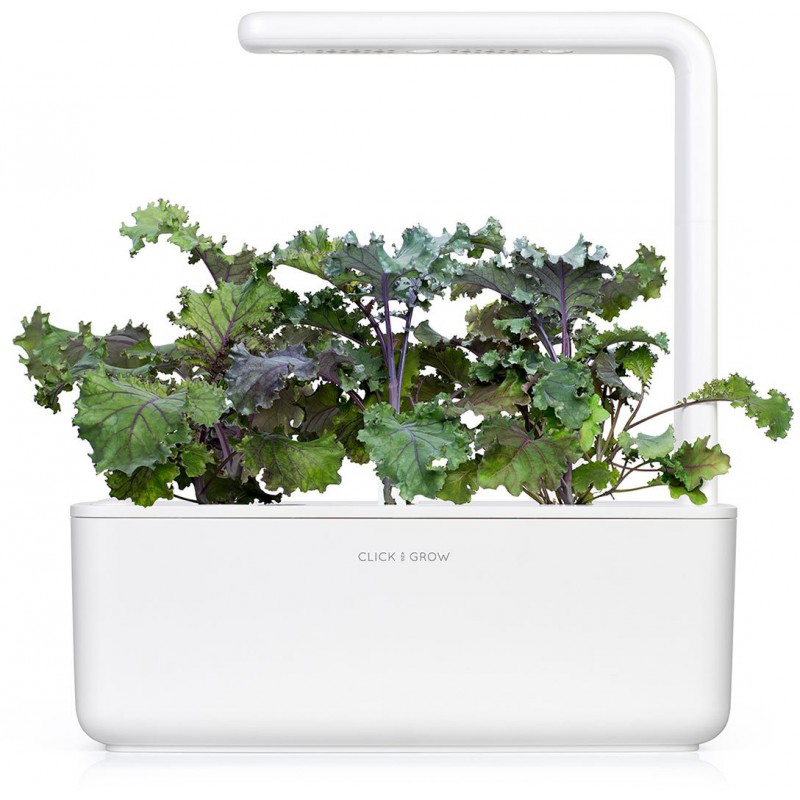
You can harvest young kale leaves to use fresh in salads or allow your plants to mature for use as a cooked green. Remove the older outer leaves, and allow the center of the plant to continue producing. Kale will keep in the refrigerator, ideally in the crisper drawer, for about a week.
How to Grow Kale in Pots
Kale is easy to keep in pots. Not only does this make the plant mobile so that you can move it into adequate sunlight and protect it from severe weather as needed, but it also helps to protect it from garden critters, such as rabbits, that might munch on the leaves. Plus, container growth is ideal if you don’t have garden space or the right soil conditions.
Select a pot with at least a 12-inch diameter. It also should have ample drainage holes. An unglazed clay container is a good option because it will allow excess soil moisture to escape through its walls, helping to prevent root rot. Use a quality potting mix; an organic mix made for growing vegetables is a good option.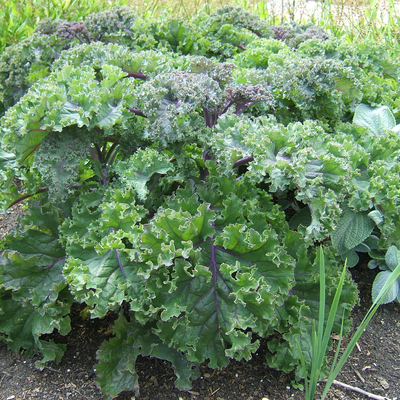 Transplant your kale into the pot at the same depth it was growing in its previous container, and water it after planting.
Propagating Kale
Kale is most commonly planted from seeds or nursery plants, but it can also be propagated via cuttings. Kale does regrow after cutting, but it requires a specific propagation process. To pick kale to keep it growing healthy, cuttings must be taken from the oldest leaves. Here’s how:
- Use gardening shears to cut a stem from the bottom of the plant on its side, choosing one with multiple leaves from the main stem (do not propagate from the plant's center). Remove the leaves on the lower half of the stem. Trim the bottom of the stem right below a leaf node at a 45-degree angle.
- Dip the cut end in rooting hormone.
- Plant the bottom half of the stem in a moistened soilless potting mix in a small container with drainage holes.
- Continue to keep the growing medium moist. Roots should develop in a few weeks.
 If you can gently tug on the stem and feel resistance, you’ll know roots have formed. After that, it’s ready for transplanting.
How to Grow Kale From Seed
Growing kale from seed can begin inside or outside depending on your region. Kale can be direct seeded in the garden or started indoors and transplanted into the garden. You can direct seed in cold climates as soon as the soil temperature is at least 45 degrees Fahrenheit.
- Start plants indoors in a seed-starting mix about six weeks before your last expected frost date. Kale seeds germinate quickly in warm soil and should sprout up within five to eight days.
- Cover the seeds with about 1/2 inch of soil, and keep the growing medium moist.
- Transplant your seedlings from indoors after the danger of frost has passed.
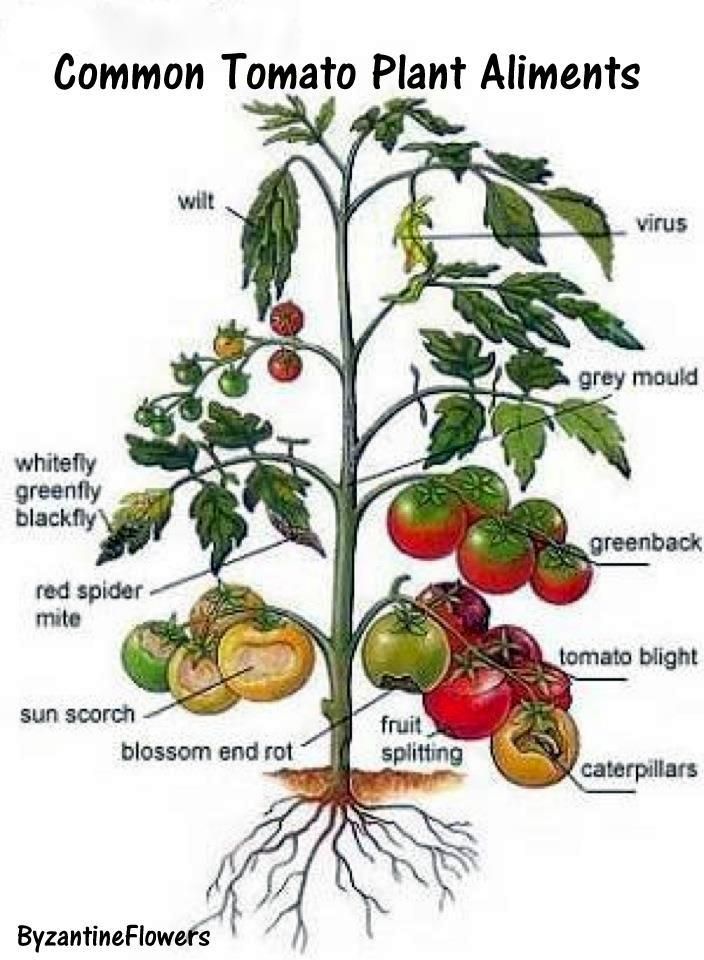
Common Pests and Plant Diseases
Kale is a member of the cabbage family, which is notorious for attracting insect pests and for rot diseases.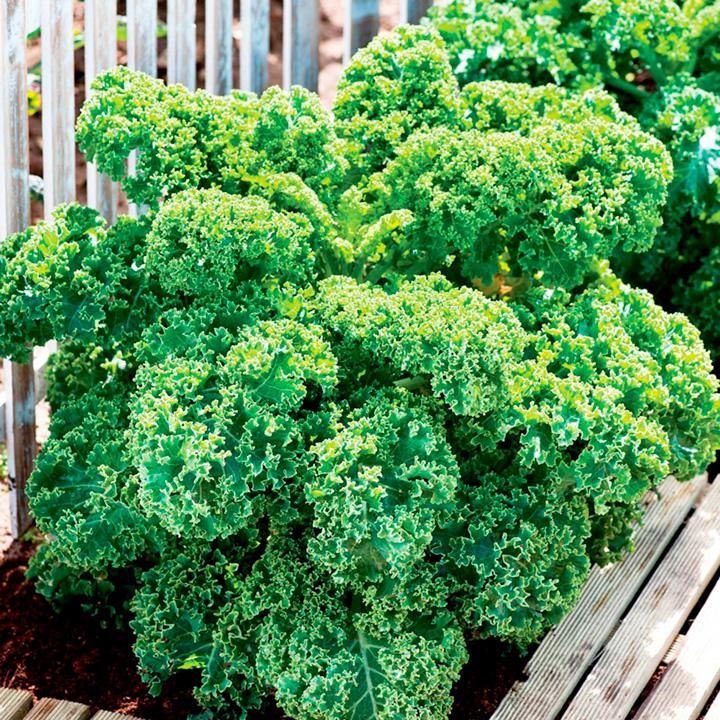 Kale is susceptible to black rot and clubroot, as well as aphids, cabbage loopers, cabbageworm, cutworms, flea beetles, and slugs. The best defense is to monitor the plants often for signs of eggs or feeding, such as holes in the leaves. Treat problems as soon as they arise.
Article Sources
The Spruce uses only high-quality sources, including peer-reviewed studies, to support the facts within our articles. Read our editorial process to learn more about how we fact-check and keep our content accurate, reliable, and trustworthy.
Kale. Cornell University Growing Guides.
Cabbage
All about cabbage:
Cabbage - plant description
Characteristics of white cabbage
Growing cabbage seedlings
Planting and growing cabbage
Harvesting
Tips for growing cabbage (video)
home garden.
Cabbage belongs to the cruciferous family (Brassicaceae). In the world there is a wide variety of types of cabbage.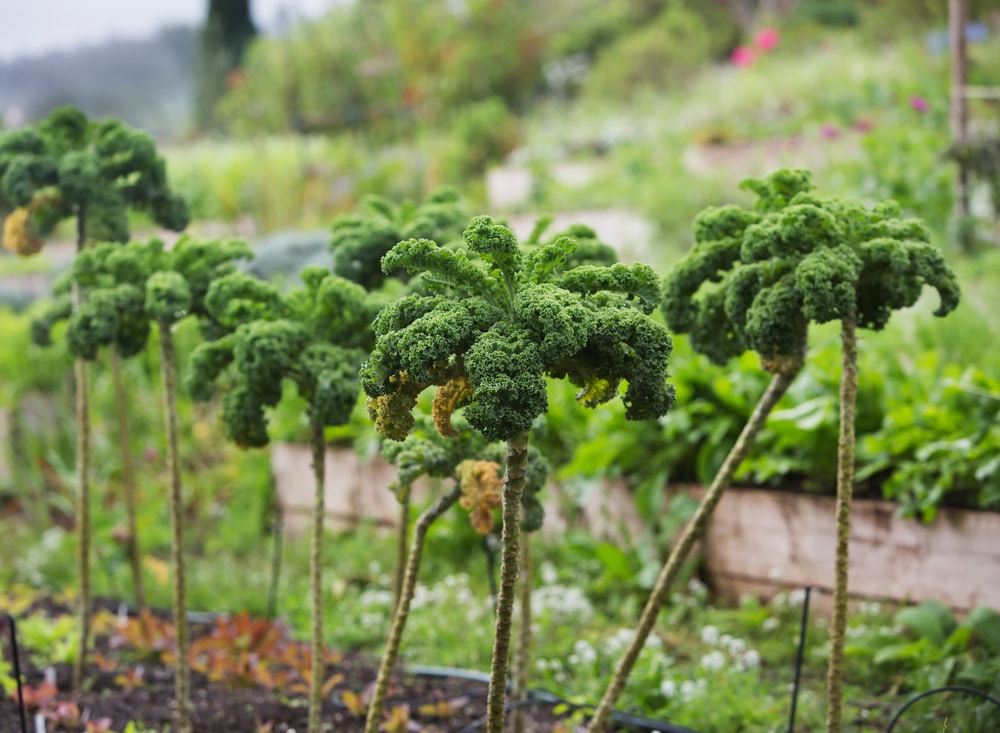 Cabbage is a biennial plant: in the first year it forms a compact head on a short stem, located between the leaves. The cabbage itself is edible. In the second year of growing cabbage, it begins to bloom. The flowers are collected in brushes. After fertilization of flowers, fruits are tied in the form of pods. Early varieties of white cabbage form heads that are not so large and less dense, late varieties - heads are larger and more compact.
Characteristics of white cabbage
Cabbage is resistant to cold, grows especially well on fertile soils. There are different types of cabbage differing in color: green, red, purple. The shape of the heads of white cabbage and their size ranges from standard round to pointed. Most types of cabbage have smooth leaves, although some may have a slightly serrated leaf structure. Cabbage is easy to grow if you follow all the agrotechnical rules for this species. Cabbage is an excellent source of vitamins and is known as a vegetable that has disease-preventing abilities.
Regardless of its type (fresh, pickled), it is a very healthy vegetable, contains vitamins C, E, K, B group and provitamin A. In addition, it contains phytoncides, which give it an antimicrobial property, have an antiviral and anti-inflammatory effect. Most varieties of cabbage that are known to us and cultivated in the country are descended from wild cabbage.
White cabbage grows best in nutrient-rich sandy fertile soils with acidity close to neutral (pH = 6.5-7.5). For early varieties, you should choose the best soils that warm up easily. It is good if the soil was fertilized with humus or rotted compost in the fall. Cabbage has relatively high water requirements, especially when the head begins to form. In addition, she prefers sunny places and those where other cruciferous plants have not been cultivated for several years.
Growing seedlings
Growing white cabbage requires very heavy, non-acid soils rich in beneficial minerals. It also needs a good supply of water.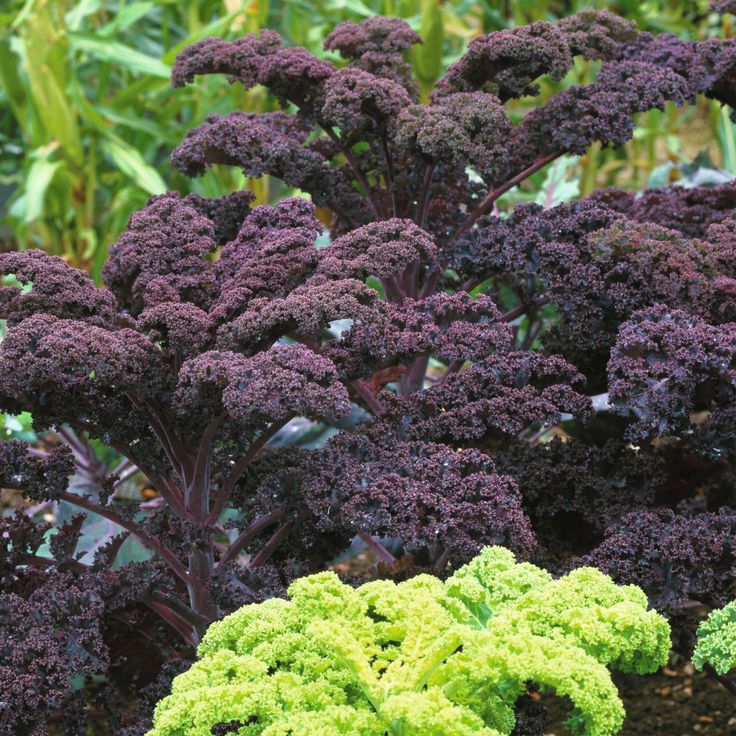 Cabbage seedlings should not be grown in the same place more than four years in a row.
Cabbage seeds are cultivated to a depth of about 1.5 cm. Seedlings are planted in open ground, depending on the variety: early varieties in early April, medium varieties from late April to mid-May and late varieties, from early to late June. When transplanting, additionally feed the plant with fertilizers containing nitrogen.
It is best to grow white cabbage a year after legumes: peas or beans. Cabbage grows well in the first year, after the autumn feeding of the soil with manure. White cabbage is not very demanding on climatic conditions. Its seeds germinate even at a temperature of 5-10 degrees Celsius, seedlings also feel very comfortable and develop well at this temperature.
Planting and Growing Cabbage
All vegetables except cabbage can be good precursors for planting cabbage. Cabbage can be grown from ready-made seedlings that are bought, or seedlings grown on their own (it takes 6-8 weeks from the time of sowing to the seedlings are ready for planting).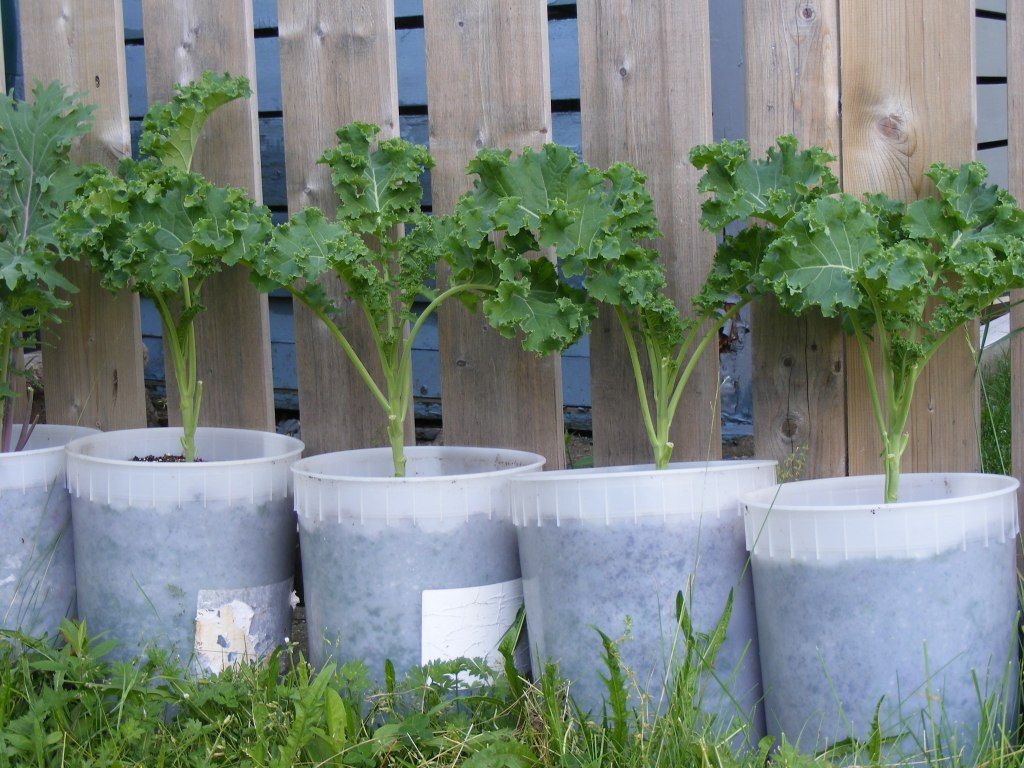
Cabbage seedlings are planted manually or by machine, it all depends on the size of the plot and your capabilities. The distance between the wheels of the tractor is taken as the distance between the rows during mechanical planting of seedlings.
Cabbage is planted in rows, 35 to 70 centimeters apart, depending on the type of cabbage and the head size you want. The closer the plants are to each other, the smaller the heads will be formed.
Early varieties of cabbage are usually planted in a square manner in nests spaced 35 cm apart. In this case, a head of cabbage can reach a weight of 1.5 kg; in late varieties, heads weighing from 2 to 4 kg are formed.
Plant in moist soil and in cool weather, and if the day is warm and sunny, the plants should be shaded for a few days after planting to protect them from heat stroke. Landing should be carried out in accordance with weather conditions.
To grow a good crop, the soil must be well moistened.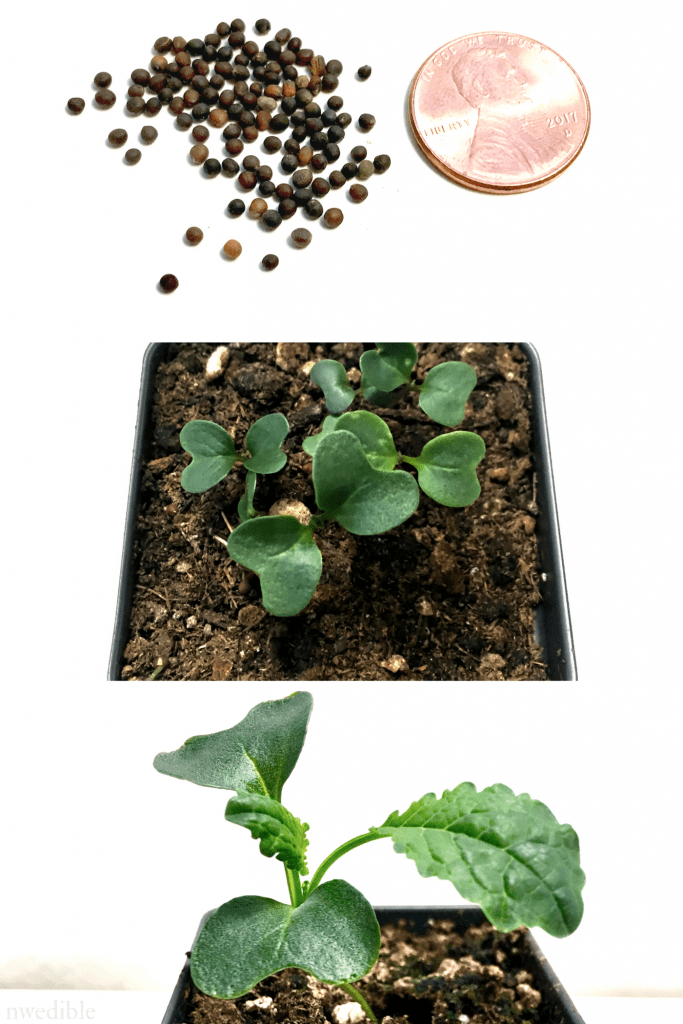 Watering is especially important for spring sowing, as it helps young plants withstand intense sunlight and high summer temperatures, and provides enough water for faster head formation and growth. During growth, cabbage should be watered and fertilized 2-3 times every three weeks, later varieties four times every three weeks. The land in the beds must be periodically loosened. You also need to remove weeds.
Harvest
Cabbage is harvested at any time from the point of head formation. To get the maximum yield, cut off hard heads of cabbage (you can check this by pressing on the head with your hand) when the formed head reaches the size appropriate for its variety, but before they begin to crack.
Sudden heavy rain can damage matured heads, the impact of drops will crack them, and the exposed inner fabric will quickly begin to deteriorate and become useless. It is necessary to collect such heads of white cabbage as quickly as possible.
Early varieties are harvested from early June to mid-July, medium varieties from late July to September, late varieties until the end of October (may be left in the ground until the first frost).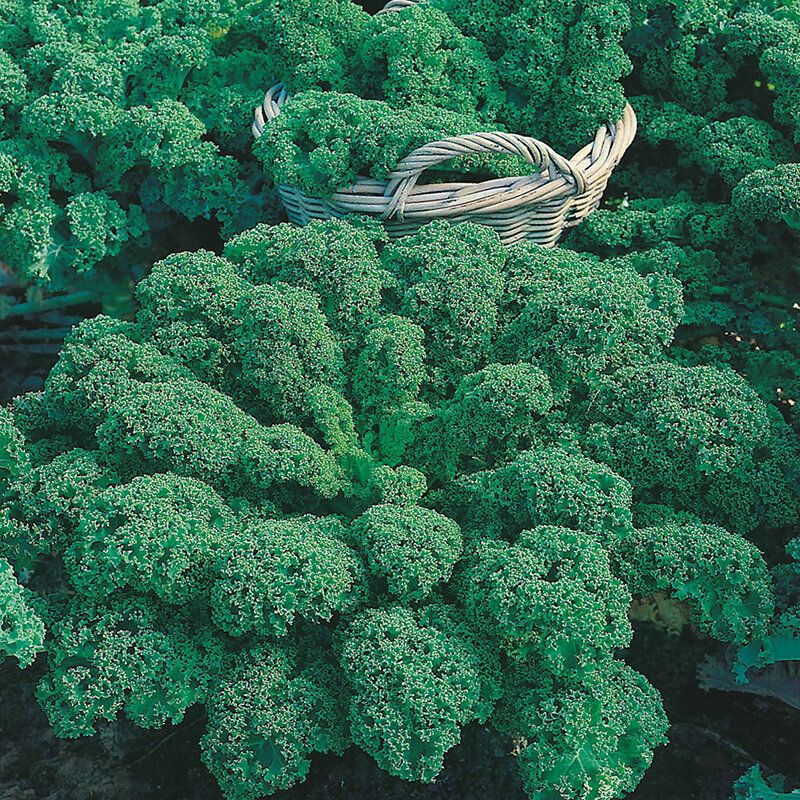
Similar articles:
Plantmate → Savoy cabbage - varieties, landing, cultivation
Plantmate → Kabbet storage
Crown breeding → Red -leaf cabbage
Crowning
001
It happens that strong seedlings of vegetables begin to wither in the garden, while the neighbors are developing rapidly and are already laying fruits, although their land is the same. A culture from the Cruciferous family does not tolerate acidic soils, it stretches out in the shade. It is not easy to understand what to do when cabbage planted in a plot where the land is fertile and the sun shines all day does not grow. In order not to be left without juicy heads, you need to find out what the culture lacks and urgently take action.
Contents
- Signs of the death of cabbage and suspension in growth
- Factors provoking a stop in growth
- Planting in a shaded section
- The requirement for soil
- Upmisable climatic conditions
- LADICS CORROMS CORNITION or excess nutrition
- Improper watering
- Pests and diseases that affect the growth of cabbage
- What cabbage seedlings need: a solution to the problem
- We organize competent care for cabbage plantings
- Treatment and prevention from parasites and diseases
- Transplanting and sheltering bushes
Signs of cabbage death and stunting
When the plant development begins to turn yellow and dry the leaves, the smell of rot arises in the garden. A head of cabbage is not formed, instead a rosette with a dry heart is formed. The apical part of the cabbage grows poorly, becomes covered with mucus, if seeds were used during planting, pollinated with grains of vegetables from the same Cruciferous family.
When the cabbage stands still, and the lower leaves have fallen to the ground, the upper leaves wither in the sun, most likely, it is stricken with a disease, and in the absence of urgent measures, it will die.
Factors that provoke stunting
To restore the development of cabbage, improve the formation of heads, you need to find out the reason that contributed to the fact that the crop stopped growing.
Planting in a shady area
If the distance between the forks in the bed is less than half a meter, and between the rows is 40–60 cm, the cabbage does not have enough light, some bushes stop developing, and the heads of cabbage are laid worse. The vegetable grows well in the area where the sun's rays fall.
Soil requirement not met
Cabbage loves moisture, but wilts when standing in water. Before planting in the ground, you need to check the composition of the soil. An area where it grows well is not suitable for a culture from the Cruciferous family:
- mint;
- plantain;
- sorrel.
Perennial grass thrives well in high acid soil, cabbage dies after planting.
If no bubbles are released when vinegar hits the ground, during digging the soil is diluted with chalk, lime or dolomite flour, 500 g is applied per 1 sq. m. site.
Reduces acidity, enriches the soil with calcium, manganese, iron, phosphorus eggshell.
Temperature
Cabbage does not react well to heat. Already at 26-27 ° C, the rosette dries, the leaves wither and turn yellow, and the heads stop growing. With a lack of moisture, the culture can die at just 19 ° C. Although the heads regain their firmness and flavor after a frost, a sharp drop in temperature adversely affects the roots, and they begin to rot.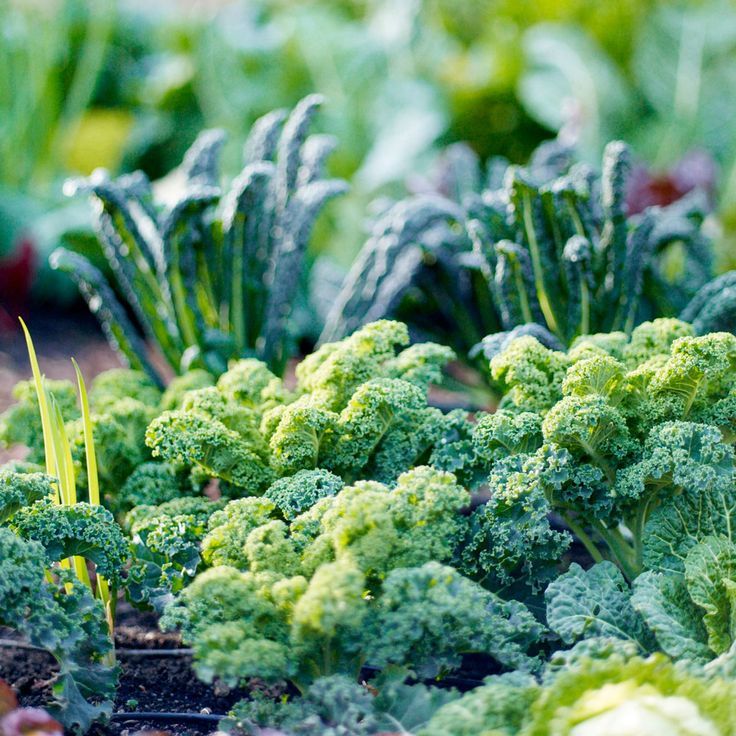
Unsuitable climatic conditions
Cabbage does not tolerate heat, does not tolerate drought, feels comfortable in middle latitudes, but does not grow well in regions where the air temperature rises above 30 ° C, does not take root in the north, where cold springs and short summers. Temperate climates are best suited for outdoor cultivation.
Agrotechnical errors
Heads of cabbage turn out small if varieties of different ripening periods are planted on the bed at the same time, the heads of late cabbage ripen too early and begin to crack. Nitrogen contributes to the appearance of thick tops, but delays the growth of heads of cabbage, during their formation the culture needs phosphorus and potassium.
Some gardeners do not spud cabbage, as a result of which lateral roots are not formed that hold the plant in the ground, insects start up. The cruciferous culture attracts various parasites, and if the beds are not sprayed with Karbofos when seedlings appear, the plant is attacked by scoops, fleas, and moths.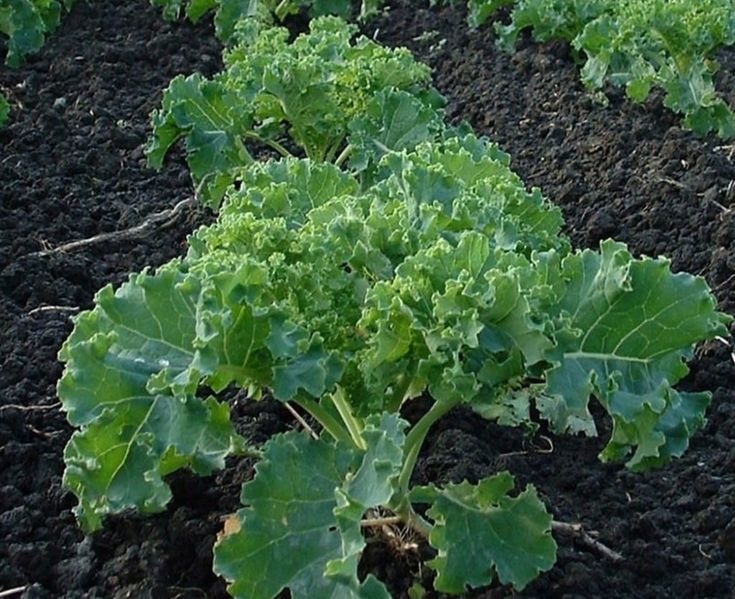
Damage to the root system
Cabbage should be weeded regularly to prevent weeds from drowning it. After watering, rain, it is necessary to loosen the ground, but this must be done very carefully so as not to hook the roots, the stems begin to rot, the leaves dry, and the plant dies.
Nutrition deficiency or excess
Cabbage cannot develop normally in poor, depleted land. As soon as the seedlings take root, they are fed with the Kemira Combi complex preparation.
When, due to adverse weather, the rosette of leaves of the plant begins to dry out or rot, water using one of the options. In a bucket of water, dissolve 2.5 g of magnesium and boron and 1 tbsp. l. funds "Kristalin". In the second option, in the same amount of liquid, mix 2 tablespoons of magnesium sulfate and superphosphate, add 3 drops of iodine.
Excess nitrogen promotes leaf growth, but heads are less likely to set. No fertilizer will harm cabbages when nutrients are applied in liquid form to irrigated soil.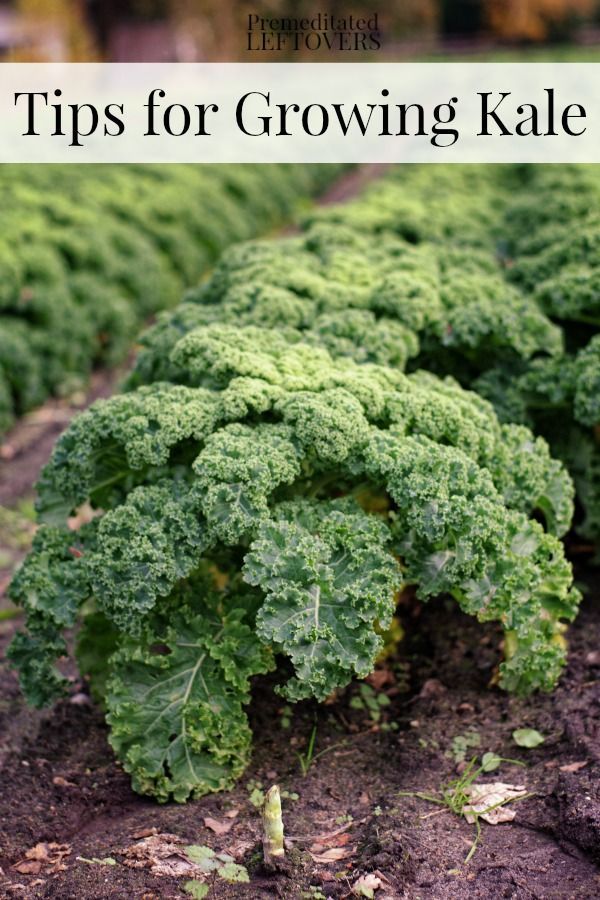
Improper watering
The soil in the garden must not be allowed to dry out, but the crop does not tolerate excess moisture and rots in such soil. Cabbage should be watered in the evening every 5 days, if it's hot, they start irrigating in a day or two. When the soil dries out, heads of cabbage do not tie.
Pests and diseases affecting the growth of cabbage
Large and succulent leaves of the crop attract insects. Cruciferous fleas attack plants when they have not yet had time to take root in the garden. Caterpillars of the cabbage moth eat the core of the ovary, and it rots.
Aphids, which appear with the first warm days, not only drink all the juice from the leaves, but also carry pathogenic fungi. If there are traces of rot on the cabbage, the plant is cut out and destroyed.
To deal with moths, the bed is sprayed with Enterobacterin or a solution of potassium arsenate. Aphids do not tolerate the smell of tobacco, leave the plants when treated with liquid soap and ash.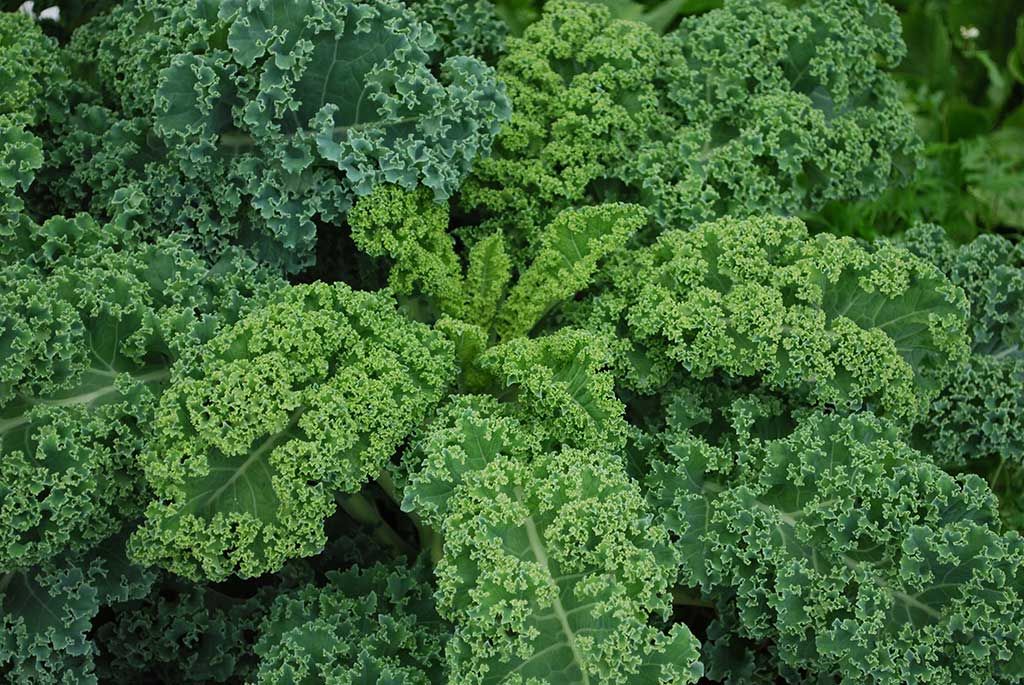
Cabbage falls as if cut when infected with clubroot. The fungus lives in the ground for years, with high humidity and warm weather, it becomes active, forms white growths, which causes the root to dry and the seedling to rot. A diseased plant cannot be cured, it is dug up and burned.
Downy mildew is seed-borne or develops in dense plantings. Cabbage leaves are covered with yellowish spots, spores of the fungus spread to the pedicels, stems, forming a plaque in the form of mold. When signs of illness appear, the plants are treated with the Ridomil Gold preparation. To prevent downy mildew, the seeds are soaked in hot and then in cold water before planting and pickled with chemicals.
In damp weather, black veins appear on the leaves. Rot during storage passes from one head to another. Before laying the heads of cabbage, the cellar or basement is disinfected, and the seeds are disinfected before sowing. The culture suffers from black leg, diseased plants are dug up with roots and destroyed.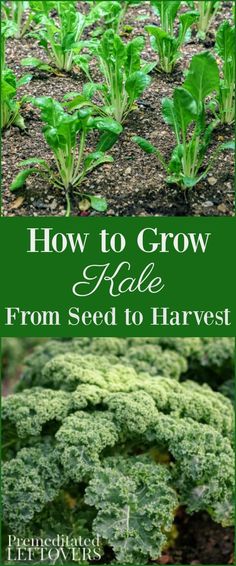
What cabbage seedlings need: a solution to the problem
Only with the creation of optimal conditions and proper care can one count on a harvest of large and juicy heads of cabbage. But even if the cabbage is carefully looked after, the heads do not tie when low-quality seeds are sown. In order for the plants to quickly start, the seedlings are hardened 2 weeks before being sent to the garden. It must be remembered that varieties of late and early ripening are sown at different times.
We organize competent care of cabbage plantings
Large heads are laid if the plants have enough light, moisture and nutrients. Culture does not develop in depleted land. From what to feed the seedlings, their growth largely depends. Pour into each hole:
- sand;
- peat;
- humus;
- wood ash;
- nitroammofosk.
When heads are formed, plants should be fertilized with organic matter and mineral complexes that do not contain nitrogen.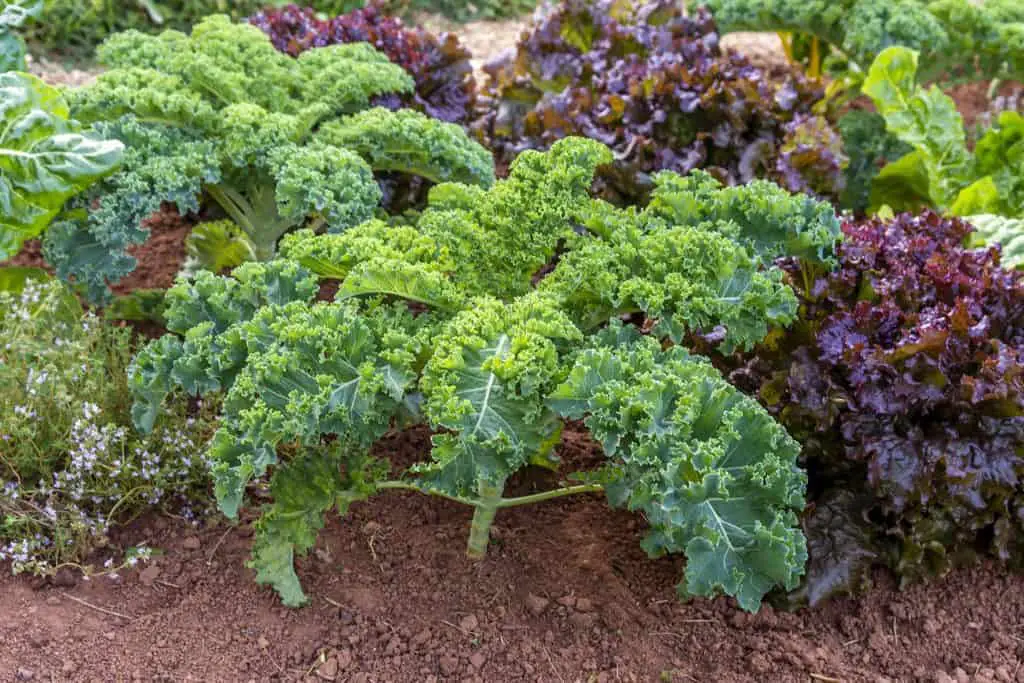 Cabbage loves moisture, and experienced vegetable growers recommend watering it regularly in the morning or after sunset. Do not use cold water for irrigation. When caring for seedlings, you need to spud each plant at least 2 times with earth.
Treatment and prevention from parasites and diseases
Cabbage leaves are used in salads, go for the preparation of cabbage rolls, therefore it is not recommended to treat the culture with poisons. To protect seedlings from cruciferous fleas and slugs, the ashes are mixed with tobacco dust and sprinkled on the beds. Spraying with infusion helps to cope with aphids and caterpillars, for which half a bucket of water is poured into the tops of tomatoes. The composition is boiled for 3 hours, filtered, mixed with tar soap and diluted with boiling water.
Insects do not really like the smell of onions, cabbage is treated with an infusion of husks, Faire is added to it - dishwashing detergent. To remove slugs, the larvae of the May beetle, put jam or honey in a jar, add water and bury it in the garden.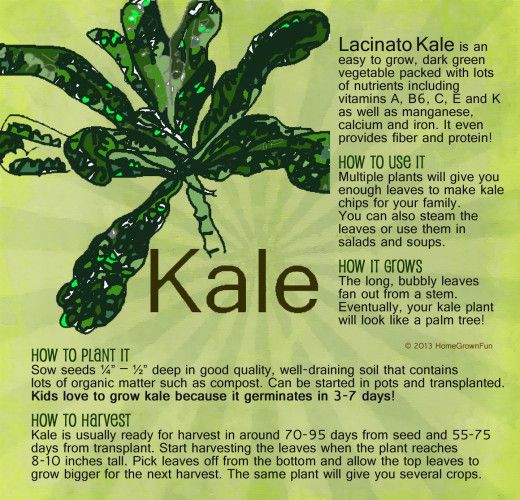 The food attracts ants, and they quickly eat pests, climbing into a container with sweetness.
It is recommended to plant next to cruciferous crops:
- basil;
- sage;
- marigolds;
- dill.
The smell of spicy herbs and fragrant calendula is not liked by fleas and aphids, but attracts insects that destroy parasites. Prevention of diseases is carried out before planting cabbage in the garden. The earth is treated with fungicides, ash is placed in the holes. Often, when affected by downy mildew and black leg, the plants are dug up and destroyed.
To protect the cabbage from powdery mildew, the seeds are placed in water heated to 50 °C before planting, after 15 minutes they are transferred to cold water.
Spraying the beds with Bordeaux liquid helps to prevent the development of phytophthora. It is very difficult to deal with the kila. Plants are spudded and watered with manure when the heads of cabbage have already set up and will soon be cut off.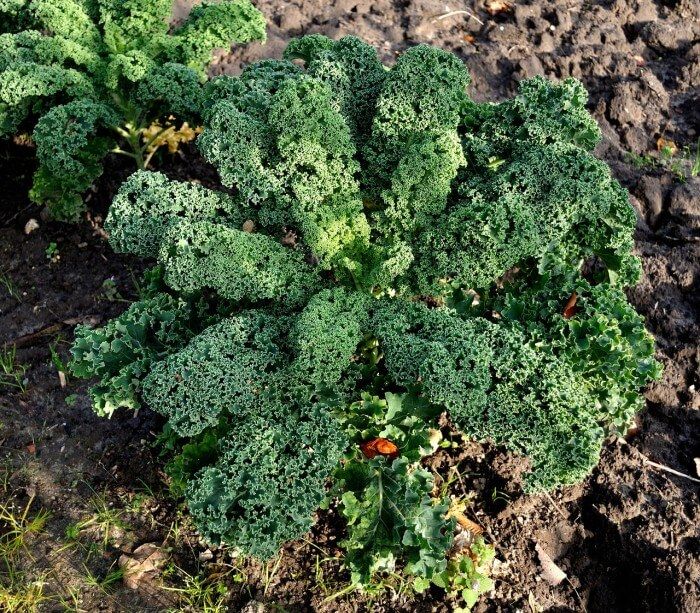 To prevent the disease, crop rotation is observed, acidic soil is lime, the site is dug deep, which helps to destroy fungal spores and prevent the growth of bacteria.
To combat rot, clubroot and black leg, systemic fungicides Topaz, Trichodermin, Fitosporin-M are used, but the leaves are not sprayed with solutions, but the roots are watered.
Transplanting and sheltering bushes
When placing cabbage in the garden, one should take into account not only the ripening period, but also observe a certain interval. Vegetable growers recommend planting a crop, leaving between the bushes:
- late varieties - 65 cm;
- mid-season - 50;
- early - 35.
Row spacing should be between 75 and 50 centimeters. The leaves of young cabbage are too tender. At first, the seedlings need to be shaded from the bright rays of the sun. Seeds of early varieties are sown at the end of April, late cabbage is sent to the garden in the last days of May - early June and grown through seedlings.