Ideas for toy boxes
12 Free Toy Box Plans That You Can Build In a Weekend
By
Stacy Fisher
Stacy Fisher
Stacy Fisher is an expert on crafting, sewing, and frugal finds, sharing her knowledge of hands-on DIY creations, finding freebies, and budgeting. Stacy was a guest on "The Dr. Oz Show" and featured in Woman's World Magazine. She has nearly two decades of writing and editing experience.
Learn more about The Spruce Crafts' Editorial Process
Updated on 08/04/22
svetikd/Getty ImagesUse one of these free toy box plans to build a gift for your child or grandchild that they'll cherish for years. It's a great way to add storage to a kid's room or playroom and the kids will love being able to organize all their toys.
Some of these plans make it super easy to build a toy chest, but others may be more difficult if you're a beginner builder. Be sure to look through each plan to see which one will work best for your skill level and the child's needs.
Each free toybox plan includes instructions, diagrams, photos, materials, tools, and even videos. All the plans are straightforward and easy to follow.
-
01 of 12
Rcbaker/Ana White
This is a simple toy box plan from Ana White that includes a hinged lid. This classic design was inspired by a Land of Nod bunk bed and it would look great in any child's bedroom. A list of items you need for the toy box are included, as well as a list of tools, pictures with dimensions, and detailed building steps.
Simple Modern Toy Box with Lid from Ana White
-
02 of 12
Shanty 2 Chic
Older kids need a little more organization than just a big toy box and this toy storage plan will get them 9 different compartments to stash their stuff.
 This toy storage chest from Shanty 2 Chic holds Ikea's Trofast baskets or any other similar-sized bin. This makes it really easy for kids to take them in and out so they can only get out the toys they want to play with at the time. A supply list, color photos, written instructions, and diagrams will help you build this toy box in no time.
 DIY Toy Storage from Shanty 2 Chic
-
03 of 12
Kreg
Here's another toy storage plan from Kreg that's perfect for older kids. A shelf sits on top of three divided bins and then two pull-out crates on the bottom. As part of the free plans, you'll get how-to instructions, a tools list, a materials list, a parts/cut list, and extra tips and tricks.
Toy Storage Console with Rolling Bins from Kreg
-
04 of 12
Chief's Shop
This plan from Chief's Shop can be used as a toy box for kids or as a storage chest for someone of any age. The instructions and images are contained in a PDF file and are so detailed at each step that it shouldn't at all be a problem to build.
 A list of all the tools, supplies, and lumber that you need are listed off to the side, as well as a comprehensive list and measurements of all the different parts that make up this toy box. Safety hinges are used to ensure the lid stays open and doesn't slam shut when it's being used.
 Pirate's Chest Toy Box from Chief's Shop
-
05 of 12
Kreg
Kreg has a free toy box plan that combines toy storage along with a bookcase. It's the perfect solution for keeping all those books and toys in the same place. Everything is included in this free plan including a set of step-by-step building instructions, a tools list, a materials list, and parts/cut list, and lots of color photos and diagrams.
Bookcase With Toy Storage from Kreg
-
06 of 12
Instructables Workshop
Simple Storage Box is an easy guide to building a toy box from NutandBolt at Instructables. As you can see in the picture, this toy box plan accounts for handles on the sides as well as a lid.
 There are detailed pictures, instructions, videos, and a list of materials in this free toy box plan.
 Simple Storage Box from Instructables
-
07 of 12
Jay's Custom Creations
This open toy box plan is easy to follow and can be built by anyone. Jay's Custom Creations offer a video walkthrough you can watch for a visual idea of how this toy box is made, but there’s also a PDF file you can download, which includes a shopping list, color-coded illustrations, and step-by-step instructions.
Lidless Toy Box from Jay's Custom Creations
-
08 of 12
The Merrythought
This MerryThought project is simple but makes a sturdy set of three wooden toy bins that would work great not only in a child's room but also in a corner in a living room or kitchen. The three bins make it easy for kids to sort and organize their toys, games, or stuffed animals. It's a pretty straightforward project that lets you decide how big you want the bins to be before you build them.
DIY Wooden Toy Bins from The Merrythought
-
09 of 12
More Like Home
More Like Home's free plan lays out very easy to follow, detailed instructions for building a cheap toy box that actually seats two small children. Images and measurements are given throughout the steps to make it really simple to build this toy box.
Little Car Toy Box from More Like Home
-
10 of 12
This Old House
Here's a free toy box plan from This Old House that shouldn't take more than around 5 hours to complete. Plus, it includes wheels and handles to make it easy for kids to move around. The estimated cost and time to build the toy chest, as well as a shopping list, pictures, downloadable template, instructions, and list of tools needed are included in this plan.
How to Build a Toy Chest from This Old House
-
11 of 12
Tetra Images/Getty Images
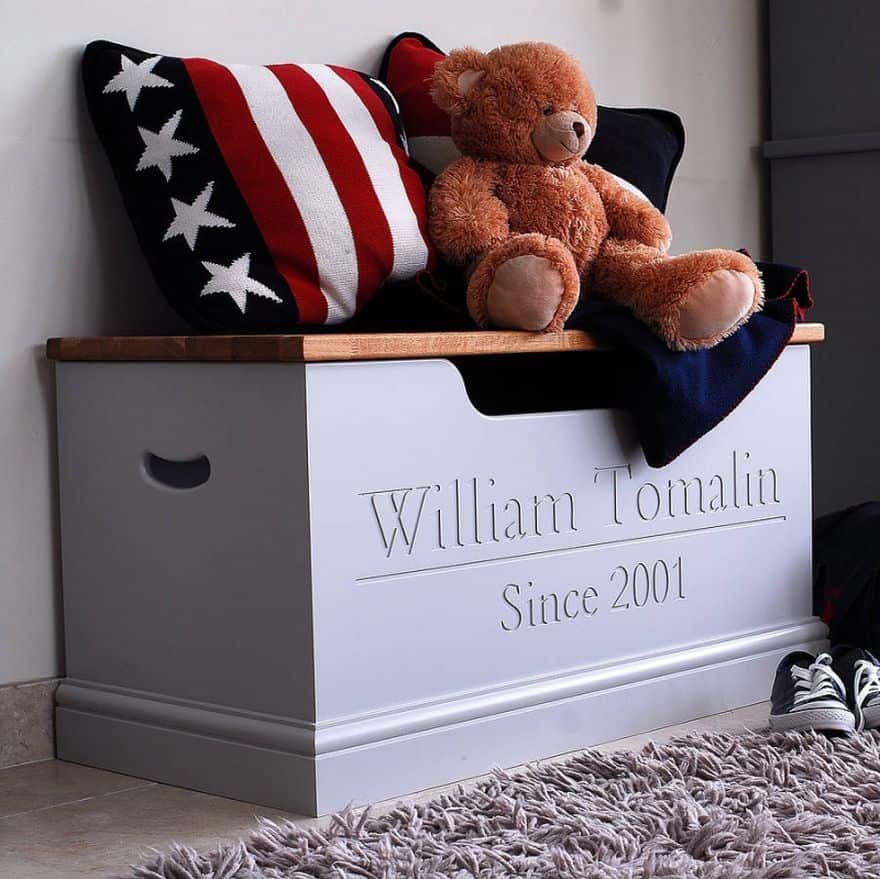
This decorative storage chest from Rona—works well for a toy box, but its design also lets it be used as a bench.
 This is an easy plan for beginners, so it shouldn't take longer than one day to complete it. The details for Rona's chest-bench plan are in a PDF file. It includes all the tools and materials you'll need, along with cutting and assembly illustrations. It's measured at 60" x 20" x 21".
 How to Build a Chest Bench from Rona
-
12 of 12
Neven Krcmarek/EyeEm/Getty Images
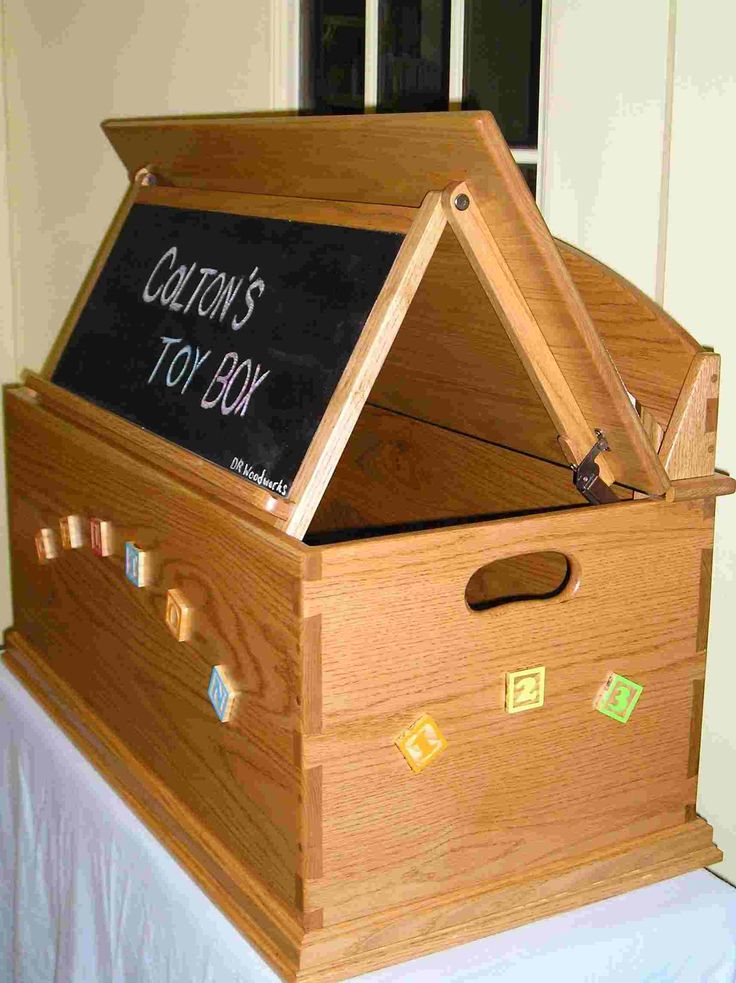
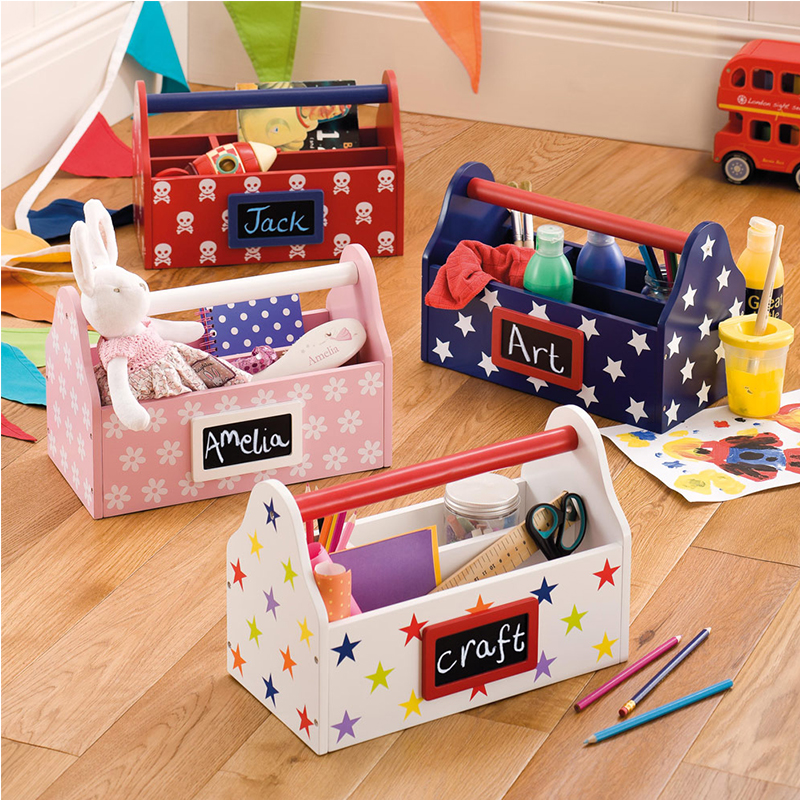
Kids like toys and chalkboards, which is why this Home Depot toy box plan combines them into one. The chalkboard paint is applied to both the backdrop of the toy box as well as the front panel, but you could always change up the plan to customize it. Ten steps through and you'll be done with this toy box, and there are images throughout each of them, some with detailed cutting instructions.
Chalkboard Toy Box from Home Depot
8 Innovative Toy Box Ideas That Will Help Your Kids Declutter
By using any of these unique DIY toy box ideas, you’ll be able to keep your home clutter-free while teaching your children the benefits of organization.
The U.S. toy market is a $21 billion industry. That’s a lot of toys! All of those stuffed animals, dolls, and games have to be stored somewhere — and no parent wants them cluttering their floors.
Organizing your kid’s room isn’t an easy task. Classic toy chests are bulky, bookcases can take up a lot of space, and plastic bins lack personality.
To help you organize your children’s favorite toys, we’ve found eight unique DIY toy box ideas that go beyond traditional storage.
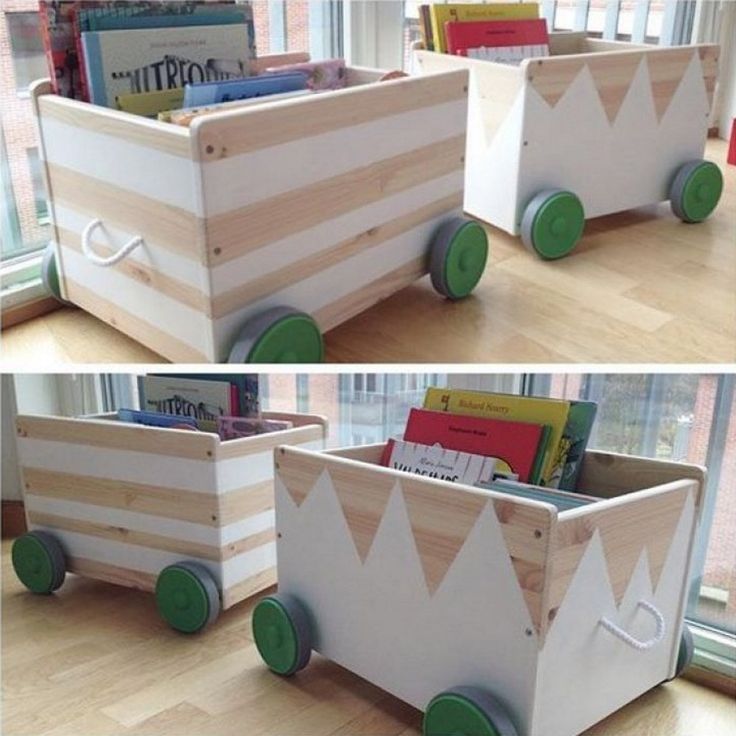
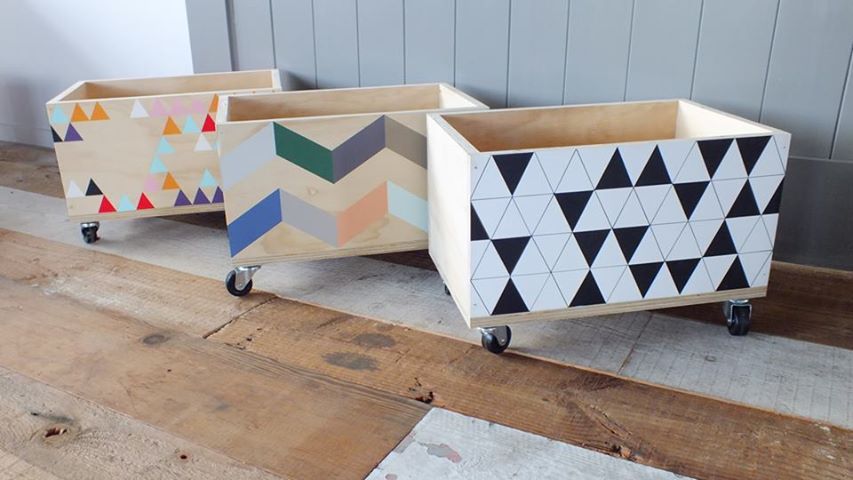
1. Rolling Wooden Crate
Image via A Night Owl
These wooden crates are the perfect height for small children to see and access all of their toys, and the wheels make it easy and safe for them to take what they need as they move around. Plus, if you have little ones who are prone to getting their fingers trapped by lids, this open-top design can be a much safer option.
Transform a plain crate into this DIY wooden toy box by adding wheels and giving it a fresh coat of paint.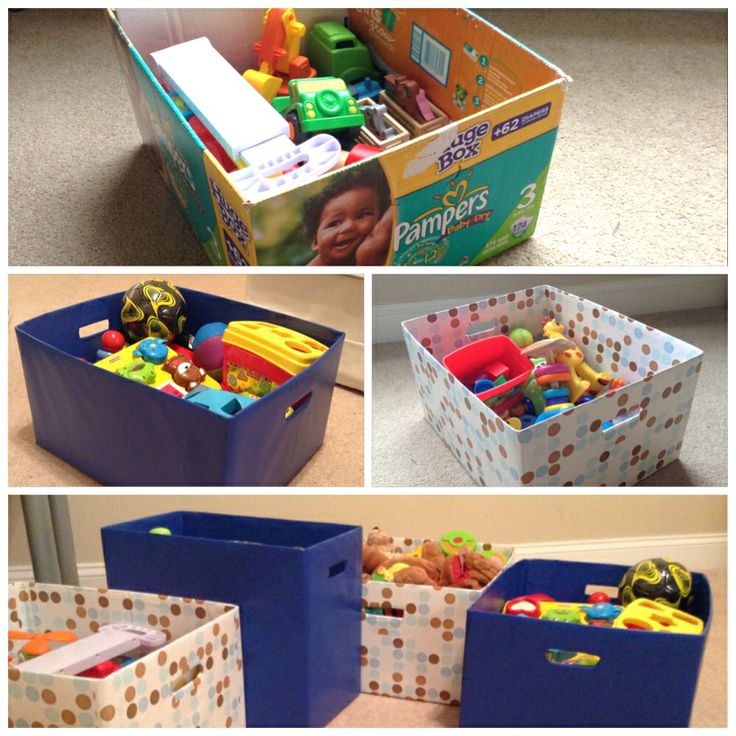 Customize the crate with different colors, designs, and stickers to match your kid’s personal style.
2. Toy Storage Swing
Image via It’s Always Autumn
Take your organization one step higher with this hanging toy storage swing. Not only does the swing put your children’s favorite stuffed playmates on display, but it keeps clutter off the ground — creating more space in your home. It’s important to note, though, that this solution works best for children who are old enough to understand not to hang from the swing themselves.
With a few basic supplies and a small budget, you can create your own stuffed animal swing in an hour (and even have your kids help with the assembly).
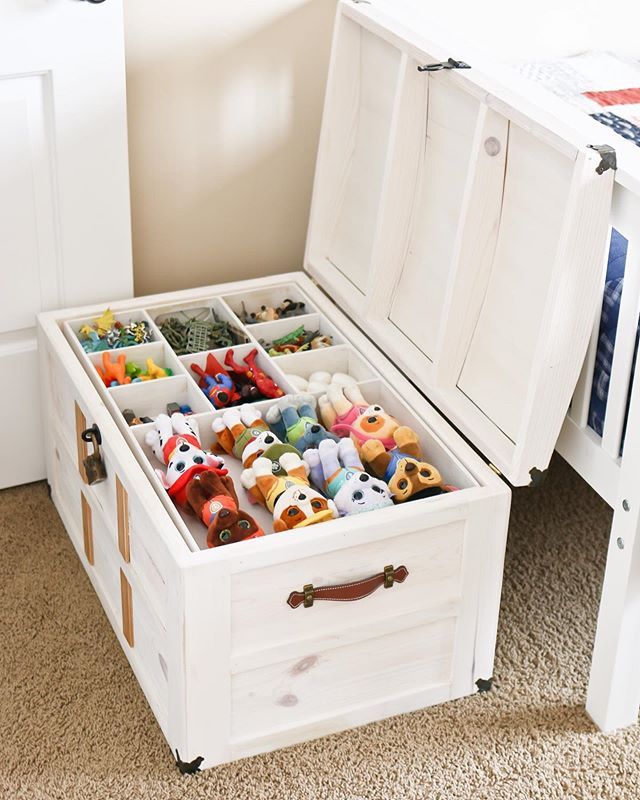
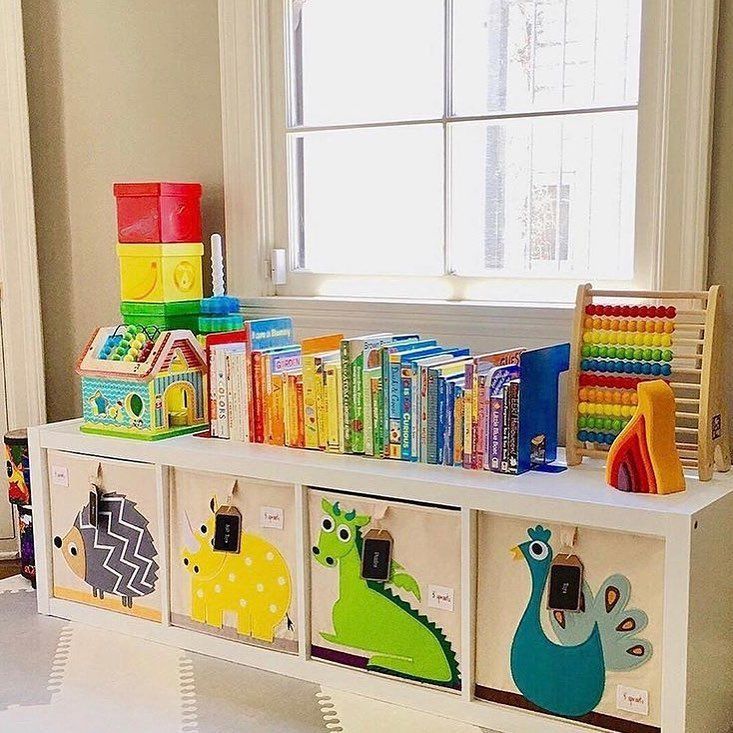
3. Labeled Toy Bins
Image via Moore than a Mommy
If you’re beginning to teach your kids the power of organization, you need labeled toy storage. This cubby system allows you to assign each colored cube to a specific toy group, helping your child associate the right toys with the right storage spot.
To add labels to each basket, simply print the letters onto contact paper or cardstock and attach them with Modge Podge. If your kids are still learning how to read, include accompanying images to help them understand where each toy belongs when it’s not being played with.
4. DIY Matchbox Car Storage
Image via The Gracious Wife
If you’ve ever been unlucky enough to step on a Matchbox toy car, you’ll appreciate this toy storage solution. Instead of throwing these miniature cars in a bin, install a wall garage that gives each car its own parking spot away from the floor and unsuspecting feet.
To create the DIY Matchbox car garage, cut PVC pipe, giving each piece a fresh coat of paint. Then, use PVC glue to attach the pipes together to create a diamond shape that can be hung from the wall.
5. Stackable Storage Cubes
Image via Pretty Handy Girl
For a more rustic take on DIY toy box ideas, consider storing trinkets in these wooden cubes.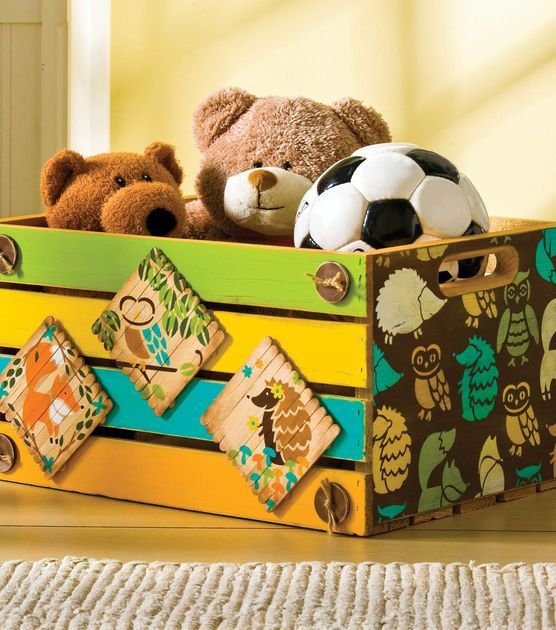 Their shape makes them a perfect home for books, stuffed animals, sneakers and more, and their size allows them to be stacked side by side or on top of one another. This simplistic design is also a great addition to your nursery storage. If you do use this in a young child’s room, it’s best to stack them horizontally to avoid accidental tipping.
Using pine boards, plywood and basic tools and supplies, you can make DIY stacking storage cubes with ease. Build as many of these as you need, customizing them to match your child’s bedroom decor.
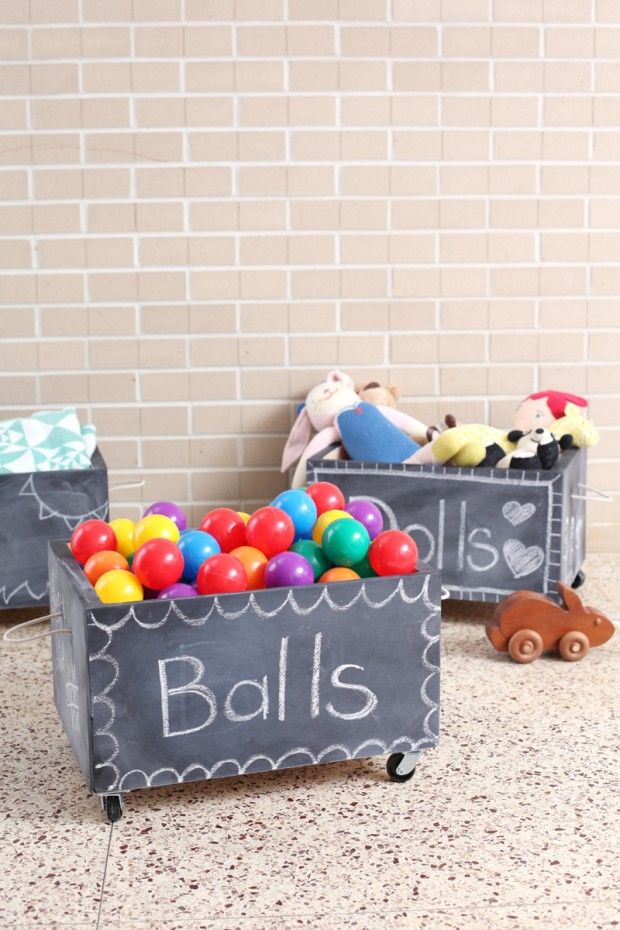
6. Under-Bed Chalkboard Bins
Image via R & R Workshop
We’ve all been guilty of resorting to Sterilite plastic bins for organized storage, but let’s face it: these bulky containers can be quite the eyesore. Instead of using them as is, give them an upgrade with chalk paint.
These DIY chalkboard toy bins can be completed in no time. After priming the front of the bins, give them a few coats of chalkboard paint. When dry, fill each drawer with belongings and use chalk to label them appropriately and place them under the bed.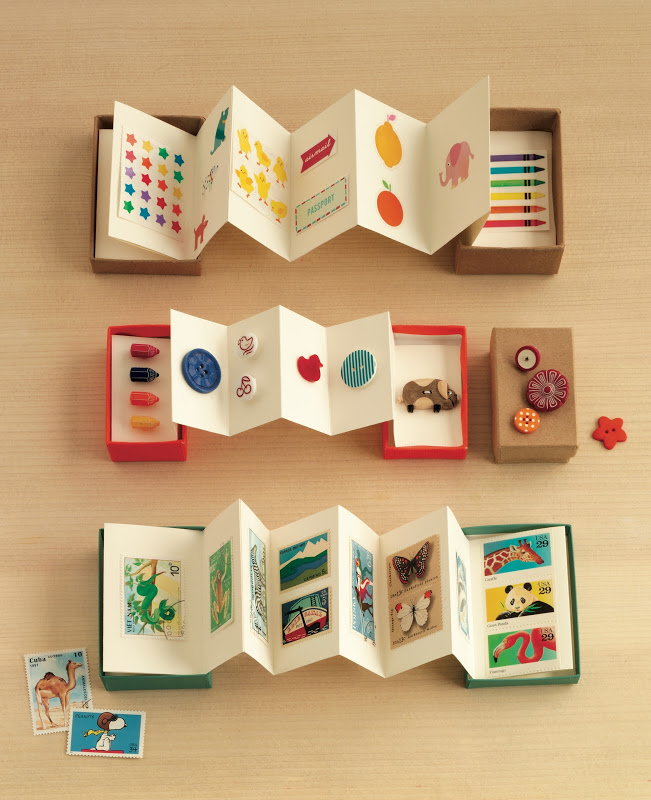 Since the labels can be changed at any time, this storage system can grow with your kids.
7. DIY Canvas Toy Bags
Image via Crafting in the Rain
If you’re looking for simplistic toy box options, hanging drawstring bags work wonders. Since canvas is naturally neutral, these bags will match in any room. Their blank space also gives you the freedom to add a touch of personality. Use stencils and fabric paint to mark each bag with whatever it contains, your child’s initials, or their favorite pattern.
With only canvas drop cloth, some cord, a cord lock and basic sewing supplies, you’ll be able to get your kid’s clutter off the ground and organized on the wall. To hang the bags safely, use drywall anchors with your screws.
8. See-Through Toy Baskets
Image via Melly Sews
If you’re trying to store toys with a lot of little pieces, like legos or doll clothes, you know what it feels like to walk into your child’s room and see those pesky items scattered everywhere.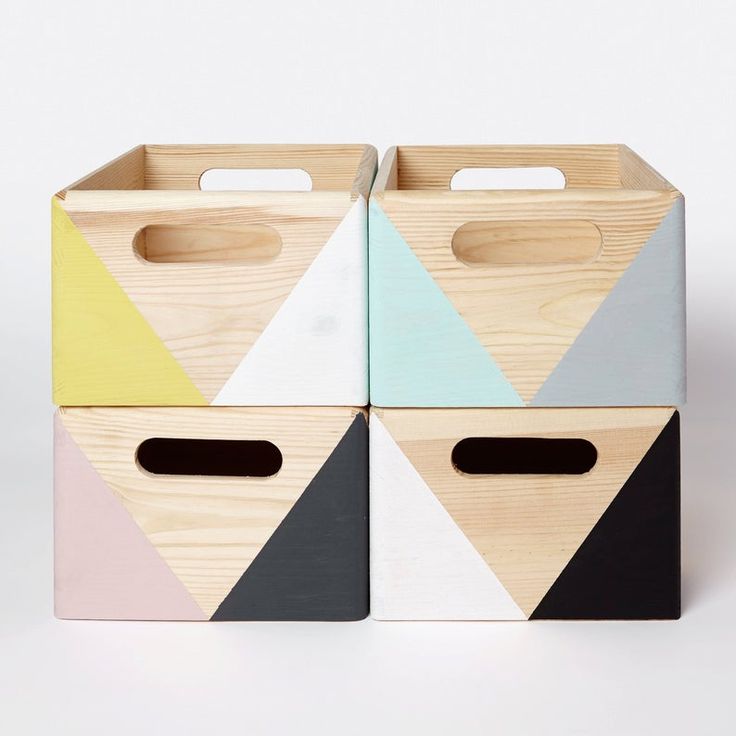 Instead of just throwing them in a container, keep them in a see-through toy bucket.
These fabric storage buckets will allow your kids see everything it holds — without needing to dump its contents onto the floor.
By using any of these unique DIY toy box ideas, you’ll be able to keep your home clutter-free while teaching your children the benefits of organization.
You may also like
About the Author
Lauren Thomann
Lauren Thomann has written about self storage and moving since 2015, making her our storage expert. She earned a Bachelor’s degree in English and Linguistics and has published over 150 articles on moving, storage, and home organization. She is also a contributing writer at The Spruce and Martha Stewart.
How to make a DIY toy storage box
Creative housewives offer many ways to create practical items for storing children's toys. A wooden box is recognized as a strong and durable construction, but its manufacture is available only to those who have the skills to work with wooden parts.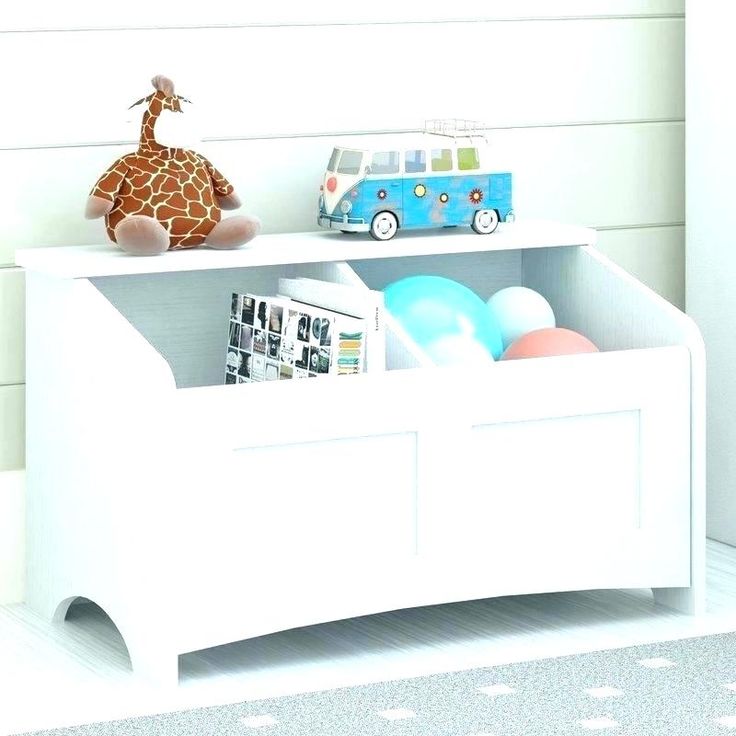 Easy to create and practical to use, a model made of plastic pipes or wooden bars is recognized. In addition to mobility and lightness, it has another advantage: it adapts as a screen for zoning space during children's games.
- 1 rational choice of place, shape and material
- 2 Instructions for manufacturing
- 2.1 Box of wood or cardboard
- 2.2 Fabric bag or decorated ottoman
- 2.3 newspaper tubes
- 2.4 Old suitcase 9000 9000 2.5 Automobile tires
- 2.6 Organizer and screen
- 2.7 Box and 4-drawer stool
Contents
- 1 1 Rational choice of location, shape and material
- 2 2 2 Instructions for the manufacture
- 2.1 2.1 Box made of wood or cardboard
- 2.2 2.2 Fabric bag or decorated ottoman
- 2.3 2.3 newspaper tubes
- 2.4 2.4 Old suitcase 9000 2.5 2.5 2.5 2.5 2.6 2.6 2.6 2.6 2.6 2.6 2.6 2.6 2.6 2.6 2.6 2.6 2.6 2.6 2.6 2.6 2.6 2.6ARMA
- 2.
 7 2.7 Box and stool of 4 drawers
1
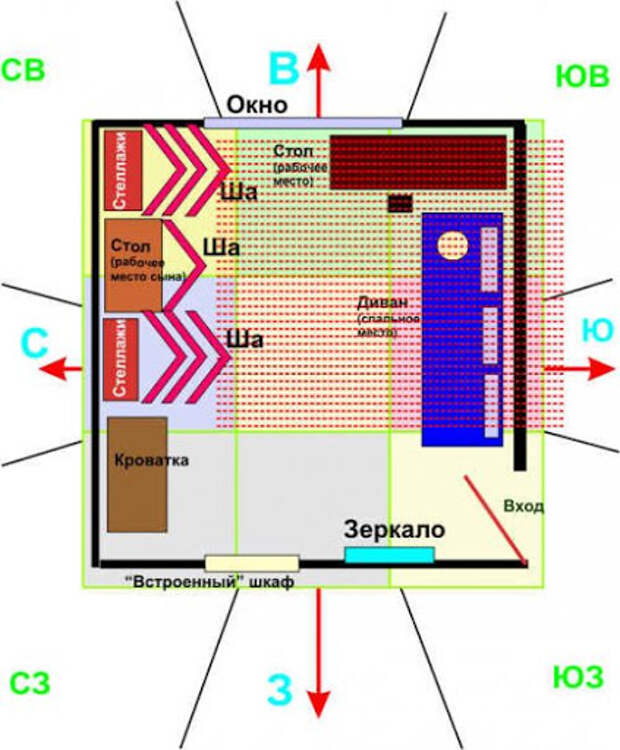
Rational choice of place, shape and materialYou can create a box for toys with your own hands from improvised materials. A container for items of children's games should be an accessible place for storing small or large things for the baby. Housewives identify several factors that are decisive when choosing the location, materials and other characteristics of a toy storage container. These include:
- baby-friendly;
- fastening strength and ease of closing the box;
- capacity for a separate class of toys;
- visual appeal of the box for the child.
The location of the toy box is important for the distribution of the baby's play time throughout the day. If the objects of interest to him are located within his reach, then he can not only choose toys on his own, but also fold them after the game. This teaches the child to keep order from an early age.
The second step is to determine the allowable and optimal volume of the box. Capacity - one of the main qualities of the box. Teachers recommend from an early age to teach kids to properly organize their workspace. In accordance with this, teach the child to distribute toys by size and type for storage in different places. To reduce the cost of manufacturing a large container, creative housewives recommend using cardboard from boxes with large household appliances as materials. Spacious containers for small items must be closed so that you do not have to collect things around the house again.
And only then choose the right materials: wood, cardboard, fabric, foam rubber. If during the manufacture of the container it is assumed that the baby will be able to handle it independently, then it should be made from safe materials. When using foam rubber or cardboard, the child will not be able to get hurt, which distinguishes such a frame from wood or metal.
When using wood, all parts to be sanded must be carefully sanded for child safety.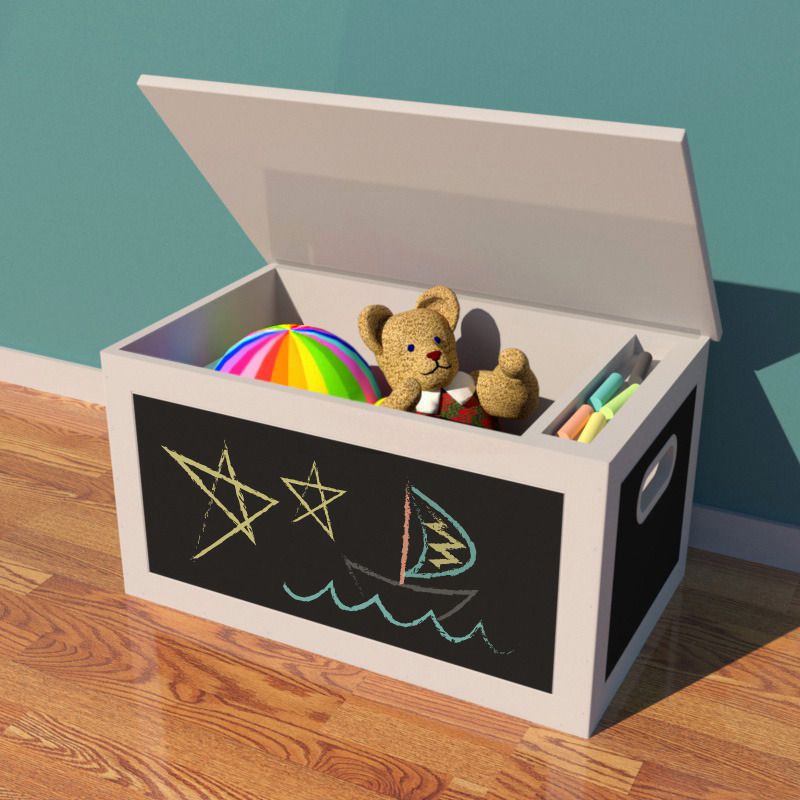 Long-term operation of structures made of natural solid materials (oak, aspen, birch) will help to ensure special impregnation, primer and coating with varnish or paints. When working with foam rubber, the edges that are turned or stitched are pre-pasted with a special adhesive tape to strengthen them.
Lids, ties and other fasteners must be easy to use. It is preferable that they are made from natural materials. It is not advisable to use a synthetic cord, as it slips and the ties are quickly untied.
Another important quality of such a container is its appearance. Firstly, any hostess selects interior items in accordance with the style and color scheme of the room. A box for storing children's toys in this matter is no exception. Secondly, children do not like to clean up, and a toy-shaped box will help diversify the process. The attractive appearance of the container will help to quickly teach the child to carefully handle things, diligently collect them in a place agreed in advance.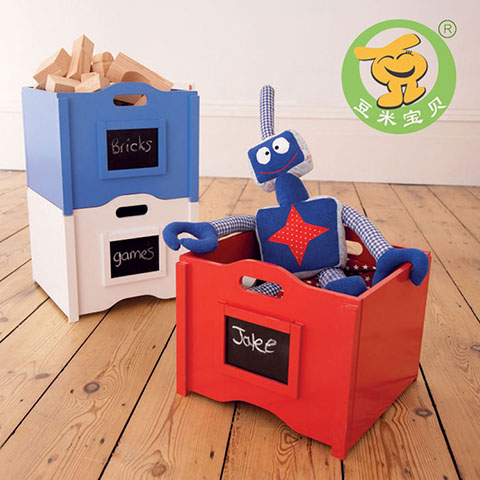
2
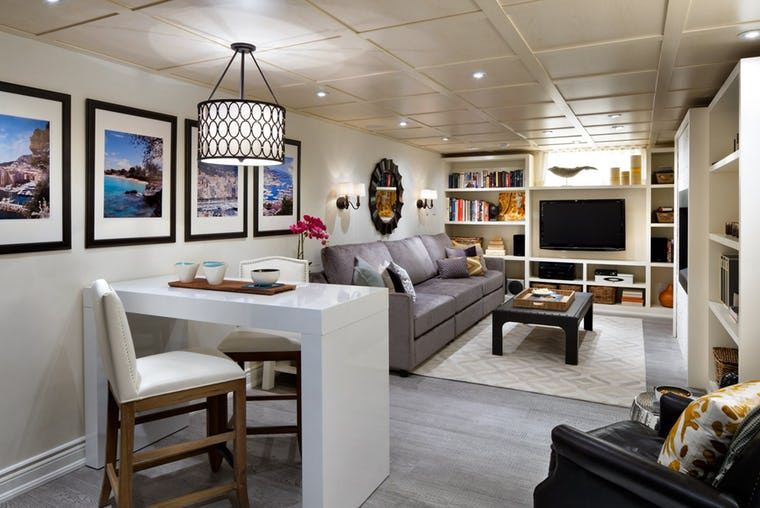
Manufacturing instructionsParticularly valuable ideas in organizing the space of a children's room are those that help to create a functional thing, such as a stool, screen or table, with the possibility of storing various things in them.
The interior and decor elements of the baby's room, which can also serve as a storage of his play items, include:
- folding bench with a second shelf for placing small toys;
- mobile folding bookcase;
- sleeping place along the window with a hidden drawer;
- hanging baskets;
- drawers built between the legs of the table on the right and left side of the seated person;
- suitcase attached to stool;
- hard-backed fabric pockets in the shape of your favorite character;
- fabric hanging pockets on the stem;
- folding rigid base with pockets or drawers, which is used for zoning the space of the room during children's games;
- baskets, woven from wicker or newspaper tubes;
- street structures from automobile tires.
2.1
Wood or Cardboard BoxThe Wood Box is the strongest, most durable and environmentally friendly box design for storing children's toys. It can be implemented as a chest of drawers or seating, bench, stand and more. To reduce the cost of crafts, it is permissible to use parts of old furniture for its manufacture.
Wooden box for storing children's toys
Manufacturing instructions:
- 1. Design a model of a wooden box, considering its dimensions, methods of movement (legs, wheels).
- 2. Prepare materials for manufacturing: plywood, boards, beams, screws, hinges for attaching a door or lid, wood glue or PVA, a saw for cutting boards.
- 3. Draw and cut out 6 parts: bottom, 4 side walls, lid.
- 4. Fasten the parts with glue and screws, the lid with hinges (folding version).
- 5. After the box has been made, it should be sanded and painted. You can "turn" it into a carriage, a car or a fabulous house.
- 6. Wheels will help make the box mobile, they should be attached to the bottom of the structure.
Cardboard box
Making a box for toys with your own hands is recognized as an easy and useful joint activity with a child from 5 years old. A pliable cardboard in the hands of a creative adult turns into a beautiful box for children's things. The child's choice of the color of paper or fabric to decorate the design will help create the illusion that he made the product himself. With this approach, the baby will cherish this thing and learn to use it faster.
Environmentally friendly materials should be chosen for fastening to cardboard; PVA glue is suitable for fixing.
2.2
Fabric bag or decorated ottoman In small apartments, finding a place for a box for children's things and games is not easy. For such cases, the ingenuity of caring housewives adapted a fabric bag for storing toys. It is convenient to fold products into it, and you can place it simply by hanging it on the back of the door. For ease of handling such a device, rings are attached at the entrance to the bag, which helps the child to easily get and place toys in it.
Toy bag hidden behind the door
Fabric toy bag is practical but doesn't look very neat. But its undoubted advantage is mobility. Such a device can be easily transported to the country house, hidden under the bed or behind the desk.
The fabric can be used to decorate a solid base made of wood or plywood: prepare a box as in the previous paragraph, then sheathe all sides of it. A practical design in the colors of the interior will succinctly fit into the overall design of the children's room.
The pouffe is also lined with fabric. In order for such a design to serve as a place to store toys, it is enough to provide a lid that a small child could freely use. It can be removable or openable. In the second case, it is hinged to the back wall of the base.
According to the color scheme of the wallpaper or furniture, the fabric for the upholstery of the ottoman is selected. Patterns are cut out on paper - these are 8 blanks according to the diagram below. For stitching, seam allowances of 1 cm should be made. You can reduce the cost of self-manufacturing storage for toys at the stage of procurement of materials. Creative housewives suggest using old jeans, a blanket, a baby blanket that are no longer used for their intended purpose.
Pattern for sheathing the cover of an ottoman with the possibility of storing children's toys in it
Sewing procedure:
- 1. According to the shape of the pattern, prepare a template on paper and transfer it to the fabric.
- 2. The corner of each piece is sewn on, folded inward, to create an opening for insertion into the stuffing fabric.
- 3. The parts are sewn together from the wrong side.
- 4. According to the size of the resulting hole, cut out a circle and, after stuffing, cover the hole with it and sew it on by hand.
- 5. The blank of the top is attached to the wooden cover of the pouffe with a joiner's stapler or an elastic band is sewn along the edge of the fabric and put on the base.
2.3
Newspaper tubesCraftsmen suggest making a practical box for storing children's toys from newspaper tubes. Decorate such a craft with a bright plug-in rag bag. A decorative elastic band or lace is sewn to its edge.
Basket-bench made of newspaper tubes
Procedure:
- 1. Determine the direction of the fibers: Randomly tear a newspaper sheet, and take the right direction, which results in a more even edge.
- 2. Newspapers are cut along the grain along the entire length into strips not more than 8 cm wide.
- 3. A thin knitting needle is applied to the corner of such a strip and, pressing it tightly against the paper, the sheet is twisted. The end is glued to the tube. At least 80 pieces of such blanks are made, although it all depends on the chosen size of the box.
- 4. To make the bottom of the basket, cut out 2 pieces in the shape of a square or oval from thick cardboard. Tubes are glued around the perimeter of one of the cardboard blanks - these are future racks.
 From above, a second identical part is glued to this blank, the tubes are fixed between them. Set aside until the glue is completely dry.
 - 5. Begin weaving by folding up the uprights vertically. The working tube is folded in half and wrapped around the first rack, twisting, moving to the next. The working tubes will need to be lengthened; for this, new tubes are inserted into the tails of the workers, carefully gluing the tip.
- 6. To achieve strength and uniformity of weaving, a weight press is installed on the bottom, the size of which clearly corresponds to the dimensions of the basket. Such a rigid base is removed before forming the edge of the basket.
- 7. Having completed the weaving, the fastening points are glued with liquid PVA.
- 8. To decorate the basket, it is coated with acrylic paints, then with building varnish for wood. Creative housewives use printed napkins to decorate using decoupage technique.
- 9. The final element is the sewing of the bag, which will be inserted into the basket.
 As the toy storage area gets dirty, the bag is simply washed and placed back in the basket.
Photo-instruction for weaving a basket from newspaper tubes
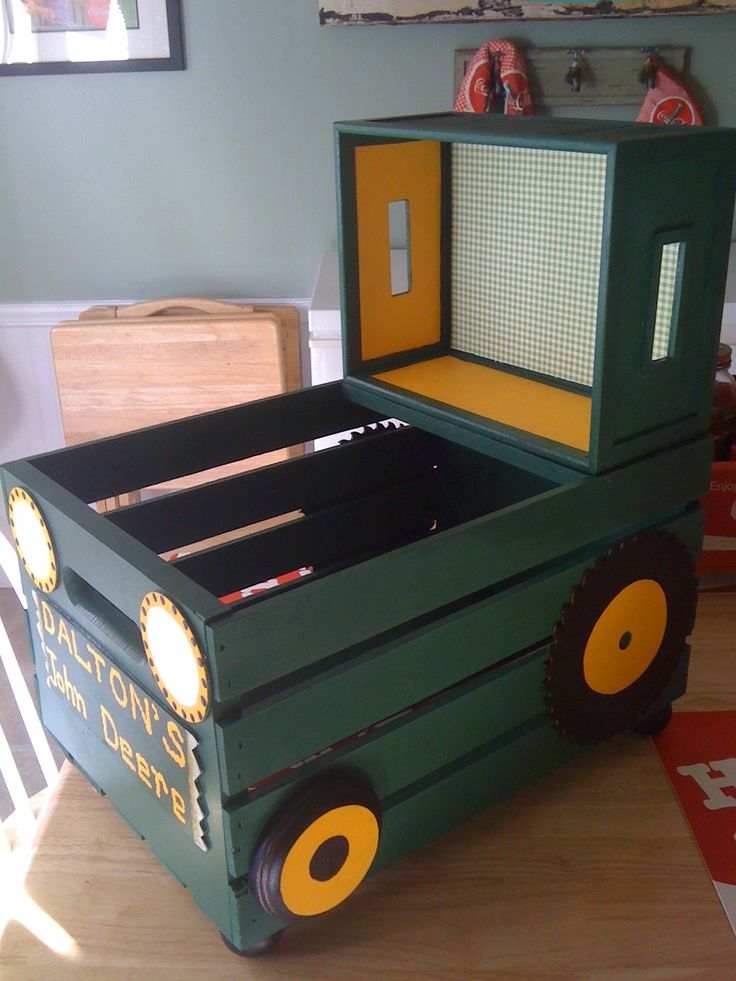
2.4
Old suitcaseCleaning up toys from a tiring task for a baby can be turned into a real game if the storage is original. An old suitcase is suitable for a box for small toys, dolls with outfits or a collection of cars.
An old suitcase to store children's toys
Attach the suitcase to a chair. Depending on the age and height of the child, the height is selected so that the baby can freely reach the storage place. Drawings are built on the surface of this design, three-dimensional elements are applied using the decoupage technique. Creative housewives are able to make a whole castle, which will not only be a storage for toys, but also decorate the interior of the room.
2.5
Tires Outdoor play equipment may be stored in the hallway or near the porch.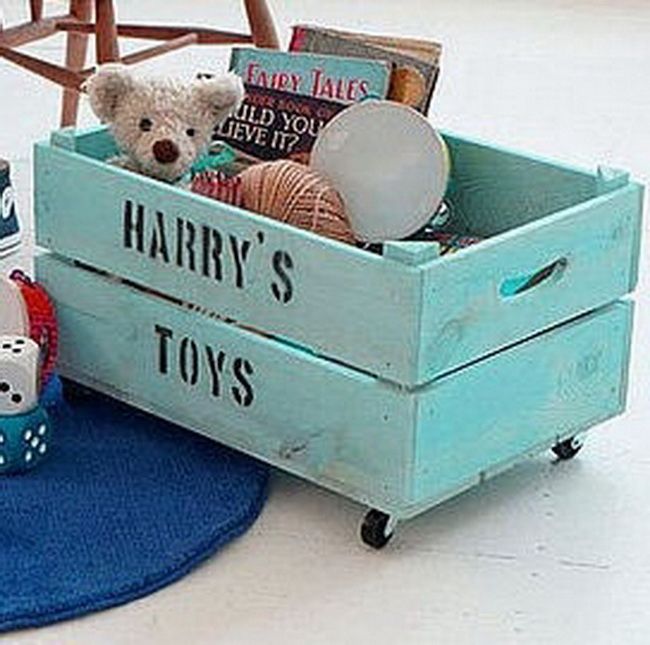
Tire bins
Old car tires can help organize storage space for bulky toys at no extra cost. The material is wear-resistant to temperature extremes and changes in air humidity, soil.
The manufacturing technology of these toy containers is simple. It is enough to paint car tires with acrylic paints in colors that match the tone of the door or porch. They are stacked on top of each other and get a container of the desired height, convenient for the child to use.
2.6
Organizer and ScreenThere are other practical ideas for storing small toys such as chocolate egg figurines, key chains, etc.. An original solution would be a folding rack with pockets on the inside. By opening this design, you can create a screen for temporary zoning of the children's room during games.
Small toy organizer and screen
A strong rigid base for such a small toy organizer is recommended to be constructed from plastic pipes or wooden blocks. A simplified version is a hinged structure on one stick-holder, on which fabric with pockets is hung.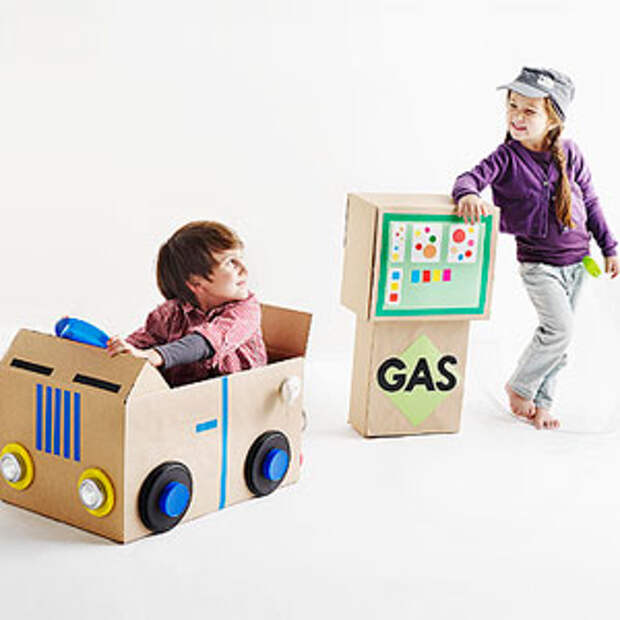
Hanging organizer for small toys
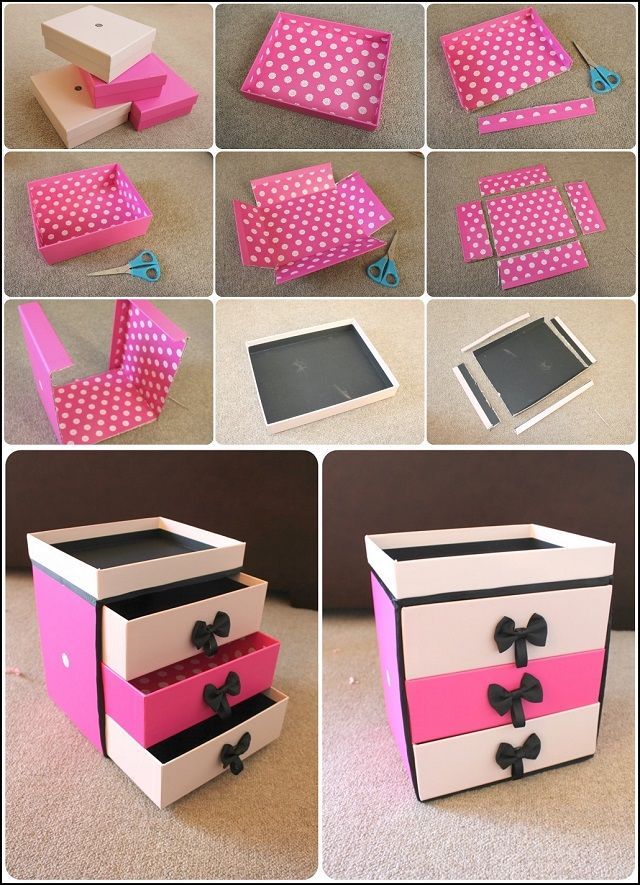
2.7
Box and stool of 4 drawersPlastic or wooden boxes are freely available at hardware or garden stores. Using them to construct practical storage for toys and a stool simplifies the fabrication task and reduces the time involved.
The boxes are nailed together or glued with superglue. The upholstery on the seat surface is selected according to the color scheme of the room. The design is convenient and its mobility: if you attach the wheels, then this stool can be easily moved from one room to another.
Square stool with the ability to store small toys
DIY toy box - ideas and photos
Toy box is a necessary element of any children's room. Cleaning should be a fun activity for the child, and each toy should have its own place. You can buy a basket or chest of drawers in the store, but it is much more interesting to create a beautiful box yourself.
You can easily make such an object with your own hands and embody your best creative ideas, pleasantly surprising children. In addition, the implementation of this design will take only a few evenings.
DIY toy box can be made from cardboard, chipboard or sewn from fabric. You get a capacious container in which you can put all the board games with toys.
Cardboard box
The simplest option is a cardboard box. The following set of tools and materials is required for work:
- Cardboard box.
- Decoration fabric or self-adhesive foil.
- Scissors, needle, thread and glue.
- Tape and ruler.
First, you need to cut off the upper part, glue the cuts with adhesive tape.
Decorating an ordinary cardboard box with colored paper and curly scissorsIf it is planned to make a product with handles, then the holes must be made in advance and the cuts should also be smoothed with tape.
Then measure the exact parameters of the box. An inner and outer cover is sewn from the fabric, and then both parts are sewn on top. For sheathing, a dense, well-cleaned material is selected.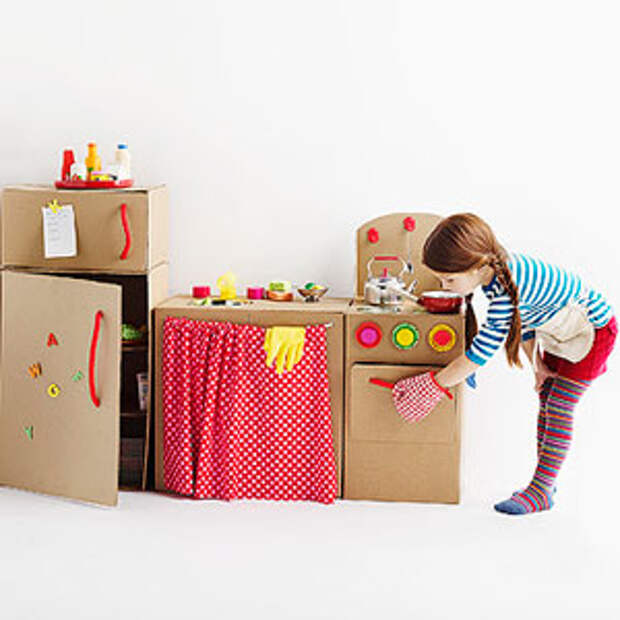
Another way to decorate the box is to cover it with cloth or self-adhesive film. This is a very simple procedure. To implement it, you need to cut out several pieces of fabric or film according to the dimensions of the walls and bottom. At the same time, do not forget to leave 1-2 centimeters for bends. First, the outer part is glued, then the inner.
Children will be happy to decorate the box with unusual patches with youImportant! Corners and joints should be given special attention, if glued poorly, the fabric may disperse.
If handles are needed for the box, they are cut out of fabric, sewn together and inserted into the slots. You can choose any method of fastening - glue or, alternatively, simply tie the ends of the fabric together.
Decor options
- A variety of designs can be pasted onto the box over fabric or film. For example, make smiles or faces with eyes and a mustache.
- Ordinary jeans for decorating the box will add additional pockets to the design.
- The toy basket is decorated with buttons, zippers and opening elements.
- If the storage box for children's toys is decorated with colored paper, then images of cartoon characters or children's photos can be used as decor. Bright colorful images can be cut from gift bags.
Tip: Another option is a fabric toy bag. It can be in the form of a backpack or a fabulous house.
Original boxes can be woven with your own hands from newspaper vines dyed with food coloringChipboard product
To store children's toys, you can make a product from plywood or chipboard.
The walls and bottom of the box are fastened together with self-tapping screws, here, of course, male help is required. To fix the lid of the box, it is best to use special spring holders. This design will prevent children from pinching their fingers. For easy movement of the storage box, it is better to install special wheels on it. They are sold in every hardware store.
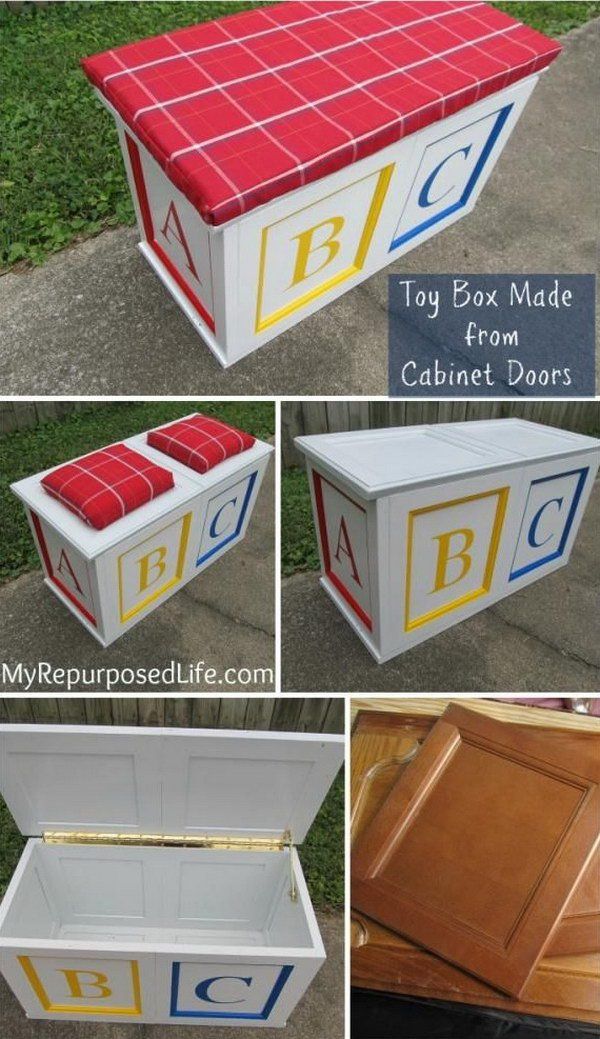
The product must be varnished.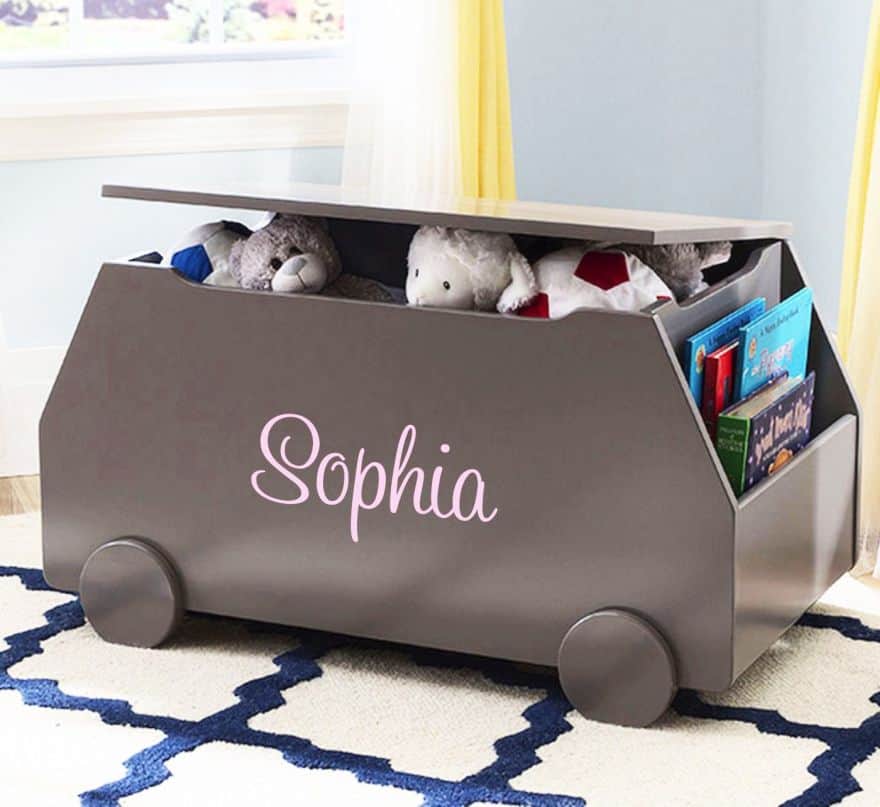 The varnish must be transparent and non-toxic. The walls of the product can be decorated with various figures, numbers or letters. These parts are easy to make out of wood with a jigsaw and paint them in different colors, or ask the children for advice, maybe they already have ready-made parts in their bins, for example, from puzzles. Then glue the decoration to the surface with glue.
You can decorate a wooden basket using a stencil and bright colors.
Important! For very young children, you can cover the wooden structure with foam rubber, and on top with colored fabric.
Interesting options
There are many interesting ways to create a convenient toy storage system.
- An old suitcase kept in the attic can become an unusual box for children's toys. Such a suitcase is easily pasted over with colored paper or sheathed with a colorful fabric.
- A great way to store them is with plastic boxes. They can be placed throughout the room or attached to the walls in a chaotic manner.
Learn more