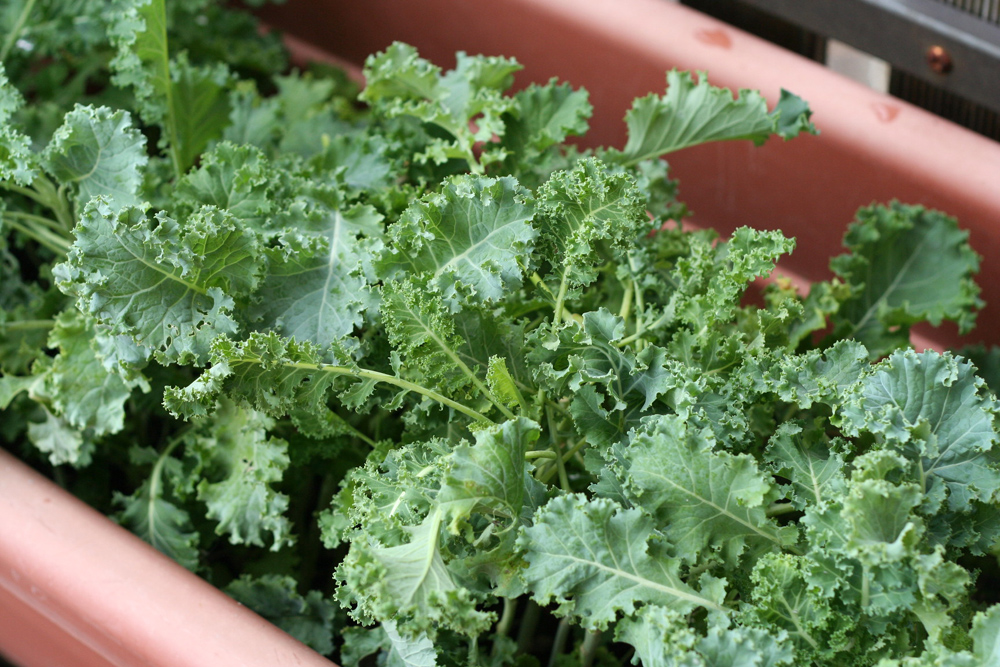
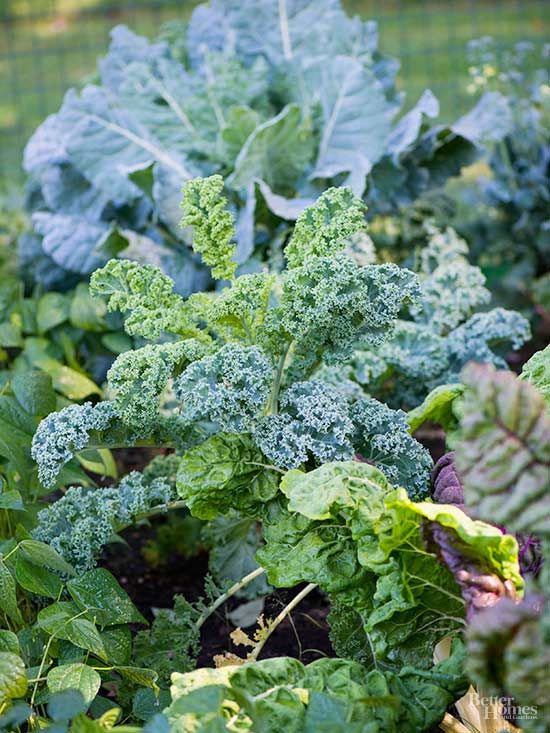
How to plant kale in the garden
How to Plant and Grow Kale
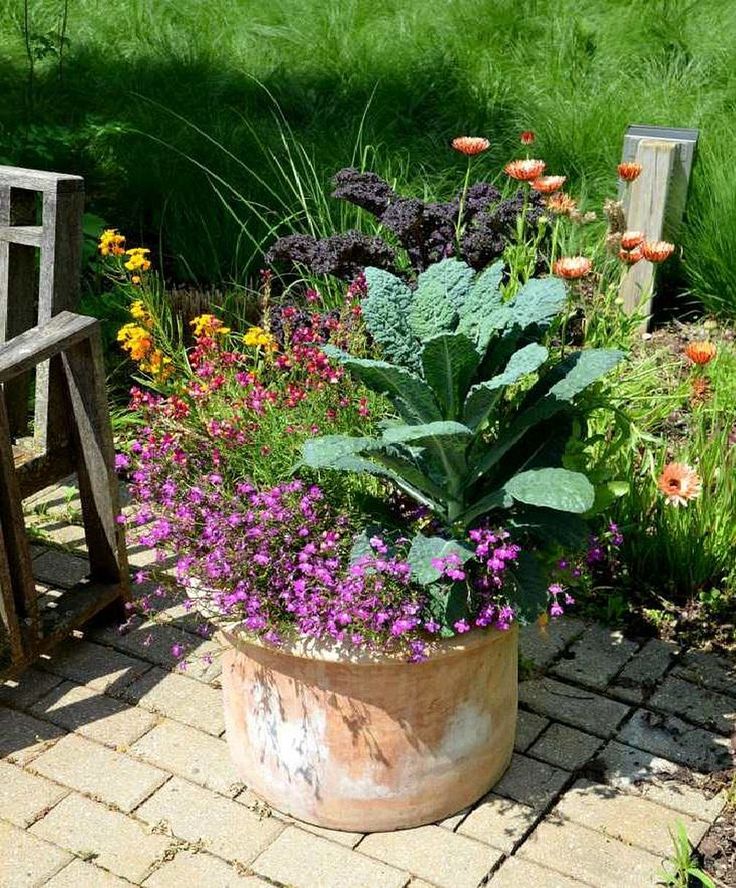
Cold-hardy and resilient, kale is an easy member of the cabbage family to grow. You can set out plants quite early in spring as long as you protect the young plants from severe cold winds with a cover. They will grow steadily for months until the weather gets too warm. You'll get a second chance to plant kale in the fall, when cool weather brings out a wonderfully sweet, nutty flavor that is unique to these cold-natured plants.
Fall is the best time for growing kale in areas where winter doesn't dip below the teens, or in a cold frame farther north, because the leaves are sweeter when they mature in cooler weather. In the kitchen, kale can be steamed, stir-fried, or substituted for spinach in omelets, casseroles, or even quesadillas. It's a wonderful addition to smoothies, too, and tender young leaves make delicious salads.
Quick Guide to Growing Kale
- Plant kale 3 to 5 weeks before the last frost.
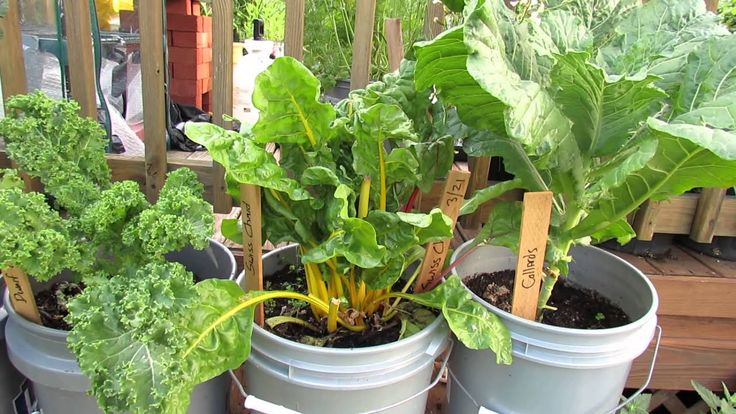
In-ground gardens, raised beds, and containers are all excellent growing options.
- Space kale 18 to 24 inches apart in an area with full sun and well-drained, fertile soil with a pH of 6.5 to 6.8.
- Improve native soil by mixing in several inches of aged compost or other rich organic matter.
- Kale is a fast grower, so keep the soil moist by giving it 1 to 1.5 inches of water each week.
- Get the most out of your harvest by regularly feeding plants with a continuous-release plant food.
- For nutritious kale year-round, consider an indoor, water-based growing system.
- Harvest kale starting with the lowermost leaves once they reach the ideal color and are large enough to eat. Leaves reach their peak flavor once they've been kissed by a light frost.
Soil, Planting, and Care
Set out plants in spring 3 to 5 weeks before the last frost; in late summer, you can begin planting kale 6 to 8 weeks before the first frost for fall and winter harvests, and continue planting throughout the fall in zones 8, 9, and 10. Be sure to choose kale starter plants from Bonnie Plants®, so you know they'll be strong and vigorous.
Kale grows best in full sun, but will tolerate partial shade as well. Plants that receive fewer than 6 hours of sun daily will not be as stocky or leafy as those that get ample sun, but they will still be plenty edible! Like collards, kale likes fertile soil to grow fast and produce tender leaves. Enrich the soil with compost and fertilizer before setting out the seedlings. Apply fertilizer and lime according to test recommendations. If you forgo the soil test, work nitrogen-rich amendments such as blood meal, cottonseed meal, or composted manure into the ground before planting.
The soil pH should be 6.5 to 6.8 to discourage clubroot disease, although the plants will grow fine in a pH of 6.2 to 6.8 if clubroot is not a problem in your garden. To be sure about your soil pH, test the soil with a do-it-yourself kit, or by using your regional Cooperative Extension office. If that seems too complicated, you can simply improve your existing soil by mixing in a few inches of Miracle-Gro® Performance Organics®All Purpose In-Ground Soil with the top layer. Enriched with aged compost, it will improve both the texture and nutrition of the native soil.
Kale is easy to plant, and grows beautifully in both raised beds and containers. To create the ideal growing environment for the plant roots, fill raised beds with 100 percent organic Miracle-Gro® Raised Bed Soil and containers with Miracle-Gro® Performance Organics® All Purpose Container Mix. Set plants at the depth at which they are growing in the container. Space them 18 to 24 inches apart. The leaves will grow bigger if given a lot of space, but smaller leaves tend to be the most tender. After planting, water plants well. Plants grow best when they have access to both great soil and a continuous source of nutrition, so apply a water-soluble fertilizer such as Miracle-Gro® Performance Organics® Edibles Plant Nutrition regularly for excellent results.
At this point you may need to be patient, because spring-planted kale may stay small until slightly warmer soil temperatures trigger vigorous growth. Kale planted in late summer or early fall may sulk through spells of hot weather. Then, when conditions improve, the plants will take off, quickly multiplying in size.
Kale likes a nice, even supply of water, about 1 to 1.5 inches per week. You can measure how much water rain has provided by using a rain gauge in the garden. Mulch with compost, finely ground leaves, weed-free hay, straw, pine needles, or finely ground bark to keep the soil cool and moist and to keep down weeds. Mulching will also help keep the leaves free of splashing soil for a clean harvest.
You also have the option of growing kale indoors. An easy way to do that is in a hydroponic growing system like the Miracle-Gro® Twelve® Indoor Growing System. There's no soil—plants grow directly in water that circulates around the roots, delivering moisture, nutrition, and air. With plenty of light courtesy of a grow light, the system provides top-notch growing conditions for kale. Best of all, you won't even have to go outside to harvest.
Troubleshooting
Kale often grows as a carefree crop, but there are several insects that like kale as much as people do. Velvety green cabbageworms often can be found chewing holes in kale leaves. The larvae of cabbage white butterflies, cabbageworms are more likely to feed on cabbage, broccoli, and cauliflower than to bother your kale.
Colourful black-and-orange harlequin bugs often show up on kale plants that are feeling the stresses of old age. Rather than fight the harlequins, most gardeners pull up and compost old plants if it is mid- to late summer. In late summer, the best way to protect young seedlings from these and other pests (like grasshoppers) is to cover them with a row cover or some other lightweight fabric, such as wedding net (tulle). The covers can be removed in mid-fall, when pest populations usually drop dramatically.
Watch for outbreaks of gray-green cabbage aphids, which often gather in clusters within the folds of frilly kale leaves. Treat small problems with insecticidal soap. Pick off and discard badly infested leaves.
Harvest and Storage
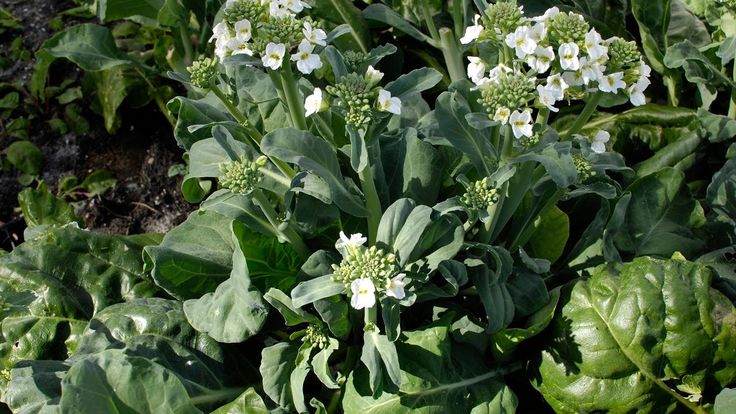
Like collards, kale leaves are sweetest in the fall, after they've been touched by a light frost. Pick the oldest leaves from the lowest section of the plants, discarding those that appear yellowed or ragged. Pick your way up the stalk, taking as many leaves as you like, as long as you leave at least 4 leaves intact at each plant's top (or growing crown). Kale will produce new leaves all winter in zones 7 to 10. In climates where hard freezes are frequent, kale often survives winter with additional cold protection from thick mulch, row covers, or plastic tunnels. Overwintered plants will eventually bolt (producing yellow flowers) in spring, signaling that it's time to remove them and make room for other crops. Wash the leaves thoroughly and store them in a plastic bag. You can eat the stems or discard them—it's up to you. If you cook the kale, the stems will become more tender. Kale leaves will keep for several days in the fridge in a loose plastic produce bag.
FAQs
Should I harvest leaves when they are young or wait until they grow larger?
It depends. Young leaves work great for salads, but if you're planning to cook the greens, let leaves reach full size. Pick the largest leaves from the bottom and outside of the plant. Avoid picking or damaging the center of the plant where new leaves arise.
How long can I expect to harvest kale?
For many months. You can pick spring-planted kale all summer, but leaves may get tough and bitter when heat arrives. Quality improves again in fall and plants continue growing even winter in mild climates. Frost makes them taste sweeter, and plants are cold-hardy at least to the low 20s. The following spring, though, they will bolt. The same is true for fall-planted kale. Winterbor is an especially cold-hardy one that works well in cold weather. Gardeners in cold climates can enjoy it through winter in a cold frame.
Is there anything I can do to help kale leaves stay sweet?
Warm weather can make kale bitter and tough. While cool temperatures are the key to sweet leaves, you can help keep roots cool by mulching around plants. Making sure plants remain well watered also improves leaf flavor.
I picked kale last week and the patch still looks sparse. Is there anything I can do to jump-start growth?
Fertilize during the growing season for a steady supply of leaves. You can side dress plants with compost or blood meal, spray foliage with diluted fish emulsion, or water with a liquid fertilizer like Bonnie Herb & Vegetable Plant Food.
How long can I store harvested kale?
Kale stays crisp in the refrigerator for up to two weeks. Store it in an unsealed plastic bag with a damp paper towel.
Frost is predicted. Should I pick all the kale and store it?
Frost actually sweetens kale. This is the most cold-hardy of all vegetables and will take quite a few of the early frosts before a hard freeze, or "black frost" as it sometimes called, kills it in colder regions. In zones 7 and warmer it often continues to produce leaves all winter long.
Green worms are eating my kale. Can I spray anything that will kill the worms without hurting my family or pets?
Cabbage worm likes to eat kale. If you've noticed a white moth fluttering among the plants, that's the source of your worms. Spray kale with Bacillus thuringiensis (Bt) to control the worms. Bt doesn't affect humans or other wildlife. Bt targets worms, which die after ingesting it. After you spray Bt, worms may take a few bites from the leaves, but they'll stop feeding and die in a few days. Spray any time you spot the moths among plants.
How to Germinate, Water, and Harvest
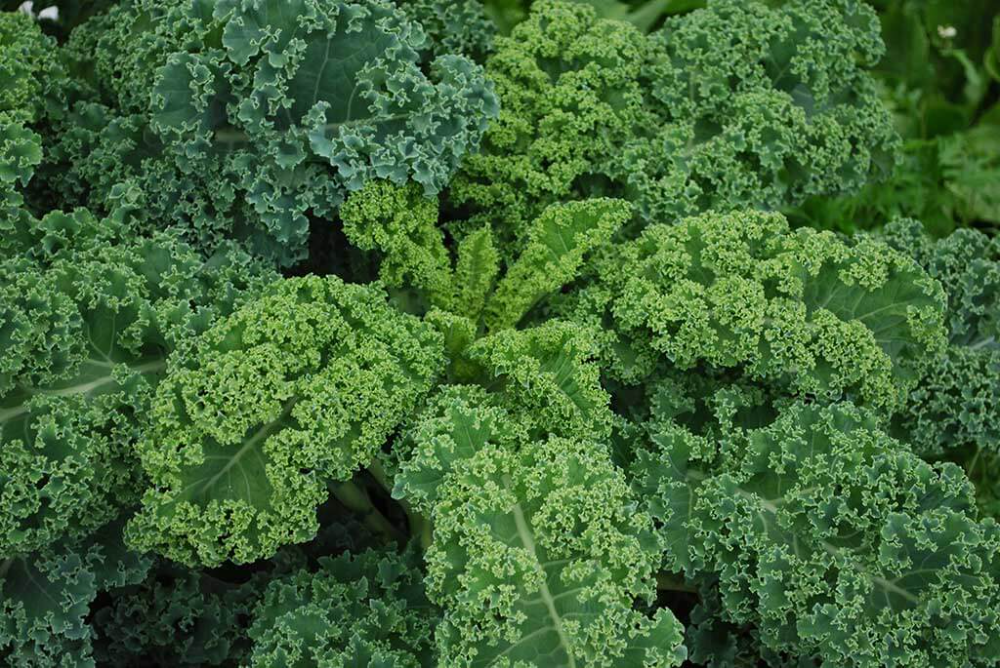
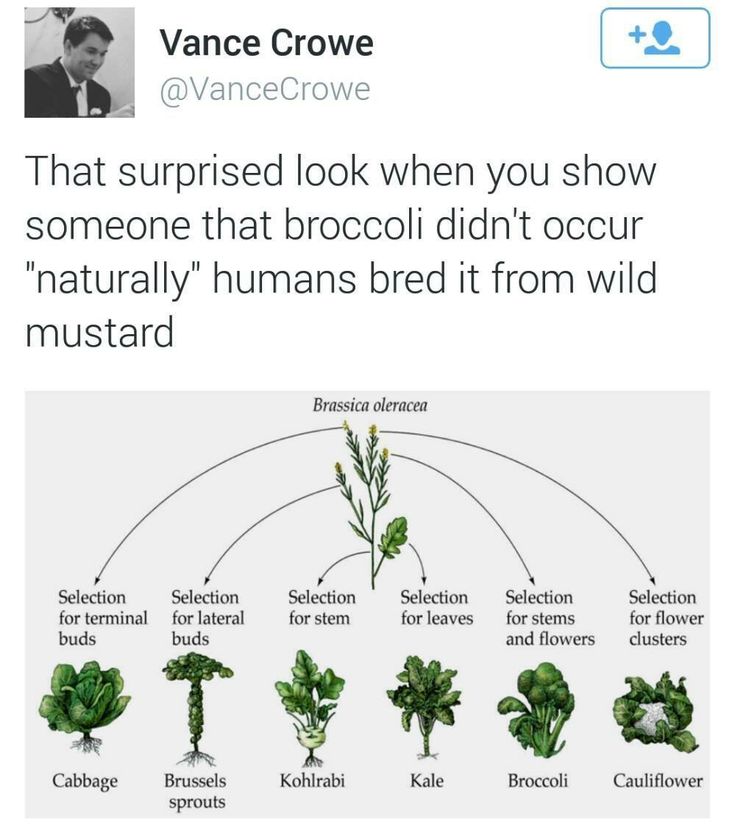
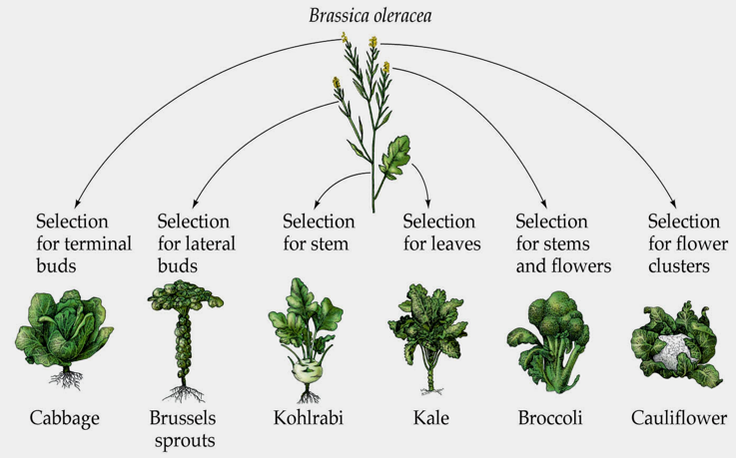
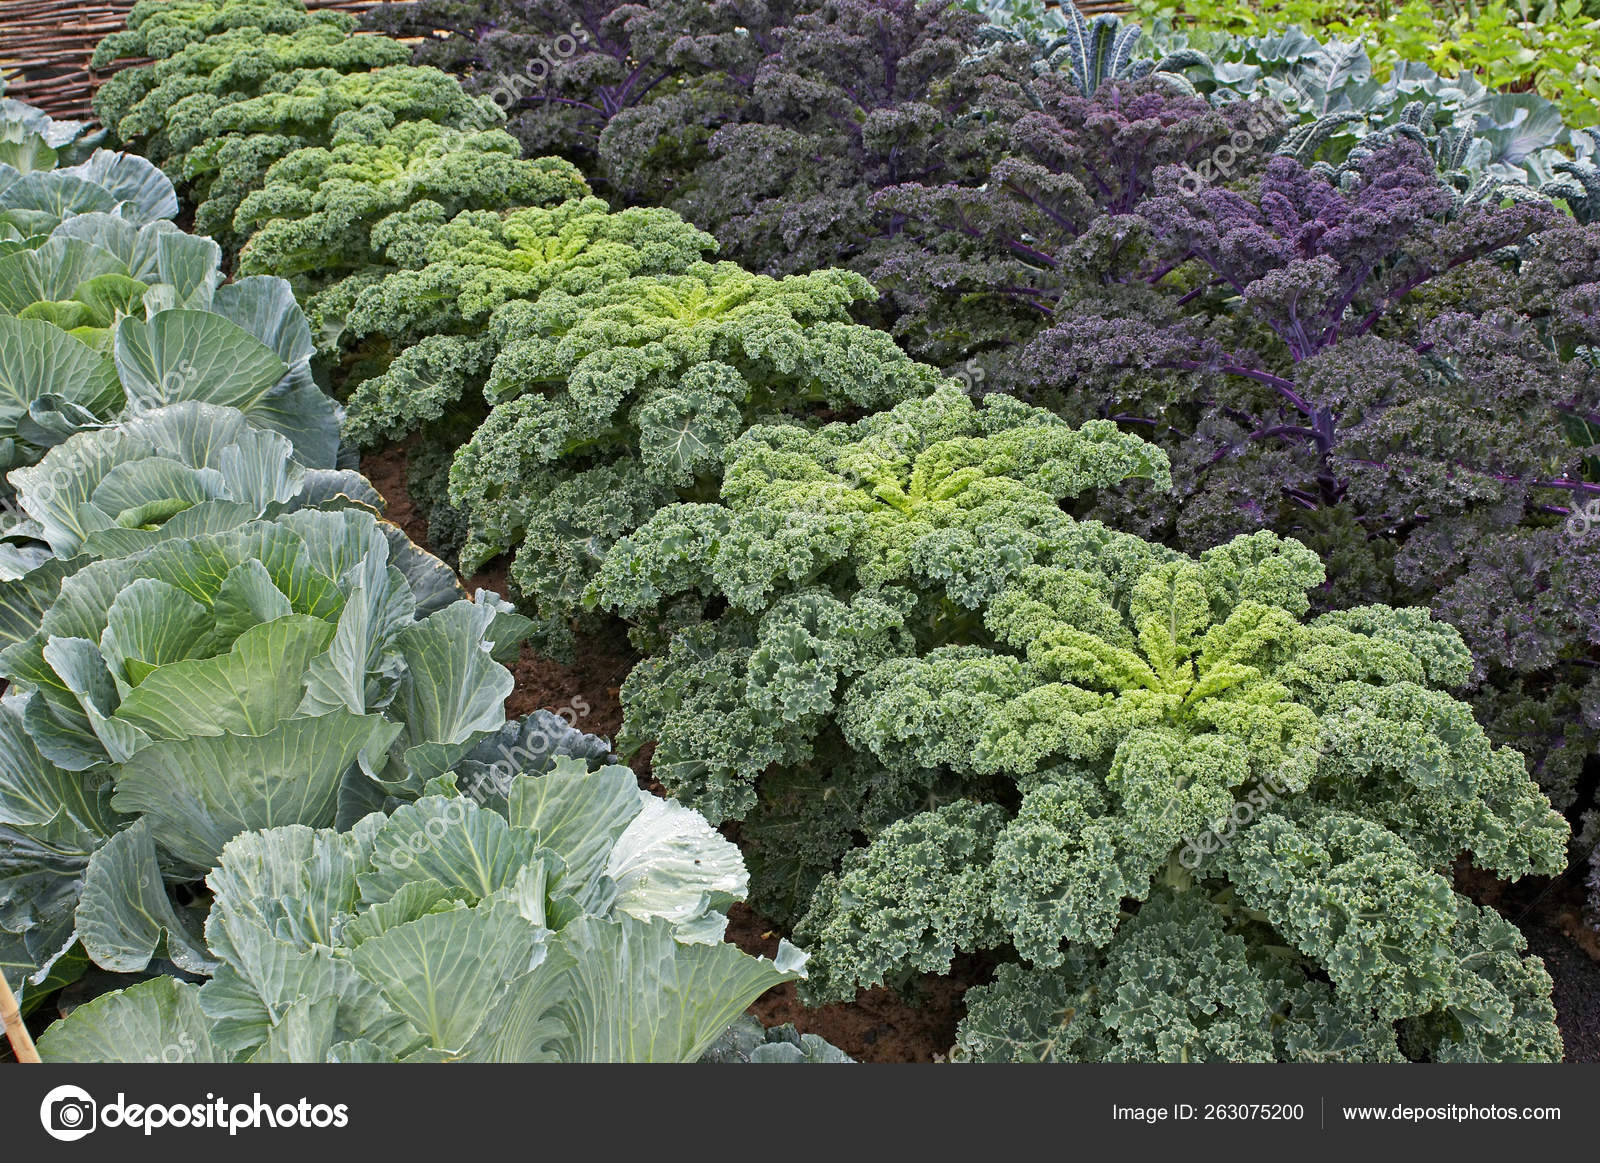
Kale (Brassica oleracea) is essentially a form of cabbage that doesn't have the tightly formed head associated with most cabbages, and it's grouped in the cooking greens category with collards, mustard, and Swiss chard. Kale plants can be quite ornamental, with textured and curly leaves that come in shades of green, purple, and other colors.
Kale has a relatively fast growth rate and can grow from seed to harvest in about three months. It is best planted in the late winter or early spring and can also be planted in the late summer for a fall to winter harvest. This biennial plant takes two years to complete its growth cycle—so it grows leaves in its first year, while seeds and flowers develop in its second growing season.
| Common Name | Kale, ornamental kale |
| Botanical Name | Brassica oleracea |
| Family | Brassicaceae |
| Plant Type | Annual, biennial, vegetable |
| Mature Size | 1–2 ft. tall, 1–2 ft. wide tall, 1–2 ft. wide |
| Sun Exposure | Full sun, partial sun |
| Soil Type | Loamy, moist, well-drained |
| Soil pH | Acidic |
| Bloom Time | Spring |
| Hardiness Zones | 7–9 (USDA) |
| Native Area | Europe |
How to Plant Kale
Kale is a fast-growing vegetable that does best in a planting location with full sun. Plant kale seeds about 1/2 inch deep, leaving at least 1 1/2 to 2 feet between each plant. High nitrogen content in the soil is important for kale to grow its leaves, so adding a few inches of organic matter like compost to a well-draining soil mixture will encourage a healthy harvest.
When to Plant
Kale can be planted three to five weeks prior to your area’s projected last frost date in the spring. In most regions, gardeners can harvest kale in the summer by planting it at this time.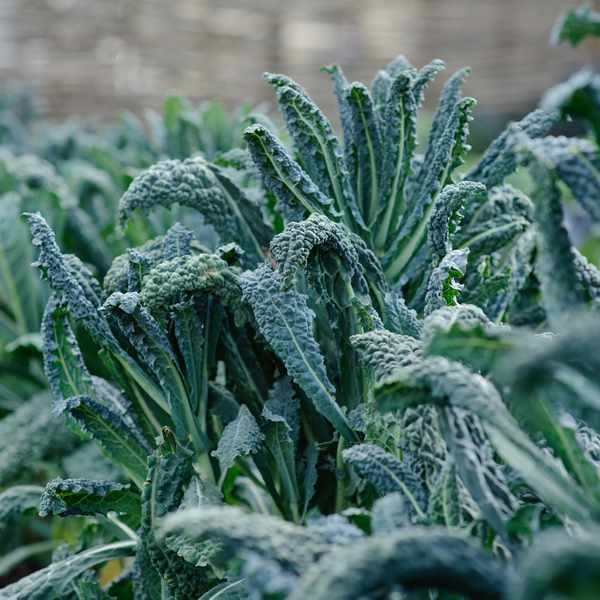 It can also be planted in late summer roughly six to eight weeks before your first fall frost.
Those in warm climates (zone 8 and above) can continue to plant in the early fall for a late fall to winter harvest. Kale takes roughly three months to reach maturity from seed, while cuttings will mature in about one month.
Tip
Cuttings are an inexpensive way to create new plants. Plant your kale in early spring if you plan to take cuttings in late summer. Kale cuttings should be taken in about three months once the plant has become established.
Selecting a Planting Site
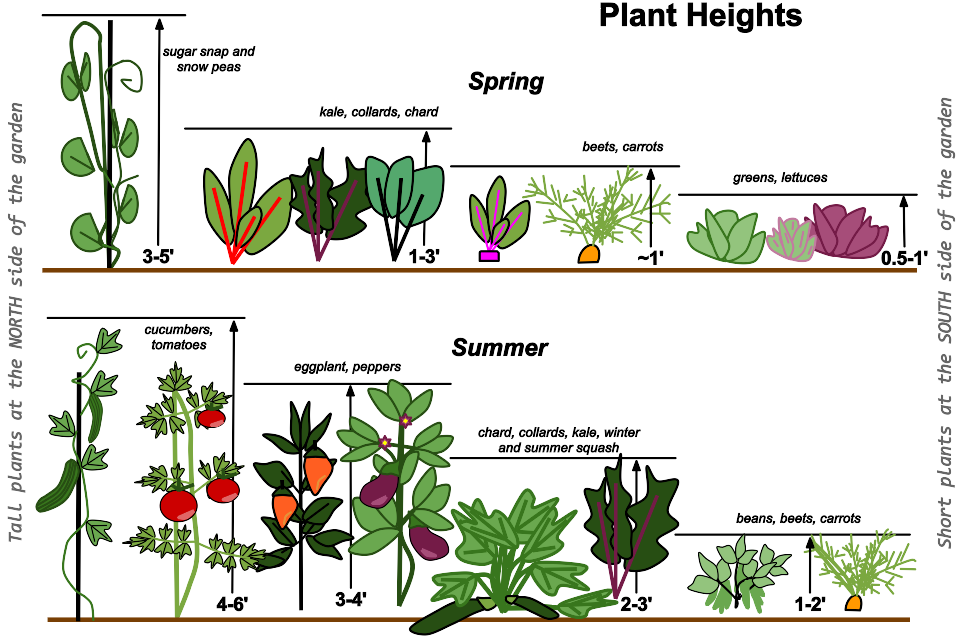
Kale grows equally well in pots, garden soil, raised garden beds, and other containers. Kale can grow indoors as long as you have adequate lighting. Soil that’s rich in organic matter and has sharp drainage is ideal, and the planting site also should get ample sunlight. Be sure the kale isn't too close to taller plants that will shade it. Growing kale in a window box can also be successful in south- or west-facing windows, but in very hot climates, east-facing windows can help prevent scorching from the afternoon sun.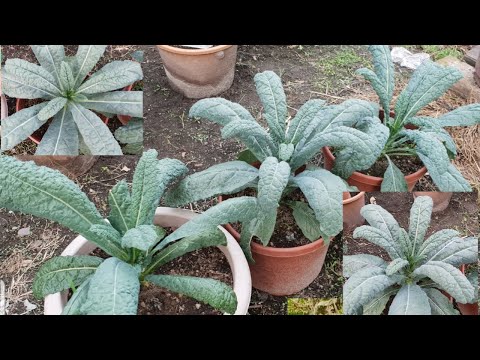
Spacing, Depth, and Support
Space kale plants roughly 1 1/2 to 2 feet apart, and plant them at the same depth they were growing in their nursery container. Seeds should be planted around 1/2 inch deep. No support structure is necessary.
Kale Care
The Spruce / Debbie Wolfe The Spruce / Debbie WolfeThe Spruce/Debbie Wolfe
Light
Kale needs full sun to partial shade in most climates, as the fullest growth will occur when the plant gets six or more hours of direct sunlight on most days. However, if you live in a hot, dry climate, provide your plant with some shade, especially from the strong afternoon sun. Heat can make the leaves wilt and lose their flavor.
Soil
Kale plants like to grow in a rich soil that's high in organic matter with a slightly acidic pH (6.5 to 6.8). The high nitrogen content provided by organic matter is crucial for healthy leaf growth. The soil also should drain well.
Water
Kale needs consistent amount of water to stay healthy, generally growing best in 1 to 1 1/2 inches of water per week.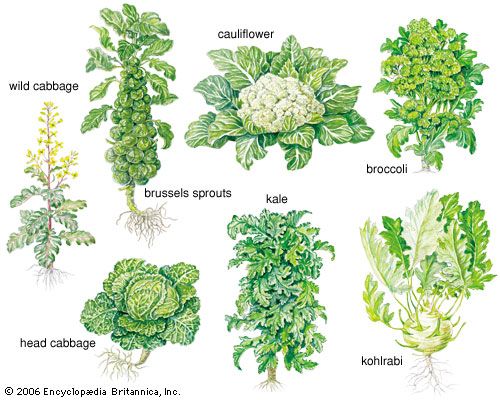 Water your kale plants regularly to keep the soil evenly moist but not soggy. Along with cool temperatures, moist soil helps to keep the kale leaves sweet and crisp, rather than tough and bitter. Mulching around your plants can help to keep the soil cool and to retain moisture.
Temperature and Humidity
The plant is usually considered a cool-weather vegetable and can handle some frost once they're mature. The optimal soil temperature for planting kale is 60 to 65 degrees. All varieties prefer cool temperatures and will be sweetened by a touch of frost. Hot weather turns kale bitter. Kale is a biennial plant, taking two growing seasons (or years) to complete its life cycle, but it's usually grown as an annual. It will collapse if exposed to heavy frosts or snow. But it can be grown throughout the winter in USDA zones 7 through 9 if the winters are mild and there is adequate water.
Fertilizer
When planting, mix fertilizer into the top 3 to 4 inches of soil. Then, feed your kale throughout the growing season, following the instructions on your fertilizer label. Use compost or a high-nitrogen vegetable fertilizer.
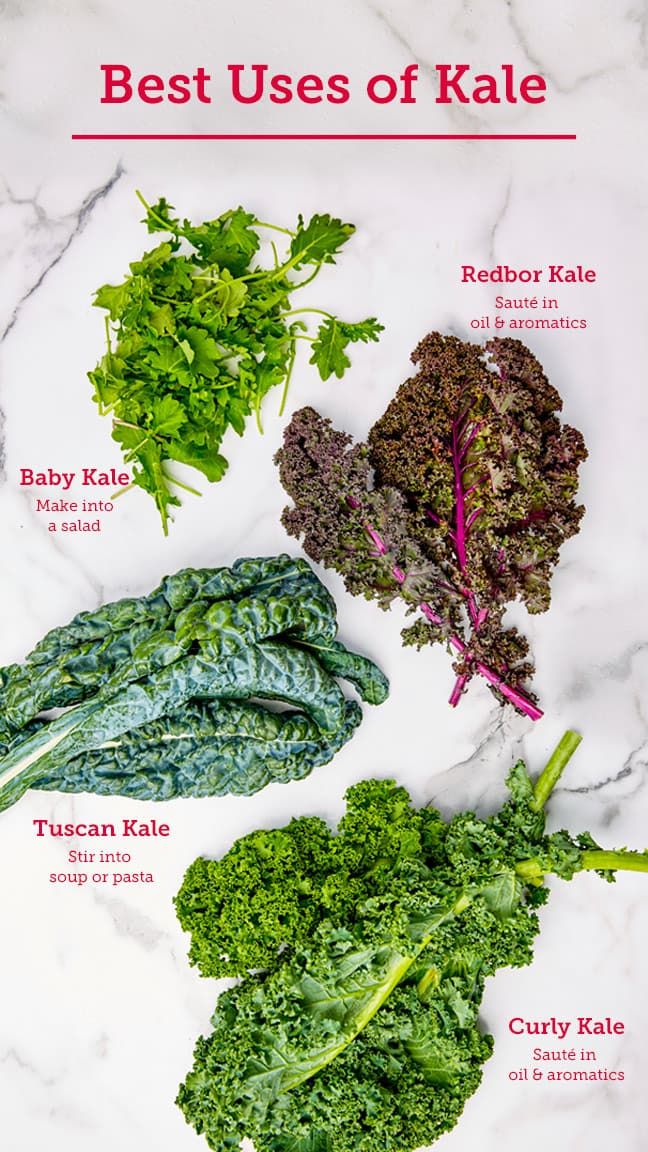
Types of Kale
There are many kale varieties, and they're all worth a try. The curly-leaf varieties tend to hang on longer in cold weather. But the flat-leaf types generally become established faster. Here are some varieties to consider:
- 'Hanover Salad' is a fast grower and an early producer. It has a pleasant taste for eating raw in salads.
- 'Lacinato' is a puckered heirloom kale from Tuscany. It is sometimes listed as Tuscan or dinosaur kale. Its thick leaves are hardy enough to be harvested even after a snowfall.
- 'Redbor' has magenta leaves with curly edges. It features a mild, crisp flavor and texture.
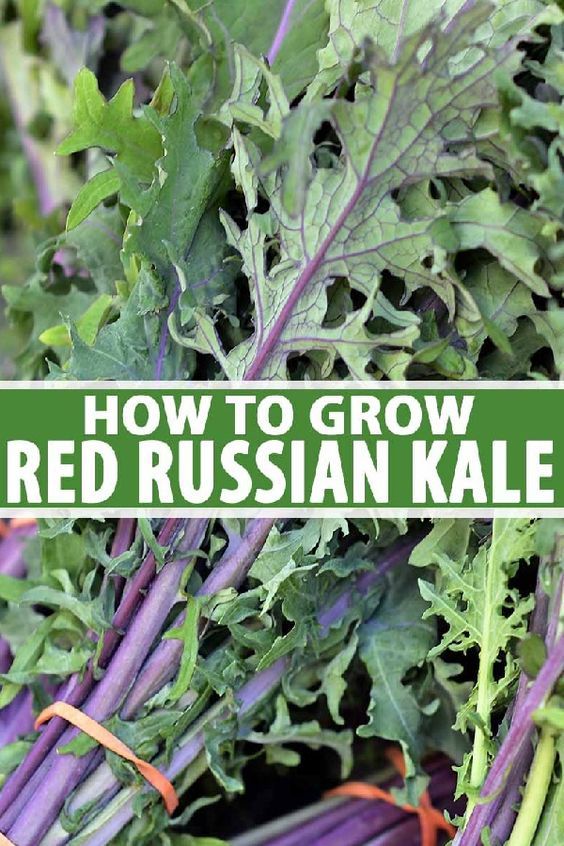
- 'Red Russian' has smooth, tender leaves with purple veins and edges. It is considered one of the sweetest varieties of kale.
- 'Vates' is a dwarf, curly, bluish-green kale that is both heat- and cold-tolerant. It is derived from 'Dwarf Blue Curled Scotch' kale.
Anna Yu/Getty Images
'Redbor' kalevalery_green/Getty Images
'Red Russian' kaleromiri/Getty Images
Kale vs. Chard
Kale and chard have similar appearances. Their leaves are often large, crisp, crinkled, and deep green. Their difference comes in their taste. Kale is generally stronger, with a bitter and earthy flavor. And chard is a much milder green. Plus, kale’s thick stems are typically best removed before eating while chard’s stems may be tenderized by cooking them.
Harvesting Kale
Expect to wait approximately two months for your kale plants to mature from seeds. Check the days to maturity on your seed packet or plant label for more precise timing. Spring-planted kale will be good for harvesting throughout the summer months, but it's especially tasty after a light frost.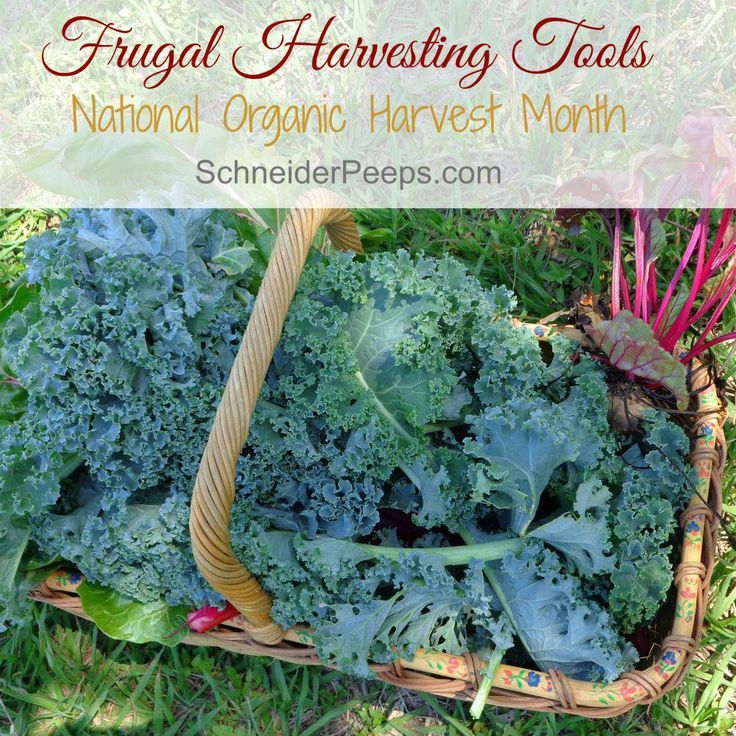
You can harvest young kale leaves to use fresh in salads or allow your plants to mature for use as a cooked green. Remove the older outer leaves, and allow the center of the plant to continue producing. Kale will keep in the refrigerator, ideally in the crisper drawer, for about a week.
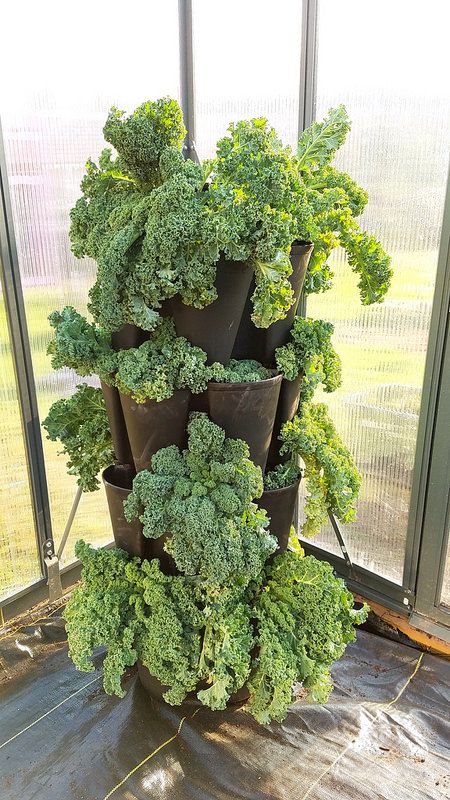
How to Grow Kale in Pots
Kale is easy to keep in pots. Not only does this make the plant mobile so that you can move it into adequate sunlight and protect it from severe weather as needed, but it also helps to protect it from garden critters, such as rabbits, that might munch on the leaves. Plus, container growth is ideal if you don’t have garden space or the right soil conditions.
Select a pot with at least a 12-inch diameter. It also should have ample drainage holes. An unglazed clay container is a good option because it will allow excess soil moisture to escape through its walls, helping to prevent root rot. Use a quality potting mix; an organic mix made for growing vegetables is a good option.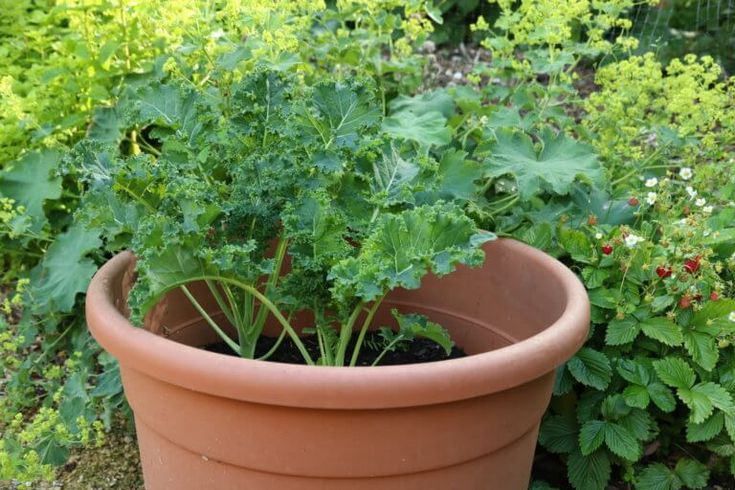 Transplant your kale into the pot at the same depth it was growing in its previous container, and water it after planting.
Propagating Kale
Kale is most commonly planted from seeds or nursery plants, but it can also be propagated via cuttings. Kale does regrow after cutting, but it requires a specific propagation process. To pick kale to keep it growing healthy, cuttings must be taken from the oldest leaves. Here’s how:
- Use gardening shears to cut a stem from the bottom of the plant on its side, choosing one with multiple leaves from the main stem (do not propagate from the plant's center). Remove the leaves on the lower half of the stem. Trim the bottom of the stem right below a leaf node at a 45-degree angle.
- Dip the cut end in rooting hormone.
- Plant the bottom half of the stem in a moistened soilless potting mix in a small container with drainage holes.
- Continue to keep the growing medium moist. Roots should develop in a few weeks.
 If you can gently tug on the stem and feel resistance, you’ll know roots have formed. After that, it’s ready for transplanting.
How to Grow Kale From Seed
Growing kale from seed can begin inside or outside depending on your region. Kale can be direct seeded in the garden or started indoors and transplanted into the garden. You can direct seed in cold climates as soon as the soil temperature is at least 45 degrees Fahrenheit.
- Start plants indoors in a seed-starting mix about six weeks before your last expected frost date. Kale seeds germinate quickly in warm soil and should sprout up within five to eight days.
- Cover the seeds with about 1/2 inch of soil, and keep the growing medium moist.
- Transplant your seedlings from indoors after the danger of frost has passed.
Common Pests and Plant Diseases
Kale is a member of the cabbage family, which is notorious for attracting insect pests and for rot diseases.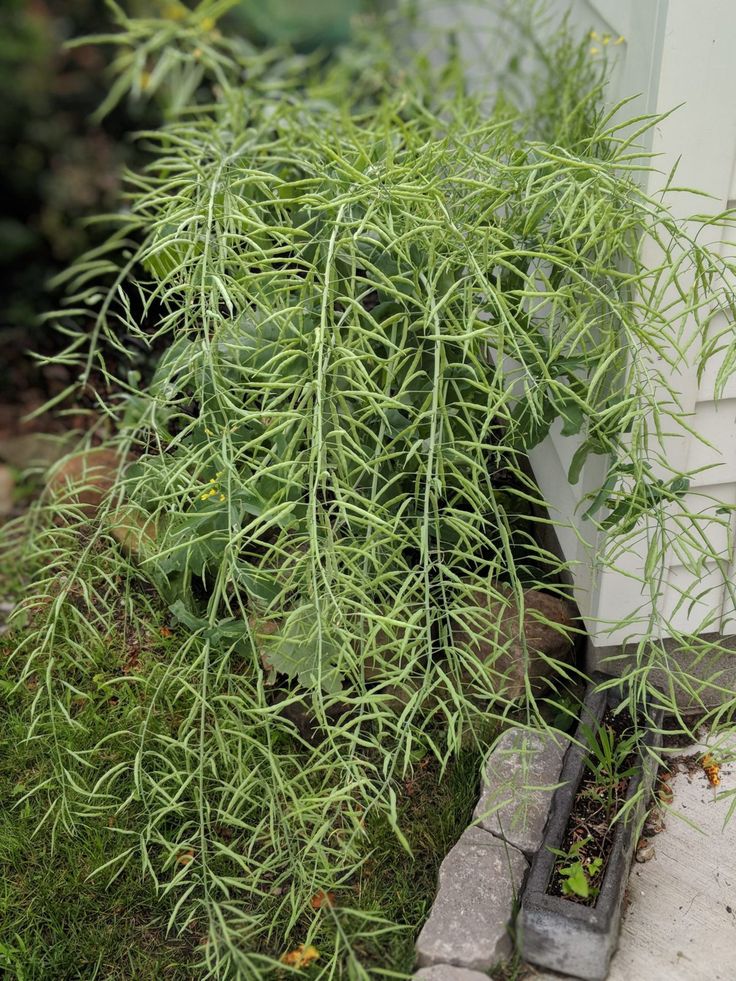 Kale is susceptible to black rot and clubroot, as well as aphids, cabbage loopers, cabbageworm, cutworms, flea beetles, and slugs. The best defense is to monitor the plants often for signs of eggs or feeding, such as holes in the leaves. Treat problems as soon as they arise.
Article Sources
The Spruce uses only high-quality sources, including peer-reviewed studies, to support the facts within our articles. Read our editorial process to learn more about how we fact-check and keep our content accurate, reliable, and trustworthy.
Kale. Cornell University Growing Guides.
When and how to plant cabbage
Cabbage is most often bred in seedlings. However, for a good harvest, it is not enough to grow healthy and strong seedlings - they must be planted correctly and on time in open ground. Beginner summer residents often have questions related to this procedure.
The very first difficulty is choosing the right variety. Depending on the ripening period, cabbage (we are talking about the most common type - white cabbage) is early (60-90 days from germination), medium (100-120 days) and late (more than 150 days). If your goal is to eat a fresh vegetable and cook soups, main dishes or salads from it, then choose early varieties. They grow quickly and have a more delicate taste. But if you expect to use cabbage for pickling, pickling or storage, then you can’t do without varieties of late ripening.
What kind of soil cabbage likes
In order for the cabbage to please with a harvest, you need to take care of choosing a suitable place for the garden bed where you will plant the seedlings.
First, let's figure out what kind of soil cabbage needs for normal growth?
- Cabbage likes neutral soil. If the soil in your area is acidic, you need to do it with liming. To do this, in the fall, add slaked lime or chalk to the future bed. In the spring, gypsum or dolomite flour can be used for this purpose. The amount of substances needed to deoxidize the soil depends on the level of its acidity.
- Cabbage in acidic soils or in conditions of high temperature and humidity is often affected by the most terrible cabbage disease - clubroot.
 There are no effective ways to deal with clubroot, so the only way to protect your plantings from the disease is preventive measures. Use fungicides as a preventive measure. A week before planting cabbage seedlings in open ground, treat the ground with a Bordeaux mixture (dissolve 10 tablespoons in 10 liters of water) or Fitosporin (1 tablespoon of the drug per 10 liters of water), and then add ash. The fungicide will protect plantings from fungal diseases, and the ash will reduce the level of acidity and enrich the soil with trace elements necessary for cabbage.
 - Cabbage needs a sunny area with a deep - more than 2 m - level of groundwater. Although this vegetable is moisture-loving, however, constant stagnation of water negatively affects its root system and can lead to rotting of the roots.
When choosing a place, also pay attention to the predecessors that grew here last season. It is best to plant cabbage after nightshade, legumes, cucumbers, carrots, onions or garlic. Cabbage can be returned to its original place no earlier than after 3-4 years. If the vegetable was affected by keel, then this period increases to 7 years - that is how much keel spores live in the soil.
When to plant cabbage outdoors
The time of planting cabbage seedlings depends not only on the region, but also on the type of cabbage: early-ripening varieties are planted earlier, varieties of late ripening - later.
To determine exactly when to plant cabbage outdoors in your area, check the weather and plant appearance.
- Early cabbage can be planted after a stable positive air temperature of at least 8-10°С is established at night. In the middle lane, such a period usually occurs in late April - early May. Medium and late-ripening varieties are planted approximately 2-3 weeks after the early ones.
- By the time of planting in open ground, seedlings should have at least 4-5 true leaves.
- Summer residents with experience to determine the timing of planting seedlings of cabbage in open ground are guided by the flowering of bird cherry.
 According to long-term observations, this period coincides with the last night frosts. After the flowering of the bird cherry, there should be no more frost.
 - Folk signs advise planting early cabbage when the daffodils have faded, and late - after the flowering of chestnuts.
Harden off seedlings two weeks before planting seedlings outdoors. In the first 3-4 days, take out the plants (or open the windows in the room where the seedlings are located) for several hours. Increase the amount of time spent outdoors every day. 2-3 days before transplanting, leave containers with seedlings outside for the whole day. Seedlings prepared in this way will more easily endure the stress associated with changing the place of cultivation.
How to plant cabbage
Plant cabbage seedlings outdoors on a cool overcast day. The ideal option is before the rain, then the seedlings will quickly take root in a new place. A few hours before transplanting, water the seedling containers well with water so that the roots are less injured.
The distance between the rows of cabbage depends on the ripening period of the crop:
- plant early varieties at a distance of 30 cm from each other - both in rows and between rows;
- Seedlings of mid-ripening varieties of cabbage should be placed at a distance of 45 cm;
- for late varieties, the distance between plants should be at least 50-60 cm.
Rules for planting cabbage seedlings in open ground:
- On the prepared bed, make the required number of holes, the size of which should slightly exceed the volume of the earthen coma.
- At the bottom of the hole, pour a matchbox of wood ash and crushed eggshells (protection from the bear), mix everything with soil and lower the seedlings into the hole. If the site has heavy, dense soil, also add sand or low-lying peat to each hole, which will loosen the soil. Fill the planting hole with earth and carefully tamp.
- Make a small trench around the plant.
 When watering, the water will go from there directly to the roots of the seedlings and will not spread over the garden.
 - Thoroughly water the cabbage.
- If the weather is sunny, cover the planted seedlings with newspapers or agrofibre. After rooting the seedlings, the protection can be removed.
To prevent overgrown seedlings from being broken by strong winds, bury them in the ground to the first true leaves.
How to care for cabbage outdoors
What is the further care of the planted seedlings?
First, watering . Make sure that the soil around young plants does not dry out. When they grow up, you can water the cabbage every other day, adding about 2 liters of water under each bush.
Second, loosening and hilling . Frequent watering makes the soil denser, and a crust forms on its surface. Because of it, the access of air to the roots of cabbage is difficult and the plant develops worse. For this reason, regularly loosen the soil around the bushes, destroying the compacted soil layer. However, watering not only contributes to the formation of an earthen crust, but also exposes the lower part of the cabbage bush, so during each loosening, add earth to each plant.
Third, feeding . Feed the transplanted seedlings for the first time two weeks after planting in open ground. To obtain the necessary nitrogen during this period, apply organic fertilizers or urea. The second time (after another three weeks), feed the cabbage with a complex mineral fertilizer.
Fourth, pest control . Not only we love cabbage - in nature there are a lot of people who want to feast on its juicy leaves. The main and most common enemies are cruciferous flea, caterpillars, snails and slugs. After their invasion, cabbage leaves can turn into a real sieve. To prevent this from happening, destroy pests by any means available to you. We already wrote about folk remedies for pest control of cabbage:
Properly cared for, cabbages will surely delight you with a rich harvest of healthy and crispy cabbages.
outdoor planting and care, cultivation, diseases and pests
Author: Elena N. https://floristics.info/en/index.php?option=com_contact&view=contact&id=19 Category: Garden plants Reissued: Last edited:
Contents
- Planting and caring for cabbage
- Botanical description
- Crowding cabbage from seeds
- How to sow seeds
- Crowding seedlings
- cabbage diving
- Planting cabbage
- when plant
- soil
- Cabbage care
- Growing conditions
- Watering
- Fertilizing
- Processing
- Cabbage diseases
Cabbage was brought to our territory from Western Europe by merchants during the heyday of Kievan Rus - in the 13th century, and by the 18th century it had already become so firmly established in Russian life that a tradition was formed after the Orthodox holiday.

The Exaltation, which is celebrated on September 27, is collectively harvesting cabbage for the winter - it was chopped and salted, and at the same time, for two weeks, fun folk games were organized, which were called skits. In the 19th century, a prominent Russian vegetable grower Rytov was able to name 22 varieties of garden cabbage.
- Red cabbage: growing in the garden
Planting and caring for cabbage
- Planting: sowing for seedlings of seeds of early varieties is carried out from the beginning of March to the third decade of the month, mid-season varieties - during the month from March 25, late varieties - from the beginning of April to the third decade of the month. Transplantation of seedlings in open ground - after 45-50 days.
- Lighting: bright sun from morning to evening.
- Soil: for early combs - loamy and sandy, for mid-season and late - loam and clay.
 Hydrogen indicator 6.0-7.0 pH.
 - Precursors: is not recommended to grow after cruciferous crops.
- Watering: after planting in the ground, the seedlings are watered every evening for a week. In the future, watering is carried out in the evening or in cloudy weather once every 5-7 days, and in heat and drought - every 2-3 days.
- Hilling: three weeks after planting, then another 10 days later.
- Mulching: a layer of peat mulch up to 5 cm thick is recommended.
- Top dressing: three top dressings with a complete mineral fertilizer during the seedling period, then with ammonium nitrate when the leaves begin to grow, the last - at the moment when the leaves begin to curl up into a head.
- Propagation: seedlings from seeds.
- Pests: aphids, caterpillars, slugs and snails, cruciferous bugs and flea beetles, cabbage leaf beetles and secret burrowers.
- Diseases: clubroot, black leg, downy mildew, fusarium, rhizoctoniosis, white and gray rot.
See below for more information on growing cabbage
Botanical description
Crop Cabbage (lat. Brassica oleracea) is a biennial plant with a tall leafy stem, bare gray or bluish-green leaves. The lower fleshy, large, petiolate lyre-pinnately dissected leaves, adjacent to each other, form a rosette - a head of cabbage around the stem, the upper leaves are oblong, sessile. Large flowers make up a multi-flowered raceme. Cabbage seeds are also large, dark brown, spherical, about 2 mm long.
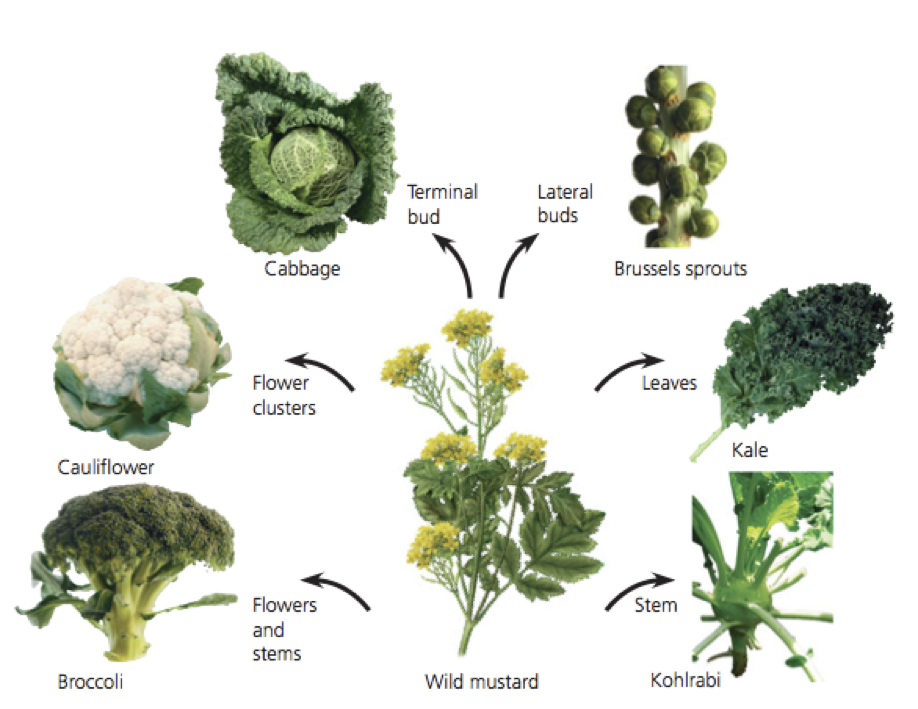
Cabbage contains mineral salts of calcium, potassium, sulfur and phosphorus, fiber, enzymes, phytoncides, fats, vitamins A, B1, B6, K, C, P, U and others. According to some scientists, garden cabbage comes from the Colchis lowland, where similar plants still grow in variety, called “kezhera” by the locals. The type of cabbage includes such well-known varieties as white and red cabbage, as well as cauliflower, Savoy, Brussels, Portuguese, kohlrabi, broccoli, Peking, Chinese and curly kale.

Growing cabbage from seeds
How to sow seeds
The quality of cabbage primarily depends on the seed, so be responsible when buying seeds and before growing seedlings of cabbage, think about why and when you want to get it - you need whether you need an early vegetable with delicate leaves for salads or strong dense heads of cabbage for winter storage and salting. The choice of variety and the timing of sowing will depend on the intended purpose of the cabbage you grow.
Widely cultivated by amateur gardeners, white cabbage, without which not a single borsch can do, is of early varieties that are suitable only for eating in the summer, mid-season, which can be eaten fresh in the summer, or can be salted for the winter, and late varieties , which are most suitable for long-term storage.
Sowing of early varieties of cabbage for seedlings is carried out from the first days of March to the twentieth of the month, seeds of mid-ripening varieties are sown from March 25 to April 25, and late cabbage is sown from early April to the third decade of the month.
 From the moment of sowing to planting seedlings in open ground, usually 45-50 days pass.
 Once you have decided on your desires and purchased seeds of the desired varieties, it's time to think about preparing the soil for seedlings. Professionals recommend preparing the soil mixture in the fall so that you do not have to extract ingredients from under the snow in winter. Mix one part of humus and sod land, add ash at the rate of 1 tablespoon per kilogram of soil and mix the composition well. The ash will act as an antiseptic and a source of macro- and microelements, preventing the appearance of blackleg on cabbage seedlings.
- Kohlrabi: growing in the garden, varieties
You can prepare a mixture of a different composition, based on peat, for example - the main thing is that it is fertile and breathable. Never use garden soil from an area where cruciferous crops were grown to grow seedlings, as it is likely that pathogens that can infect seedlings are in it.
Cabbage cultivation starts with heating the seeds for 20 minutes in water at a temperature of about 50 ºC, after which they are immersed in cold water for 5 minutes to increase the resistance of the seed to fungal diseases. Then the seeds are immersed for several hours in a growth stimulant solution - Gumat, Epin, Silk, etc. True, there are varieties whose seeds cannot be wetted - carefully read the instructions attached to the bag of seeds.
Water the soil generously before sowing and keep the soil moist until germination. The seeds are sown to a depth of 1 cm, then the container is covered with a film or paper on top so that the moisture from the top layer of the soil does not evaporate, and the crops are kept at a temperature of 20 ºC.
Growing seedlings
Seedlings appear as early as 4-5 days, after which the film or paper is removed, and the temperature is lowered to 6-10 ºC and the seedlings are kept under these conditions until they have the first true leaf.
 To do this, it is best to place a container with seedlings on a glazed loggia, and usually a week is enough to achieve the expected result. After the appearance of the leaf, the temperature on sunny days is increased to 14-18 ºC, on cloudy days it should be in the range of 14-16 ºC, and at night - 6-10 ºC.
 Caring for cabbage seedlings at this stage provides access for plants to fresh air, but seedlings must be protected from drafts. In addition, seedlings need additional illumination with a fluorescent or phytolamp: its daylight hours should be at least 12-15 hours a day.
Do not allow the soil to dry out or become too wet - this can be avoided by regularly loosening the soil after watering. A week after germination, the soil is watered with a weak solution of potassium permanganate at the rate of 3 g of potassium permanganate per 10 liters of water, or with a weak solution of copper sulfate.
Cabbage picking
A week and a half to two weeks after germination and the formation of the first true leaf, the plants dive, providing the seedlings with a large feeding area.
 An hour before diving cabbage, the soil with seedlings is watered abundantly, then each seedling is removed along with an earthen clod and, shortening its root by a third of its length, planted in an individual cup (best of all, peat-humus), deepening it by cotyledon leaves.
 - Beijing cabbage: growing in the garden, varieties
Picks can be avoided if the initial sowing of cabbage seeds is carried out in individual containers - when transplanting seedlings into open ground from personal pots, the root system of seedlings is not so injured, and by the time the seedlings are planted in the garden, it will develop to a decent size. If you grow seedlings in peat-humus pots, then you can plant seedlings in the ground right in them.
Planting cabbage in the ground is preceded by a two-week hardening, the purpose of which is to prepare seedlings for development in new conditions. The first two days in a room with seedlings, a window is opened for 3-4 hours, providing for the protection of seedlings from drafts.
 Then, within a few days, the seedlings are taken out for an hour or two to the balcony or loggia under the sun's rays, from the direct hit of which the seedlings must first be covered with gauze.
 After a week, reduce watering, take the seedlings to the balcony and keep them there until they are planted in the ground.
Planting cabbage in open ground
When to plant
Planting seedlings of early cabbage in open ground is carried out when the seedlings develop 5-7 leaves, and the seedlings reach a height of 12-20 cm. Parameters for planting in open ground seedlings of mid-ripening and late cabbage are as follows: the presence of 4-6 leaves at a seedling height of 15-20 cm. Usually seedlings of early varieties reach such results by early May, late varieties - from mid to late May, and mid-ripening varieties - from late May to mid-June .
Soil for cabbage
Before planting cabbage, you need to prepare a site for it. It should be illuminated by the sun from morning to evening.
 As for the soil, loam and sandy soil are most suitable for early varieties of cabbage, and loam or clay soil is optimal for medium and late varieties. The pH on sandy soils should be ± 6.0, and on clay-sand or clay soils - ± 7.0. Acidic soils are unsuitable for cultivating cabbage.
 Do not grow this crop in areas infected with bacteriosis for eight years. It is also undesirable to plant cabbage where other cabbage crops were grown not so long ago - turnip, radish, radish, turnip, mustard, swede or cabbage. In order to be able to use the area where these crops grew for cabbage, at least three years must pass.
The soil in the area for cabbage should be prepared in advance, from the first days of autumn preceding planting: in dry weather, carefully dig the area to the depth of a shovel bayonet, but do not try to level the surface, because the steeper the irregularities, the more moisture it can absorb over the winter and spring earth.
- Savoy cabbage: growing in the garden, varieties
After the snow has melted, the so-called “closing of moisture” is carried out - the surface of the soil is leveled with a rake to prevent too rapid evaporation of water from the soil.
 Very soon, weeds will come out of the ground, which must be removed immediately.
 How to plant in open ground
The scheme for planting seedlings in open ground is approximately as follows:
- 30x40 for hybrid and early varieties, 50x60 for mid-season and 60x70 for late varieties of white and red cabbage;
- 30x40 for kohlrabi;
- 25x50 for cauliflower;
- 60-70 for Brussels;
- 40x60 for Savoy;
- 30x50 for broccoli.
Avoid overcrowding the beds, as cabbages need a lot of light and space.
Make holes in the soil slightly larger than the root system of seedlings with an earthen clod or peat-humus pot. Put in each well a handful of sand and peat, two handfuls of humus and 50 g of wood ash, add half a teaspoon of nitrophoska, mix the additives thoroughly and pour abundantly. An earthen ball with the root system of a seedling is lowered directly into this slurry, sprinkled with moist earth, lightly pressed down and dry earth is added on top.
 Seedlings that are too elongated are planted so that the first pair of leaves is flush with the surface of the plot.
 Cabbage care
Growing conditions
At first, carefully observe the planted seedlings in order to replace the fallen seedlings in time. If weather forecasters predict sunny days, shade the seedlings from the sun for a while with newspapers or non-woven fabric. During the week, every evening, water the seedlings from a watering can with a divider; after this period, if night frosts are not expected, the shelter can be removed. Further care for seedlings in the open field consists in watering, loosening the soil, weeding the site, regular feeding and processing cabbage from pests and diseases. Three weeks after planting, the cabbage is hilled, after another 10 days, the hilling procedure is repeated.
Watering
Growing cabbage outdoors will require you to strictly observe the watering regime, since the plant needs a lot of moisture.
 How to water cabbage already planted in open ground? Watering is carried out in the evening, on cloudy days between abundant waterings, an interval of 5-6 days is enough, in hot weather it will be necessary to water every 2-3 days. After watering, loosen the soil in the area while spudding the cabbage. Professionals recommend using a 5 cm thick layer of peat mulch - it retains moisture in the soil longer and at the same time serves as food for developing plants.
 Top dressing
7-9 days after picking the seedlings, it is necessary to apply the first top dressing , consisting of 2 g of potash fertilizer, 4 g of superphosphate and 2 g of ammonium nitrate, dissolved in 1 liter of water - this amount should be enough to fertilize 50- 60 seedlings. To avoid burns, cabbage fertilizer is carried out on pre-watered soil.
The second top dressing is applied two weeks later and consists of twice the same fertilizer dissolved in the same amount of water.
 If the seedlings are slightly yellowed, feed them with a liquid solution of fermented manure at the rate of 1:10.
 - Broccoli: growing in the garden, varieties
The third, so-called hardening dressing is applied two days before planting seedlings in open ground, and it consists of 3 g of ammonium nitrate, 8 g of potash fertilizer and 5 g of superphosphate dissolved in a liter of water. A high concentration of potash fertilizers contributes to the survival of seedlings in open ground. If you do not have enough time to prepare the nutrient mixture, use the ready-made liquid complex fertilizer Kemira Lux.
If you fed the cabbage in the seedling phase, its development promises to be fast and intensive, but after planting in the open ground, feeding the cabbage does not stop. How to fertilize cabbage when its leaves grow? It is best to add a solution of 10 g of ammonium nitrate in 10 liters of water to the soil - this dose is designed for 5-6 plants.
 When the leaves begin to form into a head, a second top dressing is carried out with a solution of 4 g of urea, 5 g of double superphosphate and 8 g of potassium sulfate per 10 liters of water from the same calculation.
 Processing
The first time after planting in the ground, seedlings are dusted with ash with the addition of tobacco dust - this measure will protect young plants from slugs and fleas. Garden cabbage is a food product, therefore, it is highly undesirable, and unreasonable, to use pesticides for its treatment against pests and diseases.
How to process cabbage, in order to destroy its enemies and at the same time not poison the product that we are going to eat? There are many ways to protect garden crops from such misfortune as the invasion of aphids, caterpillars, pests of larvae and gastropods - snails and slugs.
Aphids and caterpillars can be destroyed by spraying with this infusion: 2 kg of tomato tops are poured with 5 liters of water, infused for 3-4 hours, then boiled for 3 hours, allowed to cool, filtered and diluted with water 1:2.
 To make the infusion "glue" to the leaves, and not drain to the ground, add 20-30 g of grated tar soap to it. You can use an infusion of onion peels in the fight against aphids and caterpillars: pour a liter jar of peels with two liters of boiling water and insist for two days, then filter, add another 2 liters of water and a tablespoon of liquid soap or dishwashing detergent.
 To fight the larvae of the May beetle, cutworm or cabbage fly, ants are attracted to the site by digging a jar of honey or jam diluted with water. Attracted by the sweet, black ants will also eat the larvae.
Placement of marigolds, mint, sage, cilantro, basil, rosemary and other spicy plants in and around the area with cabbage and around it can be considered a preventive measure in the fight against harmful insects. The tart aroma will scare away aphids, butterflies, slugs, fleas and will attract their eternal enemies - ladybugs, lacewings, rider beetles and others to fight them.
- Watercress: growing in the garden and at home
Cabbage diseases
Some cabbage diseases can spread so quickly that a slight delay on your part can result in the loss of the entire crop.
 We will tell you what cabbage is sick with, as well as how to process cabbage in order to save it from death. One of the most dangerous plant diseases is quila - a common fungal disease that affects early varieties of white and cauliflower at the seedling stage: growths form on the roots of seedlings that disrupt the nutrition of young plants, which is why seedlings lag behind in development - they do not even form an ovary . Remove diseased plants from the site along with an earthy clod, and sprinkle lime on the place where they grew.
 It is not yet possible to grow cabbages on this site, but other plants can grow without any risk, since clubroot only affects cruciferous plants.
A frequent occurrence is the defeat of cabbage in the seedling phase or already in the garden plot with a black leg, a fungal disease of the root neck at the base of the stem. These parts of the seedling turn black, thin, rot, the plant slows down growth and dies. Such seedlings are not planted in the ground - they will die anyway.
 The soil in the area with cabbage that died from the black leg must be replaced, because it is unsuitable for growing cabbage. As a preventive measure of the disease, the seeds are treated with granosan before planting in accordance with the instructions, approximately 0.4 g of the drug is needed to treat 100 seeds, and fifty percent Tiram (TMTD) is applied to the soil at the rate of 50 g per m².
 Sometimes cabbage suffers from downy mildew. Usually pathogens are found in the seeds, which is why their pre-sowing treatment is so important. The disease manifests itself in wet weather on the outer leaves of cabbage with soft red-yellow spots. As a result of the development of the disease, the leaves turn yellow and die. As a preventive measure, seed dressing is used before planting with Tiram or Planriz. Hydrothermal treatment also gives good results - soaking the seeds in hot water (about 50 ºC) for 20-25 minutes.
If preventive measures were not taken, or they did not help, you will have to resort to treating cabbage with garlic broth: add 75 g of finely chopped garlic to 10 liters of water, leave for 12 hours, then bring the infusion to a boil, let it cool and spray the plants.
 If this measure also fails, treat the cabbage with a two to three percent solution of Fitosporin-M. If necessary, the treatment can be repeated after two to three weeks. But keep in mind that cabbage can be treated with a fungicide only before the head is tied, otherwise there is a danger of accumulation of pesticides in the leaves.
 White and gray rot also cause a lot of trouble for gardeners. White rot develops under the condition of a combination of low temperature with high humidity and is manifested by mucilage of the outer leaves of cabbage, between which a cotton-like white mycelium with black sclerotia ranging in size from one millimeter to three centimeters is formed. A head of cabbage affected by white rot rots in storage, infecting neighboring forks.
Gray rot also appears during storage: the petioles of the lower leaves are covered with downy mold with black beaded dots. Pre-sowing disinfection of seeds, high agricultural technology, preventive cleaning and disinfection of storage facilities before laying cabbage, compliance with its storage conditions, timely detection of the disease and cleaning of affected areas will help protect the cabbage crop from these diseases.

- Cauliflower: growing in the garden, varieties
A dangerous disease is fusarium wilt, or yellowing of cabbage, which is caused by the Fusarium fungus. Cabbage is affected by the disease even in the seedling period, and the death of young plants from this scourge is sometimes 20-25%. Symptoms of the disease are the loss of turgor by leaves and the appearance of yellow foci on them. The development of leaves in places of yellowing slows down, diseased leaves fall off. In order to prevent the disease from spreading, the affected plants are dug up along with the roots and burned, the soil is steamed or changed. Help to destroy the fungus autumn and spring preventive treatment of the site with a solution of copper sulfate (5 g of the drug is dissolved in 10 liters of water).
Rhizoctonia is another fungal disease of cabbage that develops with strong fluctuations in temperature (for example, from 3 ºC to 25 ºC), air humidity (from 40 to 100%), soil acidity (pH from 4.
 5 to 8 units ). The disease affects the root neck, from which it turns yellow, dries and dies, the roots turn into a washcloth and the plant dies. Infection occurs already in the open field, the disease continues to develop even in storage. As a preventive measure, spraying the soil before planting cabbage in the soil with copper oxychloride or preparations that contain it is used.
 Cabbage pests
Learn how to kill aphids, caterpillars, larvae and gastropods in the cabbage section. But a plant among insects has many enemies, and in this section of the article we will talk about how you can get rid of other pests from the insect world. Serious enemies of cabbage are cruciferous bugs - motley bugs up to a centimeter in size, wintering in the soil. At the end of April, they begin to feed on seedlings, at the beginning of summer, females lay eggs, after two weeks, larvae appear from them, and after a month, adult bugs. These insects feed on the juice of cabbage, piercing its leaves.
 The puncture site becomes dead, and if there are many such areas, the seedling leaves wither, dry and die. Bedbugs cause the most severe damage to cabbage during a drought.
 As a preventive measure, it is necessary to remove weeds from the Cabbage family - rape, sverbigu, field yarutka, shepherd's purse, beetroot and chickweed from the site. After harvesting the cabbage, do not leave weeds on the site, collect them and burn them. Bed bugs can be destroyed by treating cabbage seedlings with Actellik or Fosbecid before heading out.
Cabbage leaf beetle, small egg-shaped beetle up to 5 mm long, damages plant leaves by eating holes in them or making indentations along the edges. Leaf beetles also hibernate in the soil, and in May their females lay eggs, from which larvae appear after 10-12 days, feeding on scraping the skin from the leaves. As a preventive measure, it is necessary, as in the case of bed bugs, to remove cruciferous weeds from the site.
 And you can scare away leaf beetles by daily morning spraying of cabbage on dew with a mixture of tobacco dust with slaked lime or ash in a 1: 1 ratio. Before the formation of heads, you can use the treatment of cabbage with a two percent solution of Aktellik or a less toxic biopreparation Bankol.
 Another enemy of cruciferous stem is the cabbage stalker – a black beetle up to 3 mm long. The larvae of the secretive trunk are dangerous, gnawing passages in the petioles of the leaves, penetrating the stem and descending through the tunnels made in it into the root of the cabbage. In this case, the conducting system is damaged, the leaves turn yellow, the plants stop developing and die. In the fight against this pest, it is very important to remove plant debris from the site in the fall, and then dig up the soil. During the growing season, timely weeding and removal of pest-affected plants from the site is important. Actellik and Phosbecid are destroyed from chemicals, but insecticide treatment is only permissible at an early stage of seedling development in the open field.
Harvesting and storage
Stop watering the cabbages three weeks before harvesting - this measure stimulates the accumulation of fiber in the forks, which contributes to better storage of the cabbage. When the night temperature drops to -2 ºC, you can start harvesting. Do not delay harvesting, because at a lower night temperature, the heads of cabbage freeze through, which negatively affects their keeping quality. Dig up the cabbage along with the root, sort it, setting aside small heads that have been eaten by beetles or touched by rot - this cabbage cannot be stored, you will have to eat it or pickle it. Storeable cabbage is put under a canopy for a day so that it dries up and slightly winds, then the stalk is cut 2 cm below the head of cabbage, leaving 3-4 covering green leaves on it. Now the cabbage can be placed in storage.
- Brussels sprouts: growing in the garden, varieties
It is best to store vegetables in the cellar - there, as a rule, high humidity, and the temperature does not drop below zero.
 If the temperature in the cellar also does not rise above 4-6 ºC in winter, then this is an almost ideal storage for cabbage, since the optimal conditions for storing cabbage heads are air temperature from -1 to +1 ºC, and humidity from 90 to 98%. But first you need to put things in order in the room: despite the high humidity, there should be no mold on the walls, and debris on the earthen or cement floor. It is desirable to whitewash the walls with a solution of quicklime, after which the cellar is fumigated with sulfur. Take care of good ventilation. If there is no ventilation system, you will have to ventilate the cellar well at least once a month.
 Cabbage is stored in a single layer on racks, as well as in a folded pyramid on wooden shields or hanging, wrapped in newspaper.
In order to keep cabbage fresh as long as possible, gardeners resort to some tricks that we are ready to share with you:
- you can tie the heads of cabbage in pairs by the stalks and hang them from the ceiling on poles.
 In this position, the heads will have access to air, they can be easily inspected for damage;
 - store cabbage in slatted wooden boxes placed on stands or shelves - the main thing is that they do not stand on the floor;
- paper-wrapped cabbages are placed in a plastic bag, without tying it, and hung from the ceiling or stacked on a shelf;
- head of cabbage is placed in a ten-liter bucket with earth, then it is covered with earth from above and the bucket is placed in the cellar. Sand can be used instead of earth.
There are a couple more storage methods, but for them, the root of the cabbage is not cut off, and the covering leaves, on the contrary, are removed. After that, the heads of cabbage are hung by the roots in a draft and slightly dried. When the upper leaves dry up, the heads of cabbage are moved to the cellar and, having tied two by two, they are hung by the roots from the ceiling. Or they immerse the head of cabbage in a clay mash of the consistency of dough for pancakes (cabbage leaves should not be visible through the clay layer), then let the clay dry, hanging the head of cabbage, and take it to the cellar, where it is also hung from the ceiling.
 We have described to you how to store white and red cabbage. Cauliflower is stored only in a suspended state, after wrapping the heads in paper.
 You can, of course, store cabbage in the refrigerator, wrapped in a paper towel and placed in a loosely tied bag, but there is not much space in the vegetable section, and the shelf life of cabbage in the refrigerator is no more than two months.
Types and varieties
On an industrial scale of agriculture and in amateur gardens, different types and varieties of garden cabbage are grown, since this vegetable, like potatoes, is one of the most basic. We offer you types and varieties of cabbage for open ground, which you can grow in your country house or near your home if you wish.
White cabbage
White cabbage is most common in our latitudes, forming a thickened low stem covered with large leaves, as well as a head of cabbage, which is an apical bud that has grown to enormous sizes. Some heads of cabbage reach 16 kg, they are round and dense.
 White cabbage contains fiber, carotene, vitamins C and B. It is widely used in folk medicine for edema and stomach diseases, externally for suppuration and boils. The yield of cabbage, as well as its size, depends on the variety: the most productive are early-ripening varieties Gribovsky and June, mid-ripening Gift and Slava, late Moscow Pozdnyaya and Amager.
 Red cabbage
Similar to white cabbage in many respects, but more frost resistant. Its leaves are more purple than red, heads weighing up to 5 kg are highly dense, therefore they are stored longer. Red cabbage has half as much fiber as white cabbage, but four times more carotene. It also contains iodine, mineral salts, pantothenic acid, iron, cyanidin, which strengthens the walls of blood vessels. The most common varieties: Gako, Mikhailovskaya, Kamennaya Head.
- Arugula: growing in the garden and on the windowsill
Cauliflower
Dietary product, which is a creamy granular tuberculate hemispherical head surrounded by green leaves weighing up to one and a half kilograms, consisting of practically merged together germinal flowers on branched short legs.
 The most commonly grown varieties: early - Movir, Early Gribovskaya, Guarantee, mid-season - Moscow Canning, Patriotic, late - Adler Winter.
 Broccoli
A type of cauliflower, its head consists of green or purple inflorescences. It is rich in mineral salts of potassium, magnesium, phosphorus, calcium, vitamins C, A, B1, B2, PP. It has an antioxidant effect, it is useful as a prevention of cardiovascular and oncological diseases.
Brussels sprouts
Looks like a long stem with many small cabbage-like heads. Brussels sprouts are ahead of citrus fruits in terms of vitamin C content, they are also rich in protein, contain magnesium, phosphorus and folic acid; it increases the body's resistance to disease, improves mental activity.
Savoy cabbage
It has the shape of a white cabbage, but its delicate, highly corrugated bright green leaves are rolled into a looser head. This species contains more proteins and vitamins than white cabbage.
Kohlrabi
It looks like a spherical stem with leaves on long petioles.
:max_bytes(150000):strip_icc()/Growing-kale-1403516-garden-view_3-5901388848964518925ba43262070c59.jpg) Contains a large amount of protein and vitamin C, glucose and calcium.
Contains a large amount of protein and vitamin C, glucose and calcium. Beijing cabbage
Today is a very popular product on our table. Her head is oblong, loose, the fiber is tender and pleasant to the taste. The leaves contain many useful substances, but its main advantage is that the vitamin C contained in it does not disappear during storage.
Chinese cabbage
Non-heading leafy vegetable. In appearance, it is more like a salad, but in composition it is close to white cabbage. It contains the essential amino acid lysine, which cleanses the human body of toxins and toxins and improves immunity. Chinese cabbage is considered a source of longevity.
- Cilantro: growing at home and in the garden
Literature
- Read related topics on Wikipedia
- Peculiarities and other plants of the Cabbage family
- Learn more
- Landscaping ideas with small rocks

- Outdoor lighting ideas for house

- Craftsman style home interior

- Mac mansion for sale

- How to get rid of a skunk under the house
- What is the best kitchenaid mixer to buy

- Country bedroom styles

- Interior design 2023

- Best grill for backyard

- Outdoor birthday party ideas adults
- Landscape small rocks

