How to dress a four poster bed
9 Ways to Dress a Four-Poster Bed
Complete the fairy-tale look or go as modern as you like with canopies, swags, drapes — or nothing at all
Affectionately known as the king of beds and the bed of kings, the four-poster is often associated with romance and fairy tales. Its kingly reference is quite accurate, as the four-poster bed was originally created for nobility around the 13th century. Its shape and materials have evolved over time from massive ornately carved oak and tapestries to sumptuous velvets, shimmery silks and embroidery.
Nowadays a four-poster bed is still often coveted by many. Let’s look at ways to dress one, from traditional drapery to breezy swags, and even how to have a gorgeously undressed look.
Heintzman Sanborn Architecture~Interior Design
Canopy
Four-poster beds evolved from canopy beds, also known as tester beds, which were created for purely functional reasons: warmth and privacy. Curtains originally hung from the ceiling, but evolved as a frame was added to the bed to support an overhead canopy, which helped with heat retention. (It’s also said that the canopy stopped critters from falling onto the bed from thatched ceilings.)
Canopies were originally made entirely of wood, often of heavily carved oak. Canopies were often used in conjunction with drapery panels. Later, fabric replaced the wood canopy portion for a lighter look. On some beds the outer canopy frame was kept, while on others it was dropped, but the four tall support posts remained. The sense of enclosure created by this bed style is psychologically comforting and likely why the four-poster bed maintains its popularity.
This elegant bed by Heintzman Sanborn Architecture~Interior Design has creamy silk at the bed’s head, canopy and valance, and operable linen-poly-blend sheer side drapery by Pollack Fabrics.
Something to consider with this design is whether the fabric components can be easily removed or not.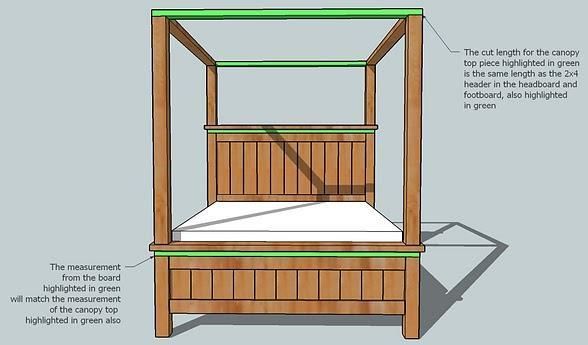 Architect Maureen Sanborn says for this bed, they concealed a wood rod between two valances (one on the interior side of the bed and one on the exterior) from which to hang the side drapery fabric. Sanborn says the rod is removable so the fabric valance and drapery can be cleaned. In contrast, some beds have to be completely taken apart to remove the fabric components.
VanderHorn Architects
Designer Cindy Rinfret took a slightly more traditional approach with this bed design for a Douglas VanderHorn Architects project in Connecticut. She paired an
upholstered headboardwith a layer of drapery behind it and partial panels at each side of the headboard. The fabric canopy is set within a shaped wood frame with a graceful gathered, fringed valance on three sides.
Something else to take into account with a canopy bed is the fabric type and yardage required, which contribute to the cost. Some fabrics, such as sheers and solid-colored linens, don’t have a visual front or back, while a printed or woven fabric does. So any valance or drapery panels visible from both sides will require fabric on both sides if you’re using a printed fabric.
In this case the gathered valance needed fabric on both sides, but the drapery at the head needed fabric only on one side, since it’s against the wall. Rinfret notes this bed required about 15 yards for the blue fabric on the headboard drapery and interior valance, and 10 yards of the floral fabric for the outside of the valance, as well as 15 yards of trim.
Shop fabric on Houzz
Echelon Custom Homes
This simple canopy is a made of a light, gauzy fabric tied to the bed frame through small grommet holes.
Gina Fitzsimmons ASID NKBA
Valance
Designer Gina Fitzsimons used a valance installed at the ceiling along with drapery at the headboard to create the perception of a partial canopy here. The turned posts of the bed fit up into the valance at the head of the bed.
Loose Swags
Draping a piece of fabric over the bed frame was likely the easiest and least expensive way to dress this bed. This approach is casual and uses a wispy, reversible fabric, such as a sheer, gauzy cotton.
Furnitureland South
Instead of a single swag, this bed has two draped swags for balance. If you think this style might be for you, decide whether you want your side panels to puddle or pool on the floor a bit, just hit the floor, or be just slightly raised off the floor, as in this image.
Rizzoli New York
Lit à la Polonaise
A lit à la Polonaise is a four-poster bed frame that’s bent to create an overhead crown. The phrase is French for “Polish bed,” and this style exudes a frilly, romantic air. Attaching fabric at the crown by ties, as shown here, or a pocket allows the fabric to be wrapped in swirling swaths around the supports.
Jeneration Interiors
Drapery at the Corners
Taking advantage of the rail supports by adding drapery panels is one of the most popular dressing options for four-poster beds. There are different possibilities for the types of drapery panels and where they’re located. Here tab-top drapery panels, two on each side, are pulled toward the posts of the bed and hang freely.
Find tab top drapery on Houzz
AMW Design Studio
Enchantingly flexible, the configuration can be easily transformed by tying the panels to the support posts or opening them up to create a headboard, as shown here. Make sure a fabric with enough weight is selected for the drapery panels, especially if you intend to move them. Metal grommets, used in these drapery panels, require a sewn heading and a medium-weight fabric.
Andrea Schumacher Interiors
Drapery at the Bed Head
Another option is to install a drapery panel only at the head of the bed to create a drapery headboard. Often another small panel is added to the side rails by the pillows to create a more enclosed, intimate space. Designer Andrea Schumacher says those panels are usually between one-fourth and one-third the width of the canopy panel at the head of the bed. Here lightweight pocket-top drapery panels allow the top rails to run easily through them.
Schumacher says the side panels are double faced, or double sided with fabric, but since the drapery panel at the head is against the wall, it required only the front, or face, fabric.
GM Construction, Inc.
The fullness of the panels is another consideration. Zero fullness means the fabric is flat, with no waves. For drapery panels with 100 percent fullness, the fabric width is halved by equal ratios of forward and backward waves or pleats created in the fabric. Most drapery varies and has a fullness of 50 to 200 percent, but 100 percent is most common.
These pinch-pleat drapery panels have a pretty, more formal look and are less full to emphasize the pleats.
Applegate Tran Interiors
Drapery at the Sides
Using drapery panels only at the sides of the bed is another alternative. This contemporary four-poster bed has rails only at the bed’s side and cool mesh panels on them.
Eduarda Correa Arquitetura & Interiores
Mix It Up
Don’t be afraid to mix it up! This bed combines a loose canopy draped over intermediate canopy rails and dreamy semitransparent panels tied to the bedposts.
Lucy Call
Nothing at All
Going bare is a great option too, allowing the bed frame to shine. Despite not having any drapery or swags, the vertical element created by this bed frame still creates a quasi-enclosed space.
SWABACK pllc
The two-toned paint on this bare bed frame creates the illusion that the upper white portion is hovering above the bed.
Gypsy Barn
Finally, this kitty’s dressed-up four-poster bed, made from an upturned table, does just fine with only some fringe and a fluffy pillow!
Find the right local pro for your project
Sponsored
Klare Kante - Hochwertige und einzigartige Schreinerarbeiten
Sponsored
Innenarchitektonische Raumästhetik & Funktionalität im Rheinland
How to dress a four poster bed six ways
Four poster beds are often deemed the epitome of luxury and tradition, but many people wonder how to dress a four poster bed to suit a modern home. Let's take a look at six popular methods for dressing a four poster bed to give you some inspiration.
1. Pelmets and curtains for a traditional look
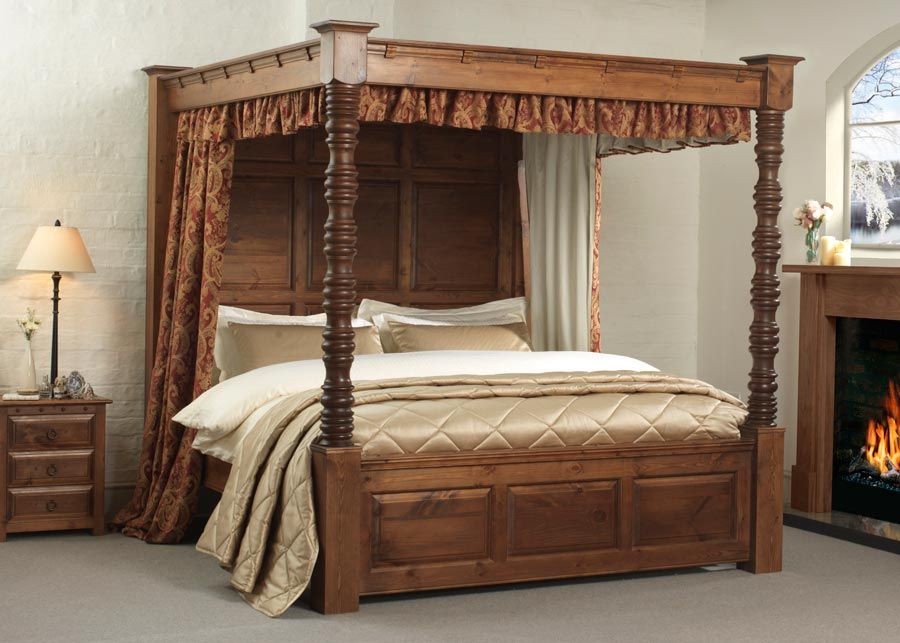
Traditionally, four poster beds would feature a full canopy over the top of the bed and heavy drapes on all four sides, with fixture points concealed behind pelmets. The goal was to block out draughts to create a warm and cosy sleeping space in large, chilly bedrooms before the days of central heating.
These days, there's less need for heavy curtains and a canopy to stay warm at night, but if you're trying to achieve a very traditional look with your four poster bed, you could still go for full curtains and pelmets when choosing how to dress a four poster bed. To complement the look, consider a valance sheet, which was traditionally used to conceal the bottom of the bed. The sheet fits over the mattress and will hang low towards the ground so that you cannot see underneath the bed.
2. Light curtains for modern timelessness
A much more updated twist on the traditional four poster bed is to have thin and lightweight curtains on all sides of the bed but without the pelmets. This gives a nod to tradition without making the bed look too boxed in. You can close the curtains to create a cosier feel or to create a little extra warmth on the coldest nights, but most people choose to leave them open and tied up at each corner. Another option is to have the curtain drawn at the head of the bed to create the illusion of a headboard while tying up the other curtains at the corners of the foot of the bed. This frames the bed nicely without looking too heavy.
To create an attractive drape effect, make sure your curtain panels are adequately wide enough that they are not pulled flat when fully open. They should be at least 50% - or preferably 100% - wider than the width of the gap they are set to fill. To maintain a contemporary and airy feel, use a medium-weight fabric that lets a little light through.
3. Curtains at the head of the bed only
If you like the idea of an enclosed space for sleeping but don't want full curtains on your four poster bed, consider putting them just at the head of the bed. As we mentioned above, this creates the illusion of a headboard and makes the head the focal point. You then add narrow curtains on the head end of each side rail to generate a cosy enclosed area around the pillows.
This style can really make a statement when you opt for a bold colour or print for the curtains. Make sure your fabric is double-sided for the narrow side curtains, as these will be visible from all angles. You can get away with using single-sided fabric for the panel that sits at the head of the bed as the reverse side will be facing the wall.
Product: Illington 4 Poster Wooden Bed Frame
4. Modern elegance with curtains at the sides
Another modern take on four poster bed curtains is to have them on just the long sides of the beds, leaving the head and foot open. You can keep them open for a light and airy feel, or close them to generate a more intimate space, but the bare head and foot leave a sense of openness.
Plus, if you have a bed with a beautiful headboard, you can ensure this takes centre stage without any drapery around it to detract attention. Very lightweight fabrics work well with this dressing method. For an ultra-modern look, consider a mesh-like material for the curtains.
5. Loose swags instead of curtains for an ethereal finish
An incredibly popular way to dress a four poster bed is to use long swathes of very lightweight fabric draped over the top of the frame. You could wrap the fabric around the upper bars and let it drape down the side of each poster. Alternatively, simply lay the fabric right over the two side bars to create a canopy effect above the bed and provide some coverage of the sides. This style is best achieved with a piece of white, sheer cotton fabric.
A big benefit of this dressing method is that it's relatively inexpensive to achieve compared to proper curtains attached to the four poster bed frame. Plus, it gives you the flexibility to play around with the finish to suit your needs. For example, when you want more coverage on the sides, simply spread the fabric out flat. When you want the bed to look more open, gather the fabric up and move it towards the head of the bed, or wrap it around the posts to keep it out of the way. Overall, this style always has a relaxed, informal and ethereal finish.
6. Leave the bed bare to shine the spotlight on the frame
Four poster bed frames look dramatic and impressive even without being dressed, so for an ultra-modern look, consider not using any curtains or drapes at all. Instead, you could add a throw and some scatter pillows to make the bed itself look cosy and inviting.
These accessories don't always fit in when you have curtains or drapes. The bed can look too cluttered, busy and overdone. By eliminating the curtains, you can generate texture with accessories and make the bed a true focal point while enjoying the cosy comforts of a warm blanket and extra pillows.
How to dress a four poster bed from Endurance Beds
Our Illington 4 Poster Wooden Bed Frame has beautiful detailing on the posts and headboard, but we've taken care to keep the design classic and timeless enough to suit a variety of tastes. This bed frame lends itself to both traditional and contemporary dressing styles, so you can style it exactly as you wish to suit your decor.
Previous post / Next post
execution technique (steps), necessary materials and tools, step-by-step instructions and expert advice
A canopy is not only a beautiful decor for a crib, but also a necessary element that performs several functions. It needs to be fixed properly. This procedure does not cause any particular difficulties. You should consider the instructions on how to put a canopy on a crib, as well as options for its design. All the details of this process will be discussed below. nine0003
Canopy functions
Before looking at how to install a canopy on a crib, you need to understand what its role is. Some parents do not see the point of attaching such a curtain at all. They consider the canopy to be just a useless dust collector. In fact, this curtain is not only a spectacular addition to the crib, but also performs several important functions.
The child will feel more secure if his bed is covered with a canopy. The fabric will protect against room dust getting to the newborn. Also, the curtain saves from drafts and direct sunlight. They prevent the baby from sleeping peacefully. In addition, if there is a canopy, mosquitoes and other flying insects will not be able to get close to the baby. nine0003
As a result, the installation of this device makes the baby's sleep calmer, and the parents' nervous system is stronger. For this reason, you need to learn how to properly attach it with your own hands. Only by doing all the steps correctly, it will be possible to protect the child from external stimuli.
A few tips
How to attach a canopy to a crib depends largely on the style of the product. There are several types of curtains on the market. They differ not only in design, but also in comfort in use. When choosing, take into account the features of the crib, as well as the conditions in the room. nine0003
The canopy must not interfere with putting the baby in and out of the crib. Therefore, it has a shutter opening mode. It is also important to pay attention to the length of the fabric that will cover the crib. Ideally, one edge should reach her legs. Otherwise, dust and insects will be able to penetrate under the canopy.
The color must be matched to the design of the room. The room will look cozier if the shade of the fabric is combined with other furniture. White color is considered universal, so it can be used in almost any interior. nine0003
If the room is very sunny, it is better to choose a canopy made of a slightly denser fabric than usual. It will protect the baby from the sun's rays. But too thick structure is not welcome. If the lighting is moderate, it is better to use a canopy made of light fabric. It is advisable to install roller shutters on the windows.
Types of fastenings
Considering the recommendations on how to properly put a canopy on a crib, you should pay attention to the different types of fastenings. They can be made from metal or plastic. There are 3 types of mounts. These are mobile, stationary varieties, as well as supports for installing a canopy around the perimeter. Each of them has its pros and cons. nine0003
Most often, parents purchase mobile holders. Such a device can be installed directly on the side of the crib in any suitable place. You do not need to use the walls or ceiling during the installation process. They will not leave traces after the canopy is dismantled.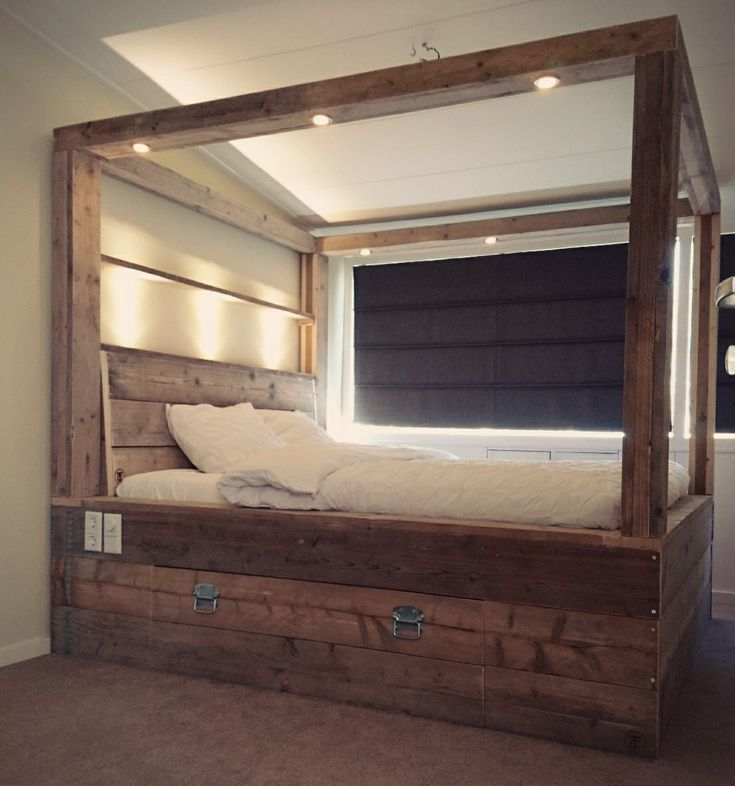
Light mobile holders. They can be easily fixed on the side. This does not require much physical effort. However, the disadvantage of the mobile design is its mobility. If you constantly install and remove this support, it may simply fall over time. When a child grows up, he can pull the holder or fabric towards himself. This, of course, is not dangerous, but unpleasant. nine0003
Stationary supports
Canopy holder for baby crib can be installed permanently. In this case, it is attached to the wall or ceiling. After dismantling, traces remain from it, therefore, this type of support is chosen only if you wish to carry out repairs soon. In extreme cases, traces of the canopy will need to be decorated. To do this, use different drawings, stickers, etc.
If you do not plan to rearrange the room in the next few years, you can install a stationary holder. The advantage of this design is its reliability. The fixation will be rigid, which will not allow the baby to pull the support and fabric onto himself. nine0003
With the help of stationary holders create spectacular compositions in the form of a ship, castle, etc. The image can be anything. This design holds up very well. It will be very difficult to rock it. This type of holder is considered more secure.
All-round fixing
Canopy fixing for baby cot is installed around the perimeter of the crib. It can be both stationary and mobile. The design is 4 slats. They can be fixed in the corners of the cradle or directly on the ceiling. nine0003
The scope of delivery usually includes mounting hardware. In this case, you just need to carefully read the manufacturer's instructions. It indicates exactly how the rails should be fastened. Sometimes you need to purchase a mount separately. Then you can choose its configuration and type of fixation yourself.
When buying a holder, it is important to pay attention to what material it is made of. It is important that the supports pass the environmental test. Even a slight chemical smell should not come from them. If it is present, it can be argued that the product is of low quality. It should be put aside. nine0003
Installation options
There are several ways to hang a canopy on a crib. If you plan to mount stationary supports, then there can be only one installation option. The mount is fixed above the crib to the ceiling or wall. But there are many more options for installing mobile supports.
Can be fixed to the side of the headboard, wide railing or around the perimeter. Each of these options has its own advantages and disadvantages. So, for example, when installing the holder at the head of the material, the material will not be able to cover the entire crib. However, at the same time, a sufficient amount of air will flow to the baby. nine0003
By installing the support on the side of the wide railing, the cot can be completely covered with fabric. This will protect the baby from external stimuli. If you install the holder on the side where the crib is adjacent to the wall, make sure that when swinging it does not damage the finish. Paint, wallpaper or other material wears out quickly in the place where the mobile holder is installed.
Perimeter Mounting Recommendations
When choosing how to put a canopy on a crib, one of the best options to consider is the perimeter support. The curtain in this case looks luxurious. At the same time, he will be able to provide high-quality protection of the crumbs from various adverse effects. nine0003
The disadvantage of this type of canopy installation is the presence of a large number of supports. They will lean on the crib in different places. If the child eventually wants to touch them, he will be able to collapse the entire structure.
Mounting the fixed holder
How to mount the structure? There is a simple instruction. The canopy on the crib must be installed in accordance with the manufacturer's recommendations. All components must be new and free of defects. Every detail is carefully inspected before installation. nine0003
Special cornices are required for fixing. They often come complete with a canopy. Otherwise, you can use a profile instead of cornices. It needs to be attached to the ceiling. The material will be laid out directly on the profile.
As an option, instead of a profile, a small cornice is attached to the ceiling. You can use 4 or 2 rails. They will hold the fabric. One of the easiest ways is to mount a hook over the crib. It must be fairly large. Adjusting such a canopy will be problematic. nine0003
Sometimes a circle of metal is attached to the ceiling. It should be small. This will ensure that the fabric is evenly distributed around the crib.
Installation procedure
How to put a canopy on a baby crib with your own hands? You will need to drill a few holes in the ceiling. If it is tension, you should choose other methods of fixation. For example, you can install a cornice or profile on the wall.
Marking is done first. This allows you to hang the canopy evenly. The holder is fixed with screws or dowels. Self-tapping screws are better not to use. They will not be able to provide high-quality fixation. First, the brackets are fixed, and then the eaves are installed in them. nine0003
Mounting of the mobile holder
This design usually consists of a tube and a loop. The last one should be on top. The tube has a clamp for installation. A canopy will cling to the loop.
The tripod can be made of plastic or metal. With the help of a bracket it is fixed on the side. The mounting height can be adjusted to your liking. This indicator is influenced by the style of the canopy and the amount of fabric. You can separate the part of the pipe with the mount from the side of the tripod where the loop is. So it will be more convenient to install the structure. nine0003
Instructions for assembling a canopy for a crib are included with the mobile holder kit. Correct installation is determined by the position of the fabric. It should evenly fall in folds on the crib, covering it completely.
Mounting material
After the tripod is set up, thread the fabric through the eyelet. Her antennae are threaded into drawstrings. They are usually provided by the manufacturer on a canopy. If this procedure is performed correctly, the fabric will fit beautifully on the crib. It is worth noting that with this mounting scheme, there must be connectors on the loop. nine0003
Sometimes the loop circle is one-piece - without connectors. In this case, the fabric is attached with Velcro or ribbons. Usually they are sewn onto the fabric by the manufacturer. If there are no such clamps, you can make them yourself. Sometimes the material is simply sewn to the loop.
When the fabric is fixed on the circle, this part of the tripod is put on the second part of the tube. Both parts must be firmly fixed. If everything is done correctly, the fabric will beautifully cover the crib with its folds. You need to straighten it so that it does not interfere with laying the child. nine0003
We have learned the basic rules of how to put a canopy on a crib, obviously you can do this task yourself. The result is a beautiful canopy that will protect the baby from various external irritants, and can also decorate the cradle.
How to attach the canopy to the crib: instructions, options for fixing the canopy
Contents:
- The benefits of a canopy for a crib nine0100
- Canopy mounting options
- Crown, fastening of the semi-frame canopy structure
- Attaching a canopy with a frame to a crib
- Making a canopy for a crib
- Homemade canopy design nine0100
The canopy makes the newborn's bed more comfortable, elegant and beautiful. It is rare when a crib is sold together with a canopy. Therefore, many people have questions about why a canopy is needed on a crib, how to hang a canopy. After all, with mother's hands, you can make the baby's world more cozy and comfortable.
Back to content
Benefits of a canopy for a crib
First you need to understand whether a canopy is needed for a crib. Many mothers do not see any benefit from him, besides, they believe that he is a wonderful "dust collector", which is dangerous for the baby. nine0003
In fact, the canopy is a functional detail, it protects from light that disturbs the baby's sleep. Prevents insects from entering the sleeping person and disturbing his sleep. A long canopy made of dense fabric to protect from drafts. If there are pets in the house, then the canopy prevents the pet and its fur from entering the crib to the baby.
Contents
Canopy fixing options
There are 4 ways to fix the canopy:
- Crown. This is a semi-frame structure that is installed on the ceiling. It is a hoop, on which the fabric is attached in the future.

- Frameless design. It is attached to the wall or to the ceiling.
- Ready-made bed with frame or separately made structure. It consists of 4 racks at the corners, which are interconnected from above.
- Stand construction.
The choice of fastening of the canopy should be done, starting from the interior of the child's room, from the preferences of the parents. The canopy should not interfere with mother and baby. nine0003
Curtains in the interior
Lilac
Ocher Curtains, dark brown
More
RUSHAL
Curtain "Nicole" 130x280 cm, pink, beige
More
Tricotika
Curtain set Louis, navy blue, golden
More
Nelya Nurieva
Curtain set Romanesque bleu 250x270 cm - 2 pcs, blue
More
Back to Table of Contents
Crown, fastening of the semi-frame canopy structure
Instructions for attaching the canopy to the ceiling are as follows:
- Above the crib, at its head, mark the place where the canopy will be attached.
 nine0100
 - Fix the base for the canopy to the ceiling with a self-tapping screw.
- Assemble the canopy material onto the holder. Ribbons, Velcro, laces, etc. can be used for this.
- At the end, gently straighten the fabric and distribute the folds.
This canopy attachment option is suitable for those who do not intend to move the crib to a new location.
After all, removing the structure from the ceiling is a troublesome business. The crown mount is the strongest and safest. The length of the canopy can be different, both to the floor and to the middle of the crib. nine0003
Mounting the canopy on the stand
Assembling the canopy on the stand is quite simple, although at first glance everything seems confusing and complicated. The main elements of such a canopy:
The main part, which is responsible for the stability of the entire structure. It can be a tube or a platform. Straight tubes that are interconnected and create the ability to adjust the tripod in height. The upper bearing part of the tripod is a curved tube. The upper round or oval part, the fabric is put on it. nine0003
To install the canopy on the stand, you just need to connect all the parts, insert the rod into the base, attach the supporting part, oval holder. At the end, fix the height of the structure and hang the canopy, straightening it and laying it in folds. Such a canopy has advantages over the ceiling and frame, it can be easily moved around the room, adjust the height of the rod. And in the future, when the child grows up, he can use it in his games, for example, to create a fabulous tent. nine0003
Photo curtains
Curtains with photo printing will be an interesting element of the decor of the room, it is more difficult to match them to the interior, because in most cases they are not one-color, but have a color pattern:
Lilac
Photocurtains "Street.
 Lanterns", yellow, white, black, blue, green, sky blue, violet, red, orange, pink
 More
Stylish home
Photocurtains "Violets", blue, lilac
More
Cameo
Fine Teas kitchen curtain set, beige
More
MarTeks
Curtain set, Persian patterns 150*270 (2) + tulle 150*270 (2), blue, beige, red
More
Back to contents
Fixing a canopy with a frame to a crib
This type of canopy implies a frame for a canopy complete with a canopy. It can be installed on the back wall, then the baby's bed will be completely covered with a canopy or at the head, in which case only part of the bed will be covered with a cloth. nine0003
Assemble the canopy on the frame as follows:
- Connect all parts of the structure.
- Install fasteners on it.
- Adjust the height of the future canopy.
- Attach the frame to the back of the crib.
- Spread the fabric to cover both the bracket and the sides of the bed.
If the crib is located with the wide side against the wall, then it is better to place the fastenings for the canopy on the wide wall, and if it is narrow, then at the headboard. Both options look great. The whole assembly process is quite simple, and if necessary, the crib can be moved around the room without any problems. nine0003
Tip! The factory instructions suggest fastening the canopy structure to the top bar of the crib using feints. But sometimes this is not enough, the child grows and soon, pulling the curtain, can bring down this structure on himself. Therefore, it is better to make holes in the back of the crib with a drill and, using a self-tapping screw, firmly fix the base of the canopy.
Roller blinds for windows
The popularity of roller blinds has recently been gaining momentum, they got their name because of the twisting mechanism, as a result of which they turn into rolls, due to which they take up very little space in the house, it is very practical , see for yourself:
DECOFEST
Mini roll "Cocoa with milk" 80x160, light brown
More
DECOFEST
Miniroll "Fresh mint" 40x160, light green
More
Kauffort
Lightproof minirollo, vanilla, size: 37x170 cm, yellow
More
Kauffort
Minirollo, light lemon, size: 37x170 cm, light yellow
More
Back to content
Making a canopy for a crib
Many mothers often want to make everything for the baby with their own hands while waiting for a baby. This also applies to the canopy in the crib of a newborn. In fact, it is possible and making a canopy with your own hands is quite simple. To do this, you need to purchase:
- About 3 meters of fabric, not very dense and only natural.
- For frills over 5 meters of lace or decorative ribbon.
- To create backstage approx. 3.5 meters of tape.
- Thick wire for carcass.
Decor is custom made. The canopy can be decorated with butterflies, decals, pompoms, bows, ribbons, etc. The very pattern for canopies can be found on the Internet, in the photo. If there is no sewing experience, then initially you can sew a canopy for a doll bed. Thus, having studied all the details and nuances, it will be easier to make a canopy for your child. nine0003
Back to Contents
Homemade canopy construction
If you make your own canopy, you can make the latch post as follows:
- Make a wooden frame on the wall.
 To do this, at a height of 1 m above the cradle at the head, or on the side, mark a place for mounting the bracket.
 - Drill a hole in the wall and attach a wooden beam horizontally to it.
- At the edges of the installed bar at a right angle, fasten the rails with self-tapping screws. nine0100
- Throw fabric over the resulting frame, create sagging of the canopy between the slats so that the material hangs evenly.
The canopy holder is the main structure of the canopy, you can also make it yourself. The most suitable material for its manufacture is thick wire. It is necessary to make an oval or a circle from it and attach it to the ceiling at the head of the crib. You can build a structure in the form of a stand. To do this, use a wooden stick, metal or plastic tube, and attach the holder to the stand with a clamp. nine0003
Tiebacks
Tiebacks are an integral part of the window design. Not always correctly selected curtains, taking into account practical advice and recommendations, are the key to a successful end result. Just a few details and the decor of the entire window looks more elegant. Tiebacks subtly emphasize the interior, look great, successfully decorate windows, being an integral part of the completed composition:
IZKOMODA
Tieback with tassels, golden color
More
IZKOMODA
Double-sided magnetic clip "Waves", silver color
More
IZKOMODA
Double-sided magnetic clip "Chrome", silver color
More
ALTEKS
SCREWS hook, dark gray
More
Initially, a canopy on a child's bed was made so that the child would have the feeling of a cocoon, so that he would feel protected, like in his mother's tummy. The canopy is not a beautiful toy, but a psychological protection for an insecure or separated baby from his mother. And in order not to frighten the child even more with a structure that unexpectedly fell on him, you need to know how to firmly and correctly fasten the canopy to the crib.
Learn more
- Planting schemes for small gardens

- Best flooring hallway

- What is the best time to plant grass seeds

- Picking bathroom colors
- Jasmine flowers season

- Landscaping with stones instead of mulch

- Detergent for down comforter
- Roses flower garden

- Paint similar to farrow and ball
- How to clean a throw rug
- How much does it cost to landscape a small garden
