How to build ground decking
How To Build A Ground Level Deck
Every homeowner has dreamt of transforming their yard into the perfect outdoor oasis, and building a deck is on top of the list. To many, this might seem like a complicated project, and rightfully so, but a ground level deck eliminates some of the hard work since you don’t need the stairs or the safety railings. How exactly can you build a ground level deck?
The exact process of building a ground deck, such as the layout and design, planning the foundation, and laying the deck, which you will learn if you read on.
What’s the Process of Building a Ground Level Deck?Ground level decks are one of the most straightforward outdoor structures to build but definitely not the easiest. Due to the low height, you need plenty of ventilation underneath or the deck will rot quickly. Due to their height, many people don’t see the reason for adding stairs or safety rails, although the latter may be necessary if you have toddlers running around.
A ground level deck is considered less than 12″ from the ground. It should be well-ventilated to allow free air movement to prevent mold and rot. Always use pressure-treated wood or better for the framing and decking.
Additionally, a ground level deck doesn’t have to be attached to a structure, eliminating a ledger board which can be a source for wood rot to your house foundation, if not installed properly. This type of deck doesn’t cost as much to build as a regular height deck, due to no stairs or railings.
Most ground level DIY decks cost $10 per square foot for pressure treated framing and decking and 2-3 times that if you have someone build it for you. The cost can go comparatively higher depending on the materials used and the size of the deck.
These are the DIY steps of building a ground level deck:
Lay Down The Plan And DesignThe success of any project depends on the planning. If you get this right, you’re halfway through your successful project.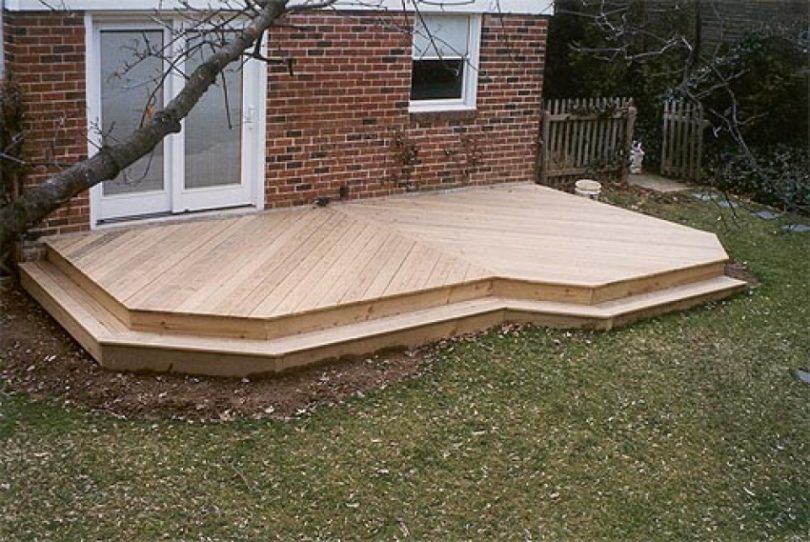 In this stage, you need to consider the following:
- Location – You don’t need a huge space for the deck, as small and simple is always better. Make sure you choose somewhere you can have a great view of your yard.
- Drainage – Standing water is the enemy of wood, and you should prepare the land and under the deck for better drainage.
- The size of the deck – The deck should be high enough from the ground to prevent mold and rot. The deck should not exceed 200 square feet or go above 30 inches high to avoid needing a permit. If you want a bigger deck, you can pull a permit or you can build separate frames as I did in my back yard.
Typical wood lengths are 8, 10, 12 and 16 feet long. To have the least amount of waste for framing and decking boards, you will want to use a size that incorporates the lengths above. An example would be a 12×16 deck.
Get All The Materials NeededPressure treated wood is the primary material for framing any deck, especially a ground level deck.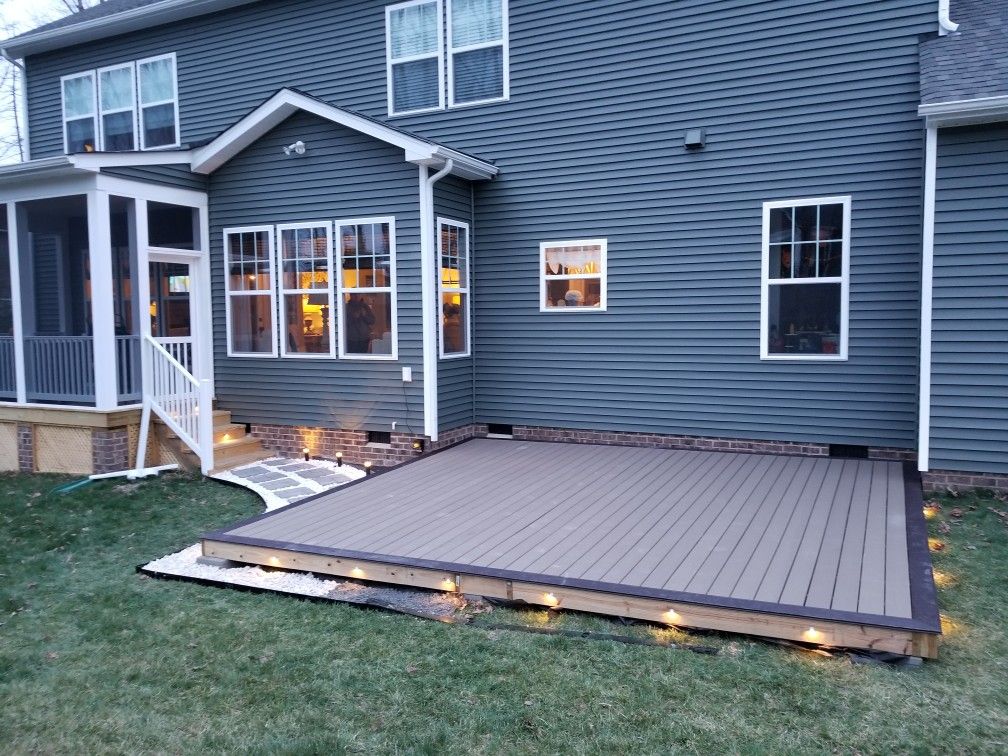 No matter if you live in a wet or dry environment, building codes require ground contact pressure treated wood for any framing members that touch the ground.
Make sure your beams and joists are considered “ground contact” pressure treated wood. If you don’t use that type of wood, your framing might not last as long.
As far as decking, there’s a wide choice of materials as listed below. The lowest grade possible is pressure treated decking which will also be the cheapest. Many decks are made with pressure treated wood and last a long time with proper maintenance. If your deck will see a lot of sun rays, see which type of decking is best for full sun.
If you want to upgrade the look and prolong the life of your deck, consider tropical hardwoods, i.e., ipe, cumaru, tigerwood or composite wood decking. They cost 2-3 times more than pressure treated decking but will last 2-3 times as long. If you can’t decide which size decking, read our article about the difference between 5/4 decking and 2/6 decking boards.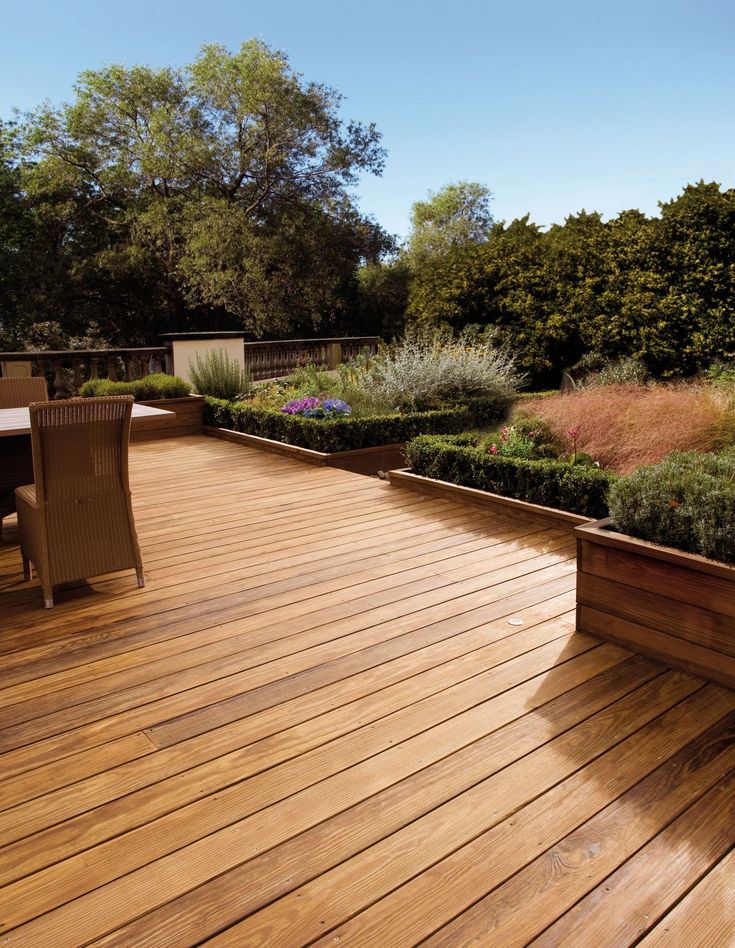
- Pressure Treated Decking
- Cedar
- Redwood
- Tropical hardwood
- Composite wood
Free air movement helps keep the ground under the deck dry and fresh, which should be at the top of your priority list. If you’re looking at building a ground level deck, I’m making an assumption that maybe you’re trying to go below a patio door or you want something without a big step up.
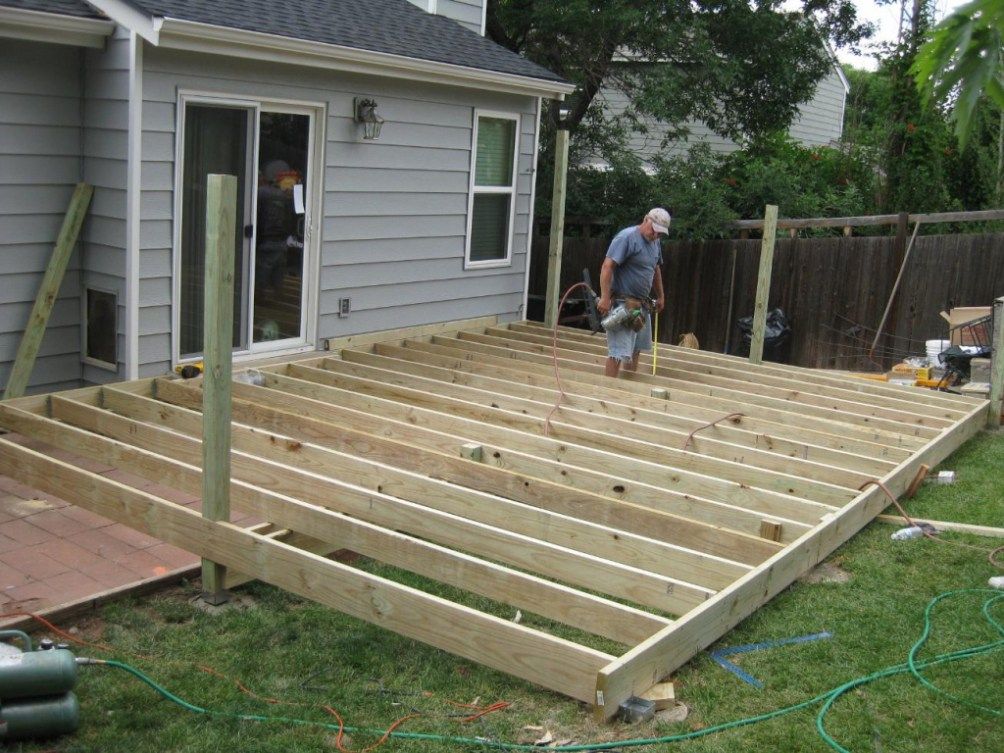
If you’re building a deck less than 6″ inches from the ground, you’ll have to remove some dirt to get the required ventilation underneath. Removing dirt will be one of the biggest parts of the entire building process. I try to dig at least 6″ or more of dirt from underneath my ground level decks, then lay 2-3 inches of gravel over weed barrier fabric, which helps with water drainage.
Set Up Leveling And The Framing
The foundation of any structure is very critical as it determines its strength and longevity.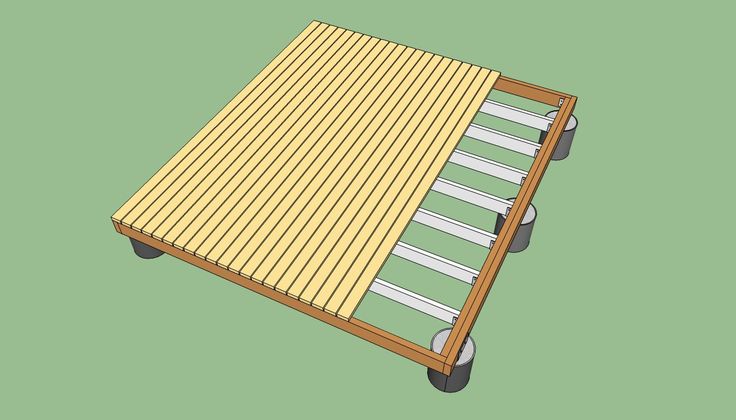 If you’re going under a patio door, that height is key to know for your deck height. I actually go backwards when building decks by putting together my flush beams and joists first.
I build the outer layer of my framing at the height I need under my patio door, then I go around each side leveling it with concrete blocks. Having a long level helps to lay on to top of the framing boards. Once everything is level you’re ready to frame everything.
Make sure you’re outer framing is a few inches less than your longest deck board. Typically you want at least an inch overhang from your deck board to your framing underneath. If you deck boards are 16 feet or 192 inches, you will want your framing to be 190 inches or less. I usually build my framing 4-6 inches less since some decking boards will have checks or cracks on their ends that will need to be cut off.
Set Up The BeamsThe flush beams will be necessary in order to allow better drainage and free airflow under the deck.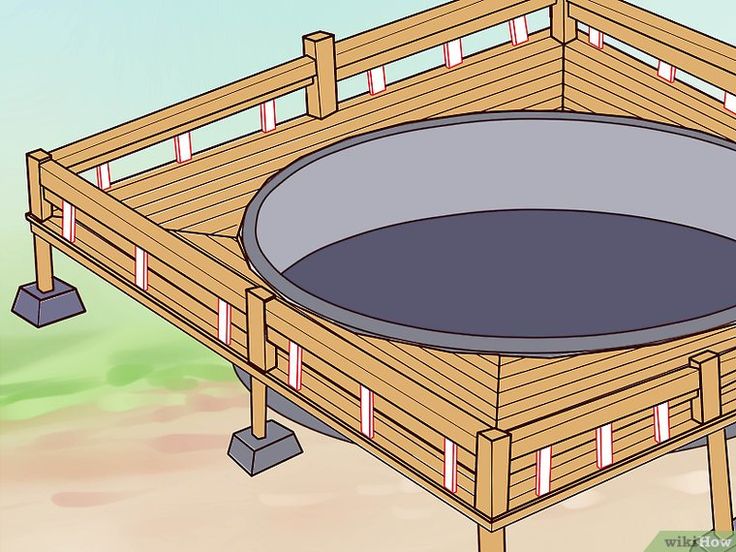 “flush beams” are on the same height as your joists, not underneath like regular beams. Make sure they are supported throughout the bottom of the deck either with buried concrete forms or floating concrete blocks. Where you live may dictate which you can use.
Anywhere with high wind possibility will require you to anchor the deck framing to the ground. You would need to either bury posts in concrete or use concrete forms and use hardware to connect to the deck framing. If you’re able to use floating concrete blocks, make sure you have enough to support the framing properly.
If you need to shim a few spots, use pressure treated or composite shims under the beams to improve leveling. Another option would be to add more gravel to the ground to level it up.
Add Inner JoistsBefore connecting all the inner joists, make sure your deck is perfectly square by taking a diagonal measurement from each corner. The measurement should be the same, if not, make adjustments, until it is the same.
I connect all my outer beams and joists with structural screws and joist hangers for my inner joists. These hardware choices will give you peace of mind to know your deck framing is very secure. With ground level decks, most beams and joists will be 2×6 or less.
I try not to go below a 2×6 for deck framing unless it’s over a concrete patio with 2x4s. Joist spacing with 2x6s should be 16″ on center or less. Most building codes will showcase the beam and joist span for certain types of wood used.
To make your deck even more sturdy, add blocking between the joists, especially if they are longer than 10-12 feet. Adding blocking halfway will stiffen the joists creating a more secure deck.
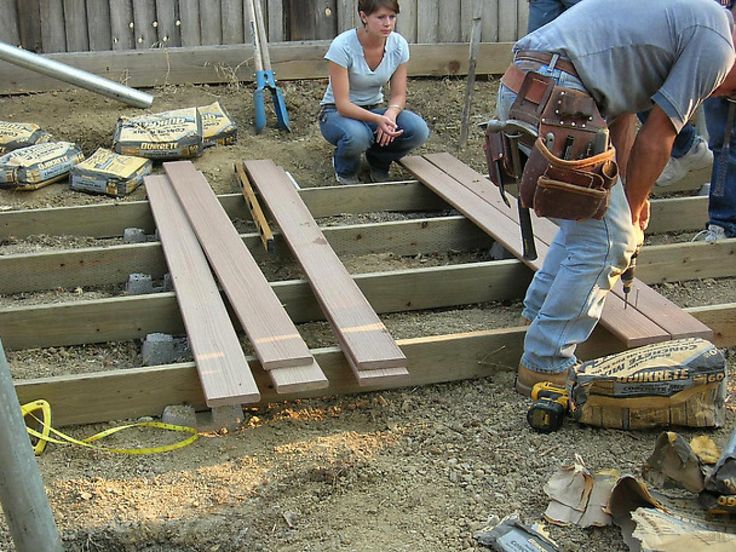
Lay The DeckingBy now, you should notice that the deck is beginning to take shape. Before laying the decking, inspect each one to find any that may have cracks or checks at the end and if possible cut off. I like to lay all my boards on the deck and install a few screws in each, then go back and fill in with the rest of the screws. Each joist will get two screws per decking board.
I also cut the ends of the boards off after installing rather than cut each board separately before installing. Note, if your first board will be next to a house go ahead and cut that one to length.
With a ground level deck, you’ll want a bigger gap to allow more ventilation. I use 1/4 to 3/8 inch gap between my decking boards. If you are using pressure treated decking boards, be careful of your gap as the boards will shrink as they dry.
To cut the ends of the deck boards at once, chalk a line across the board at the point of the cut or clamp a long straight board to the framing, as noted in the pic above. Take a circular saw and saw through each board at the marked line. If you don’t fill like you can screw in a straight line, chalk the joist locations perpendicular to the decking. This will keep your decking screws in a straight line and look more professional.
ConclusionGround-level decks are perfect for transforming your outdoor space into something that you will spend countless hours enjoying.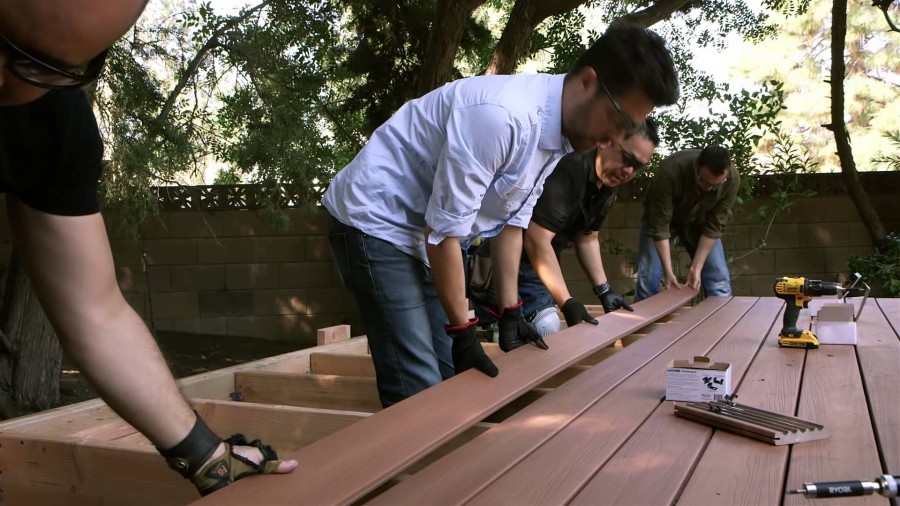 It’s also a simple structure to build with the right instructions. Hopefully, we’ve given you the confidence to tackle this project for your backyard. Don’t forget to maintain your deck by pressure washing regularly and staining or painting to prolong the life of the decking boards.
How to Build a Floating Deck
Ground-level floating decks don't need footings, railings, or steps
By
David Beaulieu
David Beaulieu
David Beaulieu is a landscaping expert and plant photographer, with 20 years of experience. He was in the nursery business for over a decade, working with a large variety of plants. David has been interviewed by numerous newspapers and national U.S. magazines, such as Woman's World and American Way.
Learn more about The Spruce's Editorial Process
Updated on 06/28/22
Reviewed by
Johnathan Brewer
Reviewed by Johnathan Brewer
Johnathan Brewer is a home improvement expert with over two decades of professional experience as a licensed general contractor specializing in kitchen and bath. He has been featured on HGTV’s “Super Scapes,” “Curb Appeal the Block,” “Elbow Room,” DIY Network's “House Crashers,” "This Old House," and OWN Network's Emmy award winning show, “Home Made Simple.” Jonathan is also a member of The Spruce Home Improvement Review Board.
Learn more about The Spruce's Review Board
Fact checked by
Alexandra Kay
Fact checked by Alexandra Kay
Alexandra Kay is a writer, fact-checker, researcher, and editor who checks The Spruce articles for accuracy and adds source citations. Alex frequently writes for b2b and b2c publications. When she isn't writing or fact-checking for print or online articles, Alex is an associate professor of English at a community college.
Learn more about The Spruce's Editorial Process
The Spruce
Project Overview
Floating decks can be set directly on the ground or, preferably, a bed of gravel. But it's best to support the deck on concrete blocks.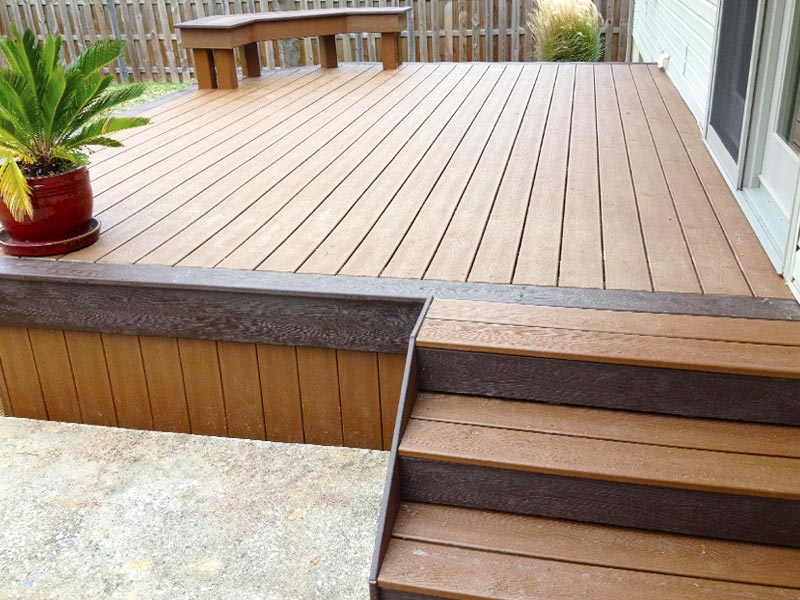 This keeps the wood off the ground and away from moisture so the wood stays drier and lasts longer. You can buy special blocks designed for deck support, or you can use standard solid concrete block (the type without holes), which are cheaper and give the deck a lower profile.
What Is a Floating Deck?
Floating decks are wood decks that rest on the ground and are not attached to any structure, including your house. Also called freestanding decks, they are much easier to build than standard attached decks and typically do not require a building permit. Many jurisdictions have height requirements for those not needing a permit, though.
Watch Now: How to Build a Floating Deck
Codes and Regulations
You typically do not need a building permit for a floating ground-level deck, but confirm this with your city's building department before starting your project. In some cases, you may be subject to zoning rules, which govern the size and placement of all structures on a property; your city office will provide guidance.
A deck does not need a handrail or stairs if its walking surface is under 30 inches above the ground. However, it's best to keep a floating deck as low as possible. Even a fall from a height of 12 inches, or so, can easily twist an ankle or cause more serious injury.
If you need to remove more than a few inches of soil to prepare the site for your new deck, call 8-1-1, the national "Call Before You Dig" hotline, to have all underground utility lines marked on your property. This is a free service that may take a few days, so call well in advance of starting your project.
Need more help? Talk to a deck & porch builder
Our partners can help you compare quotes from top-rated professionals near you
Get a Quote
Advertiser Disclosure
The offers that appear in this table are from partnerships from which The Spruce receives compensation.
Equipment / Tools
- Shovel
- Rake
- Tape measure
- Carpenter's level
- Circular saw
- Drill and drill bits
Materials
- Landscape fabric and gravel (optional)
- 9 4 x 8 x 16-inch concrete blocks
- 3 1/2-inch and 2-inch or 2 1/2-inch deck screws
- 10 Pressure-treated 2x8s (10 feet long)
- 2 Pressure-treated 2x8s (12 feet long)
- 22 Pressure-treated 5/4x6 or 2x6 decking boards (12 feet long)
The Spruce / Michela Buttignol
-
Prepare the Deck Area
Clear the ground where the deck will be installed, removing grass and all other organic material, as needed.
Installing landscape fabric Rake the ground so it is flat and level, and tamp it well with your feet or with a hand tamp tool. If desired, lay down landscape fabric over the soil and add a layer of gravel to prevent weed growth under the deck.
 -
Set the Concrete Blocks
Arrange four concrete blocks in a rectangle so they are 12 feet apart along the long sides of the rectangle and 10 feet apart along the shorts sides, measuring from the centers of the blocks.
Position a block between each pair of corner blocks so they are evenly spaced. If desired, add one or more blocks in the center of the rectangle. This can make the deck feel a bit more solid but isn't necessary for supporting the interior joists.
Use a 6-foot level or a standard (4-foot or 2-foot) level and a straight 12-foot-long board to make sure all of the blocks are level with one another. Add or remove gravel beneath blocks, as needed, to level the blocks.
Tip
If you want something even longer-lasting than concrete blocks or piers and you have experience pouring concrete, you could also consider setting the deck foundation on a concrete slab.
Installing and leveling the concrete blocks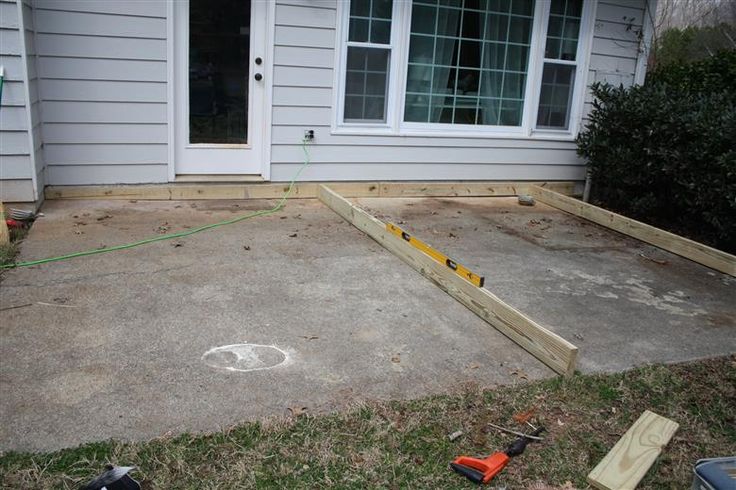
-
Build the Outer Frame
Clear a flat area of lawn (or use a garage floor or driveway) for building the deck frame. If necessary, you can also build the deck on top of the concrete blocks. Cut 10 pressure-treated 2x8 boards to length at 117 inches, using a circular saw or power miter saw; these are the standard joists.
Measure the two 12-foot 2x8s; if they're anything over 12 feet, trim them to exactly 144 inches (lumber often runs a fraction of an inch longer than the nominal dimension; in this case, 12 feet). These long joists are the end joists. Place the two end joists over the ends of two of the standard joists to create a 120-inch-by-144-inch rectangle.
Drill pilot holes, and fasten the pieces together with three 3 1/2-inch deck screws at each corner, using a drill. Measure from the inside of one corner of the frame and make a pair of marks every 16 inches along one of the 12-foot end joists.
 Do the same to mark the other end joist.
 Add two more standard joists inside the frame so each end is set between a pair of layout lines, making sure the tops of the joists are flush. Drill pilot holes, and fasten through the end joist and into the standard joist with three 3 1/2-inch screws at each end.
Framing Connectors
As an option, you can use metal framing connectors, such as Simpson Strong-Tie connectors, to make extra-strong joints. Use 90-degree corner connectors at the corners, and use joist hangers where the standard joists meet the end joists. Install the connectors using the manufacturer's approved screws.
Attaching the corners of the frame together -
Position and Square the Deck Frame
Place the deck frame onto the concrete blocks so the frame parts rest over the centers of the blocks. Measure diagonally between opposing corners. Square up the frame, as needed, by pushing diagonally from opposing corners (this takes two people).
Positioning the frame onto the concrete blocks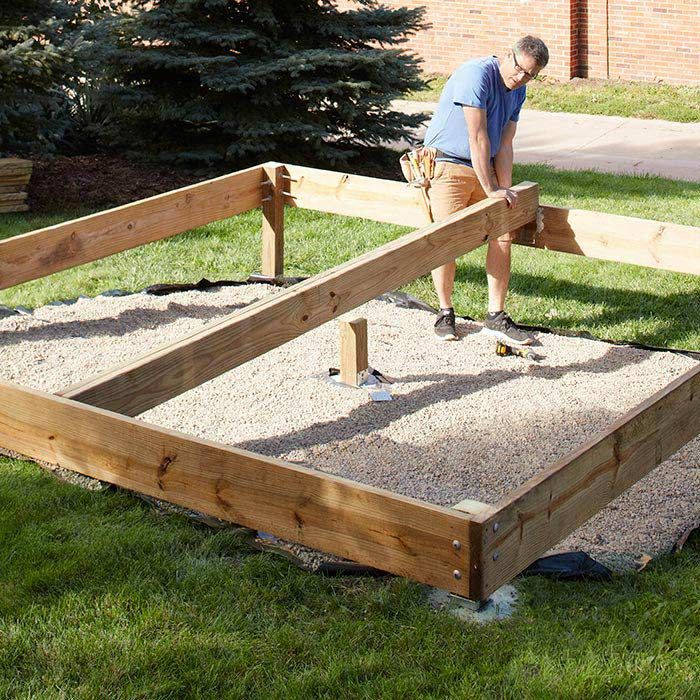 When the diagonal measurements are equal, the frame is square.
 -
Check the Blocks
Confirm that the deck frame is level and makes solid contact with each concrete block. If necessary, add or remove soil or gravel beneath blocks to adjust their height.
Making sure the frame is level on the concrete blocks -
Install the Remaining Joists
Install the six remaining standard joists, following the layout lines. Remember to keep the standard joists flush with the tops of the end joists. This ensures the deck boards will lie flat.
The Spruce
-
Install the Deck Boards
Measure all of the 12-foot-long deck boards, and trim any as needed so they are 144 inches each. Place one deck board along one long side of the deck frame so it is flush with the outside face of the end joist. Alternatively, you can place the first and last boards so they overhang the end joists by 1 inch, or so, for a finished look; just be aware that you won't have the same overhang at the sides of the frame.
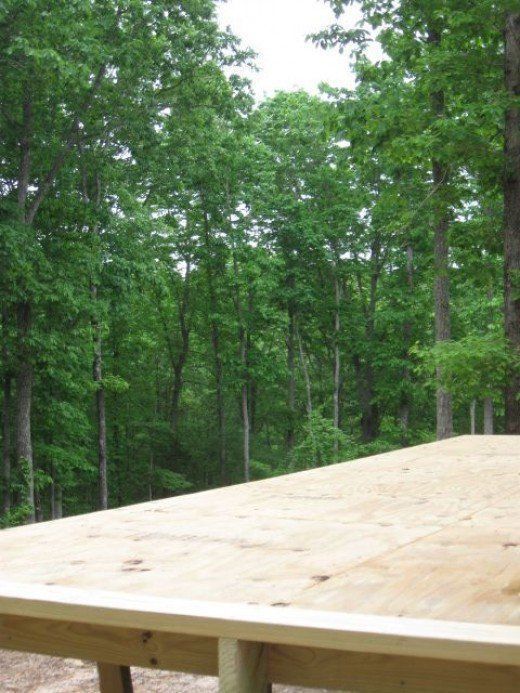
Drill pairs of pilot holes aligned with each standard joist, with one hole going into the end joist and one into the standard joist. Position the holes slightly off-center so they won't interfere with the frame screws. Fasten the deck board to the joists with 2-inch deck screws (for 1-inch-thick lumber) or 2 1/2-inch screws (for 1 1/2-inch-thick lumber).
Install the next deck board with two screws in each standard joist, spacing the two deck boards by about 1/8 inch apart. Install the remaining deck boards using the same techniques, spacing them evenly.
Screwing the boards to the joists Installing the deck boards from overhead
Tips for Building a Floating Deck
Pressure-treated lumber is the least expensive and most durable option for the deck frame and decking boards. For a modest upgrade, you can opt for Southern yellow pine (SYP) for the decking material, which typically has fewer knots and a better appearance than standard pressure-treated decking.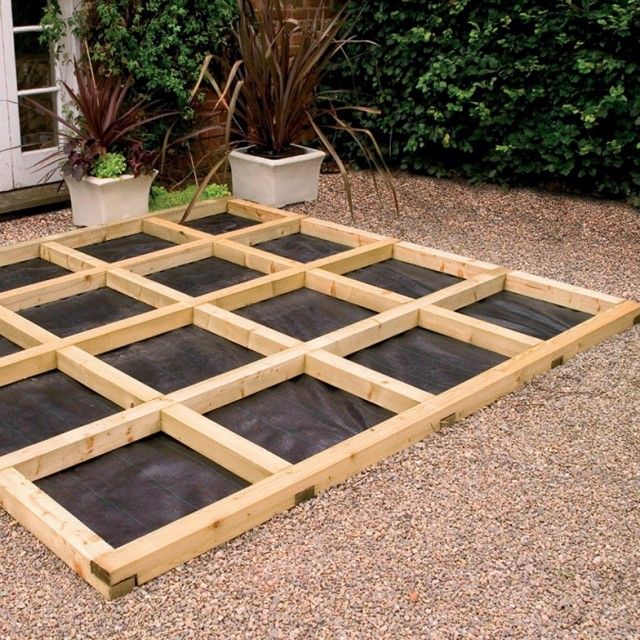 Going further up the scale, there is cedar, followed by redwood. Choose these for looks only; they're not as rot-resistant as treated lumber, despite their reputation for being naturally decay-resistant. Composite decking is also an option. It is made from recycled plastic and wood pulp, and it is essentially rot-proof and requires no protective finish.
You don't have to finish the frame (if you use pressure-treated wood), but according to experts any wood decking boards should be finished with a protective deck stain or similar sealer as soon as the wood is suitably dry. If the decking is left unfinished, it will turn gray and begin to splinter in a matter of months.
Do-it-yourself basement: step-by-step instructions
Construction, during which it is necessary to build a basement with your own hands, requires certain skills and knowledge. This is a laborious process that cannot be carried out without a precise plan and the right design, which is distinguished by its features and is fully combined with the foundation of the house.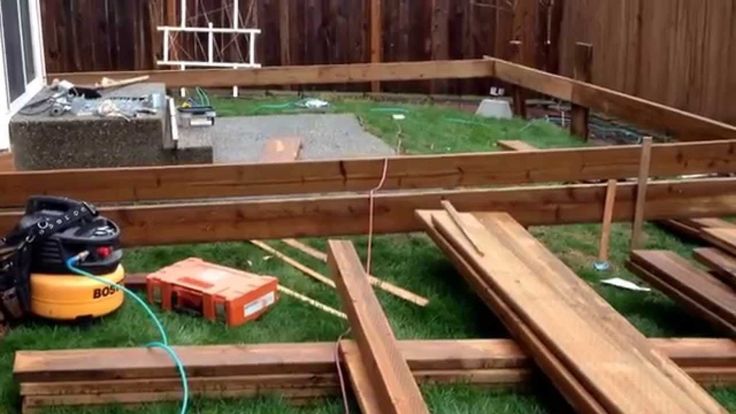
A foundation with a basement floor has a number of advantages, but high-quality and reliable can only be created if all the work carried out strictly complies with the project and construction plan. The construction of a house with a basement floor is carried out on loose and stony heaving soils, characterized by a high level of occurrence ground water.
Contents
- Design features
- Variety of building materials
- Workflow
Design features
The basement must be protected by a layer of waterproofing and insulationThe foundation for a house with a basement floor is a structure characterized by a high degree of strength and reliability, a long service life and increased bearing strength.
The foundation plinth is a continuation of the supporting structure, it provides reliable protection against the penetration of moisture and cold air into the room, helps to create additional heat and reduce energy costs.
In order for a building to be truly of high quality and functional, it must meet the following requirements:
- Plinth floor level is below ground level.
- The height of the overlap is not less than 2 m from the ground level.
- The bearing capacity of a foundation with a plinth is several times higher than that of other structures.
- Waterproofing is arranged in strict accordance with the requirements of the technological process.
- Most of the wall of the structure is located at the level of soil freezing.
- Thermal insulation prevents deformation of the foundation resulting from heaving.
- Properly selected materials and well-executed waterproofing prevent the appearance of fungus and mold.
A deep base will allow you to arrange a basement or basementIn many buildings, the main function of the basement floor is the arrangement of the basement, in which the technical room is located.
It is possible to avoid the destruction of the foundation of the house with the help of a high-quality vapor barrier.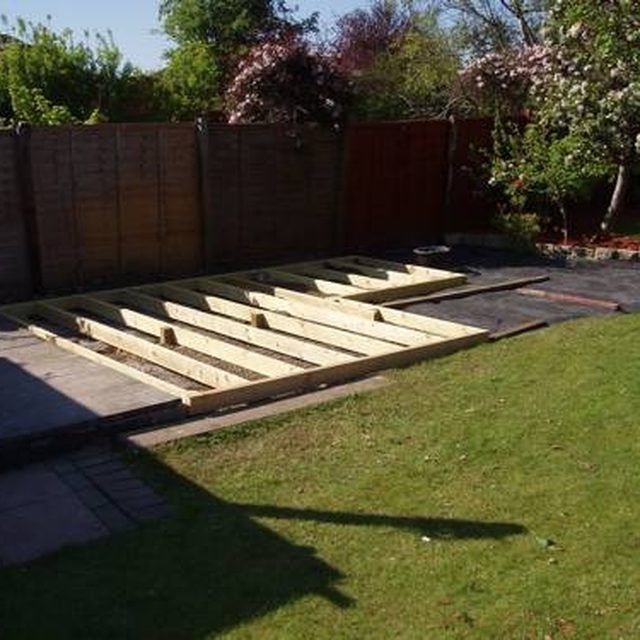 For this purpose, liquid formulations are used.
Do-it-yourself construction of a basement floor begins with choosing the most suitable form and studying various types of structures. This could be a building:
- Erected flush with the supporting structure, characterized by the need to arrange the quality of hydro and thermal insulation.
- Weakening is especially popular and is characterized by increased reliability and resistance to negative factors. It is less susceptible to the damaging effects of moisture than others and is able to withstand increased loads.
- Protruding is distinguished by its increased thickness, exceeding the thickness of the walls of the building itself. It needs additional protection and a specially designed water drainage system.
When choosing one or another form of a plinth, it is necessary to take into account the thickness of the walls of the building, the presence of a drainage system in the project, and the characteristics of the soil.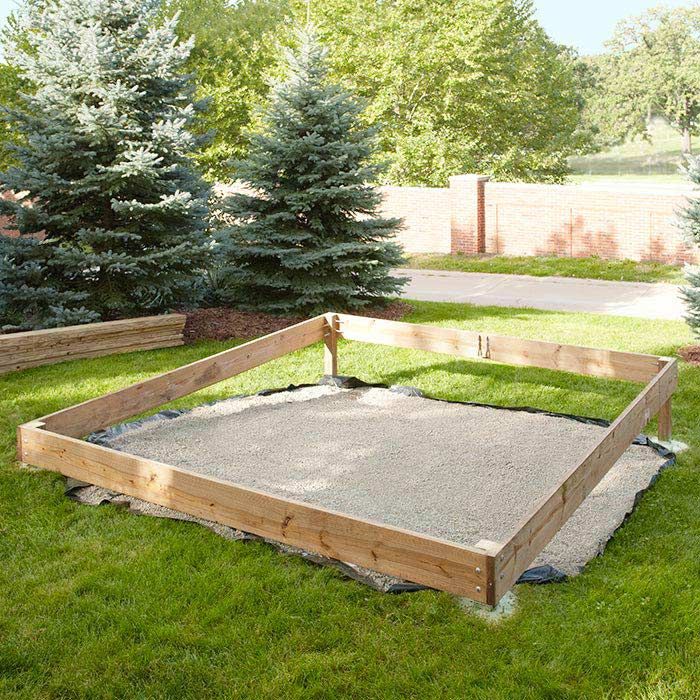
Variety of building materials
The most durable building is a monolithic baseWhen thinking about how to make a basement, you need to choose the right materials that are most suitable for this building. Among the most popular and demanded monolithic reinforced concrete.
It is able to withstand varying degrees of load, has a high degree of stability, is in demand in the construction of a seamless structure. The monolithic base is characterized by high strength characteristics and is used in the construction of heavy structures.
A high formwork is required for a monolithic baseThe foundation for the basement floor can be erected from reinforced concrete blocks in the shortest possible time even when doing the work yourself. This is one of the strongest and most reliable bases. The blocks make it possible to evenly distribute the load, they are resistant to any kind of negative influences.
Existing types of reinforced concrete blocks have different sizes, which makes it easier to choose the most suitable material for construction work when building a foundation in a private house on your own.
Do-it-yourself construction of a brick foundation of the basement floor is carried out without the use of special construction equipment and does not require special knowledge. Correct calculation and skill in working with this material is important. Natural natural stone is often used to build foundations with a basement floor with your own hands. True, special skills are required to perform the work.
The strip foundation is reinforced with metal rods
What material is better to choose, how to properly perform all the upcoming work, from what and how to make the foundation directly and how to build a basement, step-by-step instructions will tell you.
In most cases, the most suitable option for creating a base from scratch is the construction of a strip foundation under the basement. The tape has its own distinctive features and many positive qualities:
- long service life;
- high strength characteristics;
- ultimate bearing capacity;
- the possibility of erection on a wide variety of soils.
 For more information about the basement in the house, see this video:
Projects using these types of bases require precise mathematical calculations. This is done by qualified professionals.
Procedure
Pour crushed stone at the bottom of the pit and lay geotextileIn order for the basement of the house to be a reliable and high-quality structure, it is not enough to choose the right building material, geological surveys are required to find out all the features of the soil and develop a phased work plan.
We also need a detailed project of a building with a basement. The next step is the construction of a drainage system, without which melt or rainwater can accumulate in the basement. Flooding and accumulation of water in the basement itself will lead to the rapid destruction of the building.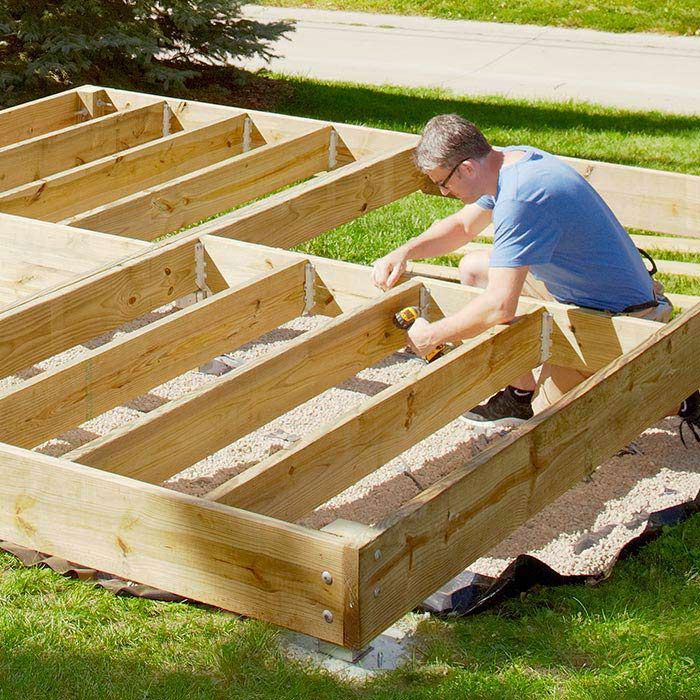
Now you can start marking the site, digging trenches and creating a pillow for the foundation of the house. In accordance with the calculations, the depth and width of the trenches are determined, and the formwork is installed. Crushed stone and sand are poured to the bottom, carefully rammed.
After the frame is connected from the reinforcement rods, it is lowered to the bottom of the trench and poured with concrete, not forgetting to tamp or remove air from the solution by bayonet.
Concrete gains strength for at least 3 weeks, only after that you can continue to work and start building the basement floor directly.
The durability of the constructed walls will be ensured by high-quality waterproofing, for which liquid materials such as mastic on a bitumen basis are used. A plinth is built from a pre-selected material. The best option according to most experts is a brick.
Blocks must be installed around the entire perimeter of the future building, cement mortar should be used for adhesion. It is important not to forget about the need for ventilation.
Ground floor in a private house. Pros and cons of plinths in cottages
When designing a house, many owners have a question: is it worth equipping a basement in it? On the one hand, the house will be more spacious; on the "zero" floor, almost any utility and even residential and entertainment rooms can be located.
However, such a project will require additional soil samples and considerable costs for installation and construction work, the amount of which often exceeds the budget intended for the construction of the entire cottage. Therefore, the question “is it worth building a basement in the house?” requires more detailed study.
What is a basement?
Many people confuse plinths with basements and technical undergrounds. In fact, the basement is, in fact, another residential floor of the house, partially hidden underground.
We also note that building codes state that if the floor slab for an underground floor does not exceed 2 meters above ground level, such a room is not a full-fledged floor, which adds additional space very beneficially.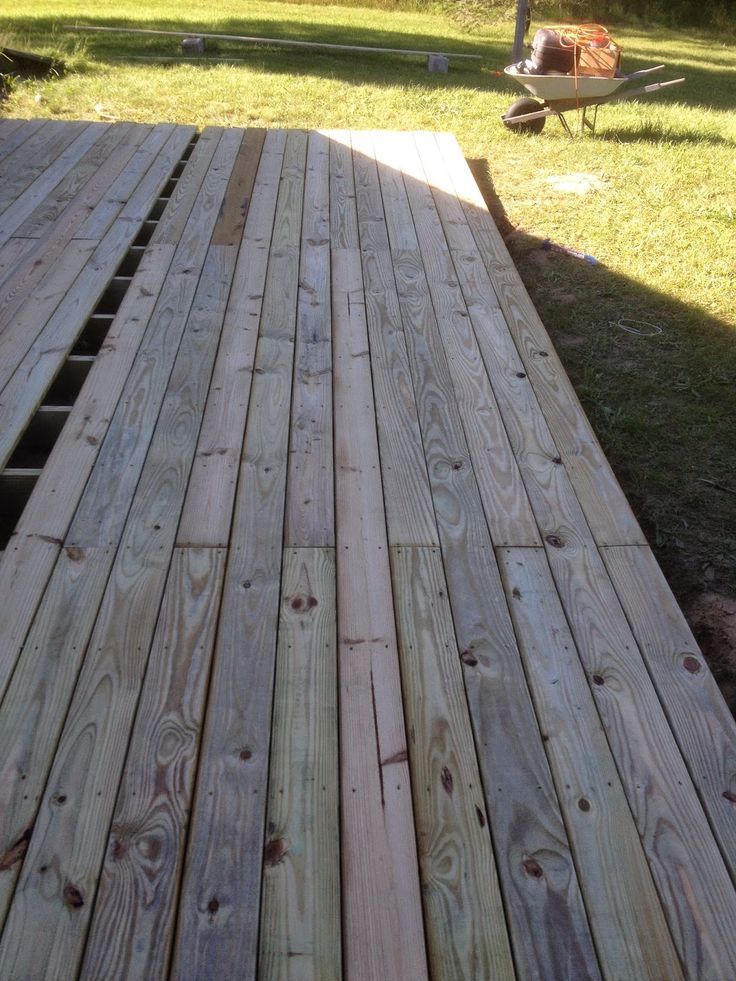 Especially when you consider the legislative ban in Russia on the construction of country houses with a height of more than two floors.
A basement is a room that is more than half above ground level. Therefore, it is possible to create an additional floor in the house without violating the current legislation.
If you are considering building a house with a basement, you should study the basic recommendations.
Recommendations for the construction of the basement
1. Study the composition of the soil and the location of groundwater
If a high level of groundwater is found on the site, this can become a serious obstacle to the intended goal. For the normal operation of the basement, you will have to spend money on a complex efficient drainage system, as well as prepare for the purchase of special equipment that maintains a normal level of moisture.
All this can make the construction simply unprofitable financially and economically.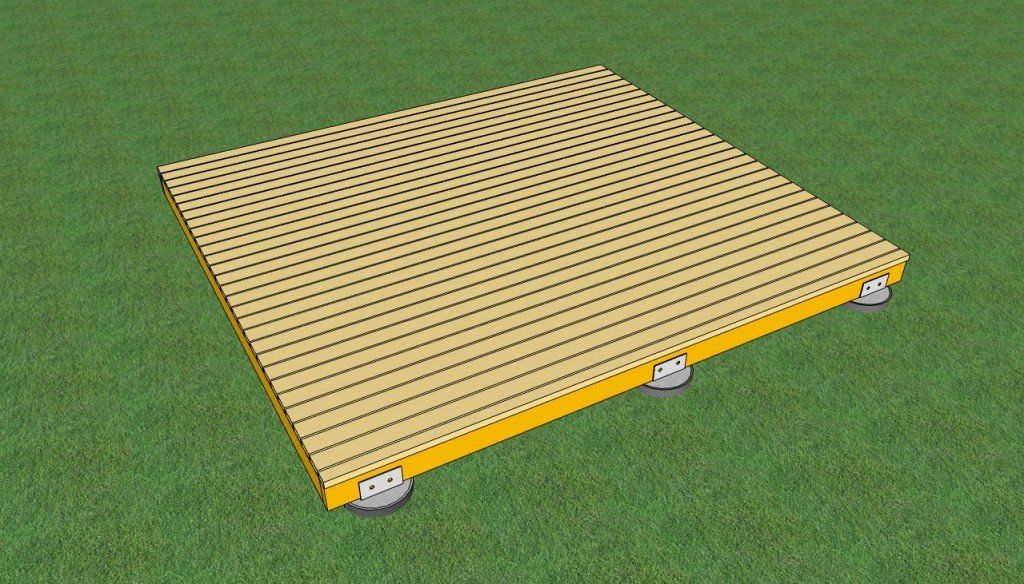 In addition to the high costs of the construction itself, the maintenance of such a room may not pay off and is not appropriate.
2. Provide protection and drainage from water
The practice of operating the lower levels in private houses shows that it is better to build not a protruding plinth (it is less durable), but a sinking one, which can ensure a constant unhindered flow of water.
In addition, the level zero will have to organize decent thermal insulation and waterproofing in order to provide the house with a long service life without major repairs. Even seemingly minor problems in waterproofing can lead to serious consequences. Do not save on the security of your own home.
3. Entrust the construction of the basement to professionals
If the main work on the construction and finishing of the cottage, with minimal experience, can be done independently - the construction of the basement requires compliance with all standards with many nuances - it is better to entrust professionals.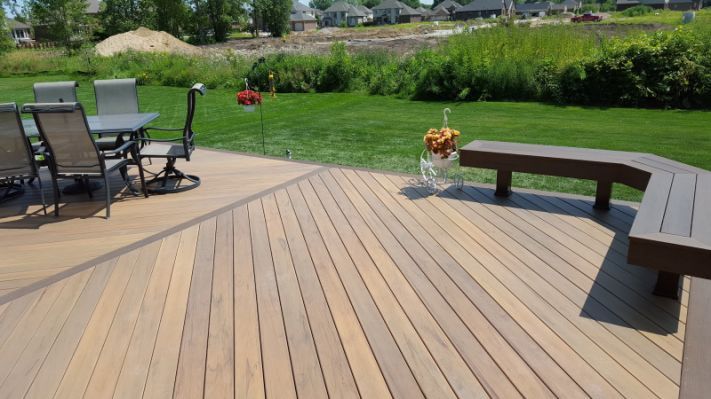
Specialists will make the correct calculations, and experienced installers will save you not only from unnecessary work, but also make the foundation of the house of high quality in all respects and ready for operation.
4. Don't Forget About Ventilation
If you plan to equip rooms with high humidity at the basement level, such as a sauna, a bathhouse, a swimming pool, a good ventilation system will be required. The most effective will be a split system and, as an option, electronic ventilation.
5. Provide Adequate Lighting
A basement floor is usually close to the ground and lacks sufficient natural sunlight, so rooms will appear dark at any time of the day. It is better to provide premises buried in the ground with a high-quality, powerful lighting system.
6. Do not build a basement in finished houses
It is not recommended to undertake the construction of a basement in an already finished building.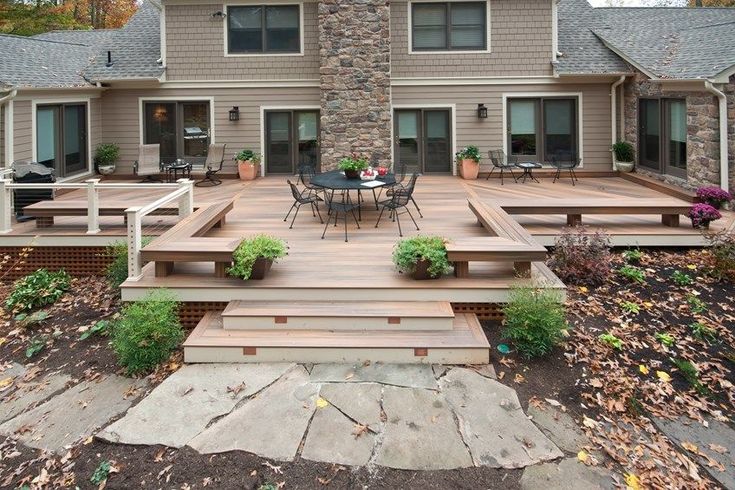 Of course, many companies will provide such a service for a fee, but this can be fraught with the destruction of the foundation if the soil is not excavated correctly, and besides, it will cost a large amount of money.
Based on the above, the owner will be able to determine how necessary the presence of a basement in his house, and what risks are associated with its construction and further use.
What to place on the basement floor?
Additional territory allows you to make the house more spacious, more functional, at the same time give originality to its design and appearance. The basement floor is almost complete, except for the placement of windows, therefore it allows you to dispose of it in any desired direction, whether it is the organization of technical or fully residential premises.
Technical rooms
It is strictly forbidden to place boiler rooms in basements, and basement rooms provide such an opportunity, which saves space on the upper levels.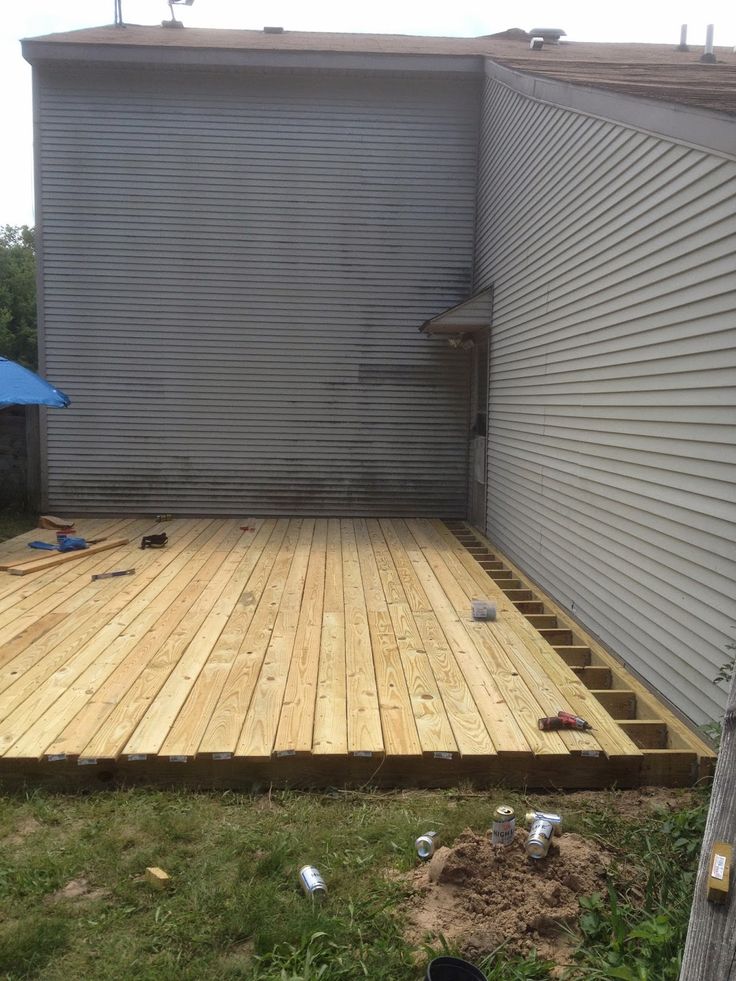 As a rule, with an area of such a floor from 100 m2, the boiler room occupies no more than 4 m2, so you can place a laundry room, bathrooms, dressing rooms, pantries or, recently popular, a room for sports and training.
Until recently, it was fashionable to place a garage in the basement, however, recently this idea has been abandoned, taking care of the environment and clean air from odors on the upper floors.
In addition, the entrance to such a garage can only be carried out at a steep slope, which makes it difficult to use it in the winter season, when the road is covered with a crust of ice. Of all the inconveniences associated with the placement of a garage space, you can find ways out by using additional equipment and air purification systems, but this will lead to new additional investments.
Residential premises
The main disadvantage of placing residential areas on the ground floor is the need to heat them in winter. But on the other hand, this is a good way out of a situation where additional space is needed, and the owners are limited in their ability to build a tall house.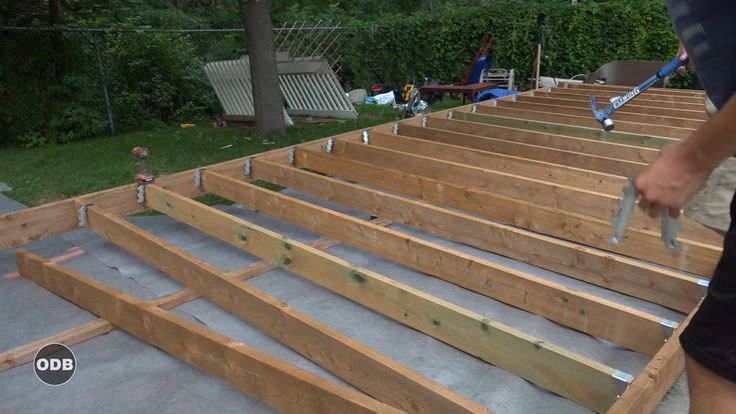
When the basement is placed on slopes, most often it is placed almost entirely above ground level, without breaking the law, and also not being a full floor. Such a floor is adequately illuminated by natural sunlight, and can also comfortably accommodate a dining room, halls and other rooms.
Zero levels in houses are great for laying out restrooms. Often there are swimming pools, billiard rooms, libraries, while not taking away the space of the upper floors for living rooms that require sunlight.
Do not forget that for entertainment and other premises, you will need a well thought out and designed ventilation system.
It is also necessary to combine rooms in the basement rationally. With all the desire, you should not place a billiard room next to the pool - this can lead to improper functioning of both rooms. To make the right architectural and design decisions, it is better to seek the advice of a specialist.
Minuses of the basement
The main disadvantage of the plinth equipment is a large amount of earthwork, concrete, preparatory and construction work.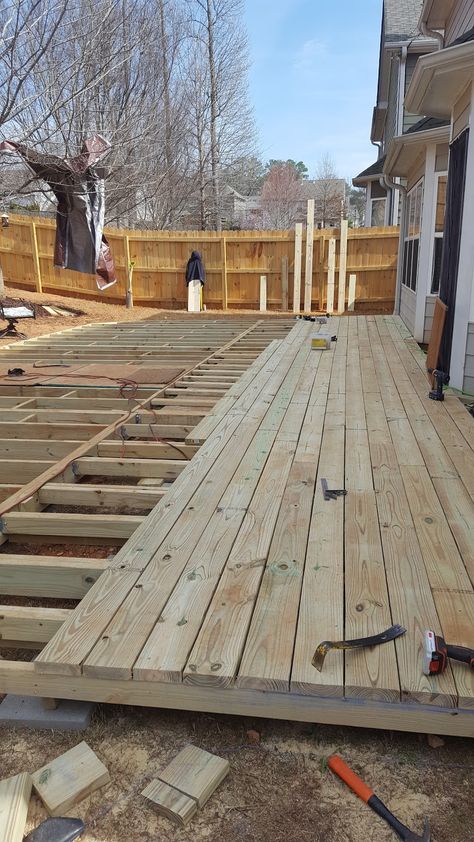 Disposal and removal of soil will require considerable expenses and the use of special equipment. And before that, you still need to pay for taking the soil for a sample and establishing its composition, as well as analyzing the possibility of carrying out similar work in this area.
It often turns out that having spent money on preliminary measures, it makes no sense to carry out further work. For a positive decision on the construction of the base, in addition to the absence of high groundwater, the correct composition of the soil is necessary - it must be sandy or stone.
Providing a good, efficient drainage system will also require additional investment, as will the construction of a mandatory blind area that removes moisture from the basement.
Since this floor will be below ground level, it will require extensive waterproofing. The simplest method is coating work. A special two-component mixture is applied to the outer walls of the floor with a roller.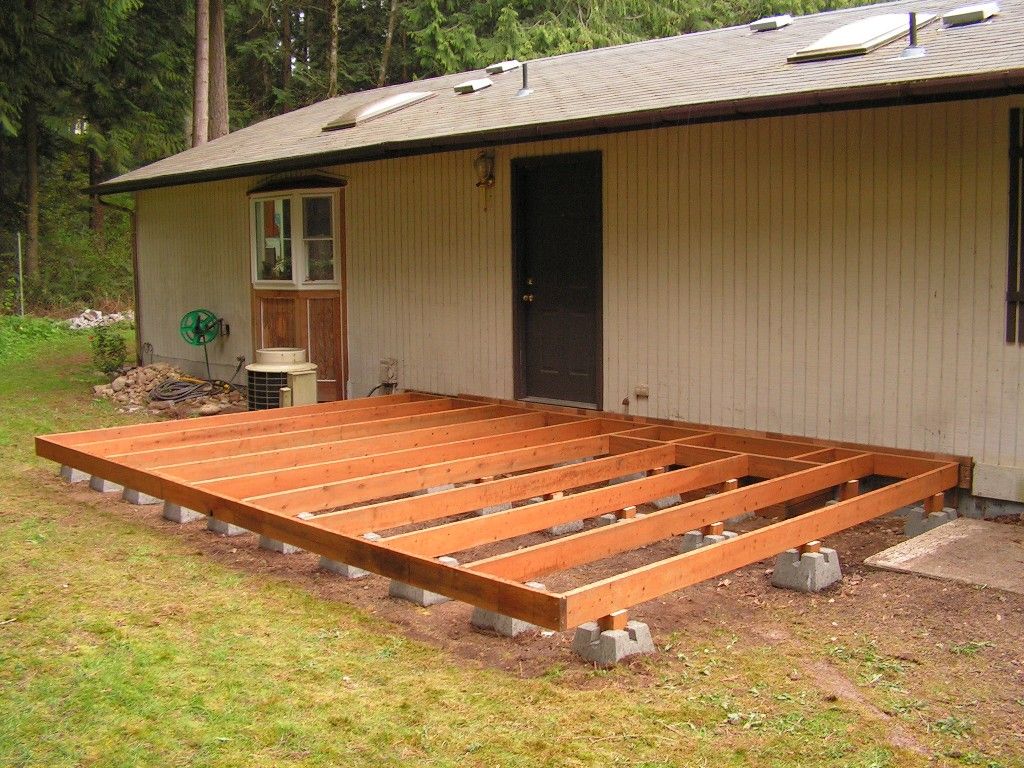 A thin rubber-concrete layer will protect the room from liquid and moisture.
Benefits of the basement
One of the most important and visible benefits of building is the extra space to accommodate the necessary rooms and facilities that would take up such precious space on the upper floors. Here you can equip a wine cellar, a billiard room, a sauna, a bowling alley, a gym, a laundry room, a boiler room and everything that can increase the comfort of residents from living in their own home.
The second plus is that placing a basement in a cottage is an indispensable solution in case of limited number of storeys or building plot area. In addition, such a decision will make the design of the house original and unusual. An additional tier will allow you to implement some design "chips", for example, if you trim part of it with natural or artificial stone.
Another interesting fact: thanks to the plinth, if the temperature is maintained in it from 16°C, the air will go to the upper floors, where it will be much warmer.